Creating Drawings on Black Paper
We’re all familiar with drawing on white paper with a dark medium. It’s the way most of us create a drawing. It’s comfortable and intuitive. Plus, there’s an endless number of “white” paper tones out there. But in this lesson, we’ll look at a paper that is often overlooked and it may just change the way you approach creating a drawing. That’s right – I’m taking about black paper.

Advantages of Drawing on Black Paper
The first advantage to working on black paper is that black paper provides high contrast – mostly high contrast in value. Value is the darkness or lightness of a color and it’s incredibly important.
When we have a dark value right next to a light value we have high contrast. Contrast makes our drawings and paintings pop. Black paper gives us nice rich blacks so that when we apply lighter values to it, the values contrast against each other. If we were working on white paper, we would have to add lots of dark material in order to create the same type of contrast or pop.
Another advantage of working on black paper is a perception of brighter colors. Since we have such a high contrast in value the colors that we add to the surface are going to naturally appear brighter. These colors might not actually be brighter but they’ll be perceived as being brighter simply because of contrast. So whenever you want your colors to stand out or pop then black paper might be a good solution.
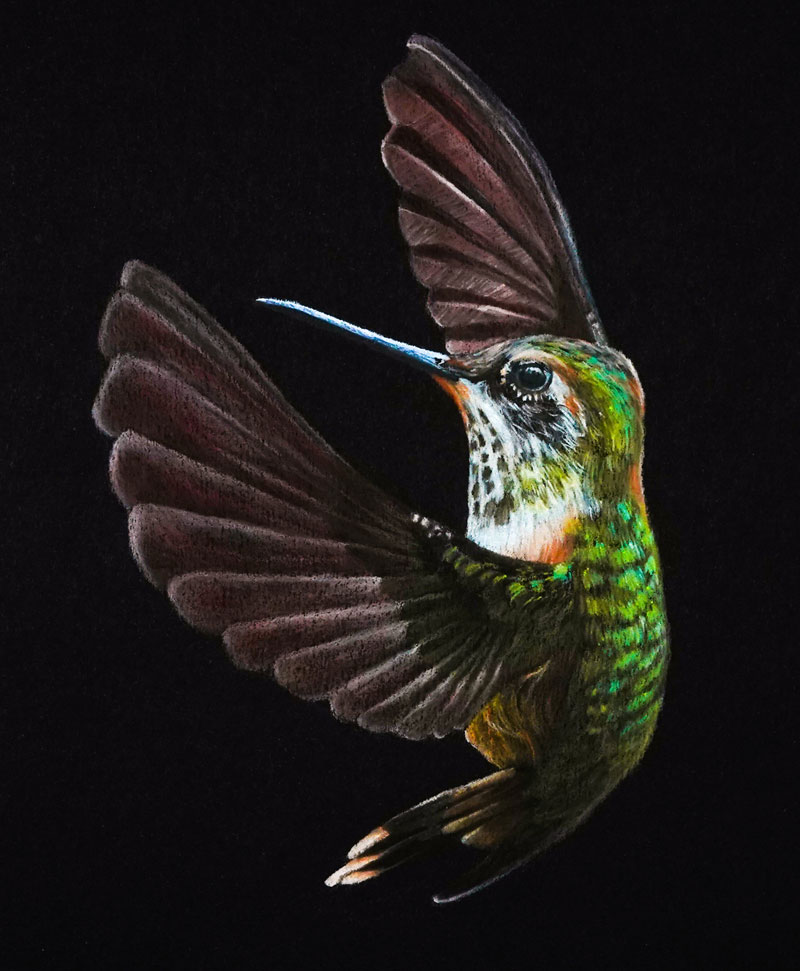
(Image above is from the course, “3 Little Birds with Colored Pencils”.)
Another advantage of working on black paper is that we get nice rich shadows. Sometimes when we work with traditional materials like graphite and charcoal on white paper, it can be difficult to push the values as dark as they need to be in the areas of shadow. These darker values are the values that we actually see in reality – those really dark, juicy shadows. But when we work on dark paper, we already have some of those dark values in place – so it’s very easy to create those natural dark shadows.
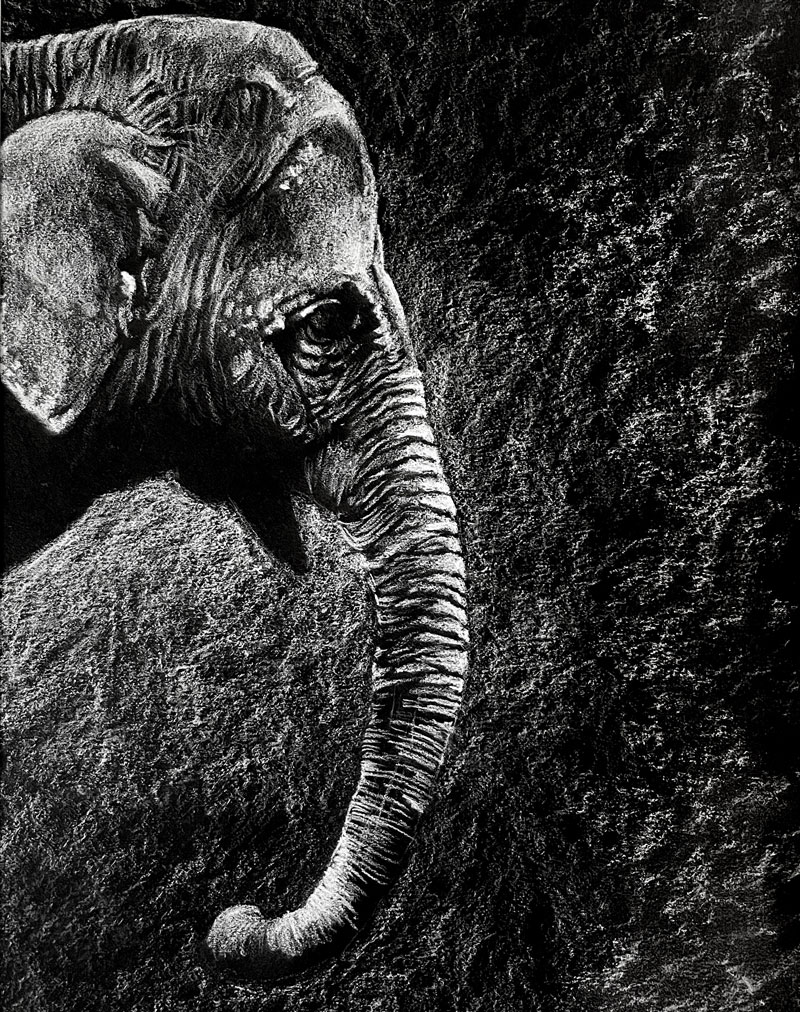
A fourth advantage to working on black paper is that it may just be faster. In any drawing or painting we create, we should work to create a full range of value. This means that we may have to put a lot of dark material on the surface when working on white paper. This obviously can be time-consuming. But when we work on black paper, we can create a scene that looks complete while applying less material to the surface.
See also: All About Drawing Papers
Perhaps we’re working with a scene that has a small amount of light or high contrast. In these situations, just a small amount of material on the surface will suffice. The reverse of this isn’t true – when we work on white paper, we still find that we need to apply a lot of dark material in order to create a similar illusion.
Disadvantages to Drawing on Black Paper
Every drawing surface has its advantages and disadvantages, so let’s take a look at a few of the disadvantages to drawing on black paper.
The biggest disadvantage to drawing on black paper is that you have to think in reverse. We’re all accustomed to drawing on white paper with dark material. This means that we’re used to applying dark material in areas of middle value and shadows. But when we work on black paper we have to add the lighter values and leave alone some of the darker values. This can be a challenging thought reversal if you’re doing this for the first time. But with just a little practice, it becomes easier.
Another disadvantage to drawing on black paper is that you’re limited in the mediums that you can use. Logically, we wouldn’t work on black paper with graphite, black charcoal or traditional pen and ink. But even though we’re limited to the mediums that we can use – thankfully, these mediums work extremely well with black paper and create that pop that we’re after.
Suggested Mediums for Drawing on Black Paper
Colored Pencils – Colored pencils work exceptionally well with black paper. Because of that color contrast that we discussed earlier, color pencils stand out on black paper.
Soft Pastels – Soft pastel is another drawing medium that works exceptionally well on black paper. Like colored pencils, soft pastels create strong contrast – but cover a little easier.
Oil Pastels – Even though oil pastels share the “pastel” nomenclature with their softer counterparts, they are a different medium all-together. Oil pastels feature an oil-based binder which never dries completely. They are thick and sticky instead of brittle and chalky like soft pastels. But for the same reasons as the previously mentioned mediums – they work great on black paper.
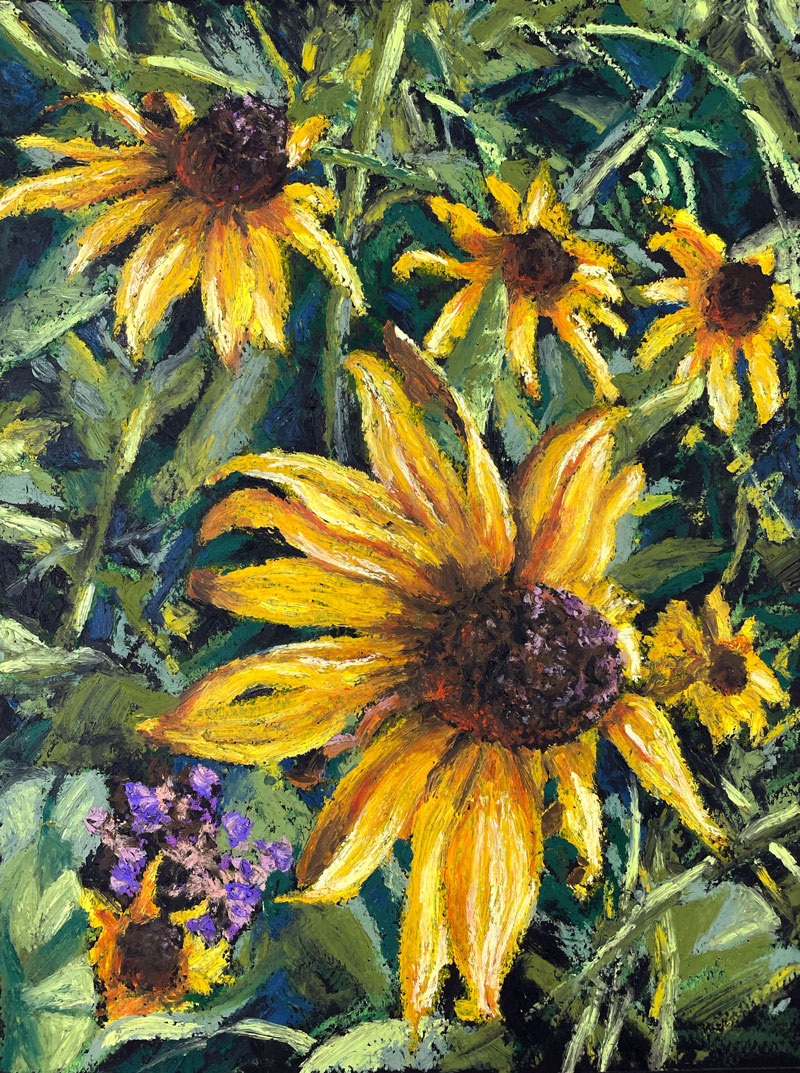
Image above is from the course, “The Oil Pastel Course”
White Charcoal – As the name suggests, white charcoal is a chalky and powdery medium similar to traditional black charcoal. Even though it’s called “white charcoal” – it’s not truly charcoal, but a manufactured pigmented medium that behaves in a similar manner as charcoal.
White Ink – Pigmented inks also work well on black paper. You can use traditional ink techniques like hatching, cross-hatching, and stippling, but instead of using these techniques for the darker values – you use them for the areas of highlight and lighter value.

Subjects and Scenes for Drawing on Black Paper
You may find greater success drawing on black paper with a few specific subjects.
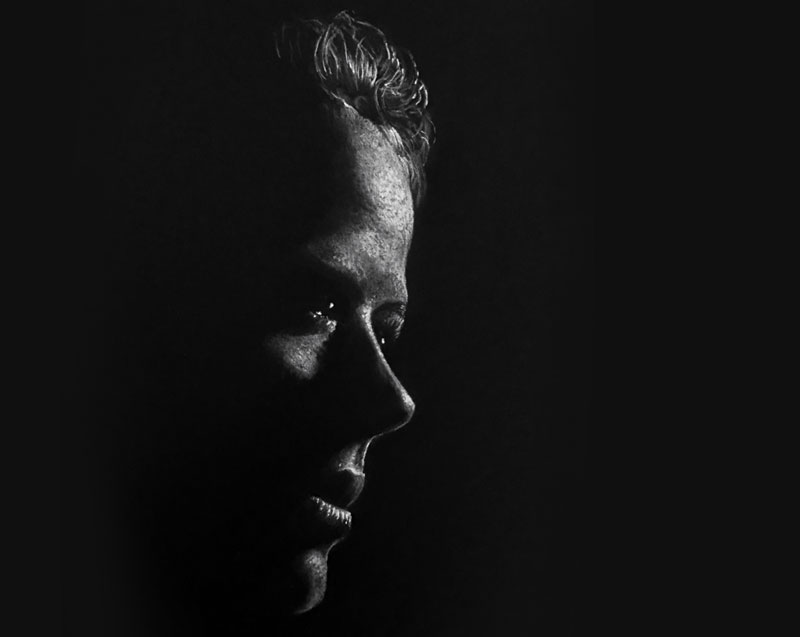
You may consider composing a scene with one intense light or strong contrast. Only light the areas that you wish to draw, leaving the rest of the scene dark. This can be accomplished using one soft spotlight on your subject. This will lead to stronger, easily-recognizable areas of lighter value with dark shadows.
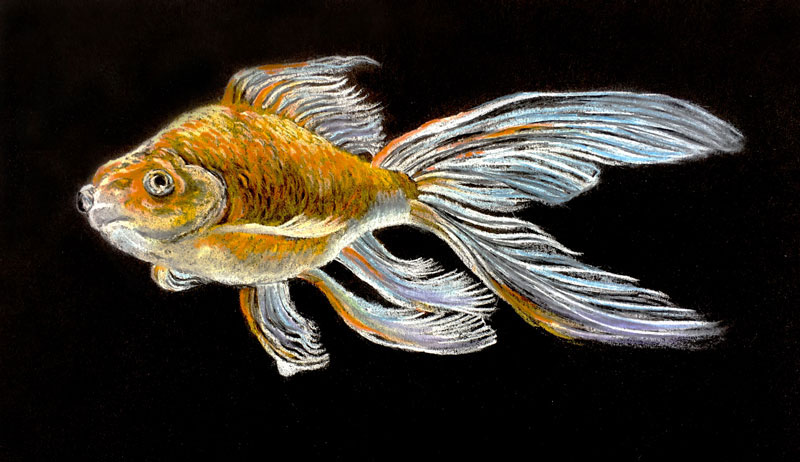
Brighter or colorful subjects, set against a dark or black background, will also make great subjects. When you start with high contrast on your subjects and then use a medium that accentuates high contrast, then you’re setting yourself up for success.
Specific Black Paper Brands
There are a ton of paper options out there and many of them are high quality surfaces. I’ll share a few of my picks with you here.
Canson Mi-Teintes Pastel Paper – This paper is extremely versatile. Featuring two distinctly different surface textures, this paper is great for applying soft pastels, oil pastels, and colored pencils. Both sides of the paper are suitable for drawing, but each side does feature a heavier tooth.
Strathmore Artagain – This paper is smoother than Mi-Teintes paper making it suitable for white charcoal, colored pencils, and white ink.
Black Ingres Paper – This paper is nearly identical to charcoal paper, its biggest difference being color. Featuring a laid pattern as its tooth, this paper is best suited for white charcoal but it could also be used with colored pencils and soft pastels.
Let’s Wrap It Up
So when was the last time you created a drawing on black paper? Maybe it’s time to revisit this wonderful surface or start a new drawing adventure. Either way, black paper provides some fantastic benefits but also a few drawbacks. It’s not right for every subject or every medium but it may be right for your next project.
If so, join over 36,000 others that receive our newsletter with new drawing and painting lessons. Plus, check out three of our course videos and ebooks for free.
How to Draw a Diamond
Draw a Diamond with Pencil and Charcoal
We all have a natural tendency to label subjects that we draw or paint as “difficult” or “easy”. Usually, subjects whose forms are basic or are lacking clear details receive the “easy” label. We typically designate subjects with lots of details or complex shapes as “difficult”.
While it is true that some objects are potentially “easier” to draw than others, the reality is that the process of drawing complex subjects is essentially the same as drawing simple ones. Less complex subjects simply take less time to draw compared to complex subjects. So, we should say that some subjects are “less time-consuming” to draw while other, more complex objects, simply take more time and attention.
One subject that continually captivates artists and audiences alike is the reflective and transparent object. Glass and shiny metals fall into this category and when the artist successfully captures them in a drawing, the result is often impressive.
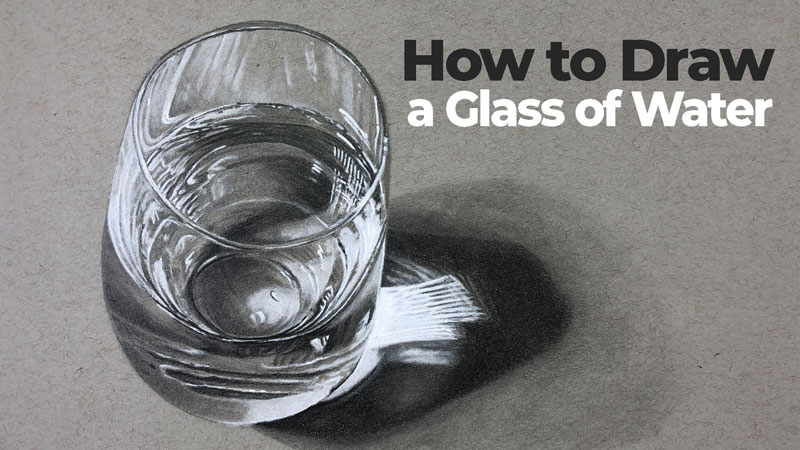
See also: How to Draw a Glass of Water
These highly reflective, awe-inspiring subjects may seem very difficult to draw, but they’re a lot easier than most people think. Successfully capturing these subjects in a drawing boils down to the basics of observational drawing.
In this lesson, I’ll share with you just how easy it is to capture a “difficult” complex subject like a diamond in a drawing. You’ll see just how simple this process can be and how anyone can do it.
It’s not about talent, it’s about patience and knowledge. Let’s get started.
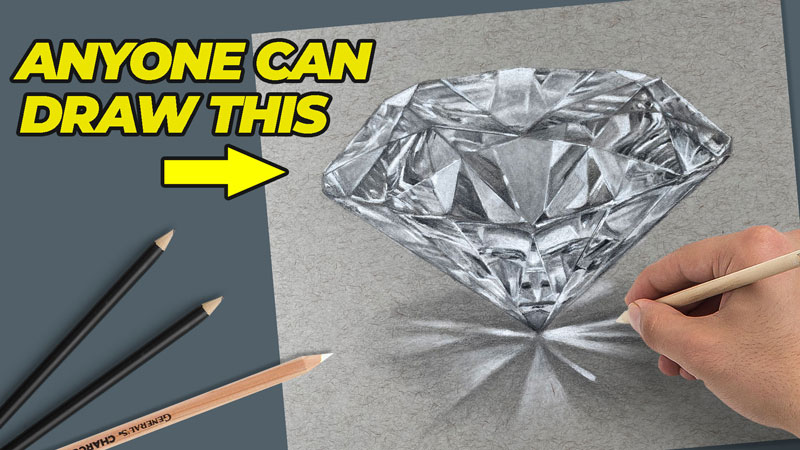
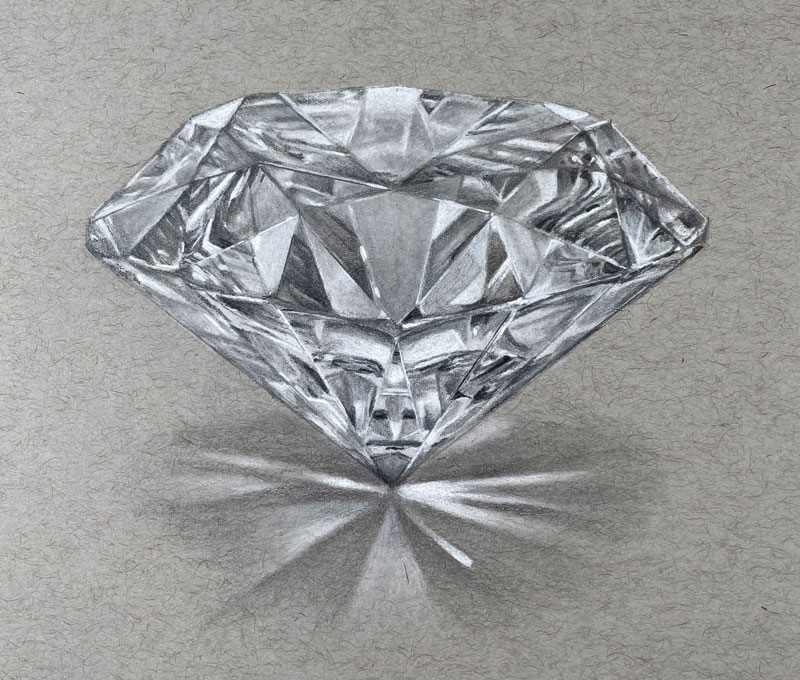
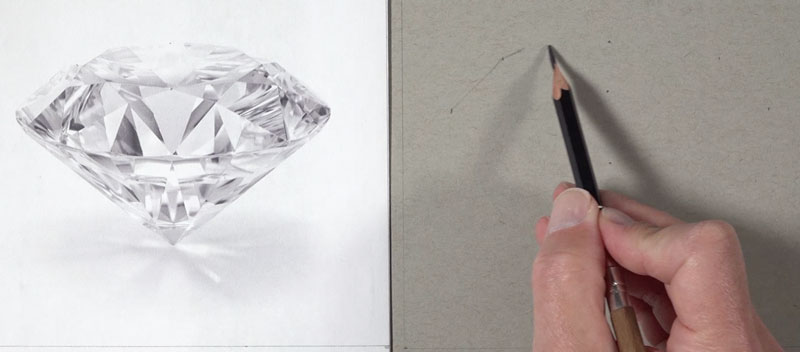
Here’s a look at the completed drawing…
Materials and Surface for Drawing a Diamond
Let’s start by briefly discussing the materials and surface that are used for this drawing. It may seem trivial, but the surface and the materials play an important role in developing this illusion.
The surface is gray toned drawing paper by Strathmore. A gray surface provides a neutral, middle value. Starting from a middle value allows us to push the lights and the darks to create a full range of value which leads to a more realistic drawing.
We see the world around us in a full range of value. This means we see the darkest darks, the lightest lights, and a whole range of values in between. Therefore, we need to replicate this range in our drawings as well.
Working on a surface with a middle value encourages a full range of value in the final drawing. We simply need to add lighter values with a light drawing medium and darker values with a dark drawing medium.
See also: 6 Reasons to Draw on Toned Paper
Our lighter values are created with white charcoal. While this medium is called “white charcoal”, it is speculated that this material is actually calcium carbonate. Nonetheless, this drawing medium performs identically to compressed black charcoal. This means that it is easily blended and smudged with a blending tool.
Our darker values are developed with graphite. An H, HB, and 2B pencil are used in this lesson, but you may need to go darker by adding a 4B or even 6B pencil. If you find it difficult to make the values as dark as they need to be, adding a darker pencil will help.
Charcoal and graphite are two different mediums and as a result, behave differently on the drawing surface. For this reason, we need to consider the order and manner in which they are applied on the surface.
Graphite pencils will mostly cover applications of white charcoal. However, the reverse of this is not true. White charcoal will not cover graphite applications easily. To combat this, areas where lighter values are to be applied must be preserved with white charcoal before getting too dark with graphite pencil applications.
Drawing the Diamond with Accuracy
There are several methods for ensuring that the contour lines of your subject are accurate on the drawing paper. You could use the grid technique or a graphite transfer. In this lesson, I’d like to share a third method. This method requires a printout of the photo reference that is exactly the same size as the drawing surface and designated picture plane.
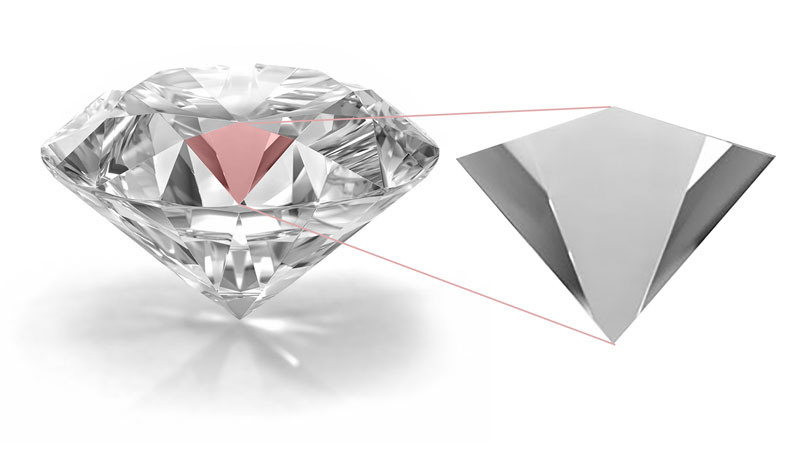
Here’s a look at the photo reference used for this drawing…
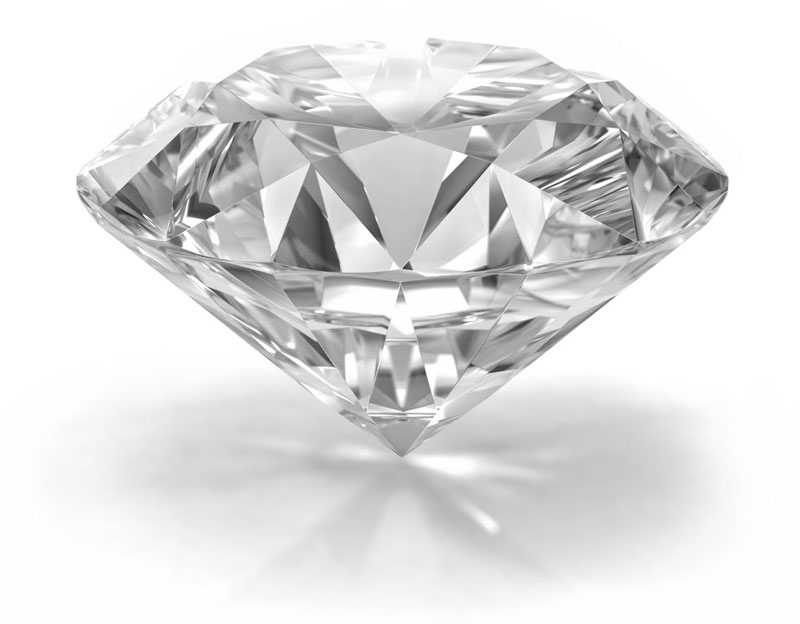
If you play around with your printer settings, you should be able to print the reference so that it is the size you wish the drawing to be.
We’ll use measurements taken from the photo reference to position the lines for our diamond on the drawing paper. You can use any measuring device, like a ruler to take these measurements. However, you can also use a simple piece of paper as I have in this drawing.
Using small piece of paper, measurements are recorded with small dashes over the reference photo. Since the designated picture plane is exactly the same size and shape as the photo reference, these measurements are easily reproduced on the drawing paper.
In this case, I recorded the locations of the top, bottom, and middle of the diamond. I then recorded the outer edges of the diamond and specific points where the top of the diamond angled down to its outer edges. You can take and record as many measurements as you wish.
Using these basic measurements, we can “find” the shape of the diamond and essentially “connect the dots” to draw the lines. These lines are drawn with a light touch using a light, H graphite pencil.
Drawing the Basic Shapes of the Diamond
With the outer contour lines of the diamond drawn, we can now focus on the planes of the form. In this case, these planes can be simplified into triangles and a few trapezoids.
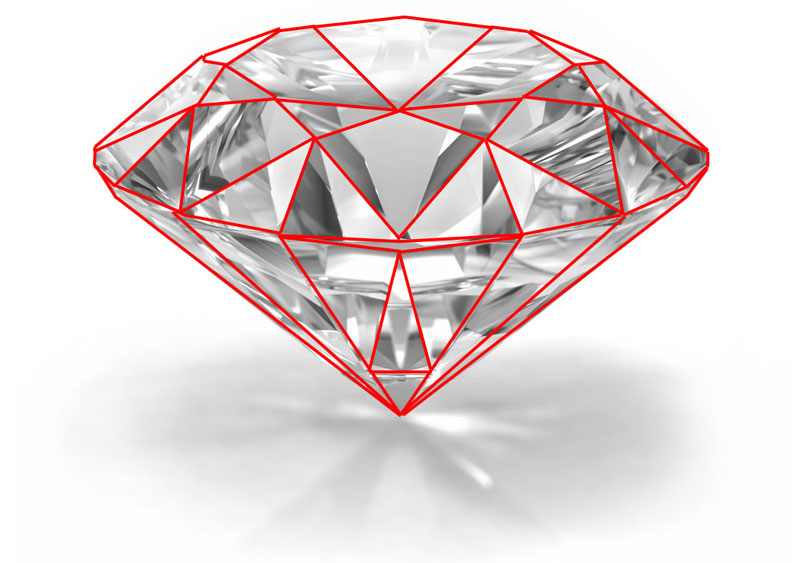
Starting at the top of the diamond, I carefully begin drawing each shape by connecting lines. At first, these lines are drawn “freehand” with light, loose marks of the H graphite pencil. But once I feel confident with my loose lines, I reach for the ruler and make the lines as straight as possible.
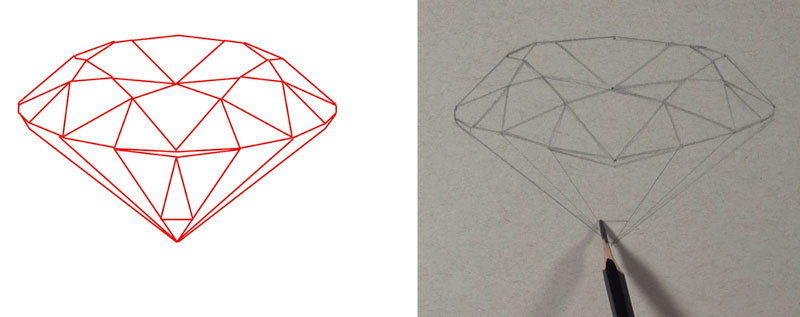
It’s important to place only light pressure on the pencil when making these lines. If you place too much pressure on the pencil, small grooves will develop on the paper. These grooves may be visible when the drawing is complete so it’s best to make very light marks that don’t indent the paper.
Before moving on to the next step, you may consider using a kneaded eraser to gently lift up some of the graphite. This should leave you with a light contour line drawing of the diamond that is still faintly visible on the surface.
Shading the Diamond
Now, it’s time for the magic of this process. It’s at this stage where the drawing will transform and the realism will begin to take shape. To do this, we will methodically add both white charcoal and graphite to mimic the values in each shape.
Within each shape, you’ll notice additional shapes of differing values. We’ll simply copy the shapes and match the values to create the illusion.
Some shapes feature gradations of value, or gradual changes from dark to light. Some shapes feature dark shapes right next to lighter shapes. It is the contrast in the values and the shapes that will ultimately lead to realistic drawing.
With highly reflective or glass-like objects, we often see dark values right next to light values. Capturing this in your drawing is the secret to creating this realistic illusion.
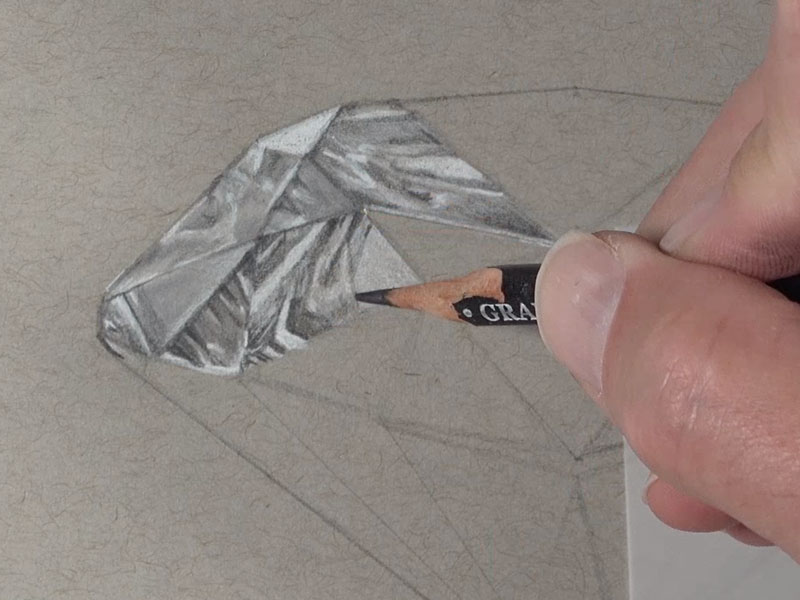
Considering the nature of the combination of media for this drawing, we’ll preserve areas of lighter value with the white charcoal before adding graphite. Essentially, we’ll start with middle values and progressively push them both darker and lighter.
In sections that feature smooth transitions of value, blending tools like stumps are used. To help prevent contamination introduced with a blending stump, I like to use one stump for lighter values and one for darker values. It doesn’t hurt to have one stump reserved for middle values as well.
Not all areas are blended and some applications are made using just the pressure of the pencil. If you blend everything, you’ll loose the variety that you need to create a convincing illusion in the drawing.
It’s at this point in the drawing where the process begins to slow and the importance of patience is realized. Work slowly as you move from shape to shape and take breaks. While taking a break, analyze your drawing and look for values that you may have missed.
So as you see, it’s not necessarily difficult to draw the values, but it is time-consuming. But if you work slowly and take your time, then anyone can do this. This isn’t difficult at all – it’s just a slow process.
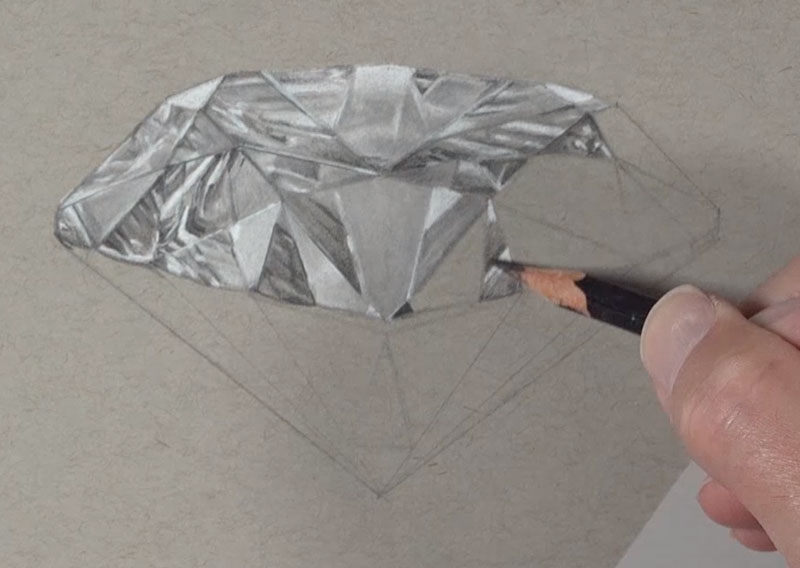
Adding Shadow Underneath
Even though a diamond is mostly transparent, it still produces a shadow. At this point in the drawing, we have a floating diamond without a shadow, so let’s add one.
But before we grab that graphite, let’s take a closer look. Because light passes through the diamond, the light is intensified in areas. This produces locations of light values where we would typically expect to see darker ones. We’ll use the white charcoal pencil to address the lighter values and the graphite pencil to address the darker tones.
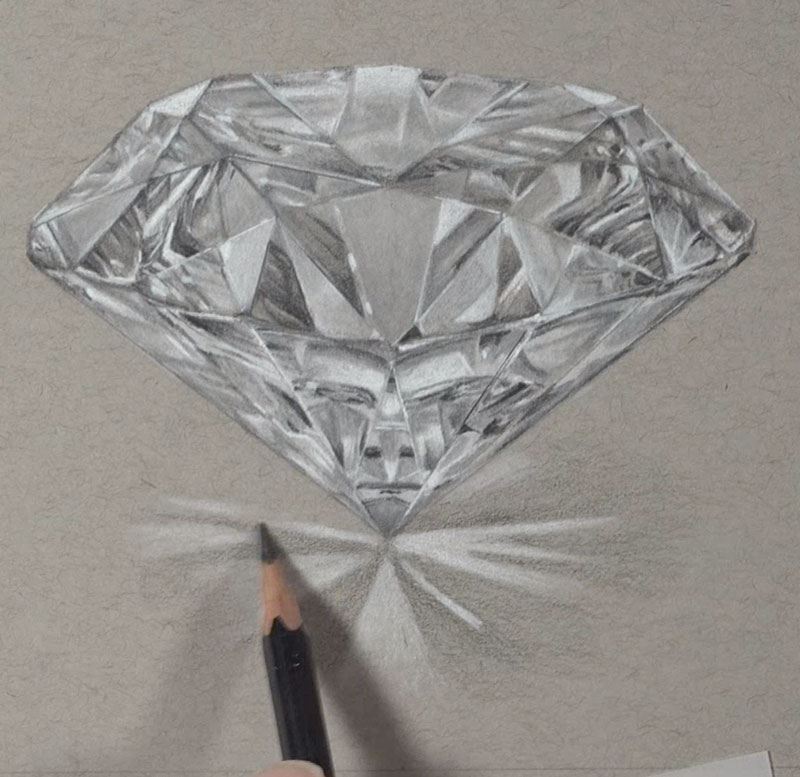
A blending stump is used to soften the cast shadow, completing the drawing.
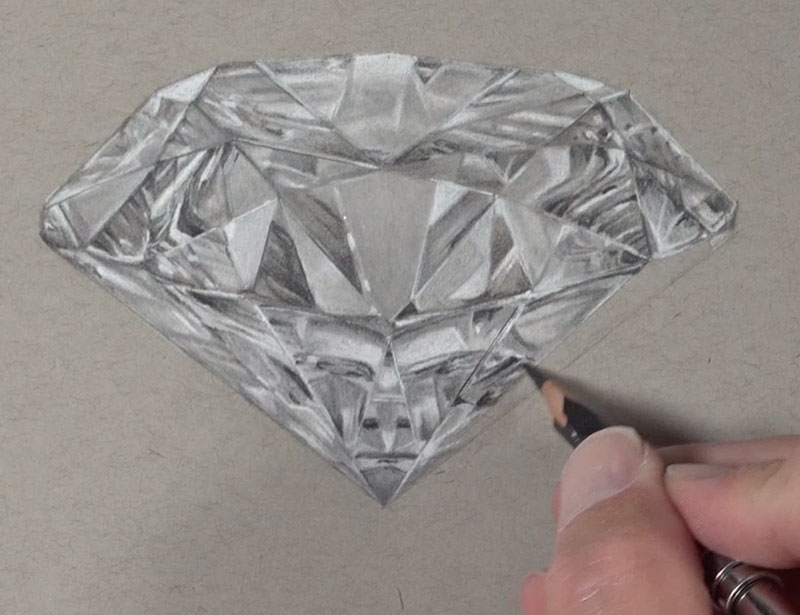
How to Draw a Diamond – Conclusion
Now our drawing of a diamond is complete. Here’s another look at the completed drawing…
Having the ability to push values lighter or darker on a toned surface is an advantage. We can essentially work the values until we are pleased with them. The combination of white charcoal and graphite gives us this advantage.
No subject should seem too hard to tackle. It’s simply all about observation and sometimes – analyzation. A drawing may look complex when complete, but often the process to create it is much simpler.
If so, join over 36,000 others that receive our newsletter with new drawing and painting lessons. Plus, check out three of our course videos and ebooks for free.

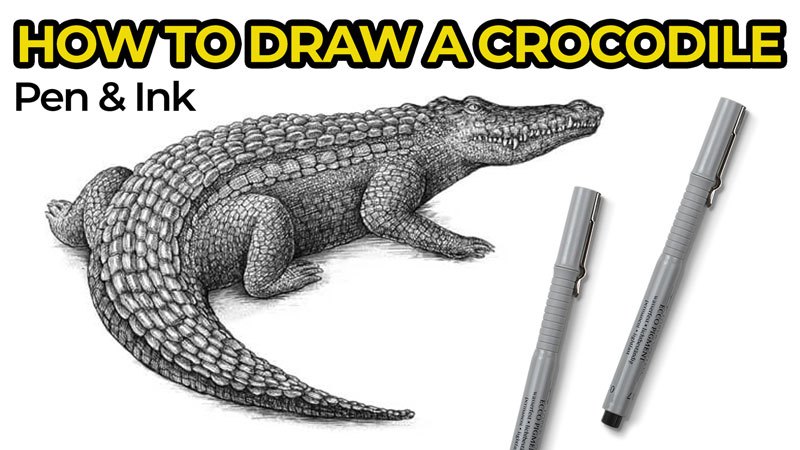
How to Draw a Crocodile with Pen and Ink
The term crocodile is sometimes used more loosely, referring to other members of the order Crocodilia. It includes alligators, caimans, and gharials.
In this tutorial, we’ll observe and draw the general appearance of crocodiles. These reptiles present a unique collection of textures, but I’ll show you a simple way to draw crocodile scales.
Art Supplies and Materials for this Lesson
I’ll use an ordinary HB graphite pencil and a plastic eraser to create an underdrawing.
See also: Artist Graphite Pencils Explained
Also, it’s good to have a kneaded eraser at hand. It will help us to soften the graphite marks.
For the inking part, I’ll be using three ink liners. The width numbers are 0.05, 0.1, and 0.3. A nib pen and liquid black ink are also an option.
My paper is of a standard A4 size (approximately 8.5″ by 11″) with a very subtle texture.
Drawing a Crocodile with a Graphite Pencil
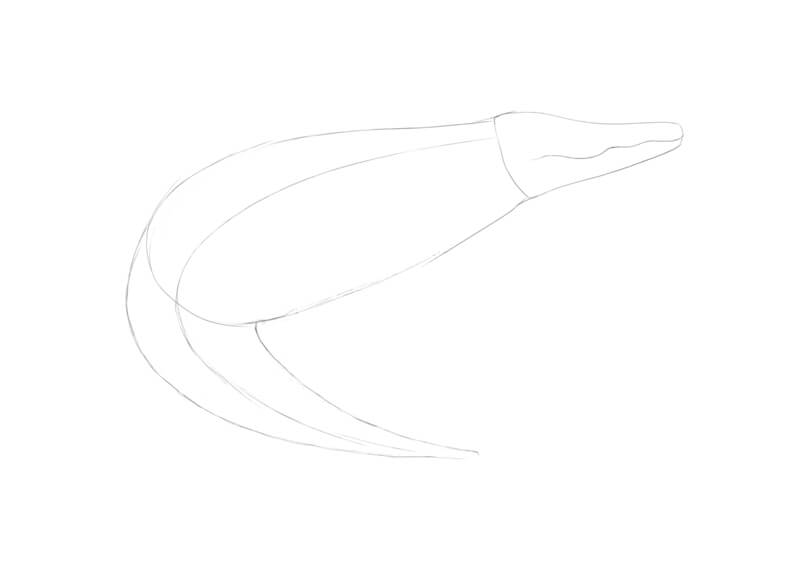
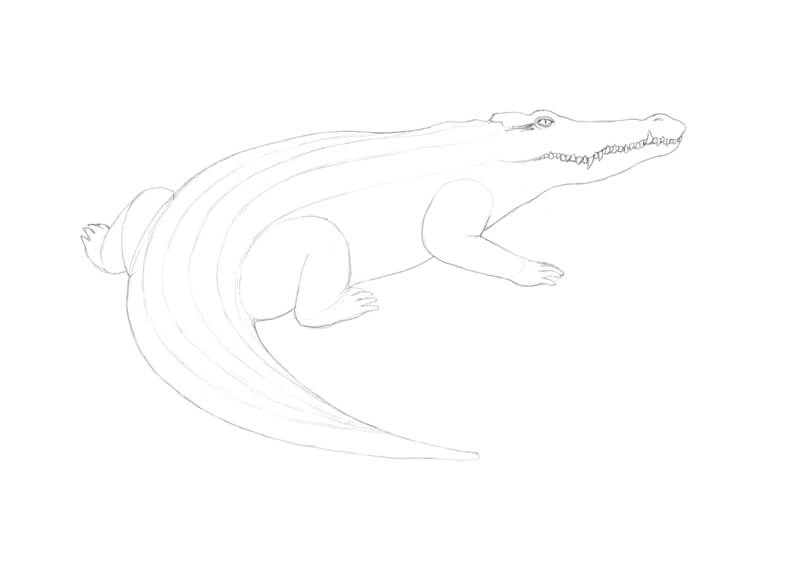
Crocodiles have a relatively long snout with powerful jaws. The head’s shape and proportions may vary from species to species.
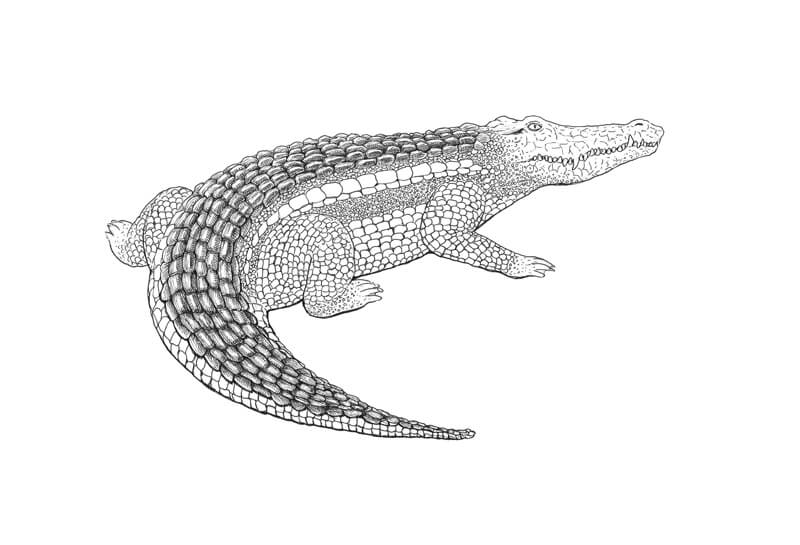
The body and tail are long, too. This feature of a crocodile’s appearance makes our task slightly more complicated, as we have to fit the whole animal into the limited space of our picture plane. The most obvious way to solve this task is to give the crocodile a turned pose. The animal’s massive tail will be twisted to the side.
I first draw the head and the body as a set of simplified shapes. Then, I add a line that marks the direction of the body and tail. I also draw the rough shape of the tail.
A curved line shows the border between the lower and upper jaws.
I draw a simplified framework of the crocodile’s short limbs.
One of the forelimbs won’t be visible due to the angle in which we are viewing the animal.
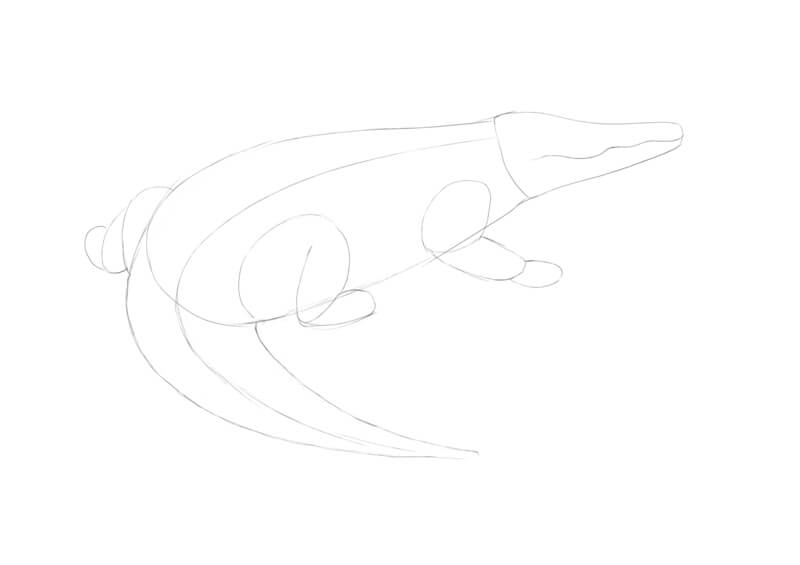
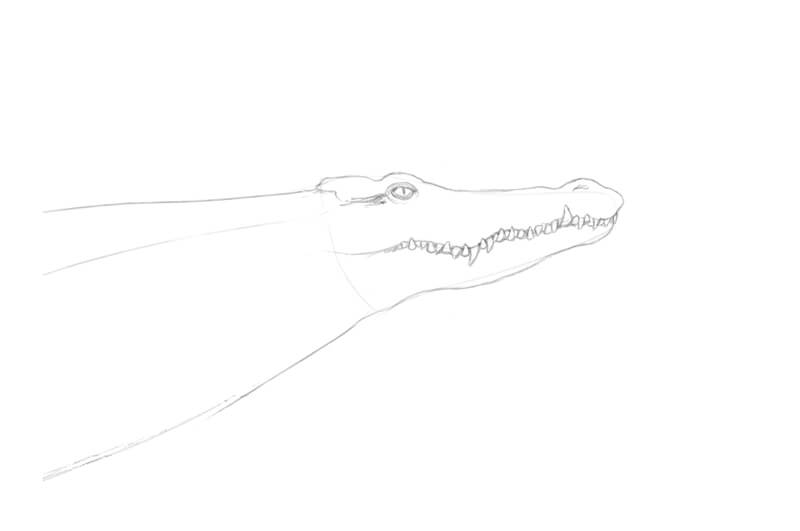
Let’s refine the head. I add the nostril and the eye with a vertical pupil.
The ear of a crocodile usually looks like a long narrow opening behind the eye. I add one.
I also change the main contour of the muzzle, accenting the jaws. The crocodiles’ body design allows the eyes, ears, and nostrils to stay above the water surface while most of the animal is hidden below.
I add the teeth of conical shape, following the pattern – one above, one below. Some teeth are larger than their neighbors. They can be found at the curves of the jaw line.
I slightly refine the contours of the limbs and erase the unnecessary graphite marks.
Let’s add the toes. Crocodiles have five toes on their front feet. Hind feet have four toes each.
Usually, there is a webbing between the toes of the back feet, but the front ones may also have it. The character of webbing depends on the species. Also, three bigger toes of each foot have sharp claws at their ends.
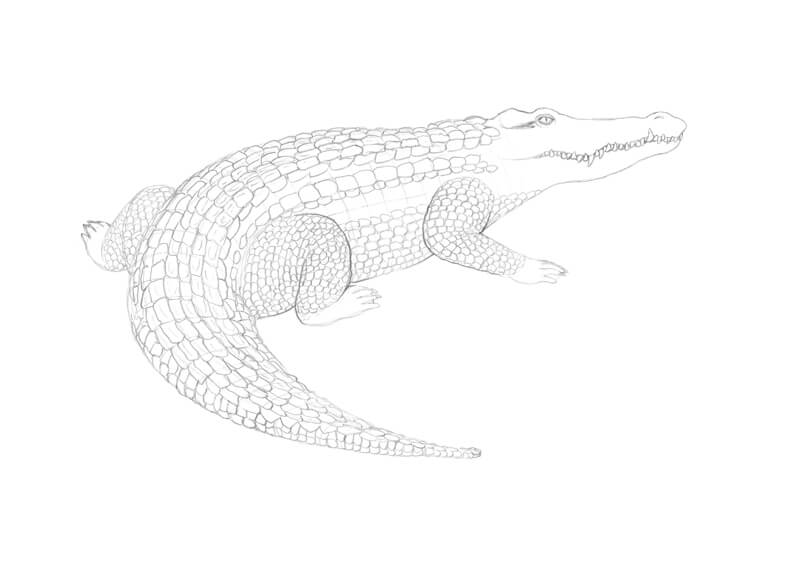
I add long lines to the crocodile’s back and tail. They follow the form of the animal. These lines will help us to draw the pattern of scales.
I add another set of subsidiary lines that go in the opposite direction. They follow the animal’s contours, creating an illusion of volume.
Keep these lines as light as possible, as we’ll need to erase them later.
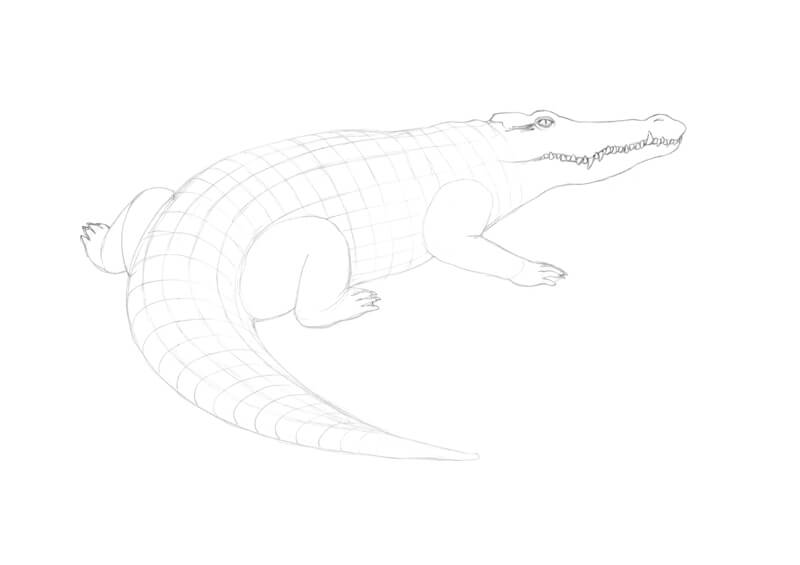
Scales of different shapes and sizes cover almost the entire body of a crocodile.
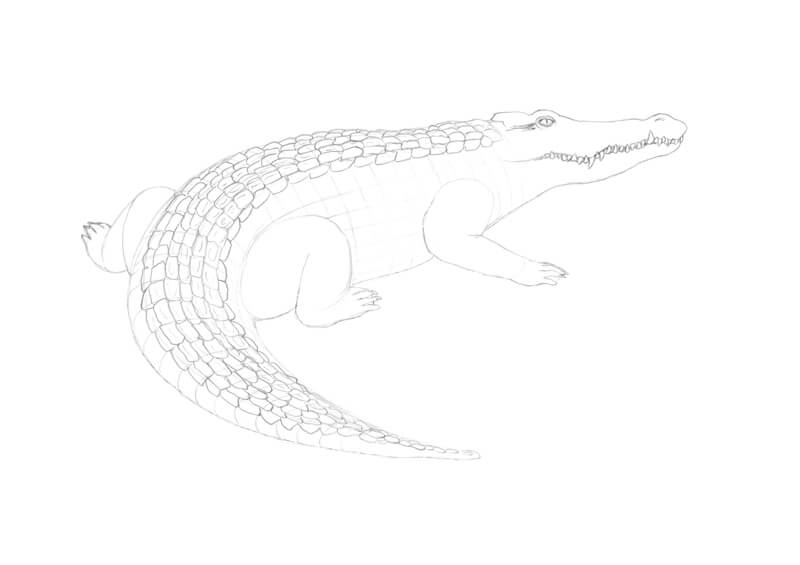
The reptile’s back and tail feature non-overlapping keeled scales. They look like thick rectangular plates with small upright outgrowths. Such scales are arranged in a relatively regular, repetitive pattern.
See also: How to Draw Animal Scales
I use the existing marks as guides, fitting the elements into the grid. We don’t have to be completely precise with the arrangement of vertical rows. However, the pattern should look recognizable.
At this stage, I focus on the bases of scales. The keeled outgrowths in the scales’ central parts can be added later.
Scales that are close to the edges of the body will look reduced. We see them in profile, or nearly so. The farther scales will look smaller than the ones closer to the viewer.
The scales of the side rows are somewhat protruding, forming an interesting bristling relief. They may cast shadows on the scales underneath.
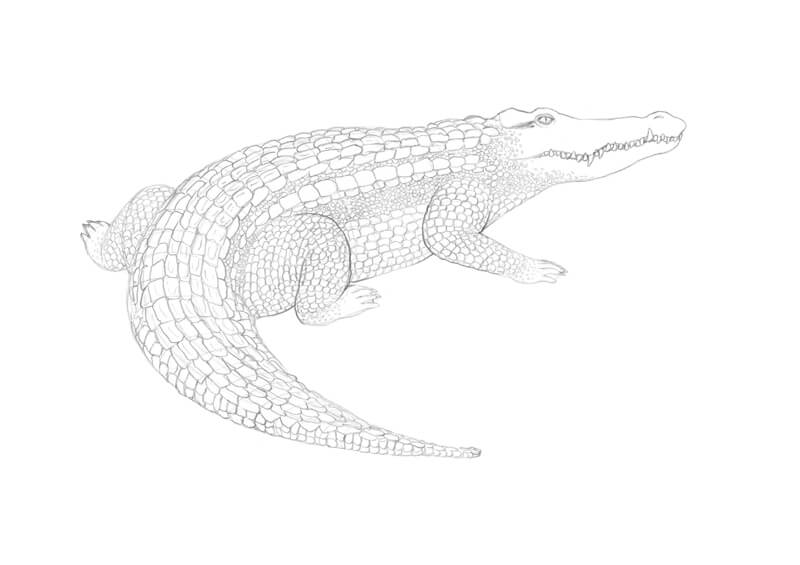
Now it’s time to add the smaller scales. They are relatively flat. The shape of such scales is close to a square or a rectangle with rounded corners.
I add the elements to the body and tail, leaving regular gaps. It’s possible to vary the size from one line of scales to another.
The scales near the belly and the tail will look smaller and reduced.
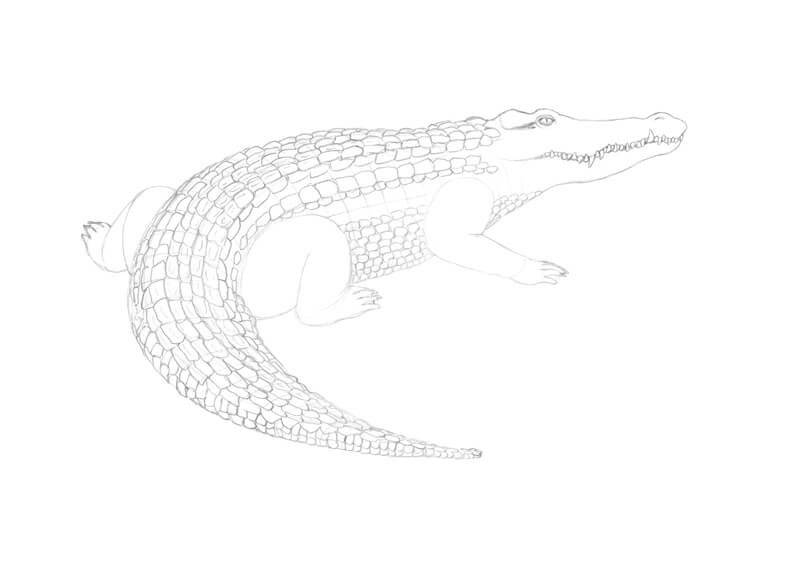
I cover the limbs with similar flat scales of a smaller size.
Feel free to add subsidiary lines first (just as we did with the crocodile’s back and tail) and then arrange the scales. The elements should conform to the contours of the legs.
I fill the resulting empty space of the body with the smallest scales of a rounded shape. They don’t follow any strict pattern.
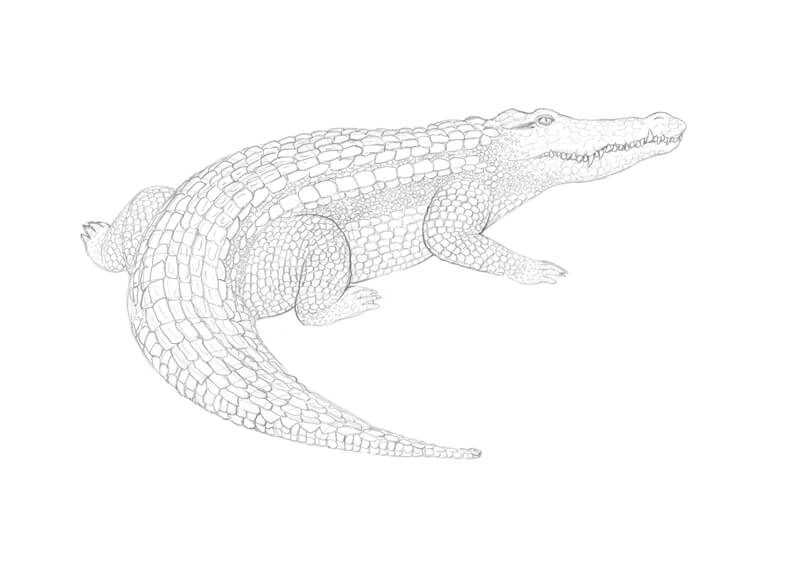
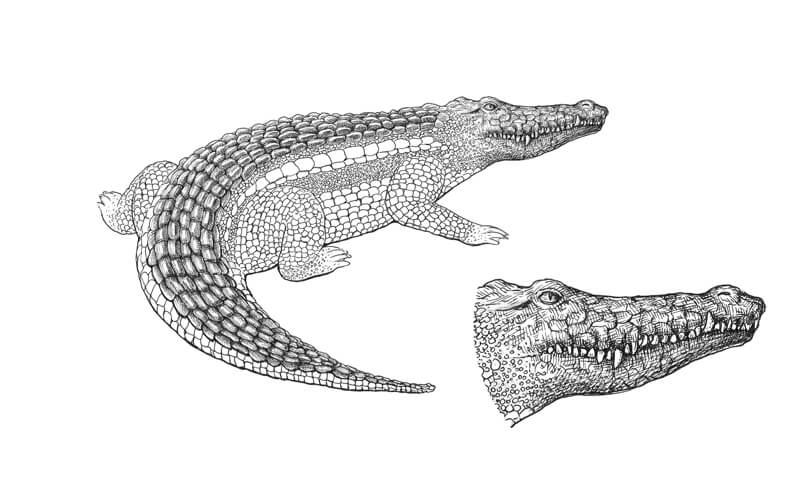
The surface of the reptile head, including face and jaws areas, may resemble cracks on dry soil or sand. Also, we can see distinct polygonal shapes. It is supposed that the skin cracking process forms this specific design.
I add a pattern of somewhat random lines to the animal’s head.
Drawing a Crocodile with Ink
It’s time to start inking! Before we proceed, it might be a good idea to soften the graphite marks with a kneaded eraser. Gently remove the subsidiary lines, but leave the significant textural details.
Let’s agree that soft light is coming somewhere from the upper left corner of the scene.
I use 0.1 ink liner to outline the contours of our crocodile’s upper parts. These areas catch more light from the environment. Thinner contours convey this impression.
Note that I change the shapes of the larger keeled scales on the reptile’s back. I make those elements taller, more protruding.
I also outline the eye and other details of the head.
I use 0.3 liner to draw the contours of the tail, limbs, and the lower part of the snout. This difference in line quality creates an illusion of weight, giving the figure visual mass.
The texture affects the character of the outline. I use organic lines that look somewhat shaky, irregular. There may be gaps between the marks, especially in the lighter areas.

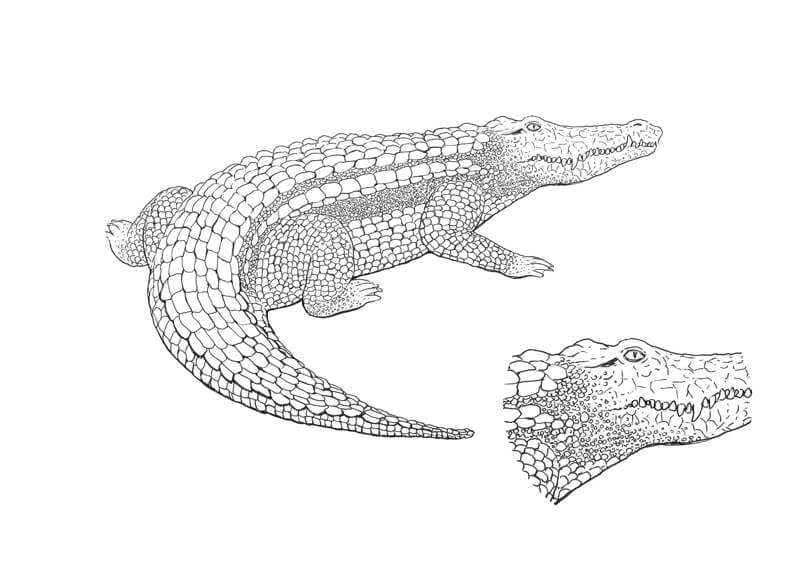
With 0.1 liner, I draw the scales, referring to the pencil underdrawing.
I recommend avoiding stiff, technical lines – those can give the artwork an unnatural look. Let some marks be spontaneous and quick. Also, allow gaps and any variation that seems appropriate.
For example, I mark the smallest scales with semicircles. Using such quick marks also streamlines the process.
In the image below, you’ll find a close-up sample of the head and neck areas.
I widen the contours of the protruding scales that are found on the tail. This part of the animal is closer to the viewer. We can bring it to the foreground (in a visual sense) by increasing the contrast and broadening the lines.
This step may seem time-consuming, but the result will be worth the effort.
Let’s work on the largest, keeled scales next. In our case, the tips of the protruding ridges catch more light than the vertical sides of the outgrowths. The stylized schemes in the image below illustrate this concept.
Point a features a scale in a top view. The thin area of the ridge’s tip is lighter than its support. From this perspective, we see very little of the ridge’s vertical planes.
Point b illustrates the difference between two view angles. The first one is close to a profile view. In this case, we see the vertical plane of the ridge. At the same time, the farther horizontal side of the scale’s basis isn’t clearly visible.
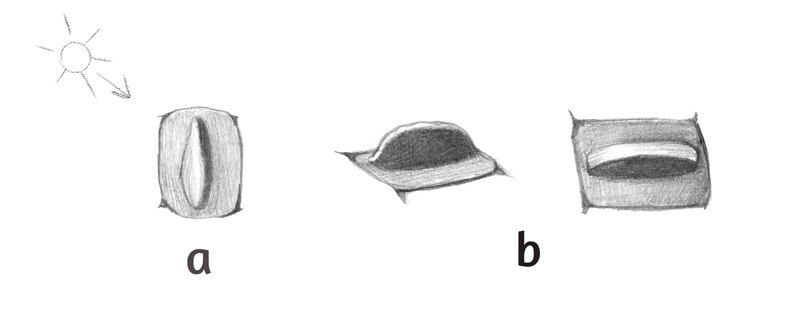
We should keep these observations in mind while drawing the scales.
I use 0.05 liner to accent the vertical planes of the ridges and the borders between the scales. I also cover the flat bases of the scales with a layer of hatching. The tips of the keels are left untouched.
I aim for a balance between texture and visual integrity. The artwork should look unified despite the large number of small elements.
I accent the pattern of cracks on the crocodile’s snout, using 0.05 liner. The short marks are arranged in groups.
Then I give the head some volume by covering it with layers of cross-hatching. The first set of lines repeats the direction of the snout. Another set of lines with curved hatches follows the form.
See also: Pen and Ink Techniques
I darken the eye and the areas of jaws below and above the teeth. I add dots to the right side of each tooth to create a hint at value transition.
See also: How to Draw Animal Eyes with Pen and Ink
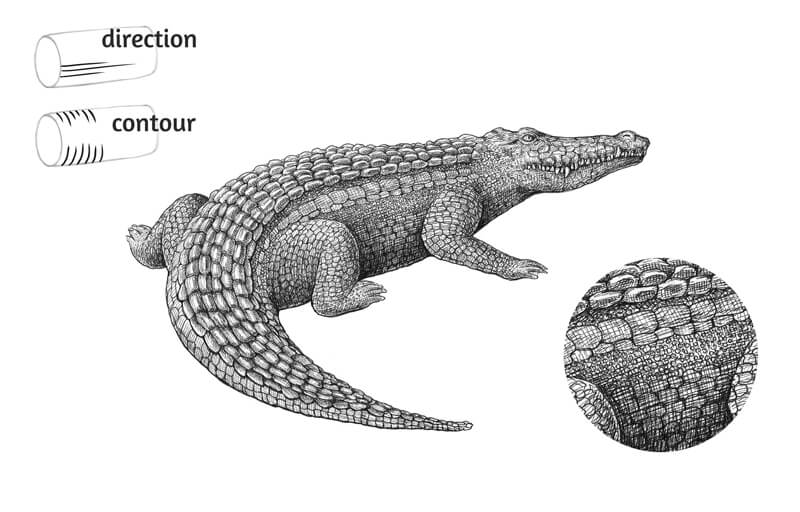
With a 0.05 liner, I add layers of hatching to the crocodile’s body. The lines follow both the direction and the contours of the form. This distinction is conditional and used here for simplification. A scheme in the image below illustrates this concept.
I apply as many layers of hatching as it feels necessary to create an illusion of volume. We can’t see many details of texture in the darkest areas. However, the scaly pattern still shows through the subsequent ink layers.
It’s possible to use a wider (0.1) liner in the most shadowed areas, such as the belly and the limbs.
We can accent some scales in the midtones to communicate the texture. This can be done by strengthening the elements’ contours. Also, we can divide the scales or their rows visually with soft, subtle shadows.
In the image below, you’ll find a close-up from the lower body area.
With a 0.1 liner, I accent the core shadows, applying another layer of contour hatching.
I darken the upper part of the crocodile’s head. This area has a relatively delicate texture, so we can use dots instead of hatching.
I also create a cast shadow under the tail’s protruding scales.
With a 0.05 liner, I add fine lines to the scales on the reptile’s back, muting down the brightness of the ridges. I leave the scales of the tail just as they are.
Such accentuated contrast creates the illusion of gloss – as if our crocodile has just got out of the water. It also draws the attention to the tail, which is in the foreground.

Now we can add a subtle cast shadow under our reptile. A quick way to do it is to apply graphite pencil marks and gently blend them. (It’s possible to use a softer type of pencil.) Also, feel free to add some ink marks.
Now, drawing of a crocodile with pen and ink is complete!
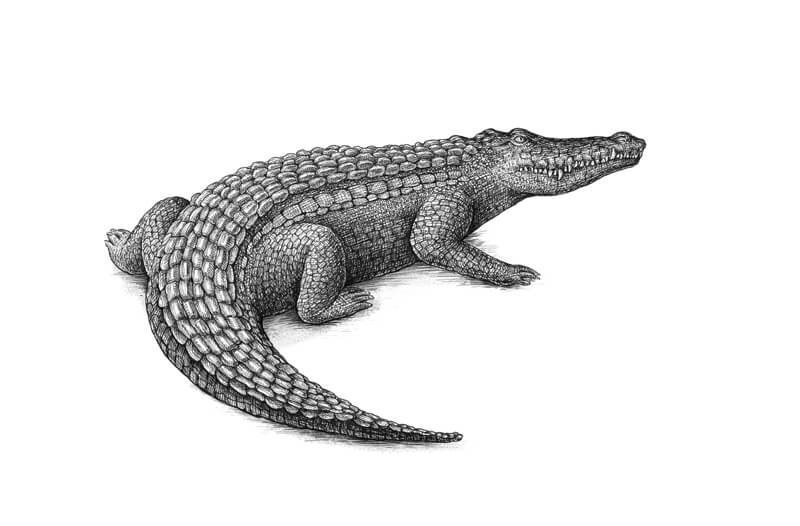
How to Draw a Crocodile with Pen and Ink – Conclusion
Congratulations – we’ve created a beautiful ink drawing! I hope that you enjoyed the process. Just be sure to be patient and allow the drawing to slowly develop as the pen and ink is applied.
The world of nature is an endless source of inspiration. Have fun with your future art projects!
If so, join over 36,000 others that receive our newsletter with new drawing and painting lessons. Plus, check out three of our course videos and ebooks for free.
Painting a Fantasy Image with a Model
Painting and drawing fantasy imagery is fun and creative. However, one major challenge to doing so is a lack of references. Portrait and landscape artists always have a reference to work from. Unfortunately, artists that paint fairies and dragons do not. References give an artist confidence to know that what he/she is painting will be visually convincing. Without a reference photo, how do fantasy artists pull off believable imagery?
So what do fantasy illustrators do to help them hit the mark? These artists often use the power of their own imagination in combination with numerous approximate references to develop their imagery. For example, using observable butterfly wings as fairy wings, or reimagining the components of construction equipment as robot parts.
Essentially, fantasy artists still work from references. They just do so in a more creative way.
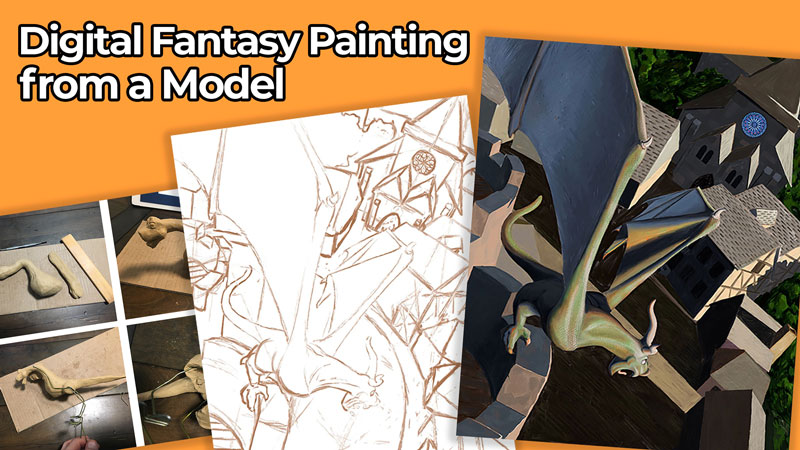
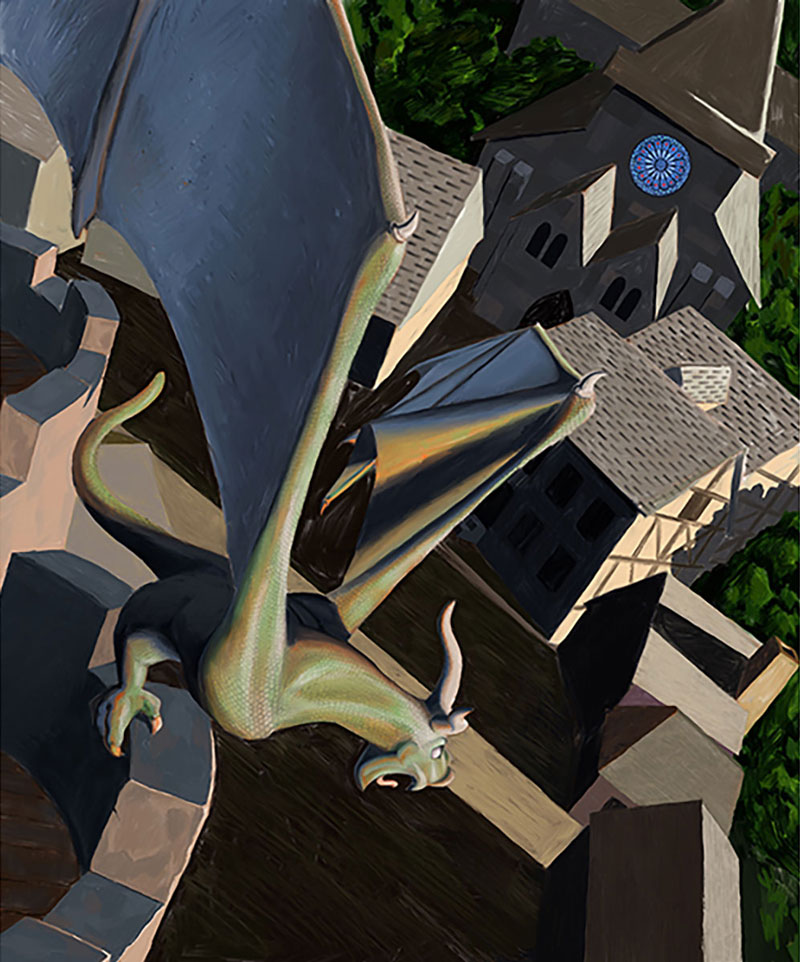
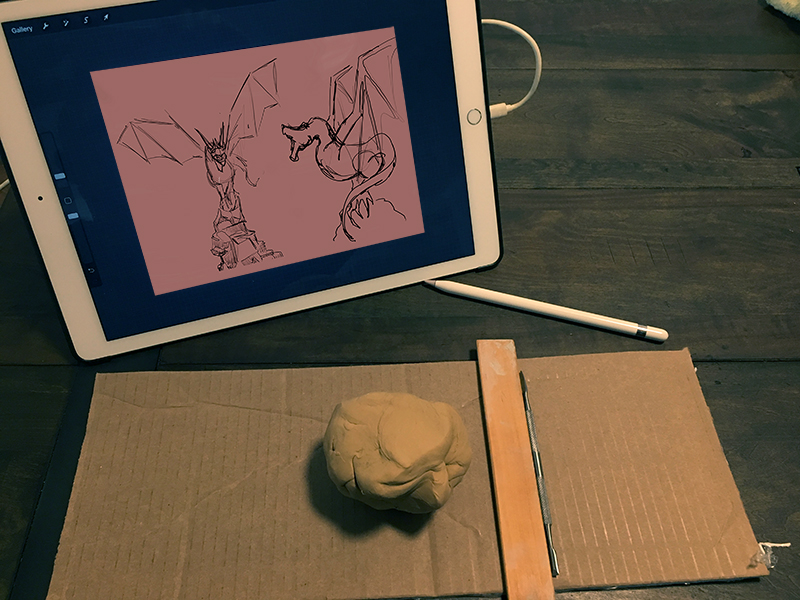
In this article, I would like to profile a process used by myself and other artists to create convincing fantasy art. This process brings together the desire to imagine with observational drawing skills. It was the process used to develop the digital fantasy painting below.
Planning a Fantasy Painting – The Art is in the Planning
Often times, the most important artistic decisions are made before a painting begins. Sometimes, numerous studies and thumbnail sketches are made to sort through compositional choices. Each sketch offers one option the artist could pursue.
The greater the number of preliminary sketches the artist makes, the more choices they have. These sketches don’t have to be perfect – they just have to capture a generalized idea. Here’s a look at a few rough preliminary sketches of the dragon I planned on using in my scene…
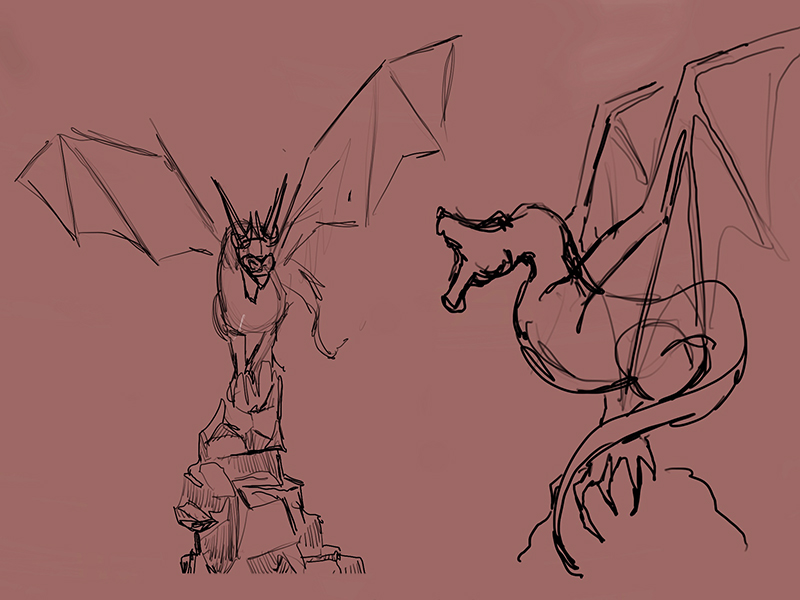
As you can see, these are simply loose gestural sketches without any detail or shading.
See also: Gesture Drawing the Human Figure
Another Way to Create a Fantasy Sketch
There is another way to sketch fantasy subject matter. But instead of sketching with paper and pen or even a digital tablet, let’s sketch in three dimensions. Three-dimensional sketching gives the artist an easy way to tweak variables like point-of-view and lighting.
A two-dimensional sketch is usually a broad, loose drawing that is short on details. Often done at once, a sketch is just a step in the process of “wrapping our minds” around our subject.
It’s the same when sketching in three dimensions. A 3D sketch is not a sculpture so much as a rough model. This model gives the fantasy illustrator a better chance to accurately capture the nuance of light and to tackle difficult drawing problems like foreshortening.
You don’t have to be an accomplished sculptor to create a workable model. Let’s take a look at how easy the model building process can be.
Building a 3D Model for Reference in a Fantasy Painting
The best media for 3D sketching are modeling clays that do not dry out when exposed to air. Plasticine is a brand of modeling clay that is made with petroleum jelly and is my top recommendation. It is a high malleable clay.
Sculpey is another brand of modeling clay that hardens when baked in a conventional oven. These two products are similar but do not feel the same. My preference is Plasticine, but I used both together to build the model below.
Besides Plasticine and Sculpey, the following materials were used to make the model…
- wire for an armature
- sculpture tools
- balsa wood strips
- drafting Mylar film
- wood glue
- a drill
- wood block for a base
Modeling clay allows the artist to focus on proportions first and the pose second. The model can be bent into position after it is assembled from basic forms. It doesn’t have to be built in its final pose. However, If the model is tall or has thin parts it could require an armature (as did the dragon). In this case, one might have to sculpt the forms and capture the desired pose all together.
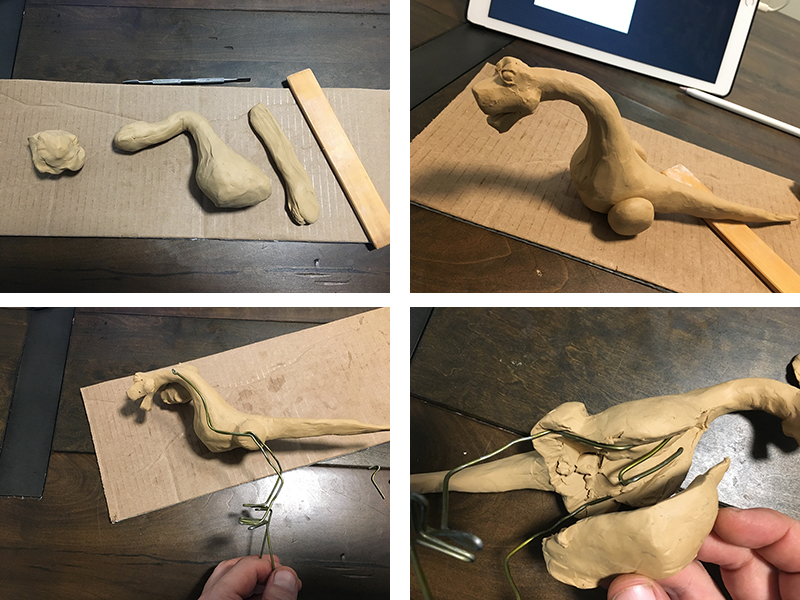
I used balsa wood and mylar to build the wings. The wood and paper wings do not unify with the clay body of the dragon but that doesn’t matter. Where the model is lacking, our imagination fills the gaps. Use any materials in combination with the modeling clay to save time and energy. You can even push objects into the clay to make textures or other unique features.
The fun begins when the model is done. It is time to play with point of view and lighting. Now, every angle from which you observe your model serves the same purpose as one two-dimensional sketch. There are literally thousands of angles to choose from. Similarly, you can quickly move a light source around a model, studying numerous options in just minutes before making a decision. Take a look at a couple of options below.
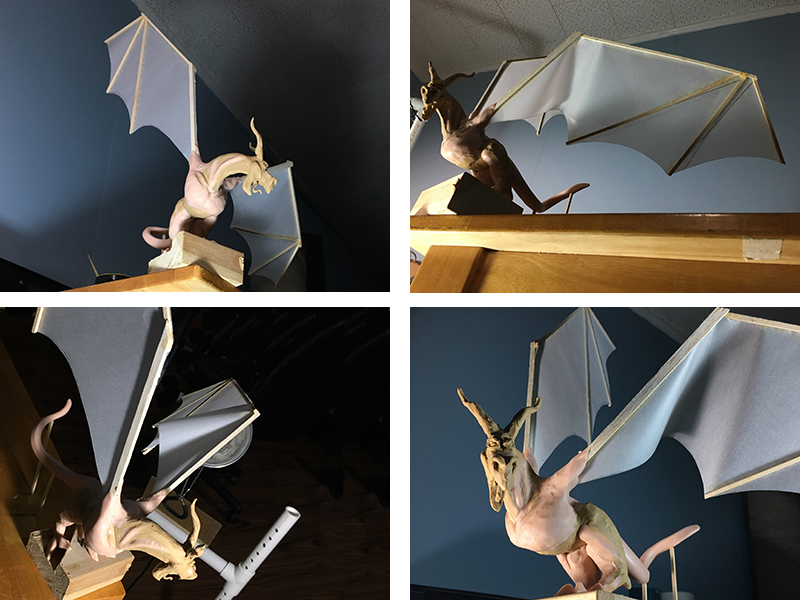
The reference photo taken from above (in the bottom left) inspired the finished painting. The extreme perspective of the light stand (white PVC in the photo) influenced the perspective of the buildings.
See also: Linear Perspective
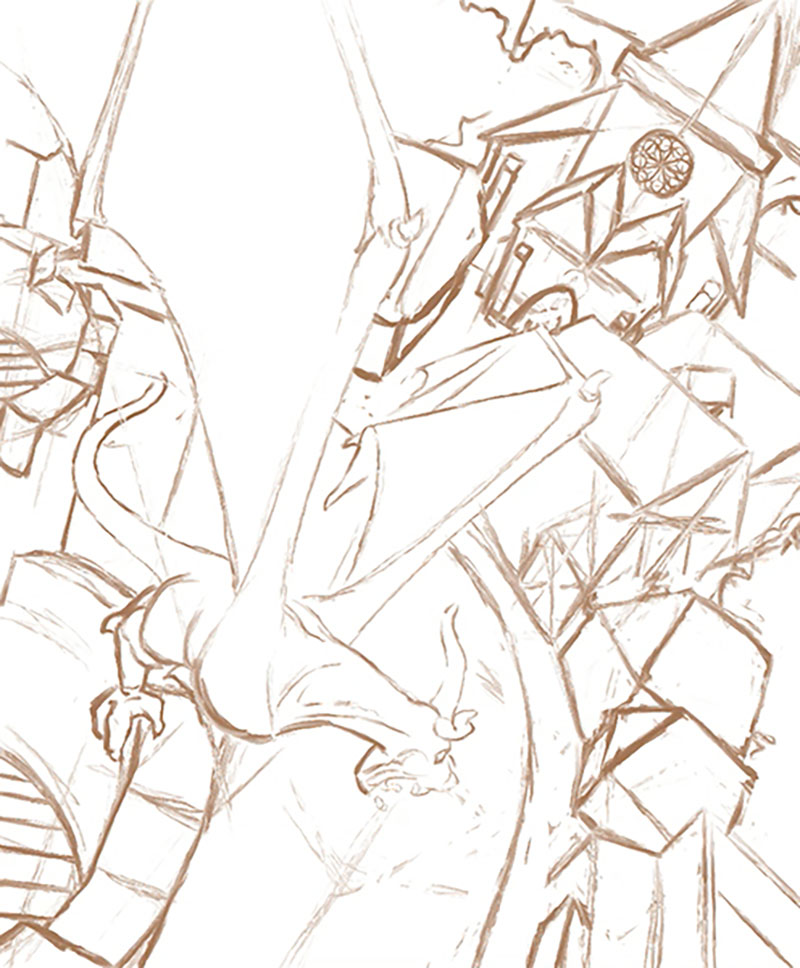
Making the Fantasy Painting
The finished painting was completed using Procreate, a digital painting program. Just like Photoshop, the program allows for the use of layers. I used the photograph of my model as a temporary layer and traced the contours of my dragon on a separate layer. If I were instead making a painting on canvas, I would have simply printed my photo to scale and make a graphite transfer of the drawing just the same.
It is not cheating to trace a photo of a model made by your own hands. It is still 100% your creation. Tracing this step is simply about efficiency. You will still need to modify those contours with details.
See also: Is It Cheating to Trace in Art?
At this point the process becomes typical – mixing the desired color and placing it in the right spot. The painting is 100% from imagination because the photo reference was a product of imagination.
Where did the Model Make a Difference?
Having the model made a difference in several ways. In my original gesture sketches, I only imagined the dragon from the front and side. The final pose was from above. Choosing such a dynamic orientation was a direct result of having a model to observe from many angles.
The model also made a difference in terms of accuracy. Without the model, the one wing may not have had such a specific fold. Even the horns would have been harder to figure out on paper than in clay, especially since one horn is foreshortened.
As mentioned before, the precarious composition is a direct result of observing the model. Without it I would not have ended up with the painting that I did.
The greatest benefit to this process for me is nailing the lighting. One short-coming I see in fantasy illustration is both a complexity of light and point of view. Without having built the model, I feel as though I might not have made such a bold choice with regards to the strong contrast in value or the unusual point of view. Pick up some modeling clay yourself and give 3D sketching a try.
If so, join over 36,000 others that receive our newsletter with new drawing and painting lessons. Plus, check out three of our course videos and ebooks for free.

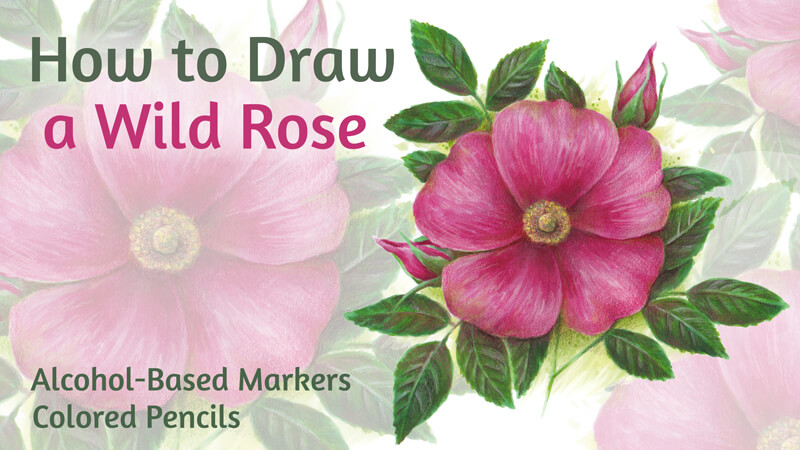
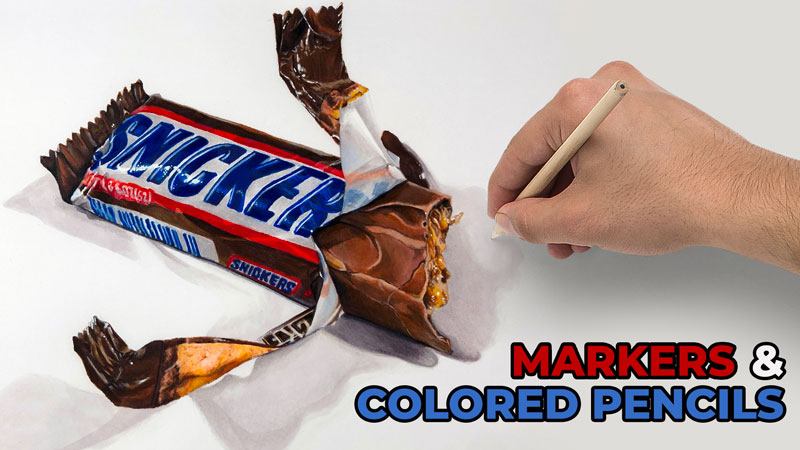
How to Draw a Wild Rose with Markers and Colored Pencils
Roses are cultivated for their beautiful flowers. They exist in a variety of colors – and the palette is truly extensive! The coloring ranges from white through various yellow, orange, and pink tones to dark crimson, maroon, and purple.
The roses’ delightful fragrance and soft, velvety petals are an inspiration, too. These flowers provoke creativity! It’s hard to find an artist who has never drawn a rose in their life.
Today’s lesson is dedicated particularly to wild roses – close relatives of well-known garden roses. The Rose (Rosaceae) family also includes apples, peaches, pears, strawberries, raspberries, blackberries, and many other species.
It is interesting to know that fossil records show the rose to be one of the most ancient flowers. All garden roses are descendants of original wild roses.
Wild roses can be found in a variety of places, such as open woods and prairies. They often grow along the roads, and also in wet soils along streams and swamps.
Uncultivated plants grow naturally, without the benefit of fertilizer or supplemental watering. The need to adapt to harsher conditions was amplified by millions of years of evolution. As a result, wild roses developed superior vigor and endurance.
These flowers are known by a variety of common names, including pasture rose, prairie rose, dog rose, eglantine, sweetbriar, and others.
Are you excited and inspired? Let’s begin your creative journey – we’ll learn more interesting facts along the way!
Drawing a Wild Rose – The Art Materials
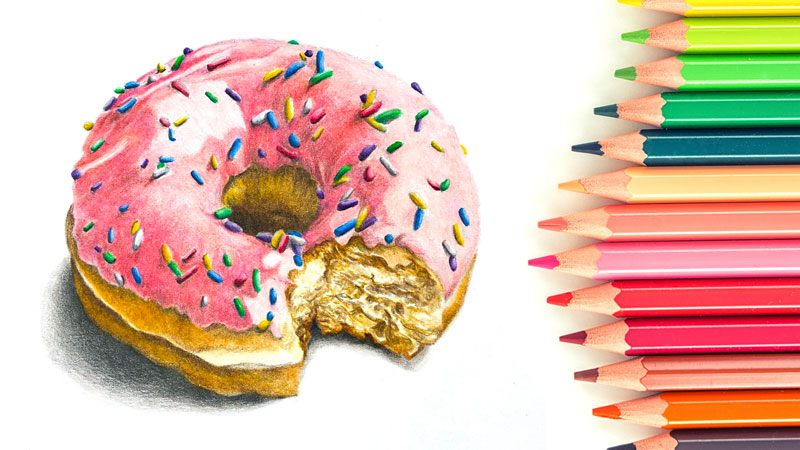
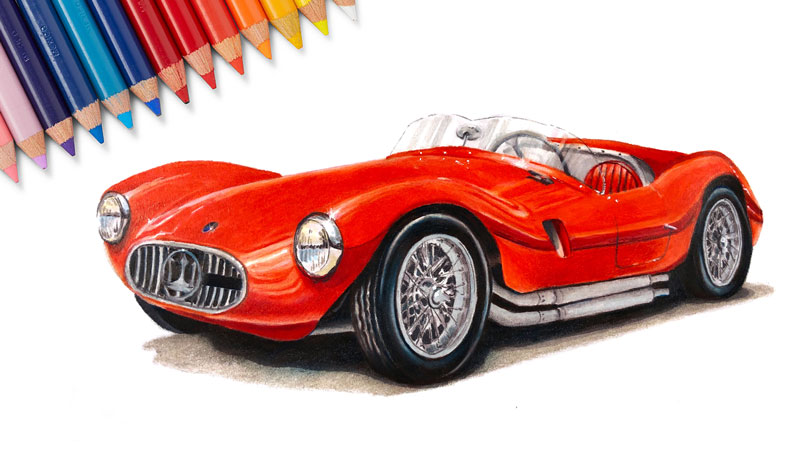
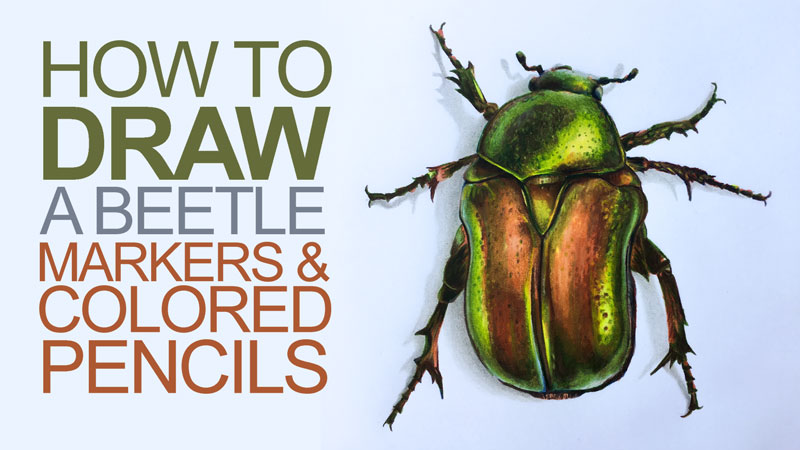
We’ll create a vivid drawing of a wild rose using alcohol-based markers and colored pencils. This combination of media has several benefits.
For example, markers allow making a solid base of color in no time. They also have a wonderful ability to create smooth gradients of color. This medium is easy to use – it gives the artist full control over the creative process.
On the other hand, colored pencils can produce very accurate, precise marks. When it comes to adding details, a sharp pencil may be the best possible option. Also, layers of colored pencil applications are semi-transparent. This feature helps to create subtle color nuances and various textural effects.
For many artists, summer is an opportunity to spend time outdoors, enjoying sunny days and beautiful nature. Bright seasonal flora is a source of constant inspiration!
See also: How to Draw a Rose
However, depicting natural objects (especially from a real model) requires speed and efficiency. Used together, alcohol-based markers and colored pencils streamline the process.
My markers are Finecolour. Each marker has two tips; a brush and a chisel. I’m going to use the brush nib only as its softness and flexibility allows for creating varied, organic lines.
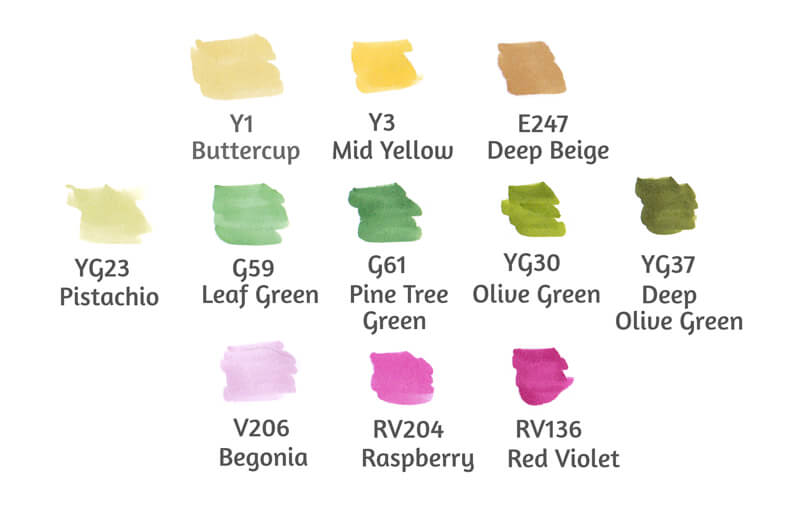
In the image below, you’ll find the chosen colors.
This project can be completed with fewer markers. Make sure that you have at least one yellow, three cool reds (light, medium, dark), and two greens (medium, dark). Unfortunately, a limited range of markers can’t provide for a significant hue variation, but it is always possible to compensate for such limitations with additional colored pencils.
If you need more information on alcohol-based markers, please check out this post. It provides thorough explanations on the types of nibs, color families, and marker techniques.
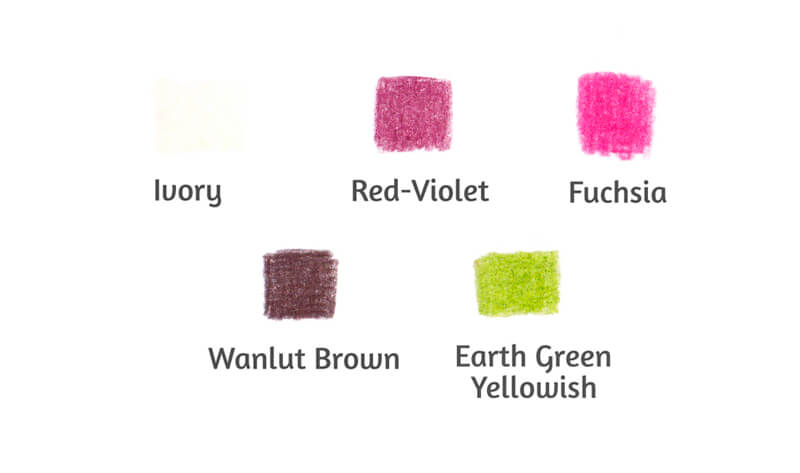
And here are the colored pencils – they’ll be applied to refine the drawing. My pencils are oil-based Faber-Castell Polychromos.
Also, keep a graphite pencil at hand – we’ll use it to create an initial outline. A couple of erasers (a plastic and a kneaded one) will help us to remove or soften the pencil marks.
See also: 9 Must Have Colored Pencil Supplies
I’ll be drawing on an A4 sheet of smooth marker paper. Its back side has a coating that prevents inks from bleeding through.
A spare piece of ordinary thin paper will be used to create a miniature sketch.
The Appearance of a Wild Rose
First, let’s observe the plant that we’re going to draw.
The flowers of wild roses are single and wide-open. They usually have five petals.
The most common color of petals is pink. The tone may vary from pale to bright. It is also possible to find flowers that sport white, red, or yellowish petals.
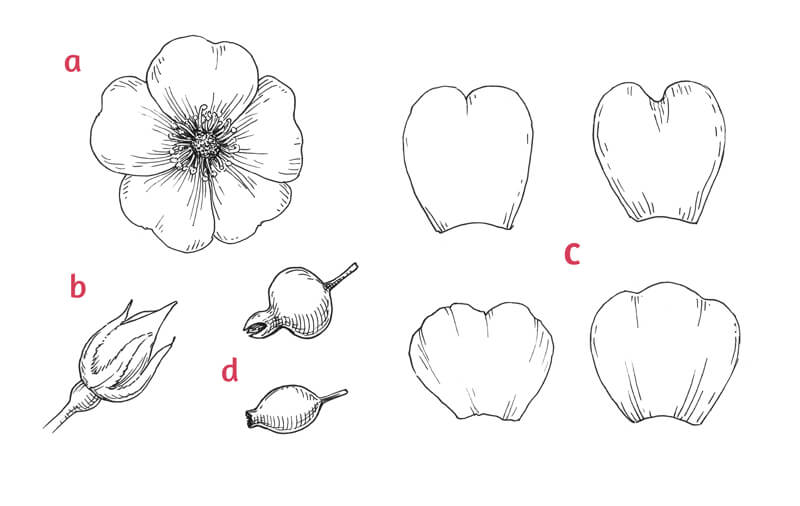
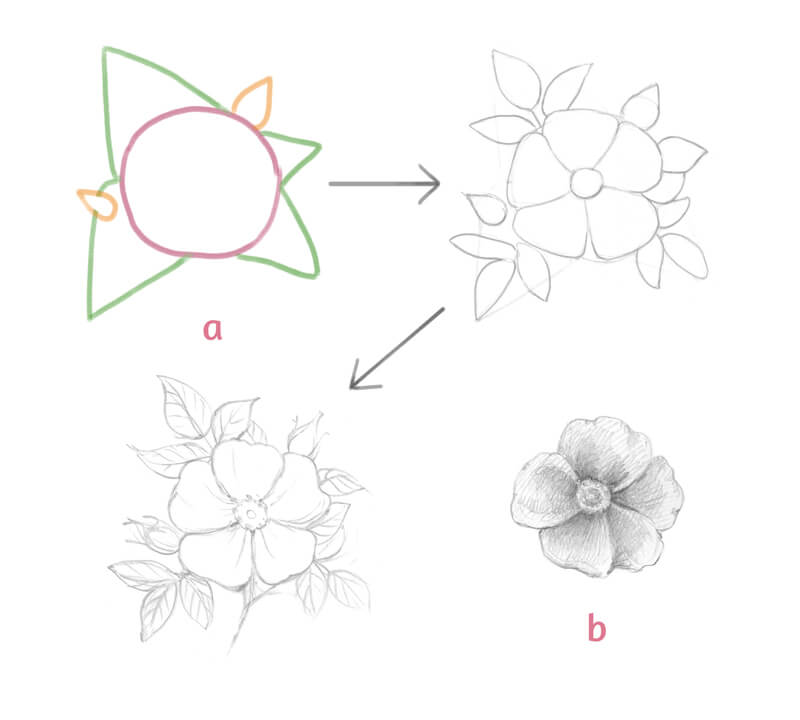
Multiple stamens and a pistil form the central part of the flower. (See point a in the image below.)
The sepals are the modified leaves that can be found beneath the petals. Usually, there are five sepals of green color. They may be long enough to be visible when a flower is viewed from above. Sometimes they appear as greenish points alternating with the petals.
Also, sepals form an envelope that protects the developing flower bud. (See point b in the image below.)
The shape of petals may vary from species to species. In most cases, a petal is rounded and divided into two distinct lobes. (Point c.)
Wild roses also have hips. (Point d.) They are berry-like structures of a rounded or slightly flattened shape. The color of hips usually ranges from red to orange. Rose hips of some species are edible. They are very rich in vitamin C and antioxidants.
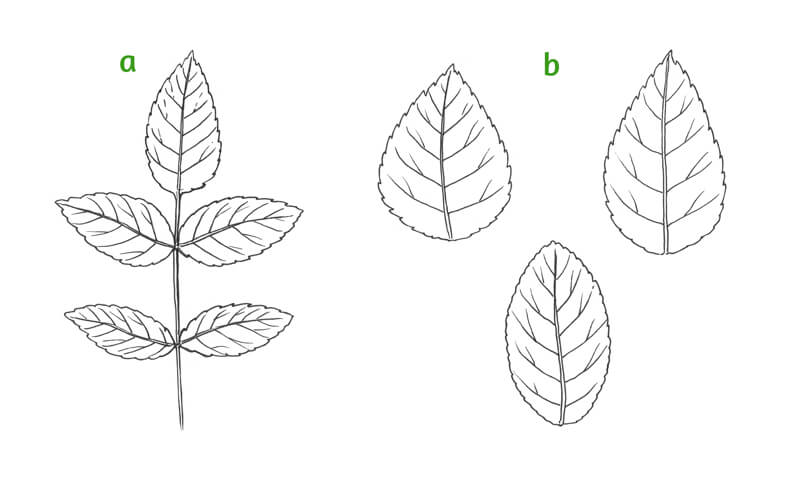
The leaves are compound (comprising several small leaflets) and alternately arranged along the stem. In most cases, wild species have seven or nine leaflets. The leaflets are located close to the stem.
There are pairs of leaflets at the sides of the stem and a single leaflet at its end. The ending elements are often slightly larger than their neighbors. (See point a in the image below.)
The leaf blades are dark green. They have one large mid-vein. (It is also called midrib.) There are from six to thirteen secondary veins that are diverging from the midrib. They form opposite pairs.
Usually, the leaflets have an oval shape and are sharply toothed. Just as in the case with the petals, the shape of leaflets may vary. (Point b.)
Now we know enough to draw a wild rose!
Developing the Composition
I create a miniature sketch first. The goal is to transfer the concept that I have in mind onto paper. Then we’ll evaluate the result in terms of composition and balance.
It takes several minutes to create a rough sketch, which may seem like an unwelcome distraction, but the importance of such work cannot be overstressed. A preparatory sketch helps to see the image as a whole. We can rearrange the elements of the future artwork until the final composition looks just right.
I start with general shapes – the masses. I’ve given them different colors for your convenience. The red rounded shape marks the position of the wide-open flower. The orange shapes are the buds. The green borders show areas that will be taken by the foliage. (See point a in the image below.)
I allow some asymmetry – it makes the composition more lively and organic.
The upper-left corner of the sketch has some empty space, but I think that a big pink bud can become a nice eye-catching accent. The final artwork must look balanced enough.
After the general masses are arranged, we can refine the objects within the shapes. You can change your drawing at any stage of the process. Add or remove the elements if that feels necessary. The final sketch doesn’t have to be very detailed.
Also, it may be a good idea to add shading to some elements of the miniature. It will help you to determine where the lights and shadows should be in your final artwork. (Point b.)
The petals of wild roses can’t boast of a whimsical value pattern that is created by various bents and drop shadows. Compared to their cultivated relatives, the flowers of wild roses look somewhat flat. Usually, there is a soft shadow near the flower’s center. The petals may cast drop shadows on their neighbors.
Creating an Underdrawing of a Wild Rose
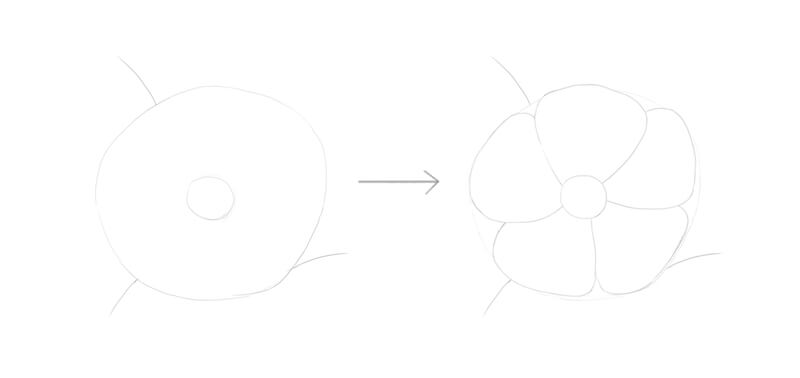
It’s time to start on the final drawing. Let’s outline the contours of our flower.
I draw a rounded shape that marks the rough borders of the rose. A smaller circle within this shape indicates the area of stamens. We can add separate petals later.
Three lines go from this rounded shape to the periphery of the drawing. These lines mark the directions of the leaf stems.
I keep my preliminary mini sketch at hand and refer to it now and then.
I mark the leaflets. They have an elongated shape with pointed tips. The goal is just to arrange the elements. We’ll add the details later.
There are two buds. In the image below, I’ve marked them with a reddish color for your convenience.
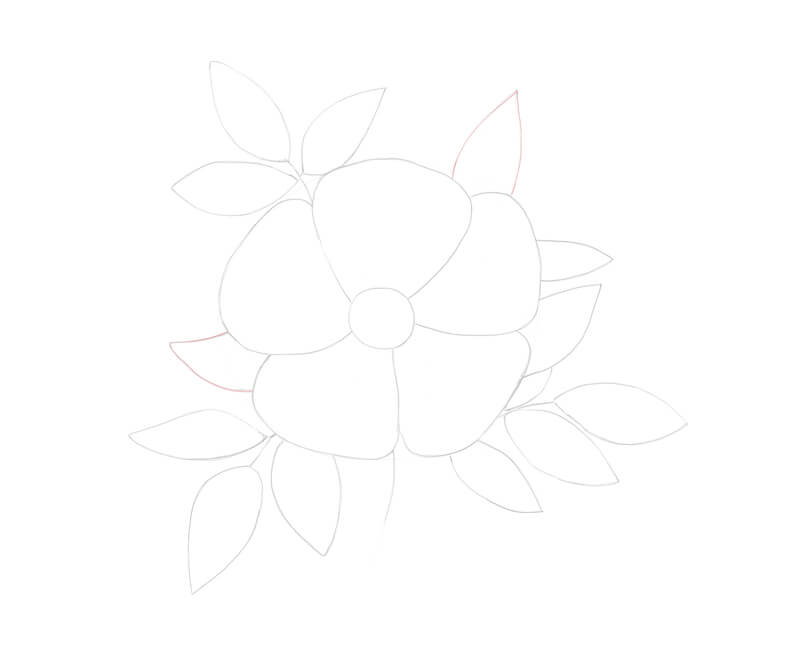
I refine the drawing. The contour line of the petals becomes curvier. I mark the pistil and define the area of stamens more precisely.
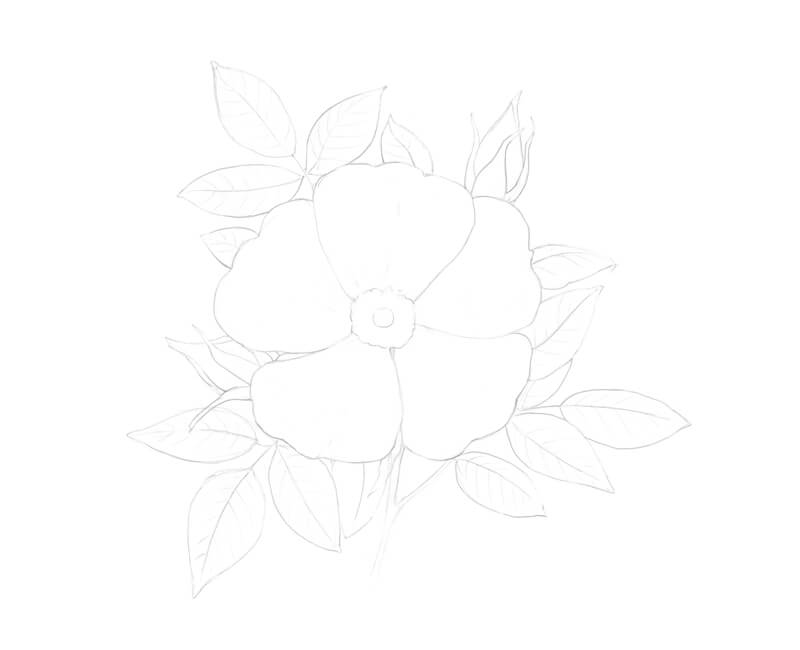
I add the veins of the leaflets and the sepals surrounding the buds. I also mark the stem in the lower part of the drawing, under the flower.
I don’t draw every single vein or stamen, keeping only the most significant details. Excess graphite may contaminate further applications. I’m going to remove it with a kneaded eraser, so the tiniest bits of visual information will be lost anyway.
Applying Alcohol-Based Markers
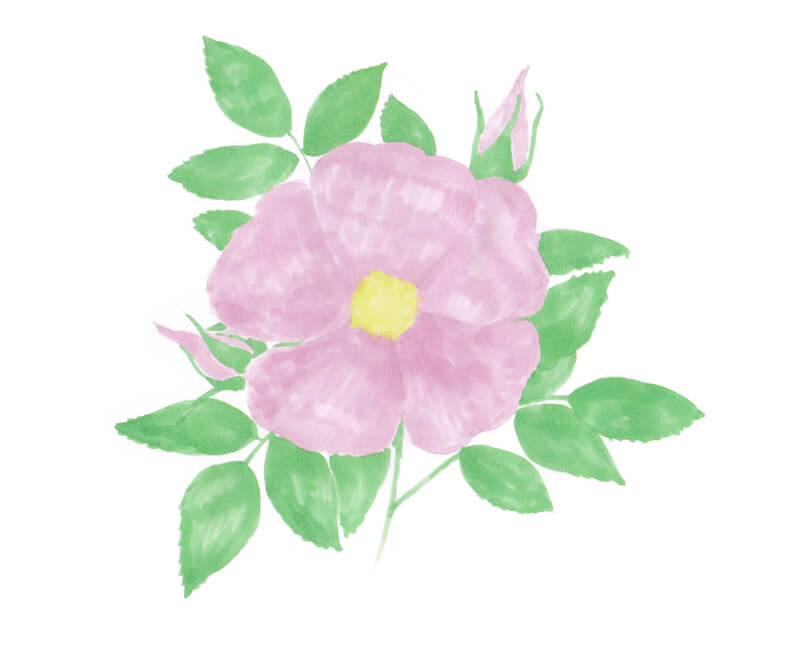
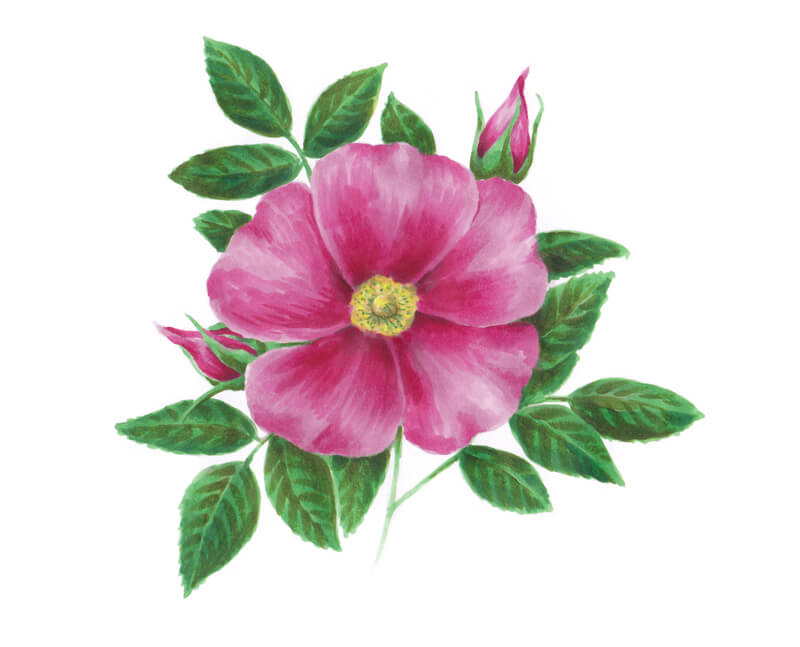
With Buttercup, I cover the whole area of the flower’s core with a single flat layer.
Then I apply Begonia to the petals and buds. I work with broad marks, using the brush nib. The strokes go from the center of the flower to its sides. The first layer’s covering is somewhat striped, so I add another one.
I add some Buttercup to the border between yellow and pink colors to blend it. If the pink applications are still wet, you’ll get a smoother transition. Such soft gradients usually make the artwork more vivid and picturesque.
See also: How to Draw with Markers and Colored Pencils
I cover the leaflets with Leaf Green. (Apply a second layer if necessary.)
I touch the edges of the leaflets, creating an effect of a toothed margin. My movements are swift. I don’t aim to be perfectly precise as this first applications is done in a sketchy manner.
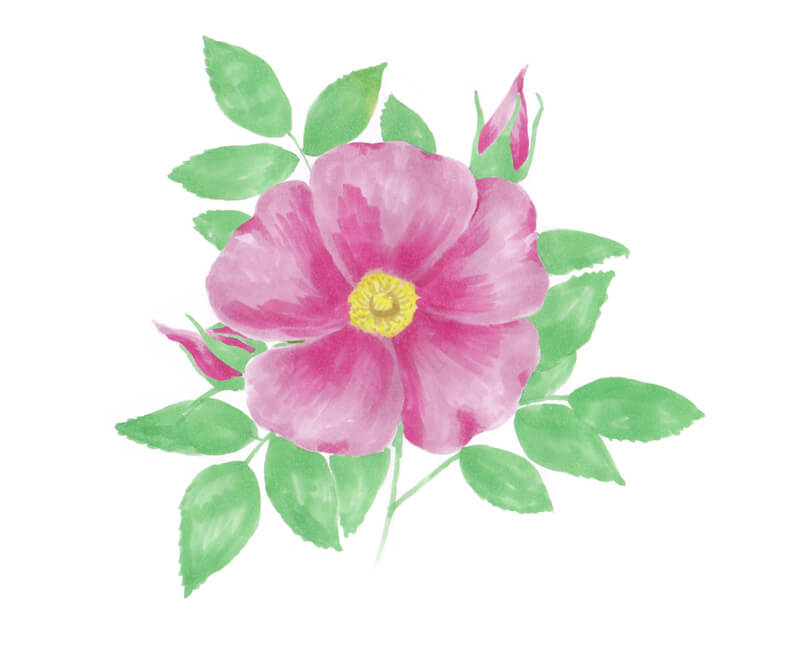
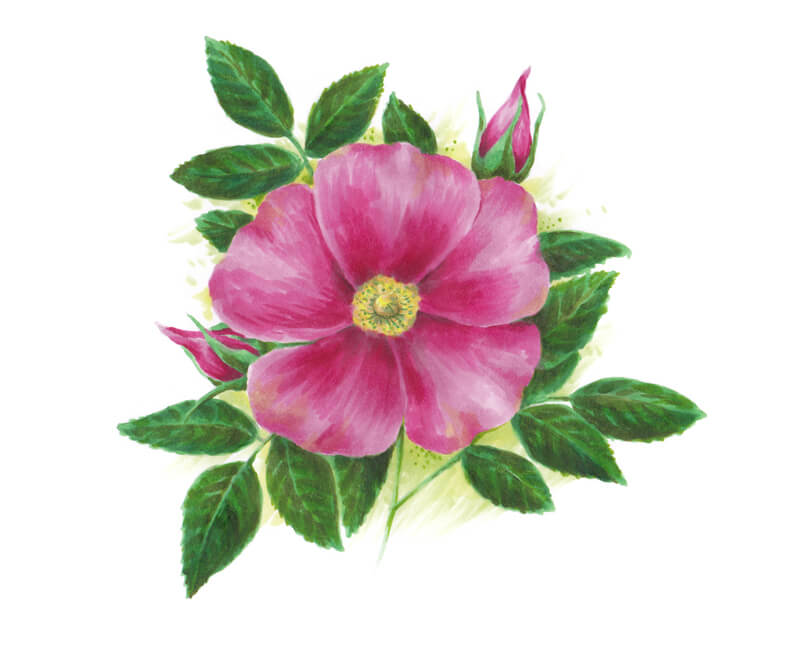
I include Raspberry in the darker areas of the petals that are near the stamens. I also add some strokes to the buds and the petals’ tips. The strokes follow the direction of the objects’ cross contour lines.
I apply Begonia on top of the “seam” between the colors of different values, blending these applications. As usual, if the existing layer is still slightly wet, you’ll get a softer transition. It’s possible to reapply the inks to moisten and reactivate the covering.
We’ll be working in the same manner throughout the tutorial. The lighter marker will be used to blend the border between the colors that present different values. (And, sometimes, hues.)
I use Deep Beige to mark the stamens with long curved lines and dots. I also accent the area under the pistil, making this element more prominent.
I touch the flower’s center with Mid Yellow to vary the colors. The marks are short, almost dot-like. I make them with the side of the marker’s brush nib.
Please note that marker applications may look different before and after drying. Sometimes it’s a good idea to wait for a minute. Let the inks dry completely before evaluating the color intensity or smoothness of blending.
I add broad sketchy strokes of Deep Olive Green to the leaflets. They mark the pattern formed by the secondary veins. I also use this marker to cover the darker areas of the leaves.
I blend the applications with Leaf Green.
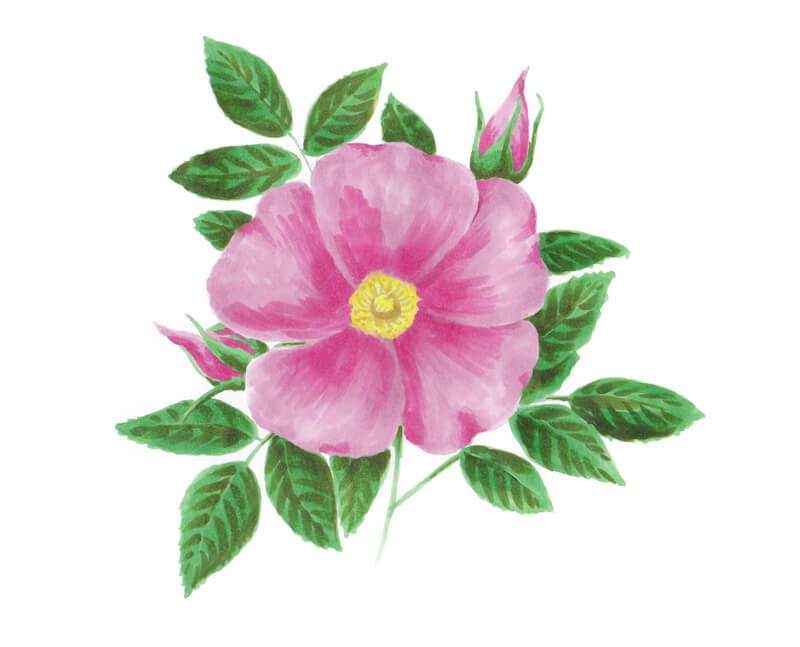
I add Red Violet to the darker parts of the petals and buds, increasing the contrast. The strokes follow the contours of the elements. They are made in a similar swift, sketchy manner.
I use Raspberry to blend the applications.
Let’s add some Begonia to the petals. This tint creates a smooth gradient from medium to light pink. We can also apply it to the yellowish core of the flower. This inclusion will unite the artwork in terms of color.
I add Pine Tree Green to the foliage. This cool shade creates a nice color variation. It also softens the transition between the contrasting darker olive strokes and the lighter base.
I use Leaf Green to blend the applications. I also add this color to the shadowed areas of the petals. Layering such colors (that are contrasting in hue) decreases the saturation of the resulting tone. We get a nice complex color that looks more realistic.
I add some Olive Green to the leaflets, aiming mostly at the lighter areas and the midtones. This warm color livens up the artwork.
I also create more teeth at the leaflets’ edges, touching the paper with the tip of the nib.
As usual, Leaf Green may be used for blending any stripes or borders in the colors of the green family.

Let’s add some color to the area that is surrounding the object. I apply broad strokes with Buttercup and Pistachio. These tints are close in value, so they blend easily.
My wrist (not the fingers!) makes this free and quick movement. Sometimes I add single hatches and large dots. I just let the marks happen naturally.
Optionally, we can add some Leaf Green or Olive Green to this base while it’s still wet. These darker marks will become blurry and blended to a certain extent.
I also add some Buttercup to the tips of the petals to unite the elements in terms of color.
Refining Our Wild Rose with Colored Pencils
We’ve created a wonderful color base. Now it’s time to add the details. We’ll also spend some time working on the textures.
I apply Fuchsia to the petals and buds. I’m softening the transition between different pinks.
Petals of a wild rose aren’t perfectly smooth. They have a subtle texture. I leave soft, loose strokes with a slightly dull pencil to convey the desired feel. The lines may be longer or shorter – this creates a pleasant variation.
In this case, pencil marks are placed on top of marker applications and smooth marker paper. This combination of materials gives the pencil strokes a slightly rough, chalky look. It is similar to dry pastel. This character of marks adds some pleasant charm to the artwork. It accents the textures, too.
I use Earth Green Yellowish to soften the color transitions in the green areas. I also refine the leaflets’ contours where necessary.
To unify the artwork in terms of color, I add some pink strokes to the foliage. They create an illusion of a reflected light on the glossy leaflets.
Similarly, I add some green strokes to the petals. The colored pencil applications are semi-transparent, so the initial color won’t change much.

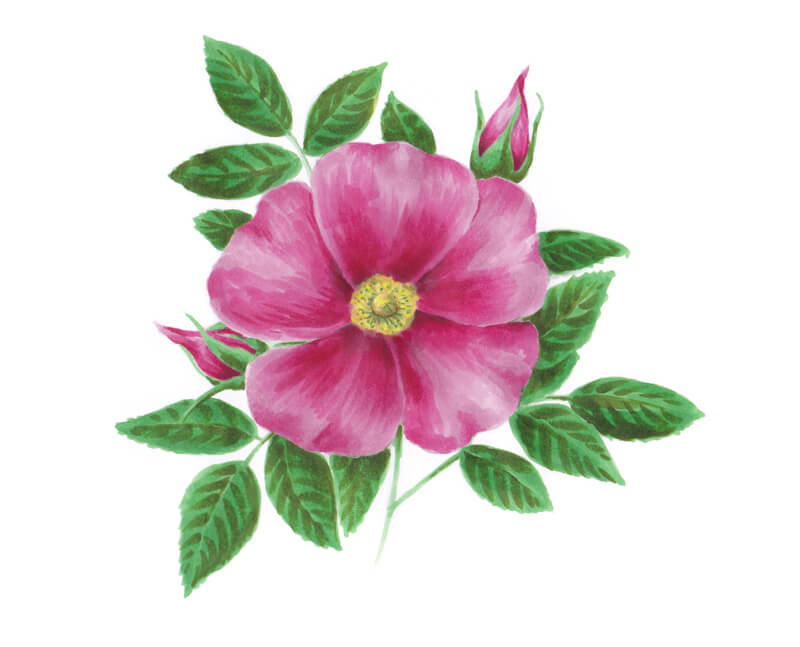
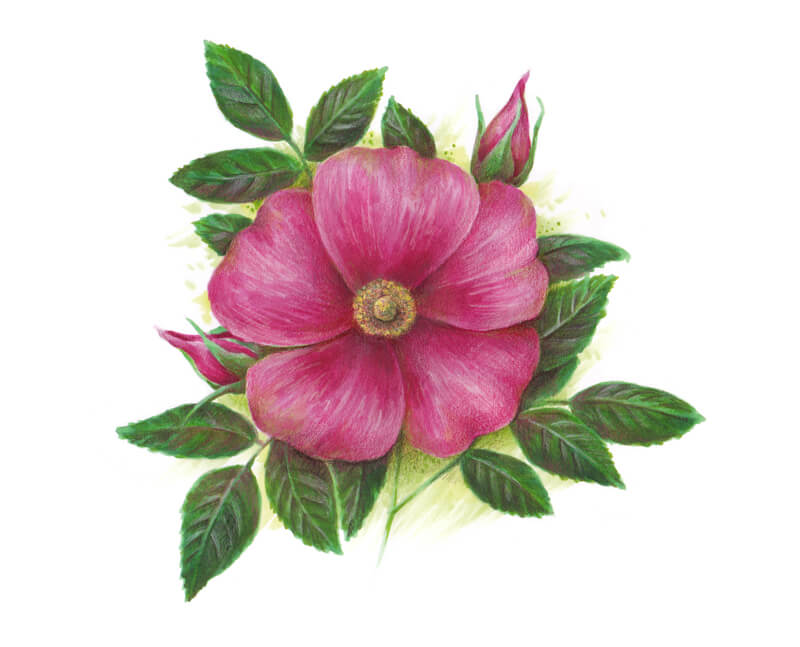
I deepen the petals’ core shadows, using Red-Violet. The covering is smooth. My pencil moves in small circles. It’s also possible to add longer lines that imitate vein-like structures.
I also strengthen the shadows in the flower’s central area.
I use Walnut Brown to draw the veins of the leaf blades. I deepen the shadows, accenting the interesting relief of the leaf blades.
I use this shade to refine the stamens. I add short lines and dots to the flower’s center. The inclusion of this color makes the drawing more realistic. I also apply a thin layer of this shade to the flower’s environment, close to the petals.

With Ivory, I accent the lighter areas of petals, where the slight bent is. I work mostly with long lines to show the texture.
I lighten the midribs and the areas near the secondary veins. I accent mostly the leaflets that are close to the flower, which is the focal point. Elaborate details usually attract the viewer’s attention, so let’s make sure that it is led to the bright, accentuated petals.
It’s time to evaluate the artwork and add or refine anything that needs a final touch.
Drawing a Wild Rose with Markers and Colored Pencils – Conclusion
Congratulations – we’ve created a wonderful artwork! I hope that you enjoyed the process and also appreciated the advantages of mixing media.
These simple yet effective techniques may be used in a variety of cases. It doesn’t matter whether you draw from nature or from a reference photo, outdoor or indoors.
I wish you much inspiration for your future art projects!
If so, join over 36,000 others that receive our newsletter with new drawing and painting lessons. Plus, check out three of our course videos and ebooks for free.
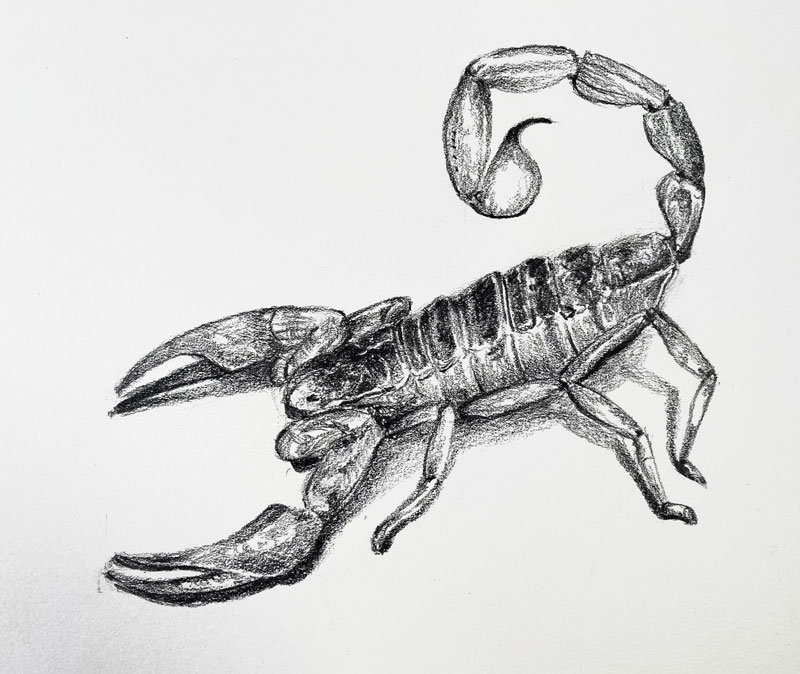
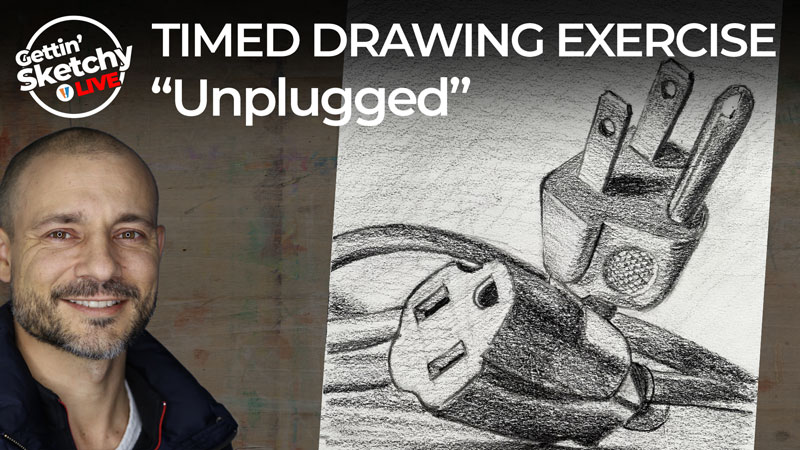
How to Draw a Scorpion – Timed Drawing Exercise
Gettin’ Sketchy – Drawing a Scorpion – Season 4 Episode 9
This episode aired live on YouTube on July 28, 2021.
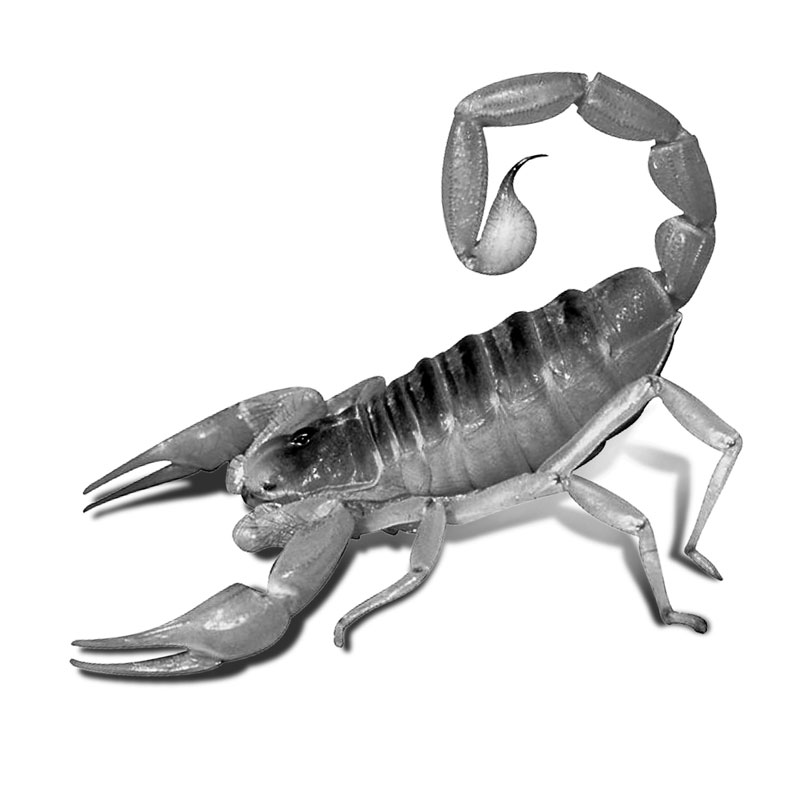
A scorpion is not a creature that you’d love to encounter, but it is a wonderful subject for drawing. There are plenty of challenging shapes, textures, and value shifts found on this particular critter. This makes a scorpion an excellent subject for a timed drawing exercise. In this lesson, we’ll draw a scorpion with graphite pencil on white drawing paper in just 45 minutes.
Here’s a look at the completed drawing…
Start the Drawing with a Basic Shape
In most circumstances, I like to begin a drawing by looking for basic shapes. By simplifying the subject down into basic shapes, I’m able to ensure better accuracy and increase the speed of the drawing. These basic shapes also give me a starting point for making comparisons. Even the most complex subjects can be broken down into simplified shapes.
In the case of this scorpion, I begin with a shape for the main portion of the body. Instead of focusing on the details or the small segments of the exoskeleton, I start with a simple ellipse.
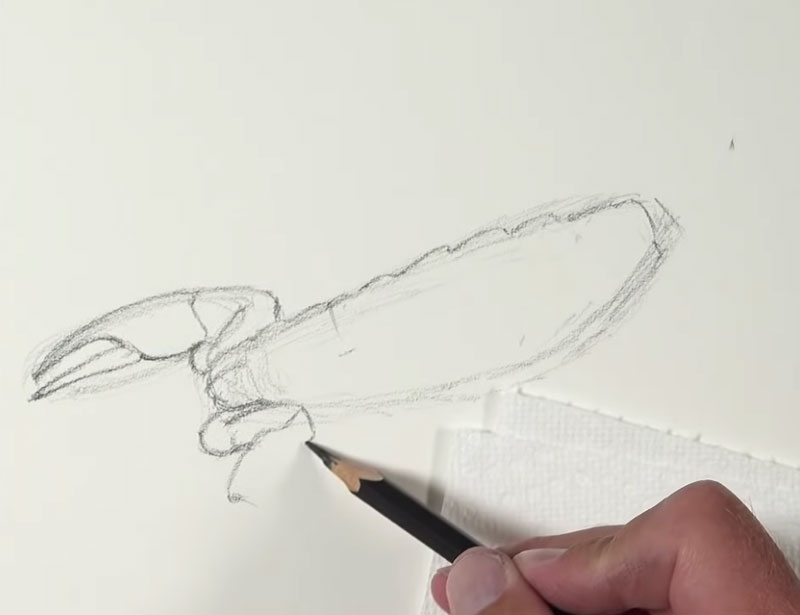
This initial shape provides a starting point for visual comparison. From this first shape, I can begin building out the basic shapes of the other parts of the scorpion. Each shape that I add branches out from the previous one. As I continue adding shapes, I can gradually begin to draw the outer contours or outlines.
We can see this method of construction take place with the first of the two menacing claws. First a simple ellipse is drawn lightly. Inside of this ellipse, additional simple shapes are “carved out” of the ellipse. The contour lines are added using the ellipse as a guide. The result is an accurate contour of the claw.
See also: How to Draw Ellipses
Drawing the Contour Lines or Outlines of the Scorpion
This approach of recognizing and drawing simplified shapes continues as I work around the body of the scorpion. After the first claw is added, I work down to the second and then address each leg segment. Then, I return to the body and refine the segments of the exoskeleton.

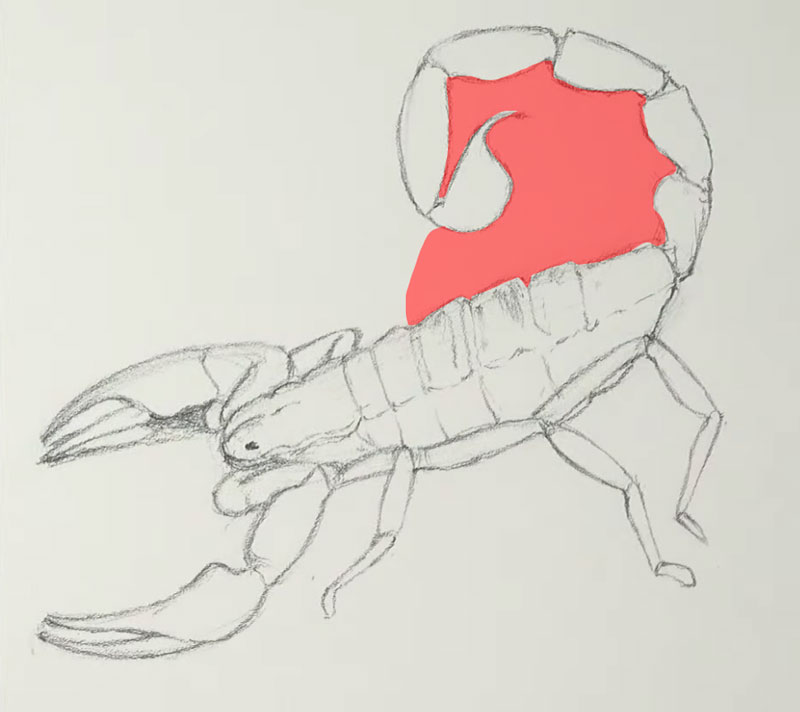
This process continues with the tail of the scorpion. However, instead of drawing one simplified shape for the entire tail and stinger, I decide to draw each segment one by one.
As each segment is drawn, I pay attention to the negative space in between the body and the tail. This negative space forms a clear shape. Instead of using just the positive space to make visual comparisons, I can also use the negative space as well. This leads to even greater accuracy in the drawing.
See also: Positive and Negative Space
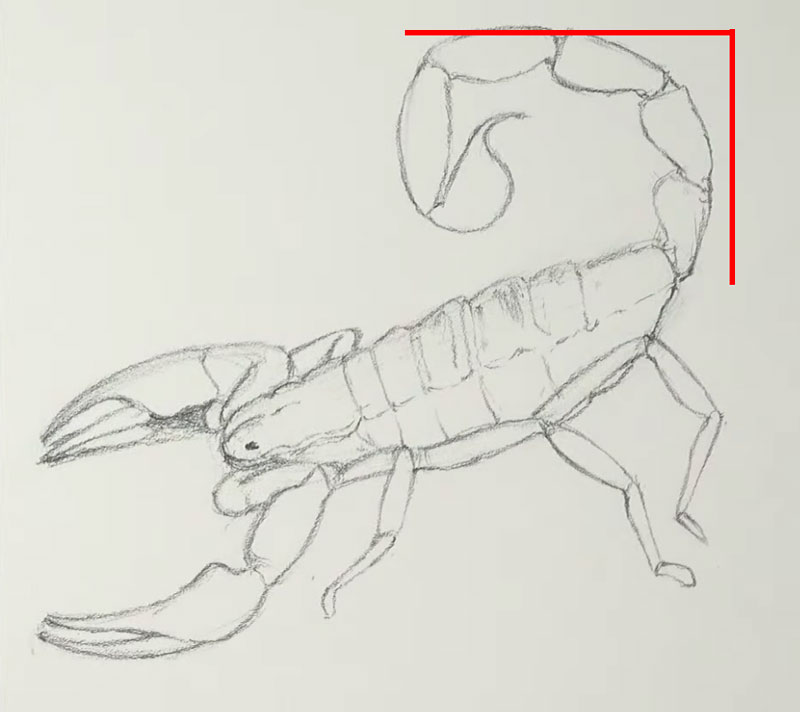
On top of the negative space, I am also paying attention to how high up on the picture plane the tail should go and how much it needs to extend back over the body. All of these small observations and comparisons work together to ensure drawing accuracy.
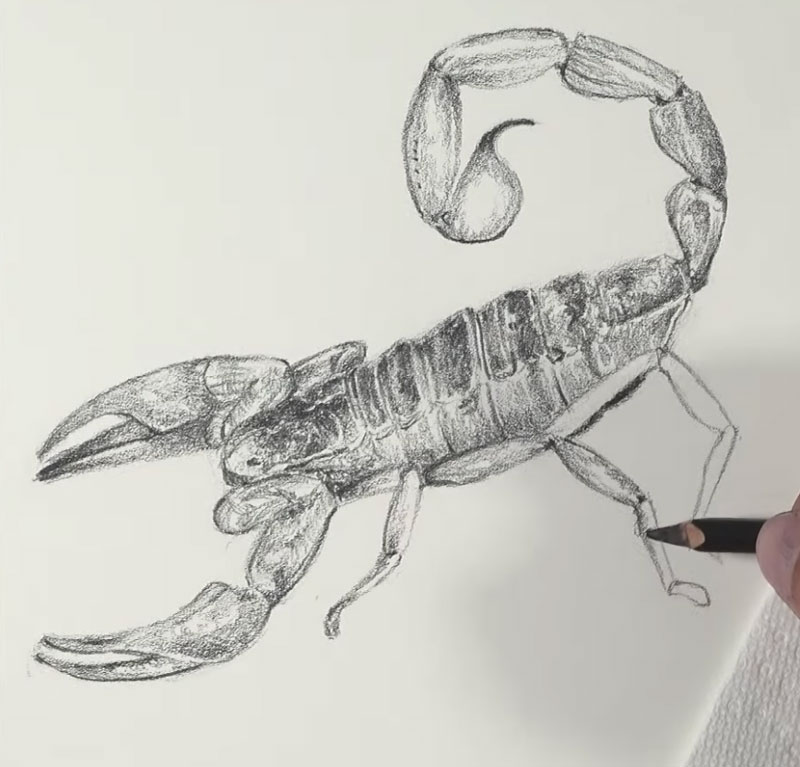
Shading the Drawing and Developing Details
Once the contour lines of the drawing are in place, I’m ready to begin developing the value and the texture. Value and texture are both important, yet different, elements of art. Texture is heavily dependent on value.
While directional stroking plays an important role in the illusion of texture in a drawing, it is the relationship of values that plays an even more important role. The intensity of contrast and positioning of values tells us whether a surface is smooth, rough, shiny, or matte.
Considering the relationship between value and texture, I begin shading the drawing rather quickly. To adjust the value, I simply adjust the amount of pressure placed on the pencil. This pencil, which we’ll get to in a moment, is softer and allows me to make both dark marks and light marks.
Since I am right-handed, I work from the left side of the picture plane to right. This ensures that the palm of my hand stays out of the way of graphite and minimizes the risk of accidental smearing.
As I work, I try to develop a full range of value. This means that my goal is to develop the darkest values and the lightest values with middle grays in between.
As the shading continues, I pay attention to the contrast in value. In areas where the contrast is not quite strong enough and parts of the scorpion are lost, I adjust the tone to ensure enough contrast. This is a deviation from the photo reference, but it makes each part of the drawing easy for our viewer’s to understand.
Once the values on the body of the scorpion are developed, I add a cast shadow underneath the body. This shadow is more intense and darker where the scorpion makes contact with surface.
Materials For Drawing the Scorpion
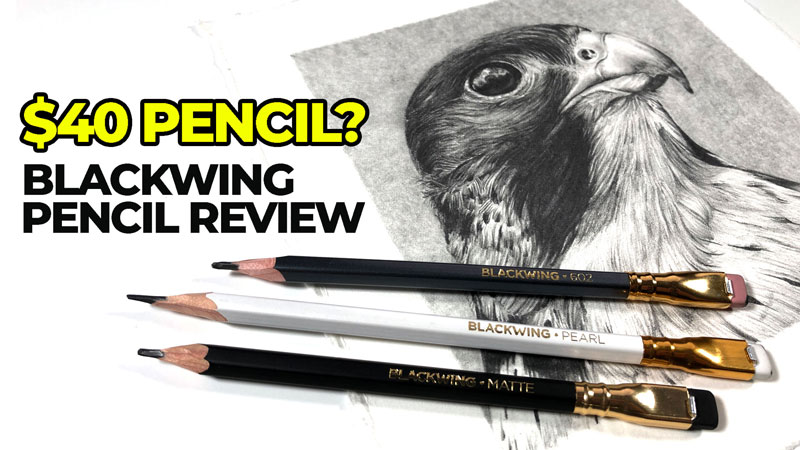
Since this is a sketch, simple and inexpensive drawing tools are used. In this case, the white paper is basic 80 lb. drawing paper. The pencil is a little more special. It is a Blackwing Matte pencil which is a bit more expensive than a regular drawing pencil. However, it is quite versatile and doesn’t produce quite as much shine compared to other graphite drawing pencils.
See also: Blackwing Pencil Review
Photo Reference
The photo reference for this drawing comes from Pixabay.com. It has been manipulated with Photoshop. The color was removed and the contrast in value was strengthen. The scorpion was also flipped horizontally and a cast shadow was manually added.
Here’s a look at the photo reference…
Drawing a Scorpion – Timed Drawing Exercise – Conclusion
Drawing is a skill that must be practiced in order to see improvement. The more practice that you put in, the more you will see improvement. Don’t be afraid to tackle subjects that seem too difficult. These subjects are often the ones that lead to greatest improvement. Remember to look for basic shapes and use these shapes to build your drawing. Then address the contours and the shading. When we approach drawing in this way, a complex subject (like a scorpion) is a breeze.
If so, join over 36,000 others that receive our newsletter with new drawing and painting lessons. Plus, check out three of our course videos and ebooks for free.


How to Draw a Baseball and Glove with Pencil
Gettin’ Sketchy – Drawing a Baseball and Glove – Season 4 Episode 8
This episode aired live on YouTube on July 21, 2021.
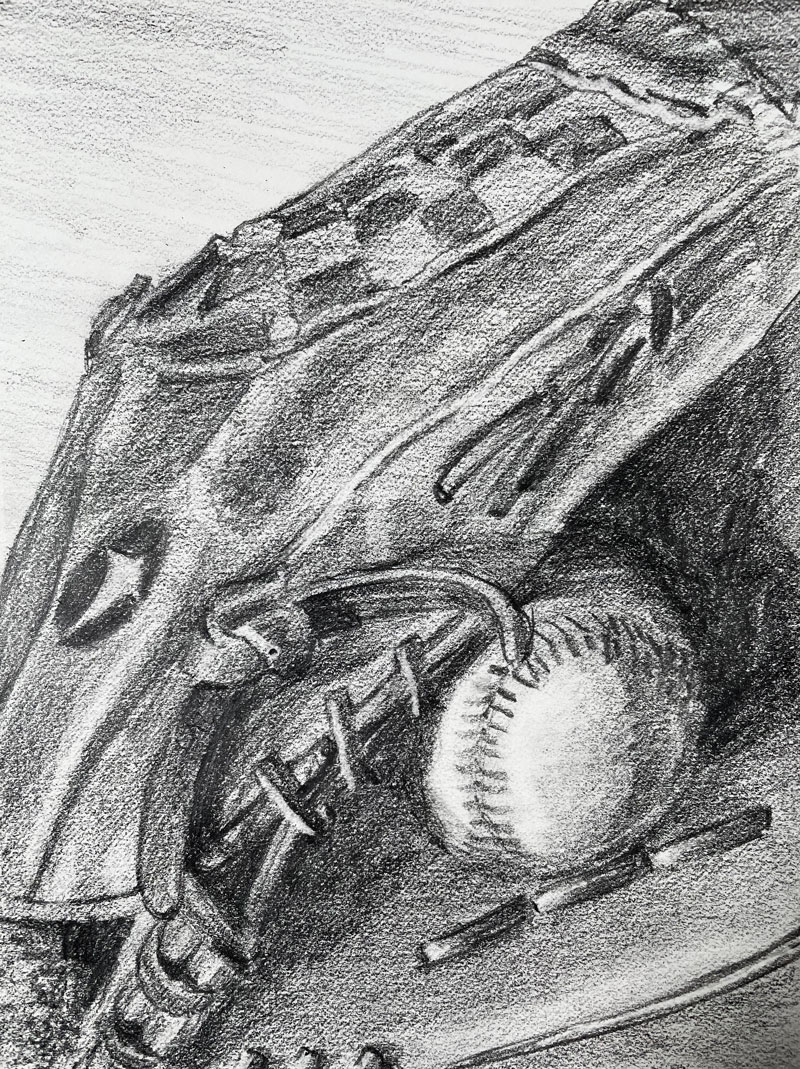
In this timed drawing exercise, Ashley creates a drawing of a baseball and a glove with pencil on white drawing paper. Drawing this subject seems like a difficult task on the surface. There are plenty of values, textures, and details. But Ashley demonstrates how even a complex subject can be simplified. The drawing is completed within about 45 minutes. Grab your sketchbook and let’s get started.
Here’s a look at the completed drawing…
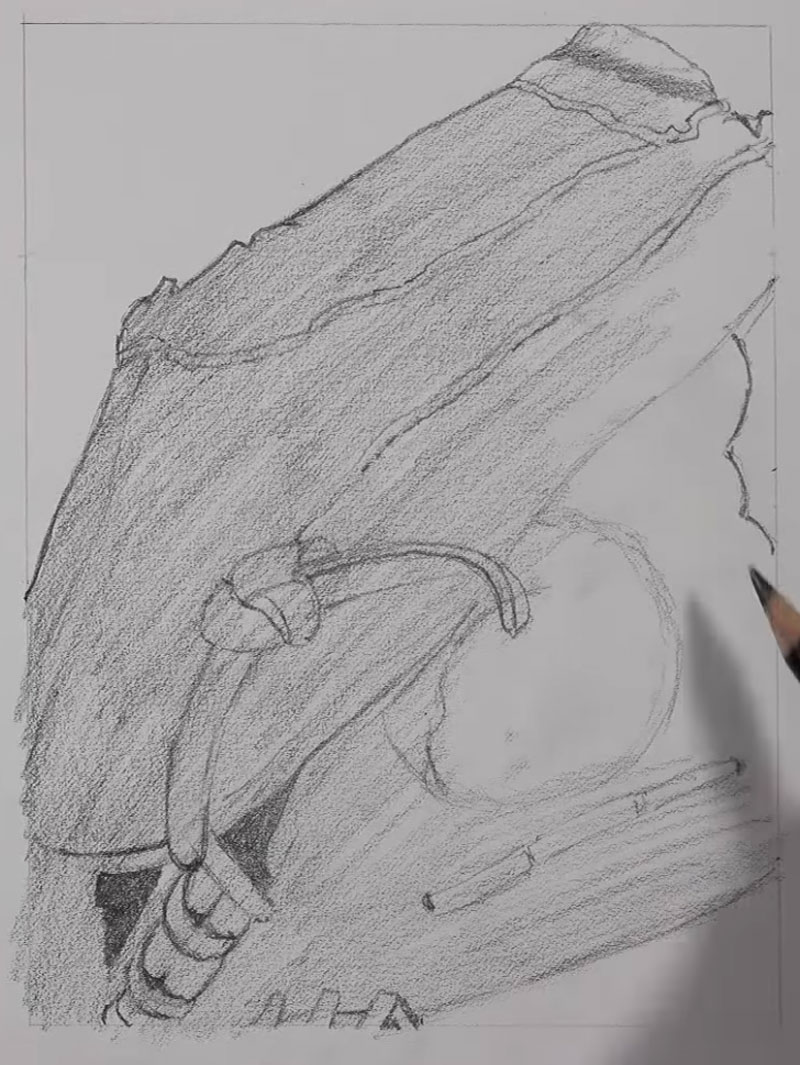
Getting Started – Drawing the Contours of the Glove and Ball
Ashley begins the drawing by analyzing the relationships between the edges of the glove and the boundaries of the picture plane. This provides a starting point for comparisons. In order to begin a drawing in this manner, you must first plan out the picture plane – making it proportional to the photo reference. As you can see below, Ashley has done this.
Ashley looks for locations along the edge of the picture plane where the glove goes out of view and uses this information to place the first marks. Drawing is about observation and making comparisons and this is great place to begin making comparisons.
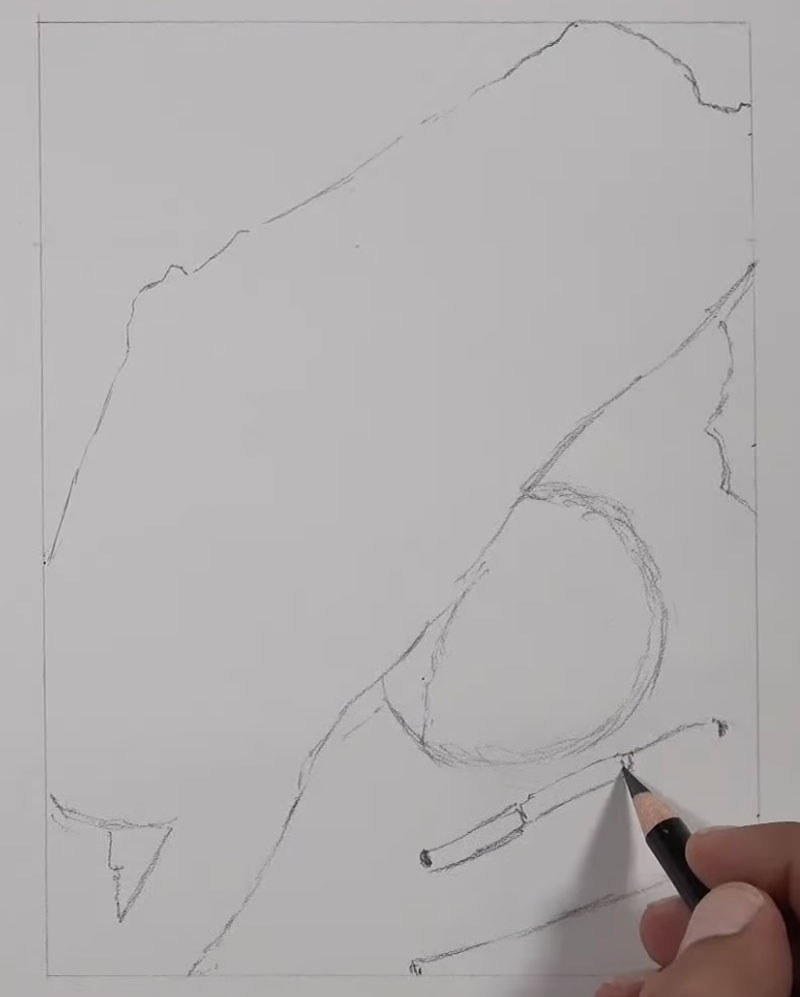
With the overall shape of the glove and ball defined, Ashley continues to make visual comparisons. With the contours in place, he can begin to add some of the details using basic shapes.
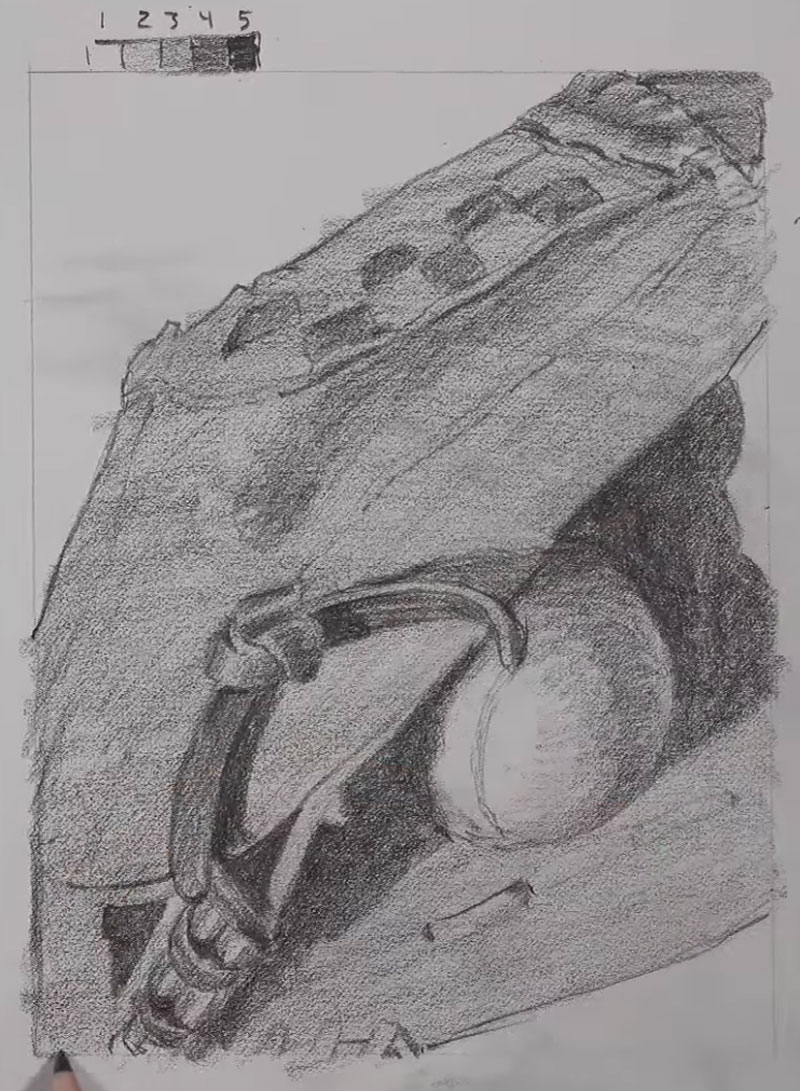
Shading the Baseball Glove and Ball with Pencil
As mentioned before, this image is full of different values and textures. For this reason, it’s important to get some of these values in place as soon as possible. One approach to doing this is to draw the contours of all of the details and then meticulously shade each section.
While this approach is perfectly acceptable for longer drawings (untimed), we are working against a time constraint here. For this reason, Ashley decides to begin adding some shading earlier in the process. His plan here is to add tone with a quick pass of the graphite and then pull out details by adjusting the values with both erasers and the pencil.
In the image below, we see this taking place. The value that is developed is still relatively light, but it does provide a middle value in which to push both darker and lighter.
From here, it’s a matter of refining the values and highlighting the details. Ashley adds a small value scale in order to make comparisons. This value scale helps him to measure the values he includes in the drawing.
In nearly every drawing or painting, a full range of value is required in order to create a convincing drawing. In order to push the range of value, Ashley begins darkening the shapes of darker tone with pencil while pulling out the highlights and lighter values with an eraser.
While this happens, the range of value becomes broader with higher levels of contrast. The texture of the glove slowly emerges and details begin to make sense. This is largely due to the fact that the illusion of texture is so dependent on value and directional stroking.
Refining the Drawing and Pulling Out the Details
The drawing continues to be refined with additional applications of the graphite pencil and erasing of lighter tones. Most of the details are implied with a subtle contrast in value. The logo is also added as well as the stitching on the baseball.
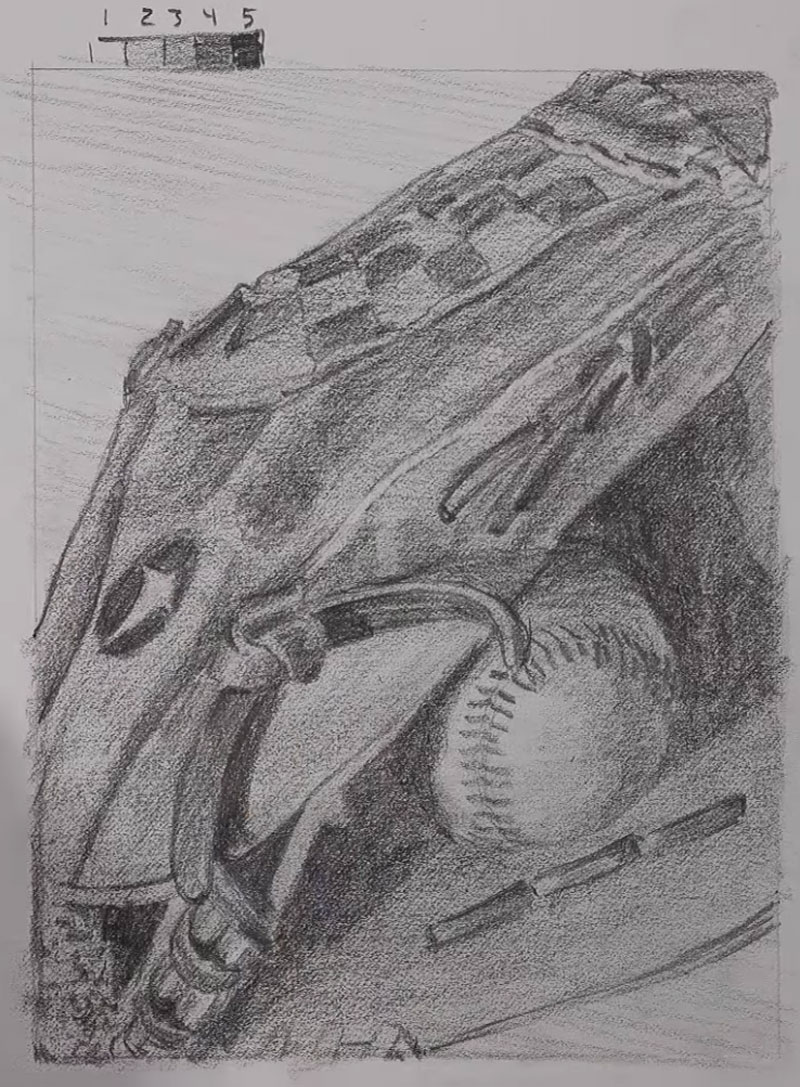
As you can see, a drawing can be manipulated after graphite has been added by using an eraser to lighten tones. Values are also added with the pencil. This process of manipulating values is sometimes called “rendering”.
This process helps the artist to produce a full range of value in a short period of time. As an added benefit, the drawing goes through different stages. At a certain stage, the drawing could be considered “finished” even though additional refinement could possibly follow.
Materials Used For Drawing the Baseball Glove and Ball
This drawing is developed using very basic tools and materials. Since the range of value in the drawing is especially important, a soft graphite pencil is used. This versatile pencil is General’s Layout pencil. This pencil is soft enough to create darker marks similar to those of a 4B pencil but hard enough to keep a sharp tip for a longer period of time. Not many pencils are capable of doing this, making this pencil an “all around performer”.
The surface used for this drawing isn’t particularly special. Basic 80 lb. white drawing paper is used which is the same type of paper you’ll likely find in most sketchbooks.
Erasers are not just for fixing mistakes and are used for making and adjusting marks as well. A basic pink rubber eraser is used along with an electric nylon eraser for precision.
Photo Reference
Ashley created the photo reference for this drawing by setting up the baseball glove and ball on a table with a strong singular light source that originates from a window. This produces distinct shadows and clear highlights.
Here’s a look at the photo reference…

Drawing a Baseball Glove and Ball – Timed Drawing Exercise – Conclusion
As we’ve seen here, even subjects that seem complex and overwhelming can be tackled in a short period of time. Details don’t have to be “spelled out” for the viewer. Instead, they can be implied through thoughtful use of value. Shading can be quick and refinement of the drawing can happen in various stages – all of which could be considered “finished”.
If so, join over 36,000 others that receive our newsletter with new drawing and painting lessons. Plus, check out three of our course videos and ebooks for free.
Drawing an Elephant with Pencil – Timed Drawing Exercise
Gettin’ Sketchy – Drawing an Elephant with Pencil – Season 4 Episode 7
This episode aired live on YouTube on July 14, 2021.
Grab your sketchbook and a soft pencil and let’s get ready to sketch an elephant.
In this timed drawing exercise, we’ll tackle drawing an elephant walking towards the viewer. This angle presents a few challenges. We can see that the animal is foreshortened and there is some awkward overlapping of the front leg and trunk. But these challenges are easily met through careful observation and visual comparisons. The real challenge here is the time constraint of just 45 minutes.
See also: Foreshortening
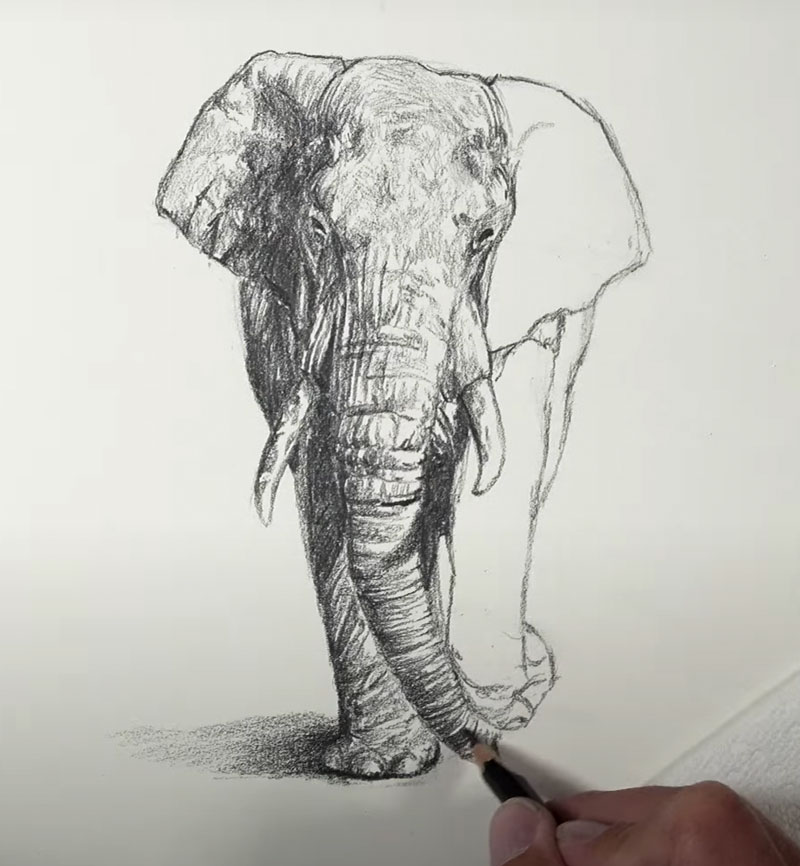
Here’s a look at the completed drawing…
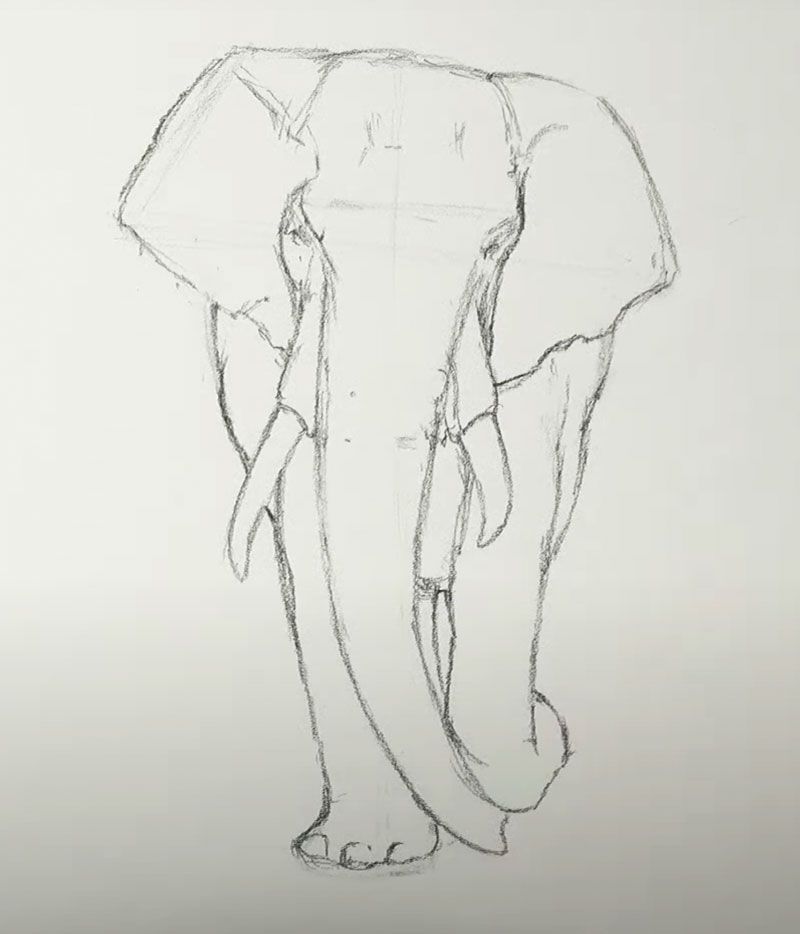
Laying Out the Drawing
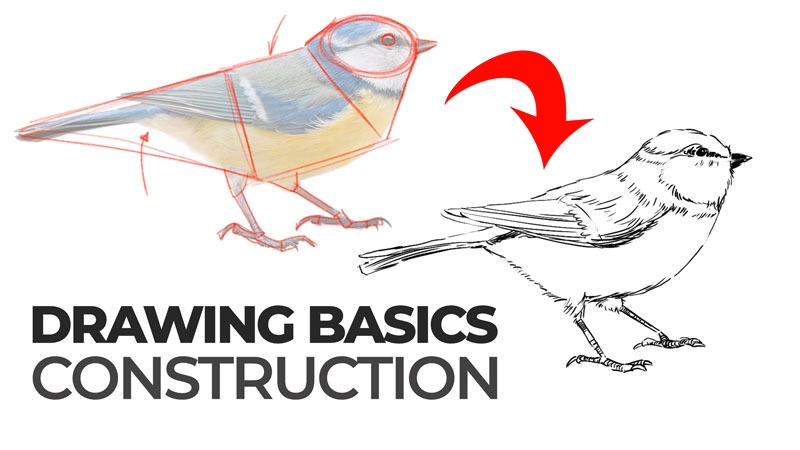
Typically, I like to construct a drawing by stacking shapes. I look at the overall shape of the subject and visually break this shape down into simpler shapes. These shapes are loosely sketched with many lines as I try to find the larger shape. This approach, commonly referred to as “construction”, allows me to work faster and with better accuracy.
See also: Drawing Basics – Construction
However, for some subjects and compositions, I prefer to work through the layout process by making pure observational comparisons. Usually, this is not a conscious decision, it just happens. In other words, I just “go with the flow” and do what feels natural.
This is the approach I took with the drawing of the elephant.
The drawing begins with a few simple measurements. First, a light line is drawn from the top of the head to the bottom of the elephant. This initial line helps to ensure that the drawing will fit within the picture plane.
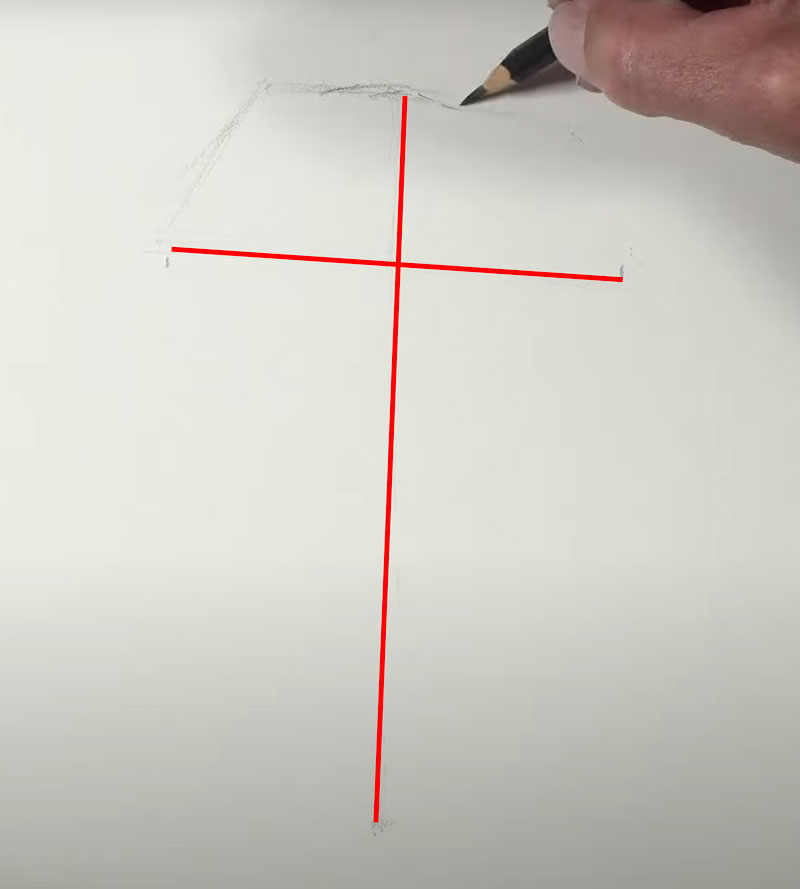
From there, I drew a line for the width of the head, including the ears. I used the height of the elephant to measure this line against. So with just a couple of lines, I knew the height and width of my drawing.
Using these two lines as a starting point, I began building each section of the elephant from the top down, continually making visual comparisons.
Shading the Drawing of an Elephant
Shading is the process of developing the value within the drawing. Value, one of the seven elements of art, refers to the darkness or lightness of color. In nearly every situation, our goal should be to develop a full range of value within the scene. This means we should strive to include the darkest darks and the lightest lights.
Since the paper is white, we rely on the paper to influence the lighter values, while using our pencil to develop the dark tones.
As the value develops through shading, the texture is also addressed. Texture in a drawing is often developed through value. The relationships of the values inform the viewer of how light behaves on the surface. The relationships of values result in the illusion of texture in a drawing. There are other influences as well. The drawing medium and the surface texture of the paper also plays a role in the creating convincing texture.
In this case, our sketch subject – the elephant – features a textured skin so the value and the texture are developed concurrently. Due to the time constraint, the shading and texture are developed rather quickly.
Since speed was important, loose directional strokes were made during the shading process. By adjusting the amount of pressure placed on the pencil, middle and darker values were developed quickly. This approach is great for sketching, but for longer drawings, a slower approach may be better.
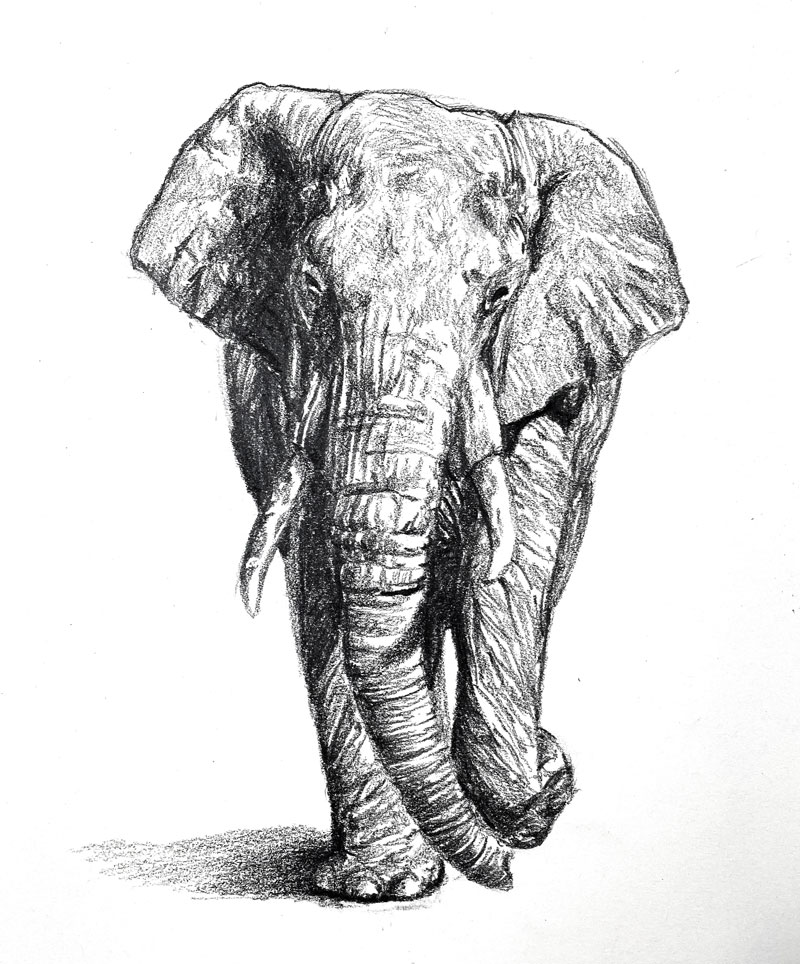
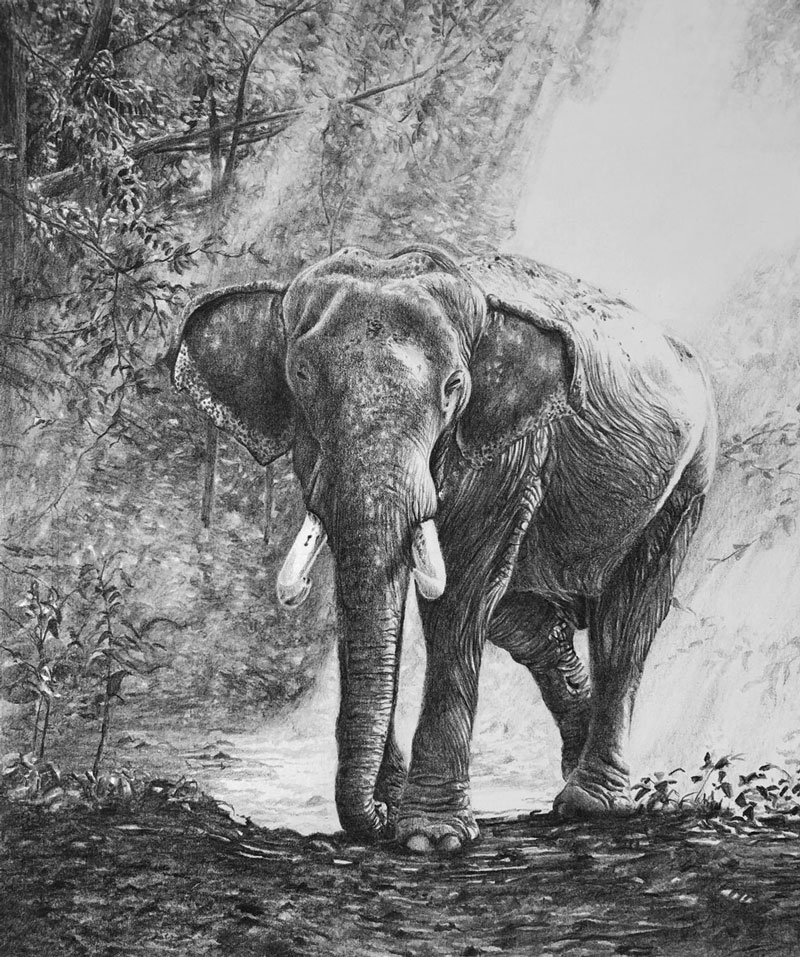
Below, you’ll find another graphite pencil drawing of an elephant that I created for a Live Lesson series. In this lesson series, we worked on Stonehenge drawing paper (a higher quality paper that is 100% cotton). Instead of just one pencil, several different grades of graphite were used.
See also: Artists Graphite Pencils Explained
A slow, methodical approach to shading was taken. But just like our quick sketch here, the pressure placed on the pencil was adjusted in order to develop the textures and range of value.
See also: Pencil Shading Techniques
In contrast, this drawing took around 20 hours to complete…
Watch the full lesson series of the drawing here…Graphite Pencil Drawing of an Elephant Live Lesson Series
So it’s important to note here that the level that you develop a drawing often happens during the stage in which you are developing the value. When more time is spent developing the value and texture, the result is usually a more realistic drawing. However, even with a quick sketch, we can still communicate the subject as long as there is a full range of value developed.
Materials Used For Drawing the Elephant
On the surface, the materials used in this sketch of an elephant are relatively simple. We only use a single pencil and white drawing paper. However, the specific paper and the pencil are important. In this case, the paper is 80 lb. white drawing paper that features a weak to medium tooth (texture). The pencil used is the Matte pencil by Blackwing. This pencil is soft like a 3B pencil but is not quite as shiny as traditional graphite, making it more closely related to a carbon pencil.
The Blackwing pencils are also smoother in feel compared to other brands of graphite pencils. This makes the marks made with this pencil a little more gratifying since the pencil seems to glide over the surface.
See also: Blackwing Pencil Review
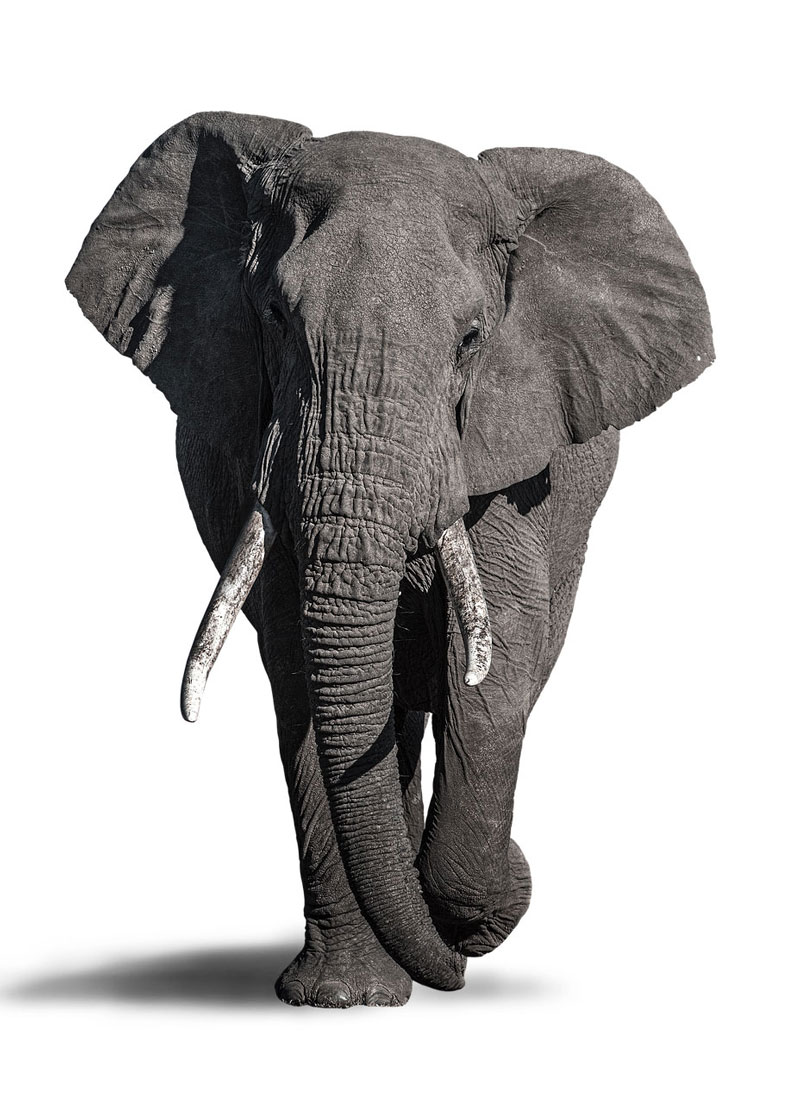
Photo Reference
The photo reference for this drawing exercise comes from Pixabay.com. The image was slightly altered to include a white background. The values were enhanced and the contrast was adjusted. A cast shadow was added on the ground to the left using Photoshop.
Here’s a look at the photo reference…
Drawing an Elephant with Pencil – Timed Drawing Exercise – Conclusion
Any drawing that we undertake will present challenges. The more challenges that we face, the more that we grow. Although this elephant sketch was completed in just 45 minutes, we were able to exercise the same “artistic muscles” we use when we create a longer, more developed drawing. Sketching is important and should be practiced often. Setting a time constraint gives us a starting and ending point. It gives us a window of practice so we’re not overwhelmed.
If so, join over 36,000 others that receive our newsletter with new drawing and painting lessons. Plus, check out three of our course videos and ebooks for free.