Materials for Drawing a Glass of Water
Value is important to consider in any drawing that we create. Value is the darkness or lightness of a color and is one of the seven elements of art. Creating a full range of value in a drawing is easier when we work on a toned surface.
Toned Drawing Paper
Working on toned drawing paper allows us to begin with a middle value or mid tone and “push” the values outward. We can add lighter values and darker tones while relying on the surface tone to help with the mid tones. For this reason, we’ll work on toned gray paper.
Graphite Pencils
Graphite pencils are applied to develop the dark values as well as some of the mid tones. The graphite pencils used in this drawing include:
- H
- HB
- 2B
- 4B
We’ll start with the lighter pencils and progressively work towards the darker pencils, gradually broadening the range of value and contrast in the drawing. (The H pencil is the lightest pencil, while the 4B pencil is the darkest.)
You may find that the 4B pencil is not quite dark enough for your drawing. This may be the case if you naturally place less pressure on the pencil. If this applies to you, then you may choose a darker pencil for the darkest shadows. A 6B pencil may be a good substitute.
A White Charcoal Pencil
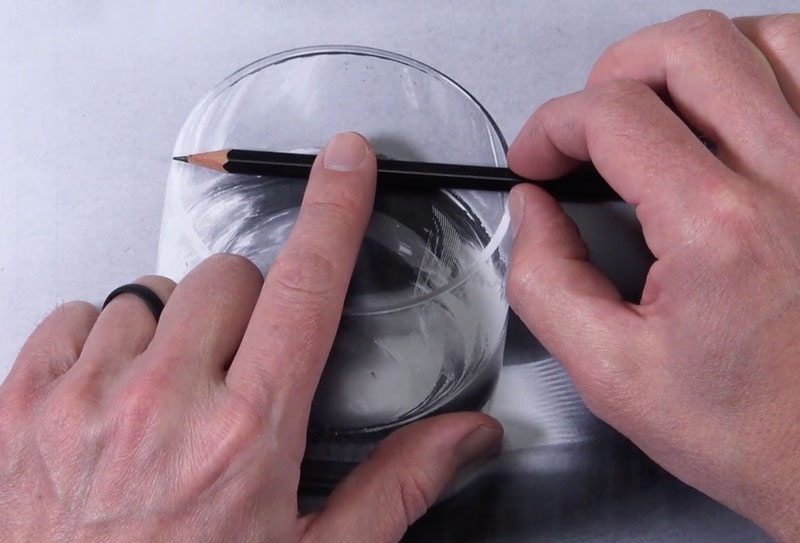
Highlights are especially important in a drawing that features a highly reflective surface like glass. In a typical drawing on white paper, highlights must be preserved or avoided while graphite is added. But since we’re working on toned paper, we can add the highlights with a white medium. In this case, white charcoal is used to develop the highlights and lighter values.
Although graphite and charcoal are different mediums, we can still use them together with success. But, the order in which we apply the media is important. White charcoal doesn’t cover heavy graphite applications easily. Graphite can be applied over white charcoal applications with better success, but the reverse of this is not suggested. For this reason, we’ll address many of the highlights early in the drawing process, before darkening the areas of darkest shadow.
If you don’t have a white charcoal pencil, a white colored pencil can be substituted. It should be noted, however, that we use blending stumps to blend the white charcoal applications. Since colored pencils do not blend in the same way as a powdery material like charcoal, you’re likely to see different results in your drawing.
Blending Stumps
We also use a blending stump to blend applications. Using a blending stump allows use to smooth transitions of tone and value which often leads to a more representational result. However, not all of the applications are blended. The blending stump is reserved for areas where there is a clear transition of value, which happens frequently in this particular subject.

It is advised to use a blending stump or even a rolled up piece of paper instead of using your fingers. Using your fingers to blend doesn’t provide enough control or precision. It can also make you drawing appear dirty, since the oils from your fingers mix with the graphite and charcoal. This leads to inconsistencies and areas that are difficult to erase and clean up.
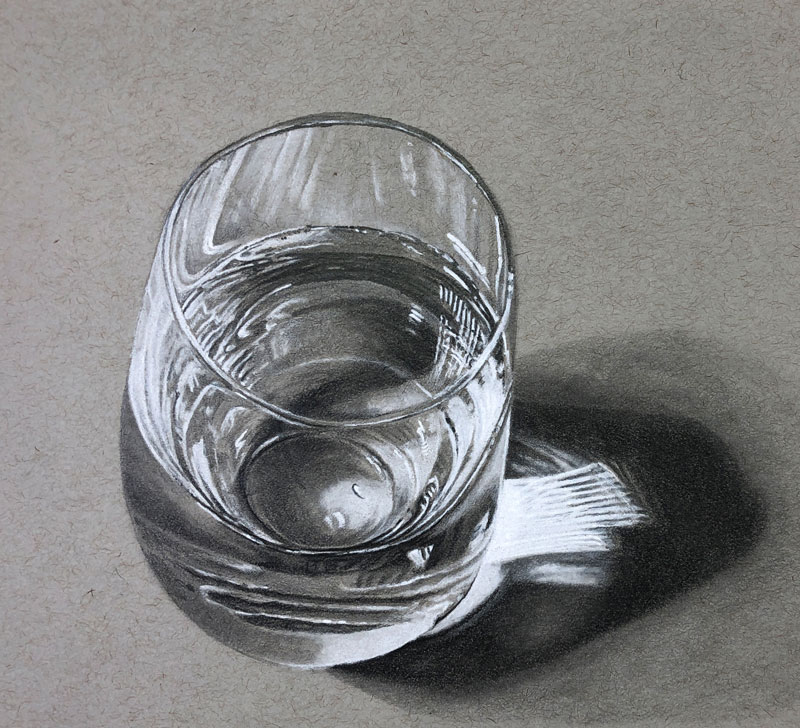
The Photo Reference
I’ve created a photo reference for this drawing by setting up one defined light source, originating from the upper left corner. A singular light source is chosen for simplicity. Multiple light sources would produce two different areas of cast shadow, which would affect our composition.
Here’s a look at the photo reference…
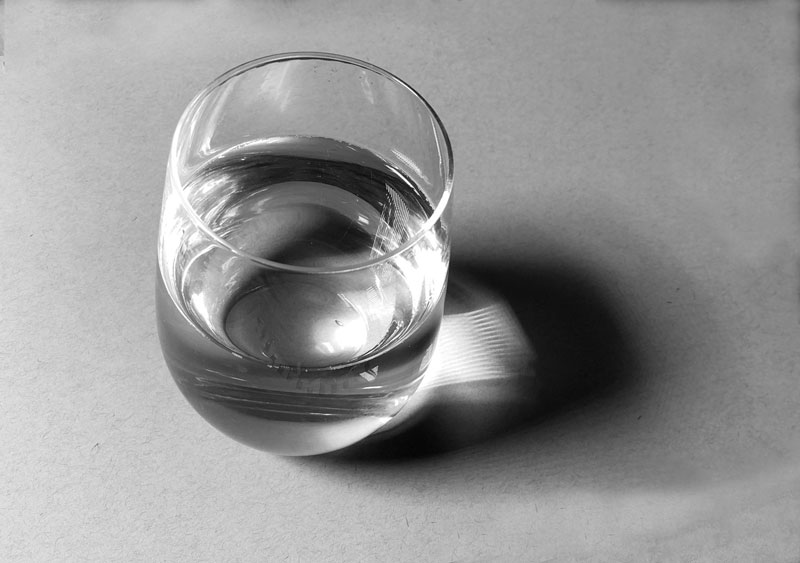
It’s important to study the reference photo before making any marks. Analyze the light and dark shapes and consider how you’ll depict them in the drawing.
How to Draw a Realistic Glass of Water
Here are the basic steps that we’ll take to create our realistic drawing of a glass of water. Remember, since we’re combining graphite with charcoal, the order in which we apply the mediums is important.
- Draw a contour line drawing.
- Add light mid tones.
- Develop the strongest highlights and light values with white charcoal.
- Develop the darker tones and shadows.
- Refine the drawing and add a cast shadow.
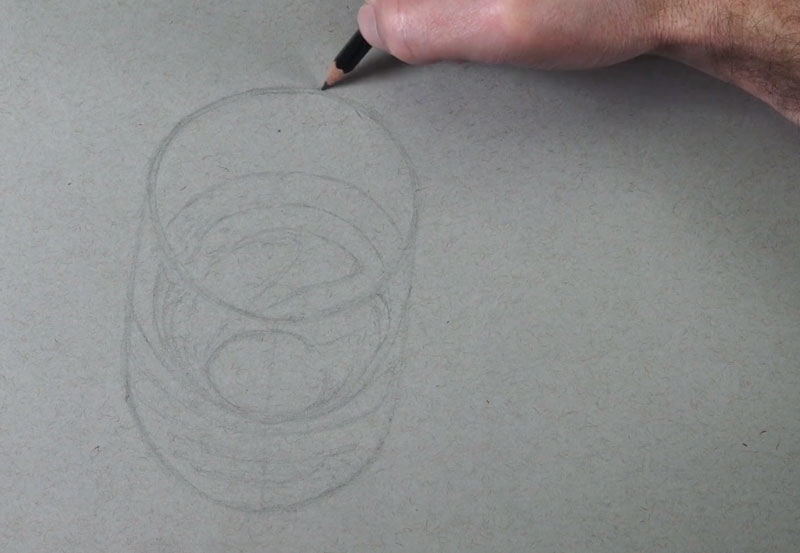
Draw a Contour Line Drawing
We’ll begin the drawing with a contour line drawing using the H graphite pencil. This means that we’ll concentrate only the outlines that we observe from the subject. These contours not only include the lines that define the boundaries of the glass, but also the shapes of different values that we see.
To ensure accuracy, we can use measuring techniques. Using your pencil as a measuring tool, you can make comparisons between different areas of the drawing. Look for opportunities by comparing larger shapes first.
In this case, the drawing that’s created is the same size as the printed reference photo. This means that we can measure on the photo reference and use the exact measurement on the drawing surface.
Using measuring we can draw the basic shape of the glass, including the ellipse that represents the opening at the top. Ellipses are a distortion of a circle. In many cases, an ellipse is simply an oval. But depending on the angle, an ellipse can be more complicated.
We’ll also add the shapes of value that we observe within the glass and the water. Look for contrast when you draw these shapes. If you find it difficult to see these shapes of value, try squinting at the subject. By squinting, we simplify the details and often easily recognize the larger shapes of darks and lights.
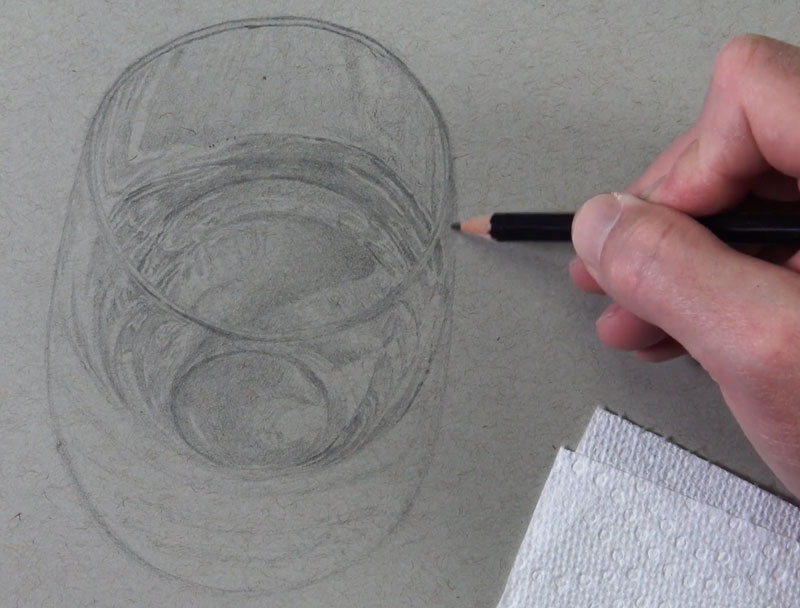
Add Light Mid Tones
Sticking with the H graphite pencil, we’ll begin developing the lighter mid tones. As we do so, we’ll also add this lighter graphite application over the areas that will eventually be the darkest areas on the glass and within the water.
To create an even application, moderate pressure is added. A circular stroking pattern is used as the pencil is applied. This does not mean that small circles are visible on the surface. Instead, the pencil is lightly pressed while your hand moves in a circular direction.
Be sure to preserve the areas where you see the lightest values. We’ll apply white charcoal in these locations in the next step.
Develop the Strongest Highlights and Light Values with White Charcoal
Next, we’ll concentrate on developing the lighter values and highlights with white charcoal. Make sure that your pencil is nice and sharp and begin making applications where you see the lightest values.
Since glass is both transparent and reflective, you’ll notice that some of these highlights are found in areas that you may not expect. We’ll see the highlights in standard locations, like on the side of the glass that is closest to the light source. But we’ll also see them on the opposite side, within the glass, and in areas within the water.
The best practice is to simply observe the reference photo and note the shape and locations of these lighter values and place them in the same locations in your drawing.
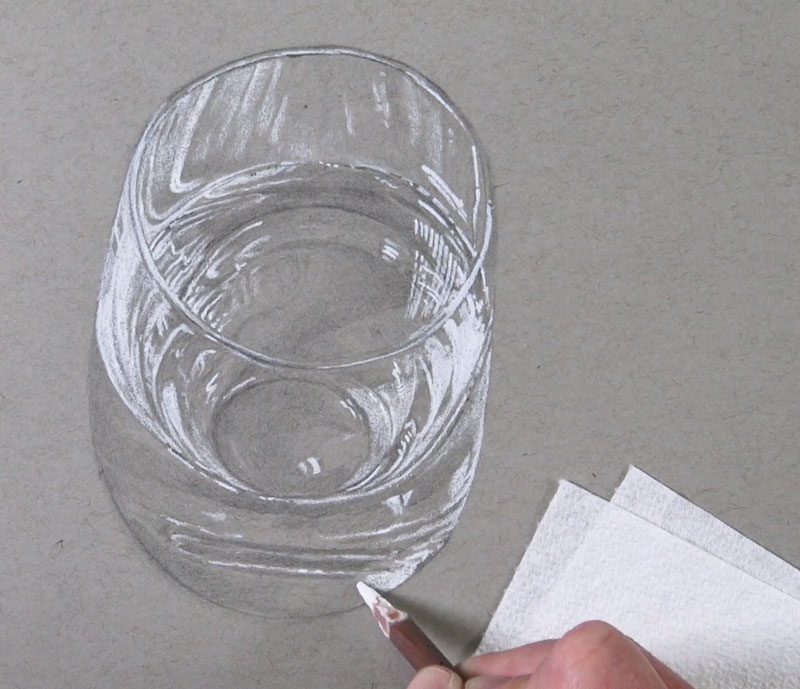
After the highlights have been added with the white charcoal pencil, we can use the blending stump to smooth some of the applications. The blending stump can also be used to tone down the intensity of the highlights if necessary.
Develop the Darker Tones and Shadows
With the highlights in place, we can begin darkening the values with softer graphite pencils. We’ll start with an HB pencil with moderate pressure. As the values become darker, the contrast also increases, making the highlights appear lighter.
Developing the darker tones requires additional applications over areas that were covered with the H pencil previously. We don’t cover all of these areas again, however. Some areas of the lighter graphite are allowed to remain visible.
This is a process that requires patience and since we’re making several passes with different graphite pencils and white charcoal, it may feel as if you’re drawing the subject several times. This is to our advantage since each time we add a slightly darker application, we may find errors that should be fixed or opportunities to make the drawing more accurate. Take your time and be patient. This slow and layered approach is essential for developing realism in drawings.
After the HB pencil has been applied, we can use the blending stump to smooth transitions of value. Here again, the blending stump is not used everywhere. It is just used in areas that have a transition or in locations where the tooth or texture of the paper is a distraction.
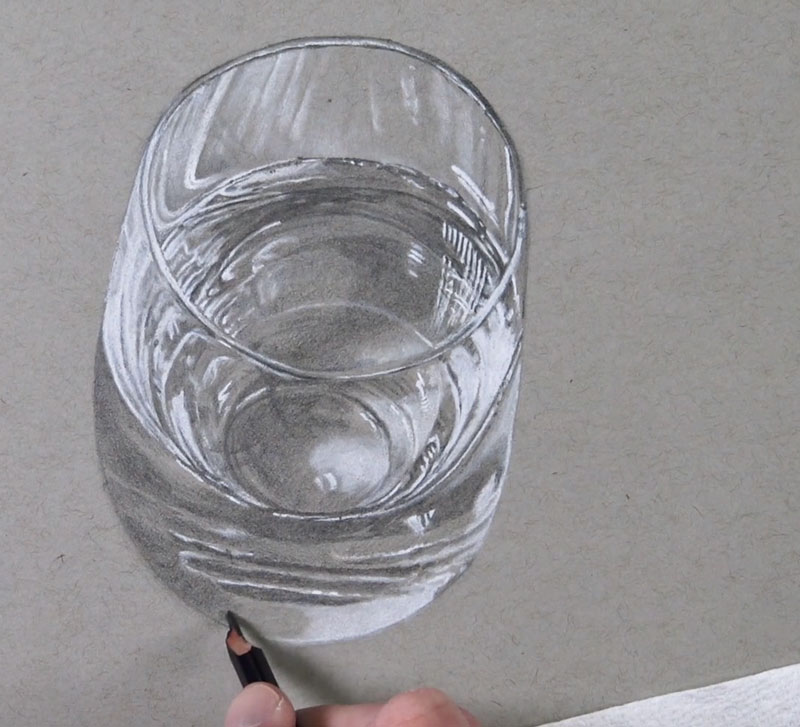
Now it’s time to push the values even darker, broadening the range of value and contrast. We’ll switch over to the 2B pencil and again make another pass over the drawing. Here again, we’ll allow some of the H and HB pencil applications to remain visible. This creates more variety in the values.
Again, this application is gently blended in areas with the blending stump.
We’ll now concentrate on the darkest values on the value scale and develop the remaining areas of darkest tone and shadow. Using our darkest pencil, 4B, we’ll go back into the drawing and darken the areas of darkest shadow in the glass and within the water.
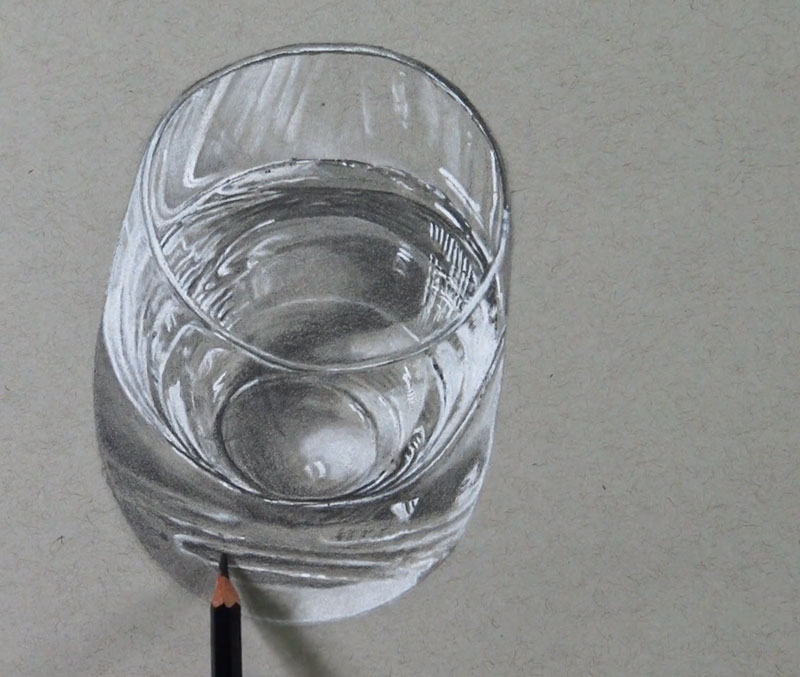
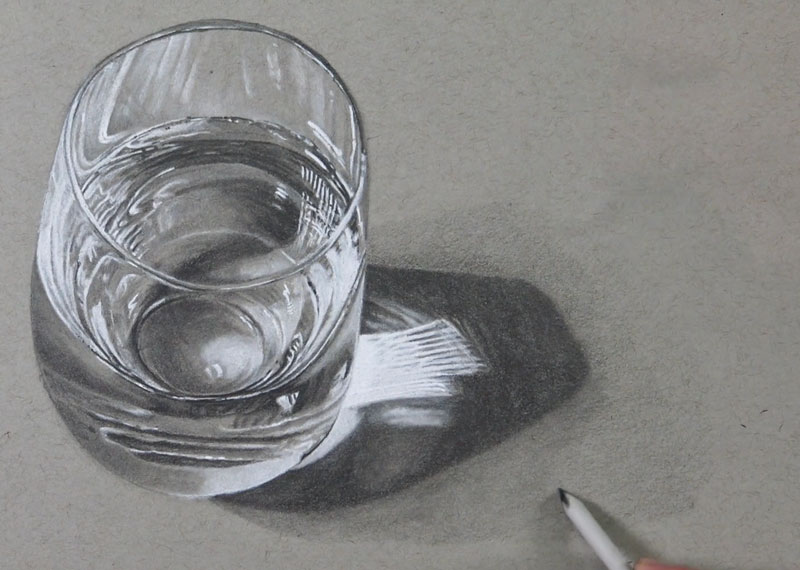
Refine the Drawing and Add a Cast Shadow
The glass and water are nearly complete. We’ll now need to add a cast shadow underneath and behind the glass. But as you’ll notice from the reference photo, we’re not dealing with an ordinary cast shadow.
The glass and the water are transparent objects. Light passes through them, instead of being reflected back towards the light source. The light actually becomes more intense as it’s refracted, resulting in an area of very light value where we’d expect to see the darkest shadow.
Before we develop the darkest areas of cast shadow, we’ll first need to define the shape of this strong light. We’ll first define the outer edges of the shape with a 2B pencil.
Then we’ll use the white charcoal pencil to fill in the shape with a heavy application.
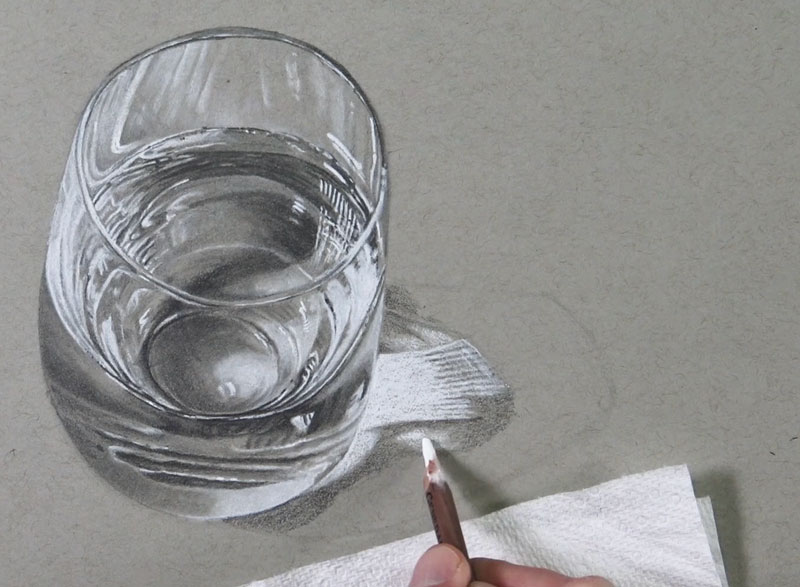
A blending stump is used to smooth this application and work the material into the texture of the paper. This results in a more natural and consistent shadow.
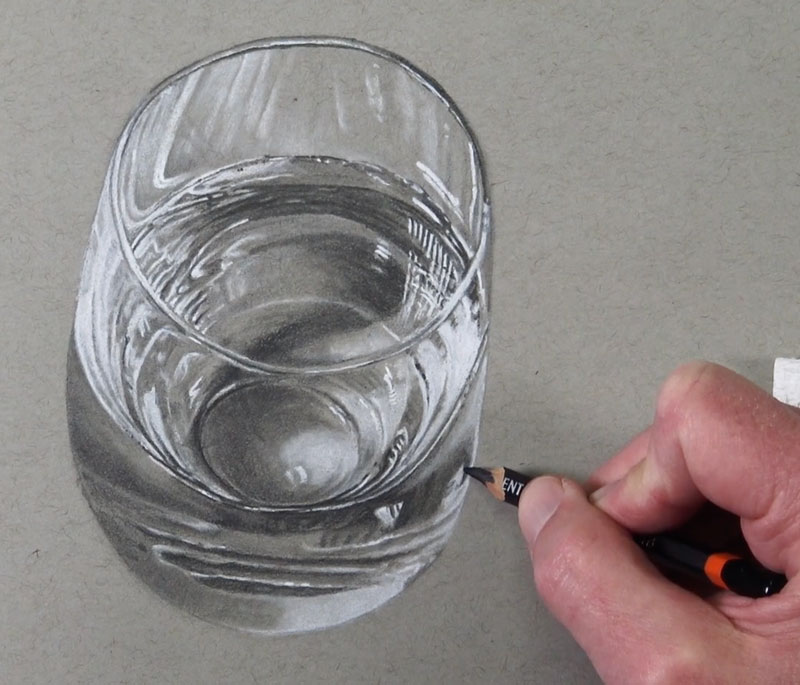
We can then extend the area of darkest tone to fill in the remainder of the largest area within the core shadow. You’ll notice that there is primary area of cast shadow. This is a shape that resembles a skewed version of the shape of the glass. This area of darkest value is called the occlusion shadow.
But the cast shadow itself extends outward a little further. This area is slightly lighter, but still considered part of the cast shadow. Since this area is lighter, the HB pencil is applied and gently blended with the blending stump.
The occlusion shadow is not a uniform value. While it’s quite dark, some areas are slightly darker than others. To address these areas of the darkest value, we’ll revisit the shadow with our 4B pencil in areas.
The location of darkest value within a cast shadow is often found right underneath and just behind the object. As the shadow extends away from the subject, the shadow may become slightly lighter. This is true for our subject as well. The area of darkest tone within the cast shadow is found right underneath the glass, where it makes contact with the surface.
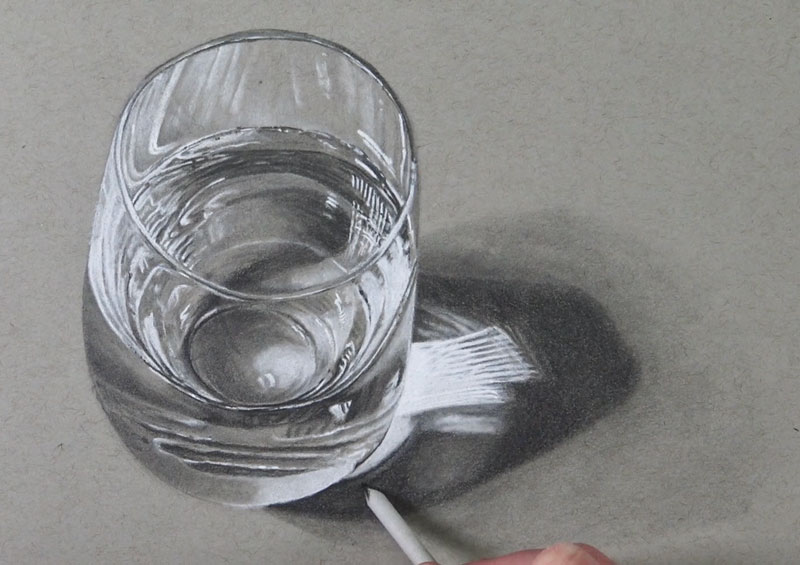
Again, this application is blended with the blending stump to eradicate any visible texture produced by paper.
Lastly, any last touch ups are handled with graphite and/or white charcoal to complete the drawing. Here’s the completed drawing…
Conclusion
It may seem difficult to create the illusion of transparency and reflection in a drawing, as we see with our glass of water. But this illusion is not as difficult as it may seem. We simply need to remember to start with general shapes and their relationships, develop the contours, and then patiently develop a full range of value with our drawing medium of choice. It does require patience and of course – close observation. But this is true for any subject we wish to draw in a realistic manner.
If so, join over 36,000 others that receive our newsletter with new drawing and painting lessons. Plus, check out three of our course videos and ebooks for free.