by Matt Fussell
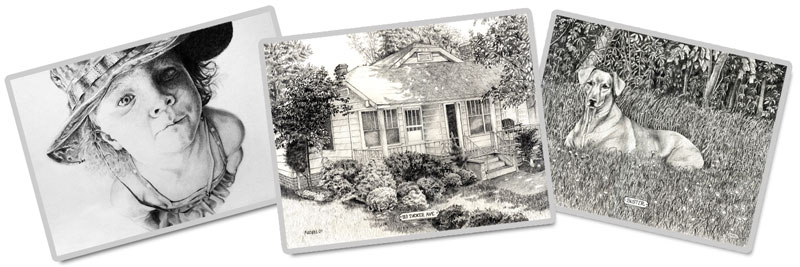
Shading is the process of adding value to create the illusion of form, space, and most importantly - light in a drawing. When executed correctly, shading can make a drawing appear three dimensional and create a convincing image.
When rendering a drawing that communicates volume, shading is absolutely critical.
Techniques used for applying shading to an object are quite varied. Each technique produces a different texture and "feel" to the drawing. The drawing medium used may determine the shading technique that is applied in the drawing.
The most common application techniques include:
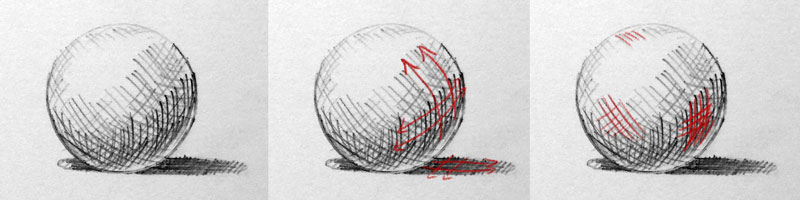
Hatching - Lines drawn in the same direction. By drawing lines closer together, darker values are created. Leaving more space between lines results in lighter values. For rounded objects, the lines may curve slightly around the form - following the contours of the object.

Cross-Hatching - Lines cross over each other. The density at which the lines cross over each other determines the value that is produced.
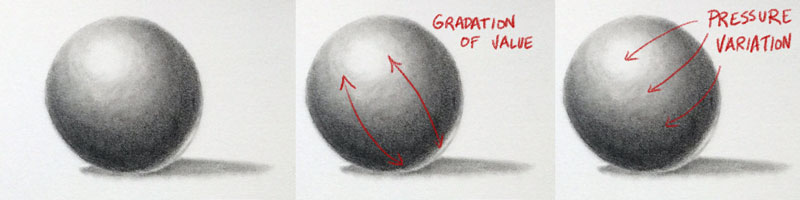
Blending - Smooth gradations of value are produced either by adjusting the amount of pressure applied to the medium or by using a blending tool, such a blending stump.
Rendering - Using an eraser to remove the medium to produce lighter values. This technique is typically used in conjunction with blending.

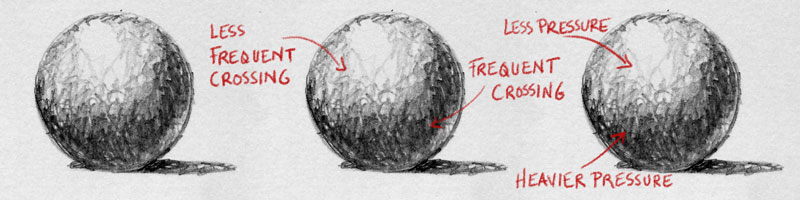
Random lines - Loose applications of crossing lines. The frequency in which the lines cross over each determines the value produced.
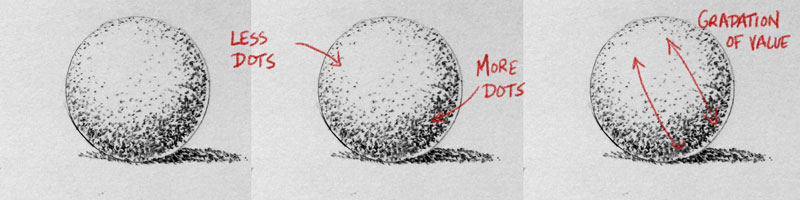
Stippling - Applying countless small dots to build up darker values in a drawing. The density of the dots determines the value produced.
It's easy to get caught up in the technique in which the material is applied and loose sight of the reason why we apply shading in the first place.
Light is how we see, after all, and shading informs us of the light within a scene. We understand the light within the scene through the use of value and contrast.

Value is the darkness or lightness of a color. Light values are called tints and dark values are called shades.
Contrast deals with difference. Contrast is produced when any difference between elements such as texture, color, size, or value occurs. It can be subtle or extreme. When it comes to shading, we are mostly concerned with the contrast that is produced from changes in value.
When light hits the subject, it produces a range of contrasting values. The intensity of the light determines the contrast of values. Generally, the stronger the light - the higher the contrast.

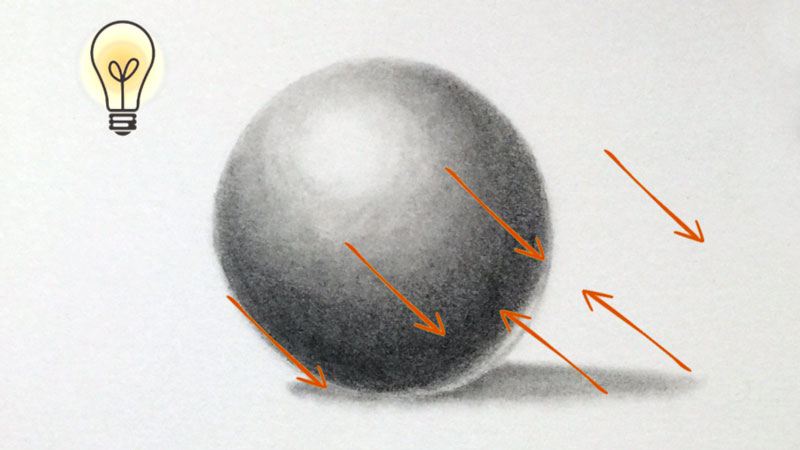
Values are arranged on the subject according to the location and intensity of the light source (or sources). To simplify the manner in which light behaves on a subject and surrounding objects, we'll look at what happens with just one light source on a smooth surface.
The locations of each area of value on the subject tell the viewer about the location of light and how the light behaves on the subject. The behavior of light (or how it is reflected) on the subject informs us about the texture and form of the subject.
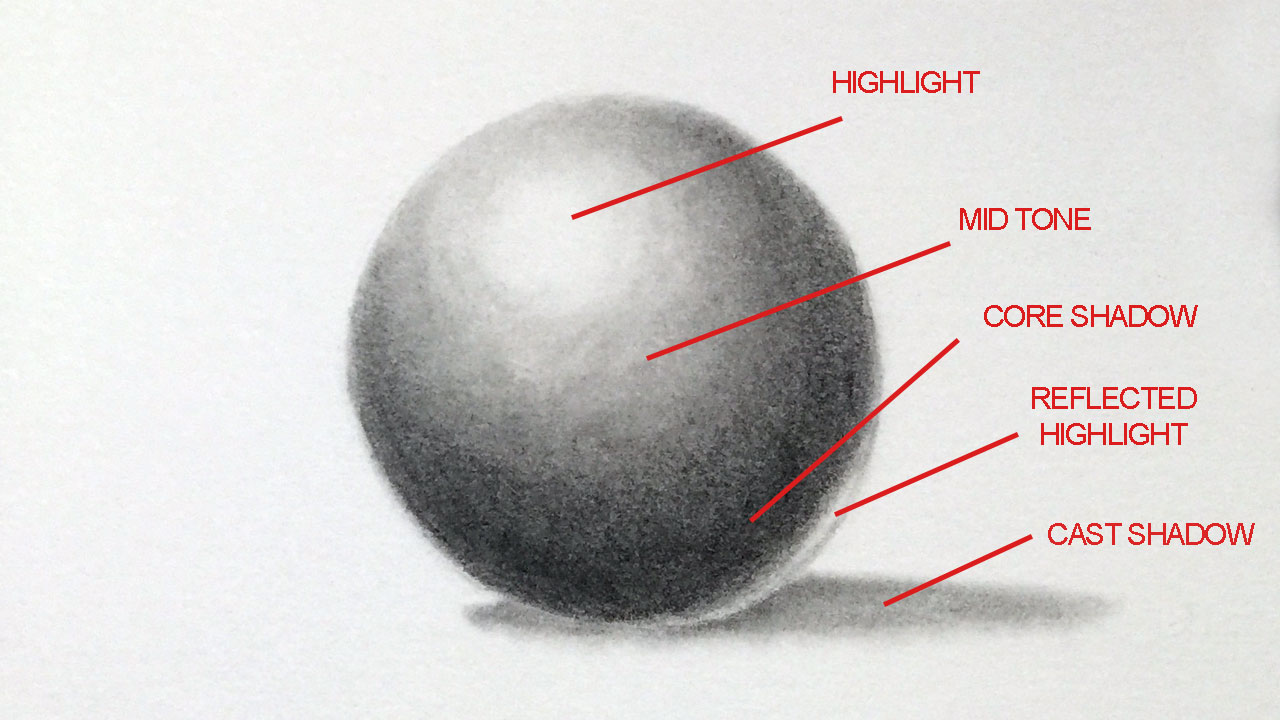
Locations of Value:
Highlight - The highlight is the location on the subject where the reflection of light is most intense. Highlights are typically indicated by a very light value of the color or in some cases - white.
Mid Tone - Mid tones are areas on the subject where some light is hitting, but in a manner that is less intense than the highlight. In many cases, the mid tone is the actual color (local color) or value of the subject.
Core Shadow - The core shadow is the area on the subject where light is prevented from hitting, producing an area of shadow. Core shadows are typically darker values of the local color.
Cast Shadow - Cast shadows are locations of darker value that result on surrounding objects or surfaces. Light is blocked from reaching these areas completely because another object is reflecting much of the light away.
Some light is reflected back off of surrounding objects and surfaces. This light bounces back onto objects producing an area of lighter value.
This area of slightly lighter value is referred to as a reflected highlight.
As mentioned before, shading also informs the viewer of the form of the object. With a sphere, the change in value is gradual (gradation). Value becomes darker or lighter, depending on the lighting conditions. The same is true for other curved forms such as cones or cylinders.
For objects with flat sides (i.e. cube), the value stays fairly consistent for each side without much gradation. Each side of the cube may be a different value representing the highlight, mid tone, or core shadow.
But what about objects that have flat sides or planes that aren't cubes?
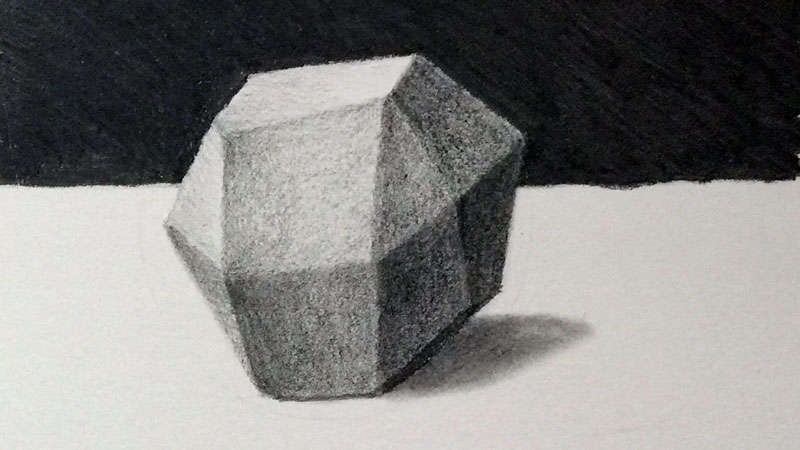
It is these situations where contrast plays an especially important role.
When shading, our goal is to depict the illusion of form and light. In most situations, this requires adding a full range of value. By comparing contrasting areas, we can evaluate the value in the drawing and make adjustments as necessary.
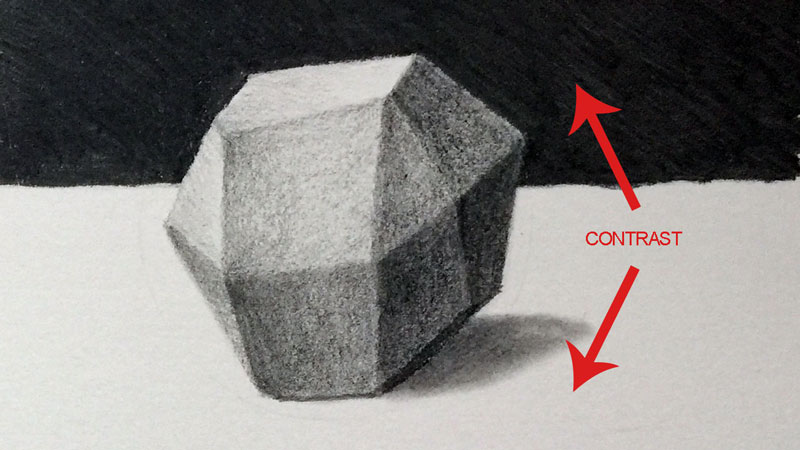
During the drawing process, a dark background is added. Adjustments to the values on the subject are made according to the contrast of values in the background and the table. Comparisons are made and the values are "pushed" in order to create a full range.
We can also exploit contrast to create edges and define the planes of the irregular form. By making the edges of each plane that are closer to the light source "a touch" lighter, we increase the contrast in value between each plane.


Many objects are hollow or have recesses. To address objects such as these, we simply consider the direction of light, thinking of it as a line.
If light is coming from a certain direction, then it should continue until it hits an object. If the object is hollow, then the light will enter into the recess, producing an area of lighter value inside of it. Shadows are created on the opposite side of the edge of the recess, closest to the light source.

The outside of the hollow form is addressed as normal, with shadows further from the light source and highlights close to it.
No matter which medium that you use to apply shading, control over the value produced is of paramount importance. The good news is that control over the medium simply requires patience and practice.
Once you have a clear understanding of how light behaves and how you can communicate it to the viewer, then you are already "half-way" there.
Practice drawing a few basic forms - a sphere, cube, and pyramid. Shade them to communicate one light source using a full range of value. (Use contrast to make comparisons).
Once you have mastered these basic forms, move on to irregular forms and simple still life objects like apples or bananas. Look for the highlights, mid tones, core shadows, cast shadows, and reflected highlights. The more that you practice, the stronger you will become!