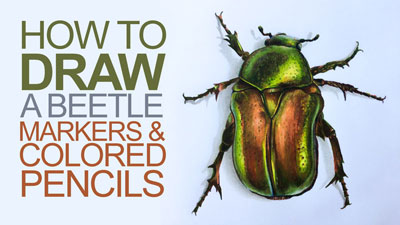
Drawing a Sports Car with Colored Pencils and Markers
In this colored pencil lesson, we’ll take a look at drawing a convertible sports car with colored pencils and markers. This combination of drawing media works extremely well together. The markers act as an underpainting, allowing us to cover broader areas in a shorter period of time. The colored pencils allow us to develop details and strong contrast. We’ll make the most of each medium as we develop the drawing.
Materials for this Lesson
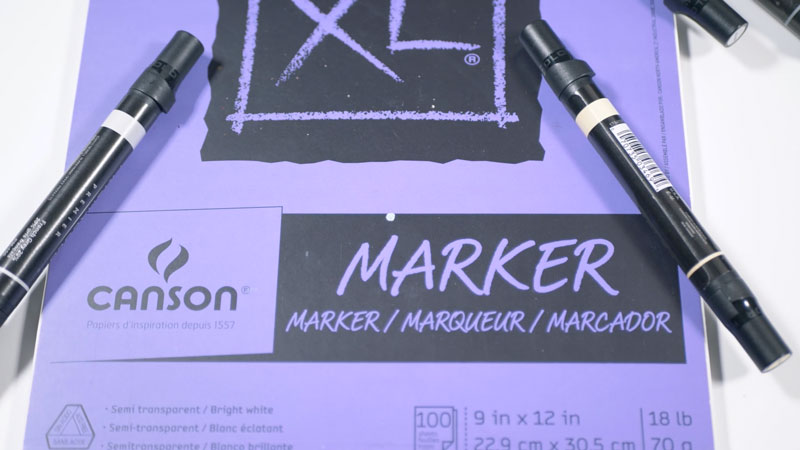
The surface that we’ll work on for this drawing is especially important. In fact, the surface plays an important role in any drawing that you create. The surface we’ll use is marker paper by Canson. This surface is designed to accept marker applications while minimizing bleeding. Even though this surface is very smooth, it’s still suitable for accepting a few layers of colored pencil applications over the top.
See also: All About Drawing Papers
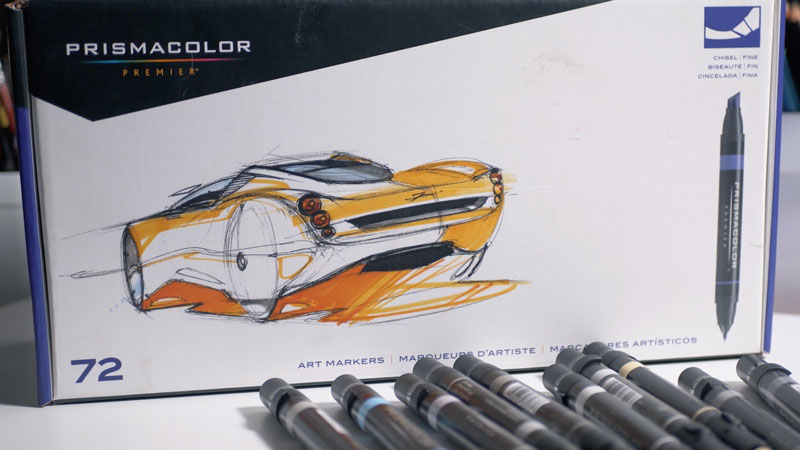
We’ll first develop an underpainting using alcohol-based markers. The alcohol-based markers we’ll use are by Prismacolor. There is a broad spectrum of markers available and you are welcome to substitute any brand that you wish. However, it’s important to work with alcohol-based markers since water-based markers will not behave in the same manner.
Alcohol-based markers are easily layered and are semi-transparent when applied. This characteristic allows us to gradually build up intensity in the color and gives us greater control over the values.
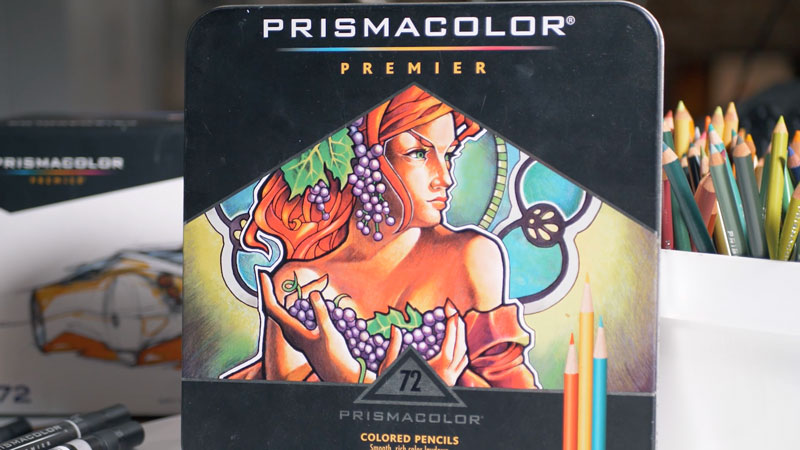
We’ll use wax-based Prismacolor Premier colored pencils to enhance the colors and develop the details. These soft and pigment-rich pencils are excellent for creating strong colors. They layer nicely and blend easily as well.
See also: Wax-based Colored Pencils vs. Oil-based Colored Pencils
Here’s a look at the specific materials used to create the art. (The following links are affiliate links which means that I make a small commission if you purchase without an additional cost to you)…
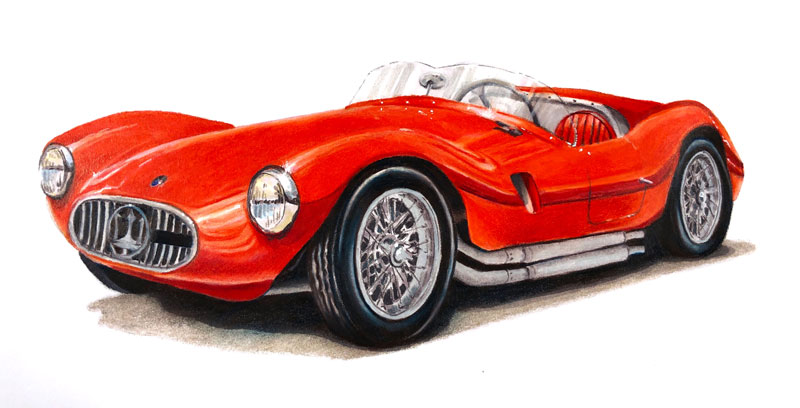
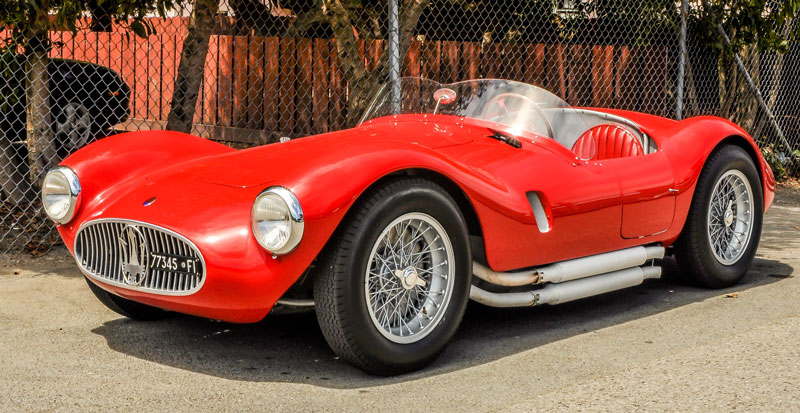
The Photo Reference
Since accuracy is very important, we’ll work from a photo reference to complete the drawing. Here’s a look at the photo reference that is used. You don’t have to work from this image. Instead, you can use what you learn from this lesson and apply it to your own drawing.
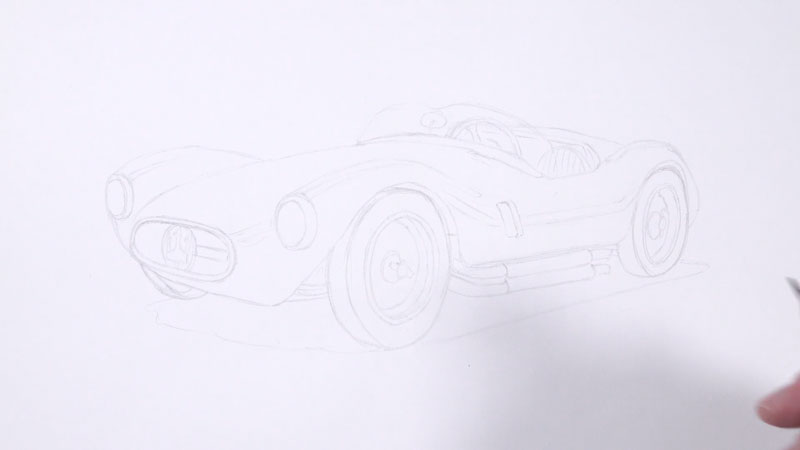
The Pencil Sketch – Transfer or Use a Light Board
With a drawing like this, accuracy is very important. For this reason, we’ll begin with a light board transfer. Marker paper is somewhat transparent making it an excellent surface for use with a light board. However, if a light board is not available, you may use a graphite transfer or the grid technique to ensure accuracy in your sketch.
A light H graphite pencil is used to create the transfer. The addition of values (or shading) is avoided. A very light touch is used in order to avoid indentations in the paper and to minimize the amount of graphite on the surface.
Marker Applications
Markers are great for covering larger areas in a drawing. They are quick but it’s difficult to develop details. For this reason, we’ll use the markers as an underpainting. Over the top, we’ll layer colored pencils to increase contrast, broaden the range of value, and develop the details.
We’ll begin with our first marker applications on the body of the car. A bit of Poppy Red, Blush Pink, and Crimson Red is applied. Poppy Red is used for the bulk of the body of the car, while Blush Pink is used as a transition color near the highlights. Crimson Red is applied in the darkest areas of shadow.
Be sure to be mindful of the highlights. Leave open spaces for them since it is difficult to make these areas lighter later in the process.
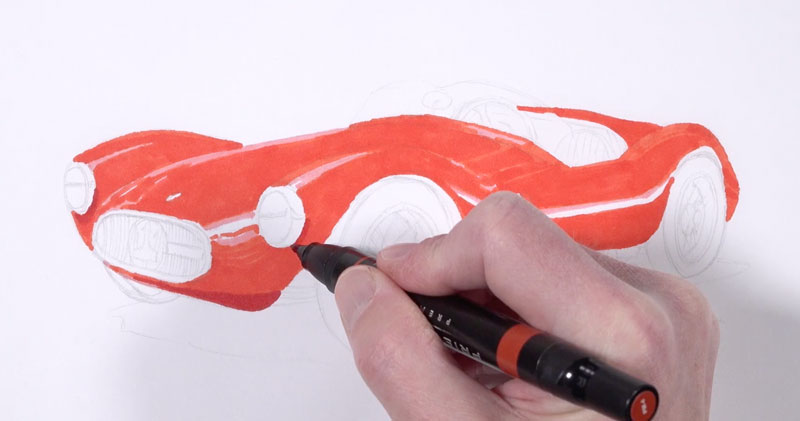

Next, we’ll layer a few grays. Warm grays are used mainly behind the seat, on the windshield, and the larger shadow under the car. Cooler grays are applied in the areas of darkest shadow right underneath the body and on the tires.
It’s a good idea to start with lighter grays and progressively layer darker versions. Remember, we’ll layer colored pencils over these applications which will make these areas darker later in the process.
See also: Warm vs. Cool Grays
Colored Pencil Applications
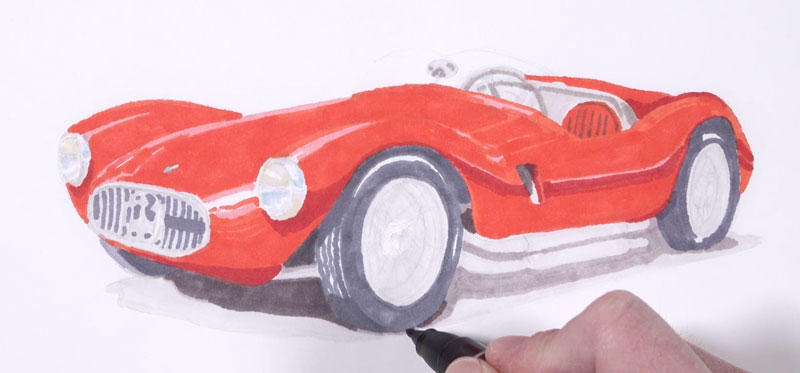
Once we have a suitable underpainting in place, we’re ready to begin with colored pencil applications. We’ll begin on the left side of the drawing and progressively work our way to the left and downward.
One of the advantages to working with the same brand of colored pencils and markers is that the same colors are found in both marker and pencil form.
We’ll begin on the body with Poppy Red, intensifying the highlights with white. In the darker areas, we’ll use Scarlet Lake. A dark warm gray is applied around the headlight.
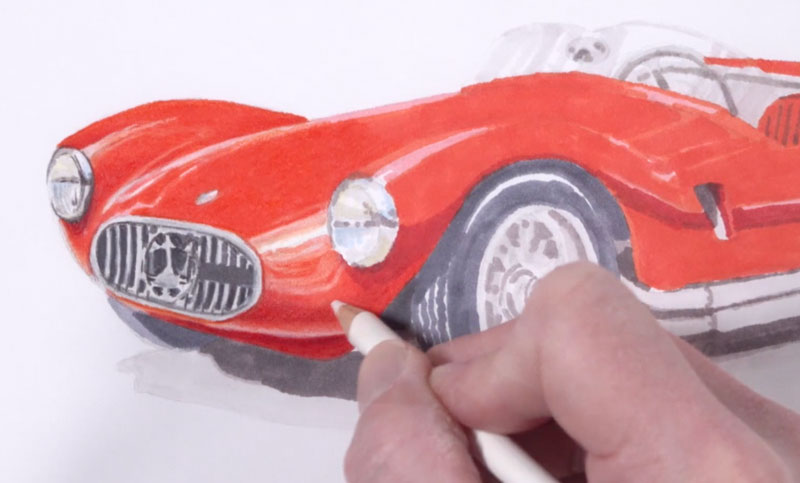
We’ll continue working our way down the body of the car, alternating between Poppy Red, white, and Scarlet Lake. We’ll also enhance the colors within the headlight.
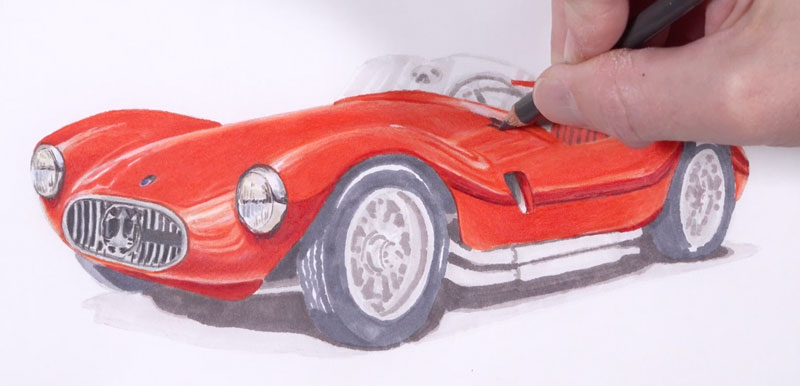

After addressing the interior with a variety of grays, we’ll move down to the darker values underneath the car and around the tires. To create a more natural “black”, we’ll layer Dark Umber and Indigo Blue. This combination of colors gives us control over the temperature of the black that we create. For a cooler black, we can allow the Indigo Blue to dominate. For a warmer black, we can allow the Dark Umber to dominate.
In this case, we want the tires and the darkest shadows around them to have a cooler appearance. To achieve this, we’ll apply the Dark Umber first followed by the Indigo Blue.
We can then enhance the highlights on the tires with a light warm gray.
We’ll continue with this approach underneath the car where we see the strongest area of cast shadow. The color that we create here by layering Dark Umber and Indigo Blue should be slightly lighter than the tires. We want to create enough contrast so that the tires are not lost while keeping the value dark.
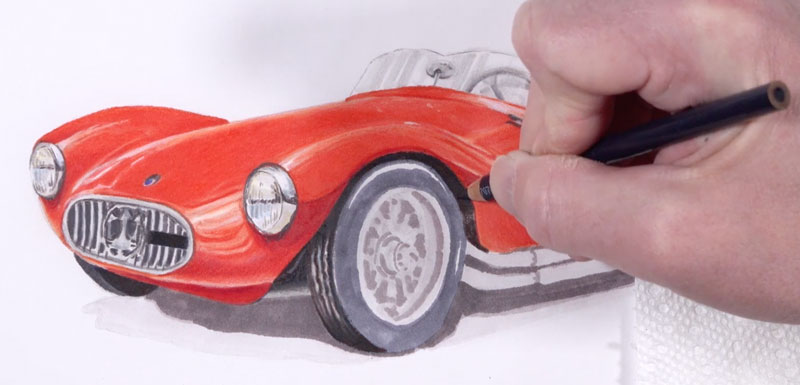
The wheels are quite intimidating. Fortunately, we don’t have spell everything out for our viewers. Instead, we can hint at the details using strategic lines and shapes of value.
Using a variety of grays, we’ll draw a few broken lines for the spokes. Then, we’ll fill in shapes of various grays to create shadows within the wheels.
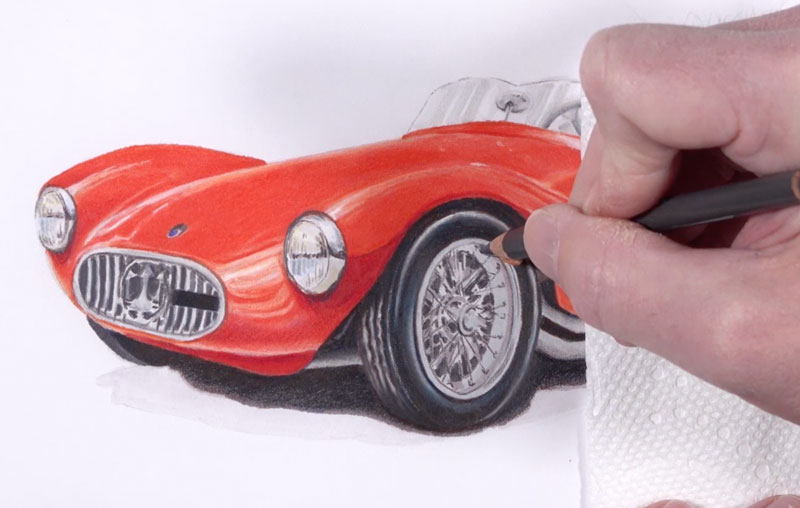
After the wheels are complete, we’ll add a warm gray to the remaining portions of the cast shadow using small circular strokes. Then we can use a colorless blender to burnish these applications, giving them a smoother appearance. Some faint coarse texture is encouraged here since it mimics the texture of the asphalt.
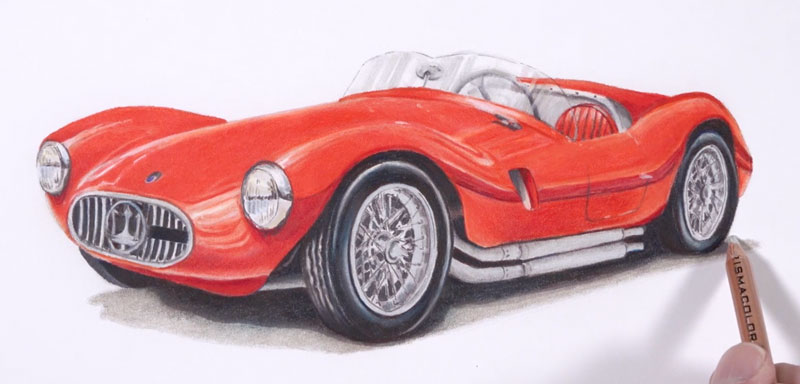
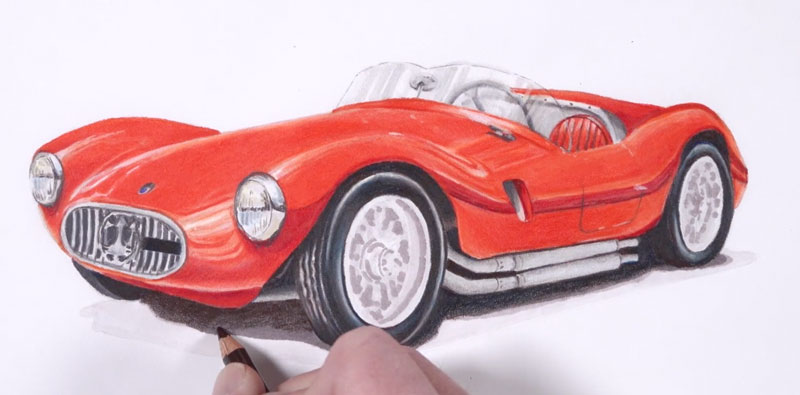
Our highlights are fairly strong but we can enhance them further. We’ll first take them as far as we can with a white colored pencil. But to make them even stronger, we’ll apply a bit of white gouache. Gouache is opaque watercolor and works well over marker and colored pencil applications.
See also: Realistic Painting with Gouache
Using a small round brush, we can apply undiluted white gouache in areas where want especially strong highlights. These highlights exist throughout the drawing, but are especially strong around the highlights, the glass, and on the body of the car. The addition of these highlights helps to create the illusion of a reflective surface that is shiny.
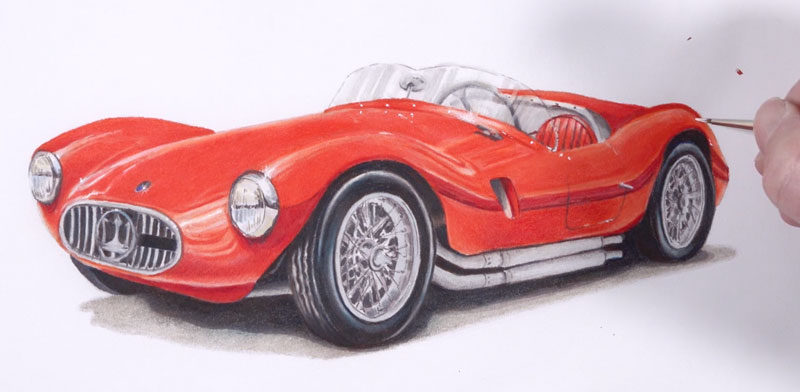
After the highlights have been enhanced, we can use a kneaded eraser to clean up any stray marks and carefully brush away any remaining fragments of colored pencil. Now, our drawing of a sports car with colored pencils and markers is complete…
Drawing a Sports Car with Colored Pencils and Markers – Conclusion
Drawing any car can be a challenge. Accuracy, of course, is extremely important. To ensure accuracy, use a transfer technique or a grid to get the contours in place.
Be sure to work on a surface that is suitable for this particular combination of media. This will make a big difference in the finished appearance.
Be patient as you add each layer of color with the markers and colored pencils. Your patience will pay off. Use a variety of different versions of the same color to gradually build up the intensity and the value range within the drawing.
Tackle subjects that challenge you and push your limits. Doing so will make you a better artist.
If so, join over 36,000 others that receive our newsletter with new drawing and painting lessons. Plus, check out three of our course videos and ebooks for free.