Dragon motifs appear frequently in modern literature, particularly within the fantasy genre. The popular examples are:
- The Hobbit by J. R. R. Tolkien
- Harry Potter series by J. K. Rowling
- A Song of Ice and Fire by George R. R. Martin
Beliefs about appearance and characteristics of dragons vary from region to region.
The earliest dragons that are known today resemble giant snakes. In western cultures, since the High Middle Ages, dragons have been depicted as creatures that have four legs, wings, and horns – capable of breathing fire. Dragons in eastern cultures are usually portrayed as wingless serpentine creatures.
It’s necessary to emphasize that dragons are fictional and so are any assumptions about their anatomy. Nobody has ever seen a real dragon! This means that we enjoy a wide range of options while designing our creature. Feel free to use the tutorial to create a base for your own dragon, changing or adding the details according to your vision.
I’m going to keep my dragon’s appearance closer to the image found in western culture. My art will be rather stylized. The balance between a realistic look and stylization is always up to you.
For this project, we’ll need a graphite pencil, an eraser, an ink liner (my choice is 0.1 number), and drawing paper. I’ll be using just a single liner. However, if you prefer having a greater choice of line width options, feel free to use a variety of different pens. In this tutorial, I’m going to show you that it’s possible to get a moderate variation of the line width using the same pen.
How Many Legs Does a Dragon Have?
This question may seem strange, but we have to dwell on this topic just for a moment.
Originally, dragons could have any number of legs. However, since the sixteenth century, English, Scottish, and Irish heraldry began to distinguish between a “dragon” and a “wyvern”. It was believed that dragons have four limbs and wings, and wyverns have only two back legs and wings.
Other features that were commonly attributed to wyverns are the inability to breathe fire and strongly pronounced fierceness.
If we rely on the number of legs as the main distinguishing feature, it is possible to say that wyverns are more often represented in movies these days. (Just remember Game of Thrones television series.) That sometimes causes heated arguments whether a particular creature is a dragon or a wyvern.
However, wyverns are quite similar to dragons. In many languages, cultures, and contexts, we won’t find a clear distinction between the two creatures. For example, in the heraldry of other European countries, it is entirely acceptable to have dragon-like creatures with two legs being called dragons.
On the other hand, there is an opinion that a model of a dragon with two legs plus wings is more correct from a “biological” standpoint. No creature found in nature has four legs and wings at the same time. The layout of all vertebrates follows a simple principle: four limbs plus a head. Animals with the ability to fly have sacrificed two of their limbs that evolved into wings.
If we rely on examples of creatures that actually exist (or existed in the past), this point of view is quite sensible. As you probably see by now, there is no clear answer as to how many legs a dragon should have. Still, knowing about the nuances may be useful.
I’m going to depict a four-legged dragon. This layout seems more fitting to the pose and composition that I have in mind.
Sketching Dragon Poses
As long as I’m working with a relatively small A4 paper size, I won’t be able to depict a dragon in a monumental posture — flying or sitting with its wings outstretched. However, it’s still possible to find a pose that is both interesting and compact.
My dragon will be lying or sitting on a hill. Its wings will be unfolded. This will make the pose more dynamic. One wing will be almost hidden behind another.
I create some rough sketches, presenting the dragons’ figure in a simplified, stylized manner. At this stage, I don’t strive for perfection.
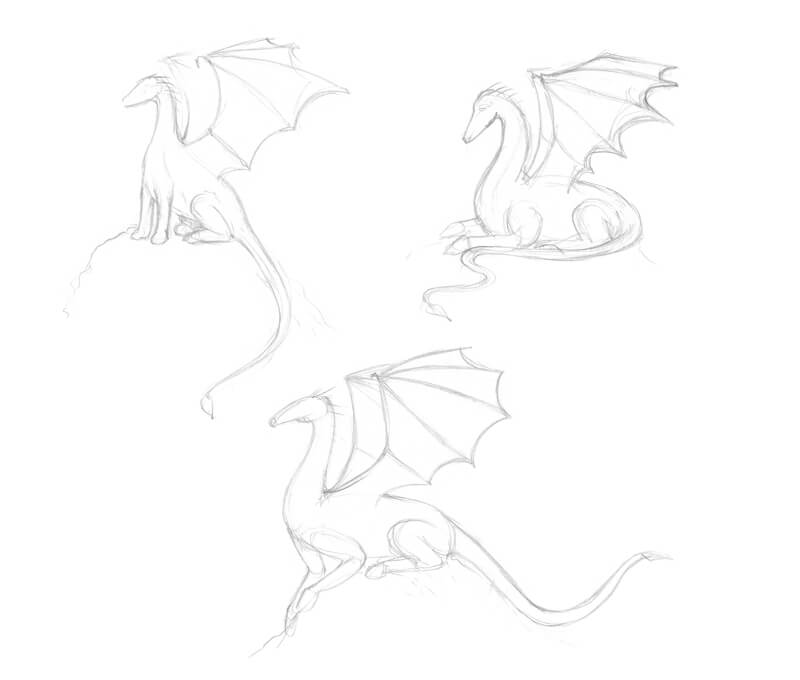
It’s difficult to choose a specific option, but we have to. Let’s say the lower one is my favorite. I feel like this dragon is up to something! Let’s proceed to the final surface with this pose as our choice.
How to Draw a Dragon with a Graphite Pencil
We’ll draw a dragon in the most simple way possible.
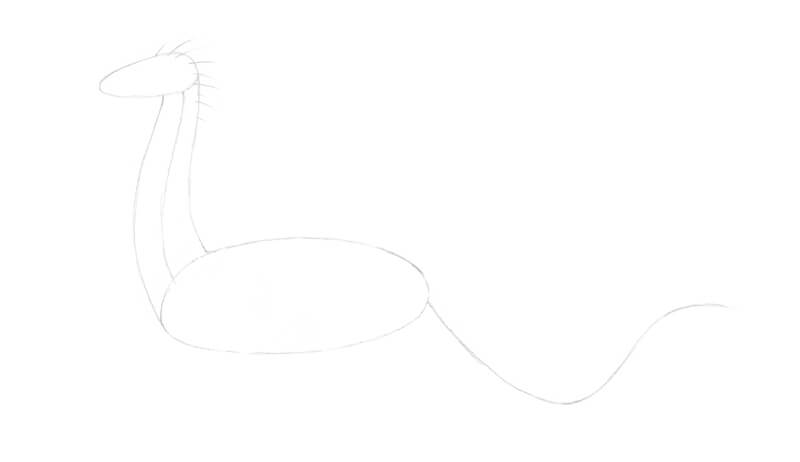
I outline the rough, rounded shapes of the dragon’s head and body. Then, I add a core line representing the neck and its general shape.
Several lines are drawn from the head and neck. They symbolize the future horn-like ridges I’m going to adorn the dragon’s body with.
A long, curved line marks the direction of the tail. Make sure that there’s enough space for the limbs as we’ll add them in the next step.
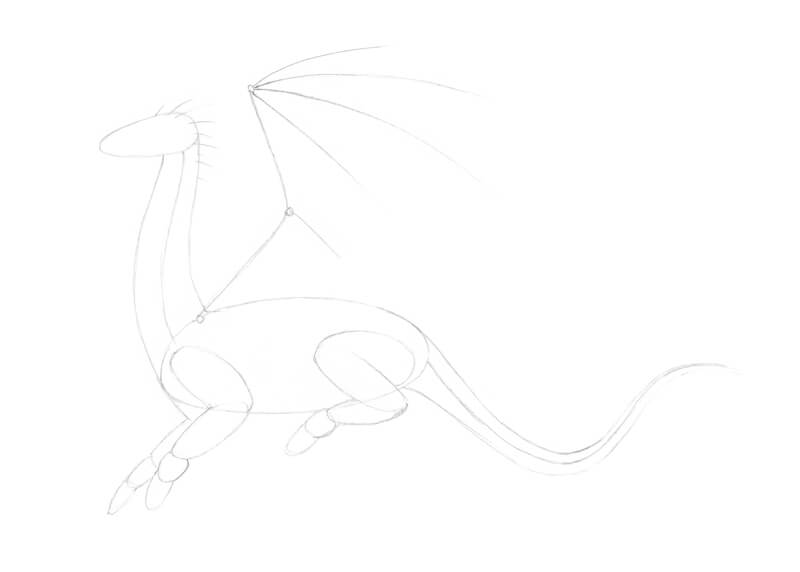
I add a simplified framework of limbs. The lower shapes are for the paws and the toes and claws. We don’t see the other hind leg because of the pose.
Then I draw a stylized framework of the wing that is closer to the viewer. Small circles mark the joints. Several long lines are going from the upper circle, indicating the direction of the wing fingers.
I also give some thickness to the tail, outlining its contours.
It’s time to refine the drawing. Feel free to remove the unnecessary pencil lines with an eraser as you go.
I make the head slightly narrower in the muzzle, then add the eye, nostril, and some ridges. It’s a good idea to make a couple of head ridges slightly wider and longer — they will become the “horns”.
The contours of the limbs evolve too. I accent the wrists and ankles and then draw the separate fingers and toes that end with long claws.
I add a small wing “thumb” and outline the contour of the membrane. The dragon looks quite unnatural with only one wing, so I mark the second one behind.
With light pencil lines, I draw the hill under the dragon.

I’m going to add the details, such as scales and various ridges on the dragon’s body.
As we’re working on a fantasy creature, we can’t find a credible photo reference to rely on — only artworks that were created by other people or movie screenshots. When it comes to the body texture or other details of the dragon’s appearance, we have to be creative.
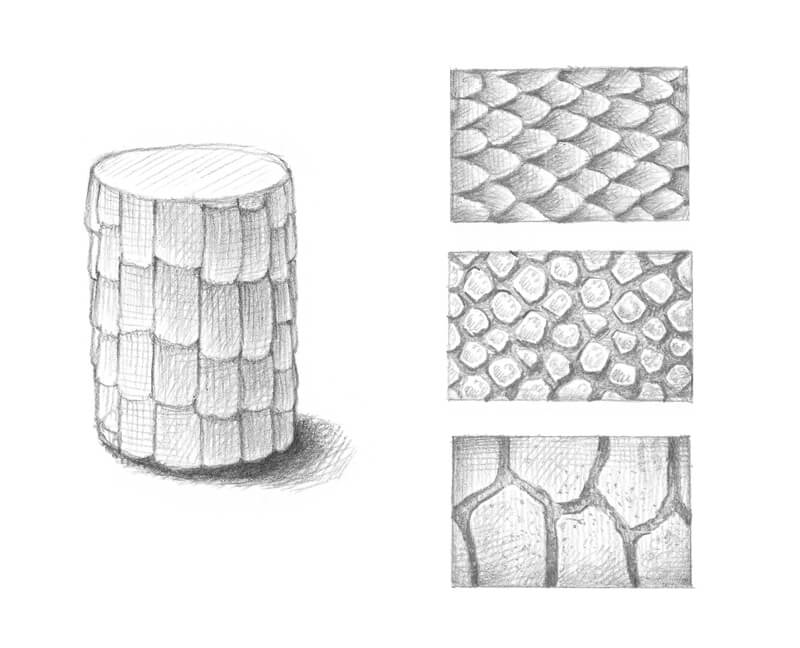
One of the options that may help is observing lizard’s skin on a real reptile or on a photo. It will suggest a variety of scale patterns. Pay attention to the rhythm of scales, their size, and shape.
Some of the texture examples are in the image below. It’s useful to create your own samples beforehand. Of course, we won’t see scales in detail in our final artwork, but having a clear vision helps in the process.
One thing to keep in mind is that scales should conform to the general shape of the object. This shape has volume. The principles of perspective will affect the pattern too. The cylinder in the image below is an illustration of this concept.
Feel free to invent your own patterns of scales or body adornments if you wish. The number of details is up to you. In many cases, a looser approach works great even with detailed images.
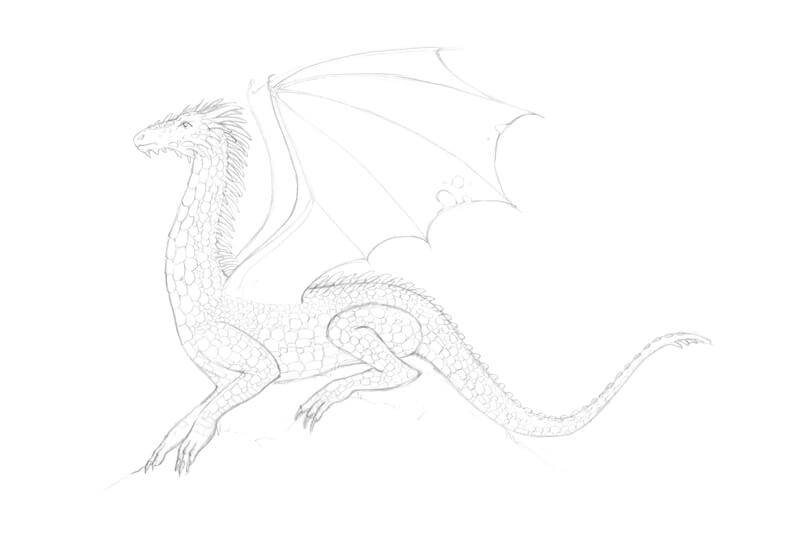
I add more ridges to the head and neck, gradually building rows of them. The dragon’s back and tail have various bumps and pointed spines. Again, the design is up to you.
I draw groups of bigger scales in the neck and limb areas. The size of scales will help to distinguish between larger and smaller body parts. The neck and legs of a dragon may be covered with larger and harder scales.
The scales will affect the silhouette, making its line slightly uneven. Take a look at the contours of the neck to see what I’m describing.
The groups of bigger scales alternate with gatherings of smaller scales. This makes the overall pattern more interesting and versatile.
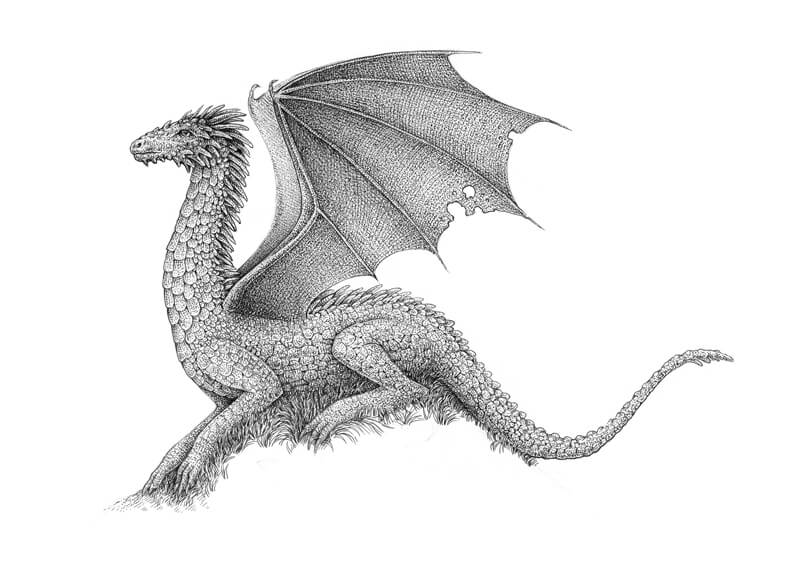
To make our dragon’s character more interesting, I add some ragged holes in the wing membrane. How did this dragon get them? What do you think? These small details add a bit of story to our drawing.
See also: How to Draw a Rabbit with Pen and Ink
How to Draw a Dragon with Ink
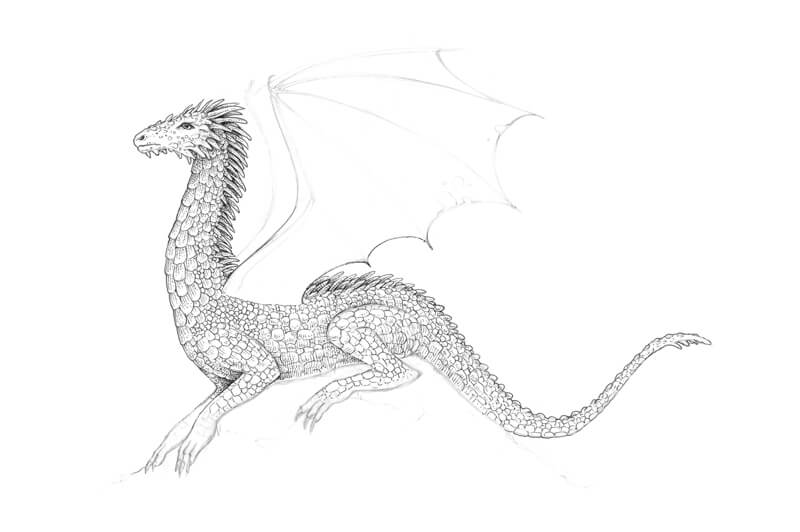
With 0.1 ink liner, I outline the main contours and scales, starting with the head of our dragon. I use short hatches and dots to create soft shadows on the scales. They shouldn’t be too contrasting.
I assume that the light comes from above because it’s a natural environment. This means that the area just below the head will be in shadow. I slightly darken the areas between the neck ridges to distinguish them visually.
I continue working on the body. Smaller scales are drawn in a looser, “sketchier” manner.
I also apply hatching to the underside of the dragon’s body to give it more volume. There is a shadow in the chest area and on the front leg. With the shadow in place, the front leg that is closer to us stands out visually.
See also: Basic Pen and Ink Techniques
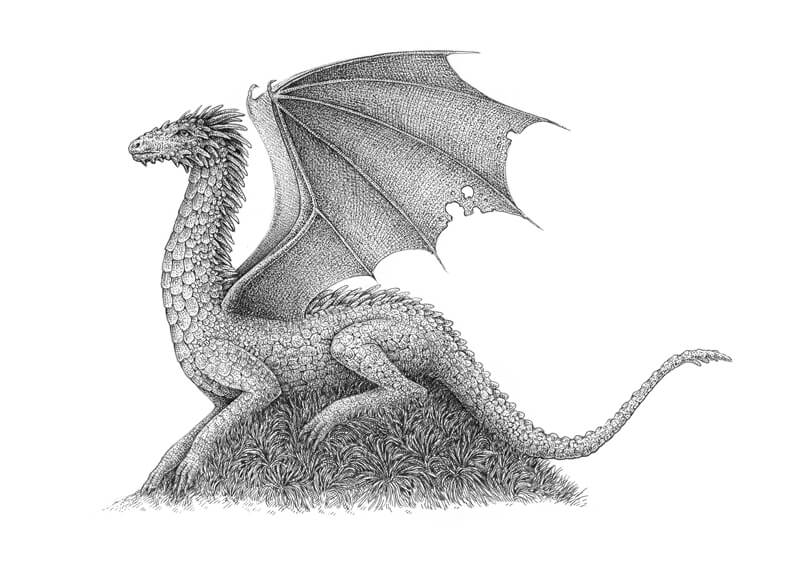
The creature is lying on a hill covered with tall grass, so I avoid creating any solid contours of the body here.
Next I’m going to add ink dots to the drawing, paying particular attention to the darker areas. Stippling allows us to create the illusion of beautiful texture that feels rough or bumpy. Vary the space between the dots to get interesting effects and to broaden the range of tone. The more dots, the darker the area will be.
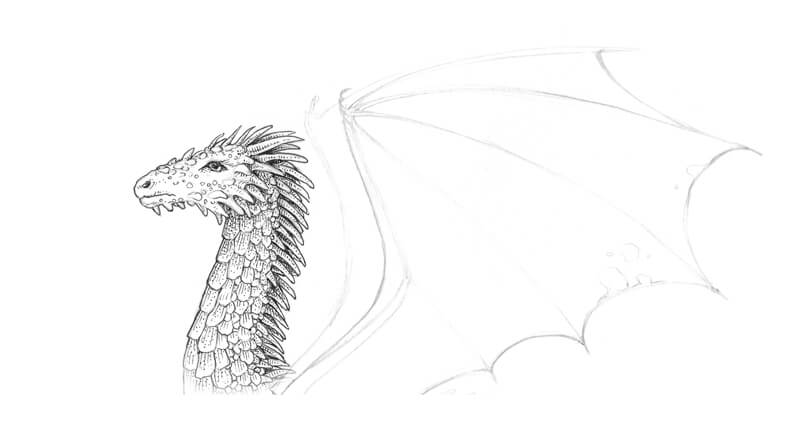
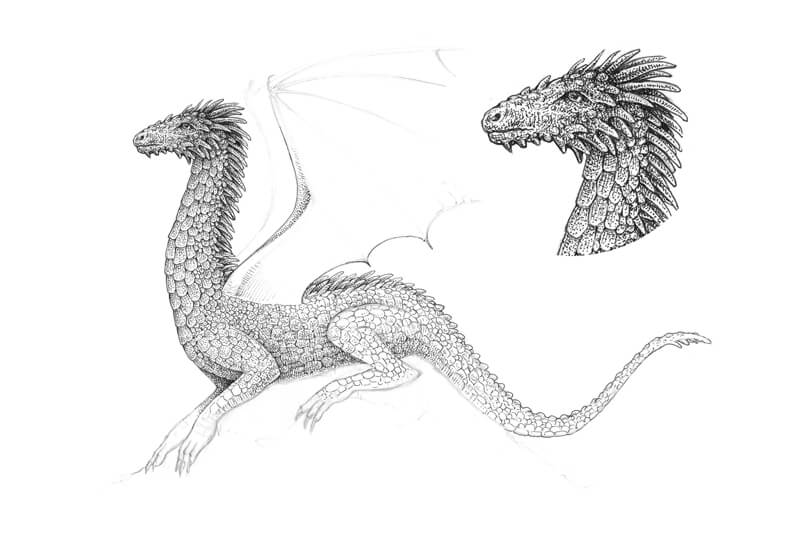
I darken the area around the eye and at the underside of the muzzle, revealing the volume and relief.
I also strengthen the contours on the bottom part of the head. This area gets less light, and a broader contour indicates this. I use the same 0.1 ink liner to create a thicker contour. It is always possible to broaden the line with your existing tool.
In the image below, you’ll find the dragon’s head in detail.
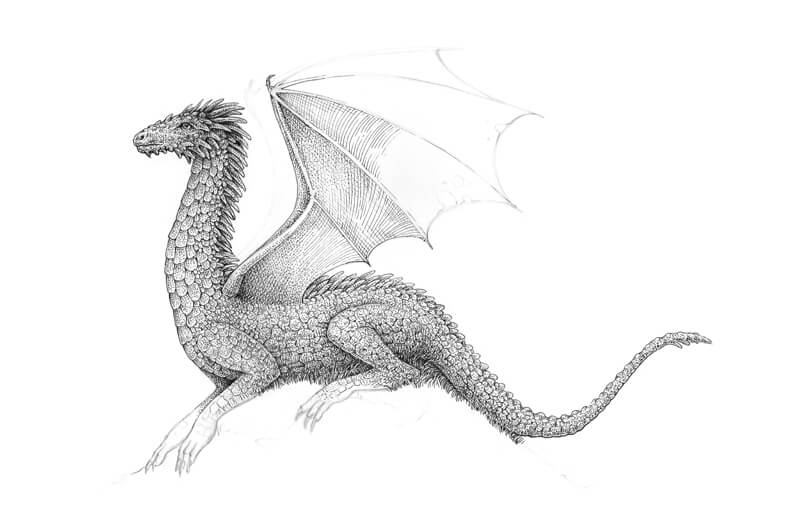
With stippling and long lines, I start working on the wing that is closer to the viewer. This combination of techniques will allow us to create the illusion of texture that feels both smooth and organic.
I continue working on the wing. The hatches accent the form while dots convey the feel of the texture. We’ll see this process in detail in the next steps.
I also proceed with the bottom part of the art, increasing the contrast. I add more dots to the underside of the dragon and its limbs. At the same time, I draw the grass with long organic lines.
When it comes to the wing, I recommend starting with lines that show the direction and the general contours.
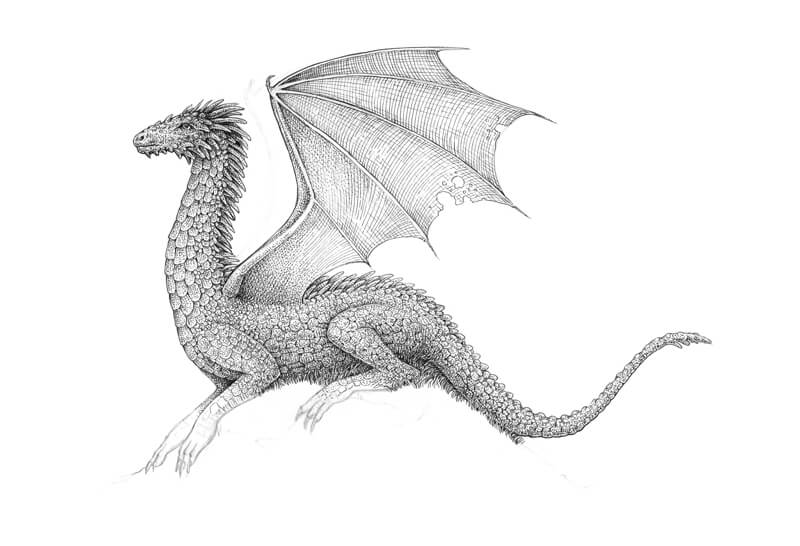
I cover the wing with dots, creating smooth transitions of value. The wing fingers remain relatively light to accent their relief. I just add a few dots to them.
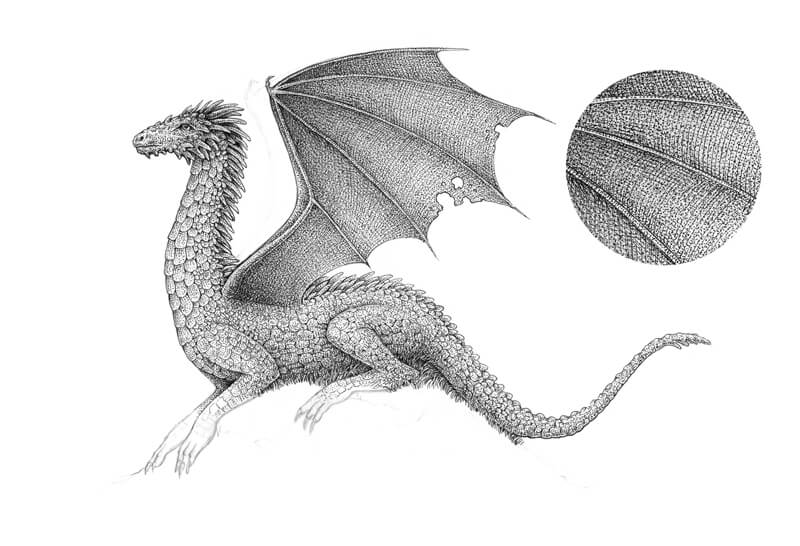
If you feel like stippling is way too time-consuming, you can use cross hatching instead.
In the image below, you’ll find a fragment of the wing in detail.
I draw the second wing, using dots and light hatches. I aim for creating a hazy silhouette rather than a detailed element of the body.
Again, it’s possible to vary the width of the lines with the same ink liner. To create thinner lines, move your hand quicker and place a lighter pressure.

I work on the limbs in combination with the grass. We don’t have to draw individual blades. Instead, we can group lines together to create the illusion of texture. Then we can create shadows with an additional layer of hatching.
See also: Line Drawing Techniques
There is a cast shadow under the dragon, so I make sure that this area is dark and contrasting.
The lower parts of the dragon’s legs are relatively thin and have small sections, like the claws. For the most part, stippling is used here.
I complete the hill. The foreground can be slightly darker and more accented, so I draw groups of longer grass blades with more intense shadows.
It’s time to evaluate the drawing. Does everything feel right in terms of value, contrast, and texture? Is the silhouette clear? Are important details in place? Sometimes it’s necessary to take a break to see what needs improvement.
And as soon as you’re happy with the result, the artwork is finished!
Drawing a Dragon with Pen and Ink – Conclusion
Congratulations! We now have created a wonderful ink drawing of a majestic fantasy creature! I hope you enjoyed every step of the process. Even complex things don’t have to be too difficult, right?
Have fun as you explore the world of imaginary creatures and drawing them with ink!
If so, join over 36,000 others that receive our newsletter with new drawing and painting lessons. Plus, check out three of our course videos and ebooks for free.