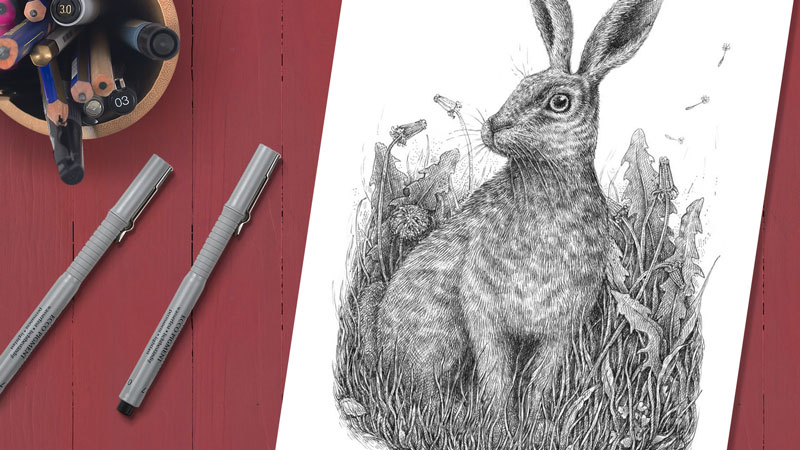
We’ll draw a rabbit in a natural environment, paying particular attention to the texture of the fur.
To complete this project, you’ll need an ordinary HB graphite pencil and an eraser for creating the underdrawing, and some ink liners. I’ll use the 0.05, 0.1, and 0.2 line widths on a smaller sheet of paper (the standard A4 format). A nib pen and liquid black ink can be used instead of liners.
Step 1 – Creating a Pencil Sketch of the Rabbit
I prefer staring an ink drawing with a pencil sketch, outlining the main details of the subject. This step ensures that I’ll be confident enough while adding the ink. This takes a lot of the “guesswork” out of the inking process.
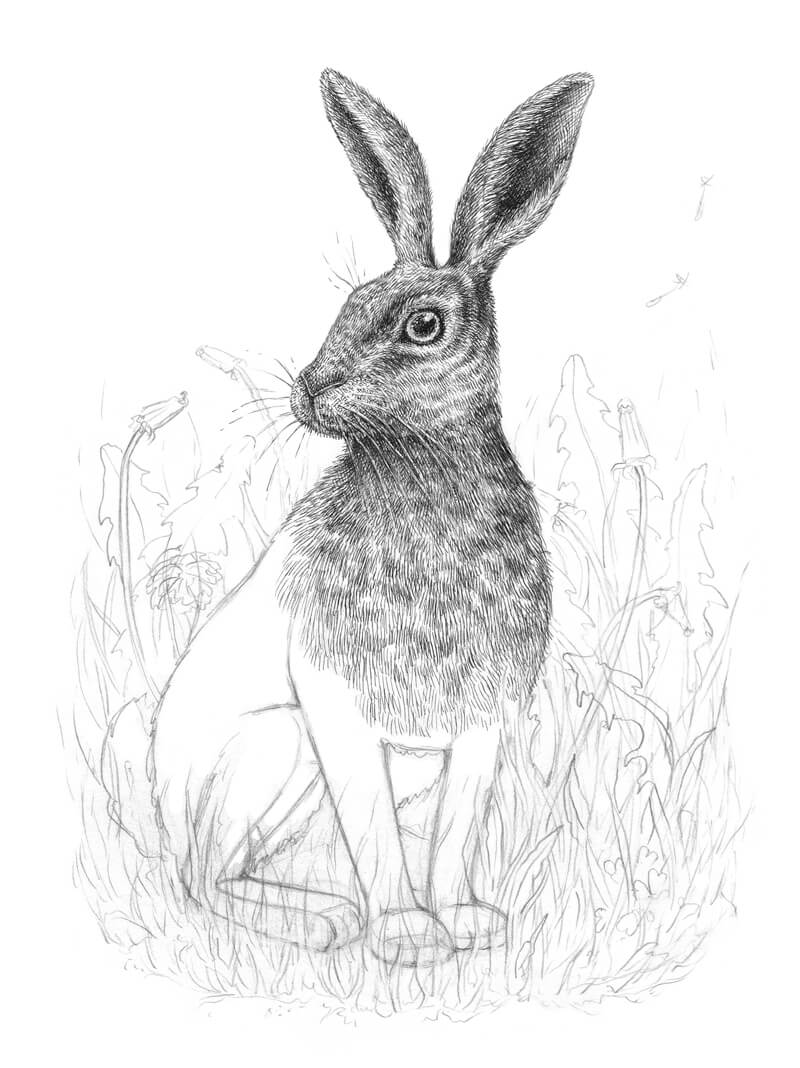
I decided to go for a relatively complex layout of the rabbit. We’ll position the rabbit at a three-quarter angle to make the drawing more interesting and to aid in creating the illusion of depth.
Don’t feel obligated to get all the anatomical features of the rabbit precisely in place. The animal in our drawing is sitting in tall grass and its limbs will be partially covered with the foreground elements.
Also, if you’re completely unfamiliar with the general appearance of a rabbit, I strongly recommend doing some research by looking at photos of rabbits on the web or in a book. You’ll may find another pose that you like better or gain some insights on the patterning of the fur.
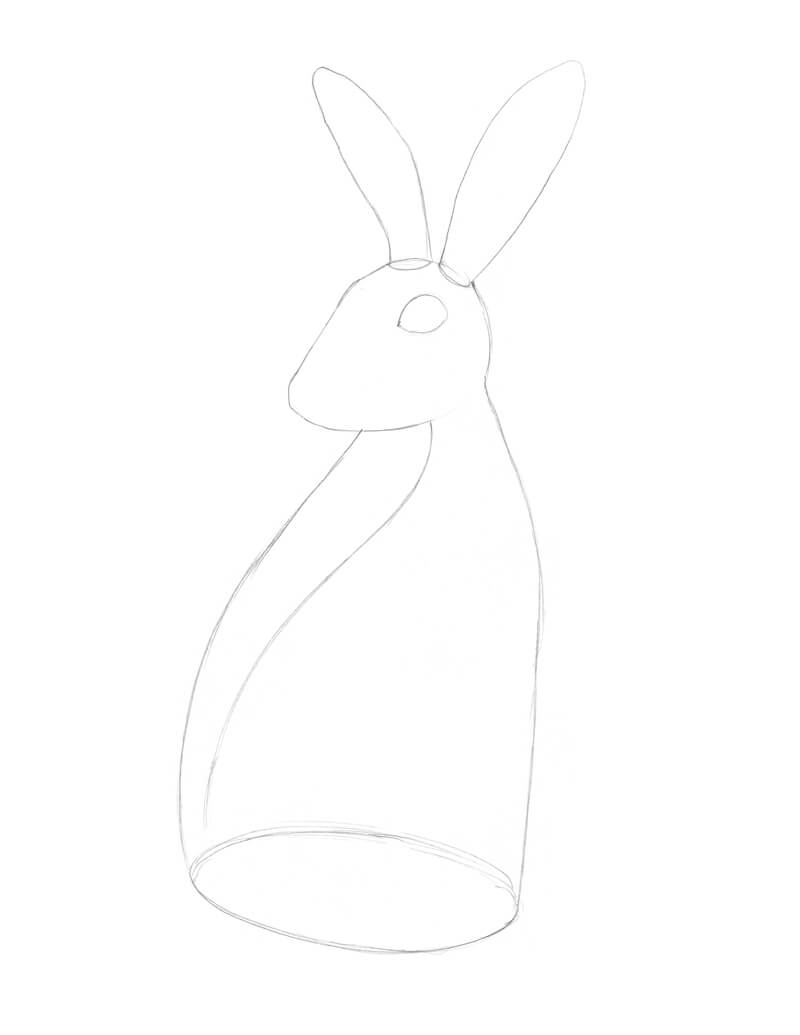
To simplify the task of designing the figure, I start by outlining the general shape of the head along with the eye and ears. Then I add the shape of the body.
A long curved line inside the larger shape marks the direction of the rabbit’s spine.
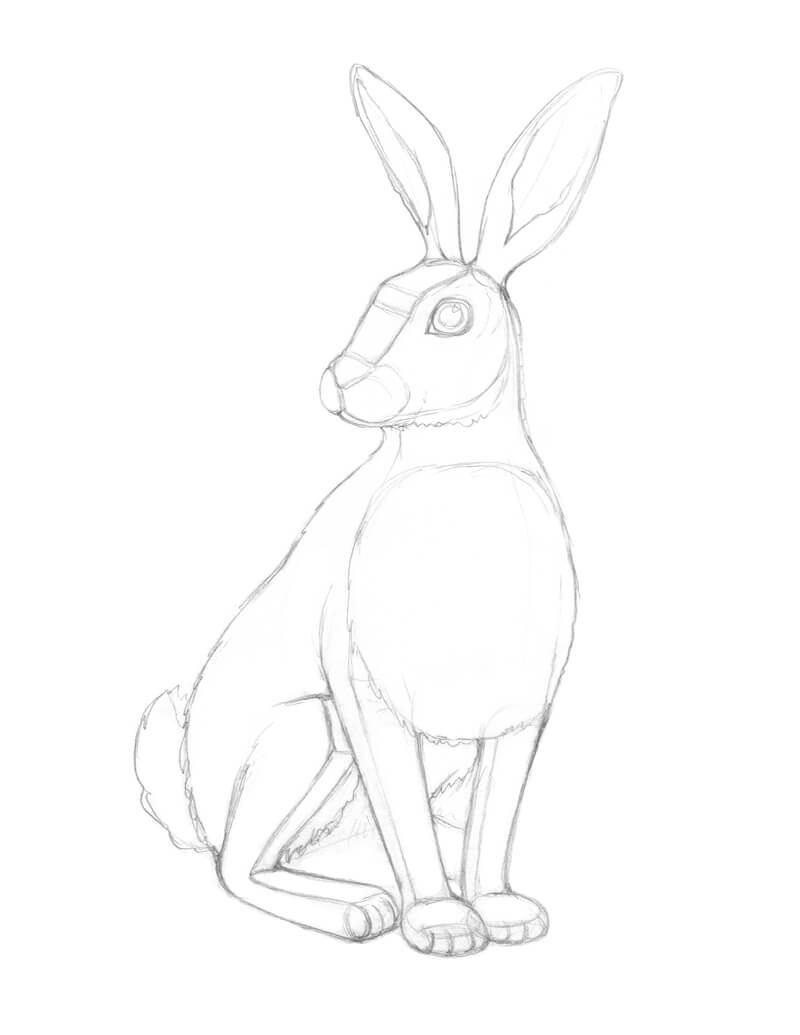
Now I add some stylized features, working rather with blocks than with small details. Now that we have the shape masses in place, let’s carve out the most significant features.
First, I refine the shape of the head, making a strongly pronounced slope and a short muzzle. The eyes (in our case, one eye that is visible) are placed quite high on the head.

I refine the drawing by adding the details of the eye (including a small spot of highlight), the ear openings, and elaborate a bit more on the rabbit’s “face”.
I imagine that the limbs in my sketch are three-dimensional objects. The current outline is very basic and stylized. Feel free to erase any unnecessary pencil lines as you go.
Rabbits have from four to five toes. Even if the paws will be mostly overlapped with the grass in the foreground, it’s still useful to keep those minor details in mind – they will make the drawing more believable.
I add a bushy tail, then change the contour line of the figure to suggest the graceful flow of the body and its textured fur covering.
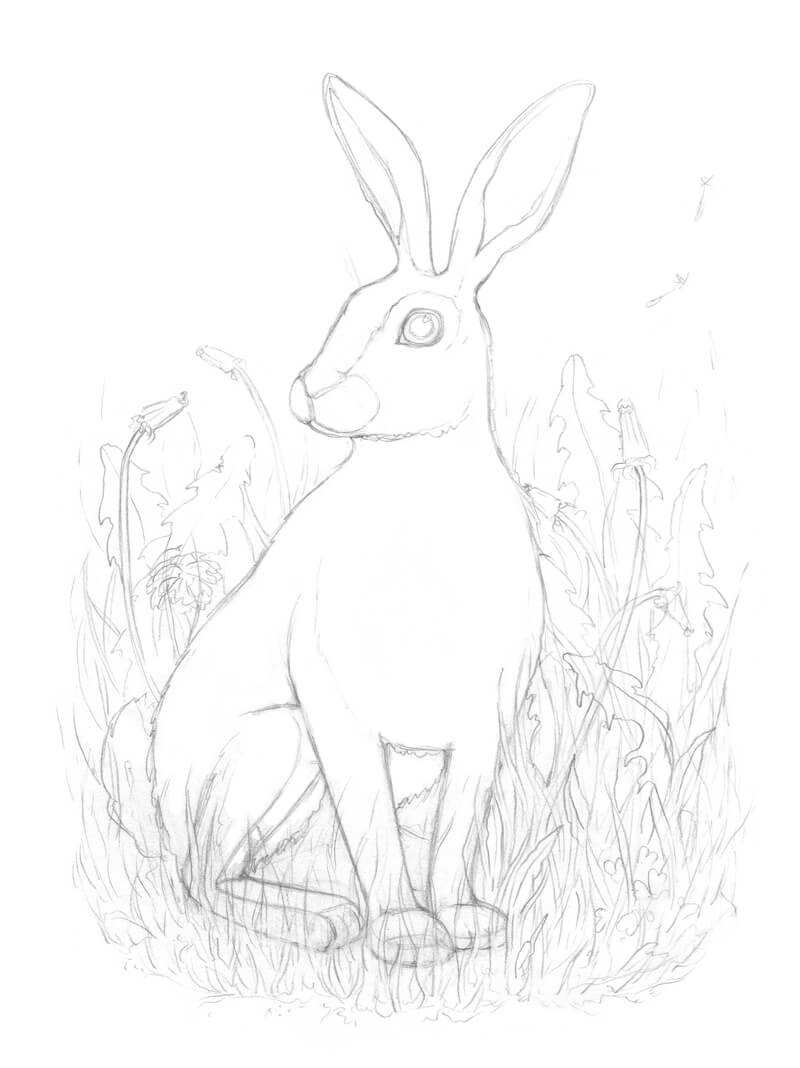
I add the details of the environment – the thin grass blades, the dandelion leaves, and the flowers on the long stems. The addition of clover leaves in the foreground creates a bit of variety to this floral mass.
Don’t let the number of details overwhelm you. The elements you see in my drawing are created in a sketchy and loose manner. The goal is to grasp the rhythm and direction. I just create marks that help me remember my design decisions when I’m ready to begin adding ink. It’s easy to become so immersed in the process that later on, some significant details may be lost.
Some pencil lines look rather thick and dark at this point, but I’m not worried about it. The type of paper I’m using absorbs ink well and allows erasing, so I’ll remove all the unnecessary marks of graphite in the next steps. On the other hand, sometimes a graphite under layer that shows through an ink artwork adds interesting tonal nuances.
Step 2 – Adding Ink to the Drawing
With our pencil sketch in place, we’re now ready to add the ink over the top. In the inking process, we’ll develop a range of value, describe the texture, and create the illusion of form and light.
The Texture of Fur
Before we dive into the inking part, let’s talk about creating a credible illusion of fur or hair texture. Visually studying your subject is an important part of mastering the skill of drawing. That’s why I recommend observing as many examples of texture as you can and doing small exercises regularly.
To put it simply, the texture of fur can be easily imitated with hatching. The direction of lines is fairly constant, consistent and is dependent on the direction of hairs that we find on the subject. But, be mindful that there may be a slight variation in that direction.
See also: How to Draw Animal Fur / Hair – Two Approaches
Relax your hand and try drawing such hair-like lines, gathering them in groups. Then layer those groups on top of each other. As soon as you feel the rhythm that is comfortable for you, we’re ready to move forward.
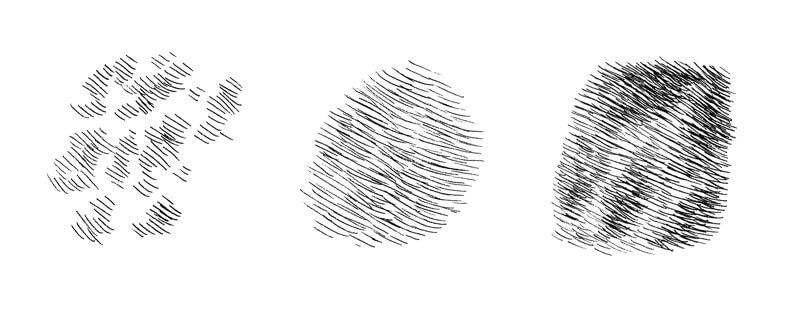
The approach we just discussed may seem simplified. Of course, it’s possible to create a more detailed example of texture if you like.
If we deal with a relatively small paper format and the subject isn’t too close to the viewer, including too much visual information may lead to a visually “busy” result. Don’t overcrowd your marks.
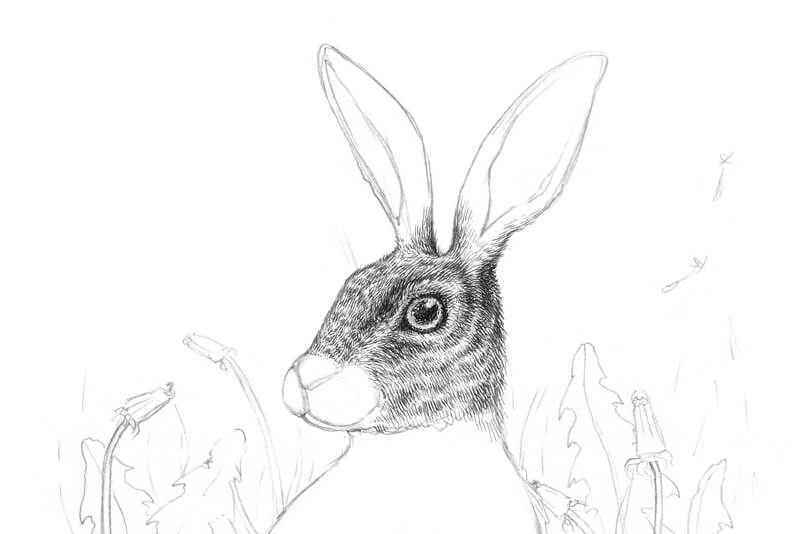
I start with the eye. It is one of the most important parts of the drawing because of its power to convey the mood and character. The pupil and the eyelid’s rims are dark and contrasting so I accent this feature, using the 0.1 ink liner. Don’t forget about the highlight in the pupil!
Now it’s time to sketch the fur in around the eye. The fur here is relatively short and forms a pattern of darker stripes.
The hatches follow the contours of the head and the direction of hair growth. Creating strokes that flow in this direction not only describes the texture and value but also helps to communicate the form.
As for the liners, I generally use the 0.05 for lighter and longer hairs, and the 0.1 is for areas that require additional contrast. Fine hatching will look similar to gradated graphite shading from a distance.
In the case with animals that have fur, avoid outlining the contours with a solid ink line. Even if you overlap it with a set of hair-like hatches later, this line will be still noticeable. Unfortunately, it may spoil the entire drawing. Instead, allow your marks to be “broken” or as a continuation of the fur pattern.

The fur on the nose is very short, so the marks here are short as well. Feel free to create a hint of a pattern on the head and nose. You can do this by simply concentrating marks in areas.
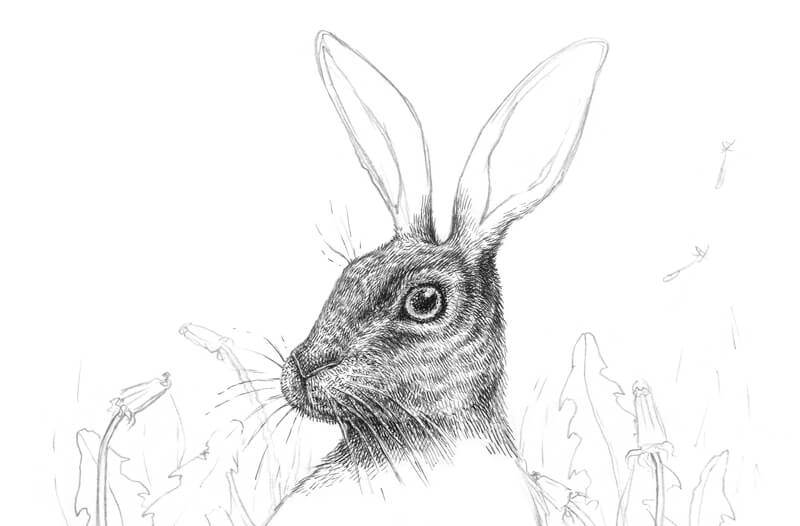
The fur gets longer closer to the neck, so I use longer lines there. I also increase the contrast between lighter and darker areas of fur, using the 0.1 liner.
I add the whiskers with thin broken lines applied with 0.05 pen.
The whiskers should be in place and clearly visible before beginning work on the muzzle. However, if you accidentally cover the whiskers with black ink, there is the option to recreate a light line with a white gel pen.
See also: How to Correct Mistakes in Pen and Ink Drawings
I cover the front side of the rabbit’s head with short hatching made with the 0.1 liner. I also create a subtle pattern on the muzzle by concentrating marks.
The nose is rather dark and has a velvety texture. I apply short hatching here and darken the lower side of the nose.
I work on the ears next. The ears usually have long, light hairs near their openings. I sketch these hairs first, using the 0.05 ink liner, then darken the inner sides of the ears.
The back side of the ears can be quite dark. Varying the pattern of values adds interest and variety to the drawing.
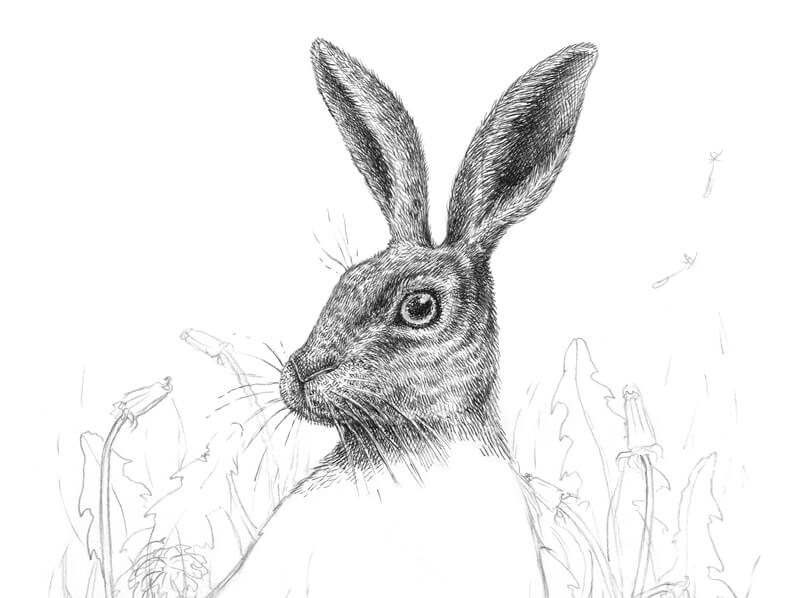
It’s time to work on the fur of the body, so I apply hatching in the manner that is already familiar to us using directional stroking with the pen.
Switching from 0.05 to 0.1 liner, I layer the groups of hatching. Some areas become darker. This creates an interesting spotty pattern and adds depth to the artwork. The direction of lines continues to follow the contours of the body.
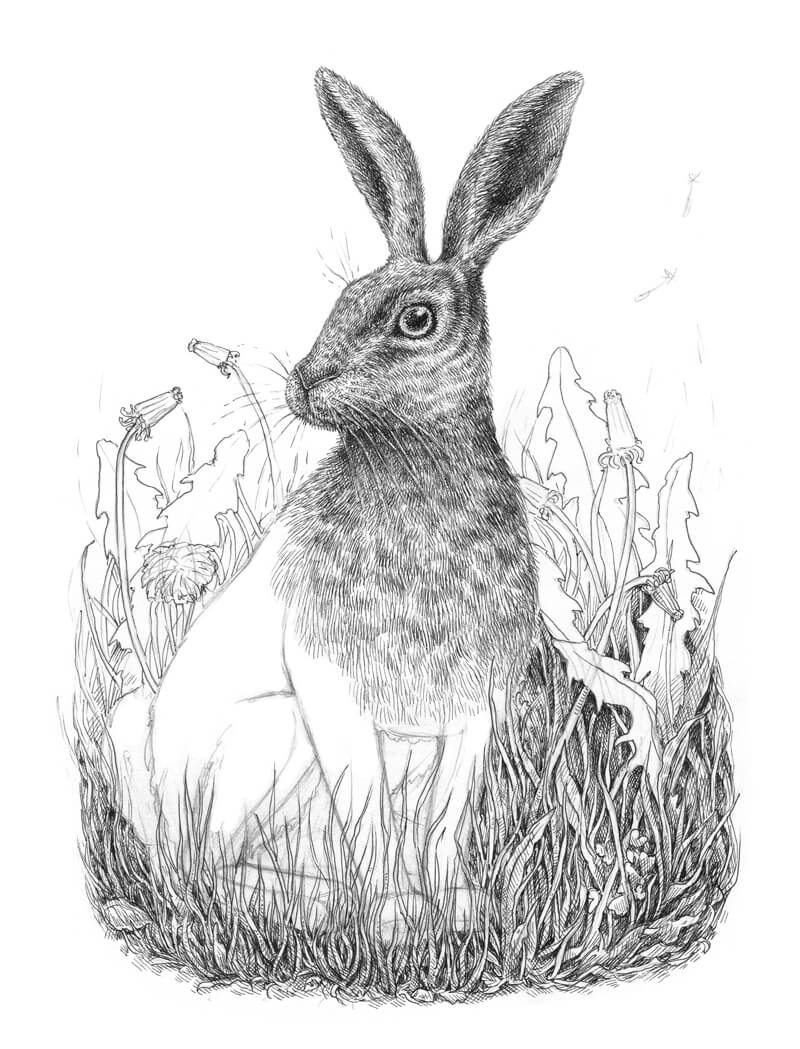
Let’s digress from the rabbit and pay attention to the environment that surrounds it. The best approach is to develop the elements in the foreground before proceeding to the limbs since these elements overlap the body of the rabbit.

With the 0.2 ink liner, I outline the contours of the grass blades, leaving some gaps between the lines. I also darken the areas between the blades and leaves. Objects that are closer to the viewer are typically higher in contrast, so we can allow some of the values here to be much darker.

With the 0.1 ink liner, I add groups of parallel hatches to the flowers and grass elements in the foreground. The goal is to suggest the middle values and create the illusion of depth.
I also add some lines to the bottom portion of the artwork. This simple trick helps to transition the marks into the blank spaces of the paper.
As we add the elements in the background, we need to take care to leave some open areas for the remaining sections of fur that are to be added.
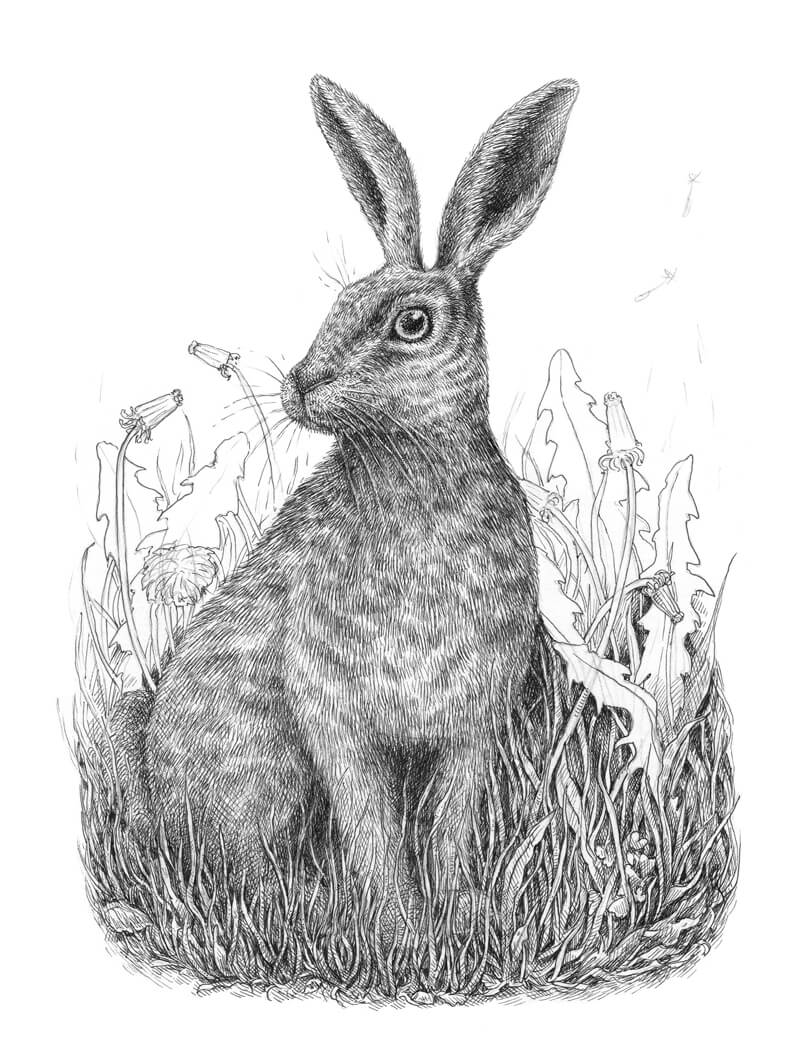
It’s time to complete the fur using the 0.05 and 0.1 liners. With a looser, more relaxed motion, I draw relatively long lines that imitate hairs.
Layering groups of hatches, it’s possible to create interesting effects that look like spots or stripes. They also help to communicate the illusion of texture.
The areas between the limbs are shaded, so I apply as many ink layers as needed to make them very dark. This creates the illusion of depth, while broadening the range of value.
On the bottom portion of the picture plane, where the foreground elements overlap our rabbit, I carefully blend the animal’s figure into its surroundings. “Blending” here refers to the process of creating a natural transition with the marks.
The limbs and the back side of our animal require such “blending”. The keys to achieving this transition are:
- Using a fine liner.
- Applying lines or dots that create a uniform pattern
- Avoiding extremes such as having areas that are too dark or too light.
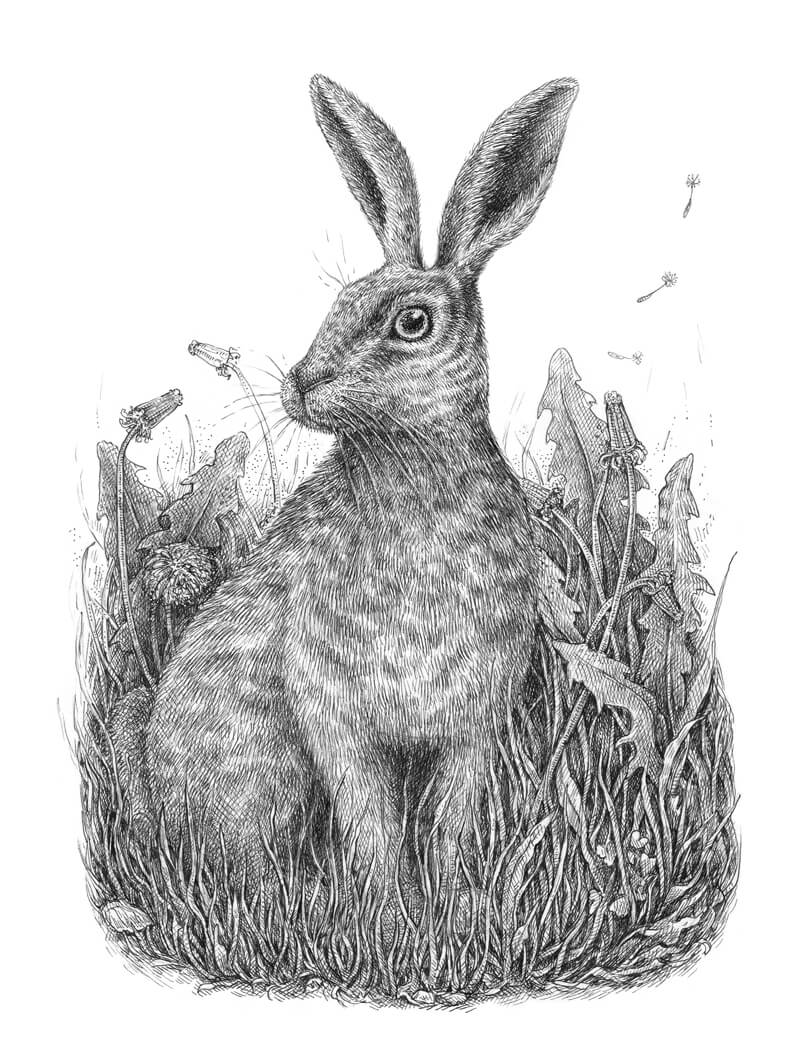
As a finishing touch, I erase the remaining pencil contours of the hare.
With the 0.05 liner, I add additional hatching to some of the background elements. To distinguish the leaves from the back of the rabbit, I darken the area behind the animal slightly.
It’s now time to evaluate the drawing. Some grass blades are too light, so I darken them slightly with the 0.1 liner. Also, I add some dots to the background, right above the leaves, to suggest burry silhouettes of something that is far away.
Three flying dandelion seeds near the corner of the artwork are a romantic symbol of the spring’s warmth. I mark them with the 0.05 liner.
Conclusion
Depicting animals and nature is fascinating, isn’t it? I always feel like there is something alive and tangible behind just a piece of paper.
Hopefully, you enjoyed this tutorial – thanks for being with me on this journey. I wish you much inspiration!
If so, join over 36,000 others that receive our newsletter with new drawing and painting lessons. Plus, check out three of our course videos and ebooks for free.