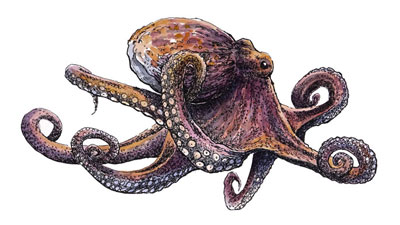
Pen and ink is naturally a linear drawing medium. (Stippling, a form of applying ink with a pen, is the only method that does not rely heavily on the usage of line to communicate the subject.) When creating a pen and ink drawing, the artist must use line to communicate contour, value, form, and texture.
This may seem like an overwhelming task, especially considering the permanence of the ink. But if we recognize that line direction, thickness, and concentration can all be exploited, then the task becomes easier.
A minority of pen and ink artists will argue that true pen and ink drawings should be made only of ink, with no pencil sketching. While this is a noble pursuit, it doesn't always lead to the highest quality drawings. Most of the challenges that deal with shape and proportion can be worked out with a light pencil sketch in the early stages of the drawing.
Since the final drawing should show no traces of graphite, a lighter mark should be made so that it is easily erased after the ink has dried. I prefer to work with an "H" graphite pencil for the initial sketch. This pencil is hard enough to make lighter marks, but not so hard as to make visible grooves in the surface of the paper. If grooves or indentations are produced in the paper, then they may show as the ink is applied.
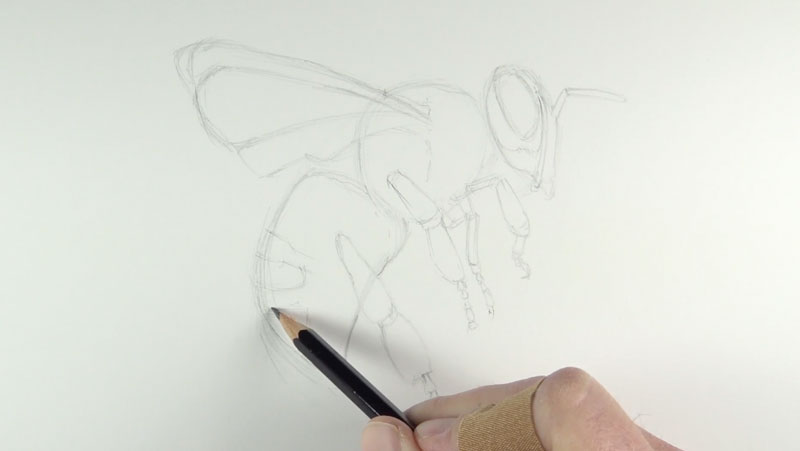
The initial graphite sketch can be very loose. The goal of the sketch is to layout the composition and build the basic shapes of the subject. Several lines may be made in an attempt to "find" the shape of the subject.
Once the graphite "skeleton" has been created, it is gently "lifted" with a kneaded eraser - leaving a light guide for subsequent pen and ink applications.
(Some of the following links are affiliate links which means we earn a small commission if you purchase at no additional cost to you.)
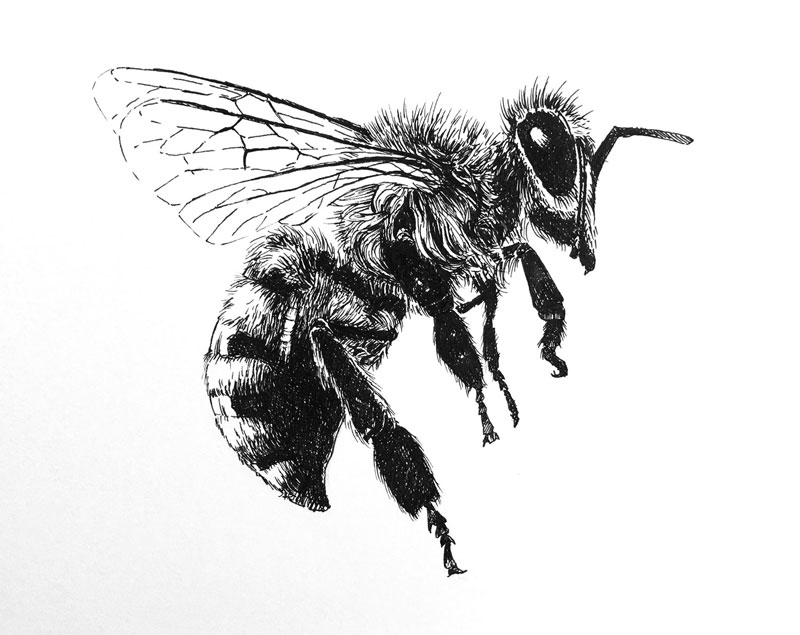
While a myriad of surfaces can be used for pen and ink drawing, most artists prefer to work on smoother papers. The line produced by the pen often mimics the surface in which it is applied to. For example, a line created on textured watercolor paper may appear broken, while a line created on smooth Bristol paper will have a crisper appearance. Smooth Bristol paper is used in this demonstration.
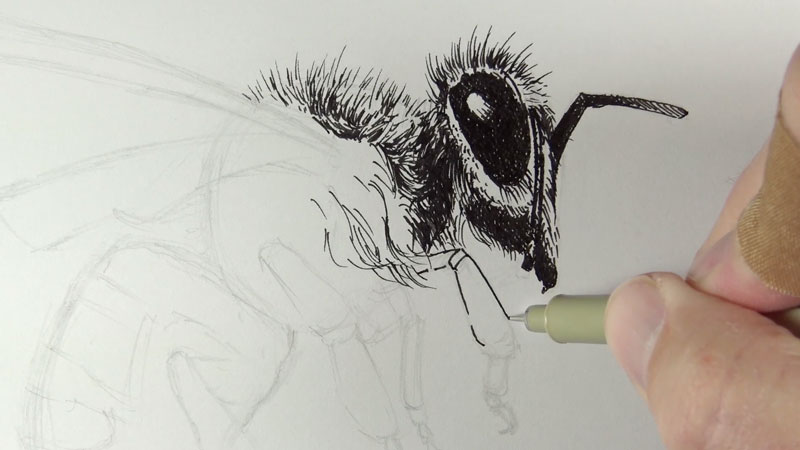
We'll begin with pen and ink applications on the head of the bee and work our way down the body. Starting with the eye, ink applications are cross hatched - leaving an area open for highlight. Lines are pulled outward around the edges to create the illusion of small hairs.
The thorax of the bee is made up of a concentration of hairs. For darker values, the concentration of marks are more intense. Directional strokes are varied to communicate the texture.
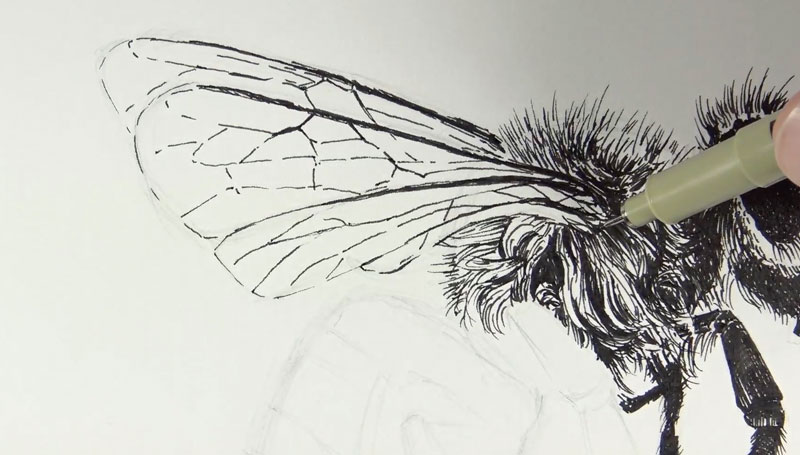
The wing of the bee must translate as a transparent object. This can be tricky with pen and ink, but varying the line quality helps to create this illusion. A broken line is used to define the outer contour. Thicker lines are used for the upper edge of each section of the wings. Thinner and partly broken lines are used for the pattern inside of the wings.
The abdomen of the bee features a distinctive pattern, alternating between yellow and black. But there is more to this pattern than just color. A textural difference also exists. The black areas are smooth and shiny, while the yellow sections are fury. The edge or contour reflects this textural contrast. The edge of the black sections are defined with a sharp line while the yellow sections are defined with lines that mimic the texture of the hair.
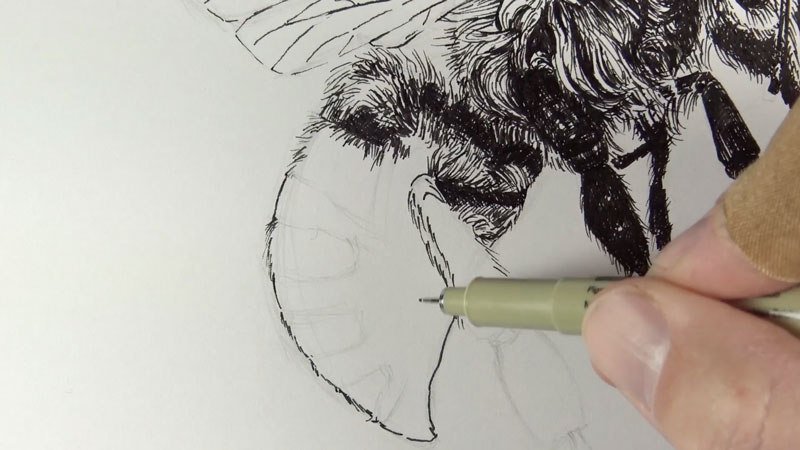

The manner is which the value is developed for each section of the abdomen should also reflect the contrasting textures. Heavy cross hatching is applied to the dark sections, while textural marks are applied to the lighter ones. A heavier concentration of textural marks are applied as they blend into the darker sections. An area of strong highlight is preserved along the edge of the darker areas to create the impression of reflection.
Each of the legs of the bee are developed by cross hatching marks. This allows for small specks of light to show through, creating a more natural appearance. Small hairs are also added along the edge by pulling a few strokes outward.
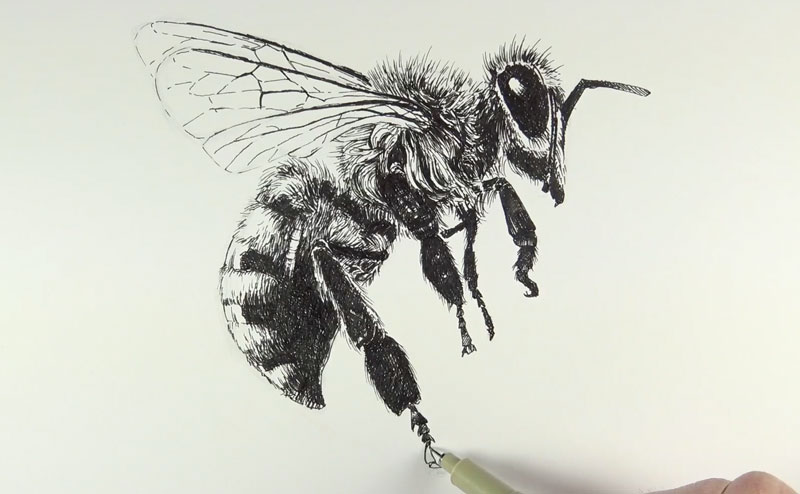
Lastly, a few more hairs are added to the thorax in between the wings to further the illusion of transparency. Once the ink has dried completely, the remaining visible graphite marks can be erased with a kneaded eraser.
Like with most drawing and painting media, patience is important. Take your time and allow the marks to do the work for you. Stay consistent with your application techniques and you are sure to find success in your own pen and ink drawings.