Today, we no longer rely on botanical drawings for scientific identification, but works of the past have inspired contemporary artists to carry on the tradition. Today, more and more artists are inspired by the natural world around them. Botanical drawing has once again become a popular genre for art-making.
In this lesson, we’ll take a look at the process of creating a botanical drawing of flowers with markers and colored pencils.
Botanical Drawing
In summer, we’re surrounded by beautiful examples of flora (fauna too). They’re a great source of inspiration. However, it’s easy to get lost in this abundance of subjects and run into another issue — lack of time to depict everything you want.
Combining the advantages of different artistic media is a way to solve this problem. It allows you to save time which means that you can capture more of the natural world around you.
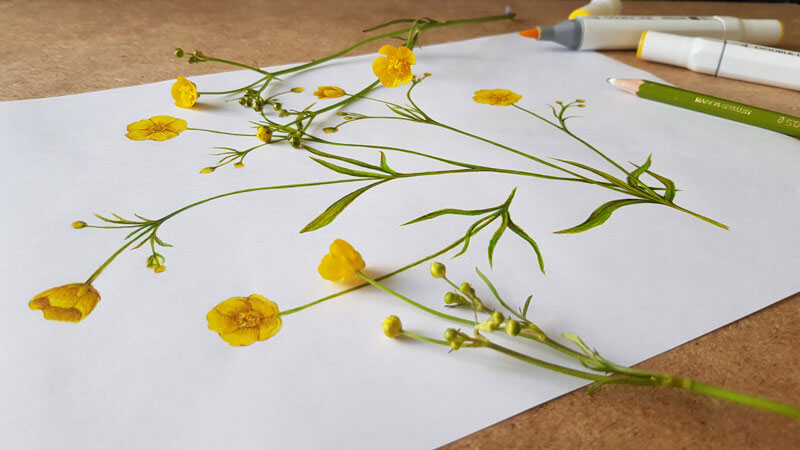
We’ll draw some buttercup flowers with alcohol markers and colored pencils in this demonstration. Colored pencils are a great medium for details, which is what we need for this subject. However, when used on their own, colored pencils are time-intensive.
Markers are a much quicker medium. However, the drawback to working with markers is that can be difficult to develop details.
But thankfully, we can combine markers and colored pencils, which will allow us to exploit the positive characteristics of each medium. We’ll use the markers to fill in areas of color quickly and use the colored pencils to refine the details.
Materials for Our Botanical Illustration
I’ll be using my usual set of art supplies for quick sketching. These tools are not as expensive as some others of well-known professional-grade brands. For me, sketching is a way to study a subject, experiment, and broaden my visual library.
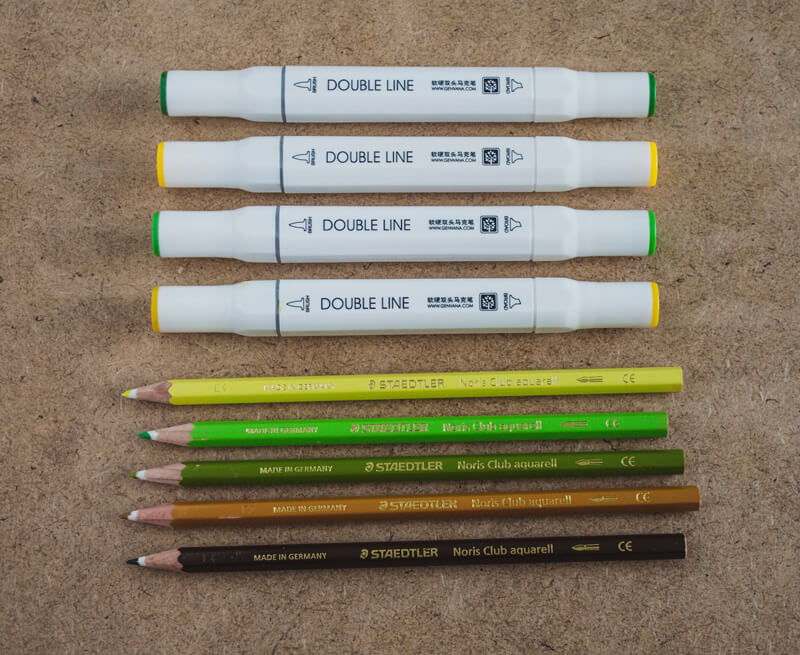
It’s also useful to keep an ordinary graphite pencil, a sharpener, and an eraser at hand.
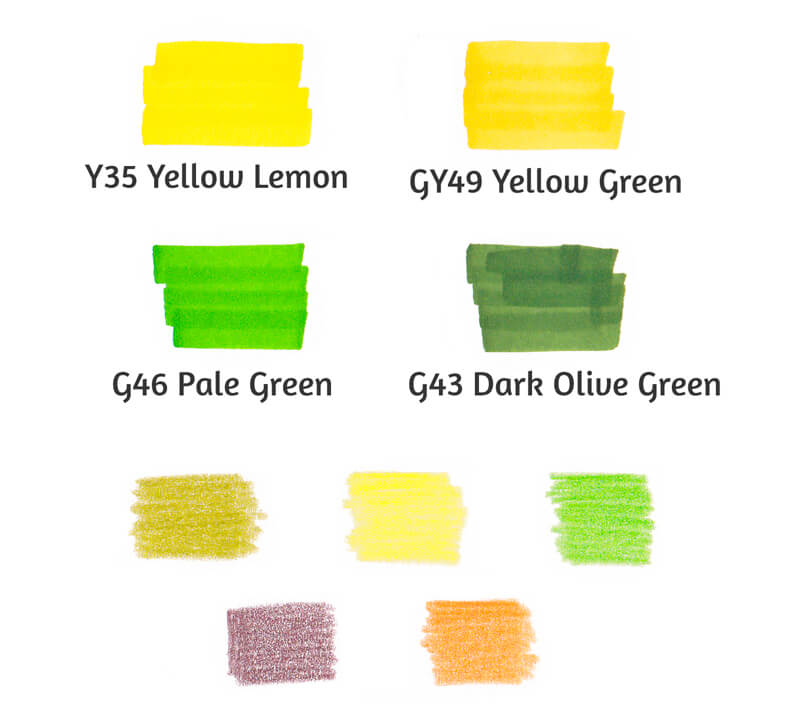
In the image below, you’ll find the color samples of alcohol markers (above) and colored pencils (below) chosen for this artwork. It’s just four markers and five pencils.
Technically, Staedtler Noris Club pencils are watercolor pencils. I won’t activate their applications with water, but instead use them as ordinary colored pencils.
The paper used is designed specifically for applications made with alcohol markers. It is sleek and has a special underlayer that prevents bleeding.
If you don’t have marker paper, you’re welcome to use ordinary drawing paper. Just remember that thicker paper tends to absorb more pigment, so the life of your markers will be shortened. You’re also likely to notice some bleeding.
Some beginning artists believe that you need a full set of colors to create a great work of art. I hope that this tutorial will be a reminder that it’s possible to create wonderful sketches with a limited number of supplies.
Find Your Drawing Inspiration in Nature
I believe that nothing beats drawing objects from direct observation. When you have a tangible subject in hand, you can rotate it to see it from multiple views. You’ll notice more of the details. You can even smell it if you wish. When you’re drawing from life, it’s easier to build an emotional connection with your subject.
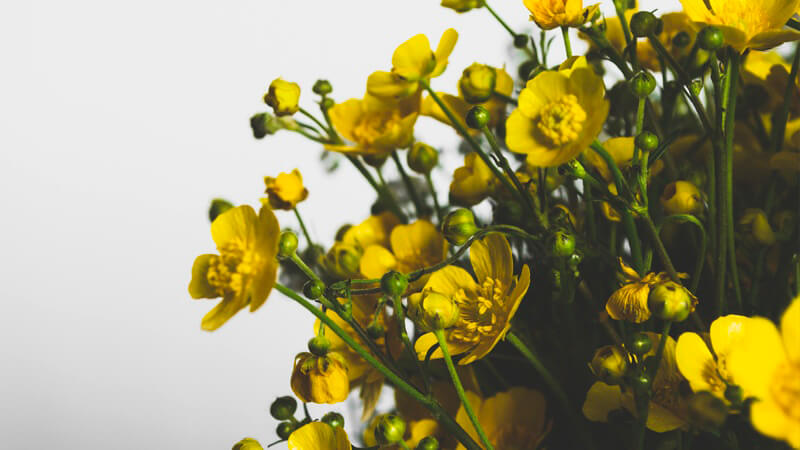
For this drawing, I’ve gathered a bunch of yellow buttercup flowers. They’re quite common where I live. Go outdoors and find something to draw that inspires you.
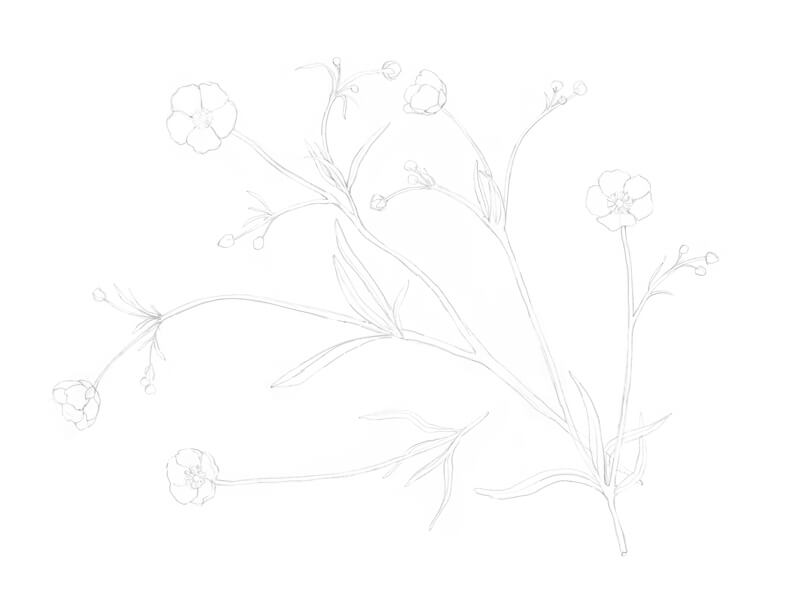
The first step involves only observation. Take a close look at your subject. If it’s a flower, pay attention to the shape and number of petals. What do you notice about the stem and leaves?
Experiment positioning your flower in different ways. Look for any natural lines and shapes that you find interesting and arrange your flowers to create an aesthetic composition.
Sketching Your Flowers
To begin the sketch, I choose one stem that seems interesting to draw, and sketch it with light graphite lines.
As I draw, I like to hold the flower in my hand. This approach isn’t comfortable for everybody since it makes getting an accurate depiction slightly more difficult. Another approach is to lay the flower on the table arranged in the manner that you wish to draw it.
There will be a couple of other stems, so it’s necessary to leave some space within the picture plane for them to be added. Usually, I don’t spend too much time thinking over the composition for a quick sketch. However, it is useful to have a general idea of it before starting the work.
To learn more about composition, see: Composition in Art
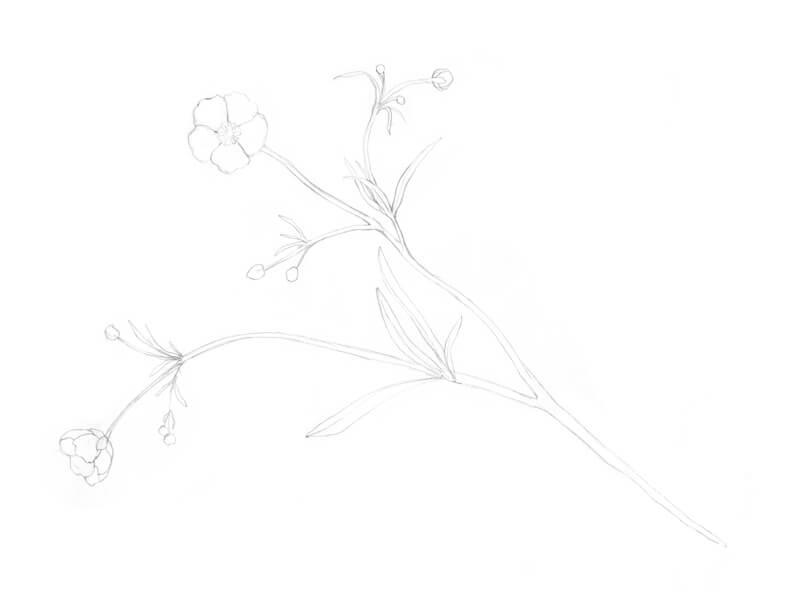
Next, I add another stem. It is overlapping the existing one, filling in the space on the right side of the paper.
Then, I add a flower on a shorter stem in the lower portion of the picture plane. This helps to balance the composition.
Depicting small flowers that have long stems and miniature leaves can be an advantage. This type of layout allows you to be creative with your use of the paper. If you need to fill in the blanks here and there, it’s easy to add additional stems and flowers.
Adding Color to the Flowers with Markers
Now we’re ready to work with color! The purpose of this step is to create a colorful base for subsequent colored pencil applications. As you may know, building a dense colored pencil covering usually requires many layers of pigment. With an under painting created with markers, we can speed up the process.
First, make sure that the pencil lines aren’t too dark. If there is too much graphite left from your sketch, it may make the drawing look dull or the graphite may smear when you apply the markers. It’s a good idea to remove excess graphite marks with a kneaded eraser before touching the sketch with a marker.
I begin applying markers to the flowers with Yellow Lemon. The markers I’m using feature two different tips: a brush tip for finer details and a broader tip for covering larger areas. I prefer the brush tip because it is quite soft and flexible. It allows making various marks, from thin and accurate to wide and organic.
However, you can get similar results with a tip of any kind. You may want to experiment get an idea of how your tool works if you aren’t familiar with it.
After covering the flowers, I next fill in the stems and leaves with Pale Green. This hue is the closest one to the natural green observed among my set of markers. But, when compared with the green of the actual flowers, it’s not quite accurate. The hue of natural green is more yellowish. We’ll correct the color with a colored pencil later in the process.
I leave small gaps between the marker strokes, especially in the leaves. They feature a noticeable texture of thin lines or veins. I’m going to create the illusion of this texture by leaving these gaps of untouched paper. Later we’ll cover these open spaces with new layers of color.
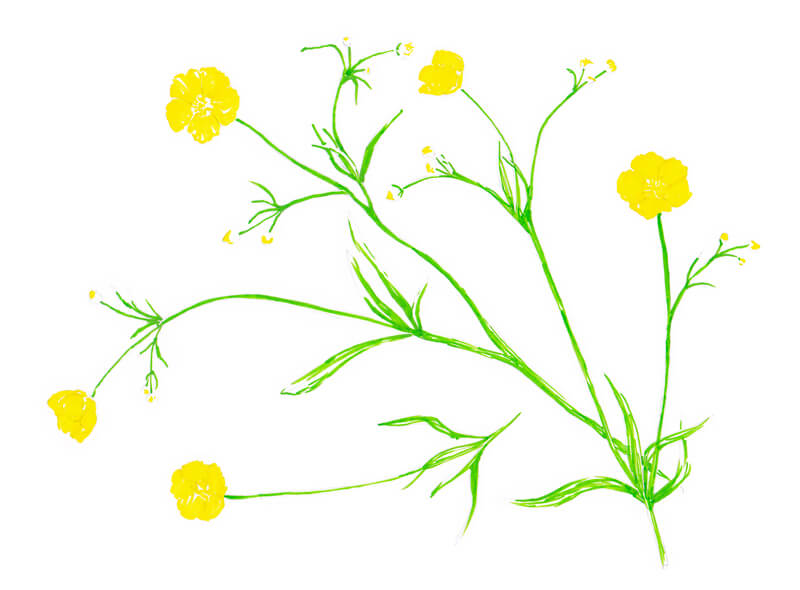
Next, I add Yellow Green to the flowers and partially to the stems and leaves. This step helps to unify the drawing.
I also add Dark Olive Green to the green areas, accenting the stems and leaves. This shade is relatively dark, so it’s important to use it sparsely and with accuracy.
Of course, we could add more layers with alcohol markers, but our color palette is limited and much of the complexity of color will be developed with colored pencils.
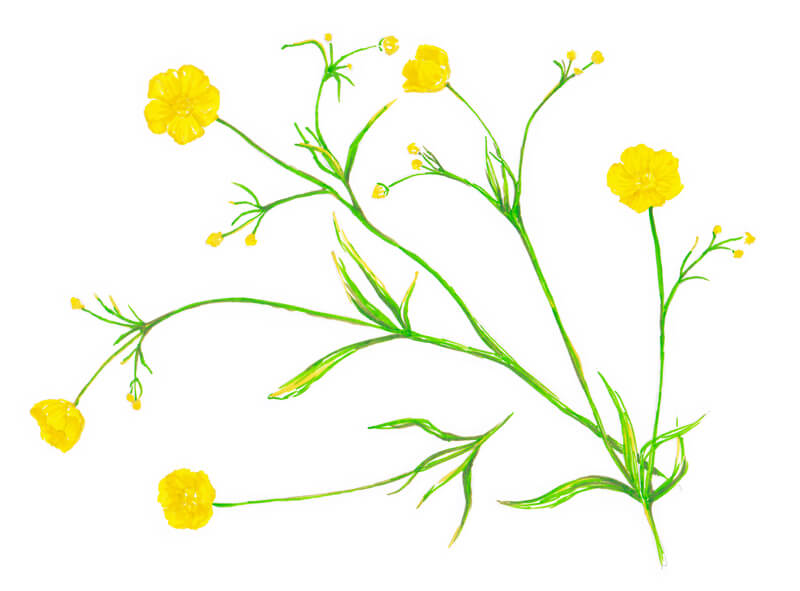

Applying Colored Pencils to the Drawing
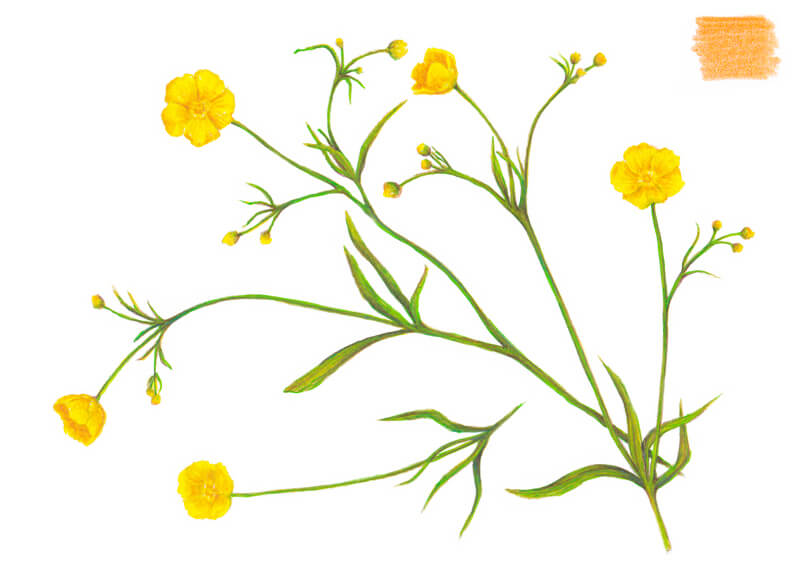
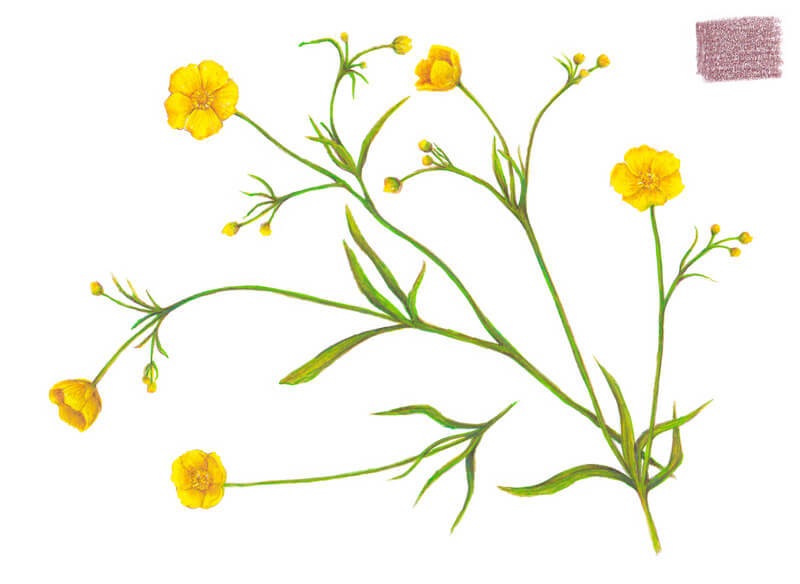
As the pencils I use don’t bear the names of colors on their casings, we have to invent them on our own. I’m going to place small samples of colors that I use in the following steps in the top right corner of each image. That way, you can match them with your own pencils if you’re following along.
I add some yellow-green pencil strokes to the stems and leaves. This makes the greens appear more natural and makes the color more consistent.
I add light yellow strokes to the lightest parts of the petals and to green areas. The pressure is quite heavy, but the surface of this paper can endure it.
I also include some bright green to the sketch. This adds some variety and richness to the color.

After taking a closer look at the stems, we can see a brownish hue. I add some dark reddish brown to the green areas. The tip of the pencil is sharp, allowing for thin, controlled lines. I carefully accent the contours with this pencil.
The addition of the reddish brown increases the contrast and leads to a broader range of value in the drawing.
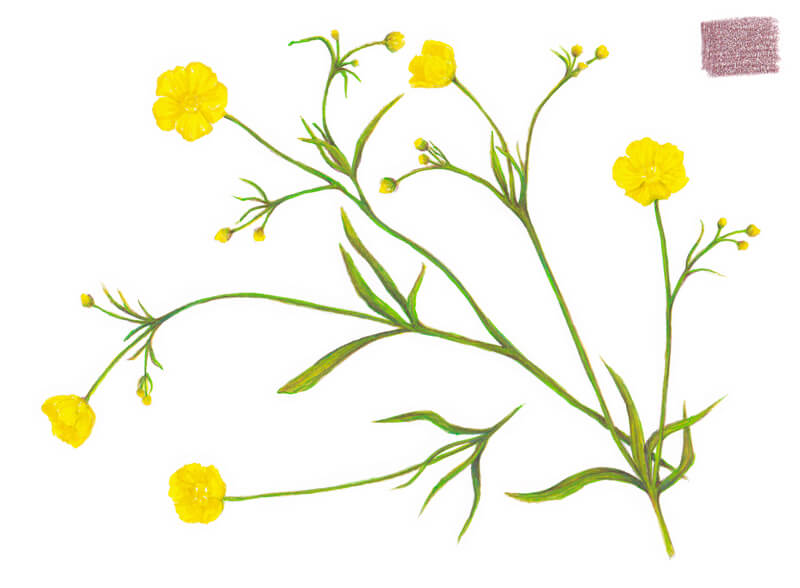
The stems and leaves are now complete, but the flowers are still almost untouched. I add some rust brown strokes to the flowers, creating soft shadows in the center portions and between the petals.
I also strengthen the undersides of the small bud-like segments.
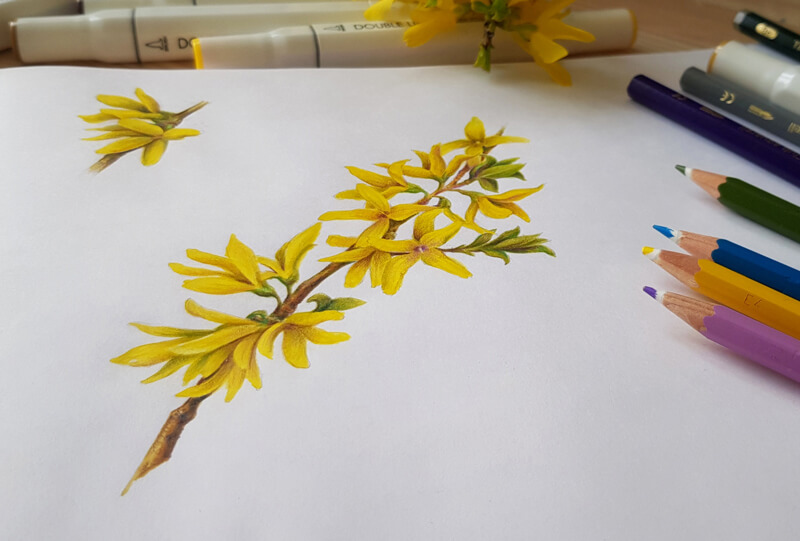
Our drawing is almost complete. After taking a moment to evaluate the art, I see that the centers of the flowers still need additional details and contrast.
With a very sharp pencil, I add some depth to the flowers using the same dark reddish brown that we used before. Be careful – too much of it will darken the flowers and they’ll lose saturation.
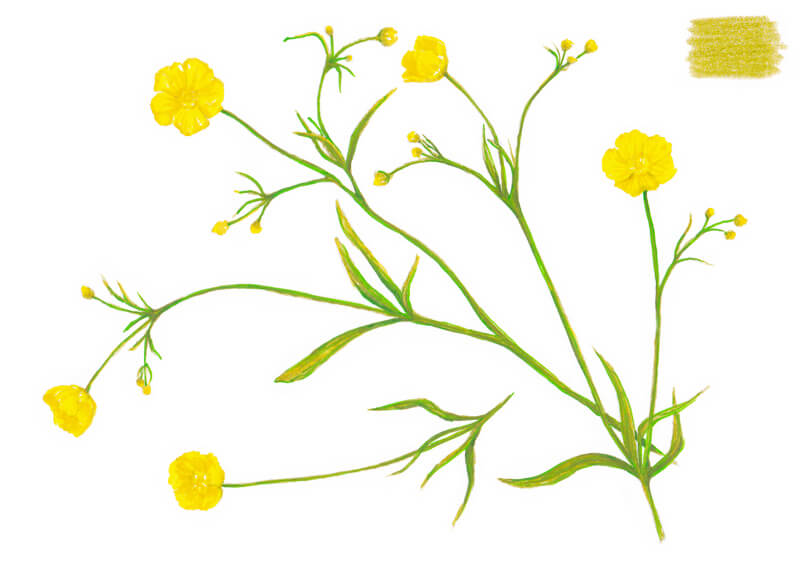
Conclusion
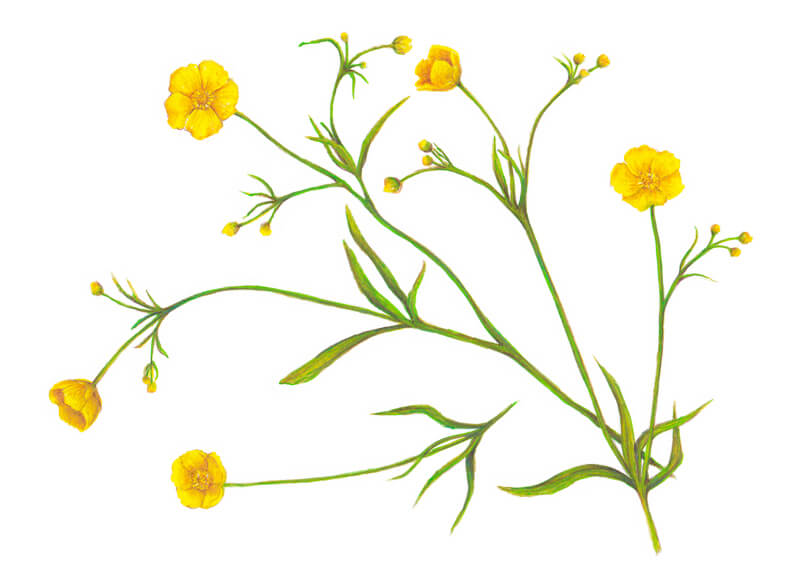
Great work! We’ve completed this quick botanical sketch.
I hope you’ve enjoyed the process of using both markers and colored pencils. This combination of media definitely has its advantages and works great for drawing botanical subjects.
More Drawings of Flowers Created by Combining Markers and Colored Pencils
Let me share with you a couple of drawings I created. These botanical sketches were created in the same manner as the one we’ve worked on today. The art supplies and colors were also limited in these examples.
Hopefully, these examples inspire you to create your own botanical series and explore the possibilities of mixed media techniques!
It’s possible to create relatively complex and detailed sketches in a short period of time. You could even create your own drawings on location if you like.

Thank you for joining me on this journey. I hope that you’ve enjoyed our look at the process.
If so, join over 36,000 others that receive our newsletter with new drawing and painting lessons. Plus, check out three of our course videos and ebooks for free.