Interesting to know: a falcon is any species in the genus Falco. There are about 40 species of falcons worldwide. The Latin word, falco is believed to derive from the Latin, falx (“sickle”) because of the shape of the birds’ wings.
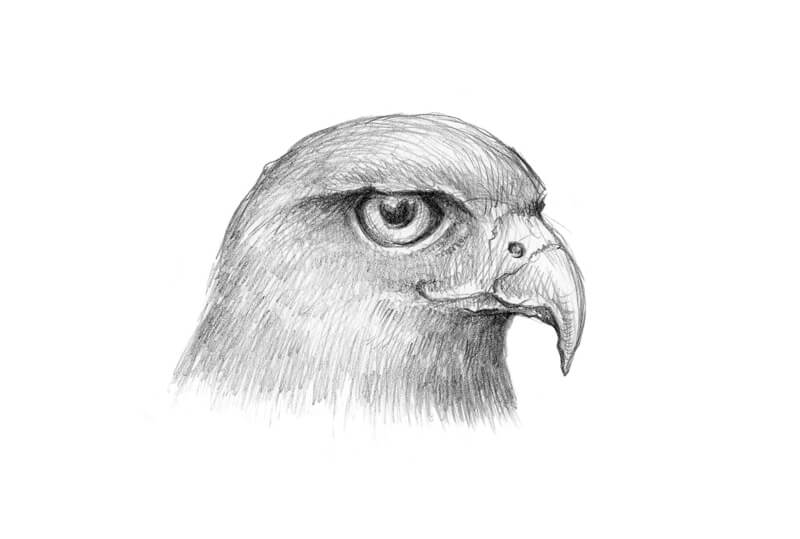
The feathering of falcons features a peculiar combination of light and dark areas, so it’s a great chance for us as artists, to study the values and textures on a truly beautiful specimen.
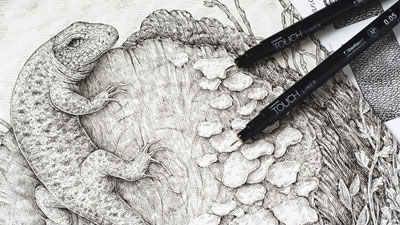
I’ll be using three ink liners (the numbers are 0.05, 0.1 and 0.2) for a relatively small drawing. A nib pen, instead of liners, is a great option for this drawing, too. A graphite pencil and an eraser will be helpful for creating an underdrawing.
Researching a Falcon
Before diving into the process of making marks on paper, it’s useful to do some research. Learn more about falcons by reading several articles or watching videos! Additional knowledge about anatomy, special characteristics, and the life of the bird may help to make your art more realistic.
For example, it’s quite difficult to draw a flying bird without understanding how its wings work. Of course, you don’t have to go too deep into specifics. Being familiar with the general structure is often sufficient. But, researching your subject may give you some inspiration.
Here’s one of my exploratory sketches. I focused on the eye, with a thin ring of bare skin around it, and its position on the head.
By the way, falcons can see up to 8 times more clearly than the sharpest human eye.
I believe that nothing compares with drawing from life. But, observing a live falcon is likely not a possibility. A quick image search may help you to better understand the structure of this bird. I’d recommend looking at many photos from different angles.
Creating Miniature Sketches
At this stage, I draw several quick mini sketches. The purpose of this exercise is to help me decide which angle and composition will work best for this particular drawing.
These sketches are rather stylized schemes so they don’t have to be absolutely correct from an anatomical standpoint.

Let’s treat this concept as not just a generic falcon, but as one with its own emotions and unique features.
Please keep in mind that a miniature sketch is just a guideline for your final artwork. The process is flexible, so change your initial concept as many times as you feel necessary.
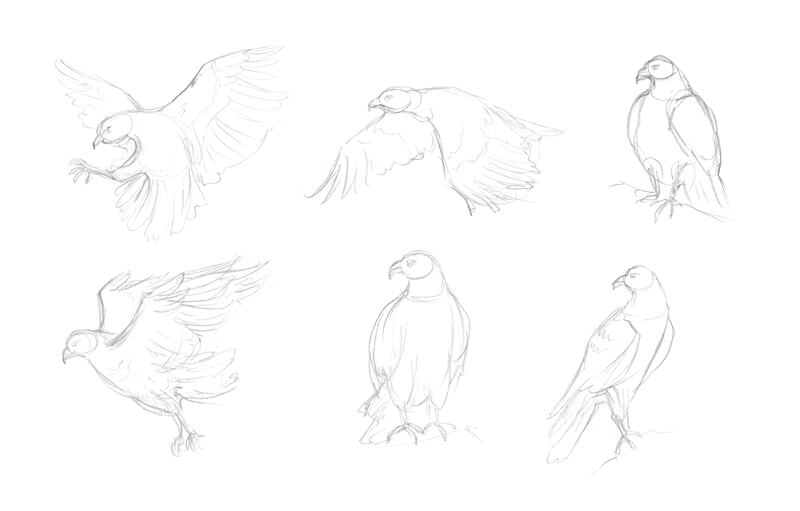
In the very beginning of the process, I was leaning towards a dynamic pose where the wings are open, taking up a relatively large portion of the paper.
But, after observing my quick sketches, I decided to go for a more static option. First of all, the size of paper for our final artwork feels too small for a dynamic, expansive pose. We could fit the wings into this format, but sacrificing details isn’t something I really want to do.
Another reason for this decision is the impression created by the pose. A “calm” pose, where the falcon is sitting on a piece of wood, with its head in profile, accents the attentiveness of the bird’s look and presents the falcon in all its majesty. I feel like the bird is ready to dart off at any moment!
Creating a Pencil Underdrawing of the Falcon
I sketch the falcon with light pencil lines, presenting the figure as a set of simple shapes, also marking the wings and tail feathers. The talons are just a framework of lines.
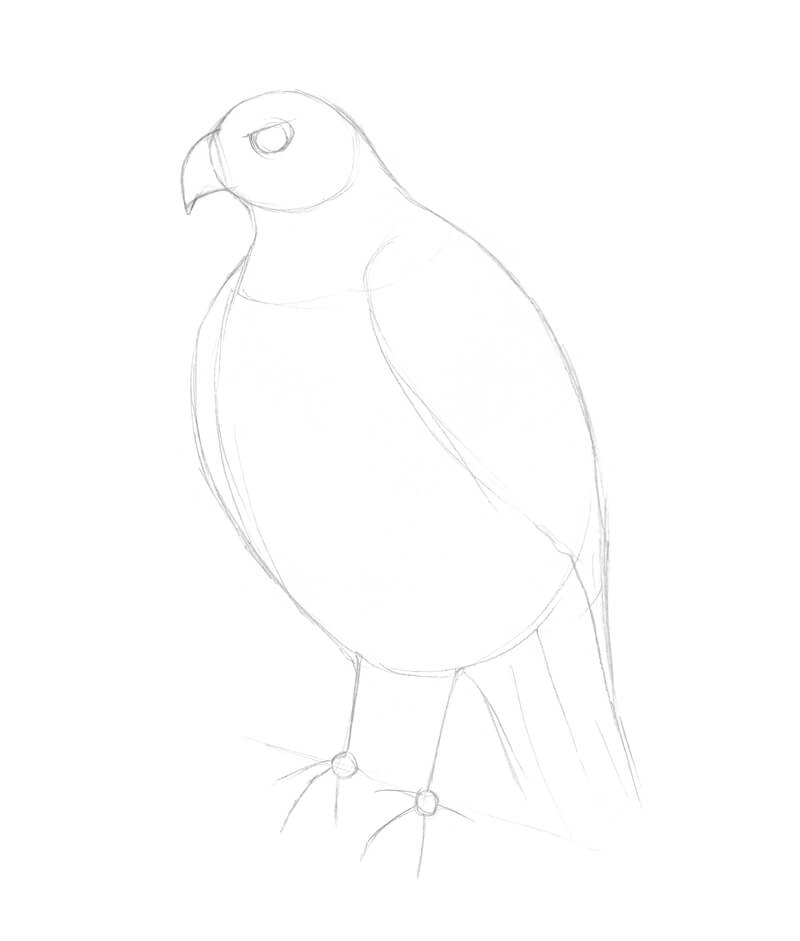
I refine the contours of the falcon’s head and mark out the contrasting pattern of dark and light areas. Some species of falcons, like Peregrine Falcons, usually have a black malar area (so-called ‘cheeks’) and a black ‘cap’.
I also mark the pattern on the bird’s body. There are small dark spots on the belly and thin stripes on the chest. The falcon’s tail feathers also feature lateral stripes.
The beak is relatively short, sharp, and strongly hooked. Falcons’ beaks are equipped with a tooth, which is a sharp triangular-shaped ridge on the outer edges of the beak.
Falcons have three forward claws and one back claw. The claws are long and sharp.
How to Draw a Falcon with Ink
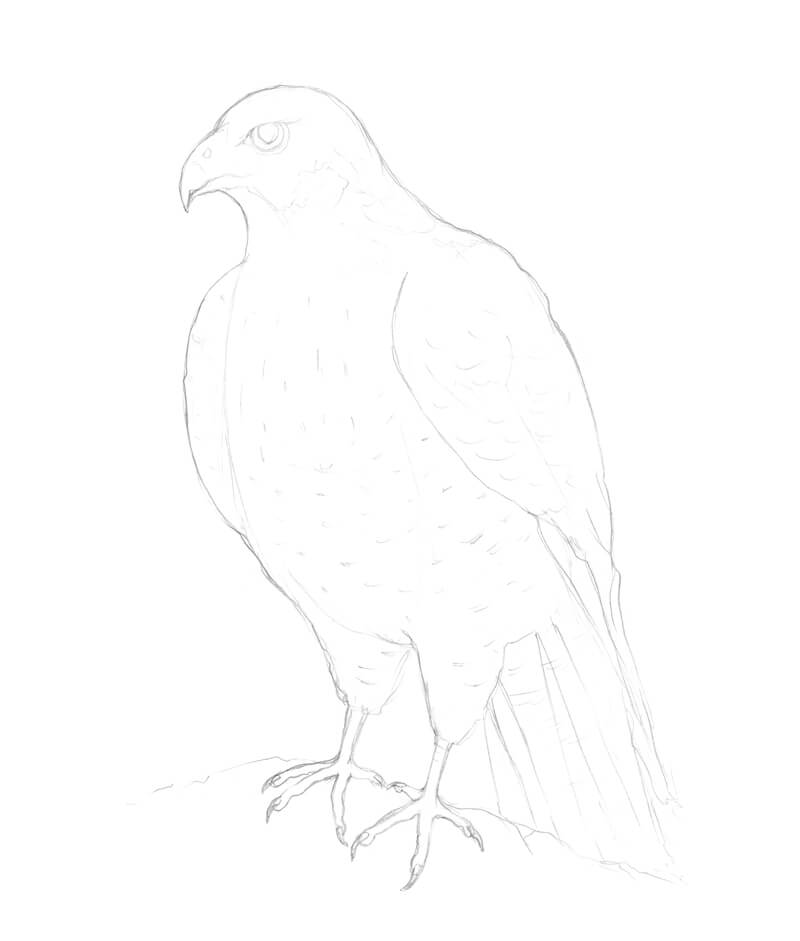
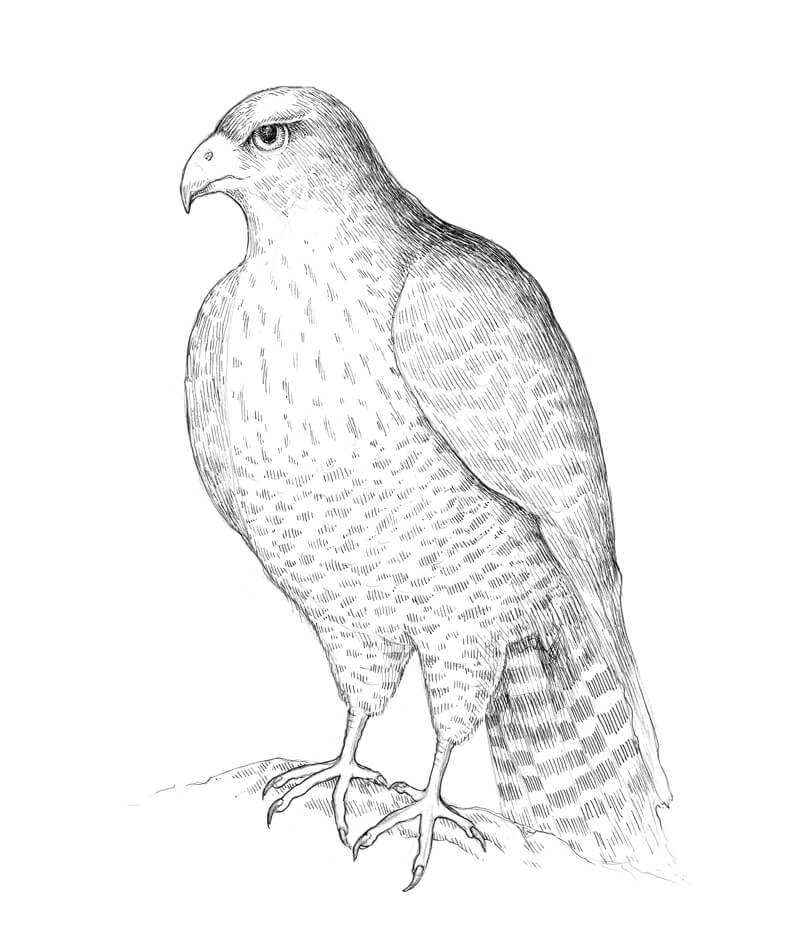
Now we’re ready to move forward with ink. I start inking with the 0.05 liner, gently outlining the main contours of the bird. It’s necessary to be careful with the contours, especially where the lighter parts of the body are – for example, in the neck area. The lines should be thin. Make gaps in the contour line, if necessary, or replace it with a set of short hatches.
Also, I darken the pupil, leaving a small area of bright highlight, and touch a few marks on the area near the eye.
I feel like developing the eye to an almost complete stage at the beginning of the work is important. The eye will become a focal point, so it often makes sense to start here.
With groups of hatches, I mark the darker areas and create a subtle differentiation between the wings and the body.
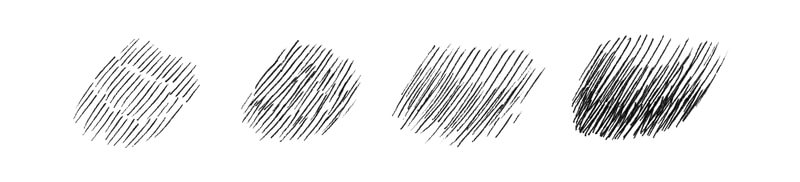
Now we’re ready to start developing the texture of the wings. But how should we do this? When it comes to hatching, there are some options to choose from.
Hatches can be parallel – or almost parallel. Or, there can be some variation in their direction. When used alone, parallel hatches look somewhat unified, like a pattern. That’s why I’ll be using mostly parallel hatching to create patterns of the falcon’s feathering.
In some cases, this technique may accent the distance between the depicted subject and its viewer. Or, make the artwork rather schematic or stylized.
The variation in direction makes the hatches feel more spontaneous and natural. By varying the stroke, we can work an area of thinner and softer feathers. Leave open gaps between hatches deliberately. This open space can create the illusion of spots or stripes.
I recommend experimenting with speed and pressure while drawing. Try to create lines, varying their length, layering new lines on top.
With the 0.1 ink liner, I create the pattern on the falcon’s body. The small spots on the belly and chest and the wide stripes on the tail feathers are addressed. I vary the pressure placed on the pen from light to medium. The lines accent the ‘flow’ of the bird’s body, conforming to the cross contours.
Also, I mark the most prominent features of the texture underneath the bird.
See also: Drawing With Ink Liners: Natural Textures
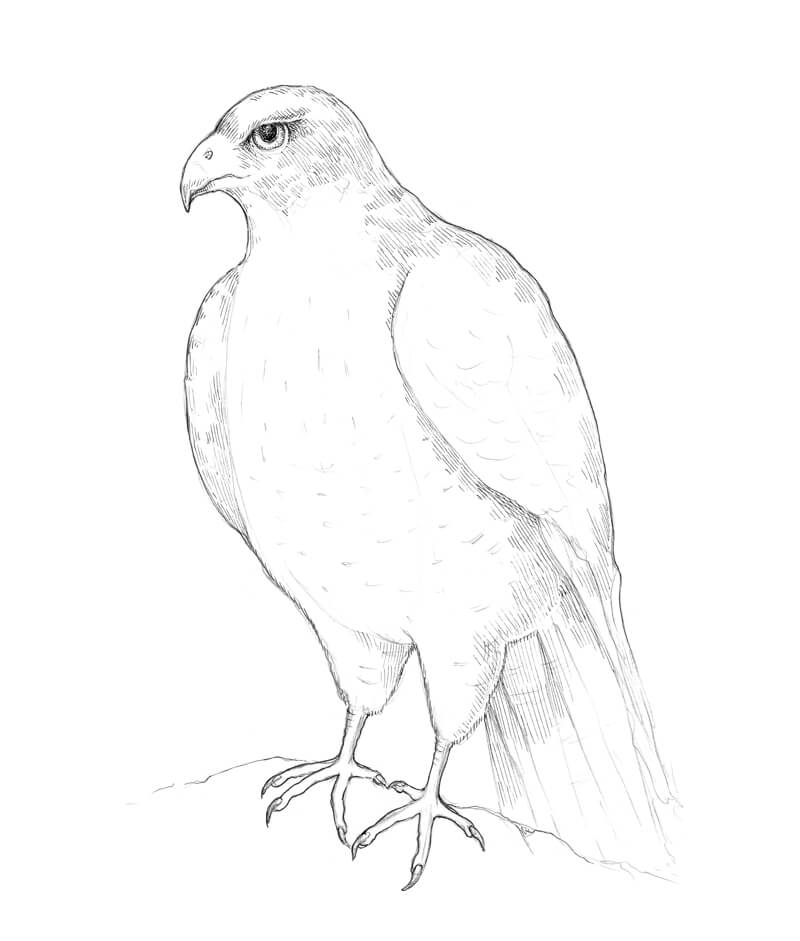
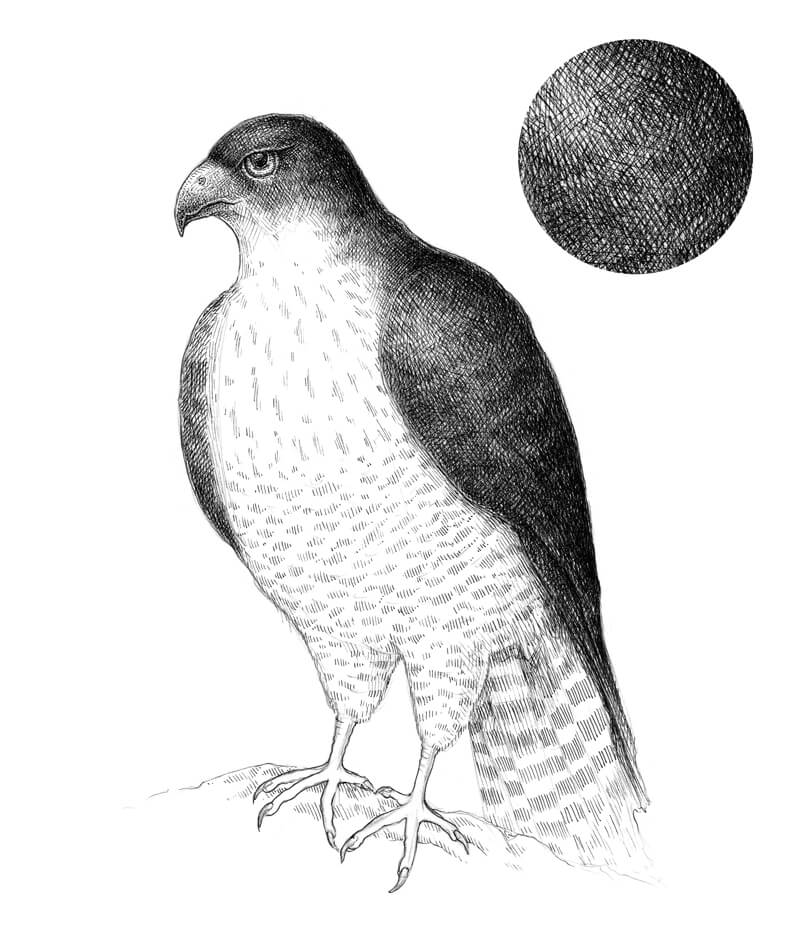
I increase the contrast in value, using the 0.2 ink liner. The darker areas, including the wings, become even darker. Since we’re placing light pressure on the liner – new hatches, especially their ends, look fine and harmonious. Changing the direction of the hatching slightly also adds variety.
I continue adding hatching, using the 0.1 liner, gradually layering ink hatches to create a uniform, dense, and smooth covering. In the image below, you’ll find a close-up of such hatching.
To give the falcon more volume, I use contour hatching in the head and neck areas. The upper part of the head should be a little lighter to reflect the light source, so I make sure that there are not too many ink marks.
See also: Hatching and Cross Hatching
I darken the tip of the beak, using thin hatches and dots.
The wings have a subtle pattern of relatively large darker spots. I develop this pattern with groups of parallel lines. The relief is created by thick feathers on the wings. Creating some diversity here by including both denser and less dense areas of ink marks.
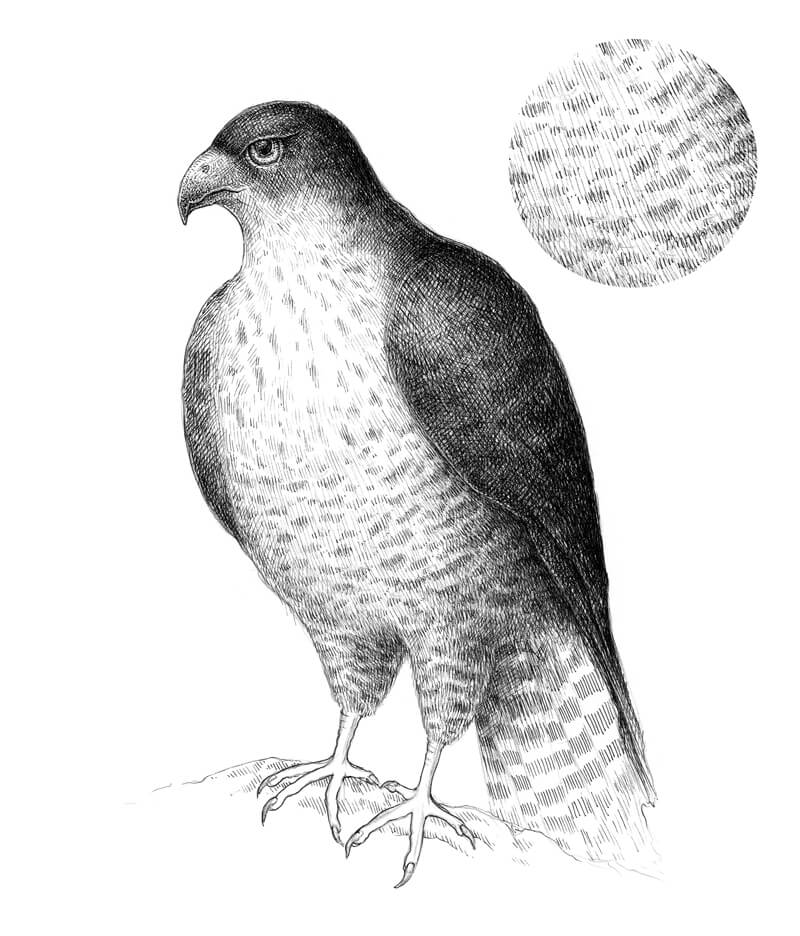
Some areas of our falcon’s body are in shadow. For example, the legs and the belly are areas of core shadow. At the same time, those parts are white or light gray with a contrasting pattern of dark spots.
To darken the “light” areas without losing the impression that they are actually light, I’ll use the finest 0.05 liner at minimal pressure. If necessary, I strengthen the dark spots in the feathers to keep the pattern clearly visible. As a result, we get a beautiful contrast between the thinner and wider lines.
Working with fine hatching has an advantage. It can unite the drawing visually, making it look more harmonious. Also, thin hatches can appear as graphite shading from a distance.
Pay attention to the contrast of the pattern on the body. The more shadow, the lower the contrast will be. Usually, we don’t notice many contrasting details if there is insufficient light.
I add some curved contour hatching to the sides of the bird’s figure to give it more volume.
The artwork is close to completion. But now it’s time to work on the falcon’s talons. With the 0.1 ink liner, I create the illusion of relief and volume, accenting the sides of the feet and toes with contour hatching. Don’t overdo them – the talons are relatively light.
I add a cast shadow under the feet, so the falcon appears grounded.
There is a shadow on the tail, behind the legs. I accentuate it with several layers of ink hatching. The striped pattern on the feathers should still be clearly visible.
However, I let the bottom part of the tail fade as it extends outward, so it blends smoothly into the surrounding space. The same principle applies to the surface under the bird.
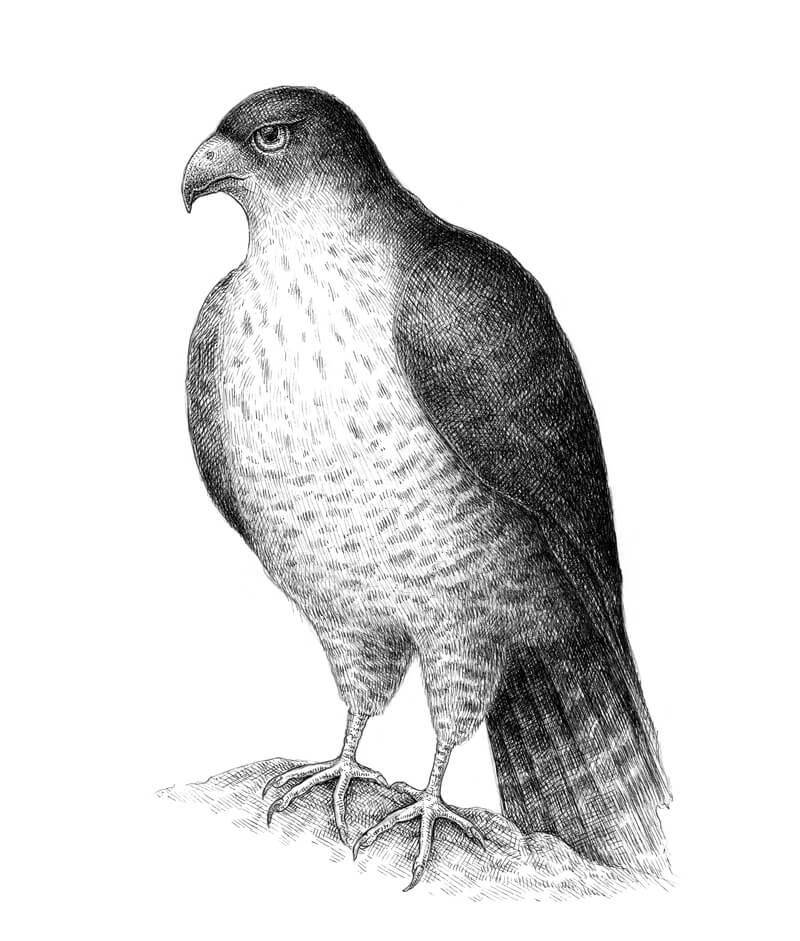
We could add more details to the feathering, but as our artwork doesn’t have a background, I think it’s time to stop and call it finished. Sometimes a slight stylization is a great thing!
Conclusion
Congratulations – the drawing is complete! I hope that you enjoyed both the process and the result of our work. Thanks for being with me on this creative journey!
The world of birds is huge and full of wonders. There are endless possibilities to explore and be inspired.
If so, join over 36,000 others that receive our newsletter with new drawing and painting lessons. Plus, check out three of our course videos and ebooks for free.