A wrong motion can leave an unpleasant blob or smear on your paper. It’s also possible to lose focus or make an erroneous decision. Anything of this kind may lead to the question: “How do I correct this disappointing mistake?”
Ink has a reputation of being an unforgiving medium. This idea may be holding many artists back from entering the world of ink drawing. It’s true that in some cases we may have to start over, but such cases are not as frequent as you might think.
In this article, we’ll discuss various tools and techniques that we can use to correct mistakes made with pen and ink. Perhaps you’ll see that you may not have to start over after all.
Related reading: 7 Must Have Pen and Ink Supplies
But before we dive into our solutions, let’s take a look at preventing the mistakes in the first place and the meaning of imperfection.
What Is a Mistake in a Pen and Ink Drawing?
There is a belief that ink as a medium attracts artists that love the sense of control. Some art media, like watercolor, doesn’t give us that kind of feeling and requires a different mindset.
If you like to be in control, anything that differs from your initial plan may be considered as a mistake. Sometimes we become so attached to our vision that any accidental deviation – even the lucky ones – should be rejected and considered a mistake. It’s unfortunate that some approach art in this manner since our “mistakes” may make our art even more interesting or feel more spontaneous.
So what if those little things that we call “mistakes” aren’t actually mistakes?
What if their purpose is to enhance our work – only if we allow them to? And what if it’s rather a matter of individual perspective than an objective thing?
Of course, real mistakes do happen and they should be addressed and not ignored.
For example, if we consider a drawing from life that should be realistic but the values are incorrect – chances are that the result will look neither believable nor attractive. Our eyes are naturally trained to notice the imperfections. If we notice them, then our viewers will too.
The best cure for this type of mistake is practice. The more you draw from observation and train your eyes, the better your drawings will become. This type of mistake is skill-based and will only be rectified by improving your skill – which requires practice.
Even still, I strongly recommend that you keep an accepting and positive attitude to any form of imperfection. If you did something wrong because you lack skill, don’t beat yourself up – as long as you’re moving forward, there is progress. Everyone, even people that we view as masters, face difficulties along the way.
The last thing to mention before we continue is time. Always take a break before deciding that a “mistake” needs correcting! Chances are that you’ll come back to your drawing in a couple of days and see its beauty and charm.
For me and many other artists, a time gap is crucial. Right after I’ve finished a new piece, I see all of the “problems”. At this point, the mind is still too focused on details – it can’t see the picture as a whole! But after a bit of time, I can see all of the things I’ve done correctly and I can appreciate the finished work – “mistakes” and all.

The Power of Prevention
Let’s remember the old truism that prevention is better than a cure. How does prevention look in the context of art made with ink?
When I was preparing this article, I had to think about my own creative process. To be honest, I make things that can be called mistakes quite rarely, therefore there is no frequent need to correct them. Why?
First, I avoid distractions while drawing and make sure that I’m as focused and observant as possible. This allows me to reach a state of “flow” and, paradoxically, feeling relaxed. The process becomes easier and more fun!
Second, I do my preliminary work. It may include searching for the necessary reference photos and examining them, studying the objects, creating sketches and so on.
Having a pencil underdrawing for your finished artwork helps a lot. When you start a new ink artwork, it’s easy to get caught up in the “fear of blank paper” trap. Careful thinking through the work with a pencil in hand eliminates the fear. No more guesswork while inking!
Before taking to your nib pen or liner, make sure that you have everything you need at hand (for example, the supplies and reference photos). Take a deep breath, clear your mind, and surrender yourself to the process of creation.
Be Aware of Smearing
While drawing with ink, watch carefully if your newly drawn lines are steady and dry enough. If your ink isn’t dry, it can easily smear. This especially applies to slick, glossy types of paper because inks dry slower on them.
After completing the artwork, let the ink dry completely before erasing any pencil marks that you used as guidelines.
Smears are perhaps the most common mistake when drawing with ink, but also the easiest to avoid with a little patience.
A quick tip: working with a waterproof ink ensures that your beautiful lines won’t be washed away with an accidental drop of liquid like water or tea.
Seven Ways to Correct Mistakes in Ink Drawings
1. Make the Mistake a Part of Your Drawing
Sometimes it’s possible to incorporate an accidental imperfection into the artwork, so no one will even notice it. No matter what kind of mistake it is – a blob of ink, a smear or an irregular line, try to approach it creatively.
A few options to transform your drawing are:
- Add more ink dots or lines to ‘blend’ the imperfection.
- Draw a new element/object, based on the “mistake”.
- Create a background or pattern.
- Apply some watercolor washes or colored pencil/marker covering.
Chances are that your imperfection, big or small, can be worked around.
Consider your surface when deciding how to “fix” a mistake. Thicker paper is more adaptable to watercolor additions and other methods that are effective for hiding or blending.
2. Cover the Mistake with White
Inks, Gouache, and Acrylics
Chances are that you’re drawing with black ink on white paper. In this case, you can paint over the unwanted ink strokes with white, using any artistic medium at your disposal.
After the white covering is completely dry, you can draw with ink on top or just leave the area as it is.
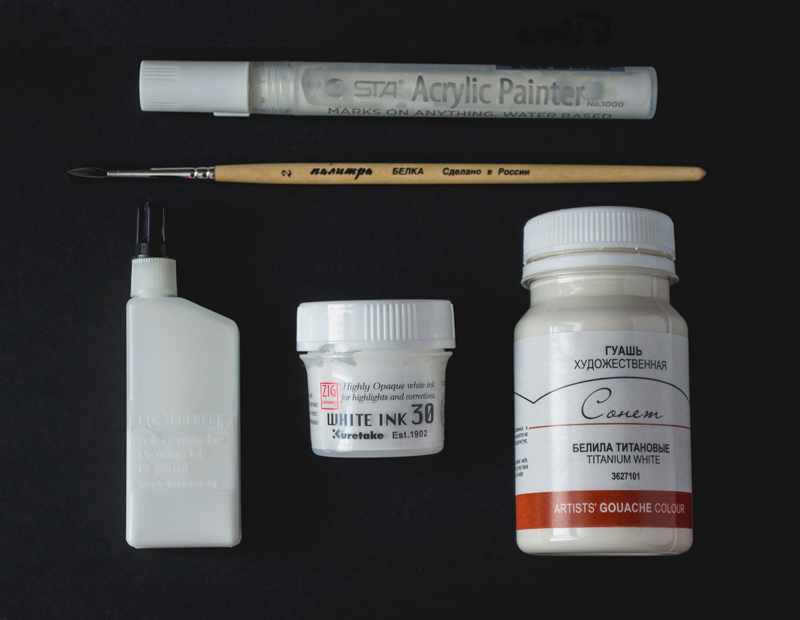
Here are some supplies I use:
- A white acrylic marker.
- White ink (make sure that its covering is opaque enough).
- White gouache.
Of course, you’ll need a brush to apply ink or gouache.
All these supplies can be used to cover a relatively large area. However, keep in mind that larger areas will draw more attention.
The potential drawback of this method is that white paper is rarely pure white, though it may appear so. Your paper and any white covering may seem slightly different visually and may actually draw attention to the mistake rather than hide it.
For example, it’s a common issue that the painted covering looks cooler in hue than the paper. That’s why it’s a great idea to add a little bit of yellow (or another color, depending on the situation) to your white base covering.
Another potential flaw of this method is that the painted area will have a different sheen from the paper. Of course, you have to examine the artwork closely to see that difference, but in some cases this contrast in texture can be very distracting. This effect can be hidden under glass however – if you decide to put the artwork in a frame.
There are also various correcting fluids that are used mainly to cover handwriting mistakes. It’s possible to give them a try, but I don’t recommend relying on this option. Such fluids may create a rather coarse, textured covering and the tint is very different from that of your paper.
If your paper isn’t white, you may have to mix paints to match the colors. It’s a tricky and relatively demanding method, but it may pay off.
Gel Pens
Gel pens are handy when it comes to correcting small areas in the drawing.
Since all pens have their own distinctive features, it’s important to choose a brand that fits your needs. I prefer the tools that provide a dense white covering on the first attempt. This means that you don’t have to layer the stokes to get the desired result.
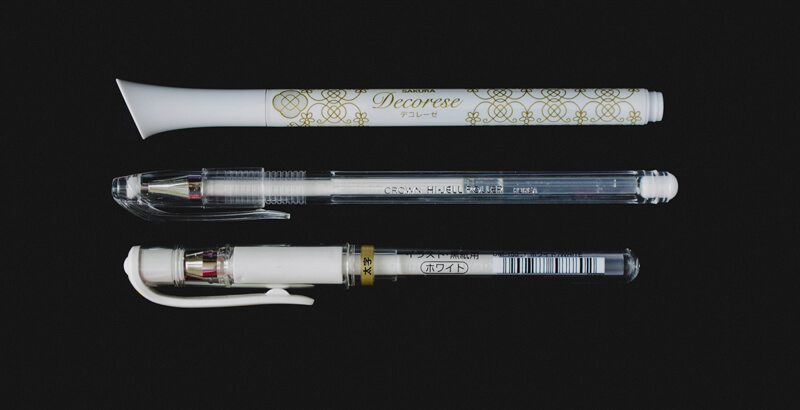
Keep in mind that gel pen strokes, placed on top of ink marks, usually create a relief. The thicker lines require more effort to cover.
In the image below, you’ll find some examples of such coverings. Note the difference between the paper and the corrected areas.
This method works for most types of paper. In some cases, it’s the only way to fix the artwork (for example, if thin paper is used).
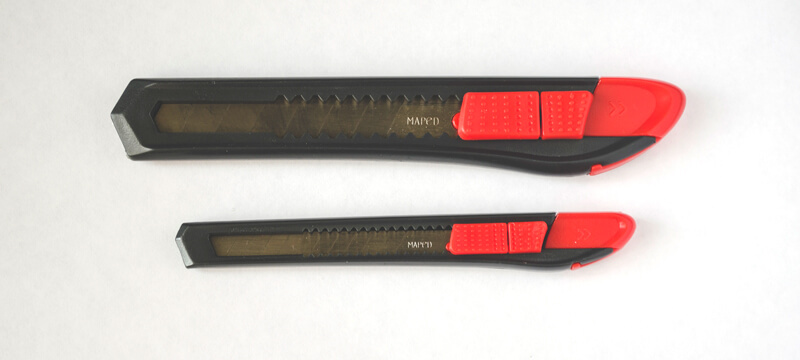
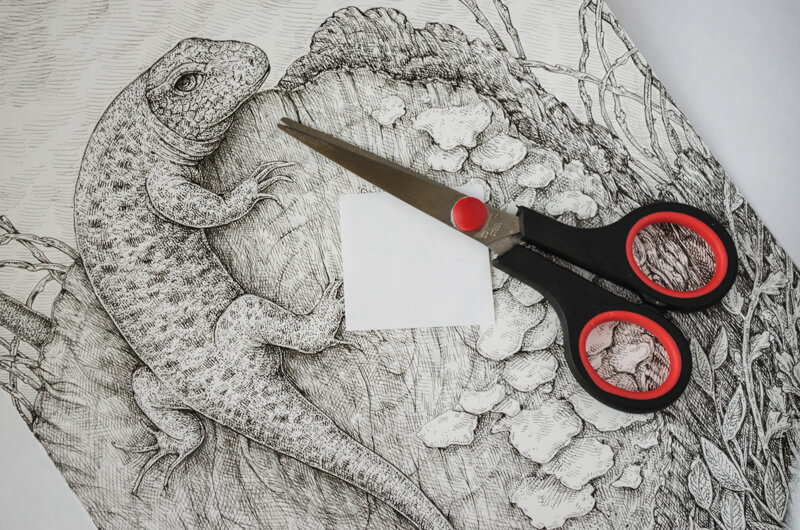
3. Remove the Mistake with Blades
A variety of knives and blades, including ordinary office knives or an X-Acto knife, may be used to cut off the upper layer of paper that holds the unwanted ink marks.
To remove a mistake, apply the tip of the knife to the paper’s surface with light pressure. It’s better to slice the paper bit by bit because you could go too deep and create a hole.
This method works especially great with coated paper – the type of paper that has a slick feel and a subtle glossy sheen. Coated paper has a peculiar structure, which makes the ink stay on the surface, so you can remove the top layer of the paper and the correction will be almost invisible.
Any heavier paper type is compatible with blades for this method. Success often depends on how deeply the pigment permeated into the paper.
The smaller an area is that needs correcting, the better your chances are at fixing it with a blade.
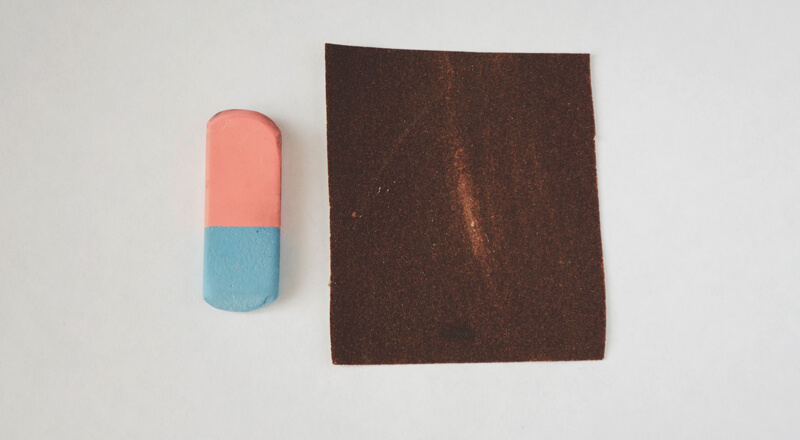
4. Use an Eraser with a Rough Surface, a Sand Eraser or a Piece of Sandpaper
An eraser or sandpaper can also be used to remove the portions of the top surface of the paper. A rough eraser can rub the paper layers off until there is a hole.
In the image below, you’ll find an example – the eraser has two ends, the reddish one is softer, for cleaning graphite marks, and the blueish one is very rough – it can erase inks.
This method works perfectly on heavier paper with some tooth.
Sometimes after using an eraser or sandpaper, the tooth of the paper looks too rugged and damaged. However, there is a secret to make it smoother and neater!
Take a sheet of thick paper and place it above the corrected area of your drawing. Press the paper sheets with your hand and apply pressure. Apply a soft eraser on top of the blank buffer paper (and the damaged area below it), and use it as though you’re trying to erase something. The paper’s tooth underneath will be all smoothed out like magic!
5. Creating a Paper “Patch”
The principle is simple: cut a piece of blank paper, which shape and size are similar to the problem area. Then adhere the paper cut-out with a small amount of glue. After the “patch” is steady, feel free to modify the selected area.
I personally don’t ever use this method because the result is too obvious. However, some folks find great success with this approach, especially if the ink drawing is produced for reproduction such as an illustration.
6. Use Digital Tools to Fix Mistakes
If you don’t have to show the original artwork to anyone, it’s possible to complete it just as it is, then scan it and make some corrections in an editing program, like Adobe Photoshop.
You may be interested in the course: Basic Photoshop for Artists
If you use Photoshop, there are basically three tools that you might need: the eyedropper tool (the hot key I), the brush tool (B) and, occasionally, the clone stamp (S).
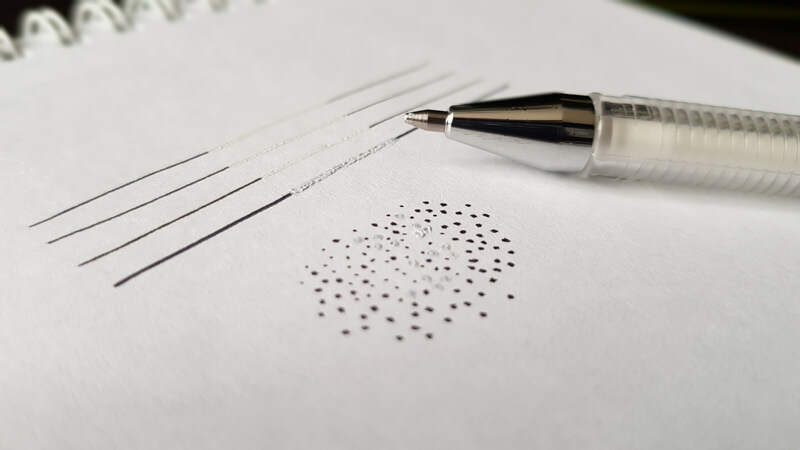
Digital tools work wonders. You can remove any ink marks that you don’t like. In the image below, you can see the result of this approach. I removed the shortest lines of the sample completely.
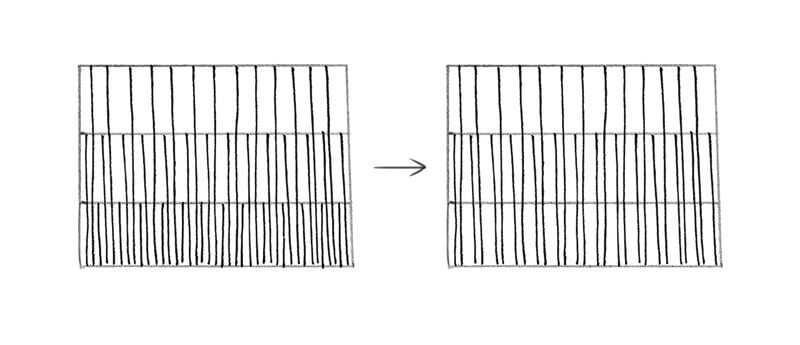
By the way, this sample is from the article on exercises for accurate lines and hatching. (Remember, practicing the basics reduces the number of mistakes and sloppy ink marks.)
Alternatively, some artists scan the artworks right at the stage after the mistake has occurred, get rid of it in the editing program and print it. The work can be continued, but without the hassle of starting over.
7. Redraw
If you tried the methods we’ve discussed and they didn’t work, or the mistake is too overwhelming, the only way to fix this issue is to start over.
Sometimes you can lighten the work by tracing over the original drawing using a light box or a well-lit window. This allows you to keep the elements that you consider successful and redraw only the elements that need to be altered.
Starting over should be your last resort. And although it may be disappointing, it’s actually not that bad. Remember, we always get better through practice, and approaching the same subject a second time may lead to better results.
Conclusion
Although there is no perfect and trouble-free way to correct something in an ink drawing, there are many ways to save your artwork. I hope that this post gives you some helpful ideas!
The closing advice is this: think about your process and enjoy your experience while drawing. Imperfections are just a part of life and will be there in every work you create. Everybody makes mistakes from time to time. The less we think about them, the rarer they become.
I wish you much inspiration, and let no fear of mistakes stop you!
If so, join over 36,000 others that receive our newsletter with new drawing and painting lessons. Plus, check out three of our course videos and ebooks for free.