
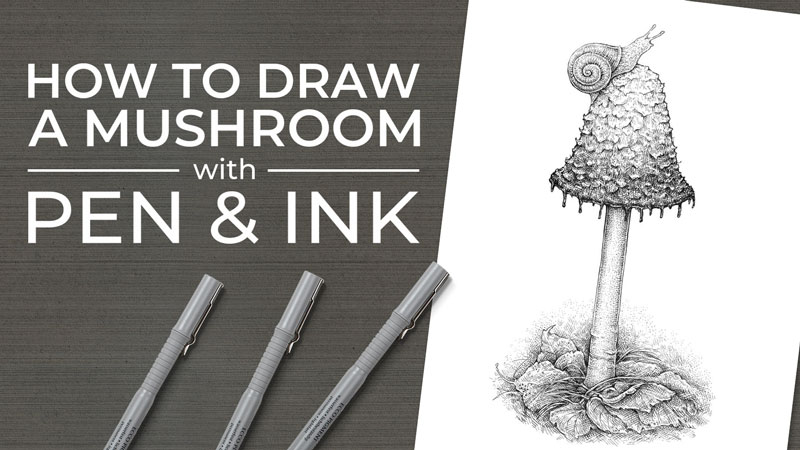
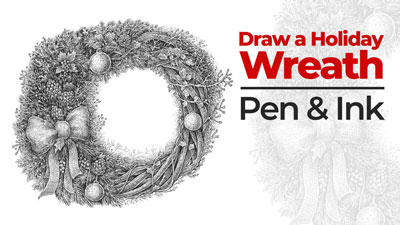
Today, we’ll create a nature-inspired drawing. Our tools will be an ordinary graphite pencil and three ink liners. This set of supplies is a great choice for capturing the general shapes and textural details of the objects we’re depicting.
If you’re going to follow along, please feel free to draw any mushroom you like. It may have an completely different shape or texture from my example. You can draw from a reference photo or find a real, tangible mushroom (or even imagine one that probably doesn’t exist). The point of this tutorial is to apply the basic principles, sharpen our artistic skills, and have fun.
So let’s skip the long introductions and dive right into the process!
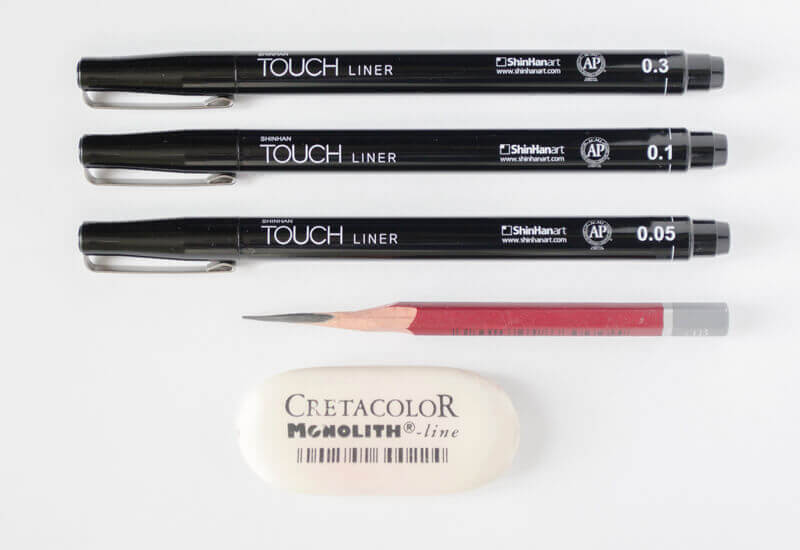
Art Supplies For Our Mushroom Drawing
As I said, you don’t need anything fancy for this project; just a graphite pencil, an eraser, and some ink liners from a very thin (0.05) to a rather thick (0.3) line width.
Also, you can choose a nib pen instead of ink liners.
I recommend using a heavier paper – just in case you decide later on that your drawing will be even better with a subtle inclusion of watercolor or some other media.
Create a Pencil Sketch of the Shape of The Mushroom
If your goal is to create a spontaneous, quick ink drawing, feel free to skip this part. However, having a graphite sketch allows thinking the artwork through beforehand and may provide you with a little confidence.
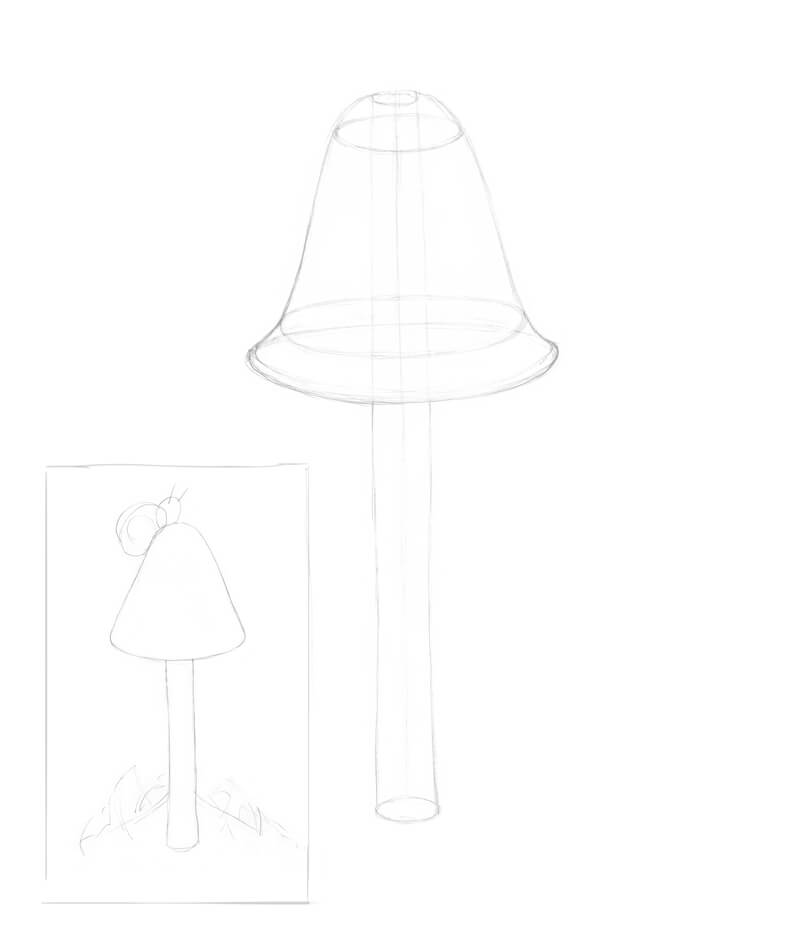
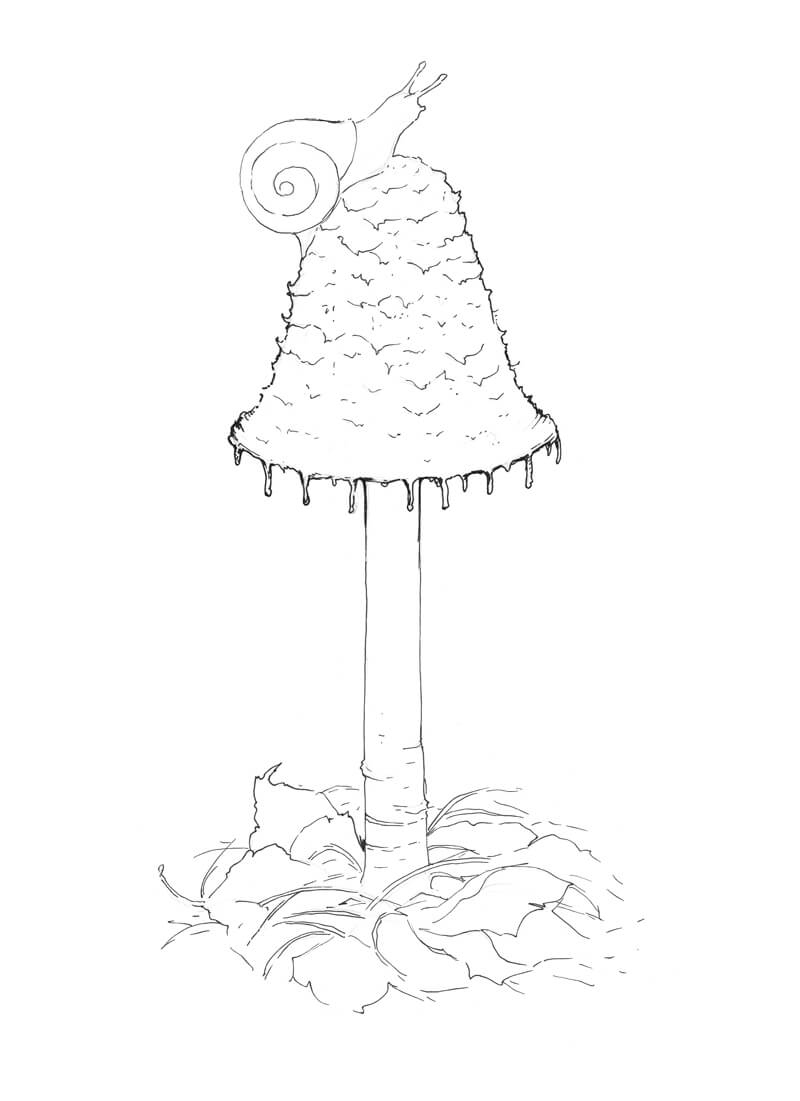
I start with a miniature sketch. The goal is to lay down the proportions and the silhouettes of the shape.
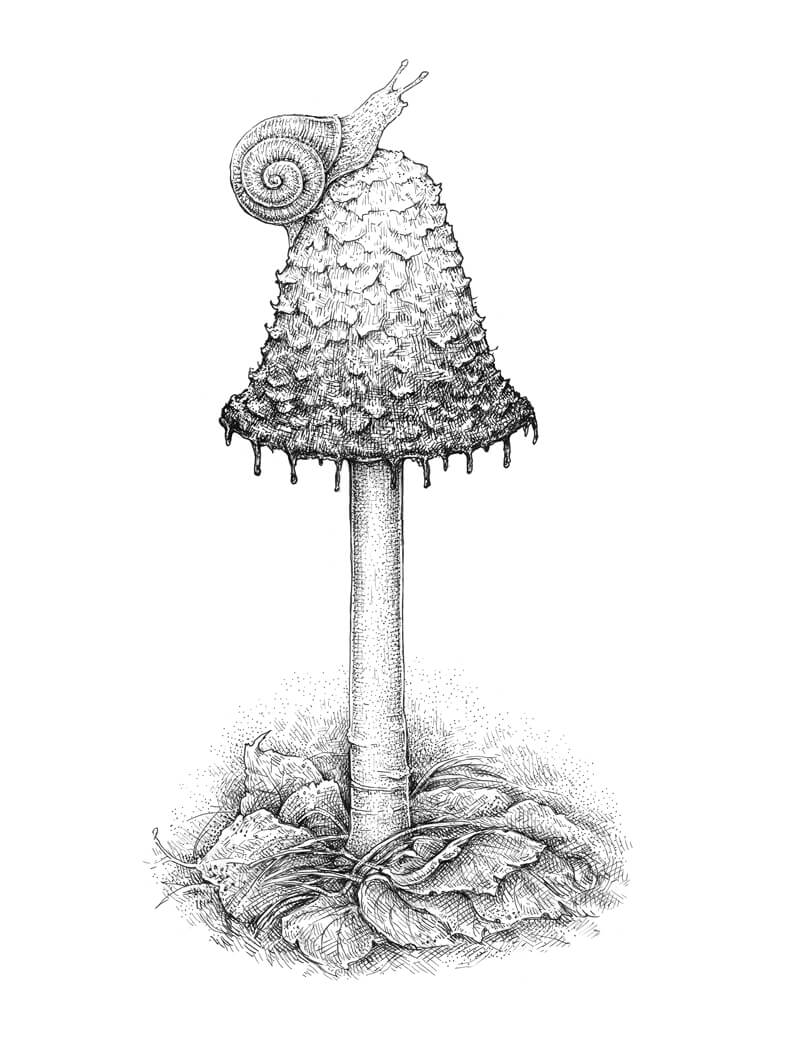
I decided to draw a mushroom with a triangular, elongated cap and a long stem. I’ll also place a small snail on top of the cap, just to make the drawing more interesting and add a bit of narrative.
I begin directly on the final paper, drafting the general shape of the mushroom.
I imagine that I can see through the object, like it’s transparent. A subsidiary core line and ovals help me to visualize that my model is three-dimensional.
Don’t strive for perfection here – a mushroom is an organic object, so it can’t be absolutely even or symmetrical.
In the image below, you’ll find our mushroom sketch alongside the miniature.
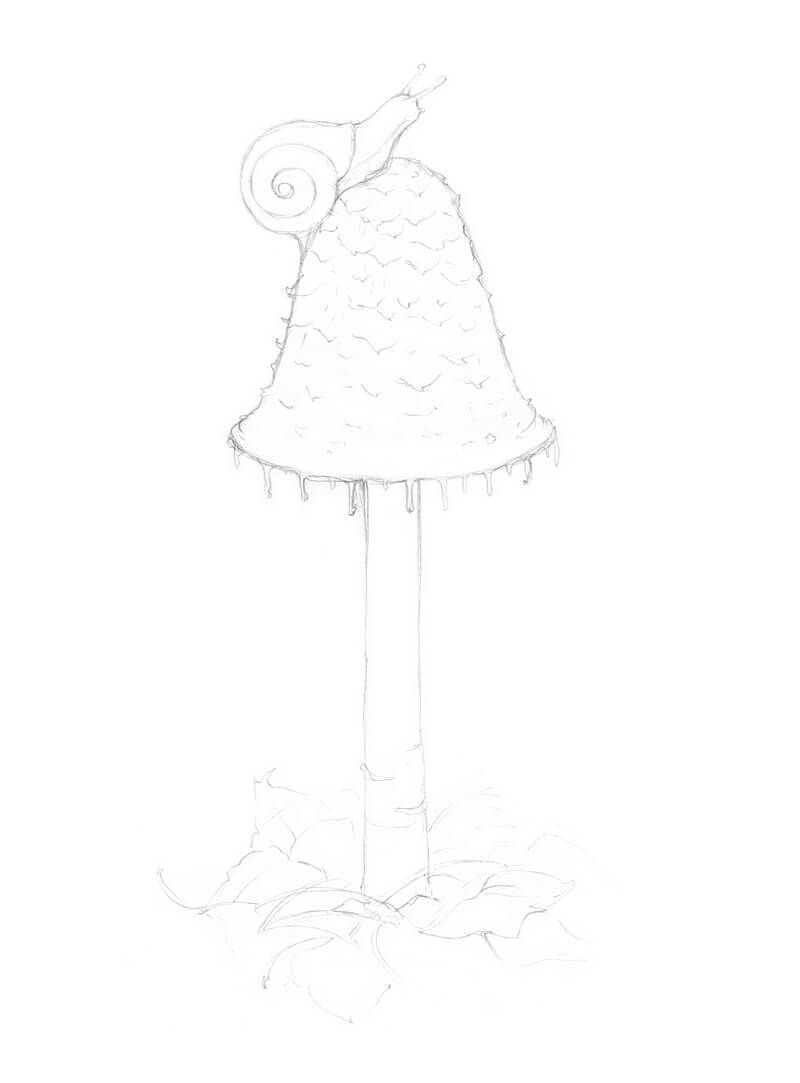
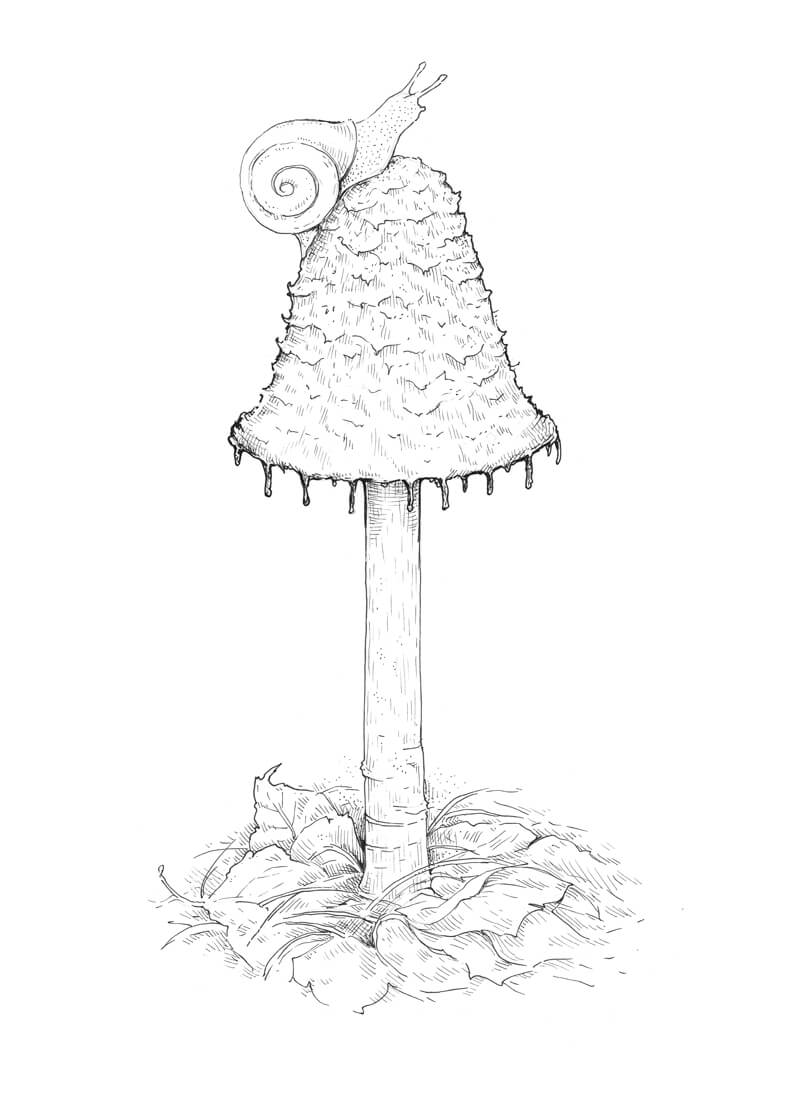
I refine the sketch, adding some details of the cap’s texture and outlining the spiral of the snail’s shell. Snails have two longer tentacles (those with the eyes at the tips) and two shorter ones. The latter usually point to the ground. They are used for olfactory orientation and help the snail in searching for food.
To fill the bottom part of the drawing, I add some fallen leaves, grass blades, and coniferous needles. For now, we’ll leave out some of the details in this area.
I’m happy with this pencil sketch – it has all the necessary elements, so we can proceed to the next part.
Let’s Add Ink To The Mushroom
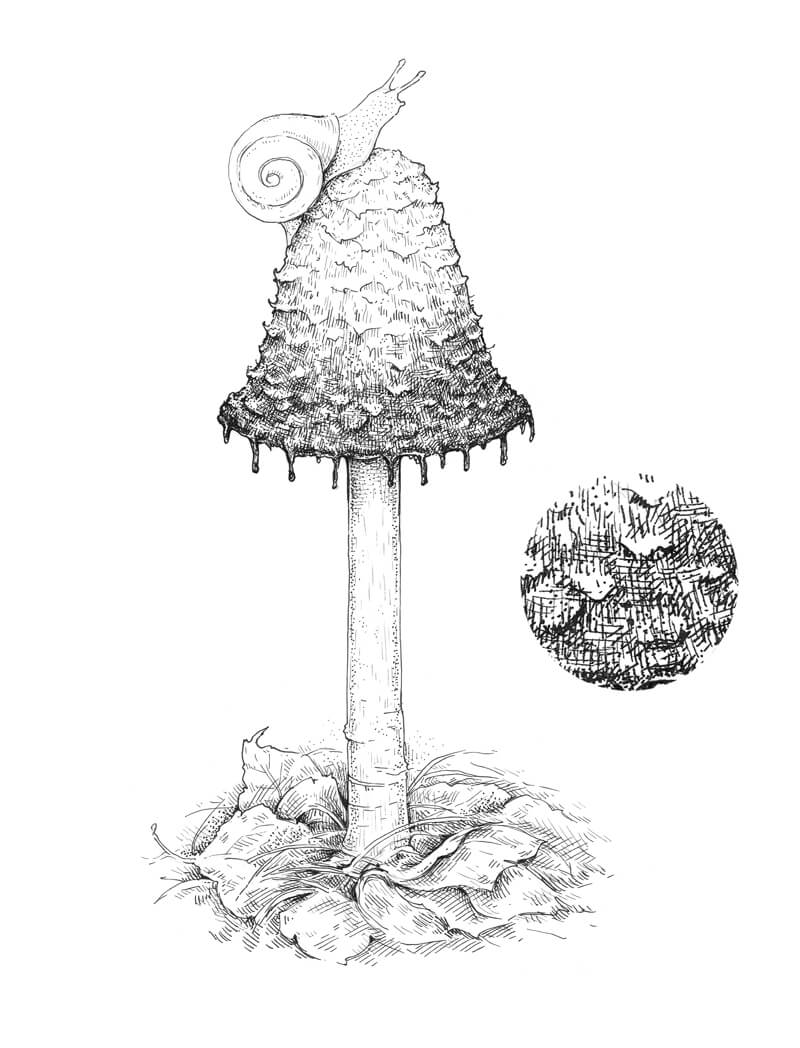
I use both 0.1 and 0.3 ink liners to outline the contours. A thinner line is better for the lighter objects (or the lighter parts of the objects). I’m going to create a tonal gradient at the mushroom’s cap, so its bottom part needs a thicker contour.

I try to find a visual rhythm in the lower part of the drawing, where we have all the leaves and grass. The elements should look like a uniform system and redirect the viewer’s attention to the mushroom.
With the 0.05 liner, I work on the lighter areas of the drawing, such as the cap’s top and the body of the snail. Groups of short hatches and dots are a great way to create a basic texture and give a hint at core shadows.
In the bottom part of the drawing, I use mostly relaxed hatches to plan the darker values.
With the 0.3 ink liner, I darken the lower part of the cap, accenting the lower portion. I use cross hatching and stippling to describe the value and the texture. Combining these techniques allows me to achieve the sense of texture and volume at the same time. The cap has some prominent, relief parts – they should remain light for now.
We need a smooth, soft transition from nearly white at the cap’s top to almost black in the bottom portion. The sides of the cap become slightly darker to create the illusion that this element is three-dimensional.
I also increase the contrast in the lower part of the drawing.
In the image below, you’ll find a close-up fragment of the mushroom’s cap.
With the 0.05 ink liner, I add the details. The short hatches create the texture of the snail’s body and the long contour lines accent the volume of its shell.
I also add some hatching to the mushroom’s cap to soften the transition from lighter to darker values.
The stem has a smooth texture, so I apply very fine contour hatching and stippling to reflect this texture.
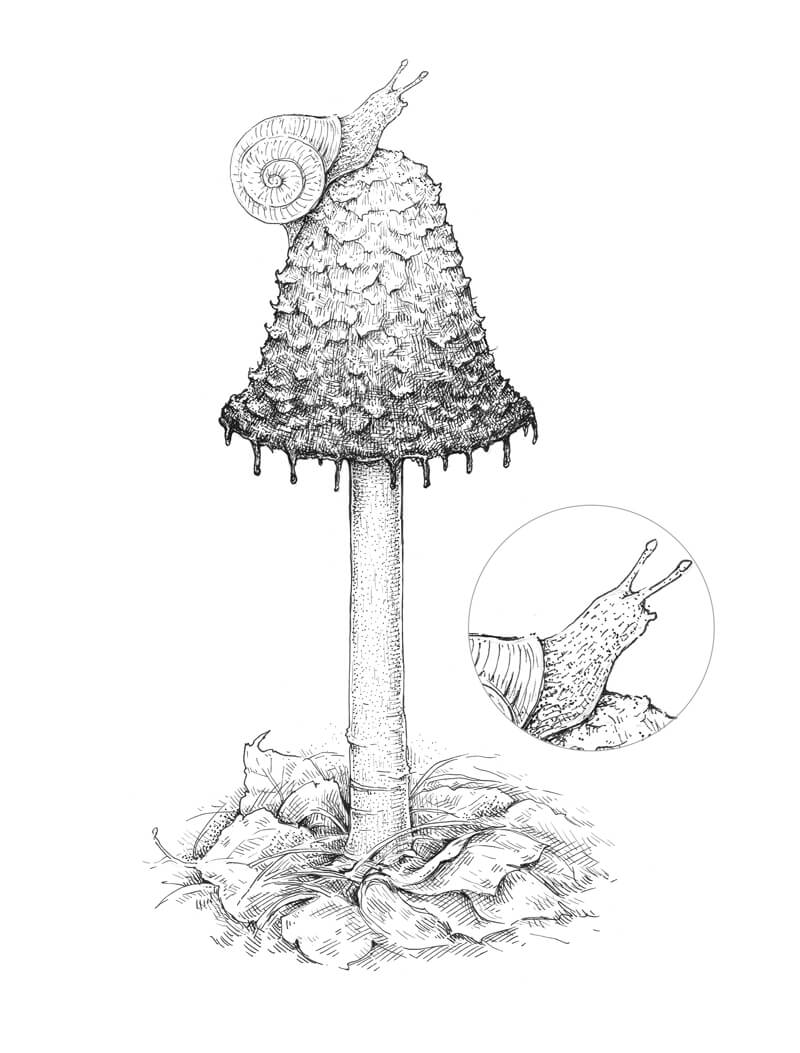
With the 0.05 liner again, I darken the shell with the long, curved hatches.
I’m going to make the shell rather dark to balance the lightness at the top of the mushroom. Don’t forget about the cast shadow under the snail. The cast shadow here should be darker than the snail’s core shadows!
I also accent the sides of the stem and darken the cast shadow that is created by the massive cap. The leaves underneath require some additional hatching, too – we need to balance the light stem and the leafy foundation.
The drawing looks quite believable at this step, but to add to its realism, I add some thin veins of the leaves. Small spots on the leaves’ surface reflect the Fall season and help to convey the mood.
As a finishing touch, I add some dots to the background in the lower part of the drawing, so the natural elements blend into it.
Conclusion
Congratulations – we’ve made it to the end! I hope that this creative journey was fascinating.
The world of mushrooms is an endless opportunity to be inspired. Just think of those dozens or even hundreds of possible shapes, textures, and colors.
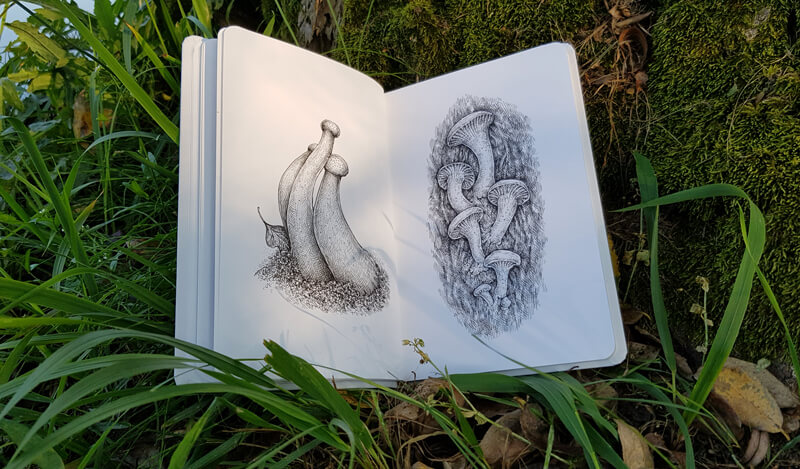
I became so excited about this theme that mushrooms of all kinds started filling the pages of my sketchbook. Here is an example:
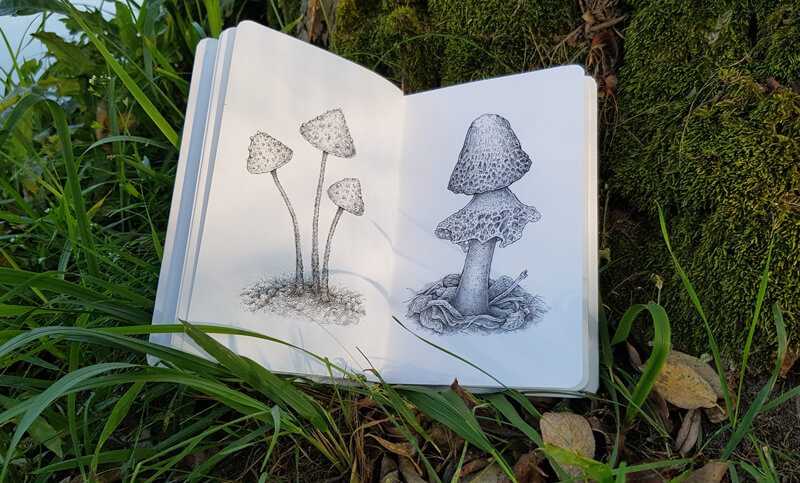
Luckily, mushrooms perfectly fit the size and orientation of many sketchbooks. One mushroom sketch a day for a week, two weeks, or a month is a nice artistic challenge, isn’t it?
If so, join over 36,000 others that receive our newsletter with new drawing and painting lessons. Plus, check out three of our course videos and ebooks for free.
Lesson Discussion
Comments are closed.
Hi Eugenia.Thanks for another cool lesson on pen & ink! Found this very helpful as always as i use ink markers most of the time. Any chance of bringing out that tutor book in the future? Thanks-Again Love your Pen Art.