
But before it becomes possible to create mind-blowing artworks, we have to spend some time with the basics. We simply cannot expect to communicate our ideas through a drawing without basic technical skills in place.
That’s why so many beginners unfortunately quit drawing only after a dozen or so unsuccessful attempts to capture a subject they like, but are too complex for their level. However, there are a few things that are important enough no matter how simple or complicated the subject is.
With any skill, we have to practice and build up our abilities. Drawing is no different. Practice plays an important role in developing ourselves as artists and should be a regular part of our activities – no matter what our current skill level.
This article is dedicated to short, yet effective drawing exercises that you can perform in just a few minutes every day. Musicians regularly practice their scales. A basketball player practices layups. We can think of these exercises in the same way. If you practice them regularly, your drawing skill will improve greatly.
Even if you are confident in your lines and hatching and pleased with the results, these exercises are still a fun exercise to practice. They provide a chance to focus your mind on a simple concrete action, which makes it easy to enter a state of “flow” (or a meditative submergence into the process).
The results of a five or ten minute warm-up, before even touching the big project you’re working on, may be surprising. Vocalists do various warm-ups before the ‘actual’ performance. We can use these exercises in the same – warming up the technical side of our artistic brains.
The tool for practice is up to you. It may be a graphite pencil, an ink liner, a nib pen, or any other mark-making tool. (I used ink liners just because they are my favorites; they provide clear, contrasting, and controlled marks on the paper.)
The paper can be any you like – ordinary printer paper is great because it’s so affordable and you can use as many sheets as you like.
Distinguishing Regular Lines From Hatching
On the surface, there isn’t a significant difference between a regular line used as contour and a hatch. Both are lines after all but each serve a different purpose.
Let’s expand the musical theme and make some comparisons. I see a contour line as a solo singer and a hatch – as a member of a chorus. Again, they are both lines, but they play different roles.
The role of a line is to convey the character and mood and in some cases – help the viewer differentiate the foreground from the background. They may communicate the light source in the scene. Lines become the contours in the drawing; they are a means of expression on their own.
A hatch is a part of a bigger system that acts as a whole. We may call this hatching (or cross-hatching, or contour hatching, depending on the character and the interaction of hatches).
To work together, hatches should be uniform. If some hatches break the visual pattern, attracting too much of the viewer’s attention, the final impression may be not as pleasant as we desired. Also, hatches are indispensable when it comes to working with values and creating an illusion of volume.
See also: Hatching and Cross Hatching
Working Your “Linear” Muscles
Drawing a line seems easy, but your mind and body work in a union to perform this task successfully. There is a difference in how we create shorter and longer marks and using the right muscles is crucial.
Take a sheet of paper and any tool you like. Draw a short line (something about 1 cm is enough) and observe how your fingers work together, moving slightly while holding your tool.
Then draw a longer line (4-5 cm). You’ll notice that your wrist becomes active to extend the line.
Now create an even longer mark (like 9-10 cm or more). This becomes possible thanks to your elbow muscles.
Below you’ll find an image with my lines (a – an “elbow” line, b – a “wrist” line, c – a “fingers” line):
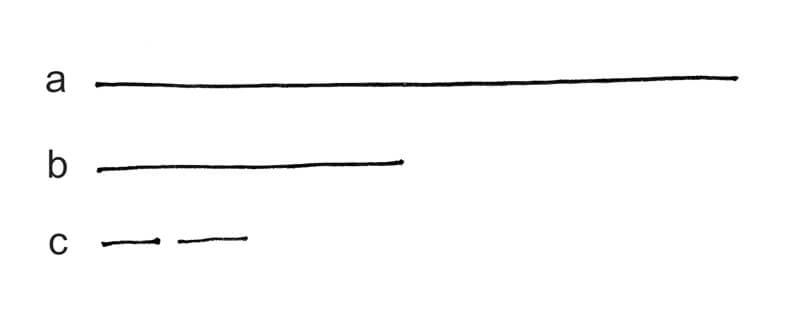
I’m sure that you’ve grasped the general idea of this exercise. Different lengths of line require slightly different movements. Keep that in mind and pay attention to the body’s behavior, especially if you feel like something goes wrong.
Using the right group of muscles provides the greatest control over your lines.
I’d say that the “wrist” or “elbow” lines are most commonly used for creating contours while the lines drawn by moving your fingers are better suited for adding hatching and refined details.
Another tip is to find out which direction of hand movement is most convenient for you: ‘away from yourself’ or ‘towards yourself’. This will vary from person to person, so I’d say that trying both ways and forming your own conclusion is important.
It’s great if you can make the marks appear the same, without any regard to the direction of the hand movement.
And the last tip for this section: check the surface that supports your paper. Any dents, bumps or a subtle texture may make consistent lines difficult, if not impossible.
“Hairy” Lines
It’s completely normal to be cautious when you’re trying to draw a line that reproduces a contour of the object you’re observing. Especially, if you’re a beginner in art. When you’re overly cautious, you may draw a short line, then add another indecisive line, and so on. The contour becomes somewhat “hairy” and messy. There are many marks, but they look confusing or heavy.
This is different from drawing lots of lines quickly to “find” the proportions of the subject. We are specifically addressing “finished” lines when we are calling them “hairy”. It is still perfectly acceptable to begin with looser, fluid lines in the beginning stages of a drawing and refine the contours as you go.
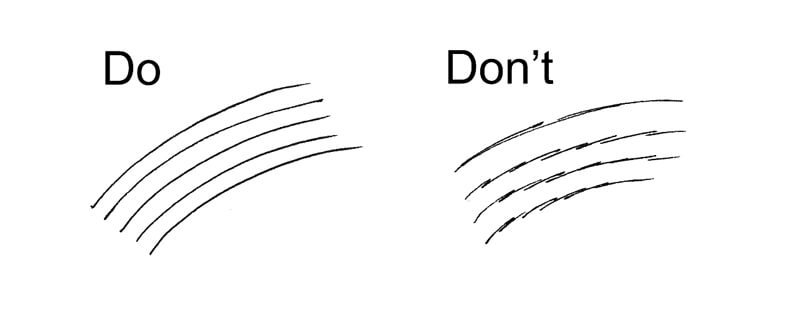
If you’d like to develop more control over your “finished” lines, I’d recommend trying to use as few lines as possible, making them as long and “streamy” as possible. Free yourself from the fear of failure, relax your mind and hands. Trusting yourself is also a skill that can be developed!
Maybe you won’t draw the contours correctly on your first attempt, but you’ll get better at this skill over time. The more you practice, the better you’ll become.
Below you’ll find an illustration of what I’m describing in this section. Now we’re ready to start practicing!
Exercise 1 – Drawing Straight Lines
Let’s focus on drawing straight lines freehand, without a ruler. Please note that the goal is to explore our abilities, and nothing more! We’re not trying to create “perfect” lines.
If you feel unsure about drawing a straight line, I’d recommend outlining a line in pencil with a ruler. This line should be barely visible as it will serve as a reference.
When you’re drawing a line, pay attention to the pressure on the tool and the speed of movement. Don’t push too hard. You’ll notice that the starting and ending points of your lines depend on how lightly you touch the paper and how quickly your tool moves.
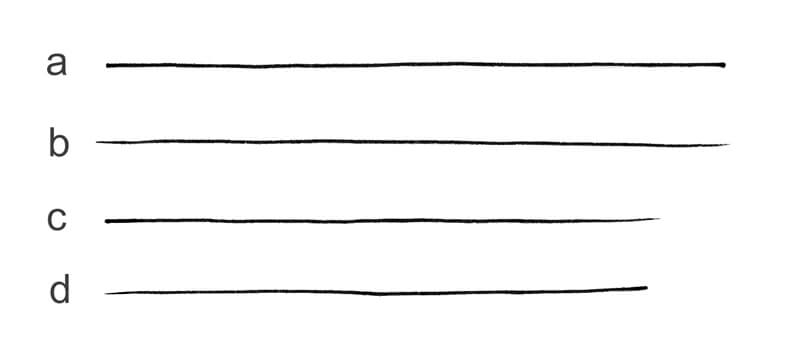
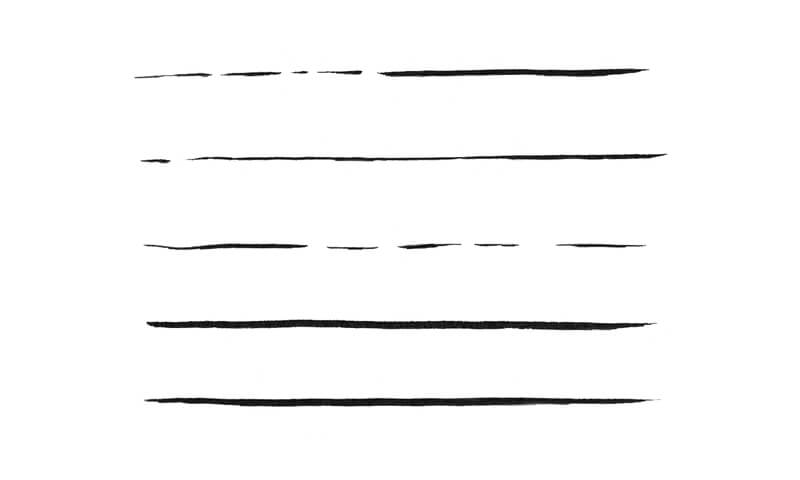
In the image below, you’ll find several lines:
a – a line with cut (thick) starting and ending points. I call them “full stop” lines because you should slow down a bit to make the ends look like this.
b – a line with sharp starting and ending points. This character of the ends is achieved by a lighter, swifter movement.
c – a line with a dense start and a light, pointed end.
d – a line with a sharp start and a “full stop” at the end.
To be fluent with your lines, I recommend repeating all four examples. Some will be more natural to you and some will require additional practice.
Please keep in mind that slowing your hand movements too much may cause unwanted effects, especially on thin paper. For example, if you leave an ink liner in one spot for several seconds, you can get a dark blob. So finding a balance is important!

To make the exercise more interesting, you can try any tool that provides a variety of line width, depending on the pressure (like a nib pen or a brush pen). Play with your tool and see how it behaves. Some drawing tools allow you to create a dramatic change in the line width.
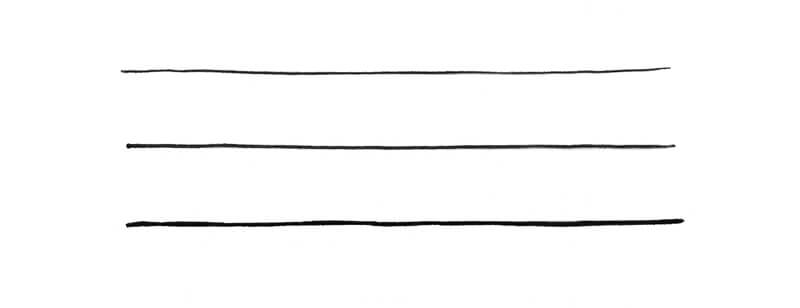
In the image below, you’ll find my lines made with a brush pen. I’ve created some continuous lines and also lines with gaps.
If you don’t have a brush pen or a nib pen, you could use various forms of the same tool. For example, you could use several ink liners or varying widths. Chances are, you’ll get to know your tools better and find out which one is the most comfortable to you.
Here are my lines created with the 0.1, 0.3 and 0.4 liners respectively…
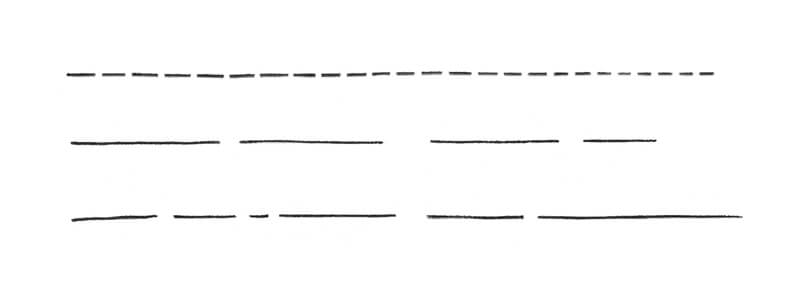
Exercise 2 – Drawing Lines with Gaps
Now let’s draw some dashed lines. The intervals may have the same lengths or have a touch of spontaneity.
Exercise 3 – Control and Accuracy Practice
The next exercise is more advanced. First, draw a line with a vertical direction – it can be straight or whimsically curved.
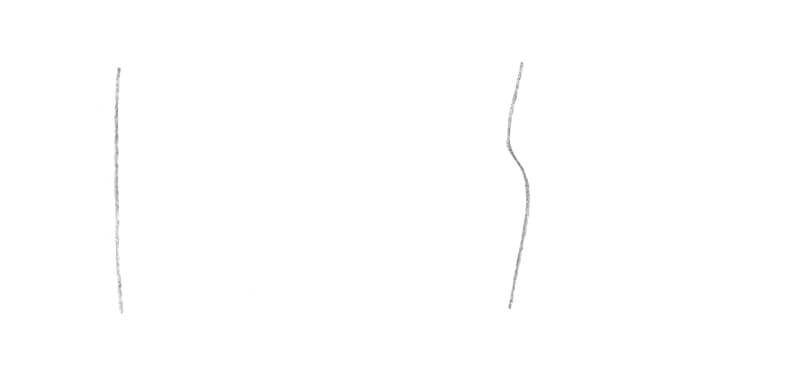
Then, add hatches – they should be located at the side of this line, or adjacent to it.
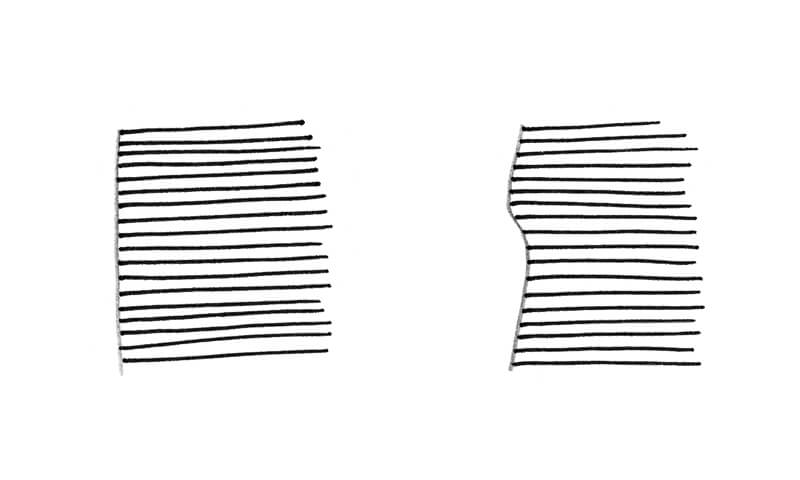
If you want to add a bit more of a challenge to this task, you can keep your hatches at a small interval, equal distant from the contour line. Or, you can draw another contour line and make sure all your hatches are ending on it.
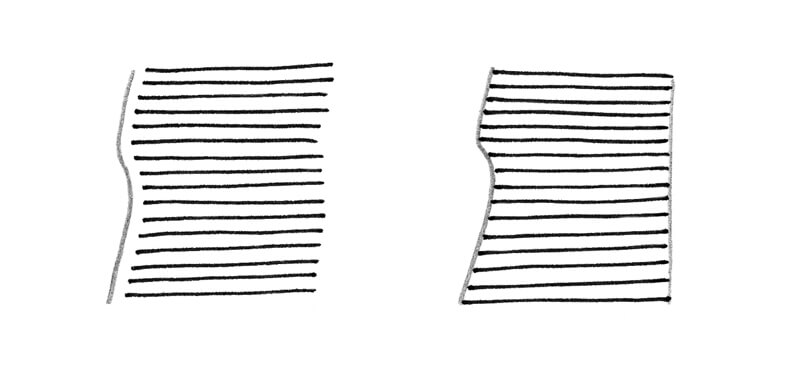
This exercise is good practice for developing greater control.
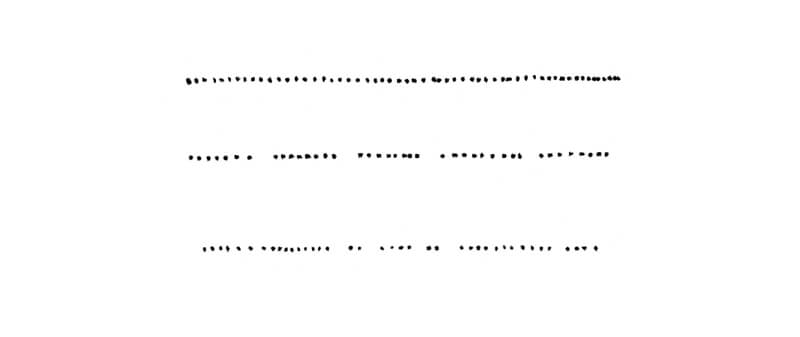
Exercise 4 – Drawing a Dotted Line
Now we’ll create a dotted line – it may seem a bit weird, but a line may consist of dots, too! And the ability to create nice dotted lines may be very helpful in your creative process.
The goal of this exercise is to find a comfortable rhythm. Observe how your hand moves, don’t rush, and make sure you pull your hand away swiftly enough after you’ve created each dot. Each dot should have a clear shape, without any smeared ‘tails’.
Your dotted line can be continuous (the intervals between the dots are approximately equal) or have some irregularity.
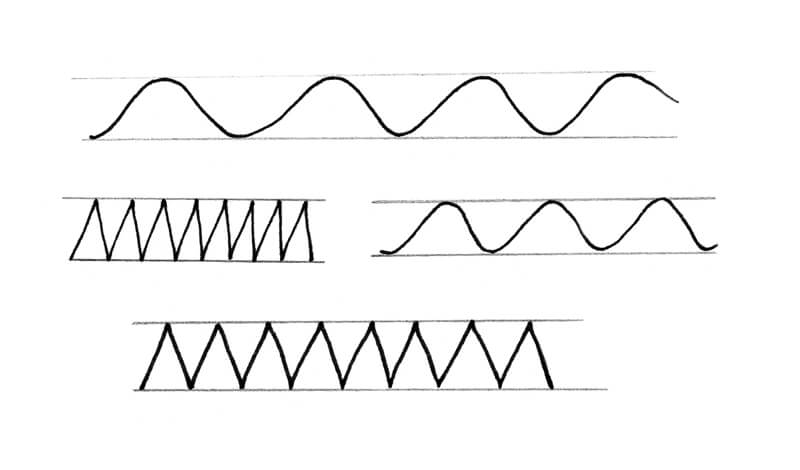
Exercise 5 – Drawing Wavy and Zigzag Lines
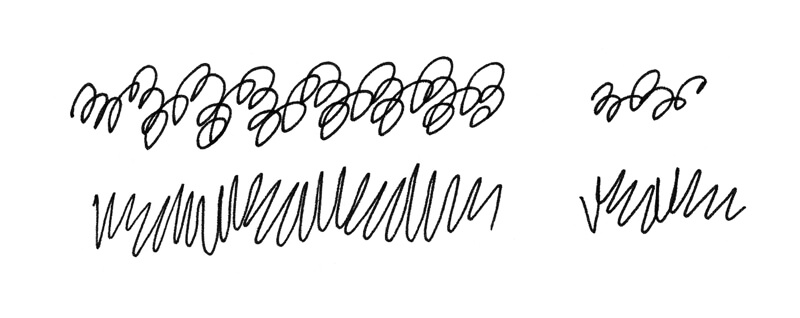
Let’s have some fun with some patterned lines, such as wavy and zigzag lines (but feel free to draw any other lines you like).
You can outline a couple of horizontal lines to create the borders, and add your lines within them. In the image below, you’ll notice how my lines are touching the borders.
Don’t strive for absolute perfection – the goal is the same as in the previous exercise; find a comfortable rhythm and a balance in the movements.
Exercise 6 – Scribbling
Drawing with precise control is important, but drawing looser and less precise lines is also an important skill to develop. So we’ll next take a break from drawing straight lines and loosen up with some scribbles.
There’s no right or wrong way to do it. Let your hand move and cast aside any expectations.
Exercise 7 – Developing The Skill of Accuracy
The next exercises are dedicated to hatching and cross-hatching.
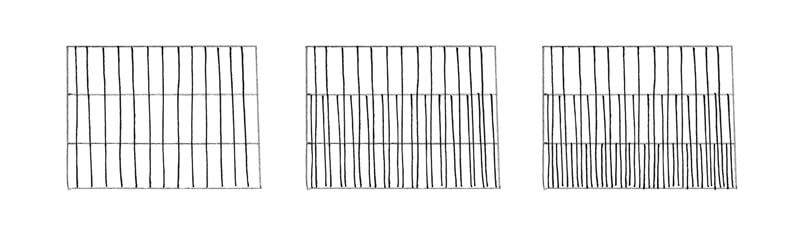
It’s useful to train your eyes and hand to place the new hatches into the gaps between the existing ones, not on top of them. To practice this skill, we’ll create a swatch like in the image below:

This image may seem confusing – so where should we start?
First, we need a rectangular shape divided into three parts (like three elongated rectangles adjacent to each other). I’ve drawn the three-part rectangular template with a graphite pencil and the hatching will be made with an ink liner.
The borders will help us differentiate the groups of hatches: the longest, medium length, and short. We start with the longest vertical hatches, filling the swatch with them. There should be some intervals between the hatches – don’t draw them too close to each other.
Then add the shorter hatches (the hatches of medium length).
Lastly, add the shortest hatches – they should occupy only one-third of the whole template.
Below you’ll find the step-by-step process of completing this exercise.
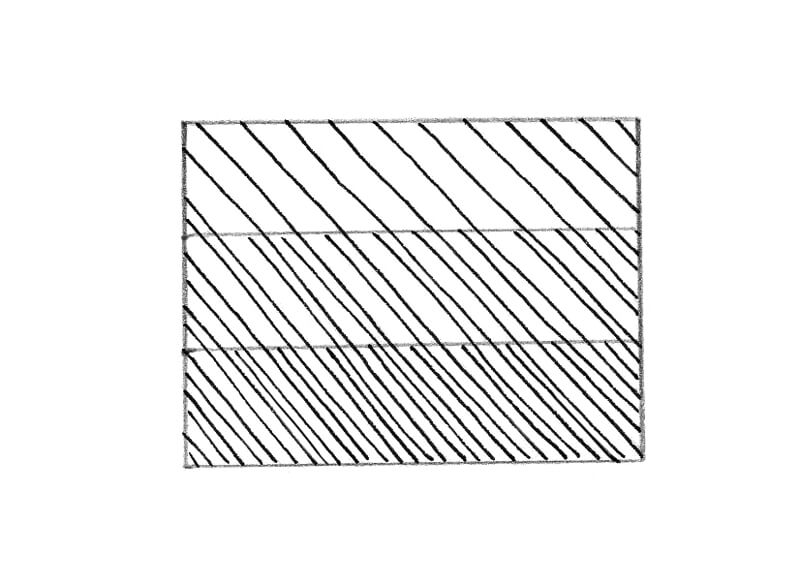
To make the task slightly more complex, repeat this exercise with inclined lines. The order of adding hatches is the same (the longest marks are added first).
Exercise 8 – Basic Hatching Practice
To practice hatching, you can use small squares/circles/rectangles that become the borders for the hatches, or just go at it without any borders at all.
Each one of your hatching swatches should have a uniform look and all of the hatches should flow in the same direction.
The hatches can be horizontal, vertical, or inclined at any degree. You can start drawing slowly, then create a new series of lines, moving faster and faster. However, the speed of drawing isn’t the focus of this exercise.
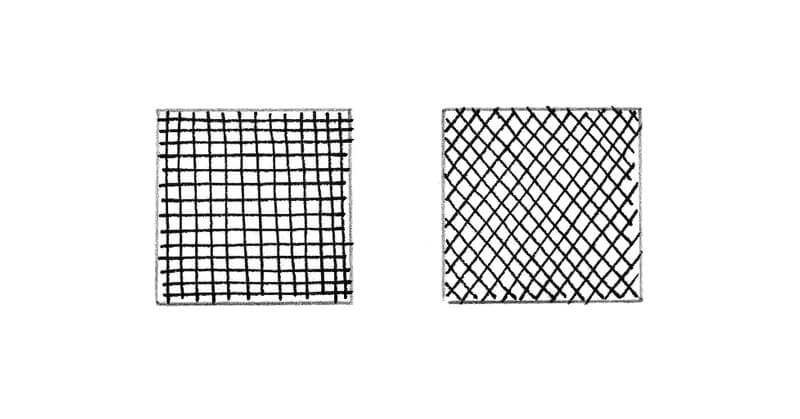
Exercise 9 – Cross Hatching Practice
This exercise is an extension of the previous one. This time, we’ll create one layer of hatching and then cover it with another one with a different direction of marks. The hatches are crossing, and we get cross hatching.
If you like this exercise, I’d recommend inventing as many examples and combinations as you can. Moreover, you can try different tools (several liners that provide different line widths) and analyze the effects that you get.
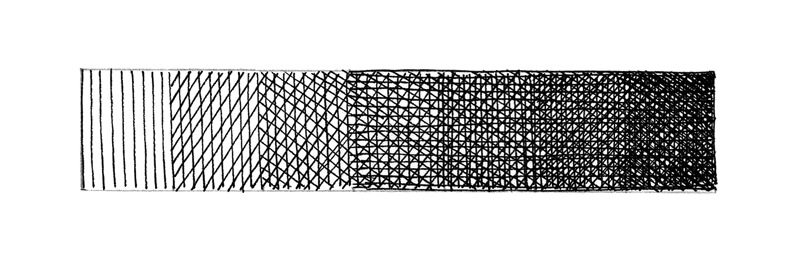
Exercise 10 – Create a Value Scale With Cross Hatching
Value is the darkness or lightness of a color. Value is incredibly important in creating the illusion of light, volume, and texture in a drawing. It’s important to practice creating a full range of value with cross hatching. Fo our tenth exercise, we’ll create a value scale using cross hatching.
Having a rectangular shape as a temple is useful. There’s no need to make it too long (the length of 9-12 cm is enough). You can also think beforehand how much space you need to create each value. A small amount of space is sufficient.

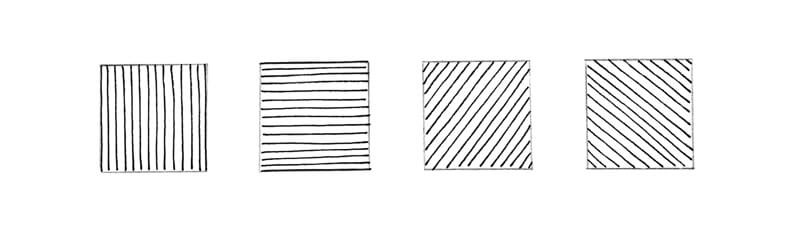
My process of completing this exercise will be the following:
- Fill the whole shape with vertical hatches.
- Add a layer of inclined hatching.
- Add a layer of inclined hatching (this time, of a different direction).
- Add horizontal hatching.
- The vertical hatches again, trying to fill the gaps.
- Inclined hatching again.
You can see the repeating pattern.
The goal is to create a nice, smooth transition from a lighter value to a darker one.
However, if some of your hatches look slightly uneven, don’t be discouraged. We want the marks to look as though a human made them – not a machine.
Your cross hatching value scale may look like this:
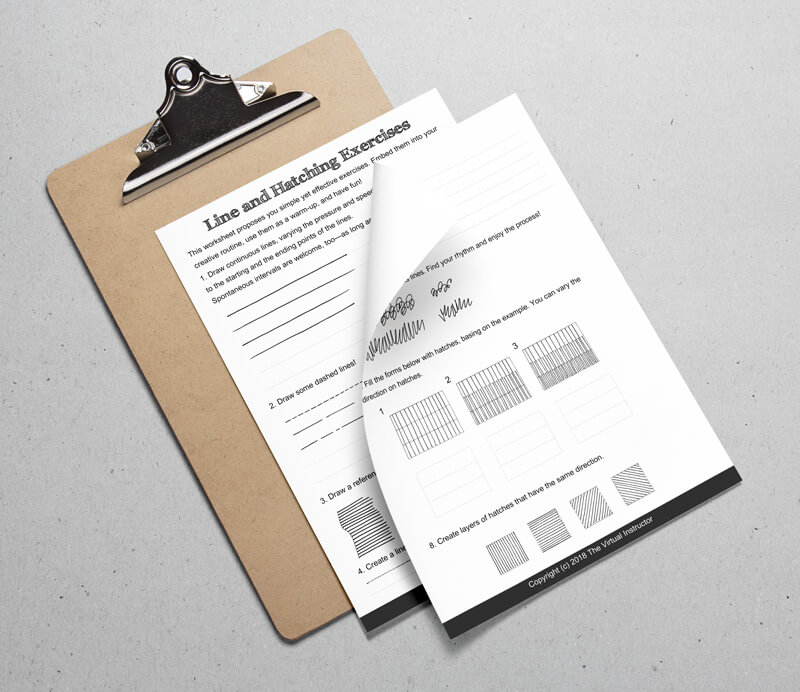
The Worksheet
I’ve compiled a worksheet to help you with your practice. You can download it and print it out so you can practice these exercises whenever you like.
A Creative Approach to the Line Practice
I hope you enjoyed the practice. These exercises are more powerful than they may seem. But don’t limit your practice to just these exercises. Let your imagination go wild and invent your own warm-ups and challenges.
Even just a small bit of practice will push your art skills much further! Many people like doodling when they’re talking on the phone or waiting. Take advantage of every spare moment.
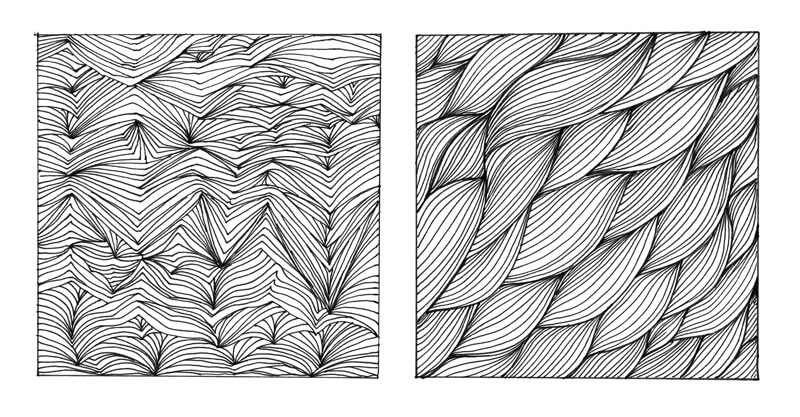
Doodling counts! Here’s a couple of mine…
Deliberate Practice
Before wrapping this lesson up, I’d like to add one more point about the way you approach your daily drawing practice. It’s completely OK to love doing the things you’re good at. But sometimes we avoid activities that seem challenging or mundane.
We often become attached to our strengths, avoiding anything that makes us feel awkward or uncomfortable. On one hand, developing skills that we’re already skilled in may make us even stronger. But anything worthwhile in life sometimes requires being attentive to some weaknesses that prevent us from moving forward with our skills (and all the amazing projects we have in mind). Art is no exception.
Let me give you an example. If an artist feels that their drawings aren’t as strong as they could be because of indecisive lines and inaccurate hatching, avoiding this weak point won’t improve their skills. They should devote some time to deliberate practice – that’s really the only way to improve.
If you know what to improve and how to practice, your success is a matter of time and effort. All the magic happens while you’re working and enjoying the process, even if there are some challenges.
Don’t be afraid to leave your comfort zone.
If so, join over 36,000 others that receive our newsletter with new drawing and painting lessons. Plus, check out three of our course videos and ebooks for free.

Lesson Discussion
Comments are closed.
Matt, Excellent advice on practicing drawing lines. Good refresher. We all start by drawing and practicing lines, but tend to forget to “exercise” doing that later as we progress into more difficult drawing, or even before making a new sketch. Like a runner stretches his leg muscles or a pianist “works” his fingers…..
Aside from that… I find the “text” in your “textbooks” very hard to read because the font is so “faint.” Or so it appears on my monitor. A bolder font would make for much easier reading… esp. for us older folks with weak eyes. Faint font makes for a classy look, but doesn’t help the readers a bit. Unfortunately we can’t “turn up the volume” like we can do with your spoken lessons. (^O^) (Altho I’ve been known to highlight faint text to make it easier to read.)