In this tutorial, we’ll focus on a calming drawing practice that is free of rules and limitations.
Every form of drawing or painting comes with its own set of challenges. Every pursuit has its own set of difficulties to overcome and skills to master. This takes time, patience, and perseverance.
Sometimes, however, all we need is a bit of spontaneity and, speaking metaphorically – a breath of fresh air. It may be just an hour of time just for ourselves – no challenging tasks, no principles to keep in mind.
Can drawing help us relax, deeply experience the moment, recharge our “inner batteries”, and develop self-awareness? Absolutely, it can!
It may be interesting to know that, according to research, only 45 minutes of making art can significantly reduce cortisol levels. Cortisol is a so-called “stress hormone”. It is the human body’s response to stress or danger.
The right amount of cortisol is essential to our health. However, if the hormone levels stay increased due to chronic stress, this may lead to serious health issues.
Also, that same research suggested that it doesn’t matter whether you’re an experienced artist or a beginner. The process of creation is equally beneficial, calming, and revitalizing for everyone.
Get Your Mind Ready For Drawing
To make the most out of your drawing session, begin it with a clear mind. Get rid of any rules or expectations of the result. Focus on the idea of self-expression through action.
You can set your own goals. For example, I use this approach to fight perfectionism. I allow the lines to be slightly uneven and accept all imperfections. There are no mistakes, only “happy accidents”.
This practice is a wonderful form of relaxation. Some art projects are complex – they require intense focus, time, and mental effort. Meditative doodling is a different story!
Also, this creative activity distracts attention from worrying thoughts. Sometimes, it brings unexpected – yet pleasant results. It may change your mood completely.
It’s possible to use any kind of artistic media for this activity. I prefer ink because it allows me to focus on lines, shapes, space, and contrast. Our attention shouldn’t be too spread out. Ink is straight-forward, deliberate and direct.
All artworks and samples in this tutorial were created with 0.2 and 0.3 ink liners.
Warm-Ups for Meditative Doodling
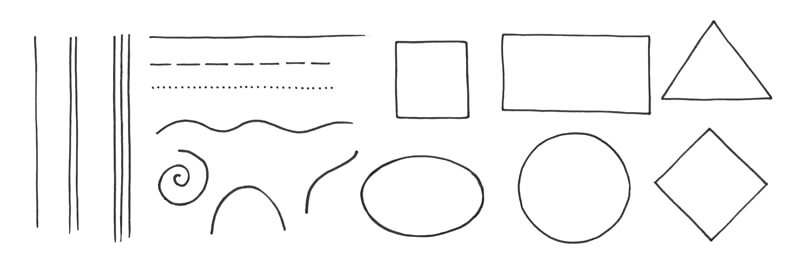
There are no rules – just some guidelines. Feel free to experiment with various lines and shapes. They are the building blocks of endless patterns that you can create.
I encourage you to invent your own patterns. Avoid copying. Your artwork is a reflection of your thoughts and emotions, so it will be unique – just as your fingerprints. Trust your hand. Focus on its movements and let your thoughts go away.
However, if you need some inspiration to get started, that’s fine, too. The art of creating patterns is ancient, so there are plenty of examples to be found. Every culture has its own set of patterns and symbols.
Shapes
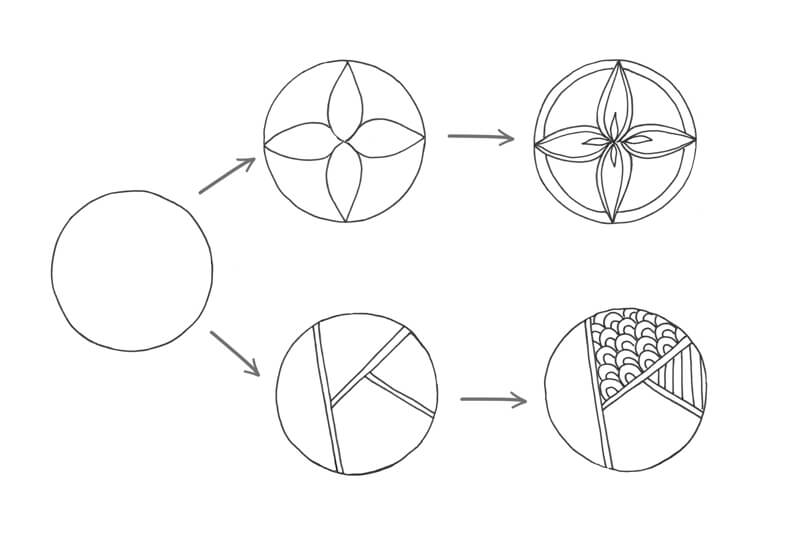
Let’s begin by exploring shapes. First, choose a simple shape. It may be a circle, a triangle, a square etc. Its purpose is to set the borders for your pattern.
Each pattern may have any number of elements inside (or even outside) the main shape. They don’t have to be symmetrical or follow any other principles of formal pattern making. Don’t overthink the process – your pattern can look like anything you imagine. Or, just let the lines flow and see what happens.
If you feel stuck, look around and pay attention to anything that resembles a pattern. It may be the surface of your wooden table, relief of cloth, or random tea leaves in your cup.
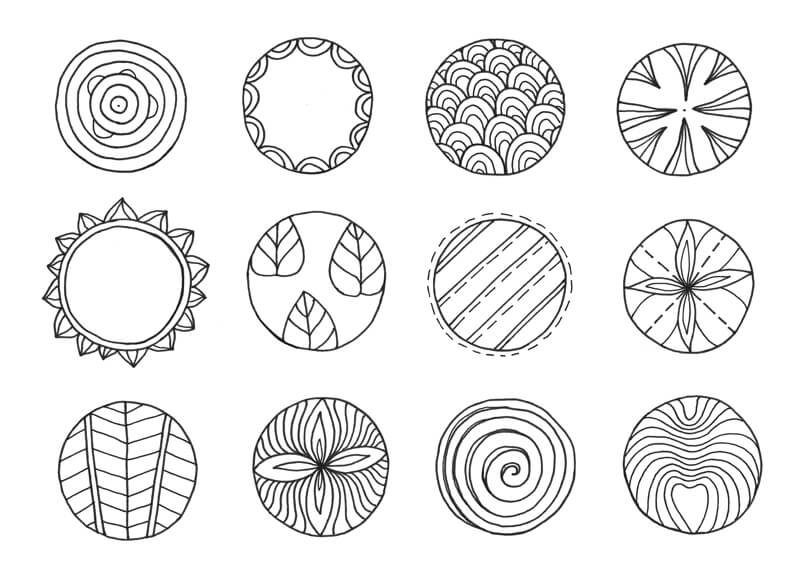
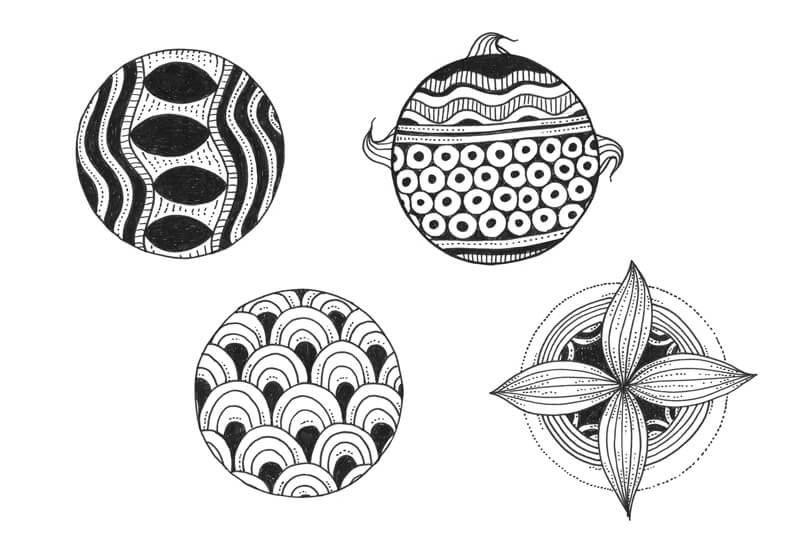
Below, you’ll find some of my examples. The basic shape is a circle. It’s difficult to describe how I designed these patterns because the process didn’t involve logic or conscious decision-making. I just let them happen. This is what meditative doodling is all about!
If your shape is also a circle and it’s difficult to outline the contour, you can use a compass. Any object with a round bottom (like a cup) may be helpful, too. Make the process as comfortable as you prefer.
See also: How to Draw a Circle
If you draw without a ruler or any tools, your lines may be slightly uneven or “shaky”. That is precisely the point! Will you allow this imperfection to exist?
Let’s focus on shapes and space, without making any elements darker than others. We’ll look at several ways of developing variety a bit later.
I find it easier to fill the main shape, starting with bigger elements.
Alternatively, it’s possible to start by outlining the borders. They divide the inner space of your shape, so you’ll get separate areas for different patterns.
Lines
The next exercises are focused on warming up your hand rather than creative “muscles”.
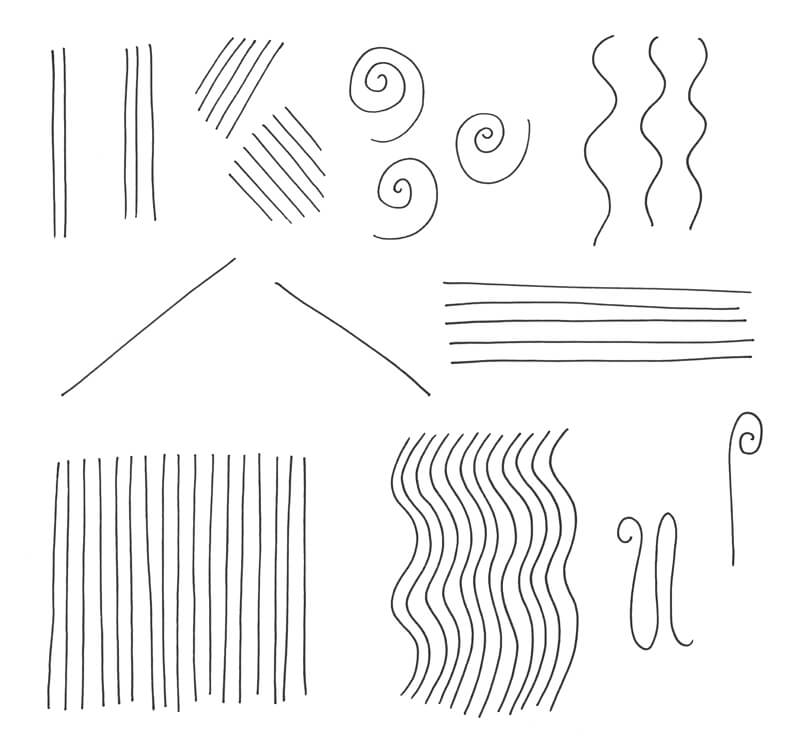
First, draw some lines. (I do it freehand, without a ruler.) They may be of any length. Also, consider their character: straight, wavy, or curved.
If you wish, draw similar lines in sets. Keep them as spontaneous and organic. Do what feels right.
Now we’ll create a pattern of lines. The resulting elements resemble a woven pattern of fibers.
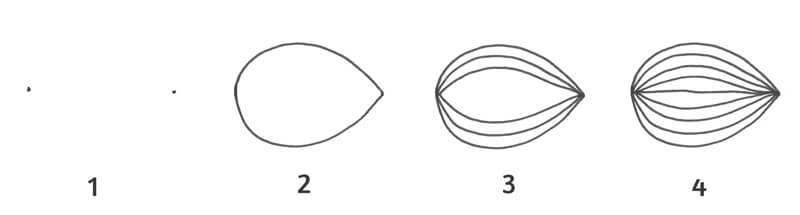
It may be easier to start by marking two dots at a short distance – or, you can mark them only in your mind.
Then, connect the dots with two lines. Theses lines will become the outer borders of the element.
Next, add more lines in between the existing ones, until the whole shape is filled with lines.
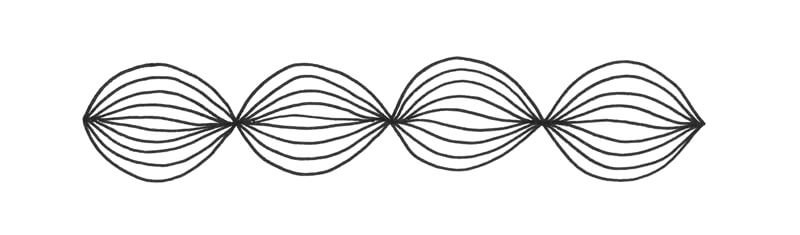
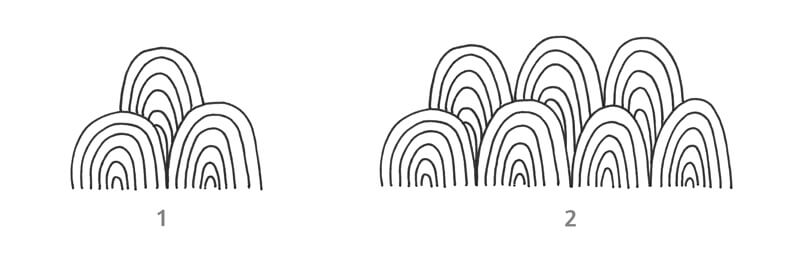
You can create chains of these patterns to adorn your doodle drawing.
In the next exercise, we’ll draw some curved lines. When organized in sets, they resemble arcs.
The principle is simple. Start with one curved line, then add new ones – creating a pattern.
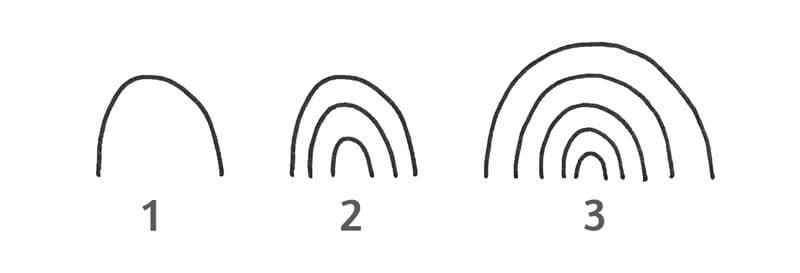
You can create as many arc elements as you wish, forming chains and placing them in rows.
Shading and Contrast Exercises
Let’s make our drawing more interesting by including some darker values. This will allow us to add depth and contrast to our stylized patterns.
Shading can be done in different ways. You can use lines (hatching) and dots (stippling). These techniques give control over tonal gradients, allowing you to increase the contrast gradually.
See also: Pen and Ink Drawing Techniques
Alternatively, it’s possible to cover the shape with dense lines. My hand performs circular motions, making a solid ink covering with small specks of paper showing through. The completed areas may look rather plain, but they definitely attract the viewer’s attention.
Of course, you can combine all those methods in a single artwork.
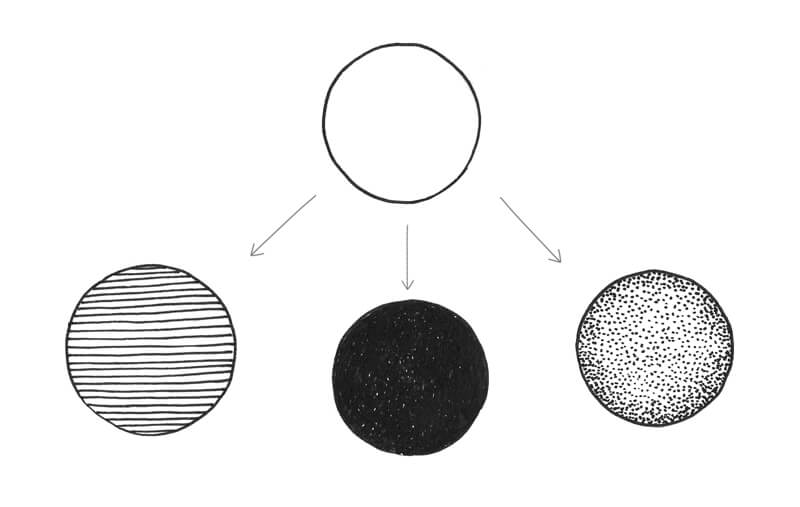
Stippling is a great way to create smooth gradations of tone, but keep your goal in mind. If your drawing session is aimed at relaxation, and lots of stippling annoys you – using this method won’t be the best option.
Try to create some patterns with pronounced lighter and darker areas to create variety. You can add some depth to the patterns that you made previously by broadening the range of value.
The Meditative Doodling Process
Let’s combine everything that we have learned and practiced in a new drawing.
I usually begin this type of project without any clear ideas of the expected outcome. This one is no exception. I’ll be using the 0.3 ink liner for the whole process.
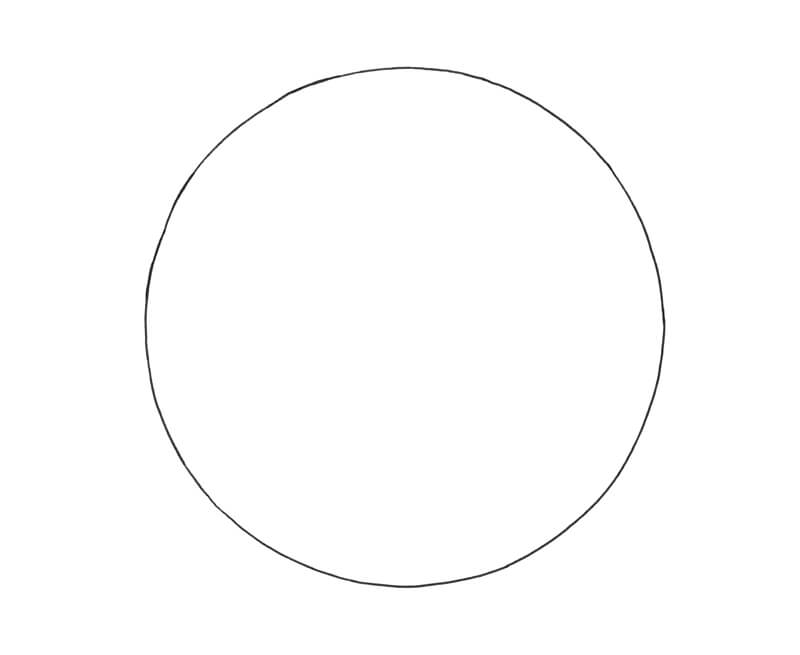
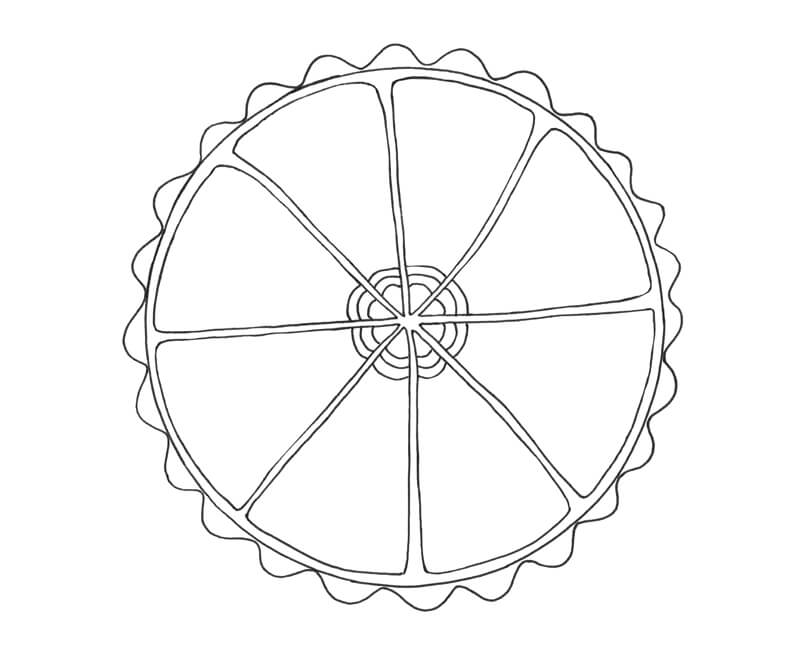
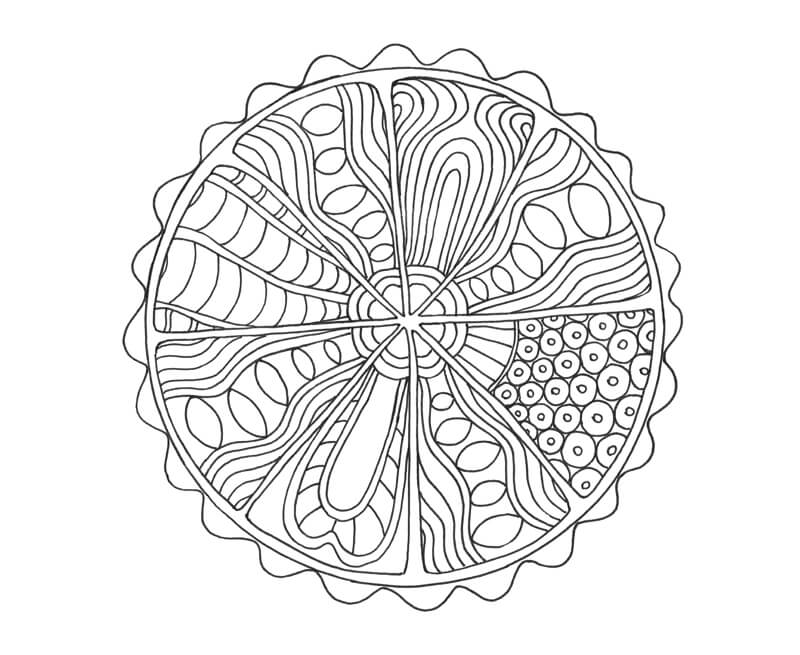
First, I outline a circle. To ensure that this shape will be precise, I’ve used a compass. All other shapes and lines will be drawn without any tools.
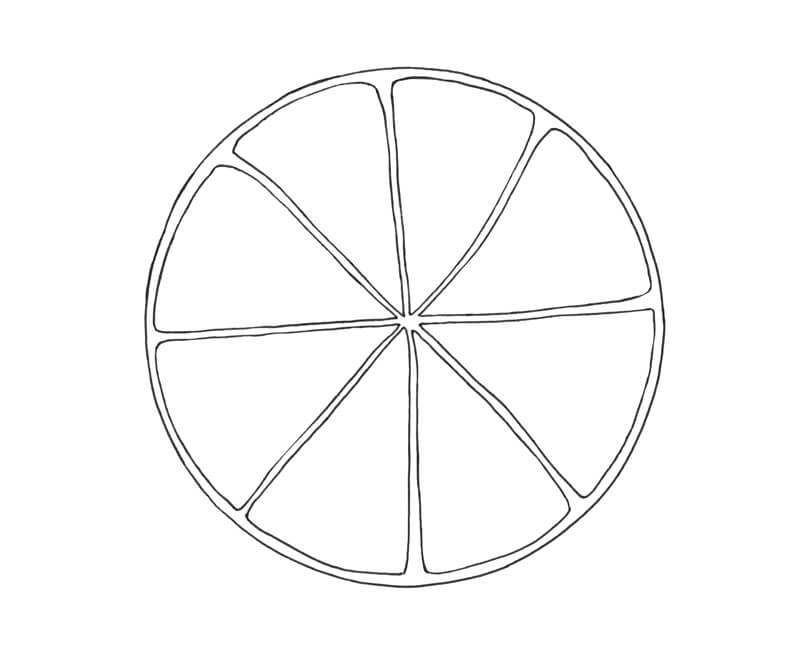
With the circle in place, the idea to draw a stylized slice of lemon enters my mind. I divide the shape into halves. Then I draw four elements in each half.
Their contours are slightly uneven, but this imperfection gives them a more natural look.
It is completely fine to use a graphite pencil to mark the important contours beforehand, especially during the initial steps of the drawing.
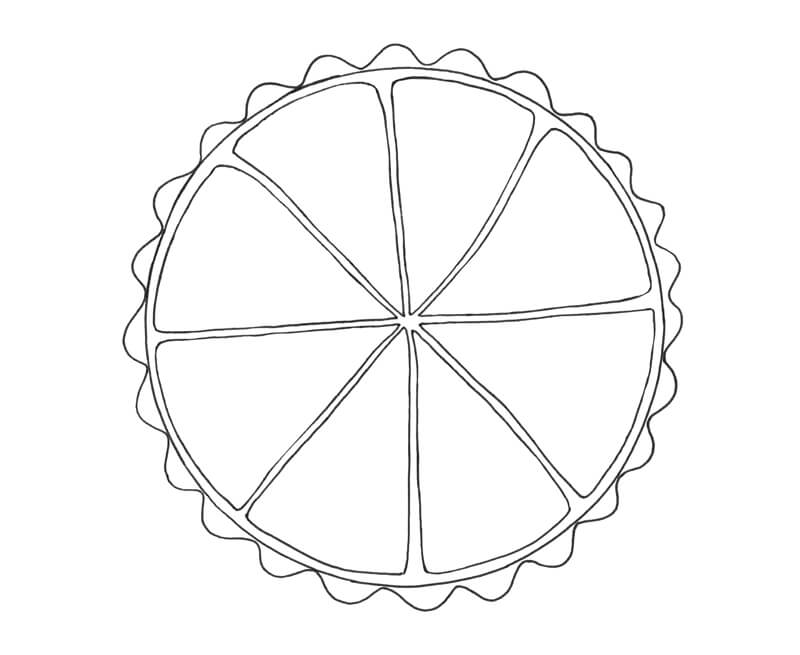
Next, I add a wavy line that is touching the outer edge of the main shape. It is a stylized suggestion of the irregular texture of a real lemon’s skin.
I add lines near the center of the pattern, inside the segments.
I draw a pattern, starting with the main elements.
My intention is to repeat this pattern in every other segment. The remaining sections will have unique patterns.
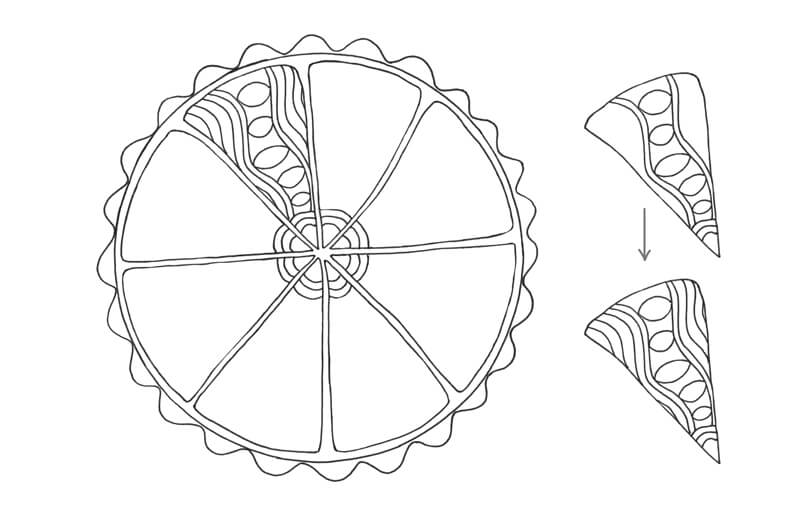
I draw a similar pattern inside every other segment of the pattern. Again, they don’t have to be perfectly even or symetrical.
Feel free to rotate your paper to make this process easier.
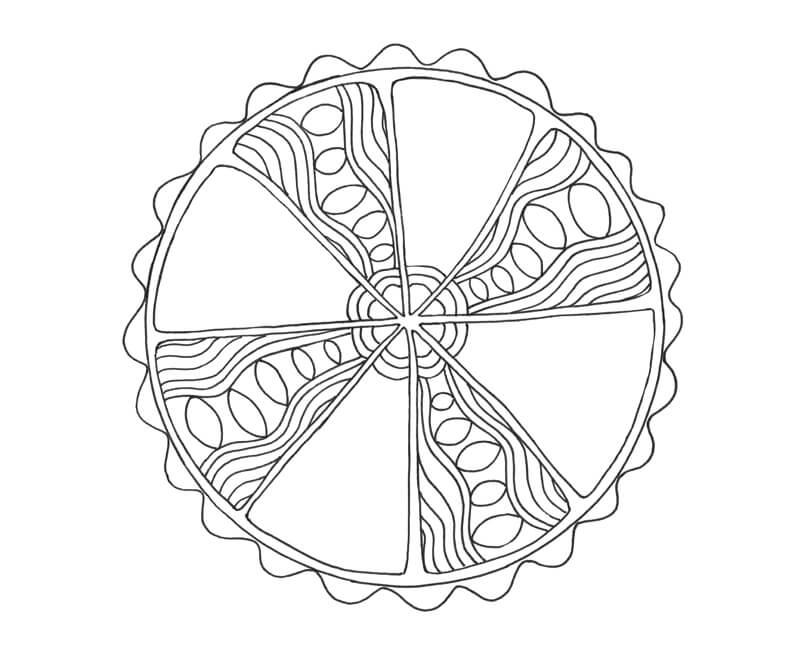
Now we have our repetitive patterns in place. Four segments remain empty.
I fill two sections with different patterns.
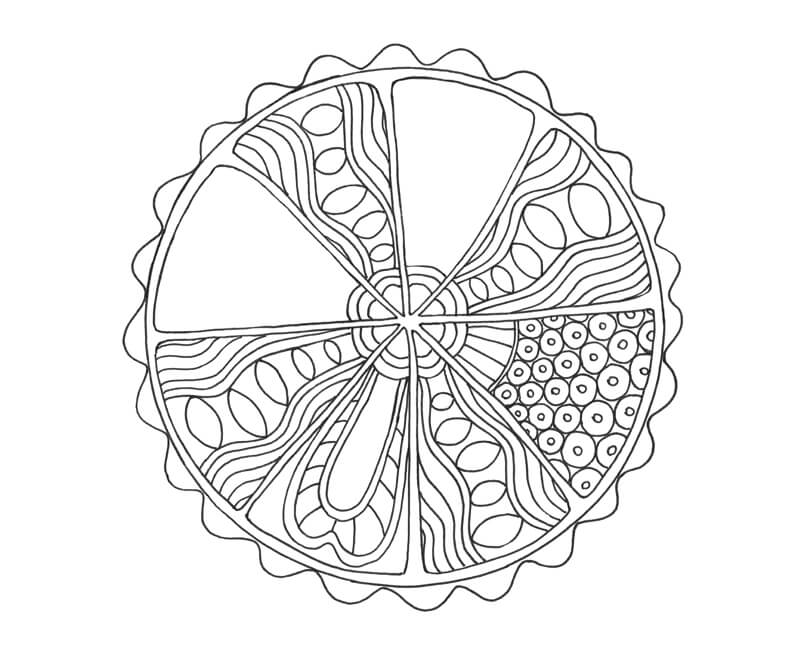
Repeat the same process with new unique patterns and the contour line drawing is complete!
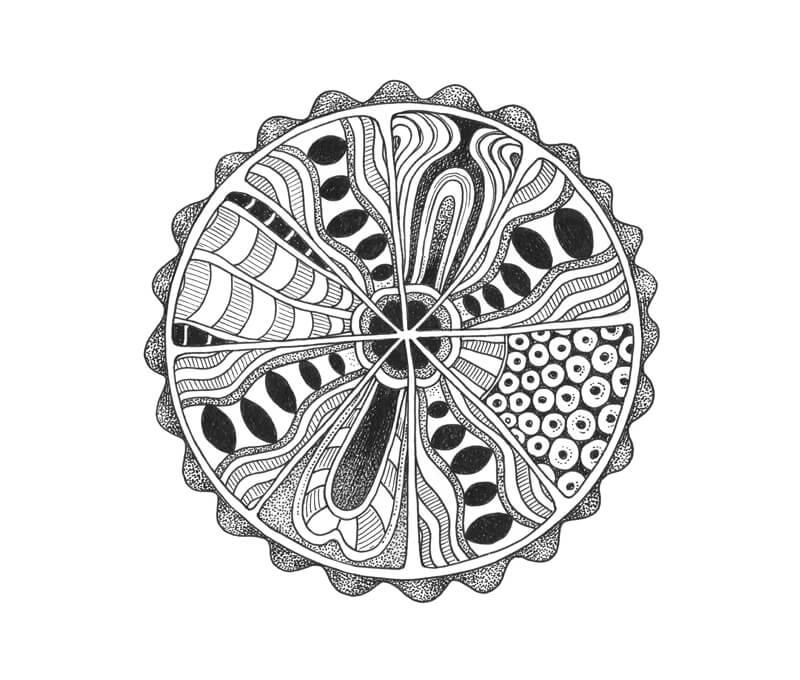
To add depth to the doodle, I darken some areas of the patterns. This not only develops depth, but it also creates contrast, balance, and variety.
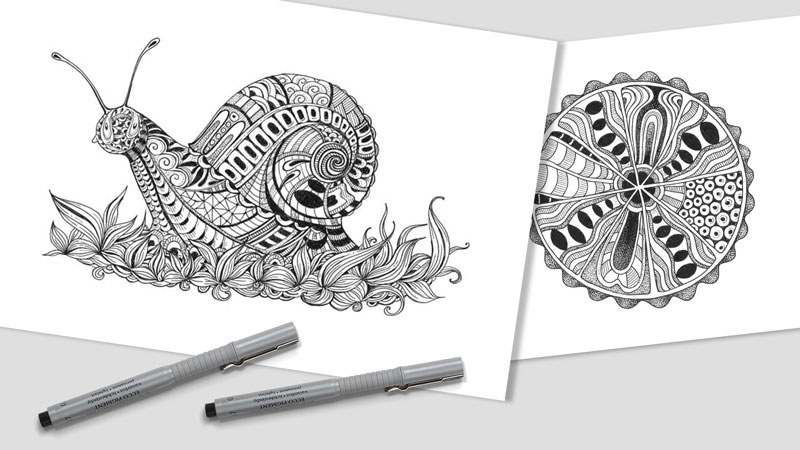
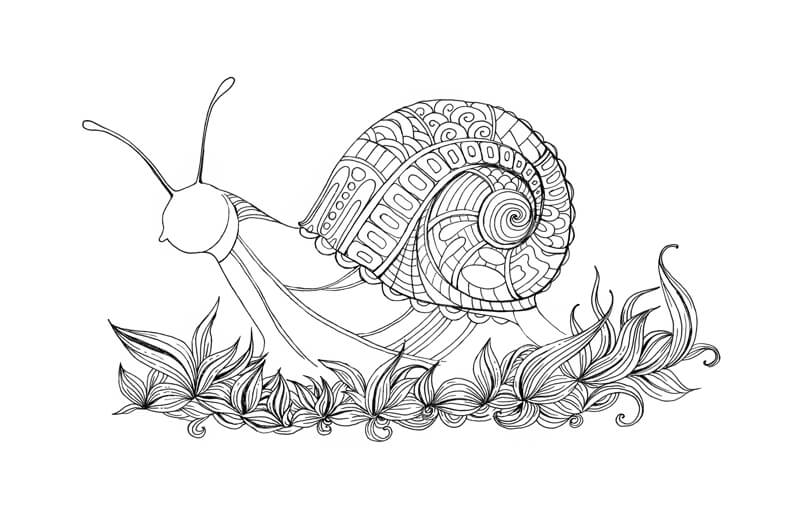
A Doodle Project: Drawing a Stylized Snail
If you are interested in taking your meditative doodles to the next level, then continue on.
We’ll create a stylized black and white drawing that is based on a specific, recognizable subject – a snail. The whole process will be just as fun and calming as it is with simpler warm-ups and non-objective doodles.
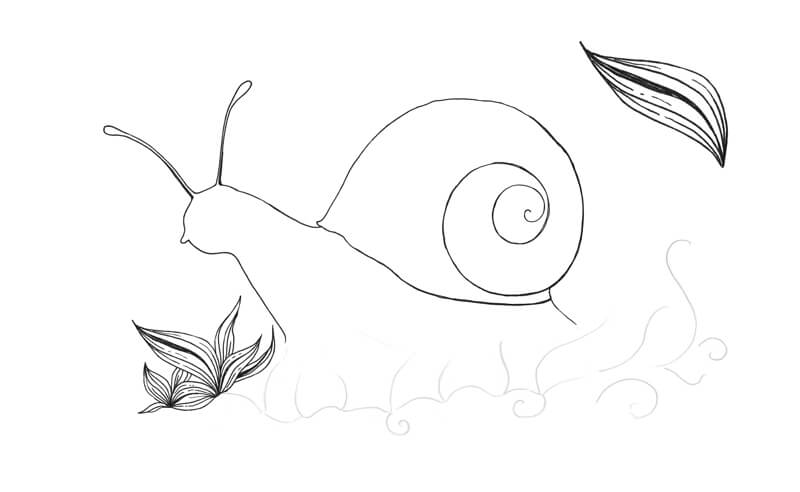
I begin with a quick pencil sketch in order to establish the main contours.
The entire artwork is developed with a 0.2 ink liner.
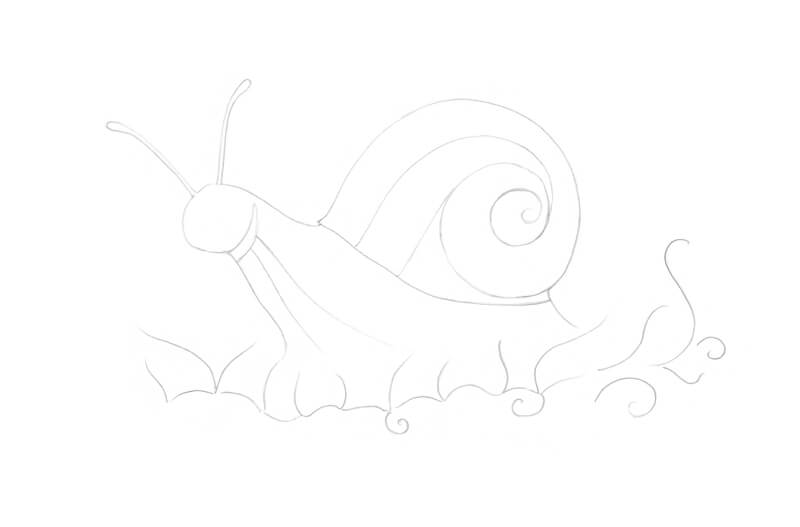
I sketch the contours of the snail, including its shell.
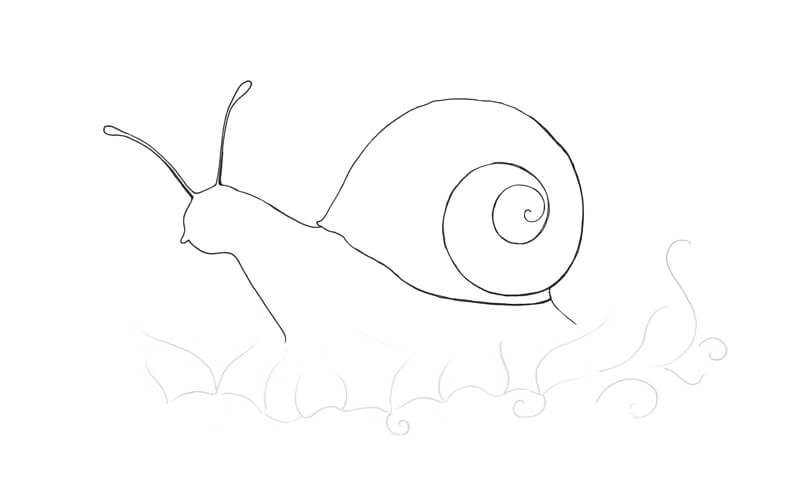
We can widen the lines with the same ink liner, if necessary. But for now, the primary goal is to get the main contours in place, so we can erase all graphite marks.
Let’s next proceed to the foreground. We’ll add some stylized grass blades. They overlap the snail, so it makes sense to draw them first.
Vary the size and direction of elements to achieve a nice organic look.
I darken the gaps between some lines to increase the contrast and create some depth.
I add more grass blades, using the same approach. Each element has its own unique character.

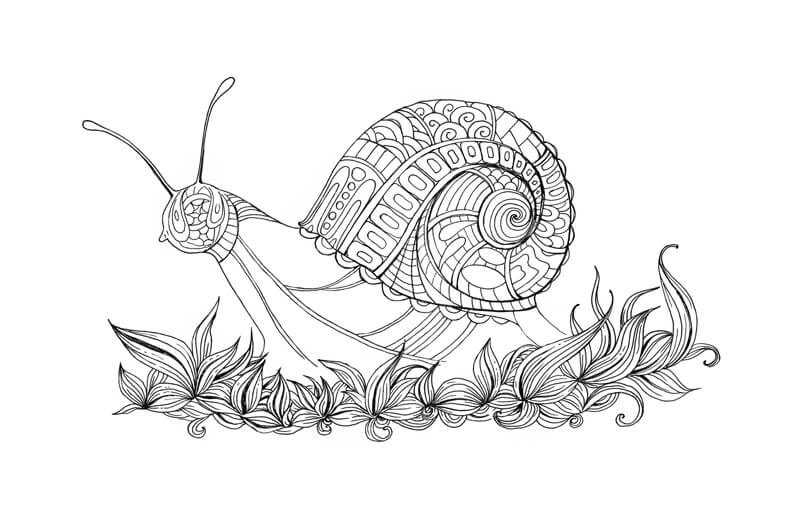
I divide the snail’s shell into segments with single and double lines.
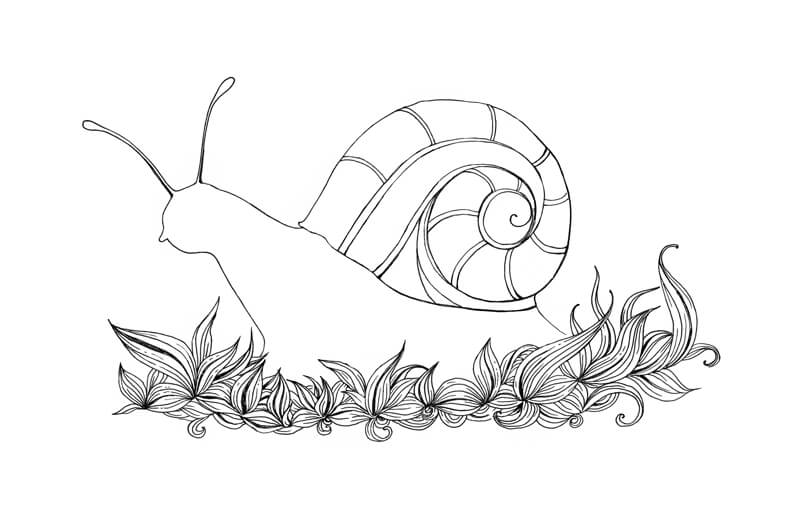
I fill one of the areas with a pattern. I allow the patterns to flow, without much thought or planning.
The pattern follows the curve of each segment, which accents the illusion of form.
I fill more segments of the shell, repeating the pattern.

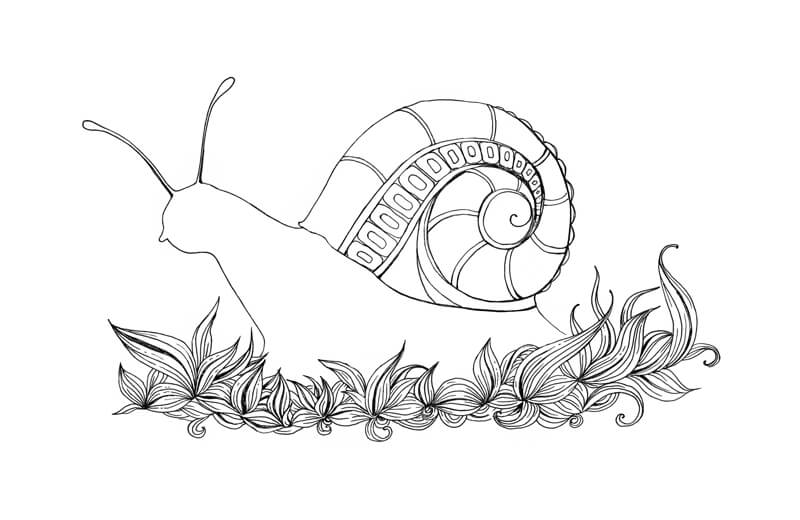
I then continue to fill the rest of the shell with patterns.
I add some lines to the head and body of the snail to create defined edges.
These lines end before they reach the grass blades. It’s important to leave some space for additional elements on the bottom part of the snail.
Next, I fill the head area with patterns. The majority of lines are curved, which accentuates the roundness of the form.
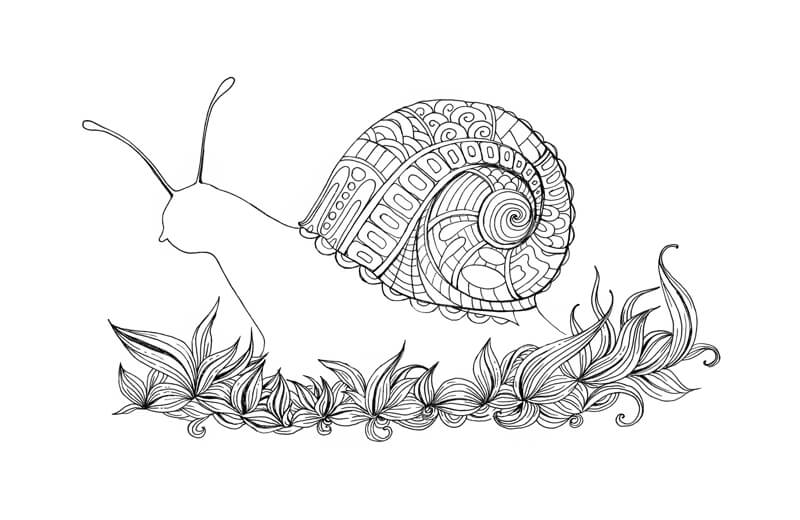
I fill the segments of the body with various patterns. Sometimes it’s helpful to take a break. Examine your work and new patterns will come to you!
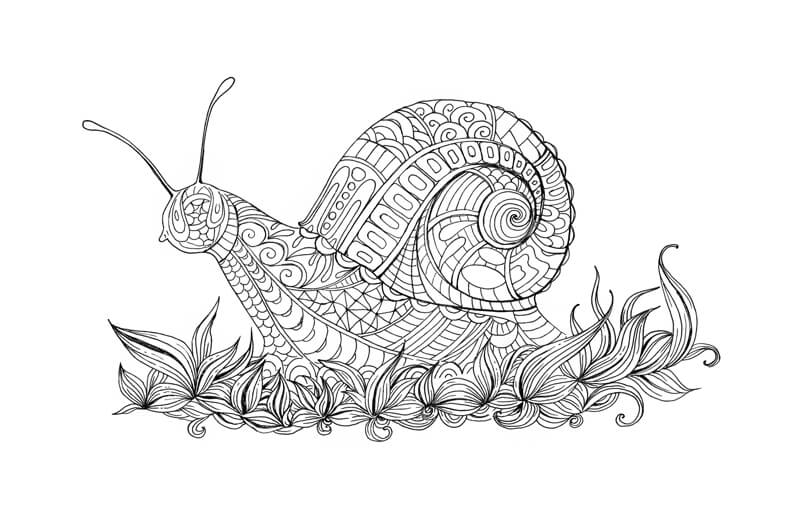
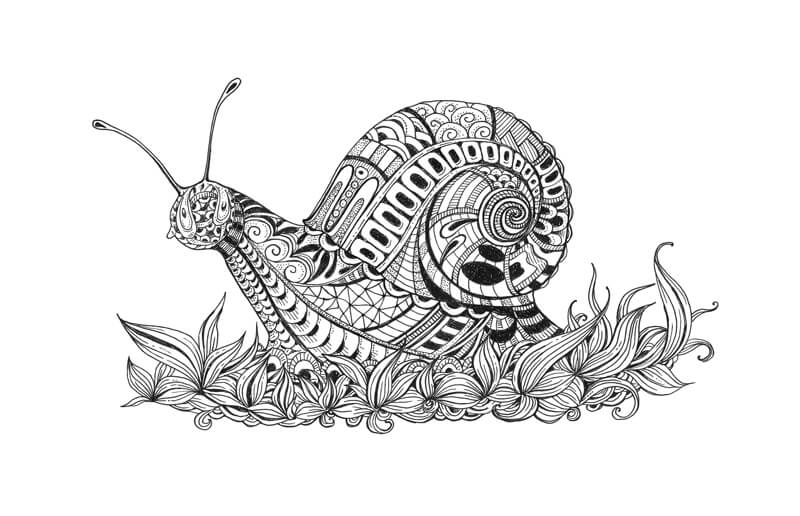
Now, we’ll develop some contrast by darkening some elements of the patterns.
It’s up to you to decide what shading techniques to use. The “plain black” approach creates the darkest spots.
Stippling and hatching is better for creating value gradations that look smoother or more delicate. This approach will create the impression of gray, rather than black.
See also: Optical Color Mixing
Conclusion
I hope that you enjoyed our doodling journey. The process is fun and relaxing and a great way to clear your mind and create at the same time.
Creating art opens up a whole world of possibilities for self-exploration and self-expression. It can help you become more happy and reduce stress. Meditative doodling doesn’t require a high degree of skill or expensive materials. You can do it anywhere and the results are often quite pleasing.
Happy doodling!
If so, join over 36,000 others that receive our newsletter with new drawing and painting lessons. Plus, check out three of our course videos and ebooks for free.