
Construction refers to the practice of breaking complex objects down into basic shapes. The artist then pieces these basics shapes together to form the more complex shape of the object that they wish to draw.
Understanding the Concept of Construction in a Drawing
We can compare the process of drawing construction with that of constructing a house. A house needs a foundation and a structure before the finishing touches are added. Of course, all we see are the finishes, but a complex structure exists underneath. Without the underlying structure, the house would not stand.
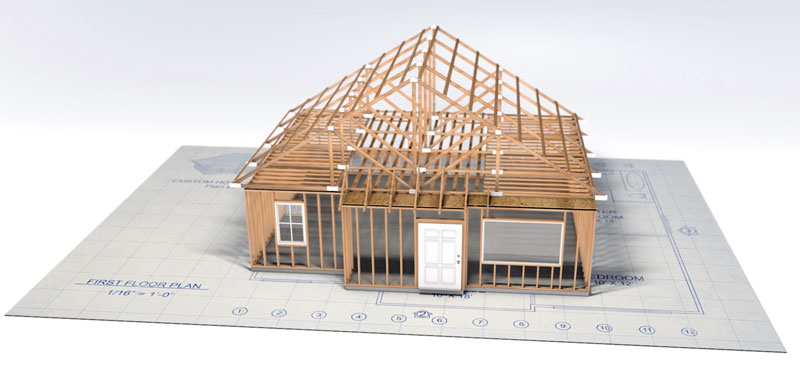
Our drawings also need an underlying structure. And by starting with the structure, we can ensure that our drawings are more accurate.
Looking For Basic Shapes
The first step in construction is to identify the basic shapes that comprise our subject. This is a subjective process. You may see different shapes than someone else and this is perfectly acceptable. You can break subjects down in any manner that makes sense to you. But remember, simple shapes are easier to draw and easier to piece together, so it’s advised to look for the most basic shapes if possible.
Let’s see how this works with three different examples…
Example 1 – A Ketchup Bottle
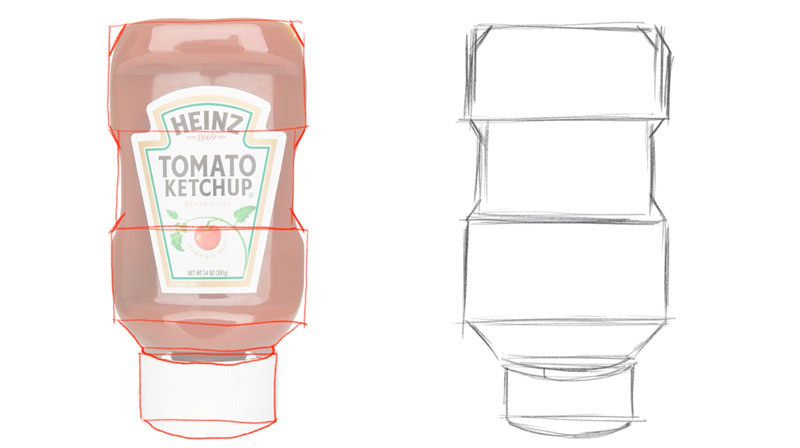
We’ll start with a very simple example – a basic bottle of ketchup. This bottle is presented from a straight on view, so our shapes will be easy to discern.
Take a look at the bottle and see what basic shapes you may be able to pick out.

The most basic shapes are a couple of rectangles. These shapes are easy to see and it’s fine to start with these. But if we look a little closer, we’ll find that we can break this object down even further. We can still use rectangles for this.
Once we’ve drawn the basic shapes, we can draw additional elements. For example, we can add the slight diagonals that happen at the bottom and top of a few of the rectangles.
We can also draw the label using basic shapes as well.
Then, once we have the construction drawing in place, we draw the contour lines right over the top. If you wish, you can carefully erase any of the remaining lines to clean up the sketch.
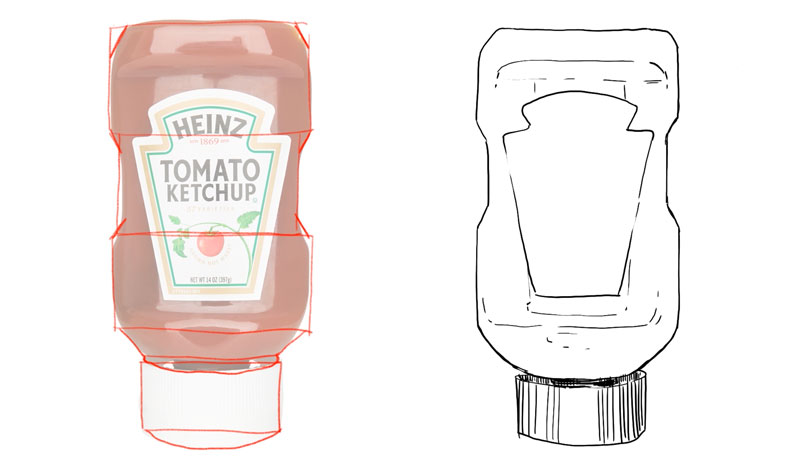
Our drawing is clearly not a refined or finished drawing, but the overall shape is in place. If we wanted to, we could complete the sketch by adding shading or color and refine it further.
Let’s take a look at another example…
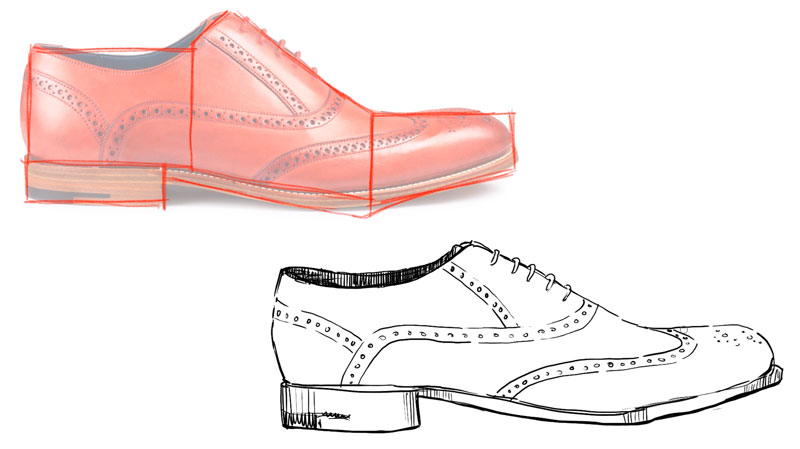
Example 2 – A Shoe
One of my favorite objects to use when discussing construction is a shoe. A shoe can be broken down into basic shapes relatively easily, but the shapes are slightly different from each other.
Let’s look at how to draw this shoe with basic shapes. First, take a look at the show and try to pick out a few basic shapes. Remember, we’ll all see things a little bit differently so the shapes that you see may different from the ones that I see.
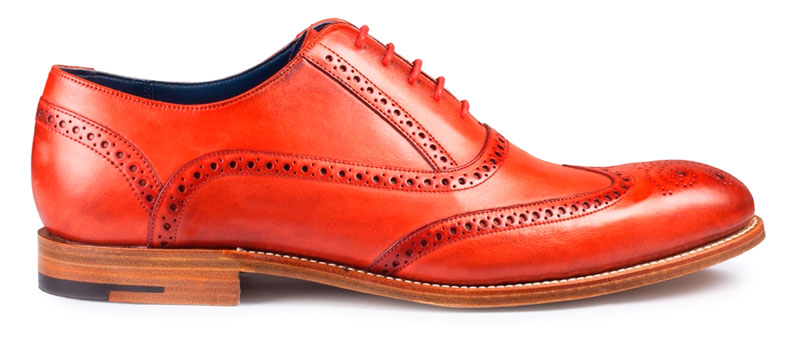
When I look at the shoe, these are the shapes that I see…

We’ll draw the basic shapes first using light sketchy lines. It may be helpful to draw several loose lines instead of trying to draw the perfect lines with just one mark. Remember, this is just the underlayment. No one will see the lines that we draw at this stage, as long as we draw them lightly and erase any remaining marks.
With our loose sketch in place, we can add the contour lines. And since we have a nice foundation in place, we can draw these contour lines with a bit more confidence.
Now, let’s look at one more example…
Example 3 – A Bird
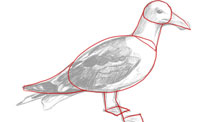
Next, we’ll look at a subject that is little more complex – a bird. Even though this subject is a little more complex, we can still break it down into easy to draw shapes.

We’ll start with head, drawing a simple oval. From there we can draw a shape for the main portion of the body, the tail feather, the legs and talons, the eye, and the beak.
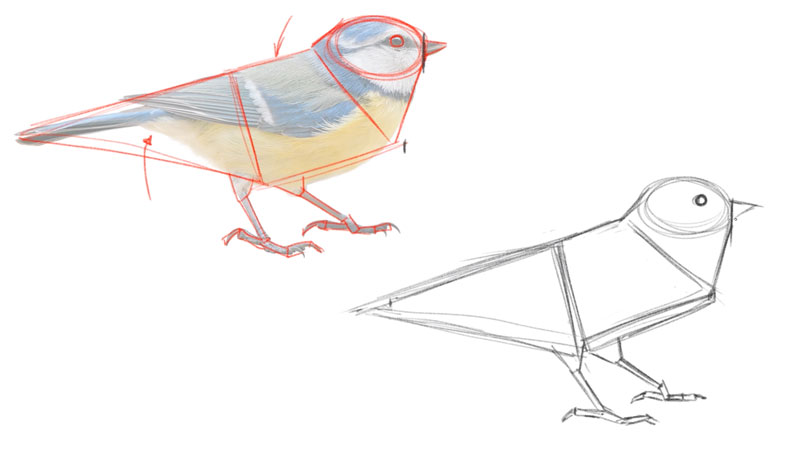
Then, just as we did with the other examples, we can add the contour lines over the top.
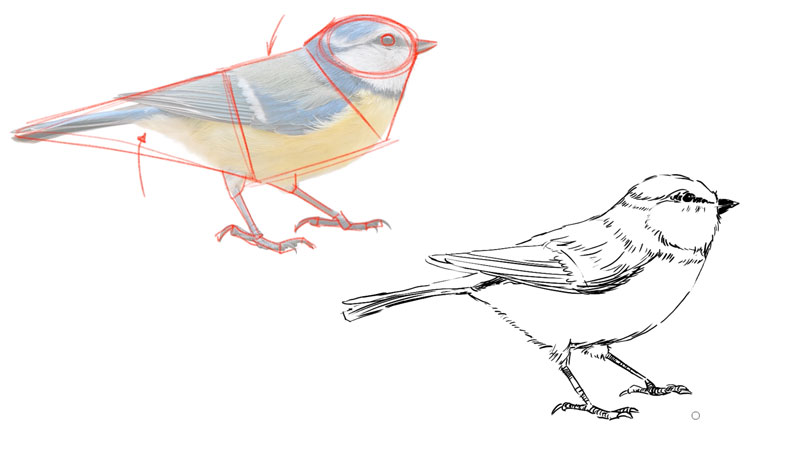
Again, our sketch here is not a completed drawing, but it’s a good start. If we wanted, we could add shading to develop the texture and the illusion of form to complete the drawing.
Conclusion
Construction is basic principle of drawing. It helps us to plan out the subjects that we wish to draw and provides a framework for developing the rest of the image. Not only that, it also helps to ensure accuracy and increases our drawing speed.
The more that you practice this skill, the better you’ll become at deconstructing the objects that you draw. Pretty soon, you’ll be seeing shapes in everything.
If so, join over 36,000 others that receive our newsletter with new drawing and painting lessons. Plus, check out three of our course videos and ebooks for free.


Thanks Matt This is an amazing site. All the Best