Gettin’ Sketchy – Drawing a Scorpion – Season 4 Episode 9
This episode aired live on YouTube on July 28, 2021.
A scorpion is not a creature that you’d love to encounter, but it is a wonderful subject for drawing. There are plenty of challenging shapes, textures, and value shifts found on this particular critter. This makes a scorpion an excellent subject for a timed drawing exercise. In this lesson, we’ll draw a scorpion with graphite pencil on white drawing paper in just 45 minutes.
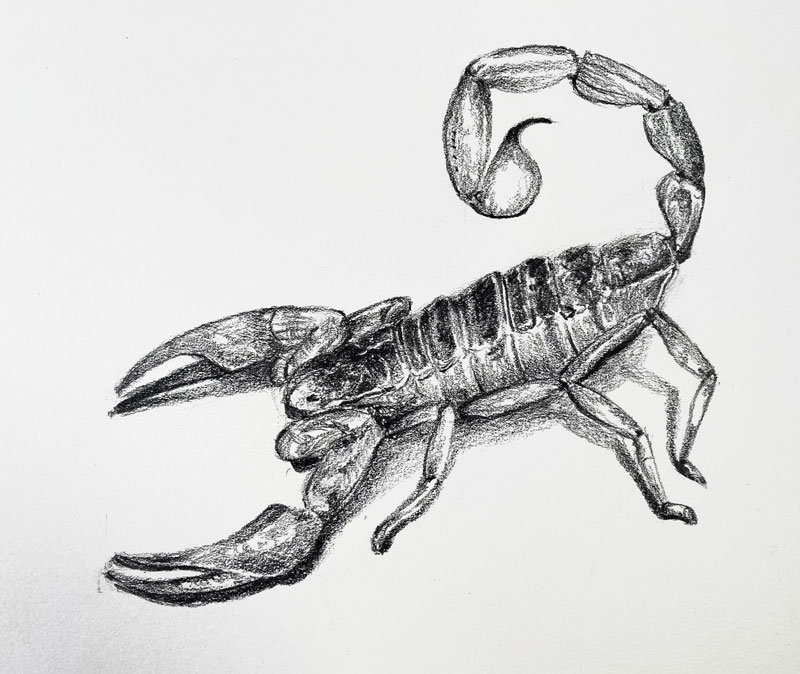
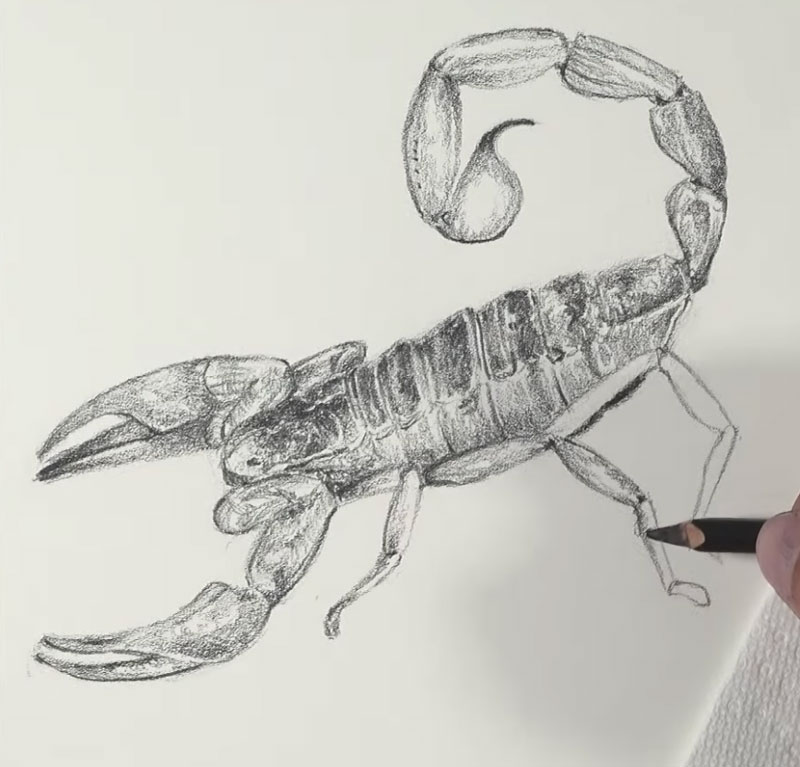
Here’s a look at the completed drawing…
Start the Drawing with a Basic Shape
In most circumstances, I like to begin a drawing by looking for basic shapes. By simplifying the subject down into basic shapes, I’m able to ensure better accuracy and increase the speed of the drawing. These basic shapes also give me a starting point for making comparisons. Even the most complex subjects can be broken down into simplified shapes.
In the case of this scorpion, I begin with a shape for the main portion of the body. Instead of focusing on the details or the small segments of the exoskeleton, I start with a simple ellipse.
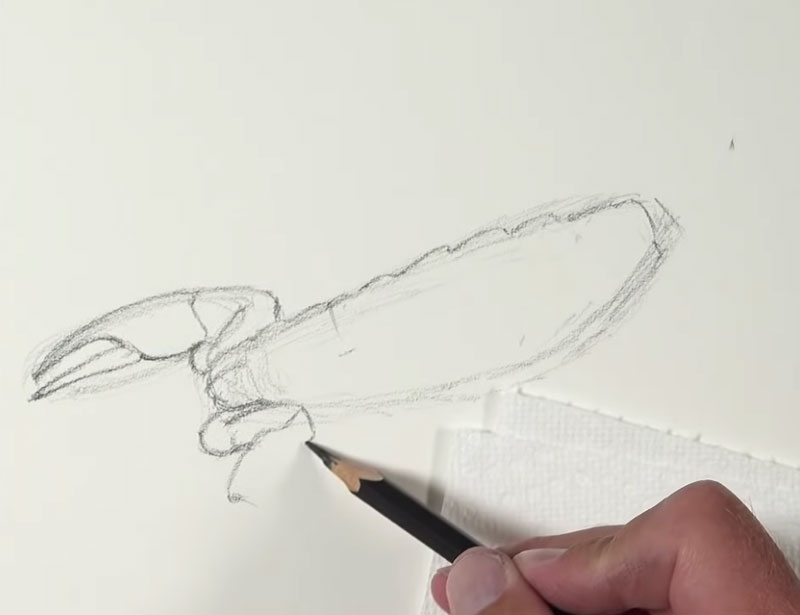
This initial shape provides a starting point for visual comparison. From this first shape, I can begin building out the basic shapes of the other parts of the scorpion. Each shape that I add branches out from the previous one. As I continue adding shapes, I can gradually begin to draw the outer contours or outlines.
We can see this method of construction take place with the first of the two menacing claws. First a simple ellipse is drawn lightly. Inside of this ellipse, additional simple shapes are “carved out” of the ellipse. The contour lines are added using the ellipse as a guide. The result is an accurate contour of the claw.
See also: How to Draw Ellipses
Drawing the Contour Lines or Outlines of the Scorpion
This approach of recognizing and drawing simplified shapes continues as I work around the body of the scorpion. After the first claw is added, I work down to the second and then address each leg segment. Then, I return to the body and refine the segments of the exoskeleton.

This process continues with the tail of the scorpion. However, instead of drawing one simplified shape for the entire tail and stinger, I decide to draw each segment one by one.
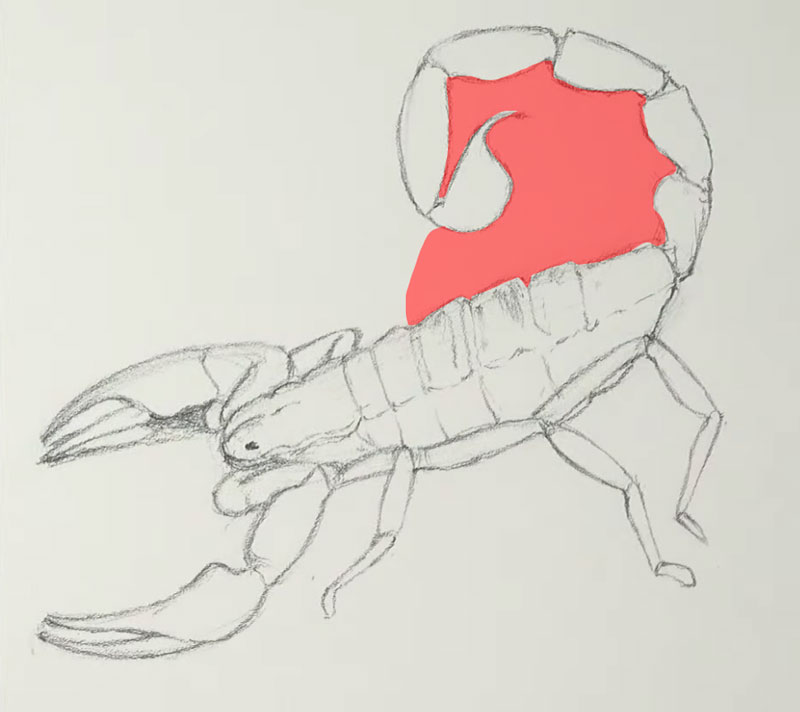
As each segment is drawn, I pay attention to the negative space in between the body and the tail. This negative space forms a clear shape. Instead of using just the positive space to make visual comparisons, I can also use the negative space as well. This leads to even greater accuracy in the drawing.
See also: Positive and Negative Space
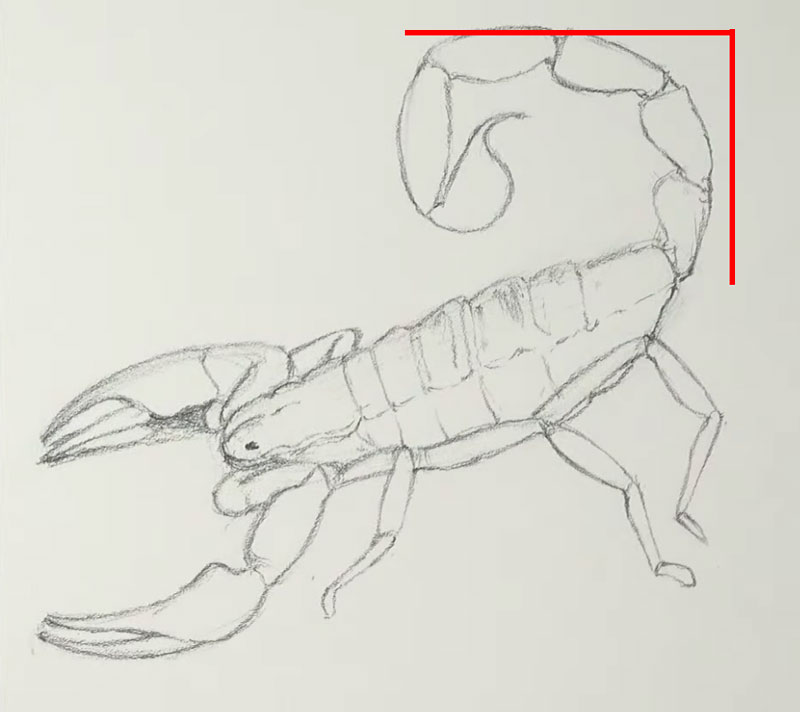
On top of the negative space, I am also paying attention to how high up on the picture plane the tail should go and how much it needs to extend back over the body. All of these small observations and comparisons work together to ensure drawing accuracy.
Shading the Drawing and Developing Details
Once the contour lines of the drawing are in place, I’m ready to begin developing the value and the texture. Value and texture are both important, yet different, elements of art. Texture is heavily dependent on value.
While directional stroking plays an important role in the illusion of texture in a drawing, it is the relationship of values that plays an even more important role. The intensity of contrast and positioning of values tells us whether a surface is smooth, rough, shiny, or matte.
Considering the relationship between value and texture, I begin shading the drawing rather quickly. To adjust the value, I simply adjust the amount of pressure placed on the pencil. This pencil, which we’ll get to in a moment, is softer and allows me to make both dark marks and light marks.
Since I am right-handed, I work from the left side of the picture plane to right. This ensures that the palm of my hand stays out of the way of graphite and minimizes the risk of accidental smearing.
As I work, I try to develop a full range of value. This means that my goal is to develop the darkest values and the lightest values with middle grays in between.
As the shading continues, I pay attention to the contrast in value. In areas where the contrast is not quite strong enough and parts of the scorpion are lost, I adjust the tone to ensure enough contrast. This is a deviation from the photo reference, but it makes each part of the drawing easy for our viewer’s to understand.
Once the values on the body of the scorpion are developed, I add a cast shadow underneath the body. This shadow is more intense and darker where the scorpion makes contact with surface.
Materials For Drawing the Scorpion
Since this is a sketch, simple and inexpensive drawing tools are used. In this case, the white paper is basic 80 lb. drawing paper. The pencil is a little more special. It is a Blackwing Matte pencil which is a bit more expensive than a regular drawing pencil. However, it is quite versatile and doesn’t produce quite as much shine compared to other graphite drawing pencils.
See also: Blackwing Pencil Review
Photo Reference
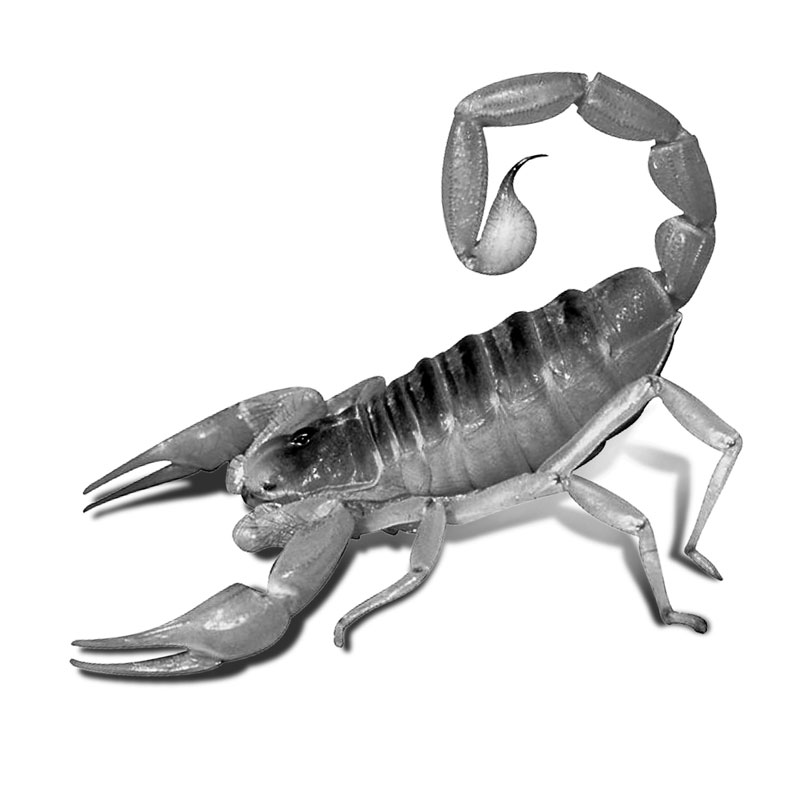
The photo reference for this drawing comes from Pixabay.com. It has been manipulated with Photoshop. The color was removed and the contrast in value was strengthen. The scorpion was also flipped horizontally and a cast shadow was manually added.
Here’s a look at the photo reference…

Drawing a Scorpion – Timed Drawing Exercise – Conclusion
Drawing is a skill that must be practiced in order to see improvement. The more practice that you put in, the more you will see improvement. Don’t be afraid to tackle subjects that seem too difficult. These subjects are often the ones that lead to greatest improvement. Remember to look for basic shapes and use these shapes to build your drawing. Then address the contours and the shading. When we approach drawing in this way, a complex subject (like a scorpion) is a breeze.
If so, join over 36,000 others that receive our newsletter with new drawing and painting lessons. Plus, check out three of our course videos and ebooks for free.