Draw a Diamond with Pencil and Charcoal
We all have a natural tendency to label subjects that we draw or paint as “difficult” or “easy”. Usually, subjects whose forms are basic or are lacking clear details receive the “easy” label. We typically designate subjects with lots of details or complex shapes as “difficult”.
While it is true that some objects are potentially “easier” to draw than others, the reality is that the process of drawing complex subjects is essentially the same as drawing simple ones. Less complex subjects simply take less time to draw compared to complex subjects. So, we should say that some subjects are “less time-consuming” to draw while other, more complex objects, simply take more time and attention.
One subject that continually captivates artists and audiences alike is the reflective and transparent object. Glass and shiny metals fall into this category and when the artist successfully captures them in a drawing, the result is often impressive.
See also: How to Draw a Glass of Water
These highly reflective, awe-inspiring subjects may seem very difficult to draw, but they’re a lot easier than most people think. Successfully capturing these subjects in a drawing boils down to the basics of observational drawing.
In this lesson, I’ll share with you just how easy it is to capture a “difficult” complex subject like a diamond in a drawing. You’ll see just how simple this process can be and how anyone can do it.
It’s not about talent, it’s about patience and knowledge. Let’s get started.
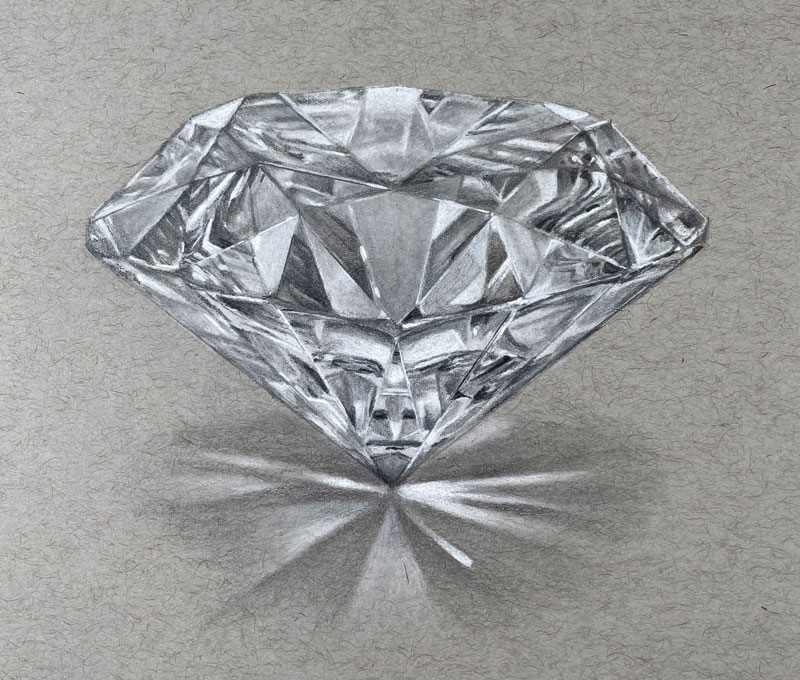
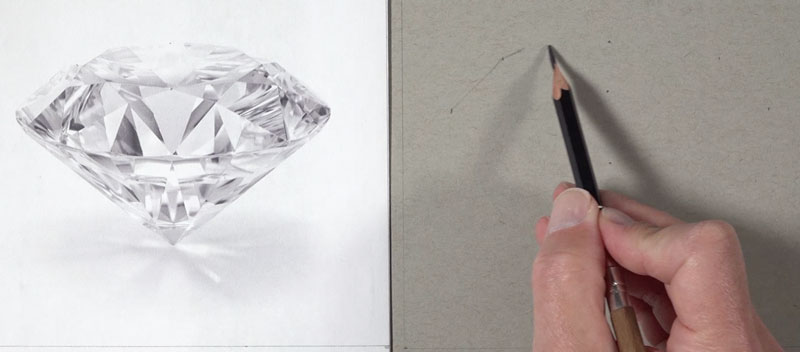
Here’s a look at the completed drawing…
Materials and Surface for Drawing a Diamond
Let’s start by briefly discussing the materials and surface that are used for this drawing. It may seem trivial, but the surface and the materials play an important role in developing this illusion.
The surface is gray toned drawing paper by Strathmore. A gray surface provides a neutral, middle value. Starting from a middle value allows us to push the lights and the darks to create a full range of value which leads to a more realistic drawing.
We see the world around us in a full range of value. This means we see the darkest darks, the lightest lights, and a whole range of values in between. Therefore, we need to replicate this range in our drawings as well.
Working on a surface with a middle value encourages a full range of value in the final drawing. We simply need to add lighter values with a light drawing medium and darker values with a dark drawing medium.
See also: 6 Reasons to Draw on Toned Paper
Our lighter values are created with white charcoal. While this medium is called “white charcoal”, it is speculated that this material is actually calcium carbonate. Nonetheless, this drawing medium performs identically to compressed black charcoal. This means that it is easily blended and smudged with a blending tool.
Our darker values are developed with graphite. An H, HB, and 2B pencil are used in this lesson, but you may need to go darker by adding a 4B or even 6B pencil. If you find it difficult to make the values as dark as they need to be, adding a darker pencil will help.
Charcoal and graphite are two different mediums and as a result, behave differently on the drawing surface. For this reason, we need to consider the order and manner in which they are applied on the surface.
Graphite pencils will mostly cover applications of white charcoal. However, the reverse of this is not true. White charcoal will not cover graphite applications easily. To combat this, areas where lighter values are to be applied must be preserved with white charcoal before getting too dark with graphite pencil applications.
Drawing the Diamond with Accuracy
There are several methods for ensuring that the contour lines of your subject are accurate on the drawing paper. You could use the grid technique or a graphite transfer. In this lesson, I’d like to share a third method. This method requires a printout of the photo reference that is exactly the same size as the drawing surface and designated picture plane.
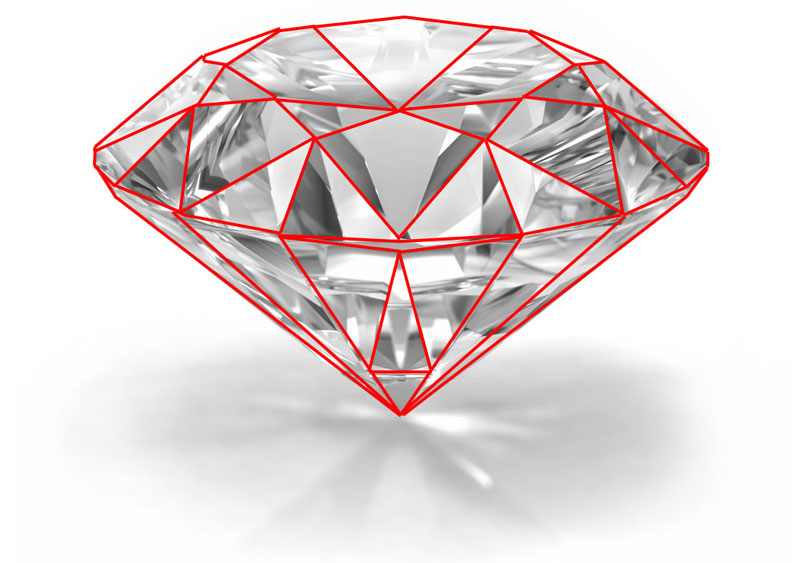
Here’s a look at the photo reference used for this drawing…
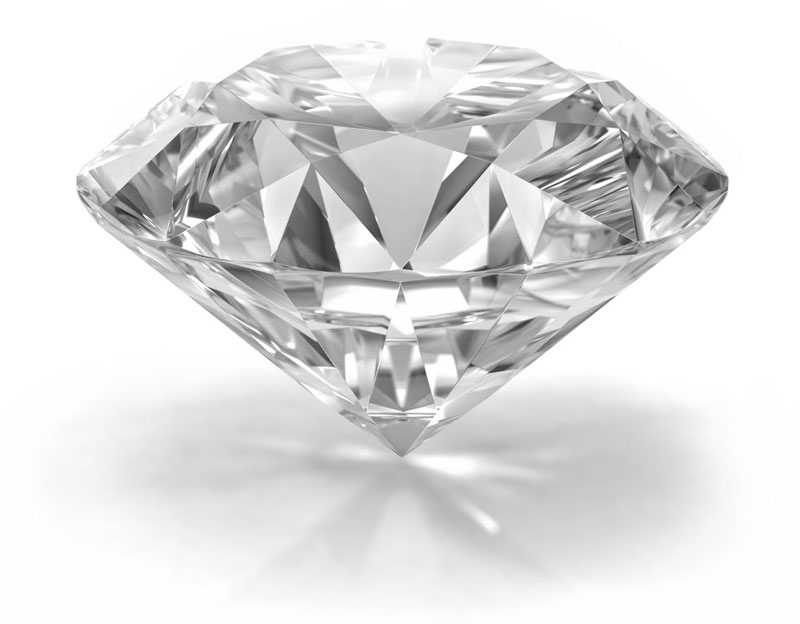
If you play around with your printer settings, you should be able to print the reference so that it is the size you wish the drawing to be.
We’ll use measurements taken from the photo reference to position the lines for our diamond on the drawing paper. You can use any measuring device, like a ruler to take these measurements. However, you can also use a simple piece of paper as I have in this drawing.
Using small piece of paper, measurements are recorded with small dashes over the reference photo. Since the designated picture plane is exactly the same size and shape as the photo reference, these measurements are easily reproduced on the drawing paper.
In this case, I recorded the locations of the top, bottom, and middle of the diamond. I then recorded the outer edges of the diamond and specific points where the top of the diamond angled down to its outer edges. You can take and record as many measurements as you wish.
Using these basic measurements, we can “find” the shape of the diamond and essentially “connect the dots” to draw the lines. These lines are drawn with a light touch using a light, H graphite pencil.
Drawing the Basic Shapes of the Diamond
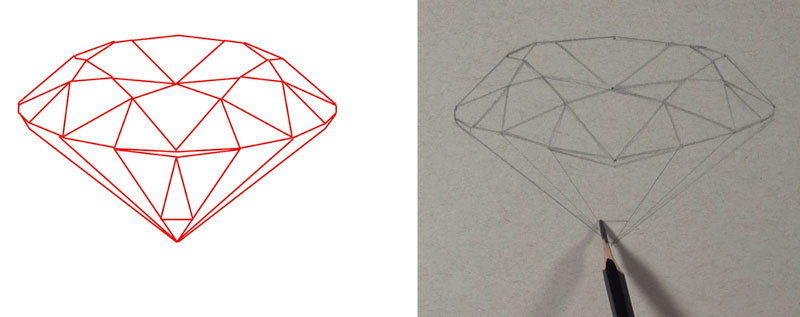
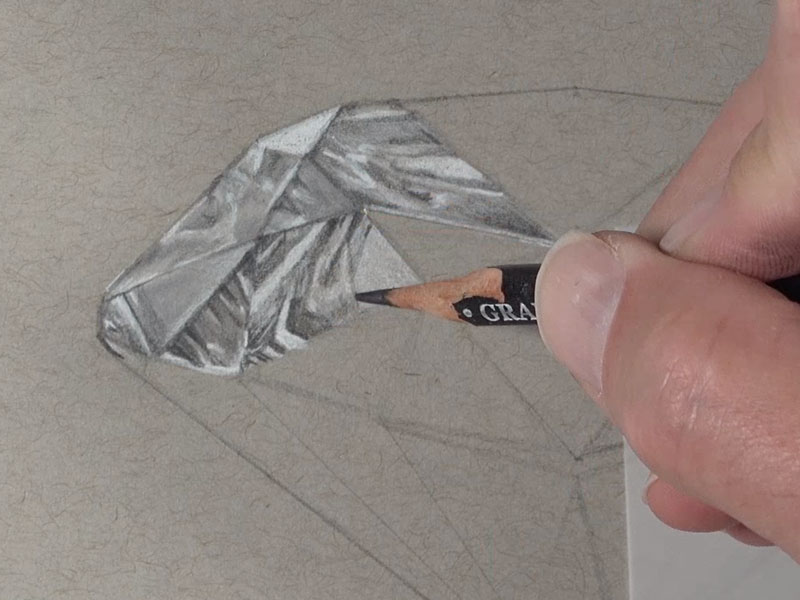
With the outer contour lines of the diamond drawn, we can now focus on the planes of the form. In this case, these planes can be simplified into triangles and a few trapezoids.
Starting at the top of the diamond, I carefully begin drawing each shape by connecting lines. At first, these lines are drawn “freehand” with light, loose marks of the H graphite pencil. But once I feel confident with my loose lines, I reach for the ruler and make the lines as straight as possible.
It’s important to place only light pressure on the pencil when making these lines. If you place too much pressure on the pencil, small grooves will develop on the paper. These grooves may be visible when the drawing is complete so it’s best to make very light marks that don’t indent the paper.
Before moving on to the next step, you may consider using a kneaded eraser to gently lift up some of the graphite. This should leave you with a light contour line drawing of the diamond that is still faintly visible on the surface.
Shading the Diamond
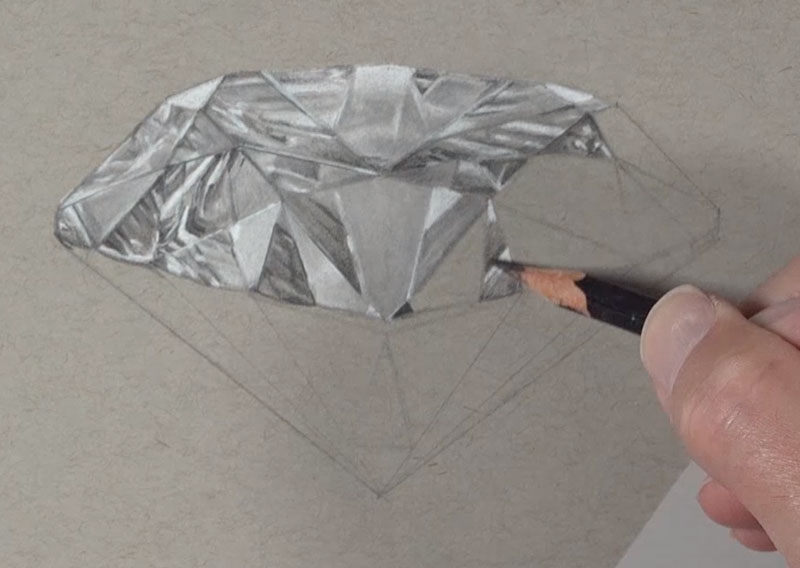
Now, it’s time for the magic of this process. It’s at this stage where the drawing will transform and the realism will begin to take shape. To do this, we will methodically add both white charcoal and graphite to mimic the values in each shape.
Within each shape, you’ll notice additional shapes of differing values. We’ll simply copy the shapes and match the values to create the illusion.
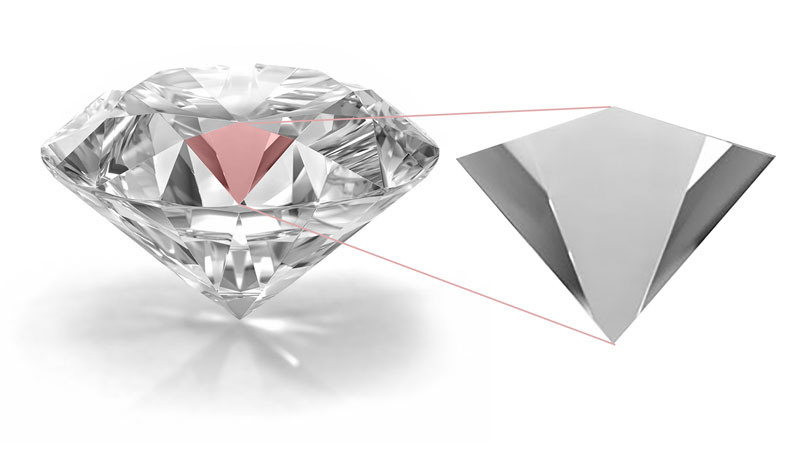
Some shapes feature gradations of value, or gradual changes from dark to light. Some shapes feature dark shapes right next to lighter shapes. It is the contrast in the values and the shapes that will ultimately lead to realistic drawing.
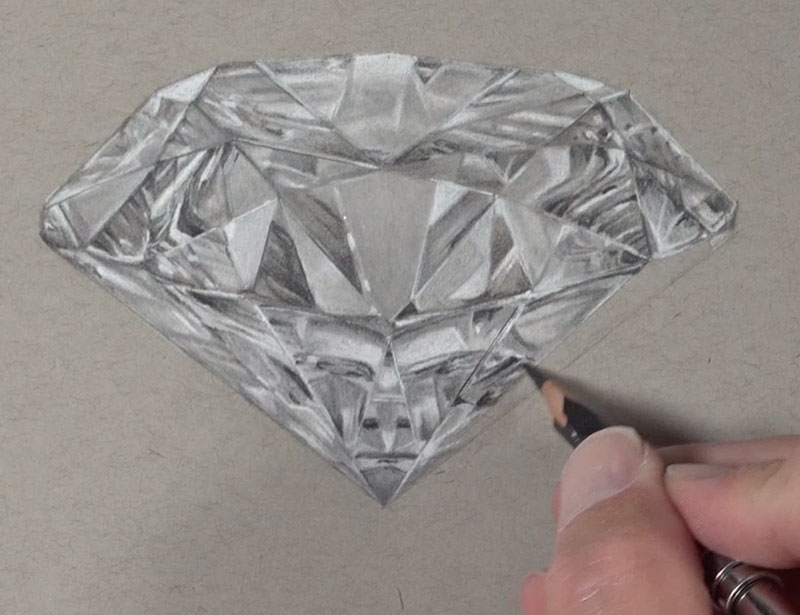
With highly reflective or glass-like objects, we often see dark values right next to light values. Capturing this in your drawing is the secret to creating this realistic illusion.
Considering the nature of the combination of media for this drawing, we’ll preserve areas of lighter value with the white charcoal before adding graphite. Essentially, we’ll start with middle values and progressively push them both darker and lighter.
In sections that feature smooth transitions of value, blending tools like stumps are used. To help prevent contamination introduced with a blending stump, I like to use one stump for lighter values and one for darker values. It doesn’t hurt to have one stump reserved for middle values as well.
Not all areas are blended and some applications are made using just the pressure of the pencil. If you blend everything, you’ll loose the variety that you need to create a convincing illusion in the drawing.
It’s at this point in the drawing where the process begins to slow and the importance of patience is realized. Work slowly as you move from shape to shape and take breaks. While taking a break, analyze your drawing and look for values that you may have missed.
So as you see, it’s not necessarily difficult to draw the values, but it is time-consuming. But if you work slowly and take your time, then anyone can do this. This isn’t difficult at all – it’s just a slow process.

Adding Shadow Underneath
Even though a diamond is mostly transparent, it still produces a shadow. At this point in the drawing, we have a floating diamond without a shadow, so let’s add one.
But before we grab that graphite, let’s take a closer look. Because light passes through the diamond, the light is intensified in areas. This produces locations of light values where we would typically expect to see darker ones. We’ll use the white charcoal pencil to address the lighter values and the graphite pencil to address the darker tones.
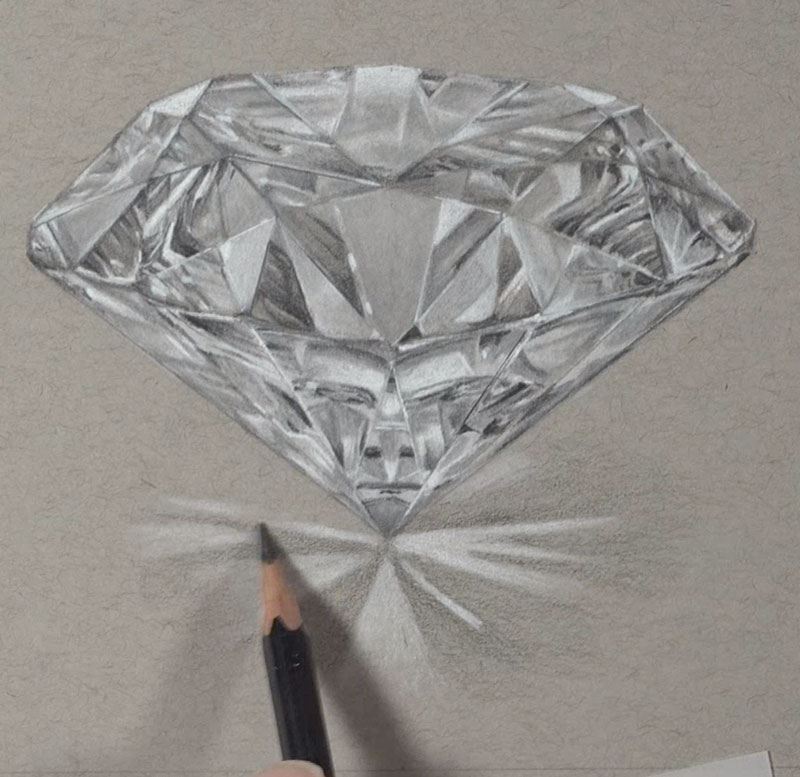
A blending stump is used to soften the cast shadow, completing the drawing.
How to Draw a Diamond – Conclusion
Now our drawing of a diamond is complete. Here’s another look at the completed drawing…
Having the ability to push values lighter or darker on a toned surface is an advantage. We can essentially work the values until we are pleased with them. The combination of white charcoal and graphite gives us this advantage.
No subject should seem too hard to tackle. It’s simply all about observation and sometimes – analyzation. A drawing may look complex when complete, but often the process to create it is much simpler.
If so, join over 36,000 others that receive our newsletter with new drawing and painting lessons. Plus, check out three of our course videos and ebooks for free.