Drawing a Horse with Charcoal
Horses are wonderful creatures. They combine an element of gracefulness with strength and beauty. In this drawing lesson, we’ll take a look at the process of drawing a horse with charcoal on toned, gray paper.
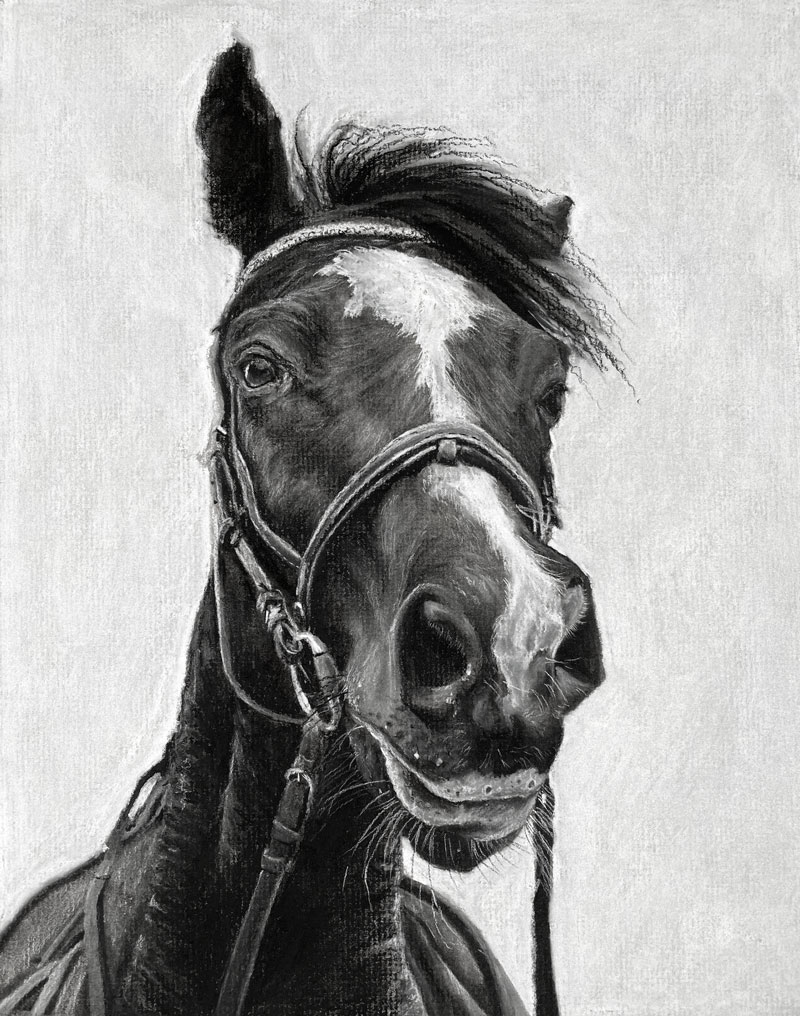
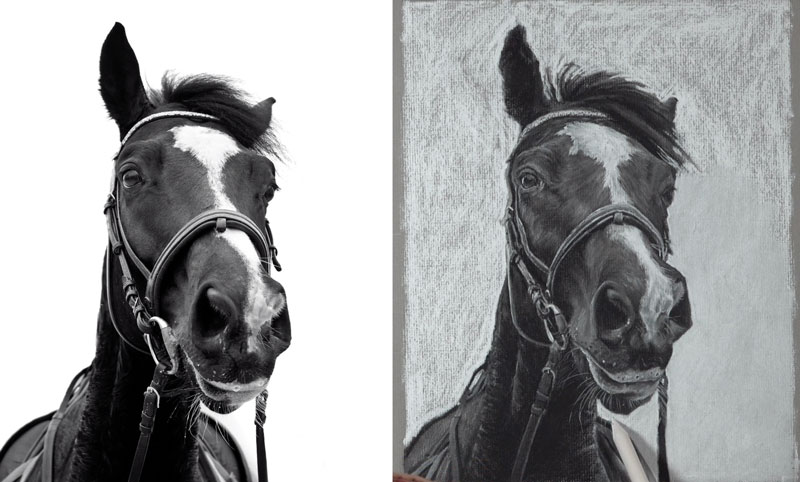
Here’s a look at the completed drawing…
Materials and Surface for Drawing a Horse
Charcoal is an inexpensive, traditional drawing media. Yes, it can be dusty and a little messy, but this is a small price to pay for the forgiveness and versatility of the medium. Plus, if the correct paper is used, then the messiness is greatly reduced.
In this lesson, we’ll use charcoal in various forms to complete the drawing. Vine charcoal is used in the early stages while compressed charcoal is used in the later stages.
Vine charcoal is soft and brittle. It’s easily spread, erased, and manipulated on the surface. This makes this form of charcoal best suited for the initial marks.
Compressed charcoal is darker and harder than vine charcoal. Unlike vine charcoal, compressed charcoal is more difficult to erase. For this drawing, we use compressed charcoal in pencil form.
See also: Charcoal Drawing Techniques
White charcoal is also used to address the lighter values and to produce a variety of grays. This material isn’t truly charcoal and the make up of this material is considered a “trade secret”. However, it does behave in a similar manner as compressed charcoal, so its use is best reserved for the later stages of the drawing.
As I mentioned before, the surface is important for a few reasons. The texture of the tooth of paper plays a role in how the medium behaves. Smoother surfaces will not hold charcoal, making the process messy and dusty. Papers with a heavier tooth will help to hold the material in place, reducing the dust. For this drawing, gray Canson Ingres paper is used. It has a similar tooth as traditional charcoal paper. Both papers feature a laid pattern.
See also: All About Drawing Papers
(The following links are affiliate links which means I make a small commission if you purchase at no additional cost to you.)
- Vine Charcoal
- Charcoal Pencils
- White Charcoal
- White Charcoal Pencils
- Canson Ingres Paper (Gray)
- Blending Stumps
Drawing with Values
To ensure accuracy in our drawing, the grid technique is used. For this approach, a grid is created over the reference image. A corresponding grid is created on the drawing surface. We are then able to observe the visual information in each square and transfer the information to the drawing surface.
Here’s a look at the reference image with a grid placed over it…
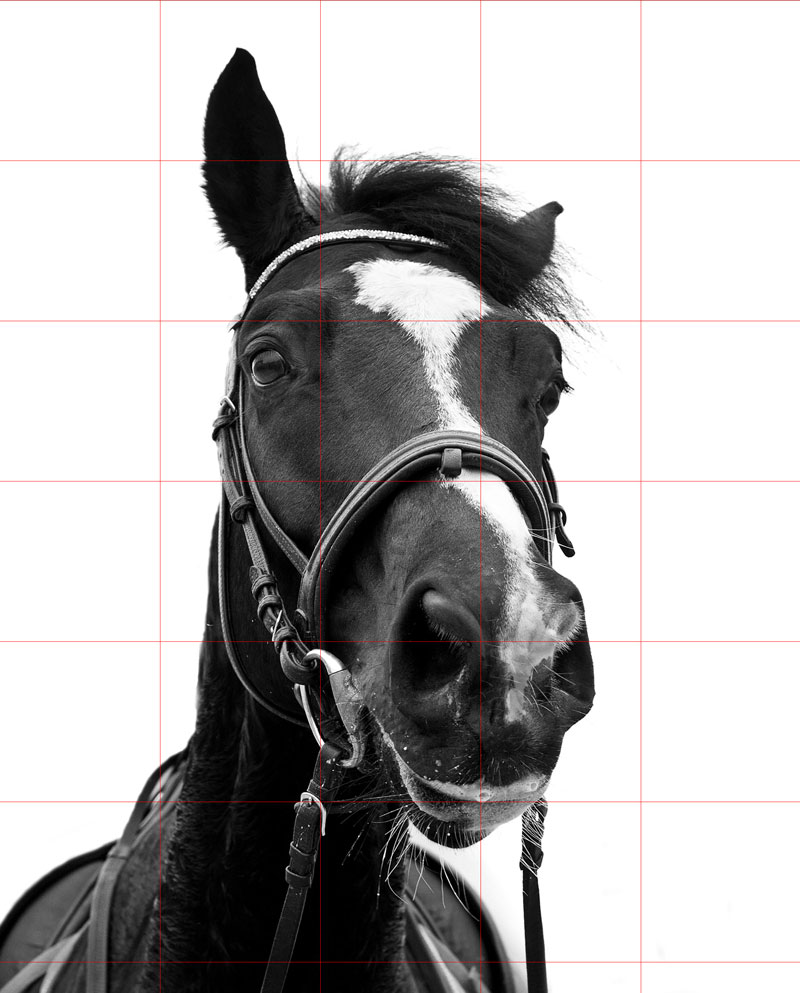
A white charcoal pencil is used to create the grid on the drawing paper. Graphite is avoided since it is a different medium and some of the grid lines may be visible when charcoal is layered. A very light touch is used with the white charcoal pencil so that the lines are just barely visible. This will ensure that the grid lines are easily removed when they are no longer needed.
We can begin anywhere on the drawing surface, but since I am right-handed, I decided to start in the upper left corner and work downward and to the right. This helps to keep my hand out of the way as I work.
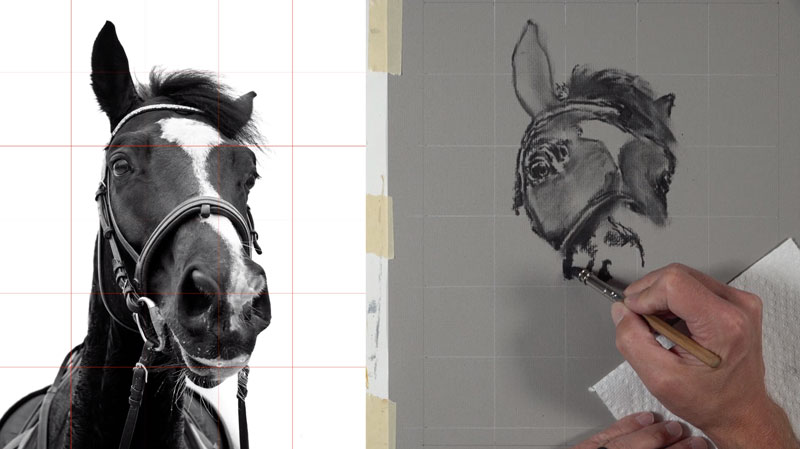
Due to the nature of charcoal, more than the contour lines are addressed in this early stage. As you can see, some information about the values are added. Since vine charcoal is so easy to erase, we can smudge and move the material around on the surface.
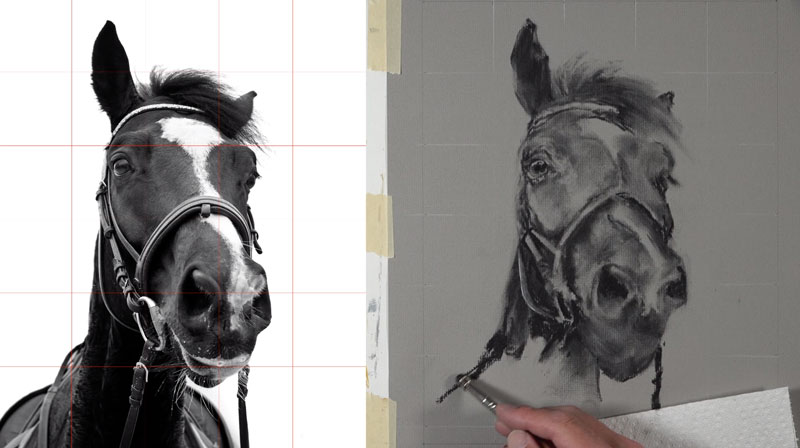
We can continue with this loose application of the charcoal, working our way down the body and the picture plane. At this point, I’m not concerned with the details – just the values, the contours, and shapes.
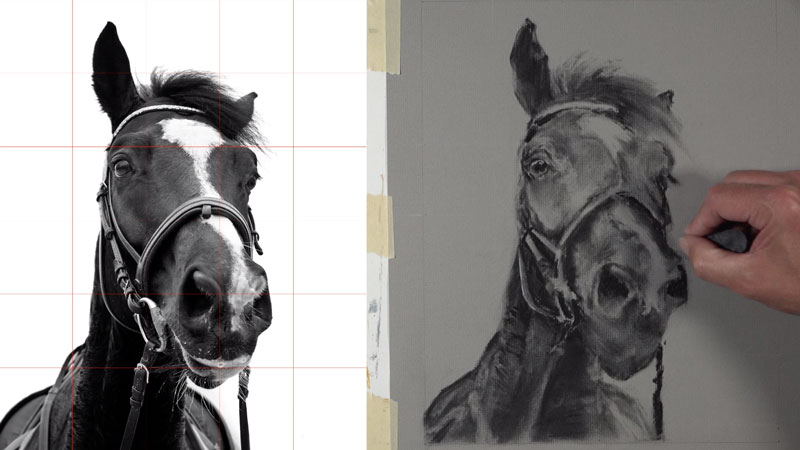
Once we have the basic shapes and some of the preliminary values in place, we can clean up the background with a kneaded eraser. As you’ll note, this eraser is used for more than just clean up. It is also used to manipulate some of the shapes of values as the preliminary drawing is developed.
All of the remaining grid lines in the background are erased. Since we have the basic shape of the horse defined, we no longer need them.
Drawing the Details of the Horse
Now we’re ready to begin developing the details of the horse with applications of compressed charcoal. We can think of the drawing that we have in place at this point as an “underpainting”. We’ll continue to manipulate the shapes and values as the drawing continues.
Since the eye of the horse is a natural focal point, I decide to begin here. By alternating between white and black charcoal, we can slowly broaden the range of value as we address the texture and subtle details.
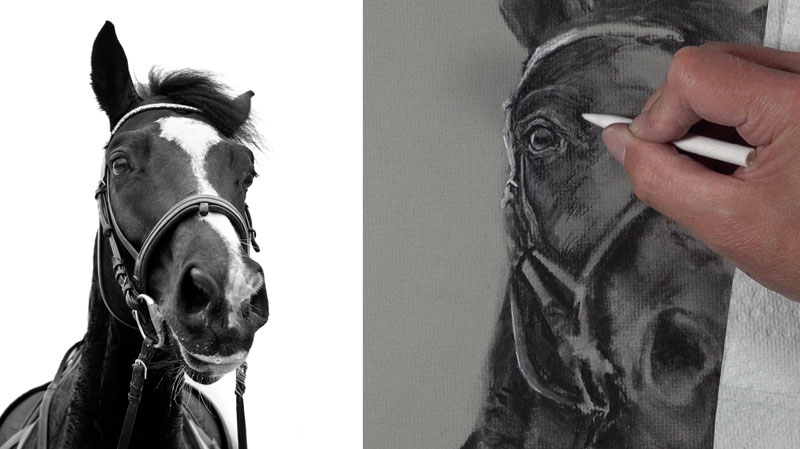
As we continue to work our way outward from the eye, we should consider the directional strokes that we make with both the pencils and the blending tools. The hair of the horse flows along the form of the head. This creates subtle indications of direction. Our marks and blends should reflect this. Ensuring that our marks flow in unison with the hair helps to create the illusion of texture and form in the drawing.
For the large shape of light value in the center of the head, a stick of white charcoal is applied. This white charcoal is slightly more intense that the white charcoal pencil and covers a larger area.
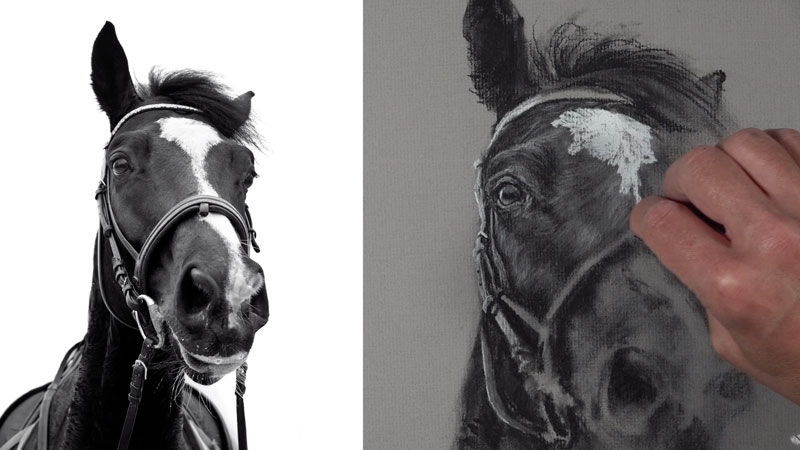
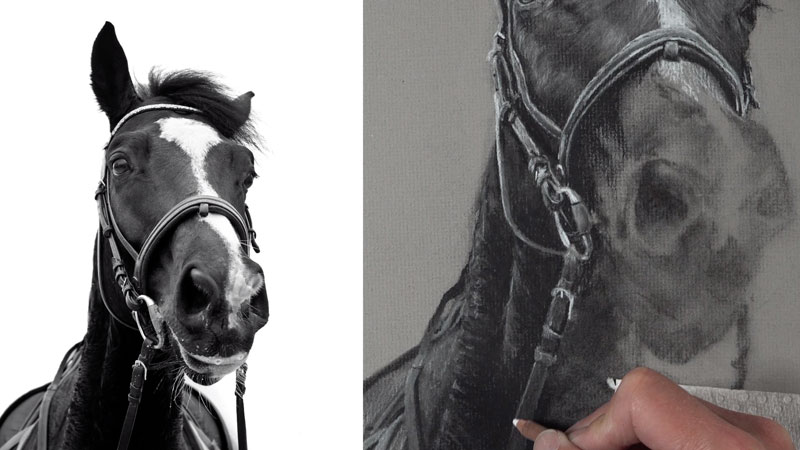
It’s easy to assume that every single detail must be included in order to develop a representational drawing. Thankfully this isn’t the case. As long as we capture the general shape and relative value of the subject or objects, then our drawing will be successful. We can see an example of this with the harness and saddle.
In this area, the details are suggested rather than replicated exactly. This ensures that attention is not pulled from the head of the horse. The harness is a supporting element and not the “star of the show”.
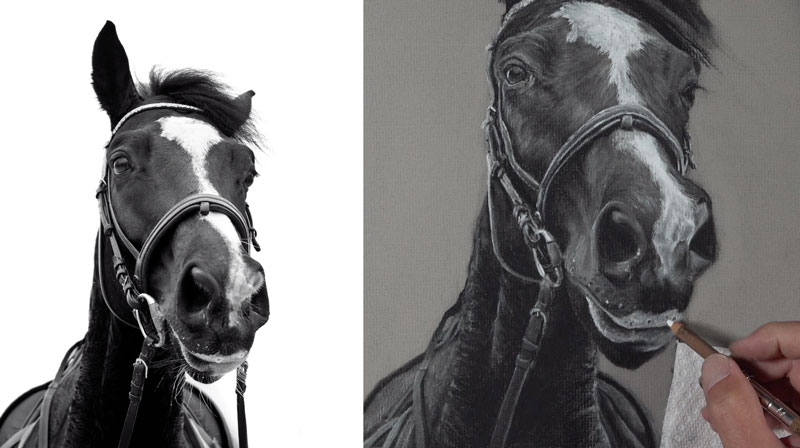
We’ll slowly work our way over to the snout of the horse, gradually building out a range of value. The snout of the horse protrudes out. This creates a bit of distortion called foreshortening. Since a grid was used to create the preliminary drawing, this should already be worked out.
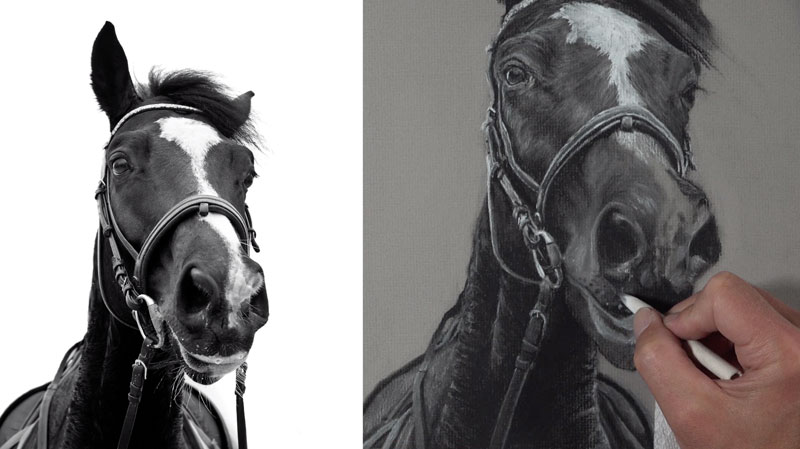
However, in order to create an even greater illusion of space, we should slightly broaden the range of value and create more contrast here. Objects that are closer to the viewer usually feature stronger contrast in value and higher levels of contrast.
The details should also be slightly more developed here as well.
Addressing the Background
Once we have refined the drawing of the horse, we can consider the background. In this drawing, the background is acceptable left as the raw, gray paper. However, I decided to add a bit more contrast to make the horse stand out by covering the background with white charcoal.
The application of white charcoal alone is acceptable in the background and creates the necessary contrast. However, by blending with a blending stump, we can make the background recede even further. This increases the illusion of space in the drawing.
Once the background is in place, we’re ready to put the finishing touches on the drawing. Some of the hairs and whiskers are added with a sharp charcoal pencil, overlapping the background.

How to Draw a Horse with Charcoal – Conclusion
Now our drawing of a horse is complete. Here’s another look at the completed drawing…
Charcoal is a wonderful medium for drawing. The rich blacks and forgiveness of the vine charcoal allow us to develop convincing drawings in a short period of time compared to other drawing mediums. The nature of charcoal as a medium also helps us to bridge the gap from drawing to painting. Layering is important with charcoal as it is with opaque painting mediums. Sure, it’s a little messy. But with the right paper and patient applications, charcoal is an excellent drawing medium.
If so, join over 36,000 others that receive our newsletter with new drawing and painting lessons. Plus, check out three of our course videos and ebooks for free.