The term crocodile is sometimes used more loosely, referring to other members of the order Crocodilia. It includes alligators, caimans, and gharials.
In this tutorial, we’ll observe and draw the general appearance of crocodiles. These reptiles present a unique collection of textures, but I’ll show you a simple way to draw crocodile scales.
Art Supplies and Materials for this Lesson
I’ll use an ordinary HB graphite pencil and a plastic eraser to create an underdrawing.
See also: Artist Graphite Pencils Explained
Also, it’s good to have a kneaded eraser at hand. It will help us to soften the graphite marks.
For the inking part, I’ll be using three ink liners. The width numbers are 0.05, 0.1, and 0.3. A nib pen and liquid black ink are also an option.
My paper is of a standard A4 size (approximately 8.5″ by 11″) with a very subtle texture.
Drawing a Crocodile with a Graphite Pencil
Crocodiles have a relatively long snout with powerful jaws. The head’s shape and proportions may vary from species to species.
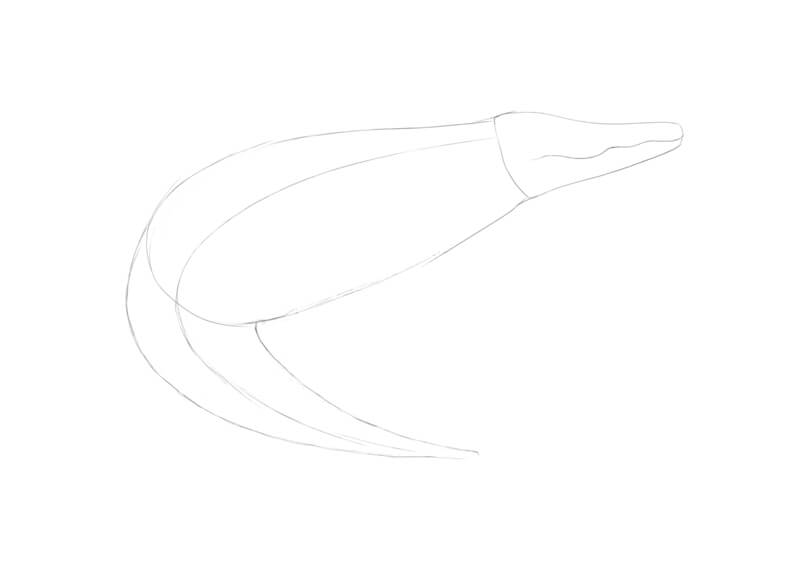
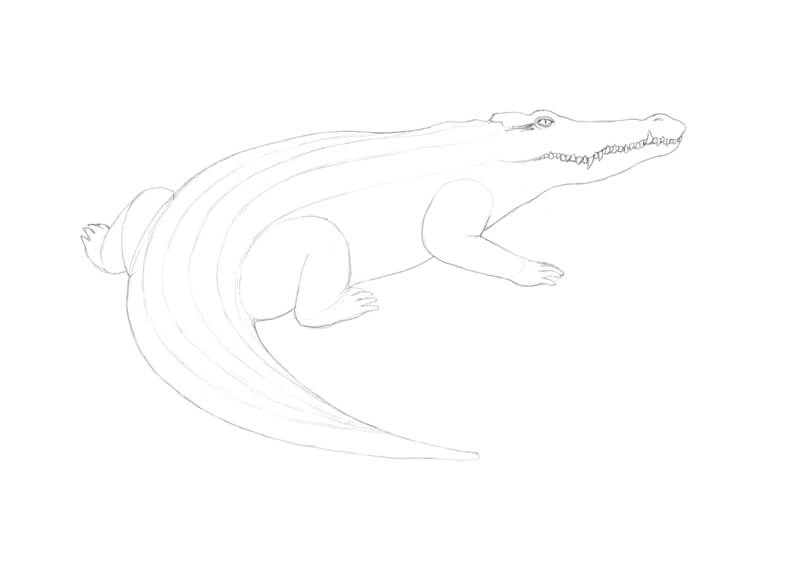
The body and tail are long, too. This feature of a crocodile’s appearance makes our task slightly more complicated, as we have to fit the whole animal into the limited space of our picture plane. The most obvious way to solve this task is to give the crocodile a turned pose. The animal’s massive tail will be twisted to the side.
I first draw the head and the body as a set of simplified shapes. Then, I add a line that marks the direction of the body and tail. I also draw the rough shape of the tail.
A curved line shows the border between the lower and upper jaws.
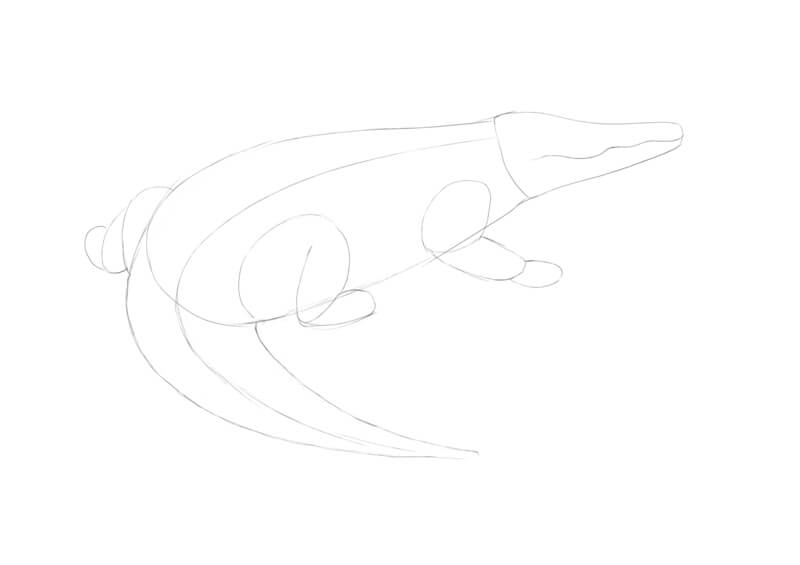
I draw a simplified framework of the crocodile’s short limbs.
One of the forelimbs won’t be visible due to the angle in which we are viewing the animal.
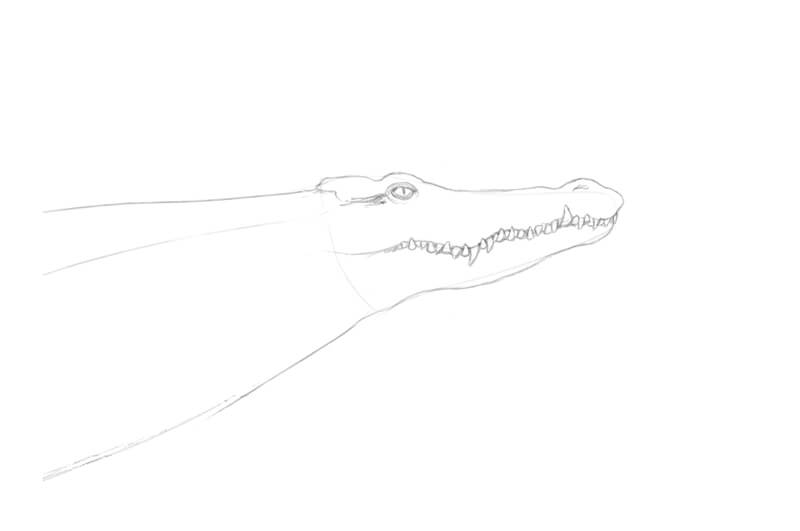
Let’s refine the head. I add the nostril and the eye with a vertical pupil.
The ear of a crocodile usually looks like a long narrow opening behind the eye. I add one.
I also change the main contour of the muzzle, accenting the jaws. The crocodiles’ body design allows the eyes, ears, and nostrils to stay above the water surface while most of the animal is hidden below.
I add the teeth of conical shape, following the pattern – one above, one below. Some teeth are larger than their neighbors. They can be found at the curves of the jaw line.
I slightly refine the contours of the limbs and erase the unnecessary graphite marks.
Let’s add the toes. Crocodiles have five toes on their front feet. Hind feet have four toes each.
Usually, there is a webbing between the toes of the back feet, but the front ones may also have it. The character of webbing depends on the species. Also, three bigger toes of each foot have sharp claws at their ends.
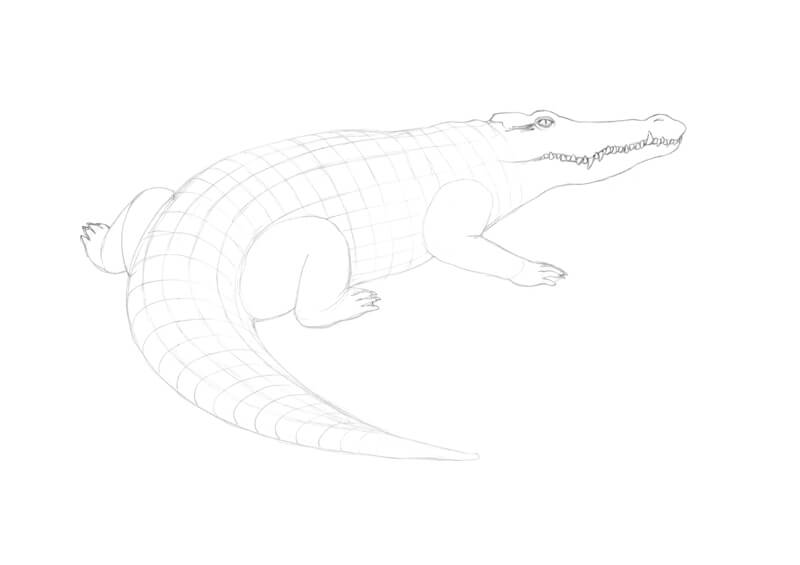
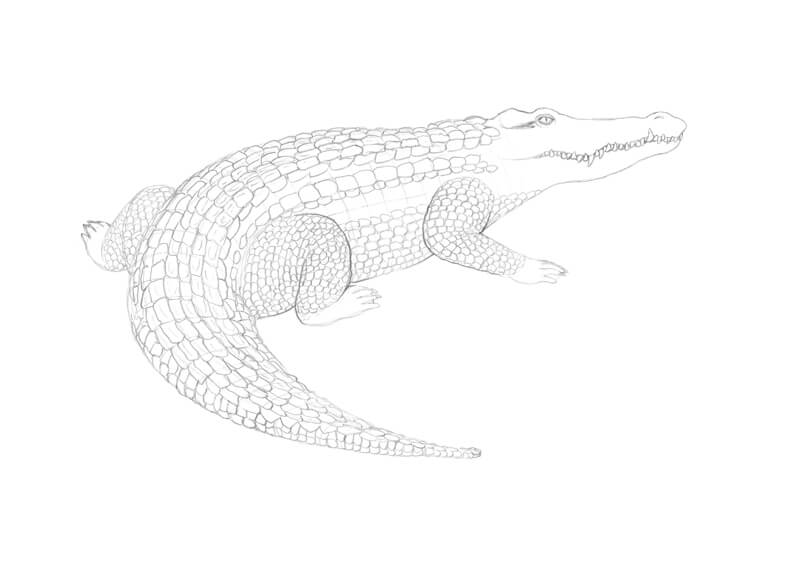
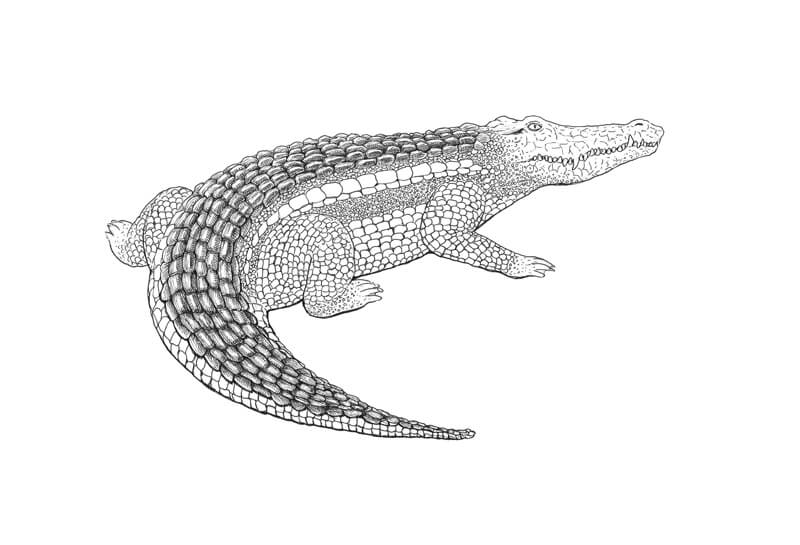
I add long lines to the crocodile’s back and tail. They follow the form of the animal. These lines will help us to draw the pattern of scales.
I add another set of subsidiary lines that go in the opposite direction. They follow the animal’s contours, creating an illusion of volume.
Keep these lines as light as possible, as we’ll need to erase them later.
Scales of different shapes and sizes cover almost the entire body of a crocodile.
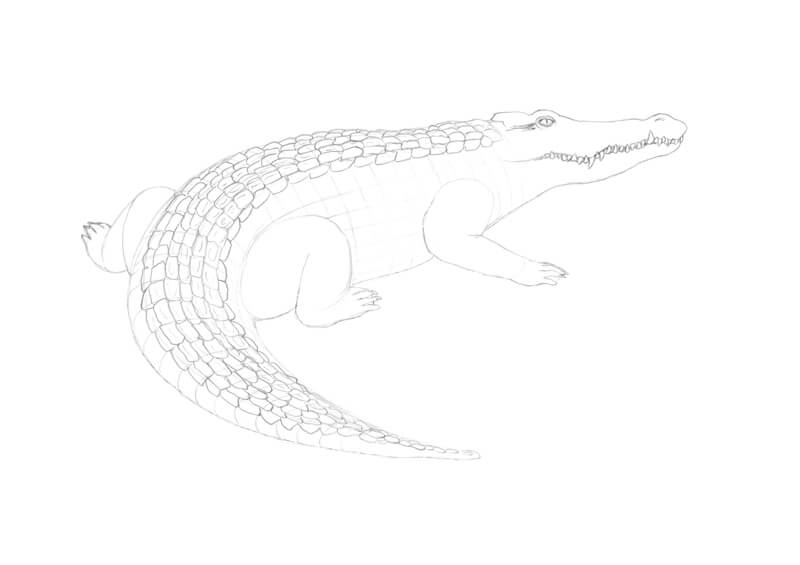
The reptile’s back and tail feature non-overlapping keeled scales. They look like thick rectangular plates with small upright outgrowths. Such scales are arranged in a relatively regular, repetitive pattern.
See also: How to Draw Animal Scales
I use the existing marks as guides, fitting the elements into the grid. We don’t have to be completely precise with the arrangement of vertical rows. However, the pattern should look recognizable.
At this stage, I focus on the bases of scales. The keeled outgrowths in the scales’ central parts can be added later.
Scales that are close to the edges of the body will look reduced. We see them in profile, or nearly so. The farther scales will look smaller than the ones closer to the viewer.
The scales of the side rows are somewhat protruding, forming an interesting bristling relief. They may cast shadows on the scales underneath.
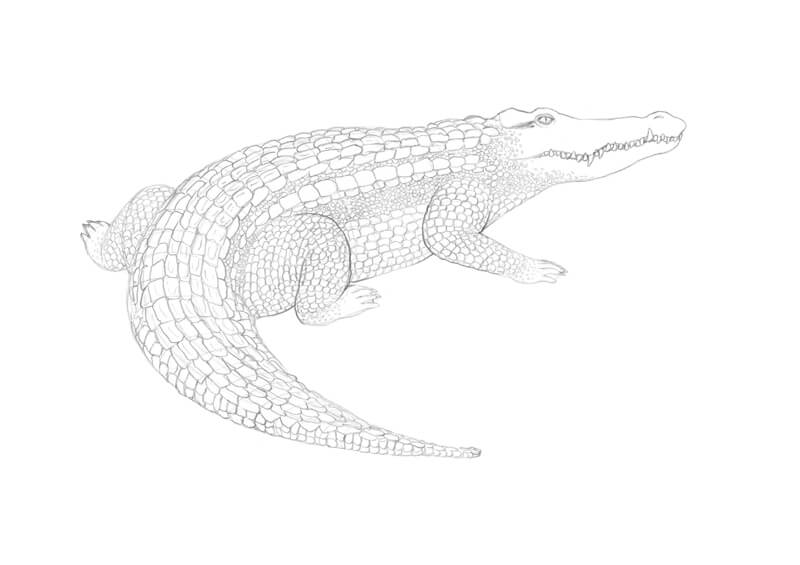
Now it’s time to add the smaller scales. They are relatively flat. The shape of such scales is close to a square or a rectangle with rounded corners.
I add the elements to the body and tail, leaving regular gaps. It’s possible to vary the size from one line of scales to another.
The scales near the belly and the tail will look smaller and reduced.
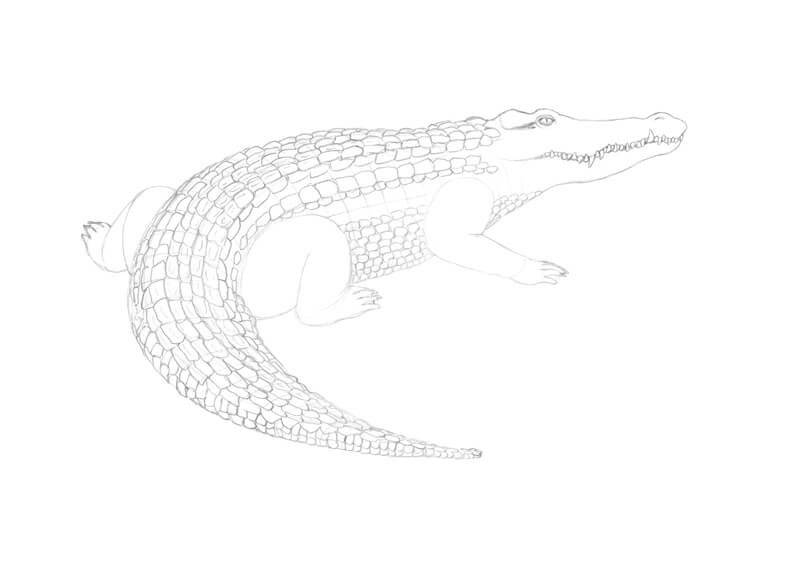
I cover the limbs with similar flat scales of a smaller size.
Feel free to add subsidiary lines first (just as we did with the crocodile’s back and tail) and then arrange the scales. The elements should conform to the contours of the legs.
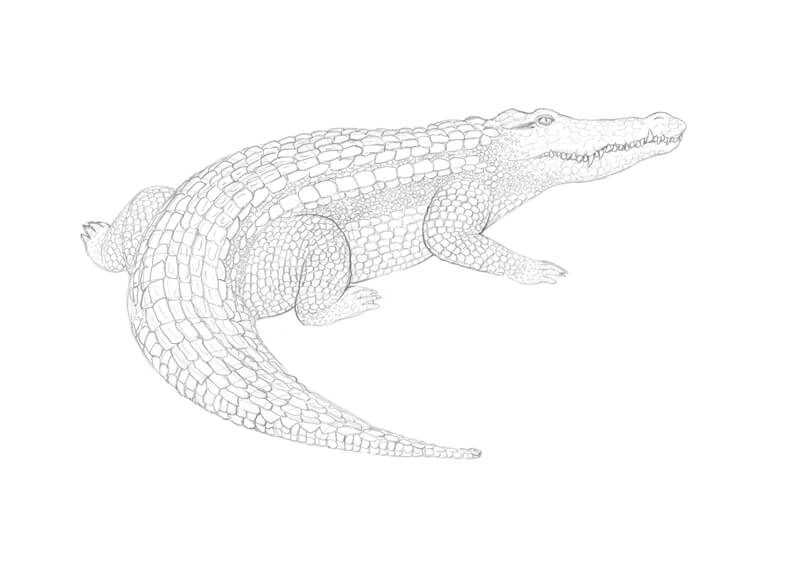
I fill the resulting empty space of the body with the smallest scales of a rounded shape. They don’t follow any strict pattern.
The surface of the reptile head, including face and jaws areas, may resemble cracks on dry soil or sand. Also, we can see distinct polygonal shapes. It is supposed that the skin cracking process forms this specific design.
I add a pattern of somewhat random lines to the animal’s head.
Drawing a Crocodile with Ink
It’s time to start inking! Before we proceed, it might be a good idea to soften the graphite marks with a kneaded eraser. Gently remove the subsidiary lines, but leave the significant textural details.
Let’s agree that soft light is coming somewhere from the upper left corner of the scene.
I use 0.1 ink liner to outline the contours of our crocodile’s upper parts. These areas catch more light from the environment. Thinner contours convey this impression.
Note that I change the shapes of the larger keeled scales on the reptile’s back. I make those elements taller, more protruding.
I also outline the eye and other details of the head.
I use 0.3 liner to draw the contours of the tail, limbs, and the lower part of the snout. This difference in line quality creates an illusion of weight, giving the figure visual mass.
The texture affects the character of the outline. I use organic lines that look somewhat shaky, irregular. There may be gaps between the marks, especially in the lighter areas.

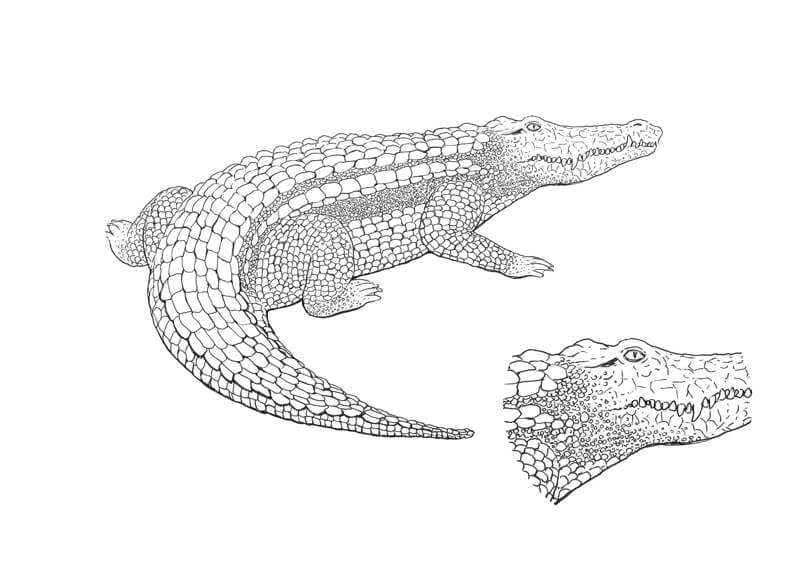
With 0.1 liner, I draw the scales, referring to the pencil underdrawing.
I recommend avoiding stiff, technical lines – those can give the artwork an unnatural look. Let some marks be spontaneous and quick. Also, allow gaps and any variation that seems appropriate.
For example, I mark the smallest scales with semicircles. Using such quick marks also streamlines the process.
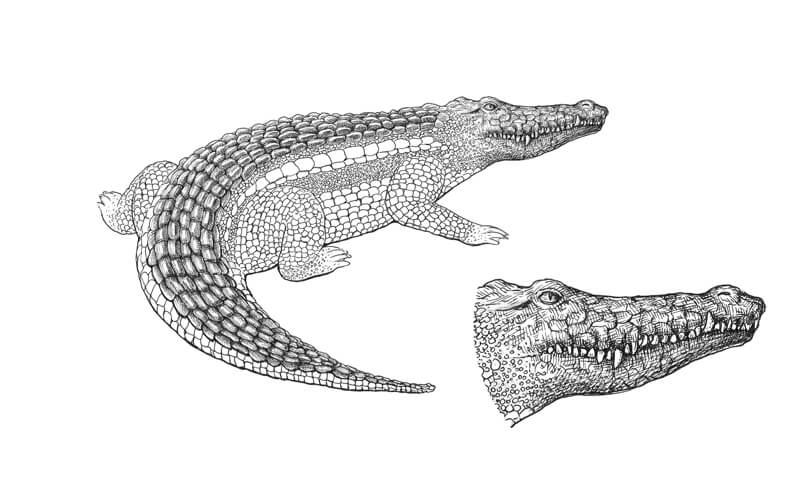
In the image below, you’ll find a close-up sample of the head and neck areas.
I widen the contours of the protruding scales that are found on the tail. This part of the animal is closer to the viewer. We can bring it to the foreground (in a visual sense) by increasing the contrast and broadening the lines.
This step may seem time-consuming, but the result will be worth the effort.
Let’s work on the largest, keeled scales next. In our case, the tips of the protruding ridges catch more light than the vertical sides of the outgrowths. The stylized schemes in the image below illustrate this concept.
Point a features a scale in a top view. The thin area of the ridge’s tip is lighter than its support. From this perspective, we see very little of the ridge’s vertical planes.
Point b illustrates the difference between two view angles. The first one is close to a profile view. In this case, we see the vertical plane of the ridge. At the same time, the farther horizontal side of the scale’s basis isn’t clearly visible.
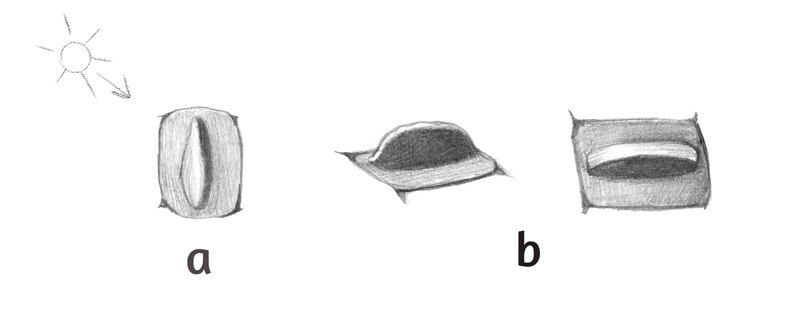
We should keep these observations in mind while drawing the scales.
I use 0.05 liner to accent the vertical planes of the ridges and the borders between the scales. I also cover the flat bases of the scales with a layer of hatching. The tips of the keels are left untouched.
I aim for a balance between texture and visual integrity. The artwork should look unified despite the large number of small elements.
I accent the pattern of cracks on the crocodile’s snout, using 0.05 liner. The short marks are arranged in groups.
Then I give the head some volume by covering it with layers of cross-hatching. The first set of lines repeats the direction of the snout. Another set of lines with curved hatches follows the form.
See also: Pen and Ink Techniques
I darken the eye and the areas of jaws below and above the teeth. I add dots to the right side of each tooth to create a hint at value transition.
See also: How to Draw Animal Eyes with Pen and Ink
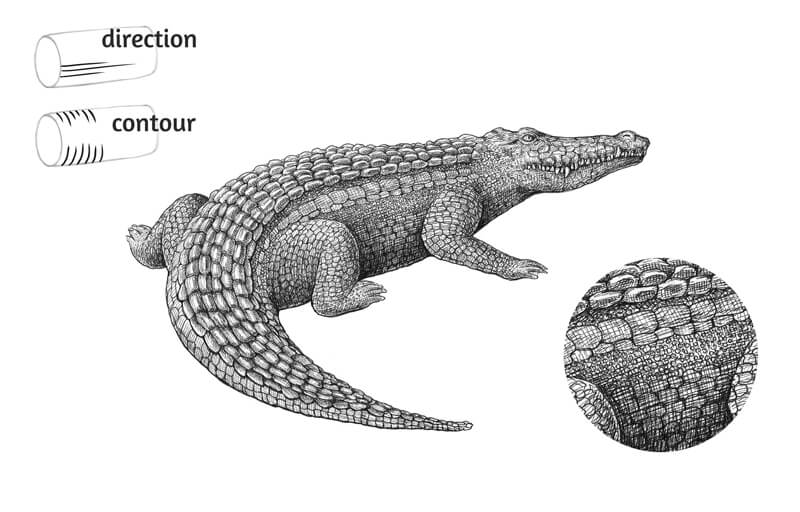
With a 0.05 liner, I add layers of hatching to the crocodile’s body. The lines follow both the direction and the contours of the form. This distinction is conditional and used here for simplification. A scheme in the image below illustrates this concept.
I apply as many layers of hatching as it feels necessary to create an illusion of volume. We can’t see many details of texture in the darkest areas. However, the scaly pattern still shows through the subsequent ink layers.
It’s possible to use a wider (0.1) liner in the most shadowed areas, such as the belly and the limbs.
We can accent some scales in the midtones to communicate the texture. This can be done by strengthening the elements’ contours. Also, we can divide the scales or their rows visually with soft, subtle shadows.
In the image below, you’ll find a close-up from the lower body area.
With a 0.1 liner, I accent the core shadows, applying another layer of contour hatching.
I darken the upper part of the crocodile’s head. This area has a relatively delicate texture, so we can use dots instead of hatching.
I also create a cast shadow under the tail’s protruding scales.
With a 0.05 liner, I add fine lines to the scales on the reptile’s back, muting down the brightness of the ridges. I leave the scales of the tail just as they are.
Such accentuated contrast creates the illusion of gloss – as if our crocodile has just got out of the water. It also draws the attention to the tail, which is in the foreground.

Now we can add a subtle cast shadow under our reptile. A quick way to do it is to apply graphite pencil marks and gently blend them. (It’s possible to use a softer type of pencil.) Also, feel free to add some ink marks.
Now, drawing of a crocodile with pen and ink is complete!
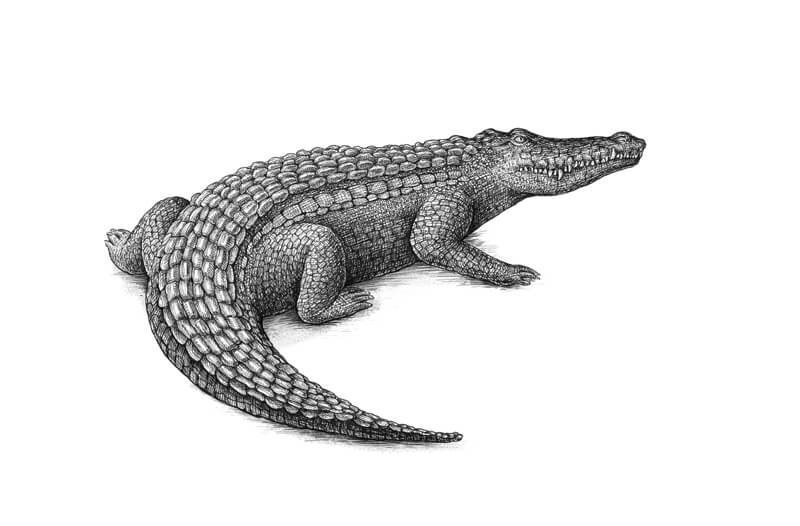
How to Draw a Crocodile with Pen and Ink – Conclusion
Congratulations – we’ve created a beautiful ink drawing! I hope that you enjoyed the process. Just be sure to be patient and allow the drawing to slowly develop as the pen and ink is applied.
The world of nature is an endless source of inspiration. Have fun with your future art projects!
If so, join over 36,000 others that receive our newsletter with new drawing and painting lessons. Plus, check out three of our course videos and ebooks for free.