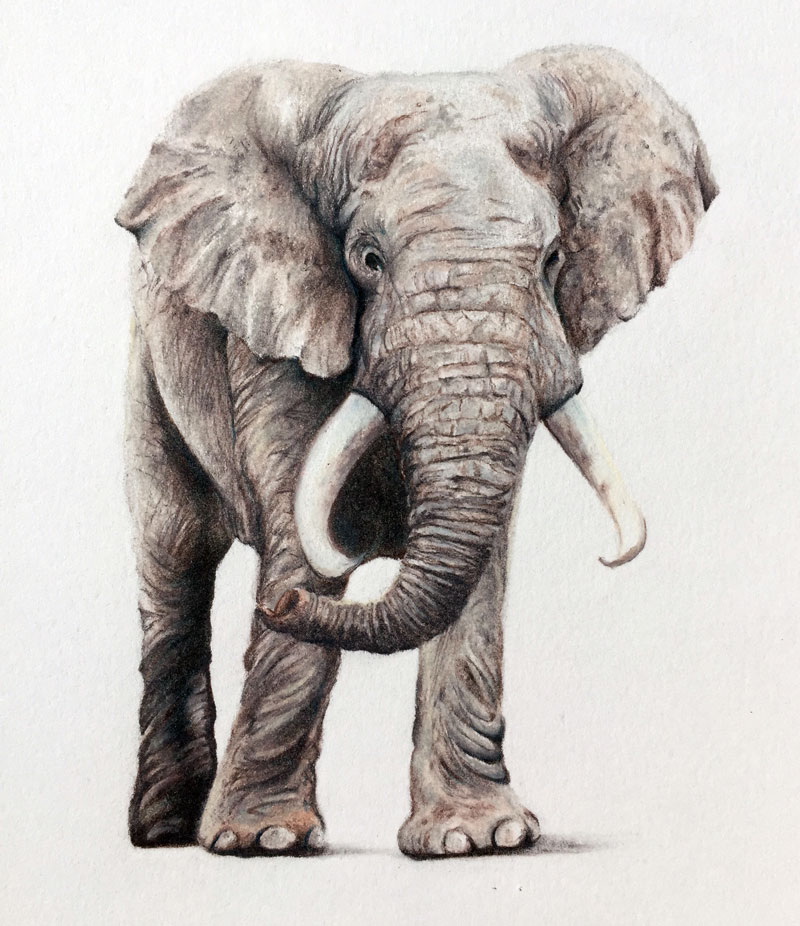
In this lesson, we'll take a look at drawing an African elephant with colored pencils. This is a slow process, as the small drawing in the following demonstration took nearly five hours to complete. It's important to note, before we get into the "nuts and bolts" of the process, that patience with colored pencils is important and you must be willing to put in the time it requires.
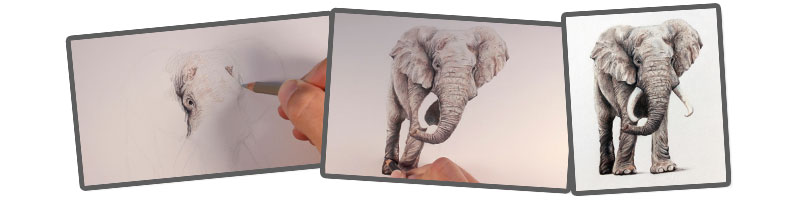
If you're willing to push the medium to its limits, then the following results can be had by anyone. The process of drawing an elephant (or any subject with colored pencils) is much like "eating an elephant", but instead of taking it "one bite at a time", we'll take it one step at a time until the drawing is complete.
Colored pencils are at their best when they are layered. By layering applications, we can create complexity in the colors and values and create near exact matches of color, if so desired. Seldom will one color work for the subject. In most instances thoughtful mixes of colors, produced through layering, create the most depth and interest in the work.
As layers develop, the binder of the pencil builds on the surface. With wax-based pencils, this build up of binder makes it easy to blend colors and cover the tooth of the paper completely, leading to a "painted" look. The process of building up this waxy surface, or working the material into the tooth (texture) of the paper by other means, is referred to as "burnishing"
With a burnished surface in place, details are easily added on top with a sharpened pencil. Our natural tendency is draw details in the beginning of the process, but with colored pencils, details are best saved for the top layer.
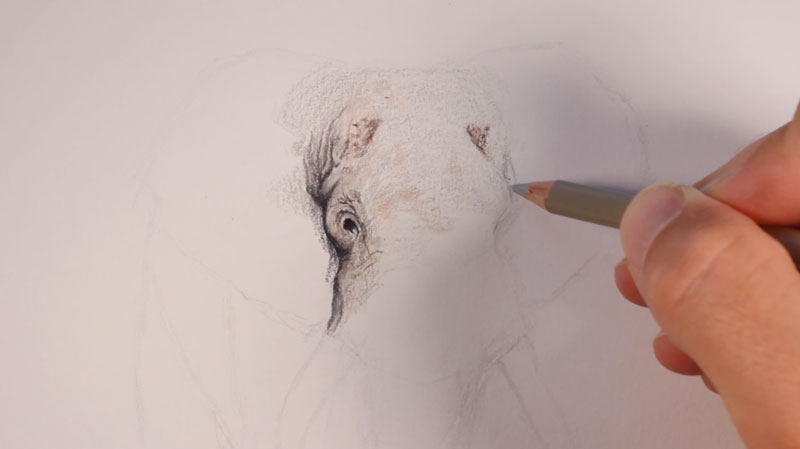
We'll start the drawing with a light application of a graphite pencil. An "HB" or "H" pencil is recommended. Care is taken to avoid placing too much pressure on the graphite pencil in order to avoid making grooves in the surface of the paper. Just the basic shapes are loosely drawn. Before applying colored pencils, we can gently lift graphite from the surface with a kneaded eraser.
Recommended Materials for This Tutorial
(Some of the following links are affiliate links which means we earn a small commission if you purchase at no additional cost to you.)
Specific Colors Used:
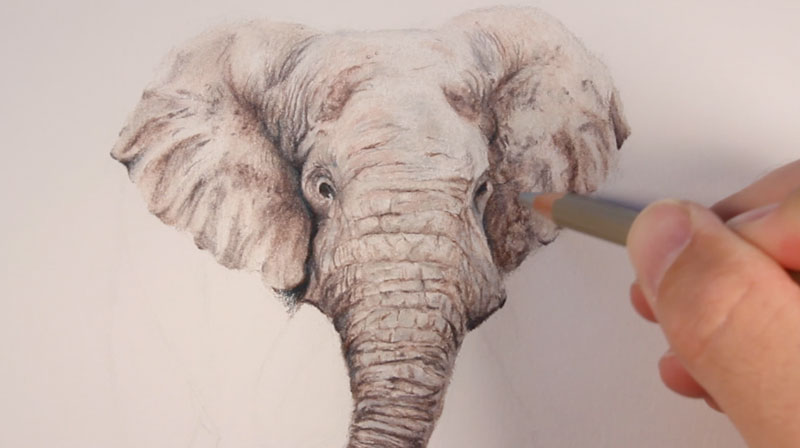
We'll start with colored pencil applications around the eyes since this area is a natural focal point. Darker values within the eyes are created by layering Dark Umber and Indigo Blue, producing a natural "black". 20% Warm Grey is lightly applied as a base application, followed by Putty Beige for additional warmth. Areas of slightly darker value are dressed with either Dark Umber or 70% Warm Grey. Some areas receive a combination of both colors.
After burnishing these applications with a colorless blender, work continues down the front of the face onto the trunk. The process remains the same, but the directional strokes change in order to communicate the wrinkles. Again 20% Warm Grey is lightly applied, along with bits of Putty Beige. Initial applications are burnished before darker values and details are layered on top. When necessary, additional burnishing with the colorless blender softens the contrast.
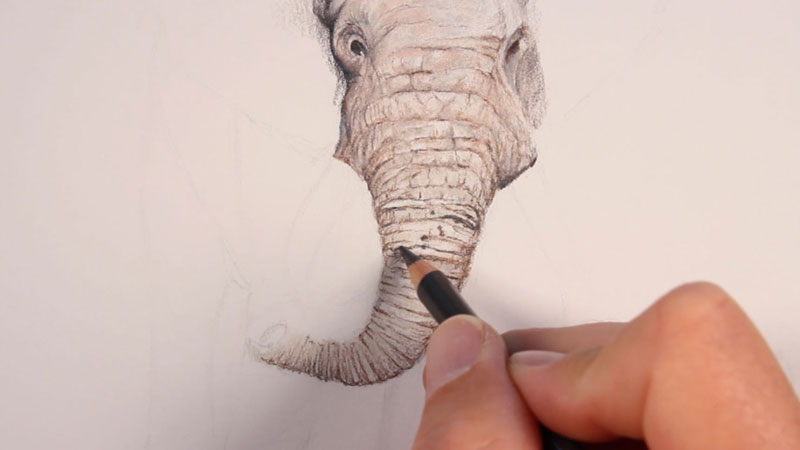

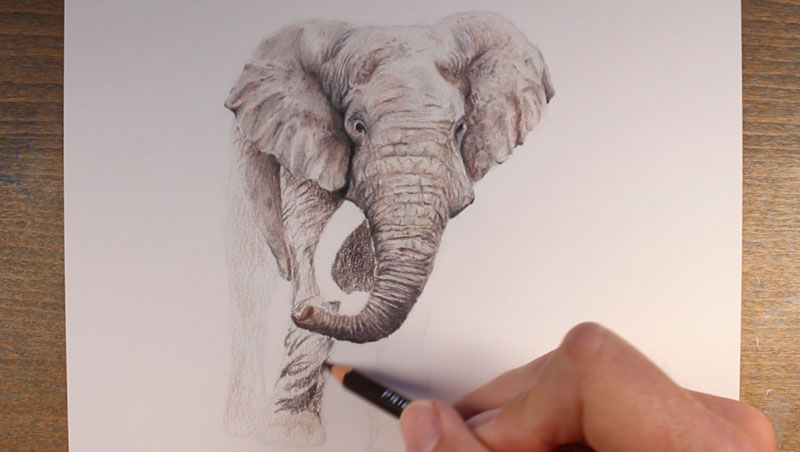
The lower portion of the trunk curves around to the left, producing an area of darker value on the underside. A heavy application of 70% Warm Grey is applied here, producing a stronger shadow. Peach and Dark Umber are used to define the area of color at the end of the trunk. Layers are burnished to eliminate the visible tooth of the paper and to create smoother transitions of value. Bits of 20% Cool Grey are added to create more variety in the color.

Using the same collection of colors, the left ear is next addressed. Light applications are slowly layered and burnished before developing darker values and details. Some imperfections are added with 70% Warm Grey and Dark Umber.
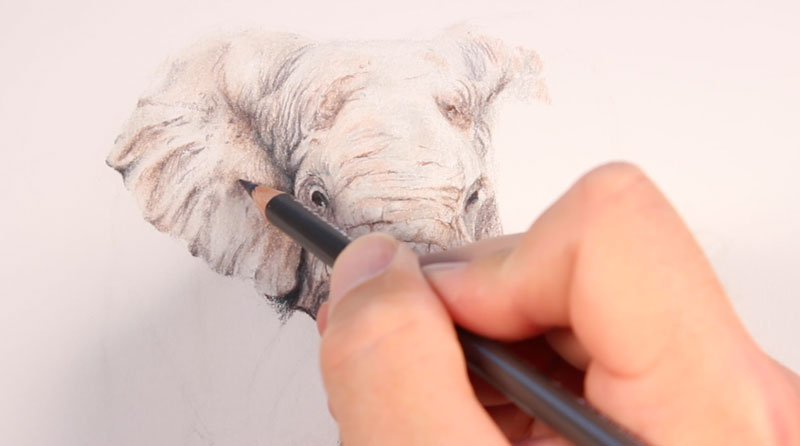
This process continues on the right ear. Darker values just to the right of the face are strengthened with applications of Dark Umber and Indigo Blue. Again, applications of 20% Cool Grey are used for added variety in the color.
With the face and ears in place, the body and legs of the elephant are addressed next. The values and contrast are a bit stronger in these areas. After applying a light application of 20% Warm Grey, a liberal amount of Dark Umber is applied in the areas of shadow. Indigo Blue is applied on top where the shadows are especially dark. Again, layers are burnished with the colorless blender before developing details with a sharpened pencil.
The visible rear leg is addressed in the same manner, strengthening values by layering Dark Umber and Indigo Blue. Highlights can be strengthened by layering White over applications. Although it will not cover colors completely, White can be used to lighten the values a bit.
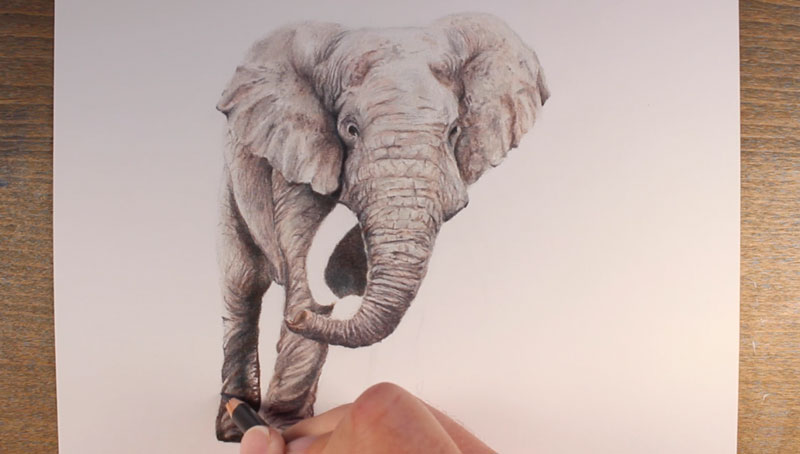
The last leg is addressed as the others, however this front leg is much lighter in value overall. Darker values still exist on the lower portion and are strengthened with our combination of Dark Umber and Indigo Blue.
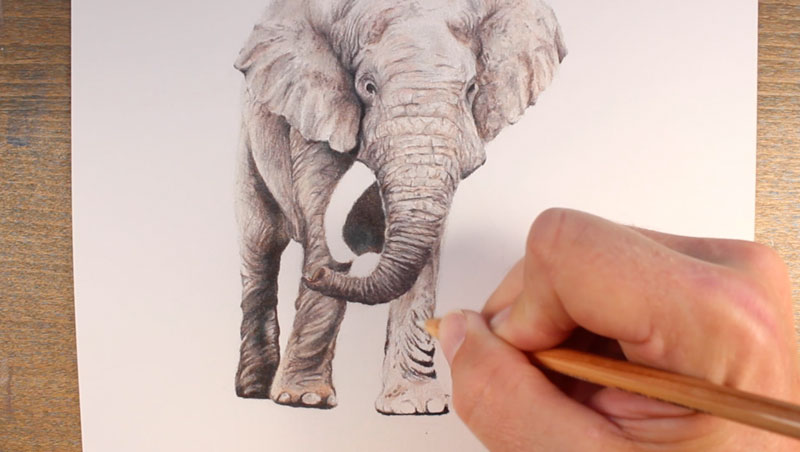
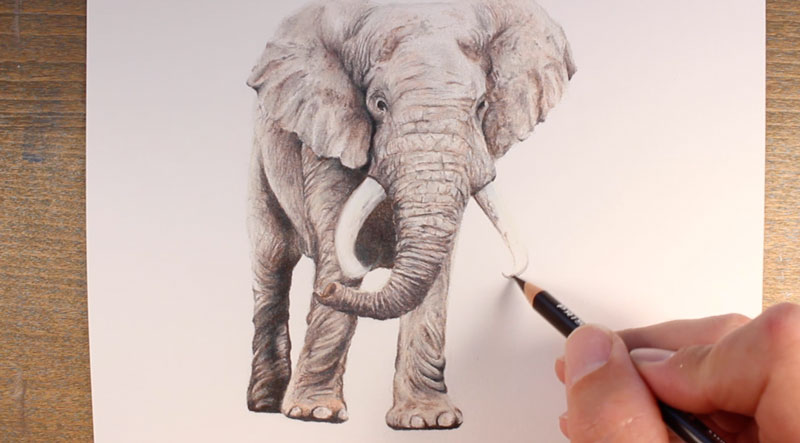
The tusks are quite simple even though several colors are used. Cream is lightly applied first. A bit of Cerulean Blue and Jade Green are applied for a little color. Imperfections and darker spots are added with 70% Warm Grey which is also used for subtle shadows. Both tusks are then burnished with a heavy application of White. Edges are cleaned and refined with a sharpened 70% Warm Grey pencil.
All that's left is to add a bit of cast shadow underneath to "ground" the subject. 20% Cool Grey is applied, extended outward and to the right from the bottom of the two front legs. 70% Warm Grey is applied over the top to darken the value a bit. These applications are burnished with the colorless blender to complete the image.