In this step by step painting lesson, we’ll look at the decisions that go into starting a realistic still life of vegetables and the steps taken to complete such a painting with oils.
Choosing Your Subjects for Still Life Painting
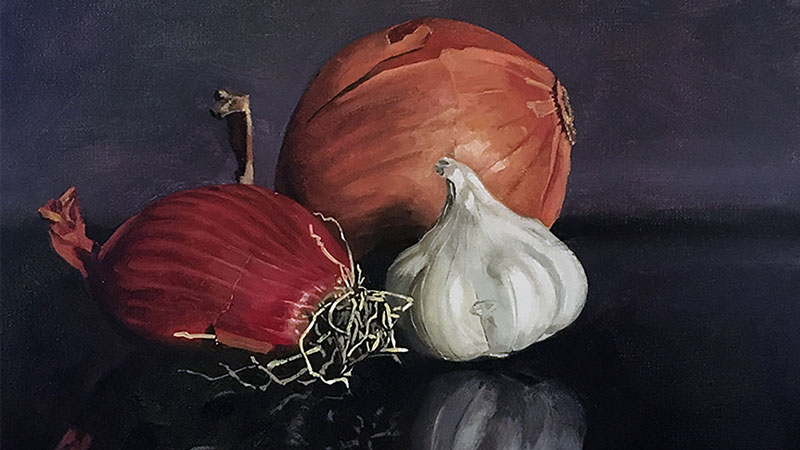
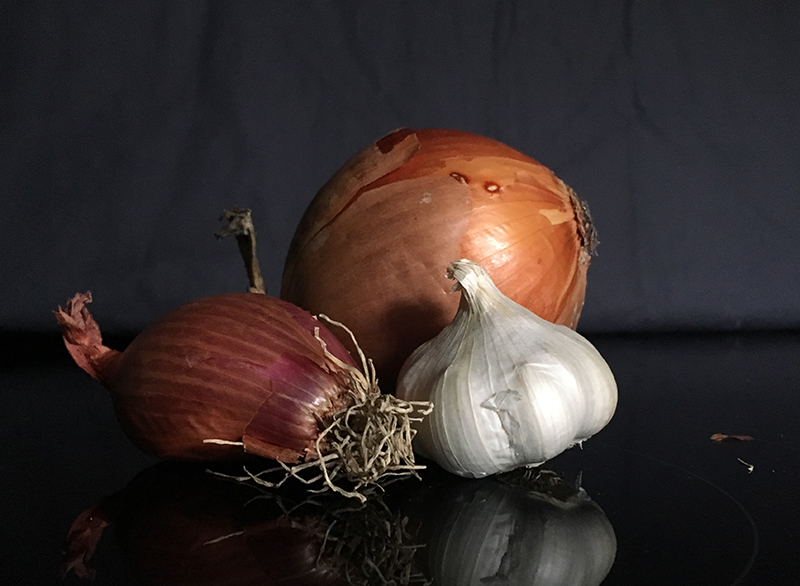
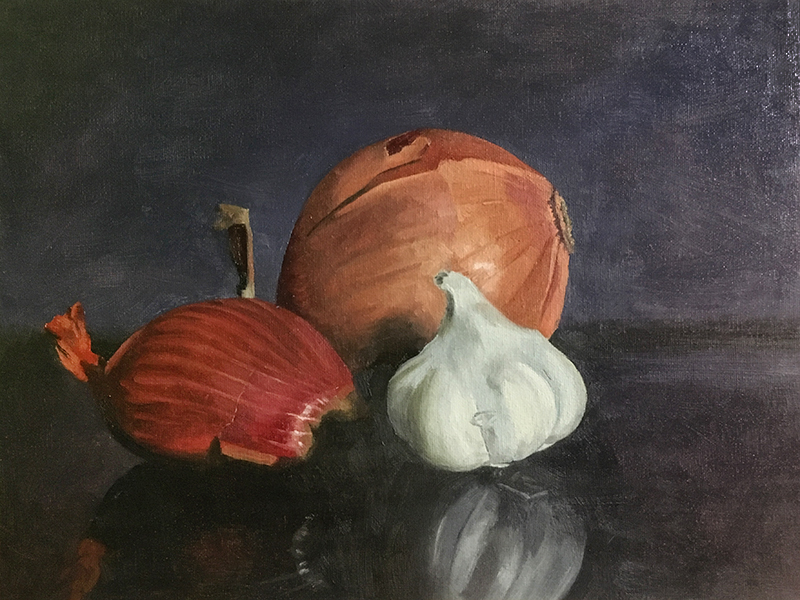
Although still life arrangements don’t have to be made up of related objects, choosing a collection of related objects does add to the harmony of the painting. For this reason, we’ll choose a group of fruits or vegetables that relate in some way. In my example, I chose to paint garlic and onions. Their flavors are often paired together, at least in some of my favorite recipes.
How else might fruits or vegetables relate? You could choose all citrus fruits or vegetables from a specific region. Color could be the driving factor in your selection.
After choosing my vegetables, I noticed that the two onions had an analogous color relationship. So, I chose a background color that was analogous as well – the red onion, orange onion, and purple background are all analogous to red because purple and orange are made with red.
So, my vegetables relate in two ways – flavor and color.
Choosing an Arrangement
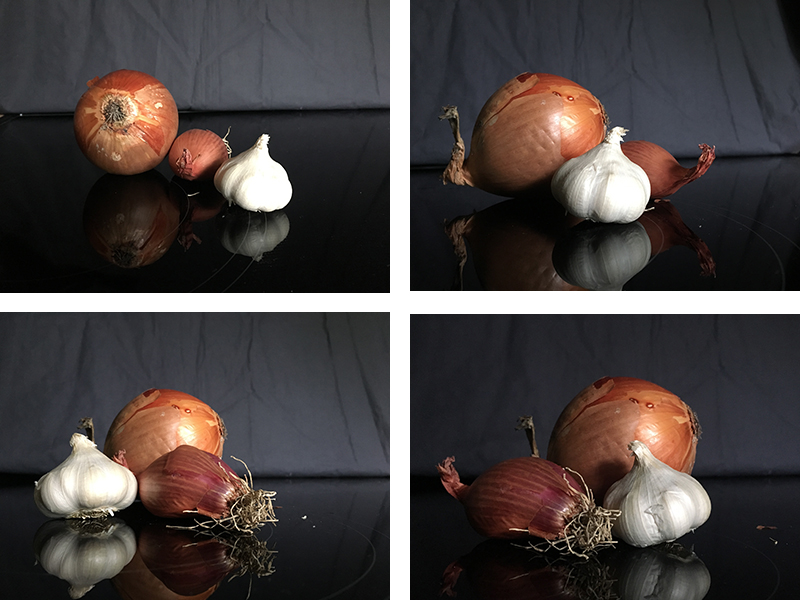
When choosing your arrangement or the positioning of the subjects, don’t just set them down and start painting. I only have three items in my composition but I arranged them in numerous ways and took six reference photos. Then, looking at two at a time, I compared photos and eliminated options until I had one reference left that felt like the best composition.
See also: Composition in Art
The option I chose was actually the last option (see below, bottom right). Had I gone with my first arrangement, I would have been less satisfied with the final painting. Take your time with this step and you won’t be disappointed.
Choosing Colors for Still Life Painting
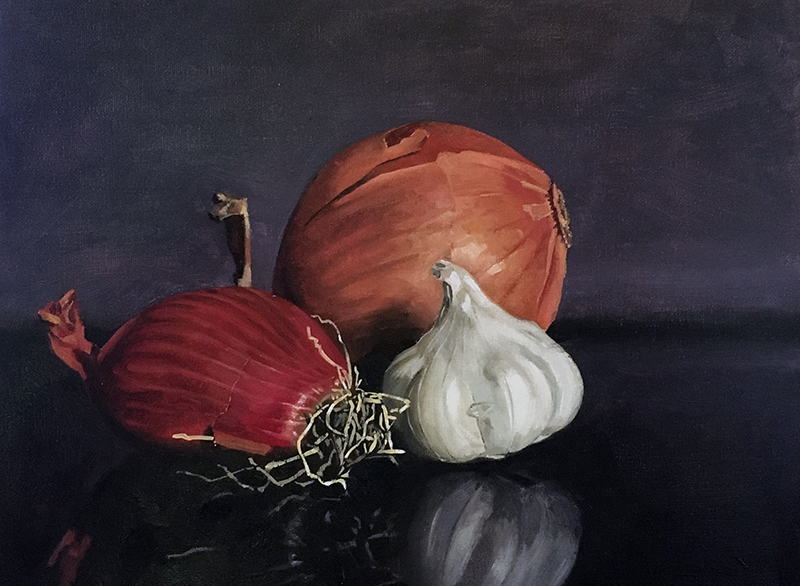
Take a closer look at the reference photo I selected (below). I used the colors in the reference photo to help me choose my pigments prior to mixing.
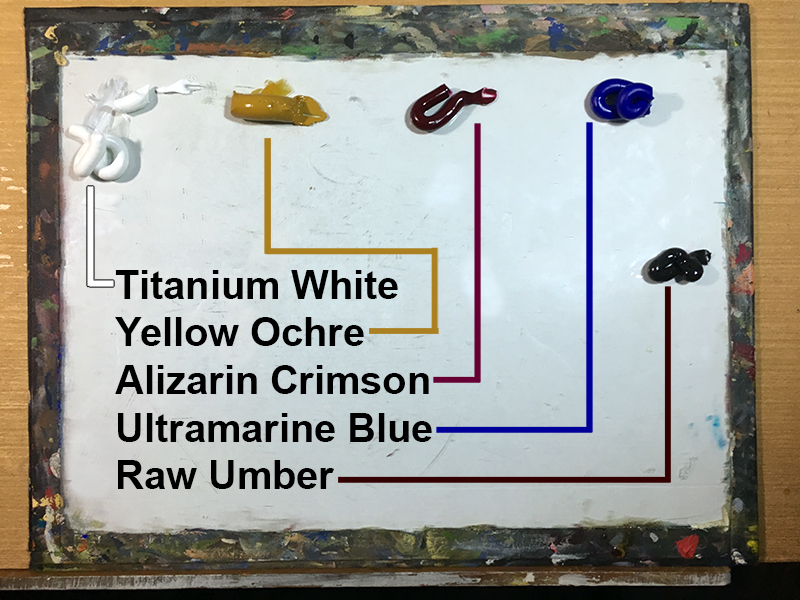
When I paint, I use the three primary colors plus white and sometimes brown. Among the primary colors, there are many pigments from which to choose. Remember, there are different yellows, reds, and blues.
For my yellow, I chose Yellow Ochre because I didn’t see any really bright yellows in the reference photo. Yellow Ochre is a dull “earthy” yellow. For my red, I chose Alizarin Crimson because of the very cool red area near the roots of the onion.
Since the cloth in the background is a dull purple, I chose Ultramarine as my blue. Ultramarine is considered a warm blue, which means it leans toward purple rather than green. Therefore, it will make a suitable purple.
You’ll see that on my palette below, I have raw umber, but no black. I like to make a dark value by mixing Ultramarine and Raw Umber and use this color as my “black”. Doing so results in tighter, cleaner mixtures. Black is strong and so dark that it often stands apart from the other colors. It can also make your painting appear flat or unnatural.
If you’re not sure what pigments to use for a particular subject, then you may try a warm and cool version of each primary color and make your choices based on your mixing experiment. The more experience you have with painting, the better suited you are to make decisions regarding the colors you’ll need on your palette.
Painting a Still Life With Oils
If you’re following along, you’re free to use any opaque medium you prefer. In this example, I’m working with oil paints and using medium to thin the paint.
Step One – Mixing Colors
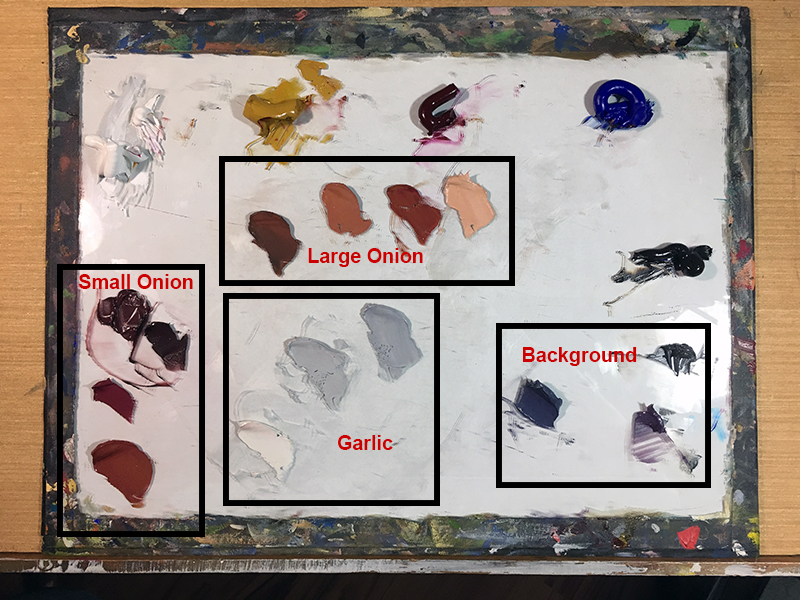
I like to premix my colors before I start painting most of the time. Doing so gives me a chance to critically analyze the colors as I see them before switching my focus to modeling form and measuring proportion and so forth.
You’ll notice in the reference photo that each vegetable is really two subtle colors and not just one color. The garlic is not only white. Some of it is a weak yellow. Look at the big onion. See how the right half is more orange than the left half. These small details are important and you can address these nuances in this first step by mixing multiple colors for each vegetable.
Step Two – Drawing the Subjects
Next, we’ll begin lightly drawing the subjects. Be careful though and don’t draw too much. This is a painting and you must save the details for the paint. Drawing the details will not make the process easier and you’ll just get frustrated because your brush won’t fit into the tiny details you drew with a sharp pencil.
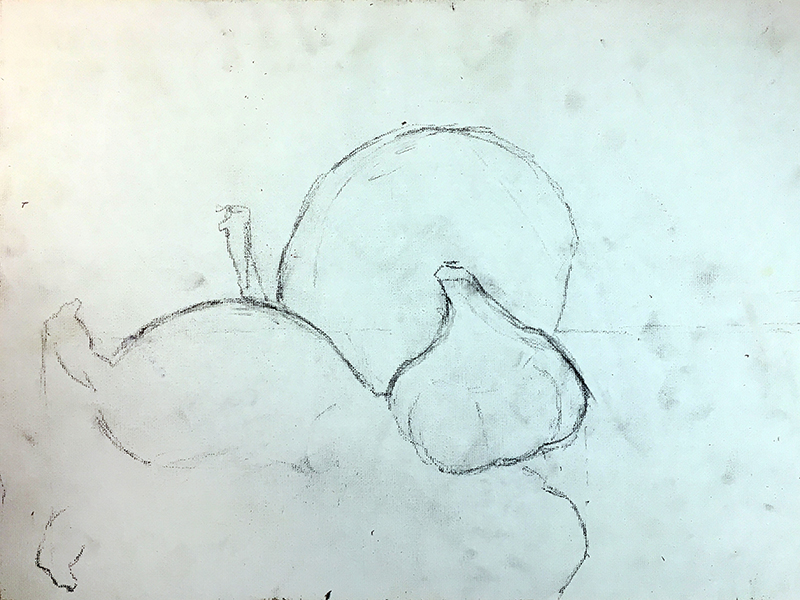
Instead of drawing all of the details that you notice, focus on the hard edges instead. See how I didn’t even draw the bottom of the smaller onion. That’s because I can’t actually see it. I also ignored the pattern on the onions and will save that for the painting process.
Step 3 – Blocking In With Paint
The block in stage is simply painting in the premixed colors in an effort to cover the canvas. See the smaller onion in the example below. You can block in the entire painting before moving to step four or you can bounce between steps three and four. You’ll see that what I have done is the latter.
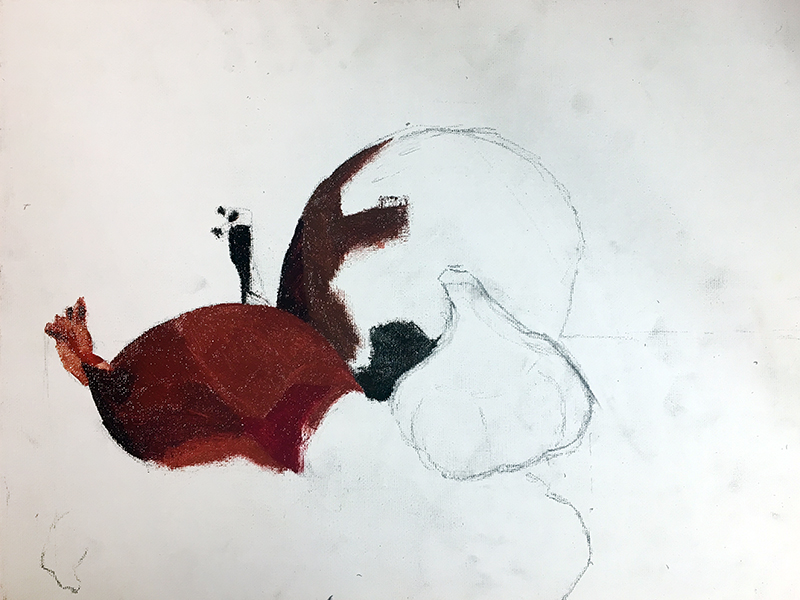
Step 4 – Model the Details
In this case, we’ll model the subjects as we block in the colors. Modeling is basically the process of changing the value of the color to create the illusion of form and texture. Highlights are typically rendered using a tint, or lighter value of the color. Shadows are developed using a shade, or darker tone of a color. The positioning of the darker and lighter values, along with the mid tones, leads to the illusion of form.
Of course, the details are captured during this step as well. I captured the detailed patterns on the onions while they were still wet. I was able to drag the lighter and darker colors through one another to create the stripes. Had I painted the stripes as a second layer over dried paint, it would have been more difficult to get the stripes to look like they are part of the onion skin and not just stripes on top of the onion skin.

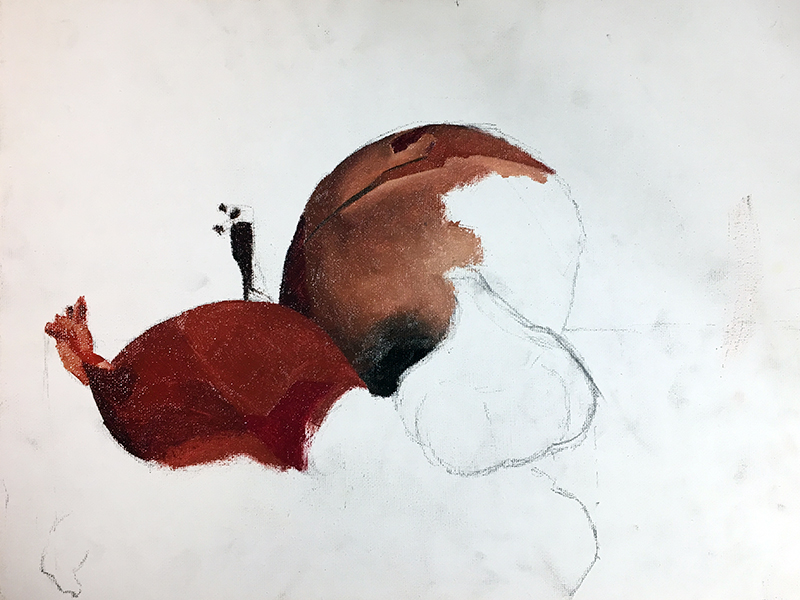
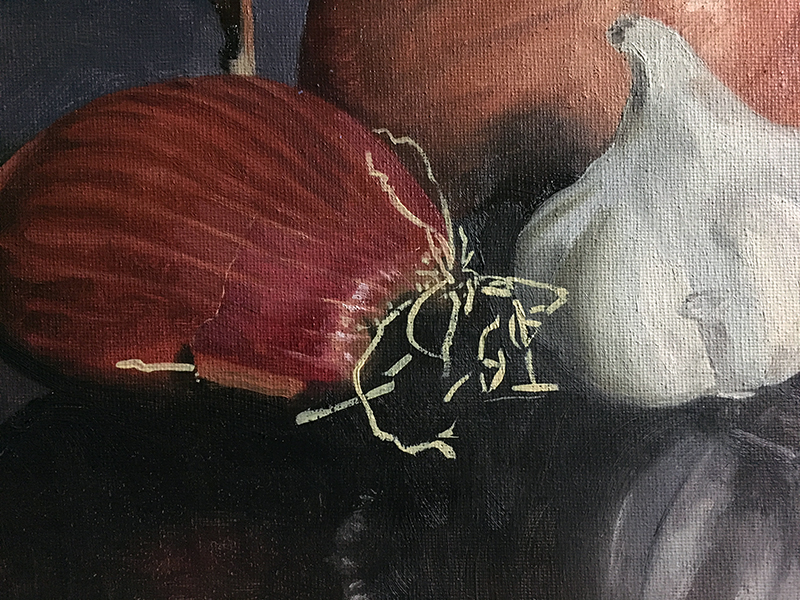
Step 5 – Planning for the Onion’s Roots
The onion features a few distinctive roots. These roots create interesting lines and add variety to the painting. I decided to finish the red onion behind where the roots will be before addressing the roots. The roots themselves are such a crisp, fine detail that it will be easier to paint them over a dry layer. I’ll finish the onion completely before returning to the onion roots.
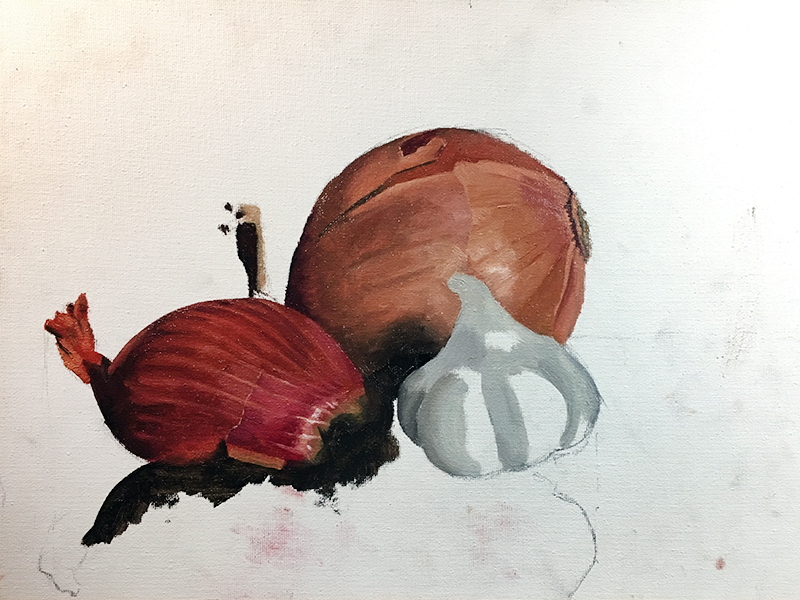
Step 6 – Using Negative Space
You’ll notice that the vegetables were nearly finished before starting the ground plane and the background. I like to paint these surrounding elements last because it gives me a chance to refine and adjust the contours of my subject. In this case, I am considering these areas to be the negative space within the scene.
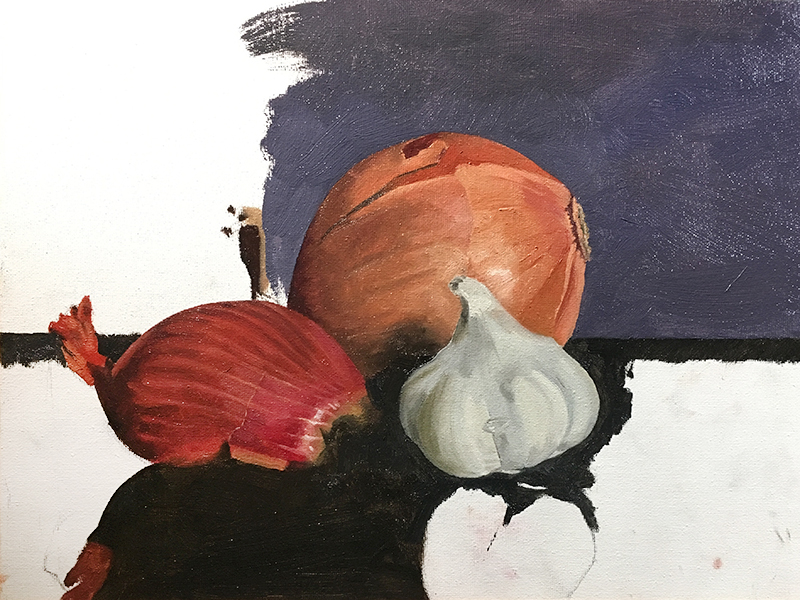
I carefully work around the edges of each of the vegetables within the scene, adding a muted purple to the background. The foreground is darker and more neutral, using a mix of Raw Umber and Ultramarine. For added realism, allow for a bit a variety in your mixes in both sections.
Step 7- Final Touches
The onion roots and subtle reflections are the final touches that are left to be added. At this point, the painting is nearly dry to the touch and I can paint the roots without my colors mixing with the layer underneath.
As with the vegetables, I premixed more than one color before starting the roots. Look at the detail below. Compare it to the reference and you’ll see that I painted all of the lightest values in first, skipping over the darker, grayer roots. They were painted after a basic shape was developed, then a few, very light and dark marks were added for variety.
You’ll also notice the subtle reflections in the dark foreground underneath the subjects within the scene. These subtle reflections are added with light applications of the same colors used on the subjects. They should be less intense and in this case, darker than their sources.
Vegetable Still Life Painting – Conclusion
Fruits and vegetables are traditional subjects for still life painting for good reason. They feature a variety of colors, values, textures, and forms that can challenge the artist. However, since the contours are usually fairly simple, you can concentrate on painting sooner without spending lots of time drawing. If you’ve never had the pleasure of painting fruits and vegetables, then give it a try. They make great models and everyone will relate to your subject.
If so, join over 36,000 others that receive our newsletter with new drawing and painting lessons. Plus, check out three of our course videos and ebooks for free.