The mushroom that I’m going to draw is similar to a green russula. However, this project isn’t a botanical illustration in the truest sense of this genre. We can stylize the form, change the colors, and add or remove some details.
My goal for this drawing is to create an illusion of various organic textures. We’ll be dealing with two groups of objects – mushrooms’ caps and surrounding plants. They feature different textures but are similar in color. We’ll need to make a distinction between these two types of life so that the artwork looks interesting and varied while still harmonious.
Art Supplies for Drawing the Mushroom
To create an underdrawing, we’ll need a graphite pencil. I recommend an H or HB. Avoid using soft pencils since it may be difficult to erase their marks completely. Hard pencils may create indentations in the surface of the paper that will show when colored pencils are applied.
It will be useful to keep a sharpener at hand, and a couple of erasers (vinyl and kneaded).
I’ve chosen a sheet of thick drawing paper.The surface has some subtle texture, which is a great fit for colored pencils.
If you wish to make your artwork resemble a vintage-style botanical illustration, consider drawing on toned paper. A subtle beige or creamy tone is a wonderful option for this project.
See also: 9 Must Have Colored Pencil Supplies
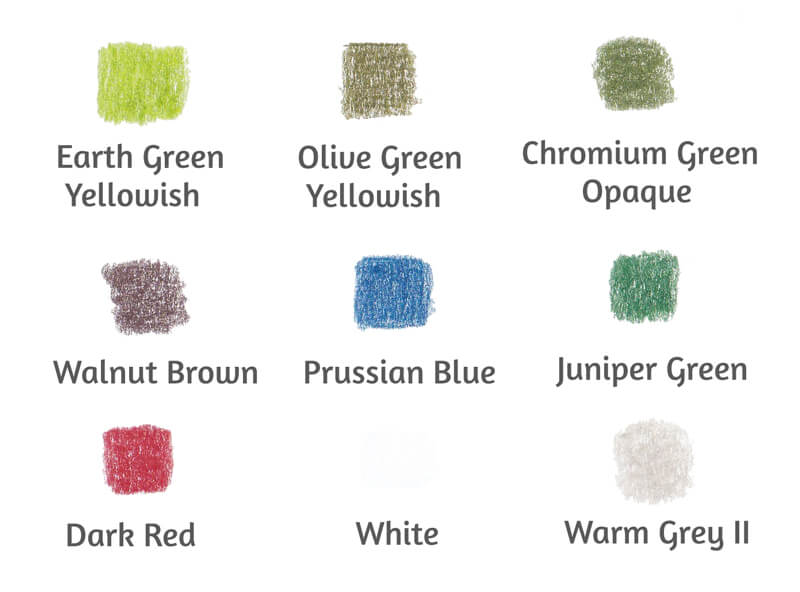
My colored pencils are Faber-Castell Polychromos (Affiliate Link), but feel free to use any colored pencils you like. Below you’ll find the colors that I’ve chosen for this project.
Draw the Mushroom with a Graphite Pencil
Before we start working with colored pencils, it’s necessary to create the outlines (or contours). I recommend planning your composition beforehand. Create a miniature sketch or just draft a rough model of the image in your mind. Will there be any secondary objects like leaves, twigs, or berries? Now is the time to make these decisions.
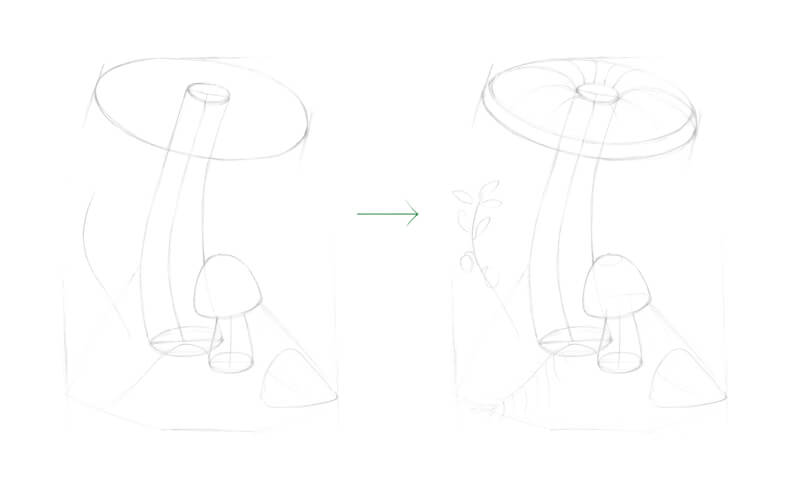
First, I mark the boundaries of the drawing and set the composition. I decided to go for a couple of mushrooms instead of just one, but the second fungus will be smaller. It is supporting its larger and older neighbor.
I add a couple of guiding lines that mark the floral elements. I also mark a stylized shape of the leaf in the lower portion of the drawing.
As you can see, I’m presenting the mushrooms as a set of forms that have some volume. This positioning helps to create a more credible, realistic drawing.
Note that the cap of the larger mushroom has a specific relief. There is a shallow hollow in the middle of the cap’s top, and the cap is bending downwards along its edges.
You don’t have to draw all of these imaginary ovals and core lines, but these marks help me to create a structure for the drawing. Keep your lines as light and few in number as you can. My outline is relatively heavy for a colored pencil drawing in order to demonstrate the construction process. It may be helpful for some beginning artists to see these steps.
See also: Drawing Basics – Construction
At this step, ask yourself if you like the composition? Are you pleased with the general impression of your basic sketch? If yes, let’s proceed. However, if there is something that needs to be changed, take your time to make those tweaks. Having a balanced composition is extremely important.
See also: Composition in Art
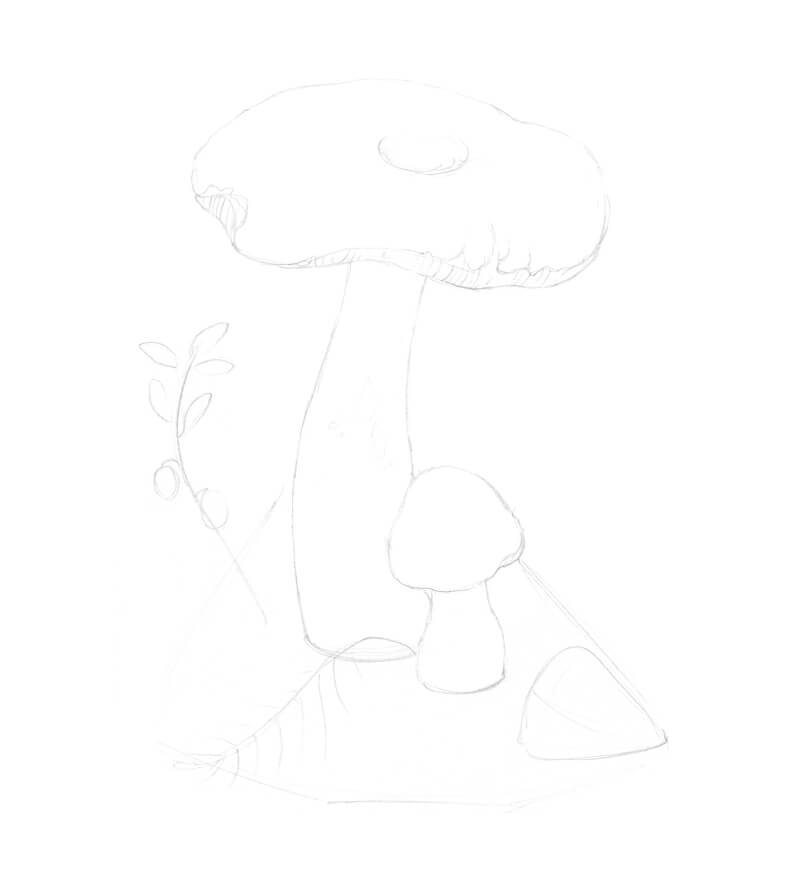
Next I refine the mushrooms. I change the shapes of the caps and stems. The contour lines should be organic, just as the objects are that we’re drawing. I erase all the unnecessary graphite marks as I go.
I mark the hollow in the cap of the bigger mushroom. The younger fungi usually don’t have this feature.
I draw the details of the cap’s underside, indicating the gills.
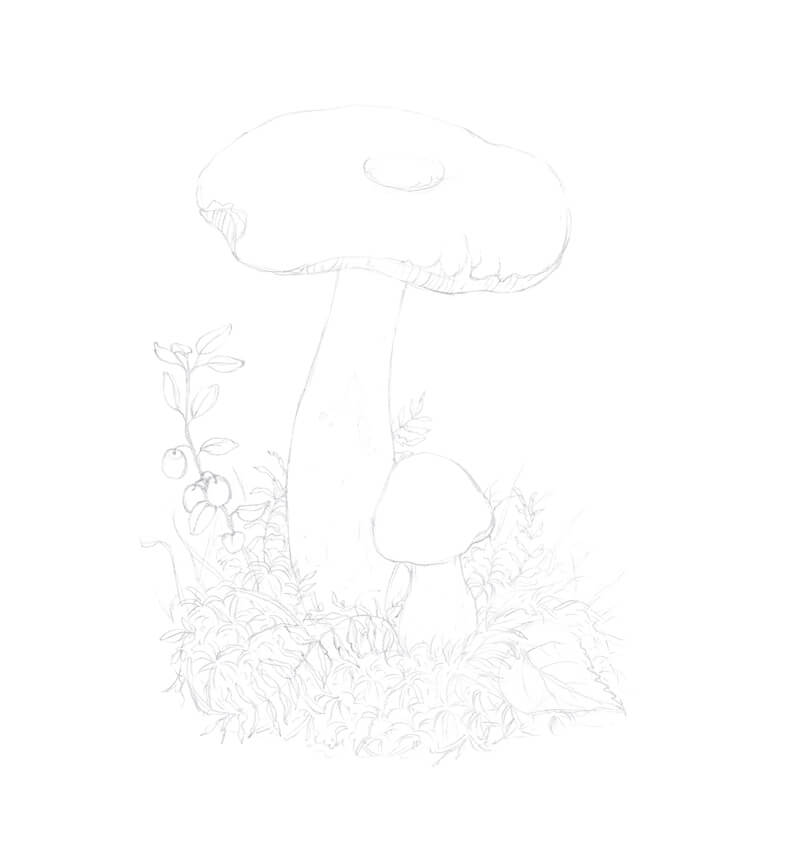
I add the surrounding elements. I draw the sphagnum moss, applying short lines that go in different directions. There are several moss-like elements of varied sizes, resembling small fern leaves. It’s good to have some variation of shapes in order to add variety and create a more natural appearance.
I refine the twig of the red whortleberry, adding more leaves. Note the direction of the upper leaves – they guide the viewer’s attention to the larger mushroom.
The leaf gets some veins as well. Remember, you don’t have to outline all of the details – only the ones that you feel are essential.
Drawing a Mushroom with Colored Pencils
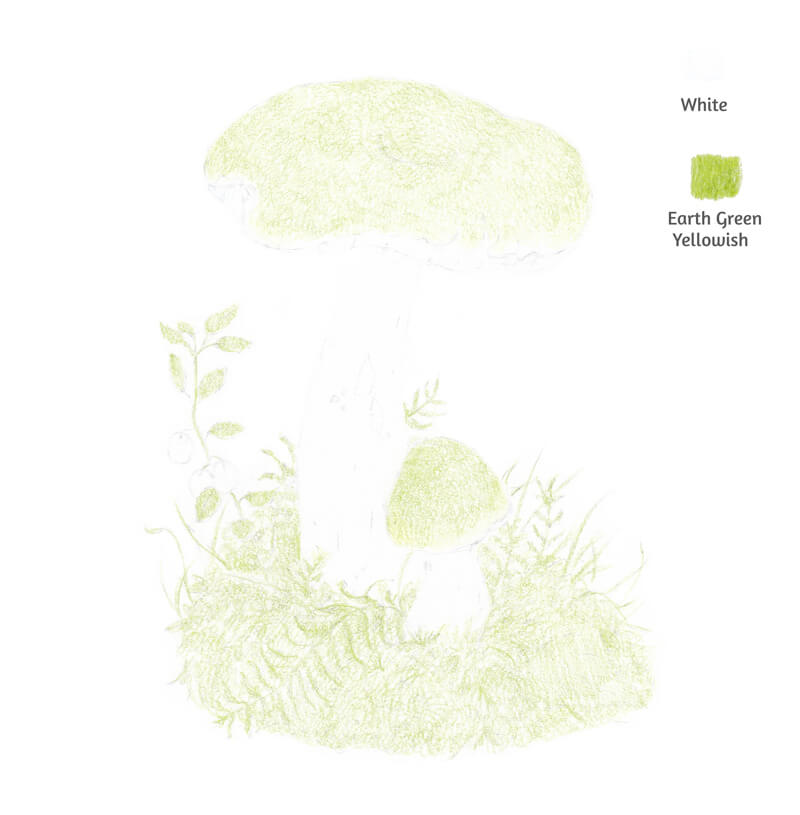
Before making marks with colored pencils, let’s first evaluate the intensity of the graphite pencil marks. Excess graphite left on the surface can contaminate the colored pencil applications. Lift any bold marks with a kneaded eraser.
We’ll first do some work to preserve some of the lighter values. I cover the mushrooms’ stems and the undersides of the caps with White. A white layer will show through the subsequent applications, affecting their value and, less significantly, the hue. A white under layer makes it easier to restore a light tone, if so required later in the process.
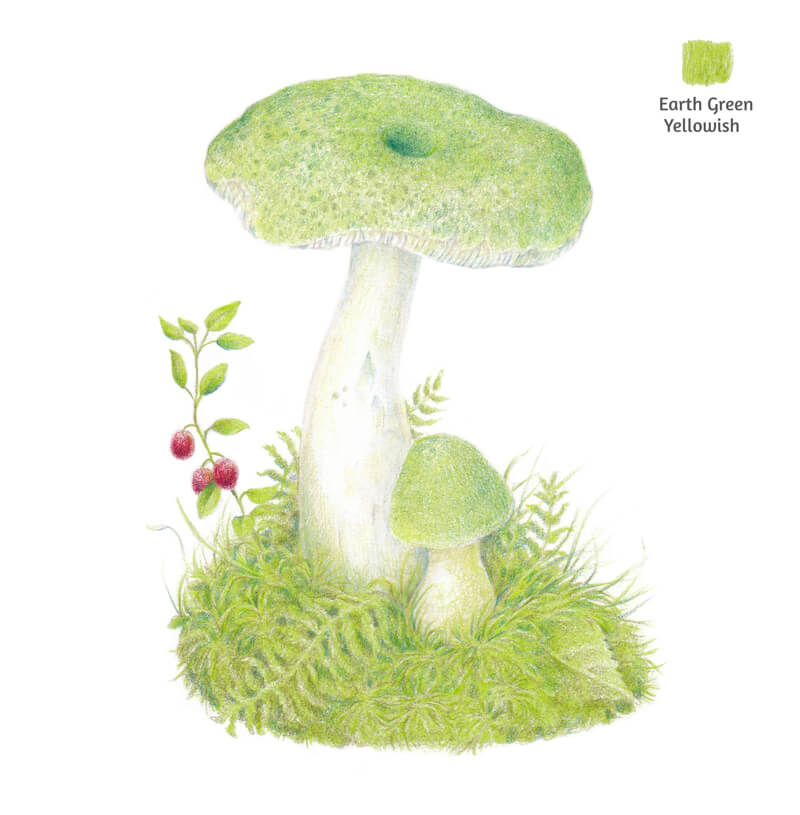
Then I cover the caps with Earth Green Yellowish. I also add this color to the floral elements around the mushroom, creating a base layer.
Keep the pressure light on your pencil. You can create small circles or directional lines – the technique is up to you. When working on grass and moss, I recommend that your marks flow in the same direction as the plants grow.
See also: 12 Colored Pencil Tips
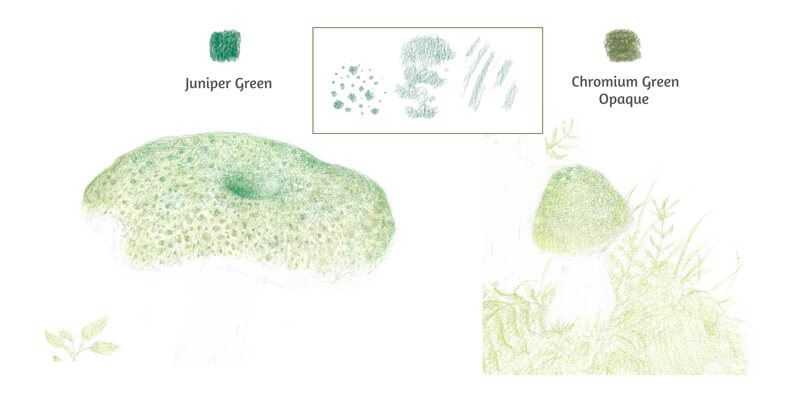
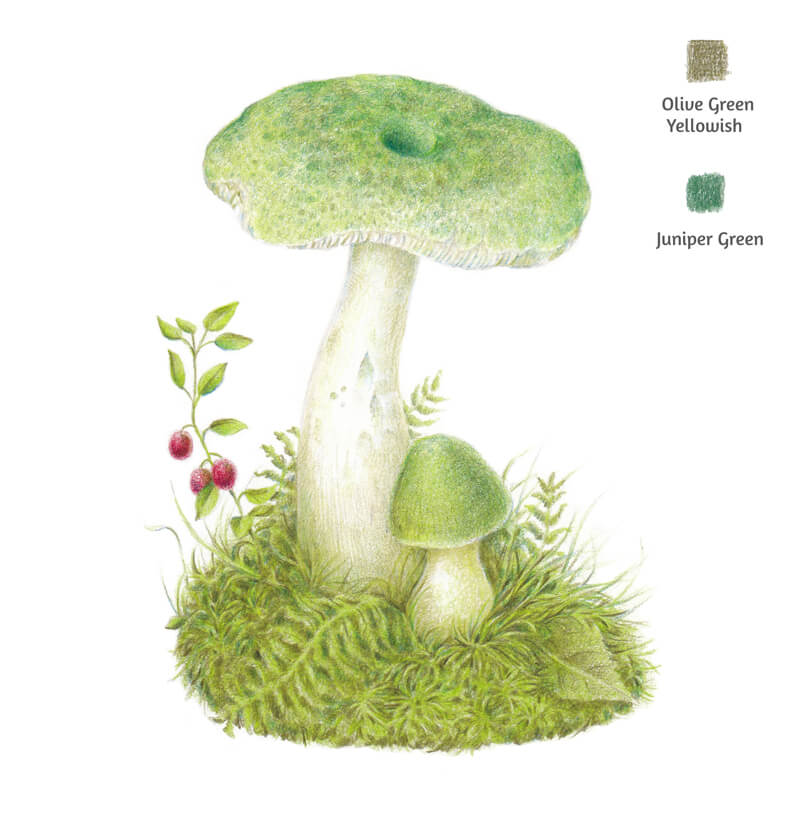
Now it’s time to start creating the pattern on the mushrooms’ caps. I work with Juniper Green and Chromium Green Opaque. These colors belong to the green family, but their perceived temperatures are quite different. The first color is cooler and the second one is warmer. Using them together creates variety.
You can choose to use the cooler hue mostly in the lower part of the cap and the warmer one in the top area. Or, apply them interchangeably.
The pattern consists of separate rounded shapes of different sizes. Some areas get a uniform covering – this is especially true for the central parts of the caps. You’ll find my samples of marks in the image below.
Young fungi usually have a less pronounced texture, so I avoid drawing too many separate spots on our smaller mushroom.
I also mark the hollow in the center of the bigger mushroom’s cap.
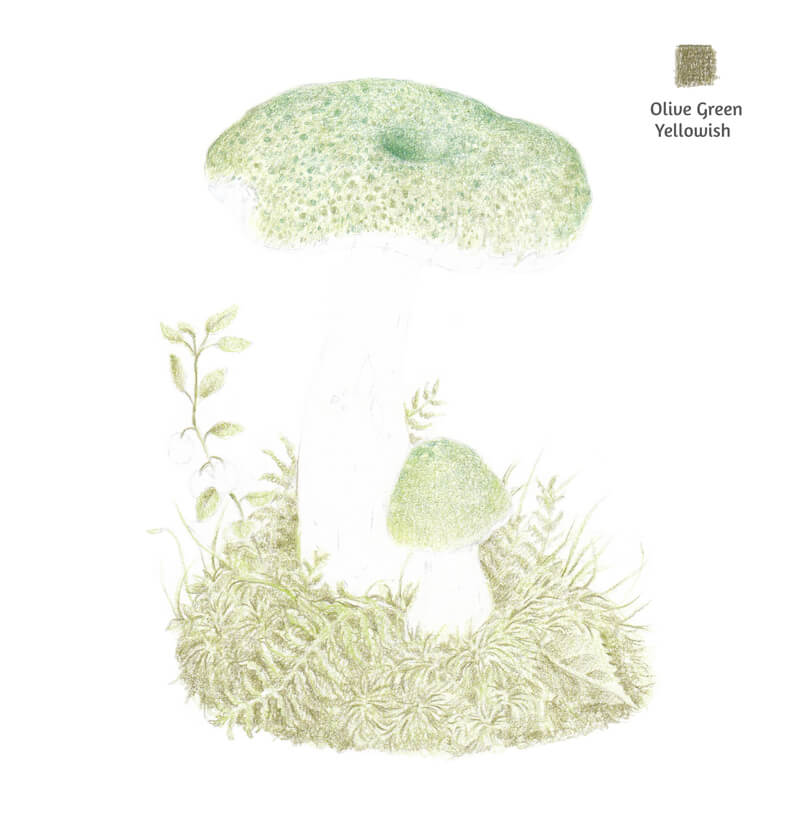
I add Olive Green Yellowish to the bottom part of the drawing. I mark the darker areas, including the gaps between the grass blades and in the moss. Inspect your drawing at this point. Your marks should conform to the pattern of shadows. However, the moss texture is quite forgiving, so developing a rough interplay of lighter and darker areas will get you a suitable result.
This green has a pronounced inclination to a dark, muted yellow sub hue. Using it to draw the floral elements will make the artwork more realistic.
Also, I intend to influence the caps and surrounding plants so that they differ in terms of color temperature. In my mind, the caps should be slightly cooler than the grass and moss.
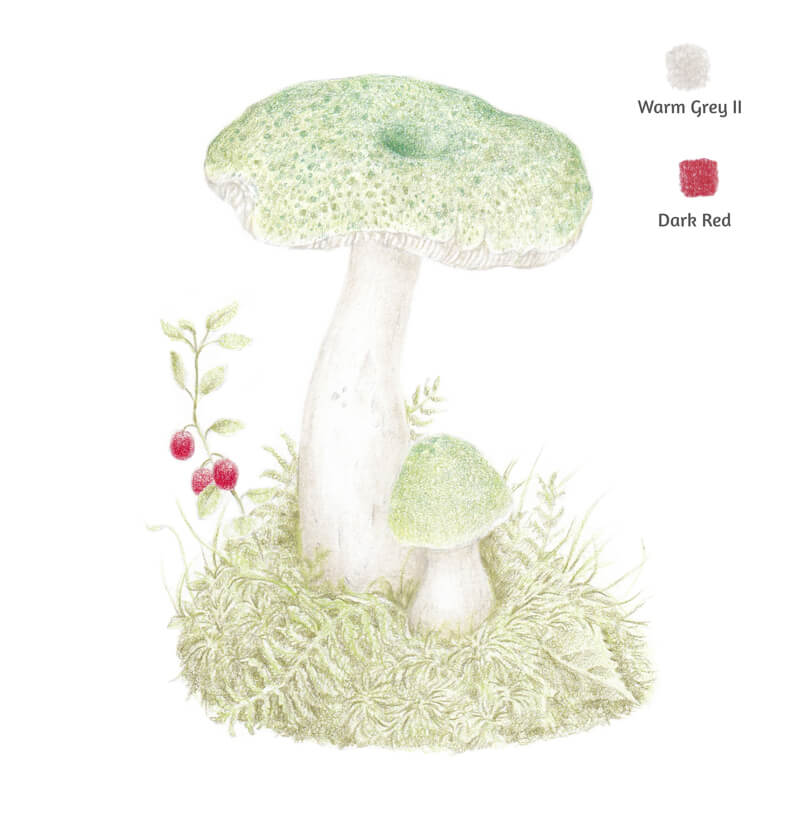
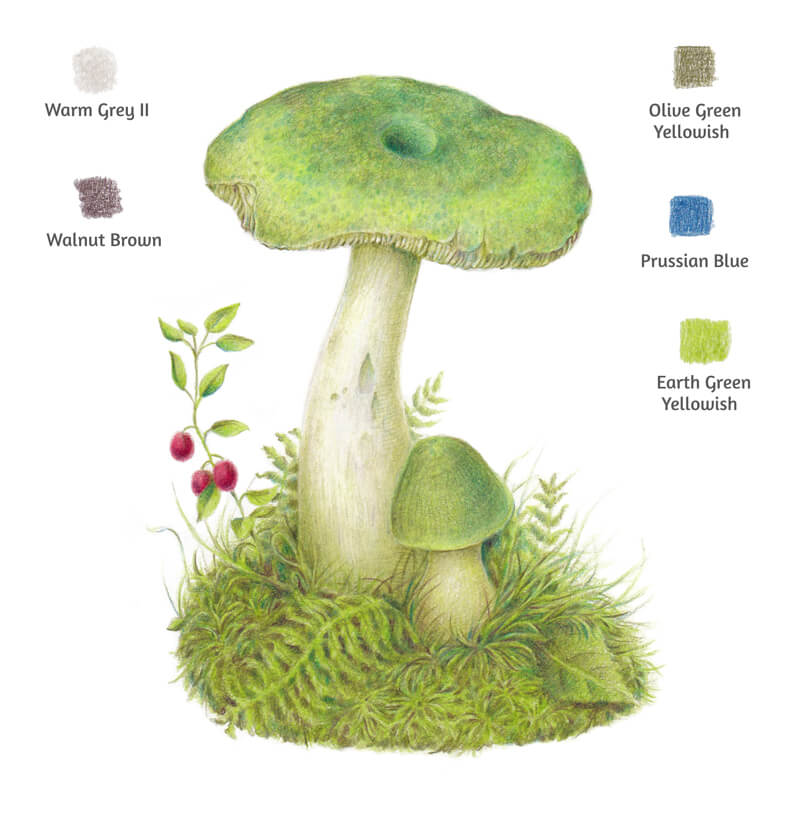
With Warm Grey II, I develop the core shadows on the mushrooms’ stems. The texture isn’t completely smooth so feel free to add some details of relief – for example, small cuts, bumps or hollows.
I also draw the gills on the larger cap’s underside. When you’re working on details, keep the tip of your pencil sharp for added control and precision.
I cover the red whortleberries with Dark Red. The shadowed areas get additional layers of color – making the color richer and darker.
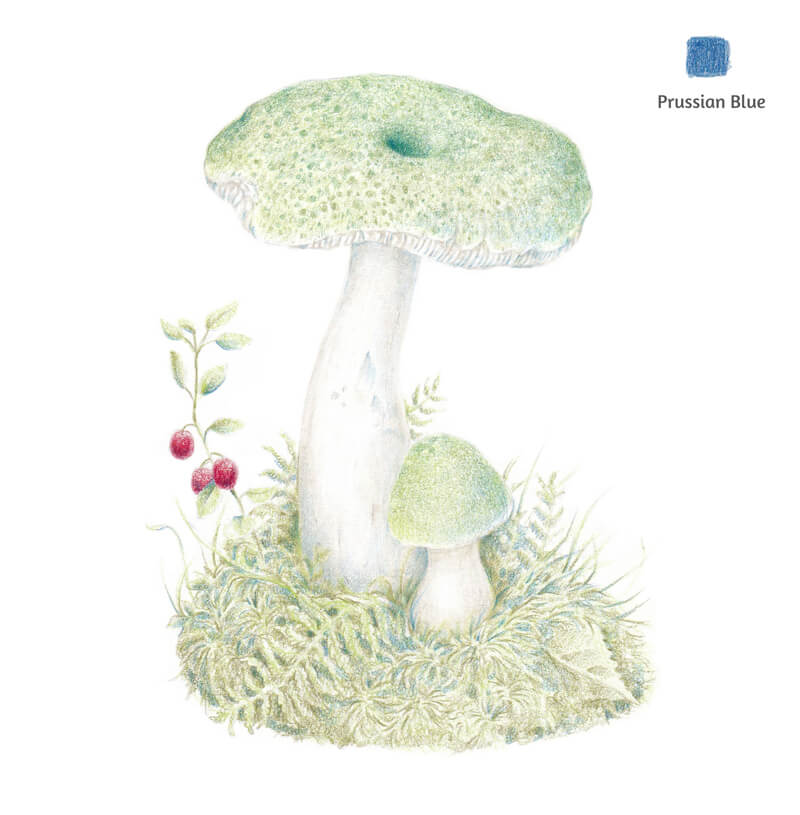
I add some Prussian Blue to the shadows. Be careful and keep the pressure at a minimum, especially when working on the lightly colored areas.
Too much of this blue hue may look unnatural. In small amounts, it gives the shadows a natural feel.
At this point, we still see too much of the paper showing through the drawing. The artwork looks slightly raw and rough. It’s time to increase the density of color.
I add another layer of color to ensure solid coverage with Earth Green Yellowish. The caps, leaves, moss – everything becomes much more saturated. All of the existing applications of color still show underneath, increasing the complexity of the color in the drawing.
Now we can increase the pressure on the pencil. (But just slightly!)
With Juniper Green, I make the pattern of the caps more noticeable while also strengthening the darker areas.
I apply Olive Green Yellowish to the floral environment. I like the existing bright green hue, but it needs to be muted down to look more realistic. At this step, the tip of my pencil is very sharp.
I also add this green to the mushrooms’ stems. There are cast shadows that the caps cast on the stems – we should intensify them. Some strokes of this color may be added to the caps as well.
Optionally, you can add more strokes of Earth Green Yellowish to the environment. Use this pencil if the layers of color are still lacking the desired intensity.
Now we have enough pigment on the paper – it’s time to burnish our drawing. I’m going to use the White pencil to complete this process. Burnishing smooths out any remaining surface texture produced by the texture of the paper. This step will make the drawing look more like a painting.
I pay particular attention to the mushrooms’ caps and stems. The goal is to polish the surface so that no tooth grain is showing through. Burnishing moves the pigment around, so some areas may appear slightly lighter after this process.
Using White for polishing the artwork is not the only option. If you’re a more experienced user of colored pencils, I suggest burnishing some areas of the caps with Warm Grey II and Earth Green Yellowish to create more variety.

The drawing is almost complete. All that’s left are a few minor changes that will enhance the result.
With Olive Green Yellowish, I enhance the details of the larger cap’s underside gills. In order to develop these details, the pencil tip is super sharp! I also add this shade to the darker areas of the stems, carefully applying the pencil with short hatches.
With Warm Grey II, I mute the brightest areas of the stems.
I add just a bit of Prussian Blue to the shadows in the moss. I also use Walnut Brown to increase the contrast in this area. You can apply the pencil in a soft shading manner or draw single lines that simulate grass or moss elements.
Lastly, I evaluate the drawing once again and make sure that there are no specks of white paper showing through. Earth Green Yellowish may be used to fill in any remaining specks of white.
How to Draw a Mushroom with Colored Pencils – Conclusion
Thanks for joining me on this journey. As you can see, it doesn’t require a ton of colors to create complexity in a colored pencil drawing. Even a simple subject, like this mushroom, can lead to a rather complex colored pencil drawing. Be sure to start with a solid graphite sketch and patiently layer colored pencil applications. Most importantly, enjoy the process.
If so, join over 36,000 others that receive our newsletter with new drawing and painting lessons. Plus, check out three of our course videos and ebooks for free.