But sometimes our thoughts about what we want to do and our actions are completely different. Expanding our “comfort zone” isn’t always easy, no matter what it is – art, learning, or anything that relates to our everyday life.
There are several reasons for this:
- We don’t know what to undertake or how to divide the task into smaller, digestible parts.
- We don’t assign a specific time to the new pursuit and may end up forgetting about the whole thing.
- We just aren’t sure that we’ll succeed, and this prevents us from starting (or continuing).
I’ve fallen into these pitfalls many times with various tasks, habits, and pursuits. For example, this past year I have been thinking about new techniques or artistic media that I wanted to try, and the weaker points in my skill set that needed my attention. Unfortunately, those three pesky reasons above kept me from actually doing anything – especially, the time reason excuse.
What’s the solution? How do we overcome these obstacles? We know that we need to expand our artistic experiences, but we keep finding excuses and end up not taking action. I’d like to share a few strategies for overcoming these excuses. I’ll also share a simple colored pencil drawing lesson that will help to ease you into something that may be brand new to you.
Become More Disciplined with Your Art
First of all, it’s necessary to make a list of everything that you are interested in (or what needs improvement).
The second step is classifying the interests, depending on the priority. In other words, if you are eager to “level-up” with a certain skill or feel like something holds you from creating better art – this should be your top priority.
Then, make the time for this thing. The best approach is to practice on a daily basis – but if this is not possible, once or twice a week is the minimum. Need a reminder? Set up a notification on your phone or write a note and keep it visible to remind you of your decision to improve.
Usually, we have so much to do every day that it’s almost impossible to carve out a whole hour to devote yourself to anything else. If that sounds like you, take a closer look at everything you do regularly and track your time. Chances are that you’ll find a block of time. You may see that some routine tasks or entertainment can be abandoned and replaced with a new pursuit (if that’s really the thing you want to be doing).
Also, we often waste so much time just waiting. It may be waiting at the doctor’s office, for the bus, or for someone we’re meeting to arrive. Of course, this time can’t be 100% focused but it’s better than nothing. Keeping a sketchbook near you provides a little opportunity for a some drawing practice.
I recommend starting with short blocks of time, like 15 minutes for sketching. Our brain has a fear of lengthy, complex tasks. It knows that we may be tired and annoyed at the end. But 15 minutes is not that big of a deal!
The fear of getting poor results can be eliminated through awareness. It’s true that our results become better with time and practice. There is nothing wrong with the process of practice – it can be messy, with a touch of uncertainty and improvisation.
Let yourself be a beginner and transform your fears into a resource. Nothing happens if you don’t try! Chances are that your results will be even better than you expected.
Or, try to expect nothing – any outcome is good just as it is.
These thoughts allowed me to inject studies and various experiments into my creative routine – and I hope they’ll help you, if you’re in a similar situation.
The Idea Behind This Project
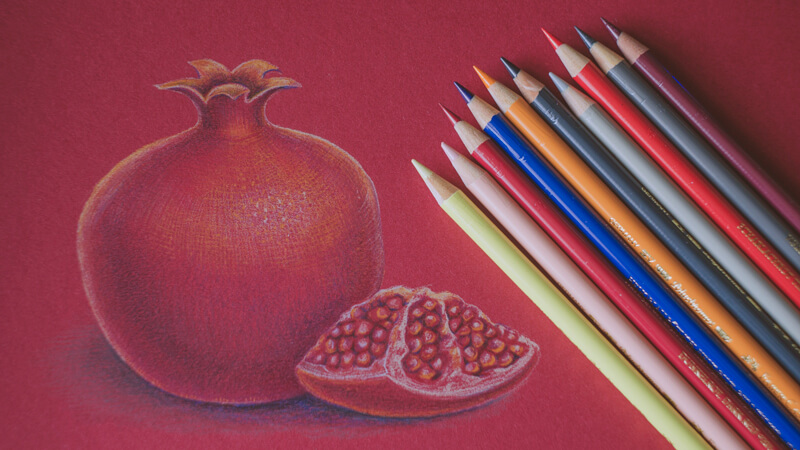
This demonstration is an example of such an artistic quest. One day, I caught a sudden idea of drawing a pomegranate on a red paper. I found a proper surface. It’s color seemed somehow bright and dark at the same time.
It also is similar to the overall color of a pomegranate, which makes this concept interesting and challenging.
On the other hand, this closeness of colors may be an advantage because we don’t have to build up the layers of pigment to create a solid covering, as we have to with ordinary white paper.
I wanted to limit the time dedicated to this project. What can be done within 45 minutes? Even though my goal is to complete the drawing in 45 minutes, it doesn’t mean that I will stop there if the drawing is incomplete.
Of course, this limitation isn’t obligatory if you decide to follow along. Having a clear deadline – with a good attitude – may help you to reach a more focused state of mind. We also know how much time we are going to commit to this – it is not entirely open-ended.
Creating the Pencil Sketch
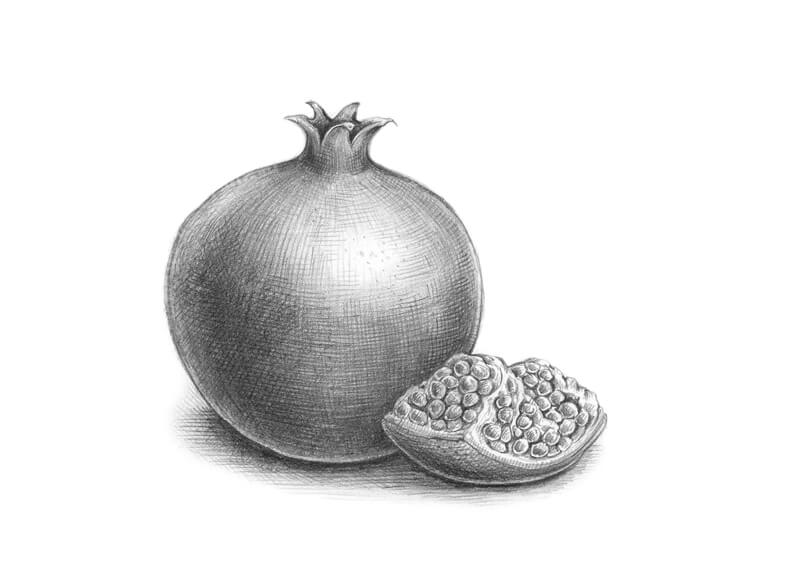
I’m working with no particular expectation. The overall set up, including the materials, is new to me. That’s why I decided to create a pencil sketch to test the concept and make notes on the positioning of values.
Creating a sketch is a great way to think through your artwork beforehand and become better prepared (especially if you feel slightly uncomfortable with red paper). This step isn’t required – if you prefer a more spontaneous approach, it’s completely fine. This preparatory sketch is also not included within the 45 minute time constraint that I’ve placed on myself.
As you can see, the sketch is far from perfect; it’s teetering on the edge of accuracy and roughness. If this was a separate project, I would soften the contours and add some more hatching here and there. However, since this is preparatory sketch, it’s more than enough.
Choosing the Supplies
The paper for this drawing is thick and rather smooth, but has a subtle texture – it becomes visible after some applications of color. However, it doesn’t allow many layers of color and we should be aware of this.
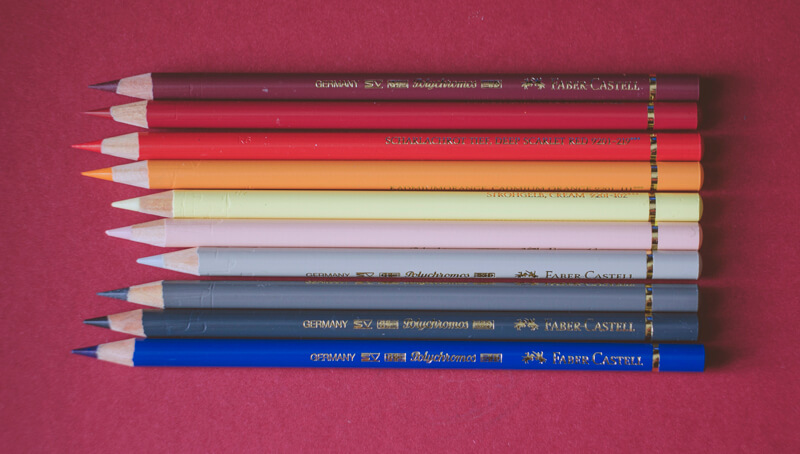
I picked a limited color palette for this sketch. There are ten pencils from the Faber-Castell Polychromos line (pictured above – from top to bottom):
- Red-Violet
- Dark Red
- Deep Scarlet Red
- Cadmium Orange
- Cream
- Light Flesh
- Warm Grey II
- Warm Grey V
- Payne’s Grey
- Helio Blue Reddish
Please note that the photo distorts the actual colors of pencils and paper!
It seems that Polychromos colored pencils work great on this kind of paper. When I was preparing this post, my first attempt included Prismacolor Premier pencils, but the result was less successful. I ran out of tooth very quickly and there were difficulties with creating details. However, your paper might behave differently, so don’t hesitate to try things out beforehand. And, if the first attempt isn’t successful, you always can create another one!
As a side note, Polychromos pencils are oil-based, while Prismacolor pencils are wax-based. These pencils behave differently becaue their binders are different. For more on the differences between these types of pencils, check out this lesson…Oil-based vs. Wax-based Colored Pencils.
This is what the pencil strokes look like on the red paper:
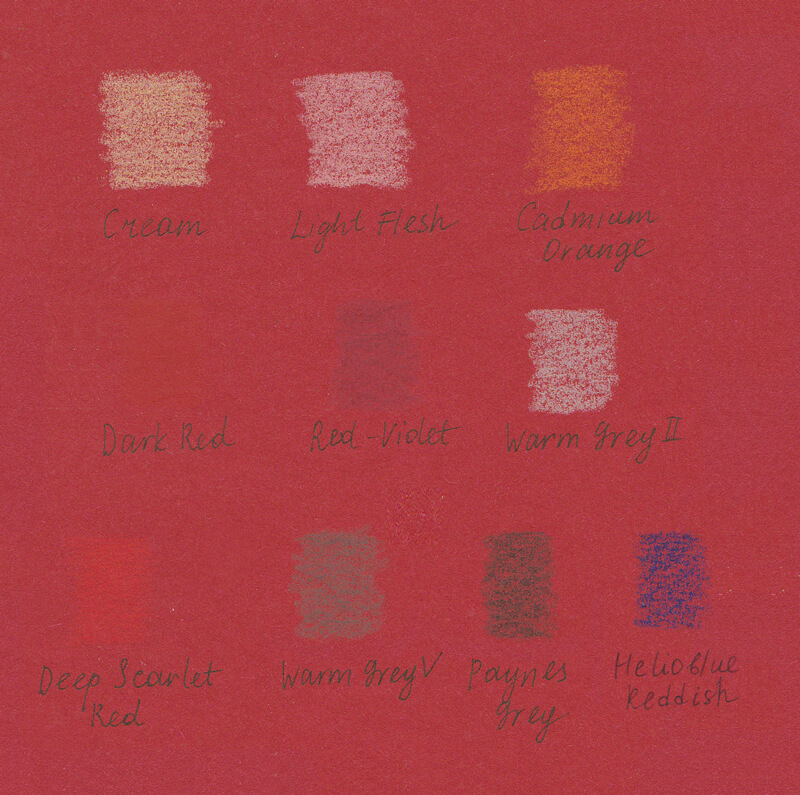
As you can see, the color of the paper influences the result greatly.
By the way, it’s possible to add fine liners to this set of tools – it will quickly and easily mark out the contours, but your sketch will become even more stylized.
Drawing the Pomegranate with the Colored Pencils
I outline the main contours, using the Cream pencil. It’s important to use light lines – we don’t want to create furrows on the surface.
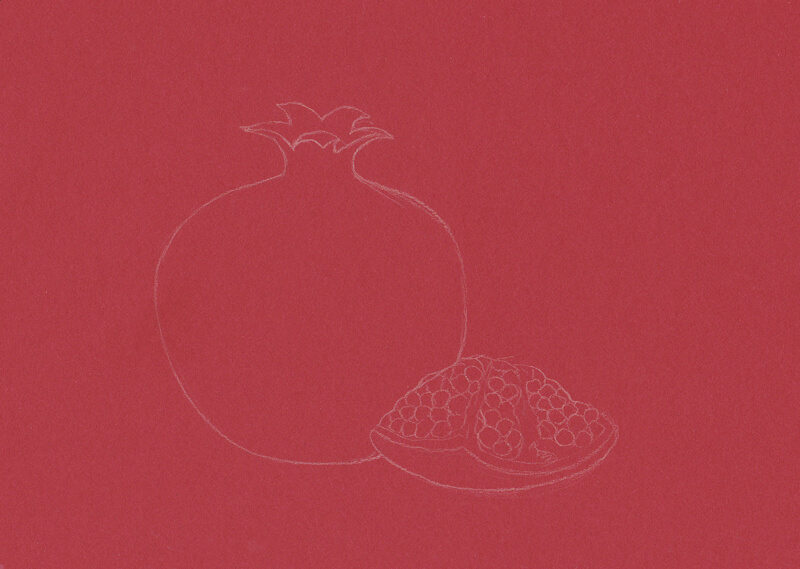
Then, I use both Cream and Light Flesh to mark the lightest areas of the drawing. As I need to work quickly, my hatches are rather long and not as polished as they would be in a realistic botanical illustration.
The color of the paper is very strong, so both pencils create similar marks.
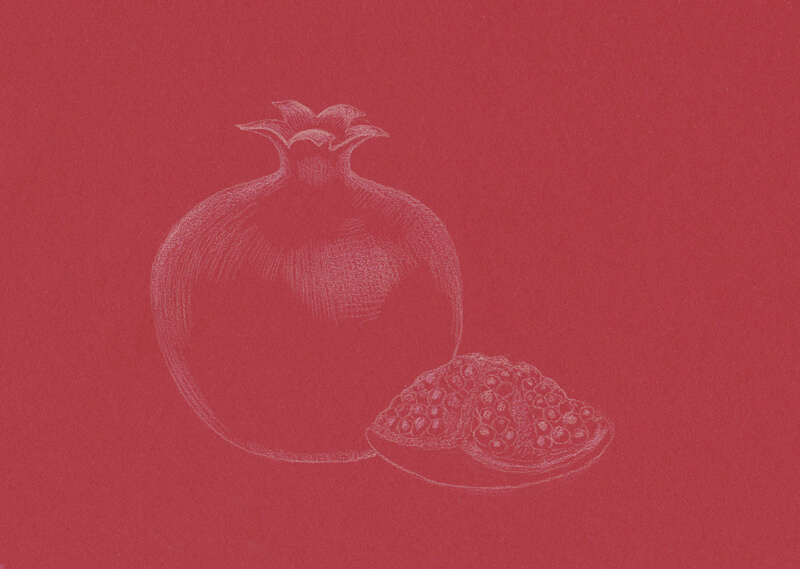
With the Dark Red pencil, I create a base for the core shadow of the pomegranate and accent the seeds. I also add some subtle brightness with Deep Scarlet Red, emphasizing the lighter parts of the fruit.
These colors are very close to the paper’s color, but this subtle difference makes the object a bit more clear.
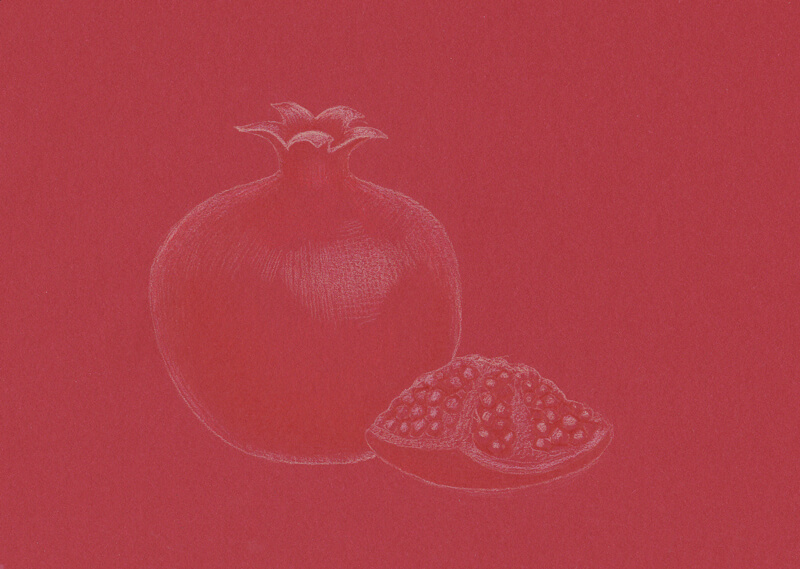
I add some orange marks, mostly to the lighter areas, using the Cadmium Orange. It’s important to brighten the seeds, but avoid creating a monotonous pattern.
A pomegranate has an uneven texture, so I use dots to accent this feature.
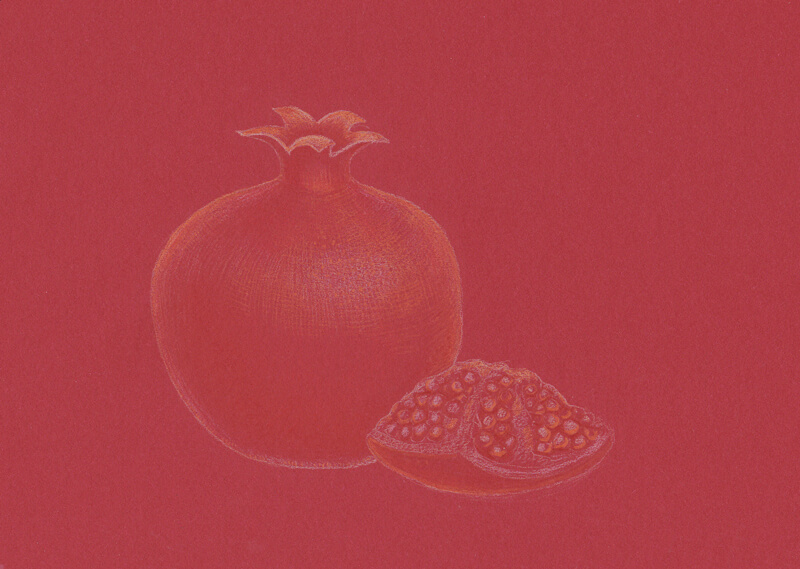
I emphasize the core shadow of the fruit, using the Helio Blue Reddish. Just a soft touch with this pencil is enough! To mute the intensity of color, I apply Dark Red right on top of blue strokes.
The upper part of the pomegranate needs some darker tones too, so I repeat the process there.
To create a cast shadow under the subjects, I mix the strokes made with the Helio Blue Reddish, Dark Red, and Warm Grey V.
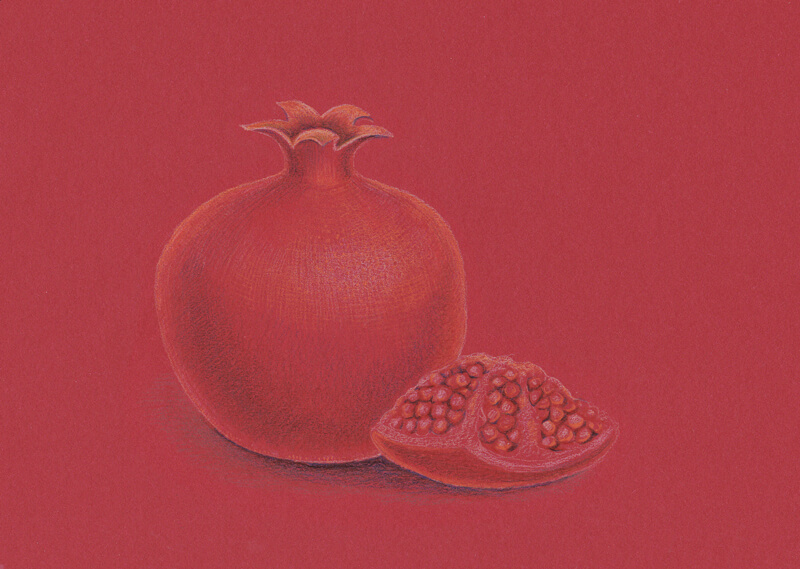
It’s time to increase the contrast in value, so I add some Red-Violet strokes to the darker areas, including the cast shadow.
Then, I emphasize the lighter spots with Cream. Again, dots in the center of the highlight create a nice illusion of texture.
The sketch becomes more stylized, but that’s the effect I was going for.
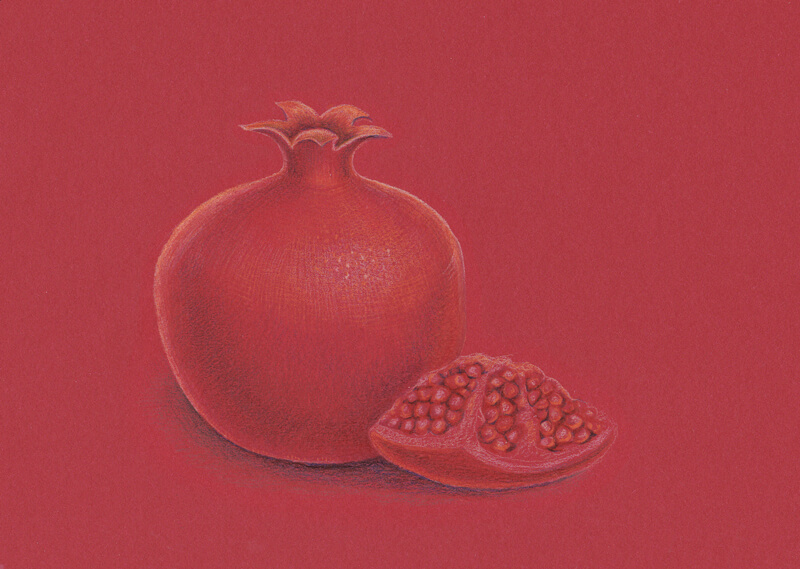
With Cream and Warm Grey II, I work on the relief details of the isolated piece of the fruit. Deciding which color to use depends on the side of the piece that’s visible and the amount of light it catches. I see its left side as a more neutral tone.
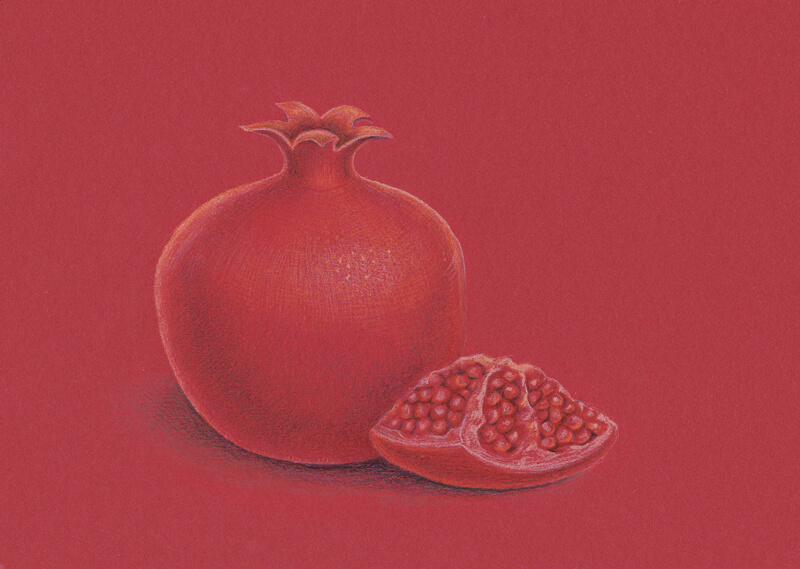
It’s time for the final hatches. I evaluate my sketch and add colorful strokes here and there.
For example, I complete the shadow using the Payne’s Grey pencil and define the contours of the pomegranate a little more with Cream. However, allowing the sides of the fruit to be a bit soft will make your sketch more natural – so avoid outlining everything.
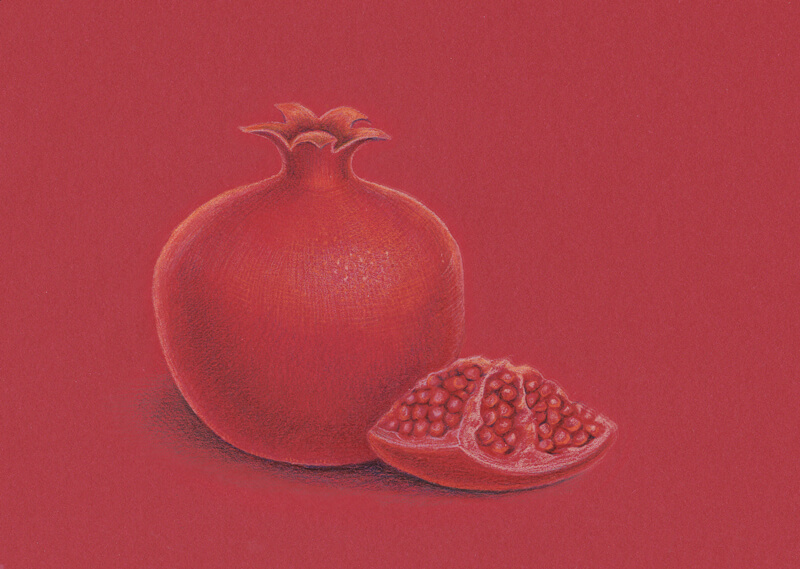
The work is now complete and we’ve met our time limits! The sketch was completed within 45 minutes, thanks in part to the choice of paper color.
Conclusion
I hope you liked this experiment and it inspired you to set your own goals and challenges. Let’s be brave and make something that we have put off for a while – and do it today!
I wish you much luck and inspiration on your journey!
If so, join over 36,000 others that receive our newsletter with new drawing and painting lessons. Plus, check out three of our course videos and ebooks for free.


