In this tutorial, we’ll create a special artwork. We’ll combine the advantages of traditional and digital tools. Hopefully, at the end of this post, you’ll be inspired by this wonderful combination!
My goal for this project is to practice ink drawing and digital painting skill and create a harmonious mixture of colors to develop a pleasant vintage look. If the result resembles an antique scientific illustration, it’s the kind of stylization I was looking for.
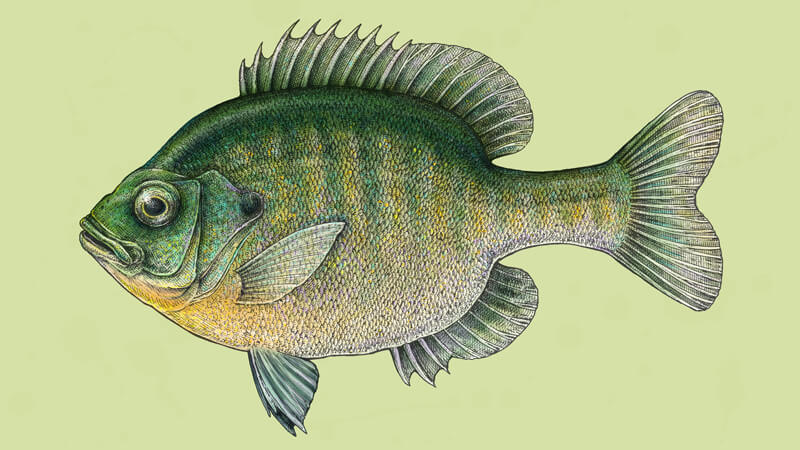
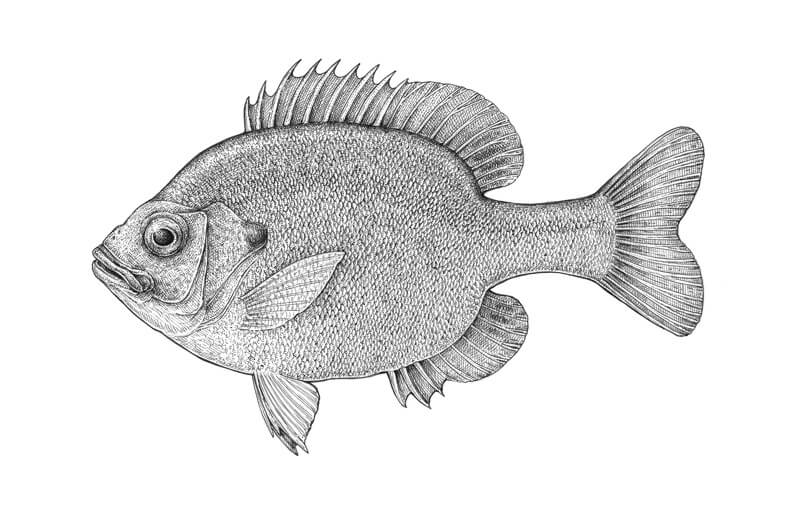
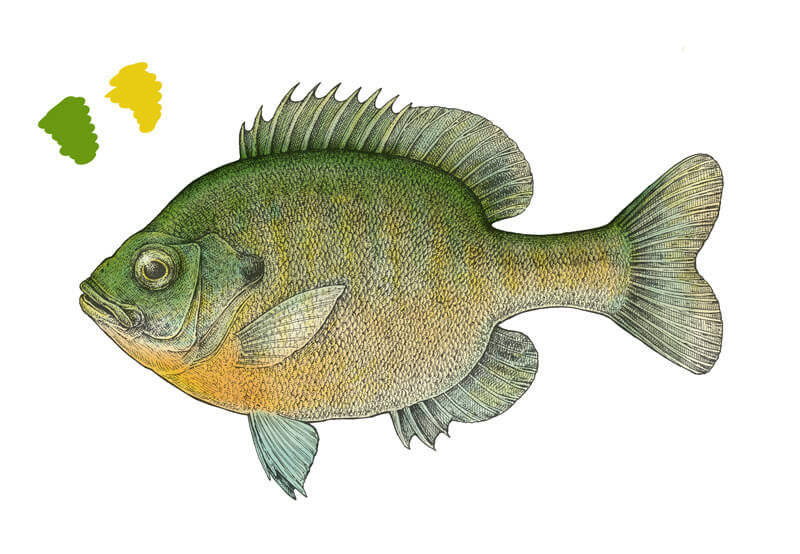
A fish (more precisely, a Bluegill) is the main subject because it’s relatively simple to draw and features a variety of beautiful colors. Our art is usually more successful if we depict that something we truly like and find interesting!
For this project, you’ll need some basic art supplies – a graphite pencil, an eraser, and drawing paper of a size that is comfortable for you (mine is a standard A4).
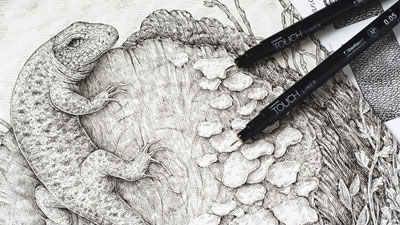
For the inking part, I’ll be using the ink liners. The widths of the pens I’ll use are 0.05, 0.1 and 0.2. Feel free to use any liners you have or even replace them with a nib pen.
Adobe Photoshop will help me in creating the colorful underpainting. You can use any version of this software or download a trial if you don’t have one.
As far as I know, many programs for graphics support digital layers and allow you to create wonderful digital paintings. As long as you understand the principles, any software will do this job for you.
I highly recommend using a graphics tablet with a stylus for painting in Photoshop. The main advantage of this device is the pressure sensitivity – the wonderful possibility to change the width of your digital paint strokes on the fly. Some other useful options are available when using a tablet too – so it’s an extremely helpful artist’s friend.
We have so much to explore, so let’s begin!
Understanding the Shape and Sketching the Fish
The first step of our work is dedicated to ink and creating the texture of scales. But before we dive into the inking part, we should outline a sketch that represents the shape of the Bluegill.
However, if you prefer to start the work with the inking tools right away, there is nothing wrong with that. Having a graphite sketch just gives us an opportunity to consider your art beforehand and become more familiar with the subject.
If you aren’t familiar with the appearance of a Bluegill, a quick Pinterest or Google Images search will give you an idea of what the fish looks like.
Unfortunately, this fish isn’t the inhabitant of lakes and rivers where I live, so there’s no chance to catch it – I have to rely on images. To grasp the main shape and anatomic features, I examined some photos on the web. The goal is to find the common features and capture them in a drawing.
At this stage, feel free to make any measurements to capture the proportions accurately. A fish is a wonderful subject that makes the observation process easy, thanks to its relatively simple and flat structure.
For example, it would be useful to observe the balance between the lengths of the head or tail compared to the overall length of the fish. Also, detect where the fins ‘start’ and ‘end’. Observation is key to a great representational drawing!
See also: 7 Drawing Techniques For Accuracy
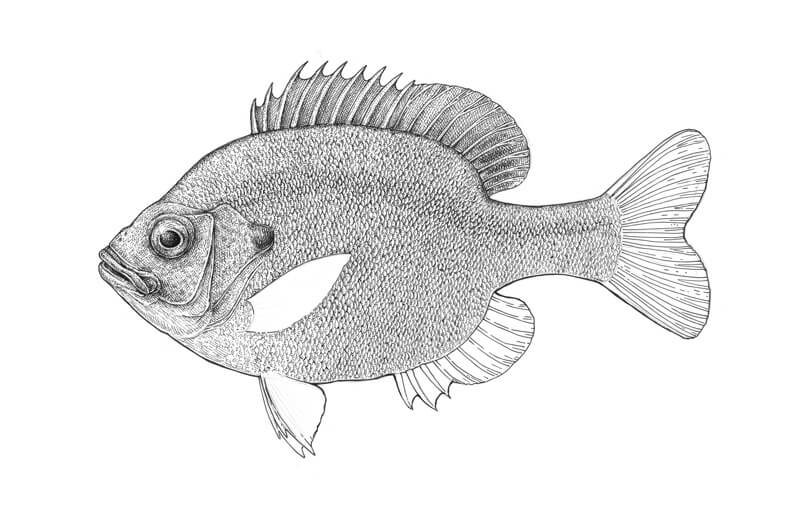
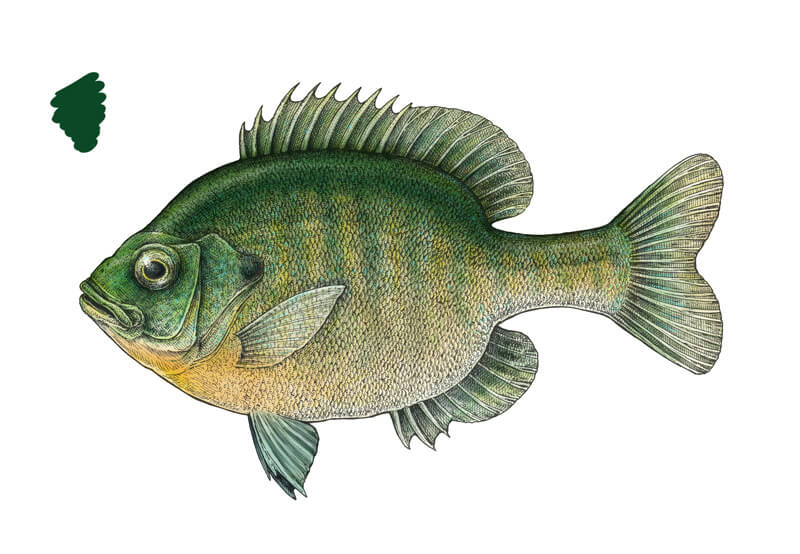
A Bluegill has a rounded body that is close to an oval in the shape and a tail of a medium length.
- A dorsal fin is found on the back of the Bluegill. A fish uses it for balance in the water and sudden movements.
- A caudal fin, also known as a tail fin.
- An anal fin is on the bottom side of the fish. A Bluegill uses it for stability while swimming.
- Pectoral fins are located on each side of the fish, around where the head meets the body. These fins are often thought of as the fish’s “arms”.
- Pelvic fins are located on each side of the fish, near its bottom middle. These help the fish go up and down or turn in the water.
All these fin names can be overwhelming at first sight, but don’t worry – everything will be clear on the actual drawing.
For now, just remember that fish fins may have a slightly different structure. Some of them have bony spines and some – rays. Spines resemble spikes. Rays look softer and usually fork near their ends.
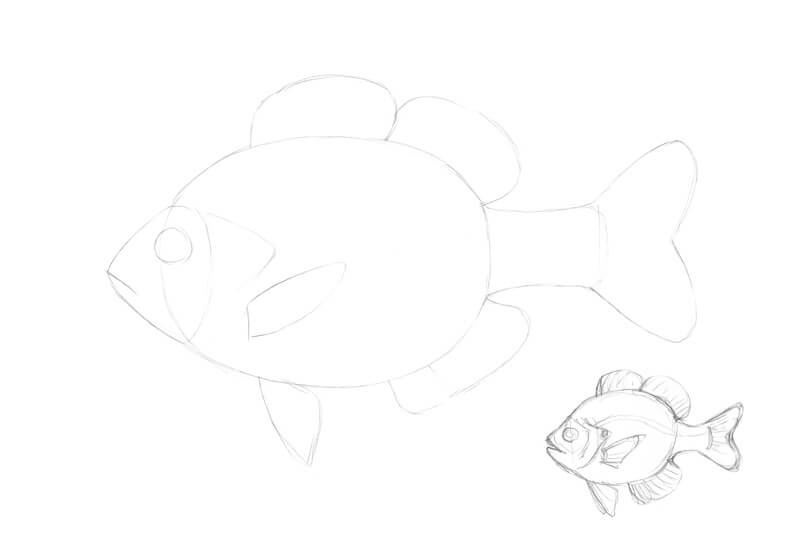
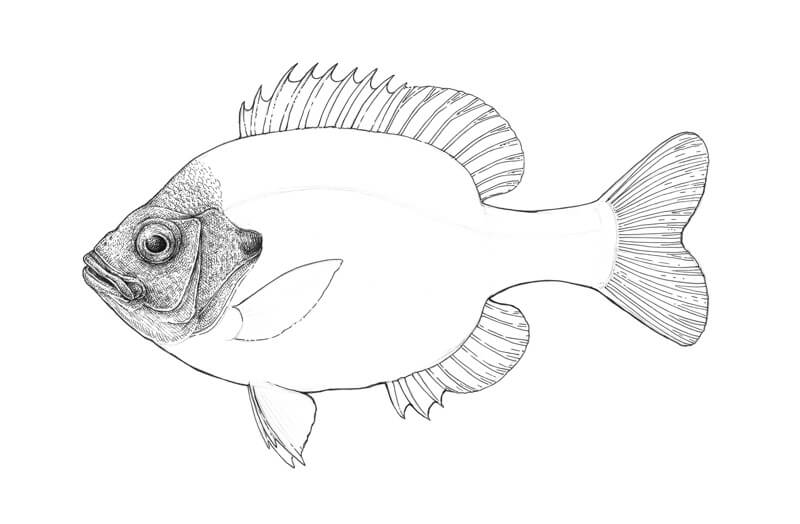
With a graphite pencil, I outline the general shape of the fish. I block in the body, head, tail, and fin segments. The simpler, the better. We don’t need a great number of details right now – only the right proportions.
If starting on the final surface of the artwork right away makes you uncomfortable, there is a solution. Draw a small sketch beforehand to familiarize yourself with everything you learned about the subject’s features and see what turns out. Chances are that your first small sketch won’t be perfect, but it will definitely give you a clue on what should be changed in the final sketch.

In the image below, you’ll find my sketch that represents the general shapes, and a preparatory mini-sketch in the corner of the image.
It’s time to add the details. My primary goal is to convey the character (or the mood) of the fish. Then, I’ll focus on the details. To achieve this, I pay attention to the head and the eyes of the Bluegill, asking myself various questions:
Where does this fish live?
It is native to North America. Bluegills live in streams, rivers, lakes, and ponds.
What food does it like?
Bluegills are omnivores. Our fish eats anything that can fit in its mouth (mostly small aquatic insects or fish).
Does it have many ‘friends’?
Bluegills are relatively gregarious and tend to be in a group. The more social individuals play an important role, helping the group to find food, locate a habitat, and avoid predators. The more sociable and less aggressive Bluegills take fishing bait more readily – quite an interesting fact, isn’t it?
What is it thinking about right now?
While the answers to the previous questions were discovered through the careful research, now it’s up to the artist to make a few decisions.
The answers help to form an impression of the personality of the fish. I conclude that my fish is careful, friendly, modest, and intelligent. Right now, it is in a calm mood. A wonderful picture!
Maybe these questions seem quite paradoxical, but this method really works. The great power of an artist lies in the ability to add perceptible nuances, convey attitude, and tell a story.
I add the following features: the large eye, gill covers, the rays and spines of the fins, and a lateral line (it’s the visible line along the side of a fish). If you wish, you can also mark some relief sections near the fish’s mouth and the prominent “lips”.
Feel free to erase the unnecessary pencil lines as you go, but keep them as light as possible.
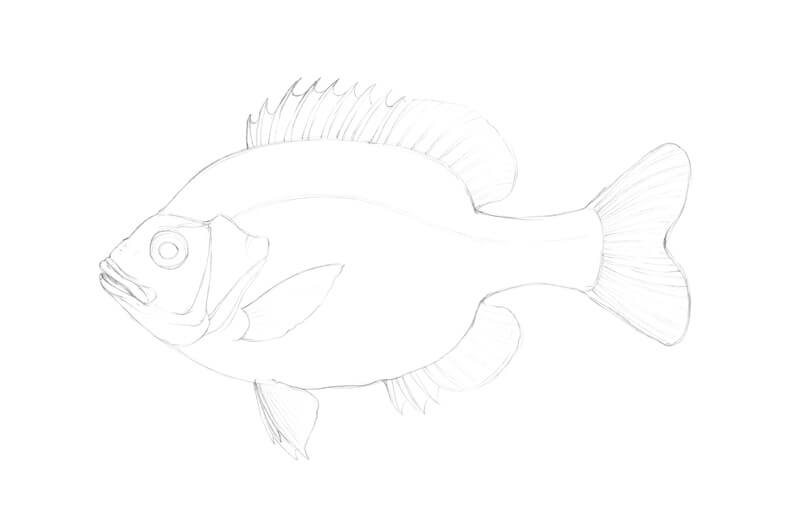
This set of details is sufficient – now we can proceed to the inking part.
Drawing The Texture of Fish Scales
There are different patterns of fish scales. The scales can be relatively big or small and their shape can be quite versatile.
To look harmonious, all scales within a pattern should work together, as a system. This means that the scales that we’re drawing should be unified – any divergent element can be distracting. The direction of each row of scales is also important and adds to the believeability of the drawing.
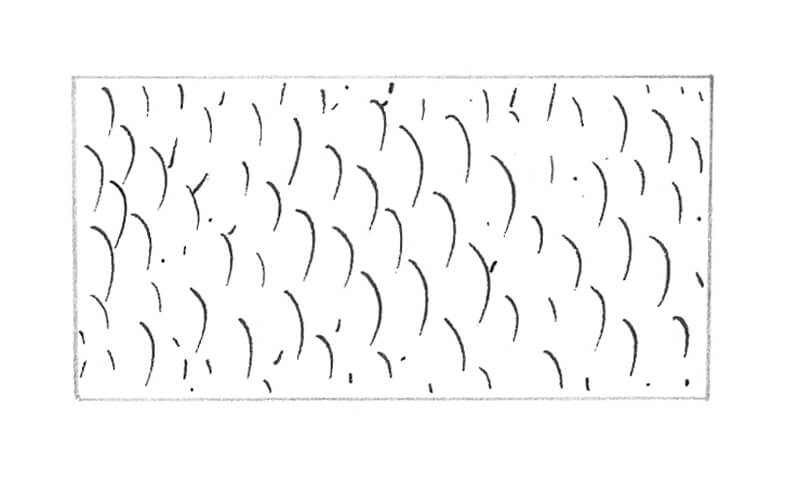
Before we start developing the details, it’s great to create some samples of scale texture. Of course, we usually don’t see the scales of a fish as a real whole object, but understanding the “nuts and bolts” of this texture will help to stylize it and exclude the unnecessary information.
I used 0.05 and 0.1 ink liners to draw the samples in the image below. Actually, feel free to use any tool you like. Ink liners may be an optimal choice because we’ll be drawing the Bluegill with them.
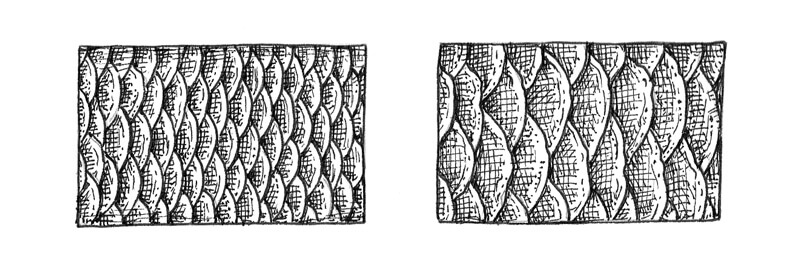
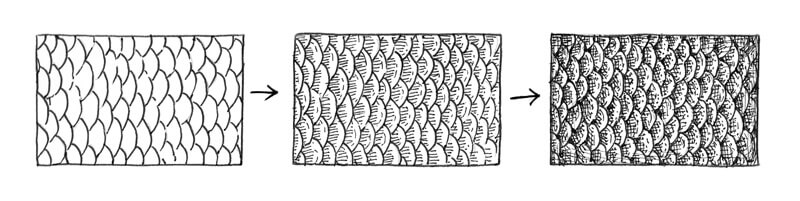
Here is an example process of building the texture of the fish scales.
- Create the contours of the scales.
The scales should be uniform in size and shape, but avoid making them perfectly even or equal – this won’t look natural. The contours may have some gaps for the same reason. Some scales may have slightly uneven edges.
- Add a hint at a darker value.
There are some shadows between the close-fitting scales. I used hatching to create the darker accents. You can also mark the external sides of the scales to make them more three-dimensional.
- Add more hatches and possibly, dots to increase the contrast and achieve the look you like and are striving for.
Now let’s apply our skills to the final artwork!
A Quick Note on Drawing the Texture of the Scales
In this tutorial, I’ll show you a detailed approach, which allows creating a refined texture of scales and requires layering the hatching and occasionally, stippling.
Of course, this manner of drawing scales isn’t the one and only. If you feel like you don’t have recourses to create something this detailed (and time-consuming), or it’s just not a part of your artistic style, you can always simplify the approach.
Sometimes increasing the size of an average scale in the pattern is a way to complete the artwork faster and with less effort.
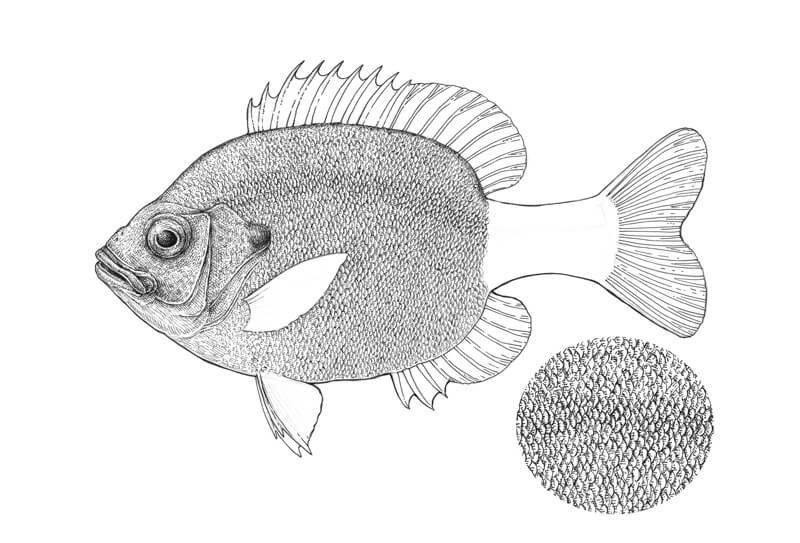
Below you’ll find an illustration of how fish scale texture can be simplified by reducing the quality of hatching and dots. This is an old artwork of mine, which I had drawn with ink initially, then added a digital painting layer.

In the corner of the image, you’ll find an enlarged fragment showing the texture. It’s just stippling plus some hatches to accent the shape of the fish.
Actually, the texture of scales can be represented in a variety of forms. They can be very simple, like in the image below, or quite complex. Different manners of drawing form different perceptions of the finished artwork. It’s up to you to decide which kind of appearance and set of techniques fit your preferences.
How to Draw a Fish with Ink Liners
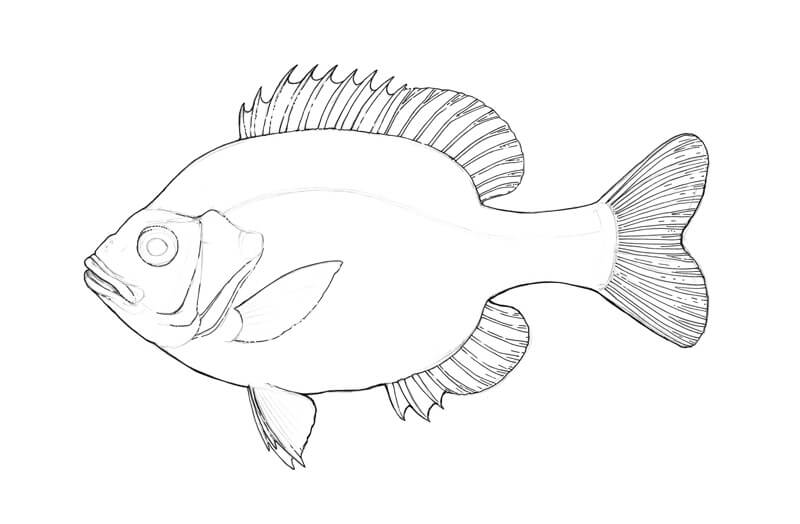
First, I outline the main contours of the Bluegill, using the 0.2 ink liner. The contour in the bottom part of the fish figure is slightly thicker – this is done to add some visual weight and create an illusion that the light source is from above.
Creating too thick of a contour may create a cartoony look, so increase the thickness gradually.
The lines inside the shape of the fish mark the relief (the rays and spines of the fins, the details near the head). These lines may be quite bold. To make them fit in the whole picture, I leave some gaps in the subsidiary contours.
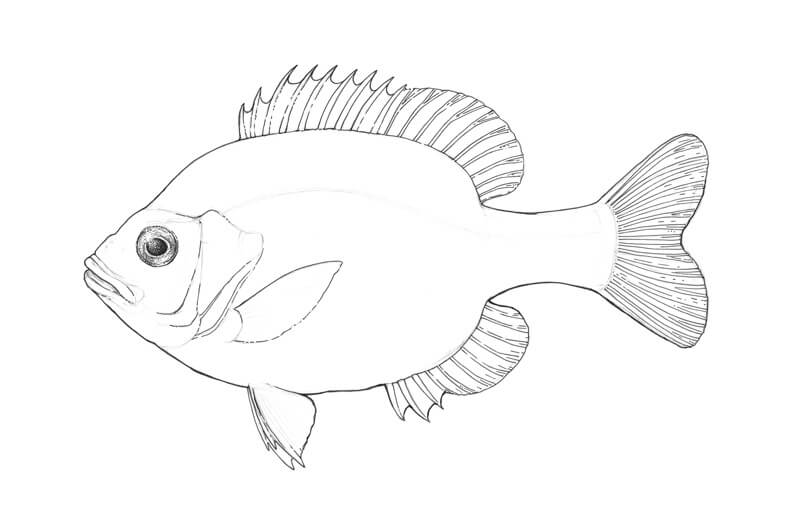
I work on the eye. It is not an exaggeration to say that the eye is the most important part of our fish because it adds so much to the mood of the artwork.
I darken the pupil and the sides of the eye, carefully repeating its shape with thin hatches made with the 0.1 liner.
The pupil has a thin lighter rim around it – it’s a great idea to keep that detail in the drawing. And, of course, no credible eye can be drawn without a highlight! I also add a smaller, subdued reflection in the bottom part of the eye.
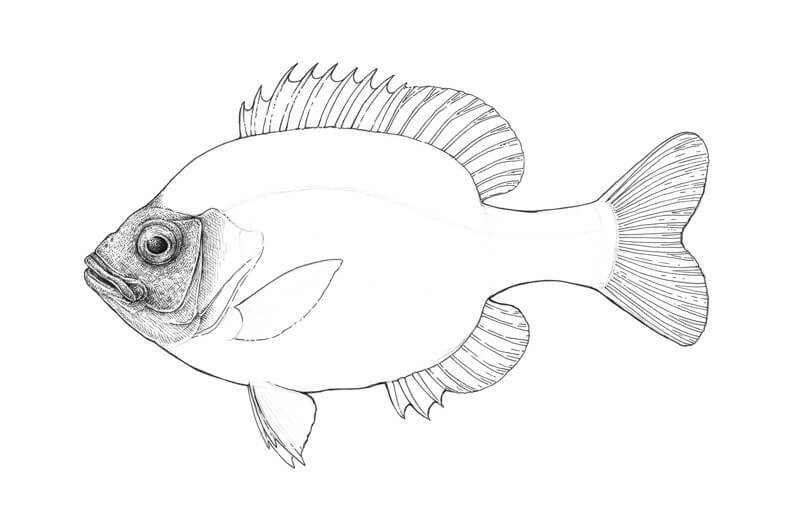
The head of the Bluegill has a subtle texture. I create its illusion with groups of short hatches and dots made with the 0.05 ink liner.
I mark the relief around the eye and darken the ‘folds’ near the mouth of the fish.

I add more hatches to the head, increasing the contrast with the 0.05 liner. The upper part of the head catches more light, so don’t overdo this area.
I also darken the opening of the fish’s mouth and accent the prominent details of the head. The goal here is to create an interesting relief.
I work on the gills and the bottom part of the fish’s head, using the 0.05 ink liner – in the same manner as in the previous steps. Then I start drawing the scales.
Bluegills have black spots on the hind edge of the gills, and our fish is no exception. I darken the area behind the fish’s head, approximately at the eye’s level, using long, rounded hatches.
This spot is supposed to be black, but I avoid making it completely solid. If we need more solidity, we can add it later, in the digital part of the process.
I continue drawing the scales with the 0.05 liner. The secret is simple: don’t outline the contours of every single scale, just mark them. Then apply hatching to create an illusion of light and shadow.
Stippling is a great addition to the groups of short hatches. It helps to vary the texture and make it look more organic.
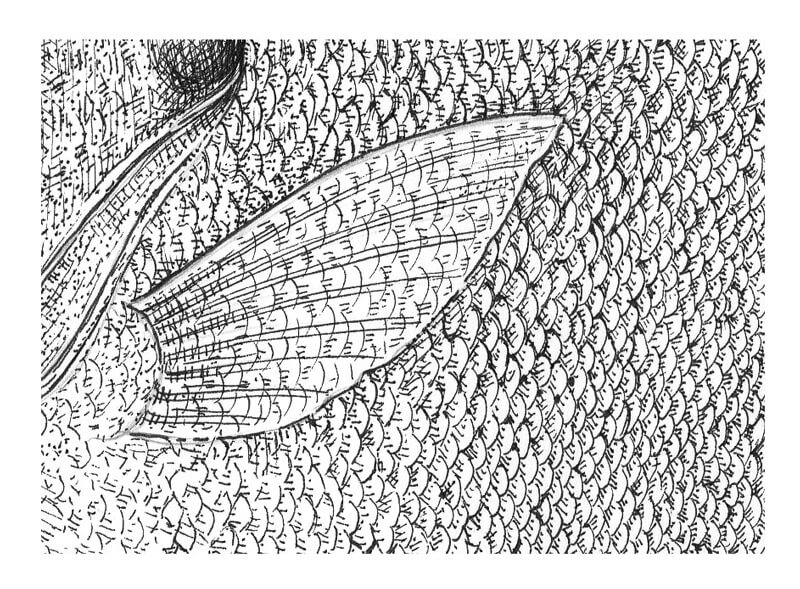
The scales near the lateral line should be more accented, so I apply an additional layer of thin hatching on top of them and make the contours of the scales slightly thicker.
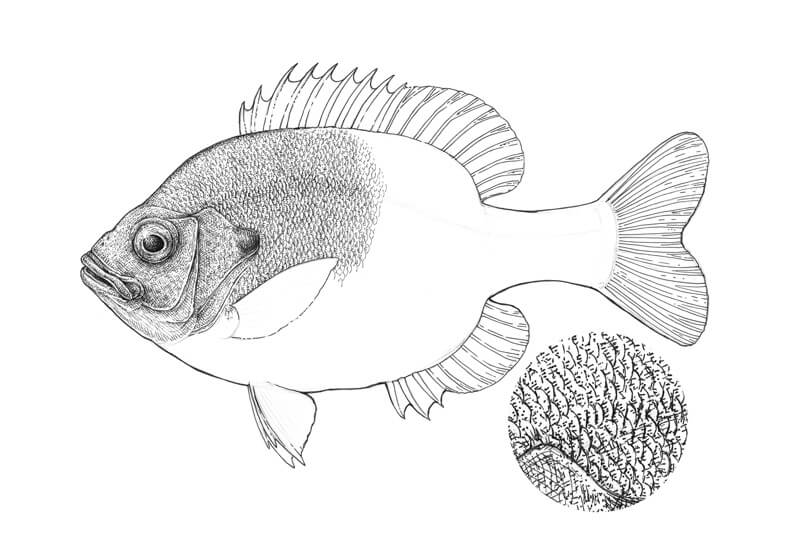
In the image below, you’ll find a fragment of scales texture in close-up alongside the actual drawing.
I continue the work in the same manner. This is quite a monotonous, yet meditative process. At this step, the texture looks somewhat flat because we haven’t applied any hatching to create an illusion of the Bluegill’s volume.
A Bluegill usually has 5-9 vertical stripes on its body, but since we’re going to add the colors digitally (which is faster than creating such nuances with ink), let’s leave the pattern relatively uniform now.
The bottom part of the Bluegill’s body is slightly lighter, so I use fewer ink marks there.
It’s quite easy to become too immersed in the drawing process while working on the textures. That’s why I recommend taking short breaks regularly, even if you don’t feel like you need one.
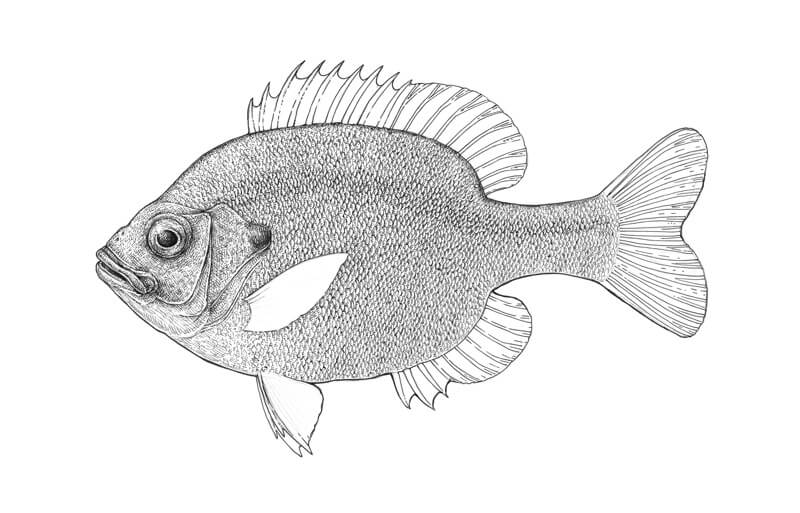
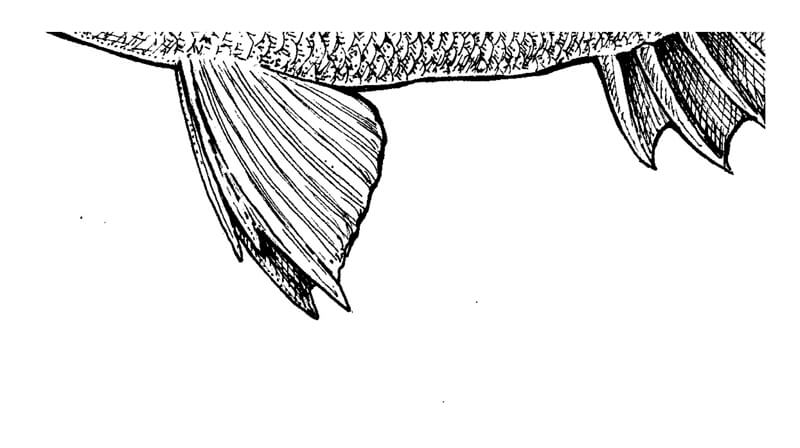
Hopefully, an enlarged fragment of the fish’s body texture (including the lateral line) will be a useful visual demonstration of my approach.
It’s time to cover the tail with scales, making sure that the direction of the new rows conform to the shape of the Bluegill’s body. In other words, don’t be afraid to make some changes!
The tail scales usually are smaller than the scales on the body.
To make sure that your texture is uniform enough, try to squint your eyes a bit and look at your artwork. If there are no weird light/dark spots or unexpected gaps, everything is just right.
However, if there is a moderate lack of uniformity, it is probably best to improve your texture. Or, feel free to leave the drawing as it is, if you like it – we shouldn’t strive for absolute perfection here.
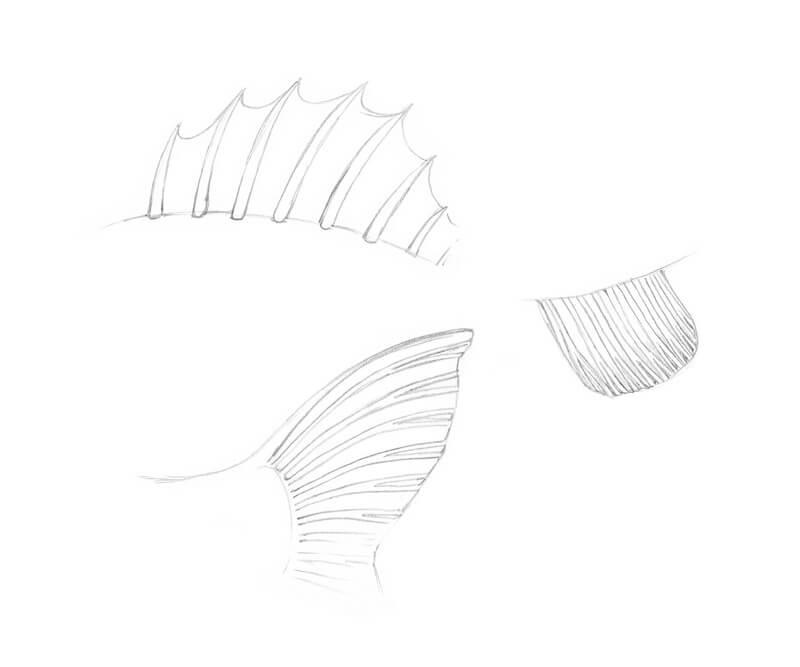
Let’s draw the fins. We’ll start with the dorsal one. I darken the areas right near the spines and rays, using the 0.05 ink liner.
The spines and rays themselves remain relatively light. I use short contour hatches and dots to create an illusion of their volume.
There are some darker spots on the dorsal fin as well. I add them with several layers of thin hatches.
Now I work on the fins that are located on the bottom part of the Bluegill’s body. The anal fin may seem slightly darker than other fins because of the spots and three relief spines that create a considerable variety of value.
I accentuate the direction of the pelvic fins (they are closer to the head in the bottom part) with the deliberate use of long, inclined lines. This creates an illusion of ‘folds’.
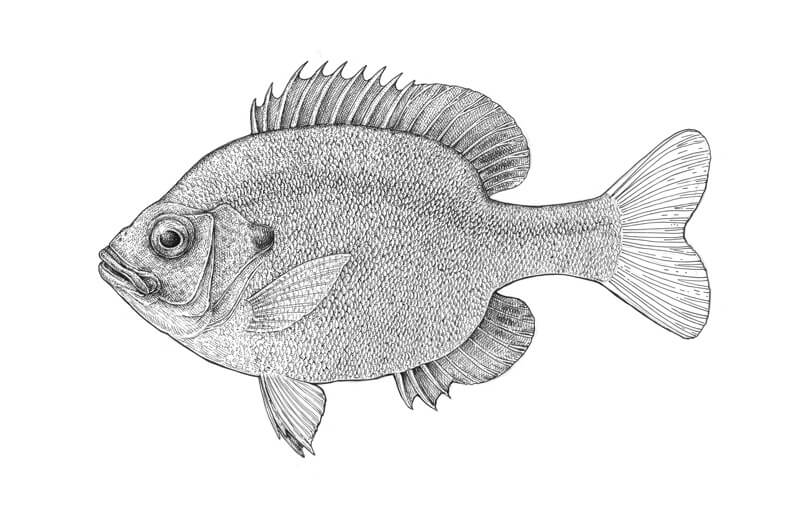
The pectoral fin is semi-transparent, so we can easily create a hint of scales that are visible here. This fin is slightly darker at the place where it is attached to the body.
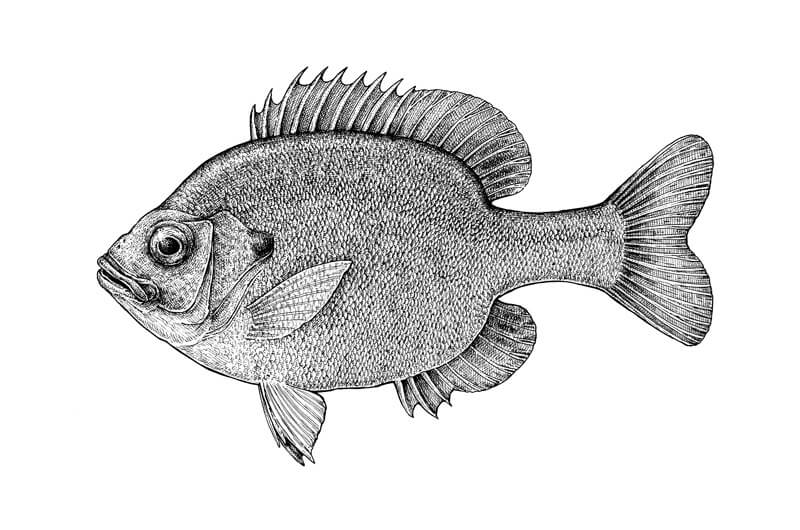
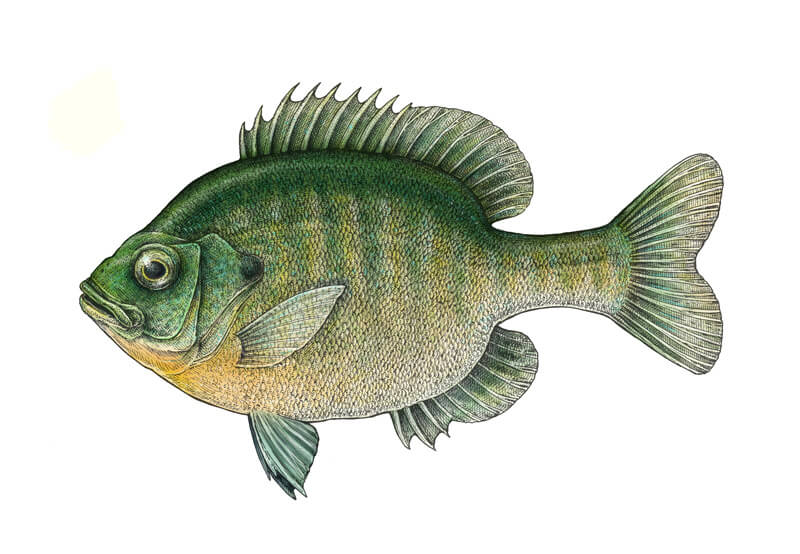
And here is the result of our work at this step:
The caudal fin is a tricky one. I cover the gaps between the rays with simple vertical hatching, leaving the rays untouched.
The ‘base’ of the fin is darker. Increasing the contrast here makes the beautiful pattern of rays clearly visible. I also accent the end of the caudal fin, so its middle part becomes lighter in comparison.
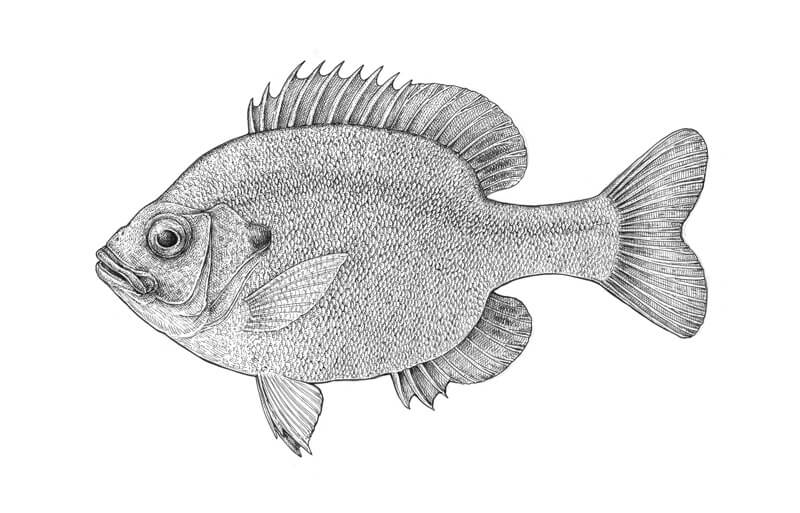
It’s time to give our fish more volume. With the 0.05 ink liner, I add rounded hatches to the back and the underside of the fish. These repeat the contours of the body. The hatching in the upper part should end at the lateral line.
I also leave a subtle highlight in the upper part of the fish to accent its three-dimensional look.
A Bluegill has a flattened body, so we don’t have to make the value here much darker or increase the contrast dramatically.
If I were going to leave this artwork as just an ink drawing, I would add more hatches to the back of the fish. But since we’re going to color it, I’ll leave the Bluegill just as it is now. Having too much ink may overload the artwork and the painted result won’t be as impressive.
Adding Color Digitally
Scanning and Editing the Ink Artwork in Photoshop
First, we need to get a digital version of our drawing. I prefer scanning because this method gives us more control over the result. It is probably easier than making a great photo (which requires special equipment and the right lighting conditions)
It’s important to have a large file with a high resolution – I scan the drawing at 300 dpi; a higher value is appropriate but not necessary in this case. The high resolution allows transferring a great number of visual details to a digital form.
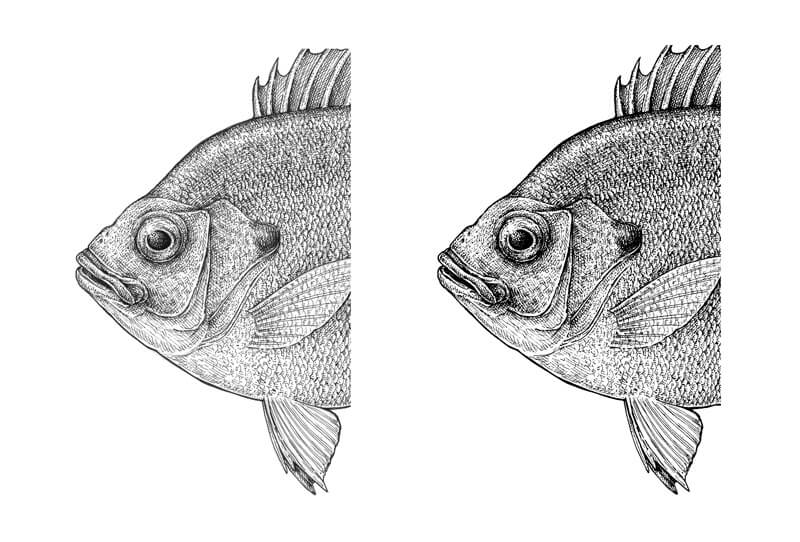
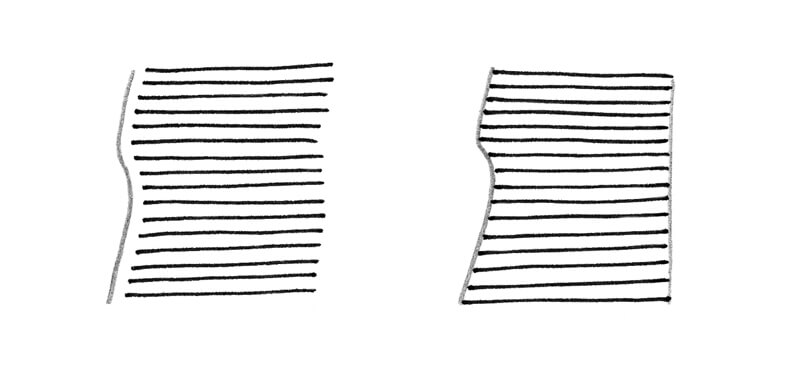
There are three main modes of scanning an image: black and white, greyscale, and color. I usually choose greyscale when I prepare images for the tutorials, and black and white – for scanning the artworks that are intended to become art or apparel prints.
Images scanned in black and white mode are very contrasting. Just compare two fragments of a fish in the image below. The one on the left side was scanned in greyscale, and the right one – in black and white.
Sometimes your scanner allows for individual preferences. For example, a higher/lower brightness or contrast for a particular image. Using advanced settings may be quite useful, especially if your scanner tends to make a scanned image slightly too bright by default.
A scanned image may have various file formats – for example, JPEG or PNG. In our case, this option is not so important.
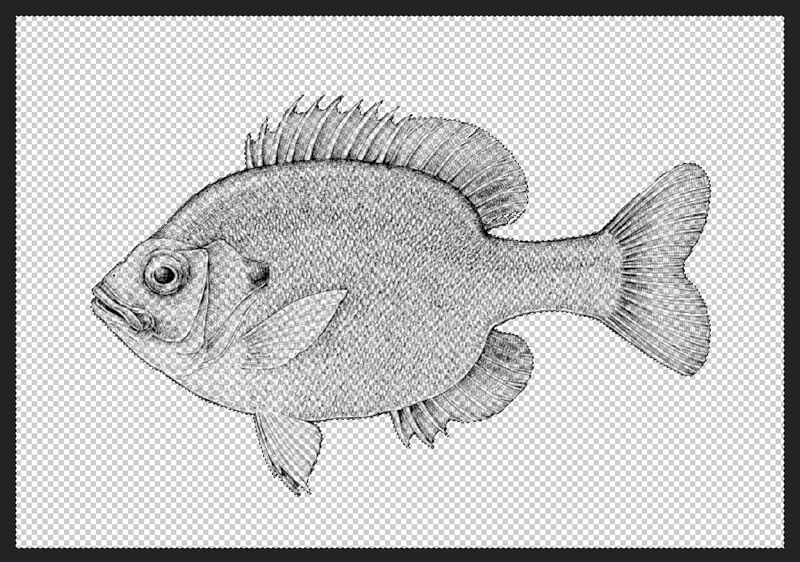
Here is my scan; a JPEG scanned in black and white mode. Its size is 3508 x 2552 px, the resolution is 300 dpi, and the color model is RGB.
I open the file in Adobe Photoshop.
I assume that you may already be familiar with the interface of this program, so we won’t be taking a close look at its features and the abundant variety of tools.
Just in case if you need an easy-to-understand knowledge about Photoshop tools and editing possibilities, please check out this course: Basic Photoshop for Artists.
Before we dive into the coloring part, we go through an editing process.
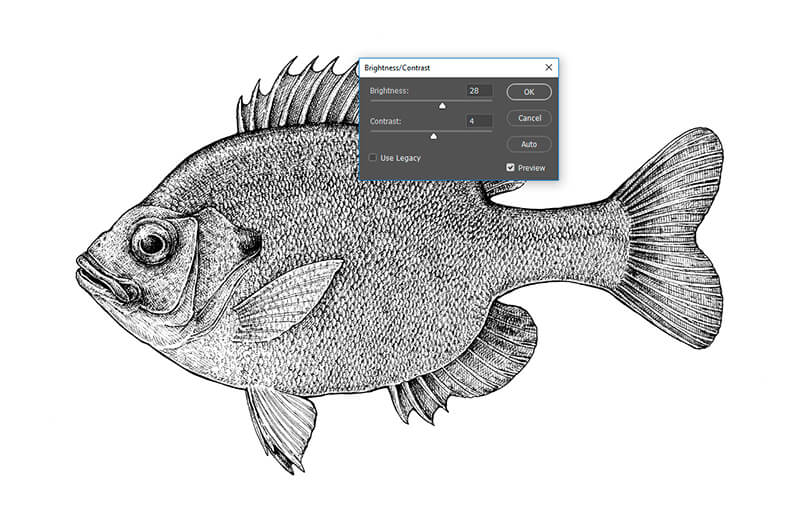
First, zoom in and examine the image. If there are some “greyish” pixels around your black ink lines, go to Image > Adjustments > Brightness/Contrast and increase the values, dragging the handles to the right side and observing the changes. We need only contrasting black lines on white as a result.
Note: pressing Ctrl+space bar allows to zoom in and out in an easy way.
I change Brightness to 28 and Contrast to 4. How much adjustment you add depends on your image; there is no perfect answer for every situation.
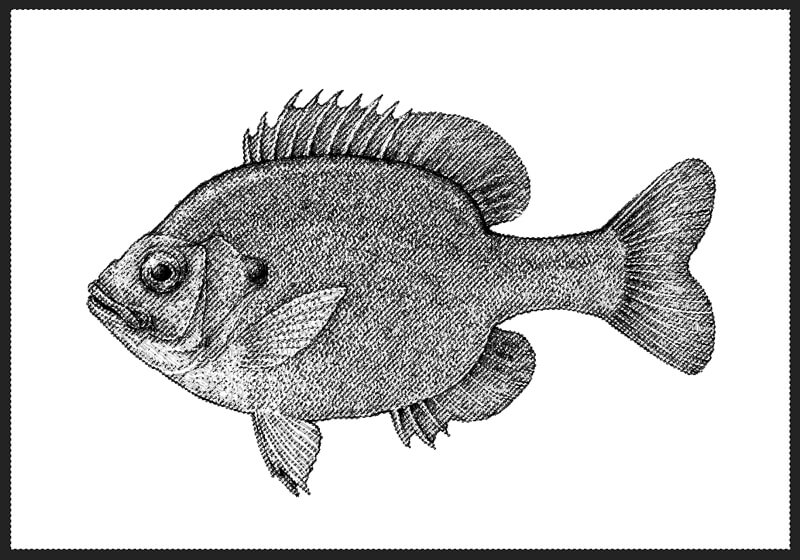
Now take a closer look at the drawing itself. Are there any weird marks near the fish, stray points or traces of pencil marks? My image has some, but in general, it’s quite clean.
With the Brush tool (The Hard Round type, 100% opacity, #ffffff white color) I cover all the unnecessary marks. Now it’s perfect!
Useful to remember: the hot key for the Brush tool is B.
Removing the visual garbage is important. A clean drawing is important. Such ‘cleaning’ is especially necessary if you’re going to transform your traditional drawing into a digital design for the printing purposes.
How to Remove a White Background in Photoshop
Now we have a digital version of your hand-drawn Bluegill. But how do we add color it and change the color of the background?
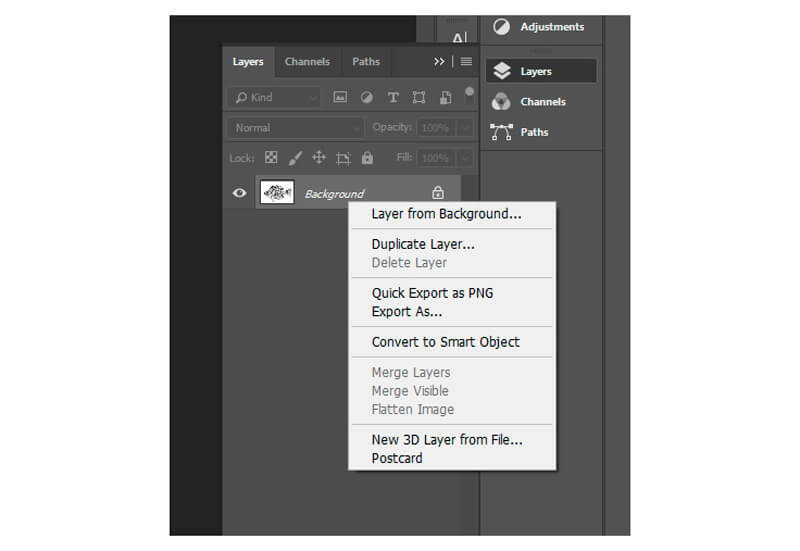
There are some important steps, preceding the fun painting part. First, click on the Background in the Layers panel with the Right Mouse Button, and choose Layer from Background.
If you don’t see the Layers panel, go to Window > Layers.
Now, with the Magic Wand tool selected (hot key W), click anywhere on the white space around the fish. The Contiguous checkbox on the Options bar should be off – it ensures that you’ll select not only the touching white pixels but all of them.
Note: The Options bar is above, right under the main menu of the program.
You’ll get the following picture:
I’ve made the screenshot above with some dark space of the program’s interface around the artboard, so you can easily see the borders of selection on the perimeter. The Magic Wand tool selected all white pixels in the image.
Now hit Delete button (this will remove the selected pixels), then go to Select > Deselect or just hit Ctrl+D.
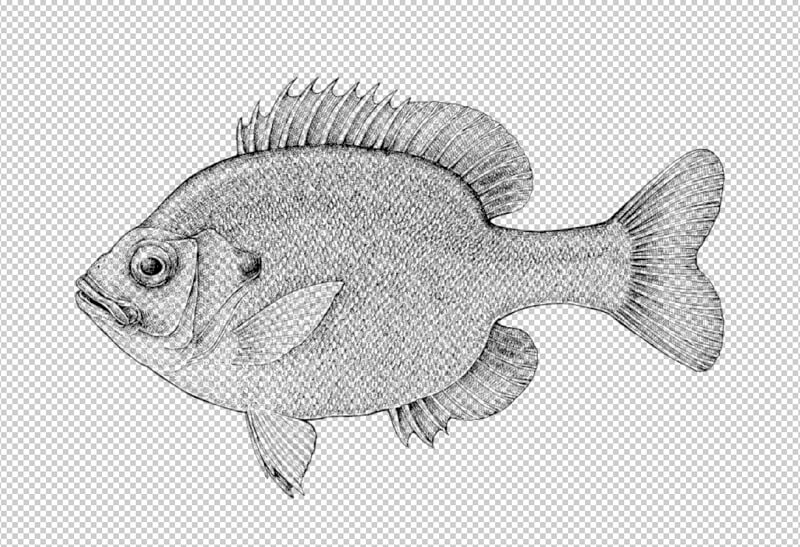
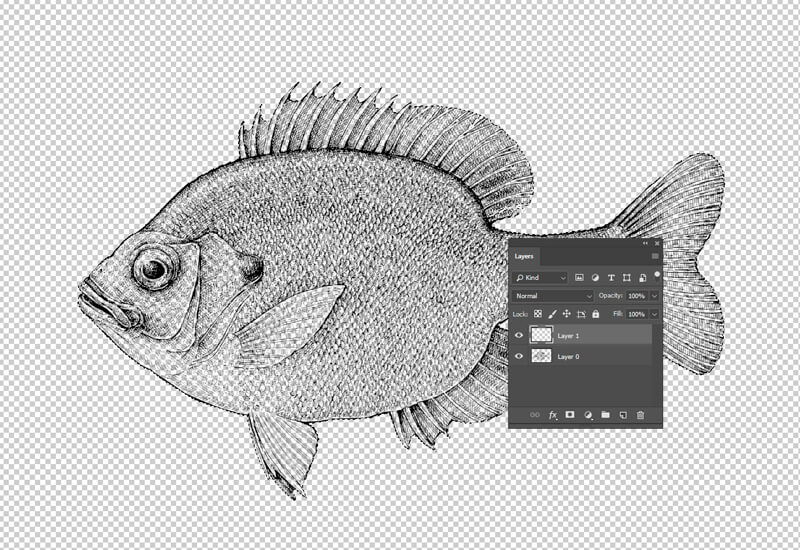
Now you’ll see something like this – black marks on a ‘transparent’ background of checked grey squares.
How to Create a Shape for Digital Painting
We removed the original background. Now it’s time to create a shape that is repeating the silhouette of the fish to paint on it. This shape should also be solid, so we can’t see any patches of the background.
I examine the artwork once again, looking for any visible gaps in the main contour (the silhouette of the fish). My drawing doesn’t have such gaps, but if yours does, enclose it using the Brush tool at 100% opacity and #000000 black color picked.
Gaps will affect the selections we get with the digital tools and may cause difficulties in the next steps. If you have a complex ink drawing with a broken contour line that can’t be joined, this method of creating a shape for underpainting won’t work as effectively. Maybe one of the future tutorials will be dedicated to such challenges!
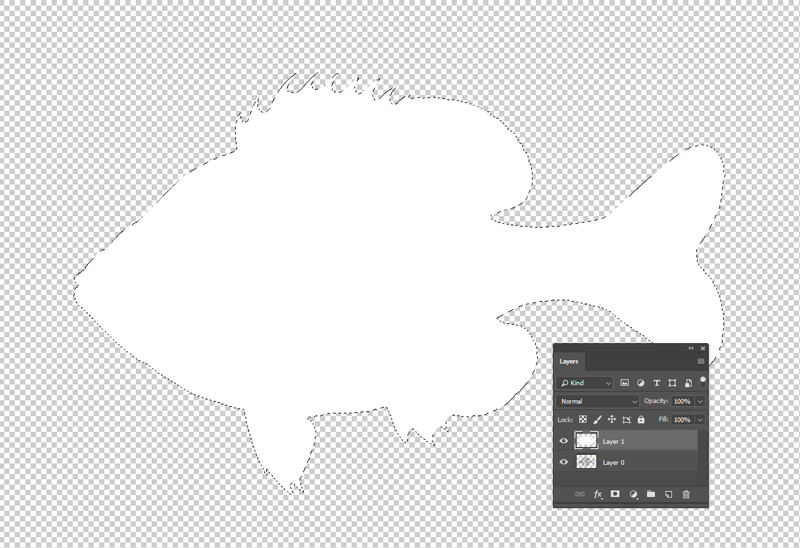
After you closed the contour, click with the Magic Wand tool selected anywhere in the space around the fish. The Contiguous checkbox should be on!
Hit Ctrl+Shift+I or go to Select > Inverse. The selection will change from “around the fish” to “inside the fish”.
Create a new layer, for example, hitting Ctrl+Shift+N.
With the Paint Bucket tool (the hot key G), click anywhere in the selected area. The layer that we’ve created just now should be selected in the Layers panel.
The white color was set as the foreground color, so the shape was filled with it.
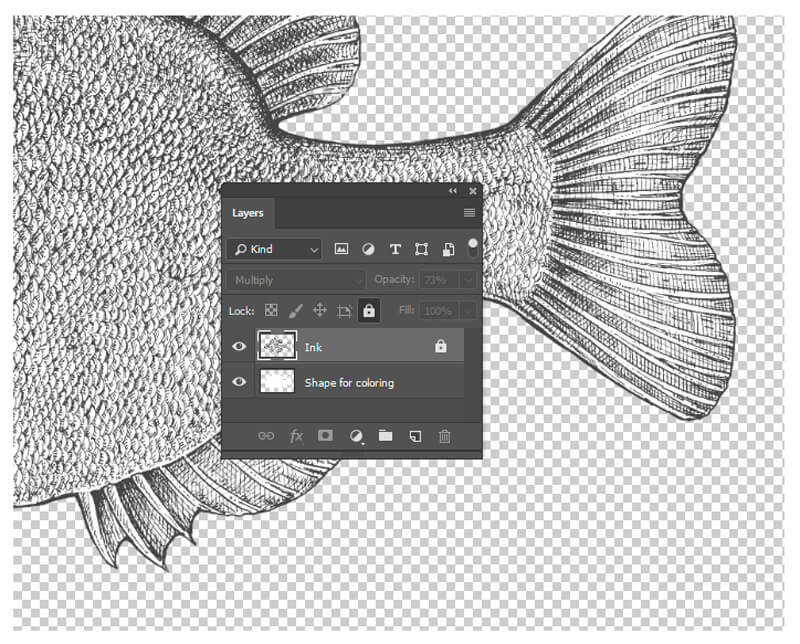
I press Ctrl+D to deselect the shape, then reorder and rename the layers in the Layers panel. Let’s agree that the layer with the black lines will be “Ink” and located on top, and the layer with the new white shape will be “Shape for coloring” and located underneath.
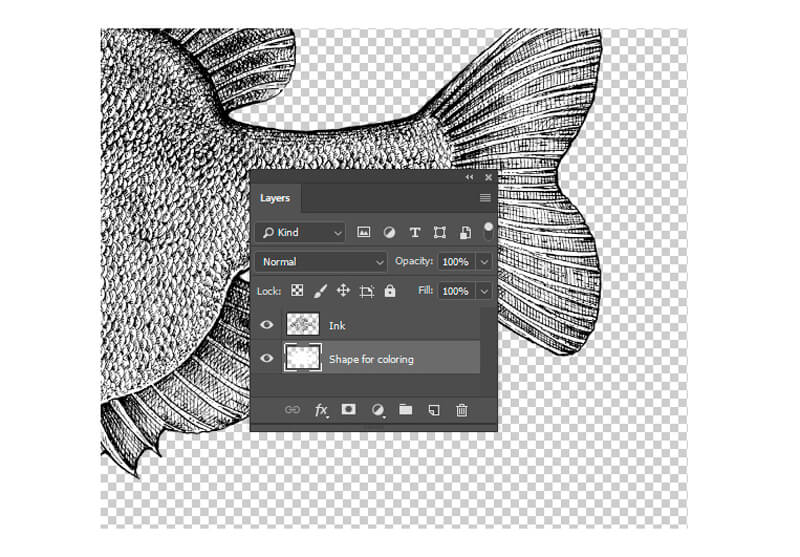
We are almost ready for painting. Select the “Ink” layer in the Layers panel, reduce its opacity and change the blending mode to Multiply.
The opacity of a layer is changed by sight; you can always adjust it later. I’ve set it to a value of 73%. The ink lines became somewhat lighter and subdued.
It’s also a good idea to lock the layer by clicking on a small padlock icon. This will ensure that we won’t draw something on this layer later on or won’t damage it any other way.
As a finishing touch, select the “Shape for coloring” layer and click on the Lock transparent pixels icon (I’ve marked it with a red line in the image below).
The great advantage of this function is that now we can apply any brush strokes to this layer, and nothing that goes beyond the shape’s borders will be visible – the transparent pixels will remain untouched.
![]()
Just a note: always watch your layers! It’s easy to become distracted and add colorful strokes to the wrong layer, which in this case, will bring a bit of chaos and uncertainty to your file. Especially, if you have more than just a couple of layers.
The Auto-Select function (you’ll find it on the Options bar of the Move tool) may be extremely useful because it allows jumping from a layer to a layer with a single click. At the same time, it requires to be as attentive with your brush strokes and selections as possible.
Great job! Now we are completely ready to move on to the painting part.
How to Paint the Fish in Adobe Photoshop
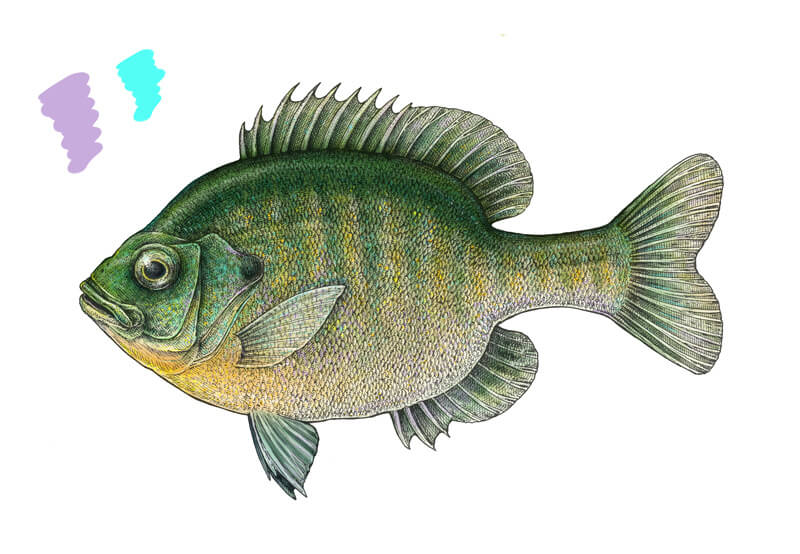
A Bluegill has a distinctive coloring, with deep blue and purple on the head, dark olive-colored stripes down the side, and a fiery orange to yellow belly. I imagine the colors that I’m going to use as separate elements.
Using the Brush tool and the Color Picker, I add samples of each color to a new layer called “Colors”.
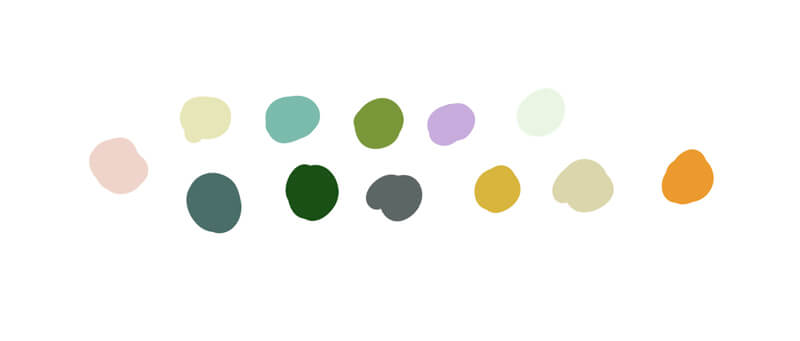
This simple action helps to set some guidelines. This color palette is here not to limit your actions but to form an integral picture (or color scheme) beforehand. You can switch the visibility of this layer off later on if you notice that it becomes distracting.
I also add a new layer – let’s call it “Background” and fill it with white. Of course, this layer should be located underneath, or it’ll cover your artwork.
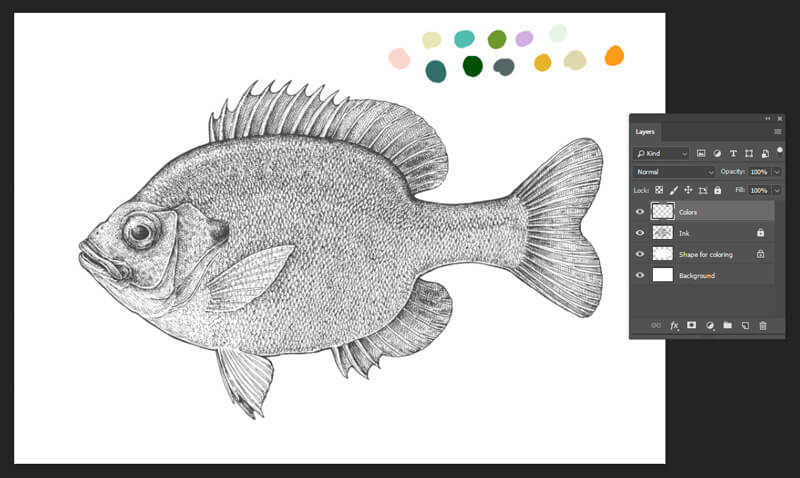
With the Paint Bucket tool, I change the color of the shape that we’ve created for the coloring purposes. Now it’s #f3f3db, a pale tint of yellow.
Then, with the Brush tool, I cover the upper part of the fish with a #1a5016 dark green color. A great way to get beautiful color transitions is to use a brush with soft edges at a reduced opacity. The diameter of the brush is quite large.
The more strokes you lay on top of each other, the more intense the color becomes – until it’s 100% opacity.
Again, pay attention to the Layers panel – are you painting on the right layer?
To make the demonstration more comprehensive, I’m going to insert a sample of each brush color I’ll be using into the screenshots. Note that the opacity of these samples will be 100%; usually, we don’t use such concentrated color in the painting process.
There are some important technical details about the Brush tool; they’re worth reminding you of even if you are not a complete beginner in Adobe Photoshop.
You can choose the type of brush and its opacity using the Options bar.
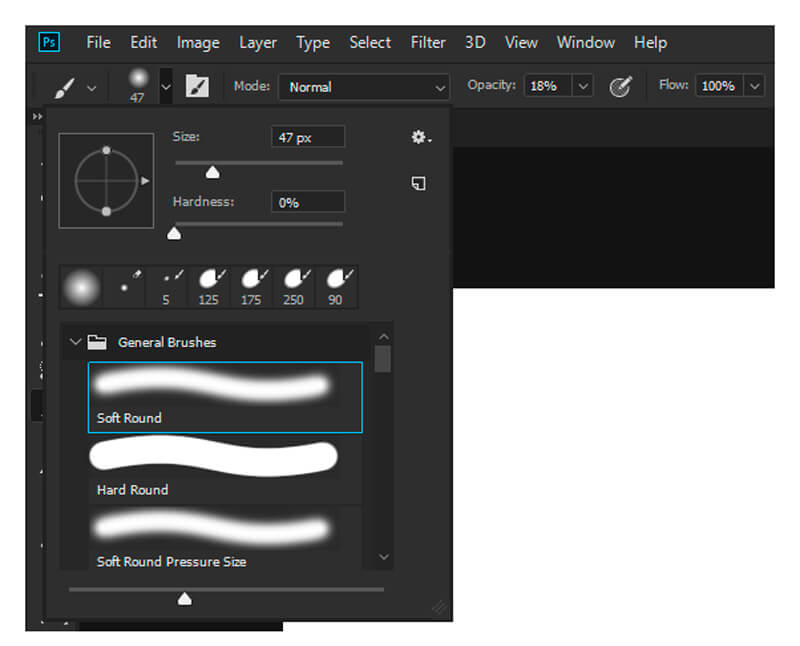
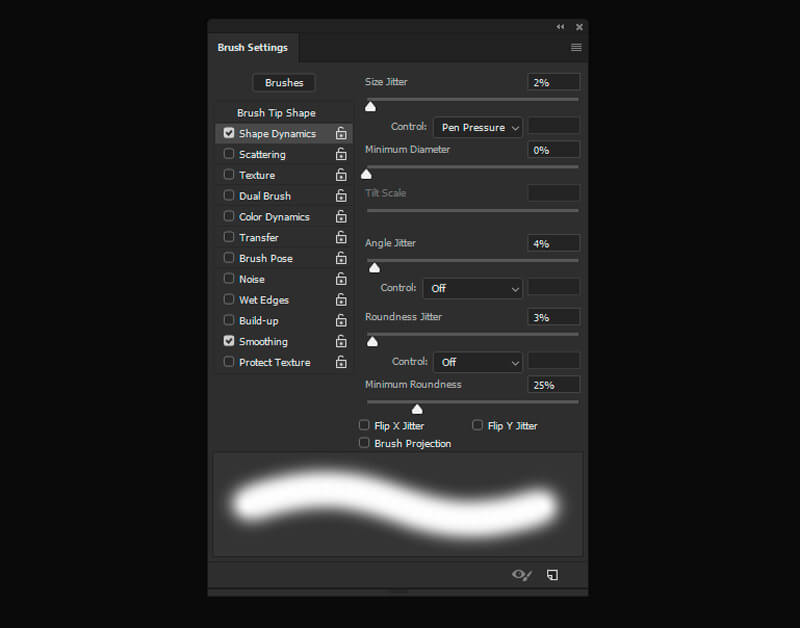
To make sure that you can vary the width of your digital lines, using a graphic tablet, go to the Brush Settings panel, find the Shape Dynamics, and set the Pen Pressure in the Size Jitter parameter.
Feel free to play with other parameters and check out the result.
And the last tip for now: the fastest way to change the size of your brush is to press keys with the square brackets on your keyboard:
[ makes the diameter of your brush smaller, and ] enlarges it.
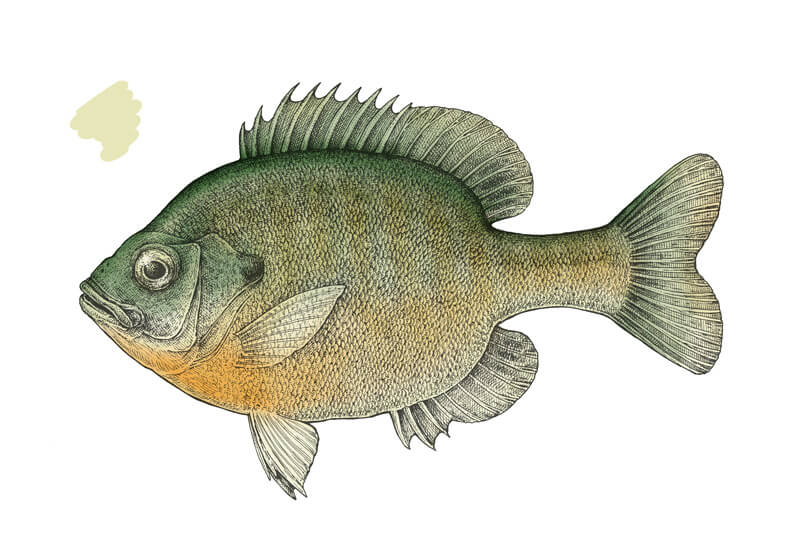
Let’s get back to our artwork. I’ve chosen a couple of oranges, such as #eb9b2d and #d7b53d with the Brush opacity of 14% to create some brighter color nuances in the middle and bottom parts of the Bluegill.
It’s a great idea to imitate the stripes on the body and also touch the fins with these warm colors.

With a light beige #e6e6b7 and 26% opacity, I accent the eye and the prominent details of the head. I add a stroke of this tint to the belly of the fish to emphasize its lightness.
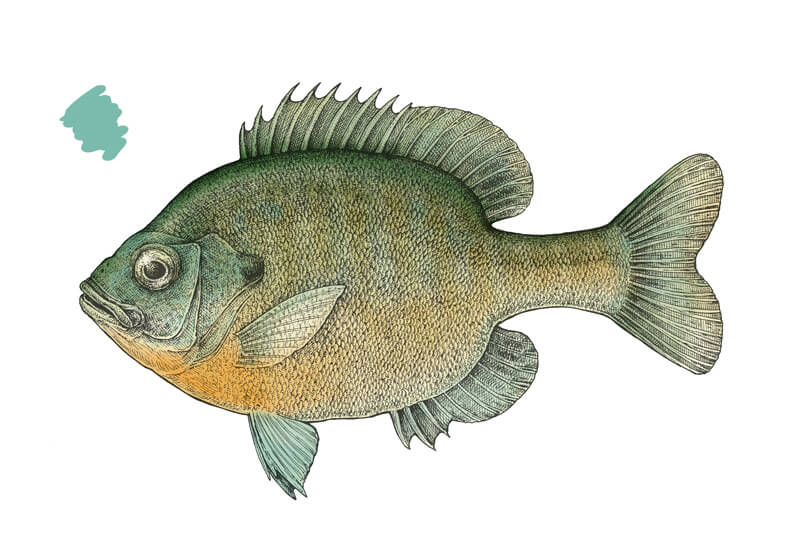
With the greenish blue tint #7bbbad and opacity of 18-26%, I touch the gill area, the body, and fins.
At this stage of work, be careful with opacity and don’t add too heavy strokes of color.
I evaluate the result and reduce the opacity of the “Ink” layer to 70% (remember to switch back to the color shape layer after such actions).
Let’s add some brightness with the green #699910 and yellow-orange #e7cc13. The opacity value is 19%.
I add the green strokes mostly to the upper part of the fish, and orange ones – to its bottom part. The diameter of the brush is still quite large, but I reduce it to create some playful nuances on the fins.
It’s time to increase the contrast. With the light #f7f6ee, which is close to white, I accent the belly of our fish, lighten the stripes on the body and the upper part of its head.
Then I pick a deep shade of blue, #191f43, and create an expressive shadow that repeats the upper contour of the fish. I extend the shadow to the lateral line, making a soft transition from a relatively intense color to just a hint at it. Remember that the back should have a soft line of the highlight!
The eye needs some darker strokes too. I darken the pupil and create a deep shadow under the eye, then accent the spot on the posterior edge of the gills.
I’ve chosen the dark blue for two reasons. First of all, it’s one of the main colors that are natural for Bluegills. Another important reason is that the blue color is so great in conveying the sense of volume in paintings. Our case is no exception – the fish looks much better now!
I vary the opacity of the Brush tool in this step; the maximum value for the lighter color is 30%, and 50% is for the darker strokes.
I use the bright green #46c51f and the dark green #155d29, both at 12% opacity, to accent the stripes and make them more varied in terms of color. The fins also require a subtle touch of green.
I pay special attention to the head and the caudal fin. It’s important to work on the whole fish, not just the body.
Here the painting process becomes more detailed, so feel free to zoom in and reduce the size of your brush.
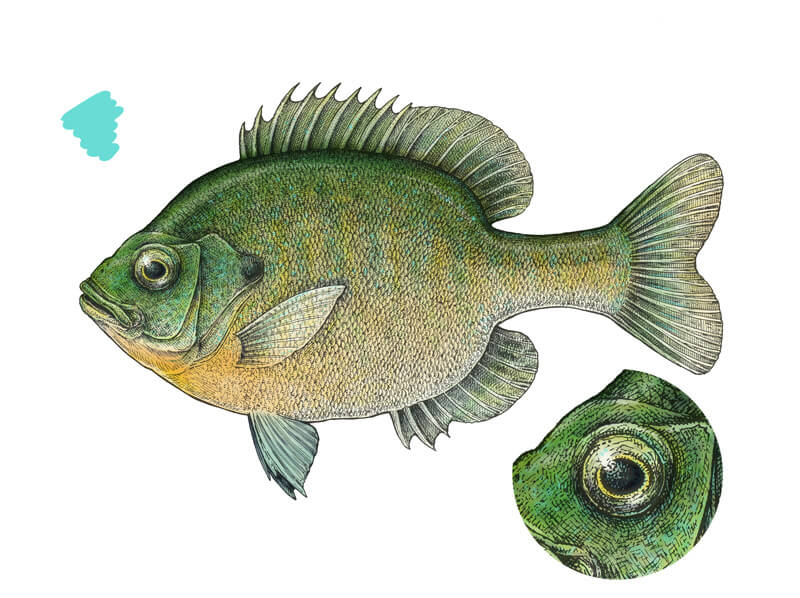
I pick a turquoise (or it’s aquamarine?) color #69dcd5 at 36% opacity and change the type of the brush to the Hard Round Pressure Size. Actually, any brush type with the clear stroke edges will be a great choice.
I zoom in and add colorful strokes to the head, including the gills, and the body of the Bluegill. The best option is to listen to your artistic voice; sometimes it’s difficult to determine when it’s enough.
I add some strokes to the eye. In the image below, you’ll find a fragment close-up.
With the dark green #0b4925, I accent the back of the bluegill, the vertical stripes, and the darker areas of the fins. The opacity value is varied depending on the desired result.
As a nice addition, I lay some strokes near the lateral line to make it more visible. This simple action makes our artwork more interesting.
I use the light #fffff3 color to emphasize the gaps between the dark green stripes and slightly touch the lighter areas in general. The relief details of the head need some accents, too.
Using a brush of a small diameter allows imitating single scales that are reflecting light. The opacity value changes from 10% to 50%.
I add some yellow-orange #ffca11 nuances at 90% opacity, imitating single scales, as in the previous step. The most concentration of this color is on the ‘breast’ of the fish, and some splashes of it can be found on the body in the stripes.
To make the bright spots even more vibrant, I adjust the color closer to the yellow hue.
Sometimes you can’t say if the artwork you’re working on is close to completion or not. This is especially true for anything that relates to detailed digital painting. If you feel somewhat tired and uncertain, the best option is to take a break and come back to your creation later, with fresh eyes.

I add some muted lilac #c8acdd and bright aquamarine #53fff5 strokes to create a true play of nuances in the scales. The gill cover is a great place to put some vibrant colors together.
The opacity varies from 20% to 30%.
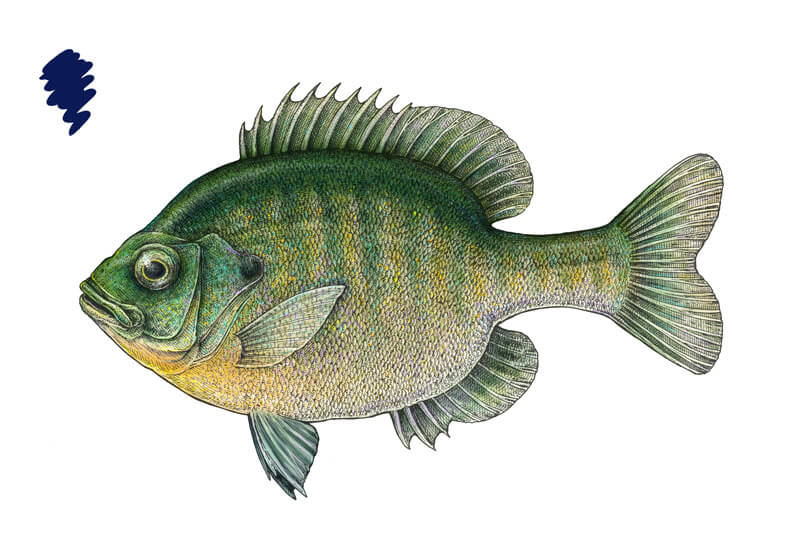
The artwork is almost complete, but it still lacks some contrast. With a soft brush of a relatively large diameter, I cover the back of the fish with the dark blue #0b1a54 color, emphasizing the pattern and everything that should be darker in my opinion.
Just look at your painting and observe your feelings. If this artwork is believable enough?
As far as I can say, mine is ready. Of course, we could add more and more details, but that we could go on with that forever. Let’s strive for interest and artistic expression, not for an absolute perfection!
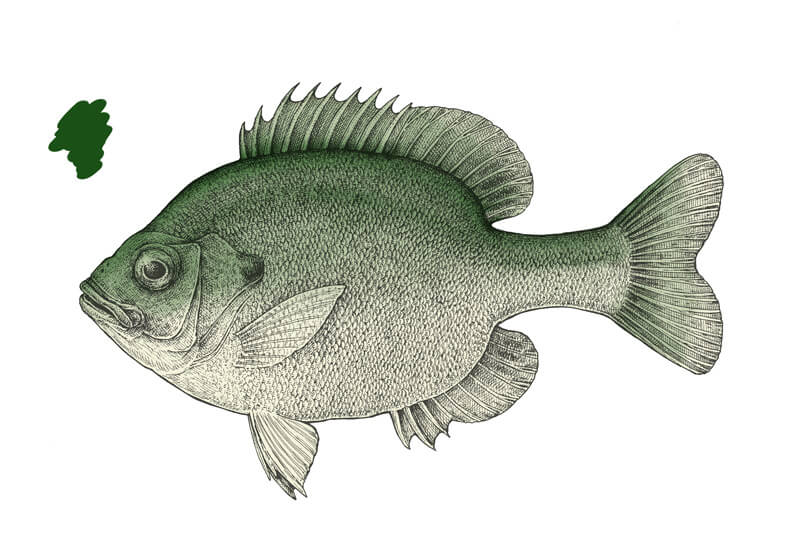
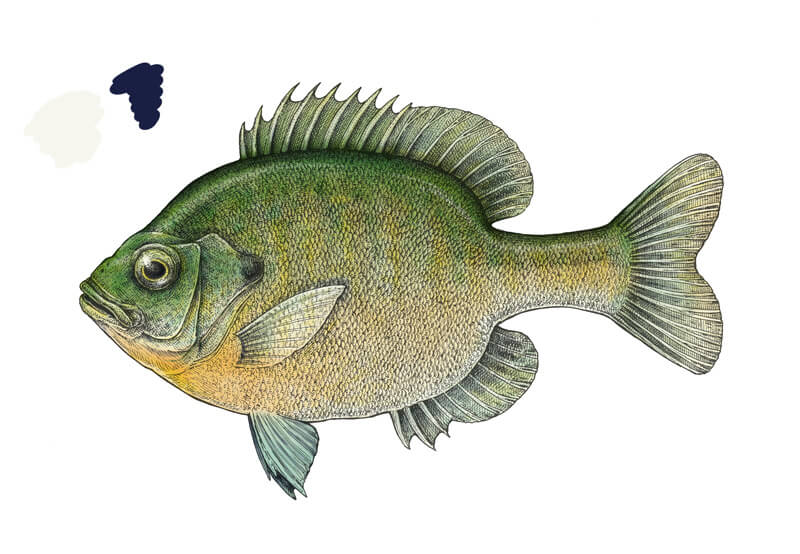
Are you curious how this digital painting layer looks just by itself, without the ink lines? Here it is:
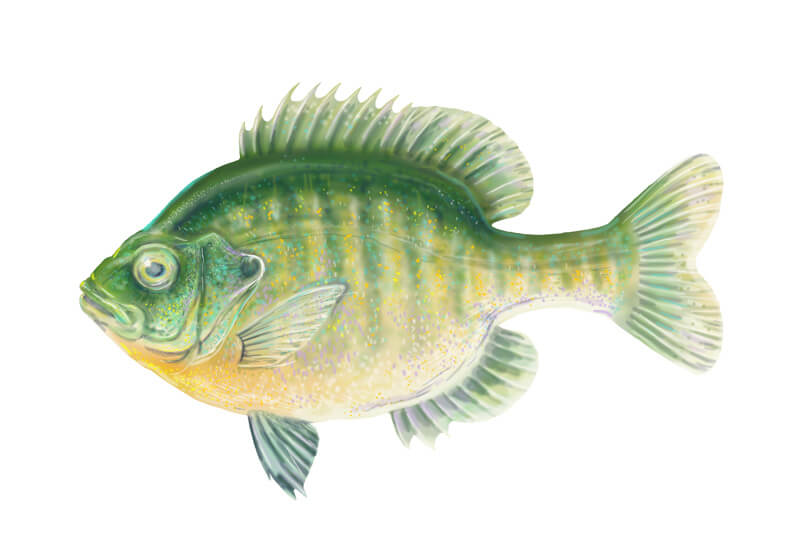
However, our work isn’t 100% finished. I’d say the Bluegill might look better on a tinted background. Let’s experiment with some options!
To change the color of the background, select the “Background” layer on the Layers panel, pick a color you like, and use the Paint Bucket tool to cover the whole area with one click.
If you like a textured look, you can place a texture (for example, some stains) on a separate layer, reduce its visibility and change the blending mode to anything that looks appropriate. I decided to use a texture from my collection. The Blending mode of the layer is set to Soft Light and the opacity is 7%.
I’ve created several version. The fish is the same, but with each colored background, it looks slightly different. Color is a relative thing!
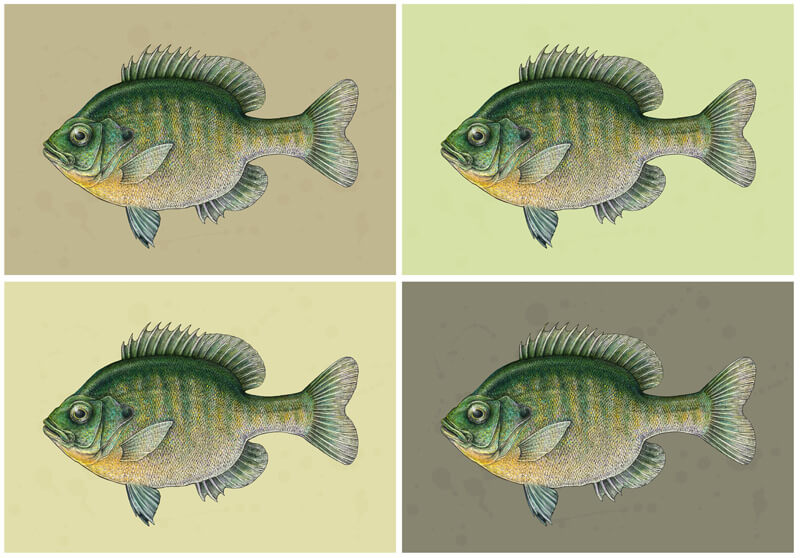
Which one do you like best? To be honest, it was extremely difficult for me to decide, particularly because I need all of my painted artworks to be “seasoned”. I often lay aside the files and come back to them after weeks or months to complete them or change something.
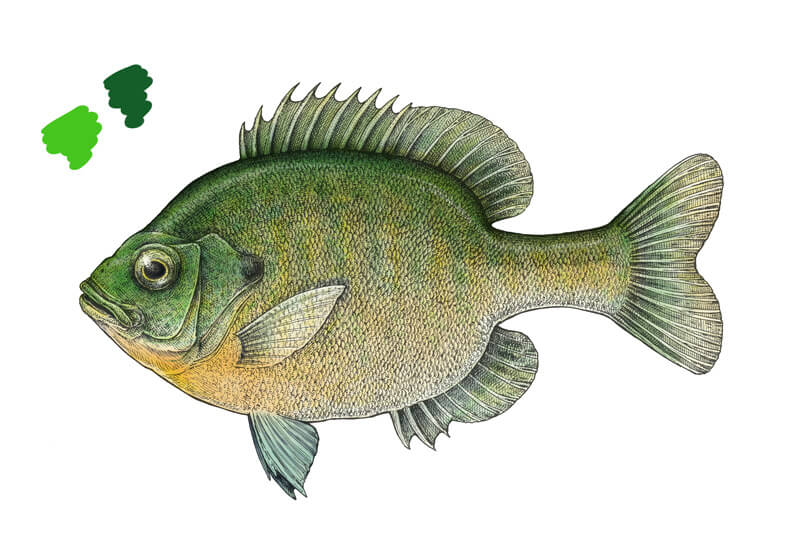
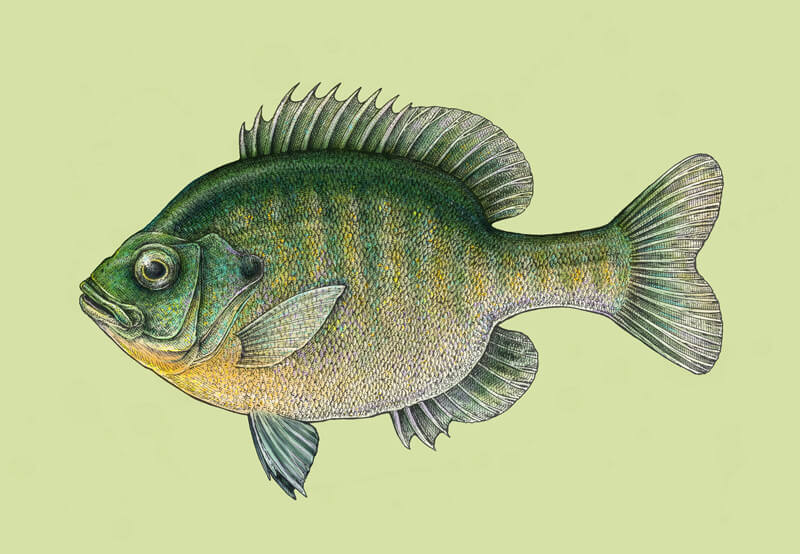
Now this version is my favorite, probably because this greenish background is so fresh and harmonious:
The other variants with brownish backgrounds are perceived as more vintage or antique, which also makes them interesting and appealing.
Pros and Cons of Combining Ink and Digital Painting
I’d say that the biggest advantage of this artistic approach is its creative power. Just think of all the possible artworks you can create, using the strengths of both media!
While ink is so great at conveying a sense of a texture and creating stunning details, digital tools such as Adobe Photoshop, allow us to experiment with color in an easy way. You’re not limited to any set of colors as happens sometimes with traditional paints!
Plus, a digital workspace provides a remarkable range of various effects, adjustments, and instruments to play with. Just remember how we changed the blending mode of the layer and got a nice subdued result.
You can also save a copy of your artwork or a separate layer in the process, making sure that you can go in a different direction if there is anything you want to change in the future. Another way to “undo” is to cancel the steps in the History panel. The Ctrl+Z combination is something that many traditional artists wish they had!
But at the same time, your drawing skills must remain strong. We began with an ink drawing using a traditional approach, without the help of technology.
Also, this low-pressure technique is for anyone who is interested in digital painting but feels slightly intimidated by it. This is a great way to become familiar with the tools Photoshop offers for traditional artists.
As for the cons, this mixed media approach is time-consuming. It’s like creating two artworks in one, plus the time for research and making sketches. However, I bet this won’t scare the artists who are curious and open to the new interesting options. Of course, there is no need to complete the artwork at one sitting! Just take your time and enjoy the process.
The Conclusion
A remarkable feature of this mixed media approach is that sometimes the result becomes unpredictable. You’re just working, adding new strokes here and there, changing something, adjusting the parameters and… suddenly notice that the artwork becomes really beautiful as if this has happened by itself.
Probably everything that relates to art and creativity has a portion of spontaneity and miracle – it doesn’t matter if it’s traditional or digital media.
Do you feel that this method is worth trying? I hope so. Please share your creations with us! By the way, a great option to start with this mixed media approach is to add color to your existing ink artworks.
Remember: we learn when we do take action!
Thank you for being with me on this artistic journey. I wish you much inspiration and creative joy!
If so, join over 36,000 others that receive our newsletter with new drawing and painting lessons. Plus, check out three of our course videos and ebooks for free.

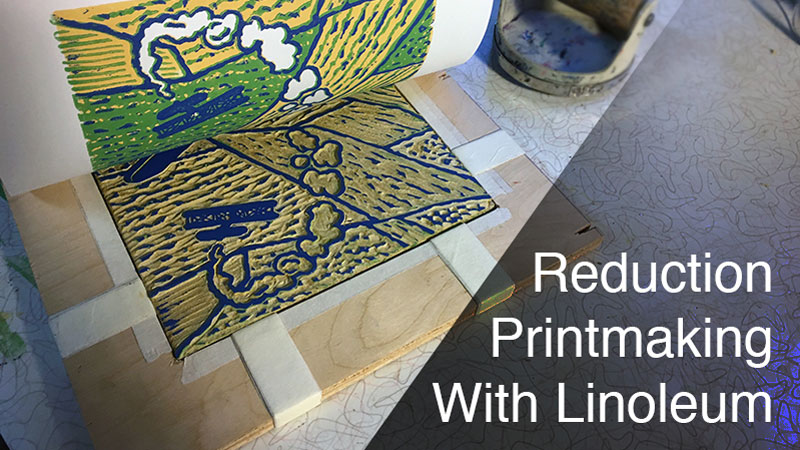
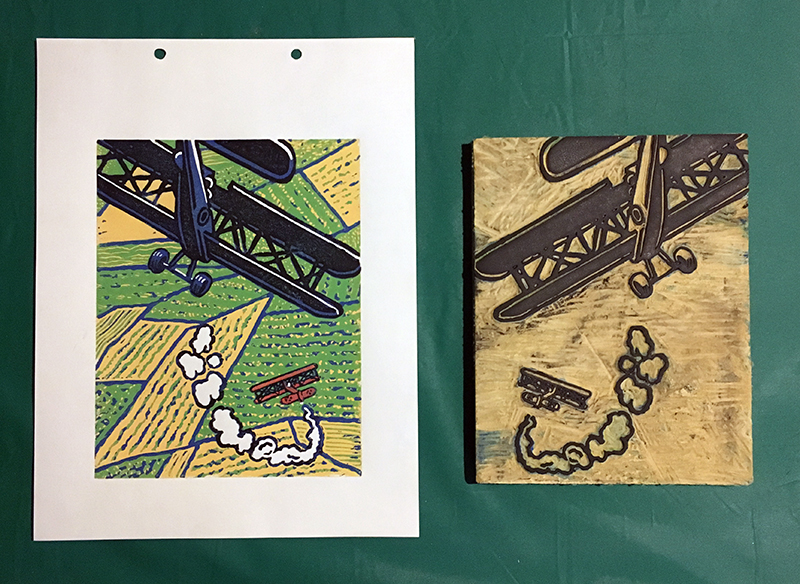
Reduction Printmaking With Linoleum
What is a Reduction Print?
Printmaking is often defined by high-contrast, single-color images. A reduction print includes several colors. The artist carves away or “reduces” portions of a printing block, printing at intervals, one color at a time. Colors are usually printed from lightest to darkest since dark colors cover lighter color better than the reverse.
There are two broad categories that most printmaking processes fall into: relief and intaglio. Intaglio processes include engraving and etching. Intaglio images are made from recessed grooves in the surface of a metal printing plate.
Relief processes, by contrast, print from raised areas on the printing plate. Wood and linoleum are ideal for relief printing, linoleum being the more user-friendly option. The reduction process is appropriate for relief, but not intaglio printmaking.
Materials for Reduction Printmaking
The sample reduction print shared in this post was made from linoleum instead of wood. Therefore, the required and suggested materials below are specific to that medium. Also, this article’s focus is the reduction print process and not linoleum printmaking in general, so the list includes materials needed to make a registration board (used to properly line-up each color-layer).
Standard Linoleum Supplies
- Linoleum (mounted or unmounted)
- Linoleum gouges
- A brayer (used to roll ink onto the linoleum)
- A barren or wooden spoon (used to apply pressure to the back of prints)
- Block printing ink (red, yellow, blue, white and black)
- A palette (for loading ink onto the brayer)
- A palette knife/spoon/case knife (to move and mix ink on the palette)
- Paper (80lb. drawing paper works fine)
- Bench hook (optional – holds the linoleum block still while carving)
- Graphite transfer paper (optional)
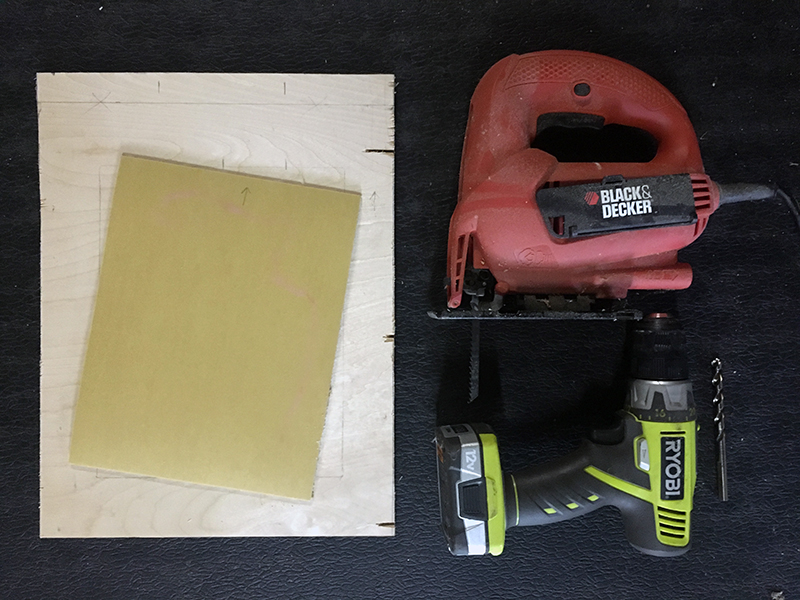
Reduction Print Supplies
- Half-inch thick plywood (must be larger than linoleum block)
- Jig-saw
- Drill bit, 1/4 inch or larger
- Small dowel rod (substitute a pencil for this item)
- Wood Glue (Elmer’s is fine too)
The Reduction Print Process
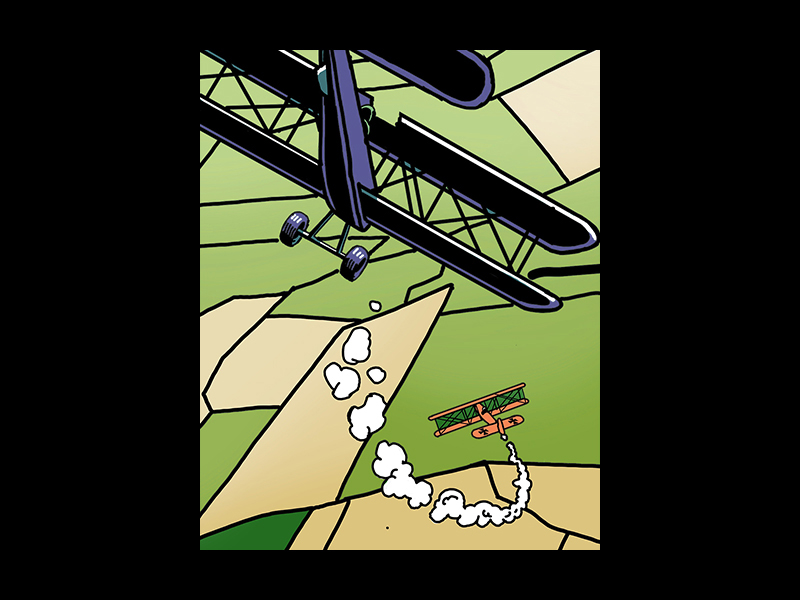
Step One: Fully develop an image. Reduction printing requires the artist to plan ahead. Besides the subject matter, the artist must decide how many colors to be used during this planning stage. I developed my “image plan” on an iPad using an application called Procreate. Doing so required access to a printer since a hard copy is helpful in the next step. In the past, I have used markers or colored pencils to create my “image plan”. The media used for this step is not important. My image has four colors plus black and white for a total of six colors.
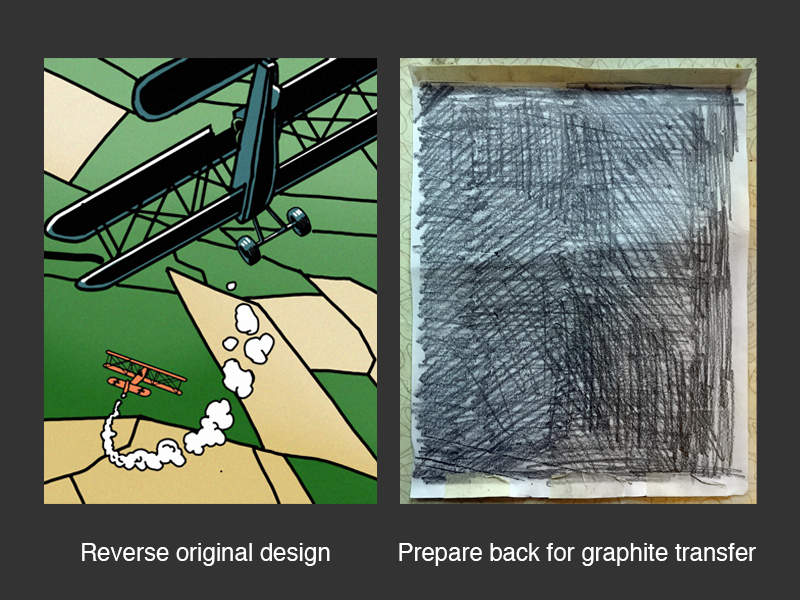
Step Two: Move the image from paper to linoleum. There are a few ways to transfer the drawing but before doing so, it is worth remembering that the final print is a mirror image of what is on the linoleum block. So before making the transfer, look at the “image plan” in a mirror to be sure it reads properly in reverse. If not, it must be flipped horizontally before transferring it to the linoleum block. (If you have text in your image, then this step is especially important!)
To flip the design horizontally, I recommend three options.
- Use a light box and trace the backside of the image.
- Flip the image horizontally using Photoshop, Procreate, or any other image editing application.
- If neither of the two previous options are available, then just put the drawing up against a window on a sunny day. The image will show through the back of the paper and can be traced just the same.
Apply soft graphite to the backside of the “design plan” with a pencil. Now the design plan is ready to trace.
Place your drawing, image side up, on the linoleum block. Some artists apply a bit of tape to one edge to help hold things in place.
Next, use a hard pencil or ball-point pen and trace the drawing with moderate pressure. The pressure placed on the drawing with transfer the soft graphite on the back of the drawing to the linoleum surface. Remove the drawing from the linoleum to reveal the transferred image.
Trace the graphite transfer with a permanent pen now. This will prevent the image from washing away when cleaning ink from the linoleum.
Step Three: Prepare a registration board or sheet. A registration board will ensure that each layer of ink that we print lines up with the visual information of the previous ink applications. If the colors do not properly line-up, then the final print may look blurry or have colors that overlap incorrectly.
Registration sheets and boards help the artist line up their paper with the block in a consistent way for each layer of color. A registration sheet is a large piece of paper with marks on it that show where to lay the linoleum block and where to lay the printing paper over the linoleum block. They work better than no registration tool at all but not as well as a registration board.
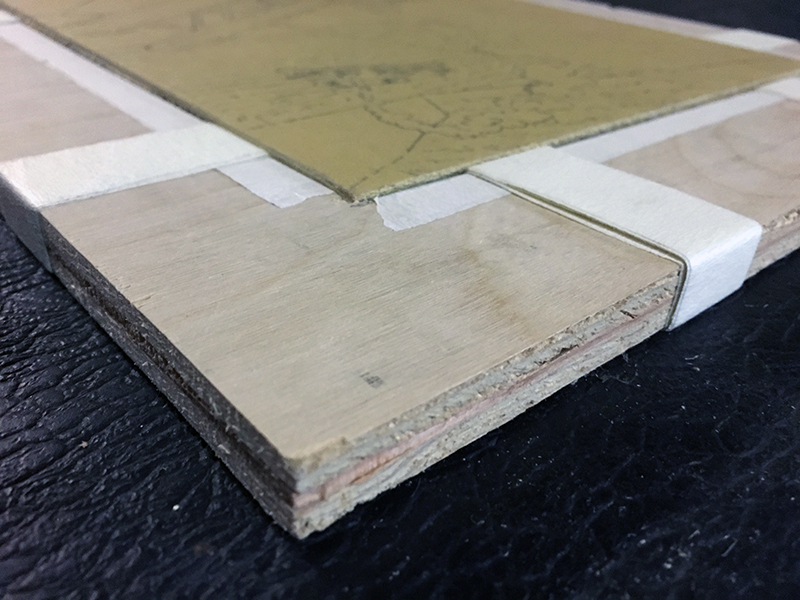
Registration boards are durable. The design pictured below is my own and not the only registration board configuration that you can make. I made my registration board to use with 8 x 10 inch linoleum blocks. My plywood is approximately 12 x 16 inches. Using a jig-saw, I cut out an 8 x 10 inch rectangle. The rectangle is 4 inches from the top and 2 inches from the sides and bottom.

I then glued the 8 x 10 inch cut-out to the underside of my 8 x 10 inch linoleum. After placing my mounted block of linoleum in the registration board’s window, I found that it was a little loose – no problem. Wrapping masking tape around the opening created a snug fit.
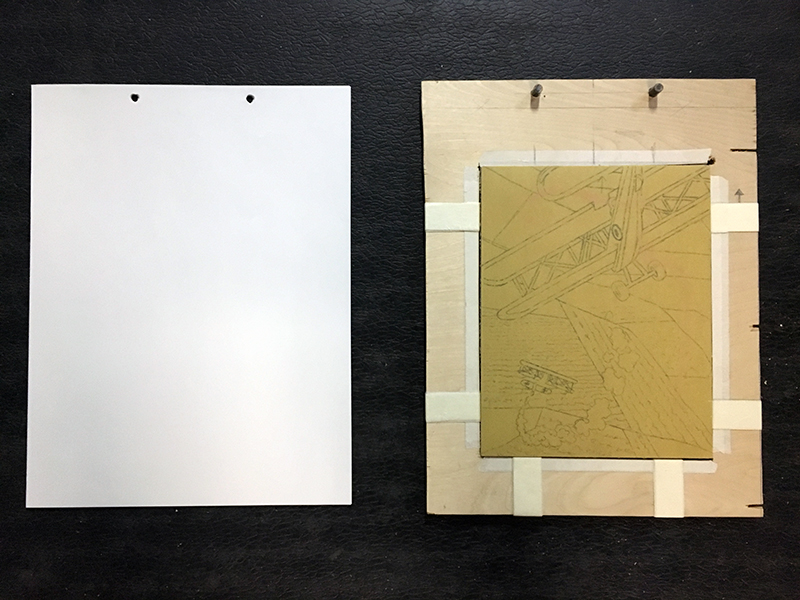
The registration board also needs pegs for the printing paper to fit over. Using a drill bit that is about the diameter of a pencil, drill two holes one half inch from the top of the board. Place small dowel rods into these holes. (I used pieces of a pencil instead of dowels.) Again, add some masking tape so that the pegs fit tight but do not glue the pegs into place. They should remain removable.
The board is now ready.
Step Four: Preparing the paper. I am going to make an edition of 10 prints. After cutting 10 sheets of paper that match the size of my registration board, I removed the pegs and place the 10 sheets, one at a time, over the board. Using my thumbs, I pressed down on the paper where it laid over the holes. Doing so left an embossed impression of the holes in the paper.
I then simply used a hole puncher and punched holes in the paper according to the impressions. (A hobby knife will work just as well.) Now when I place my paper over the pegs, it will fall across the linoleum block exactly the same way each time.
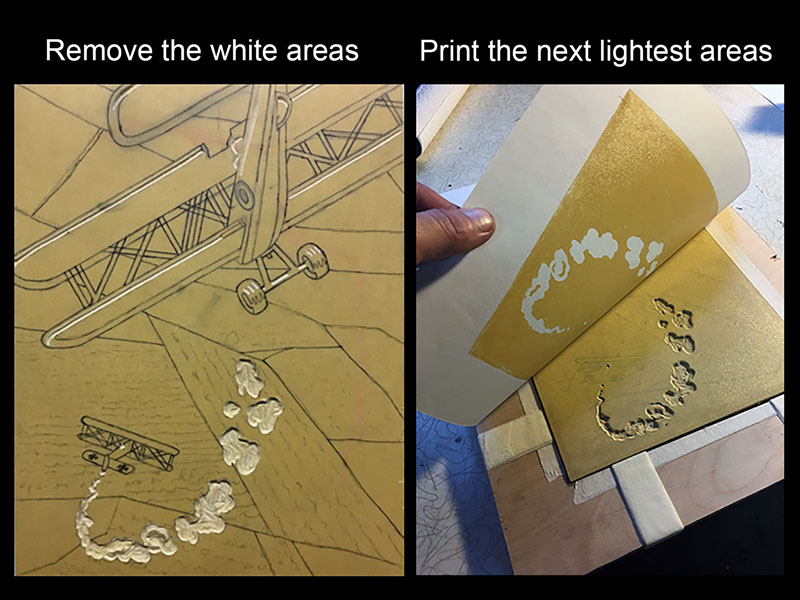
Step Five: Time to carve and print. Since my paper is white, I identified all of the white areas in the design plan and removed them from the linoleum with my gouges. If there was no white in the design, I would print my lightest color before carving anything.
After removing all of the white, I applied yellow ink with the brayer to the entire linoleum block and began making prints on all 10 sheets of paper. Now the white is locked in. No matter what else I do to the linoleum block, the white areas will remain white.
Wash the linoleum block with water before applying a different color.
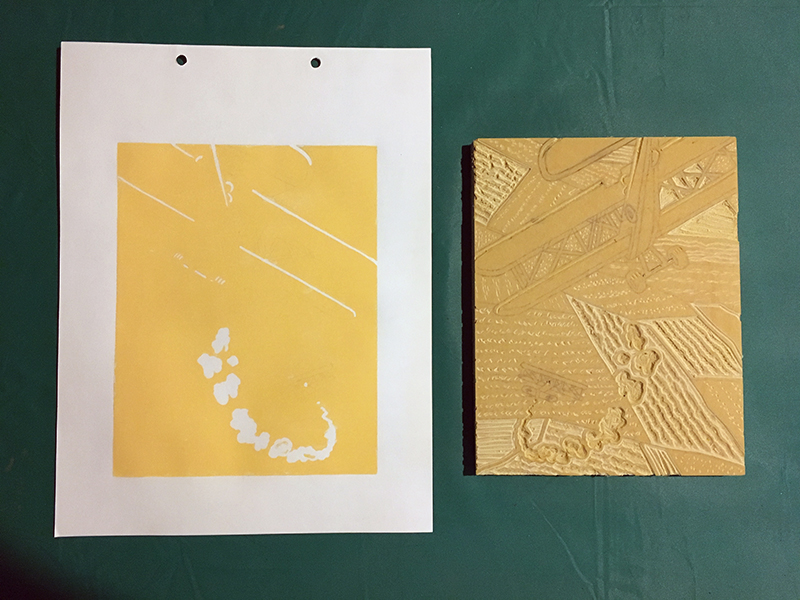
Next, I turned my attention to the parts of the block that needed to remain yellow. Remember, the prints are currently only white and yellow. Whatever I carve away at this point will remain yellow when the next color goes down.
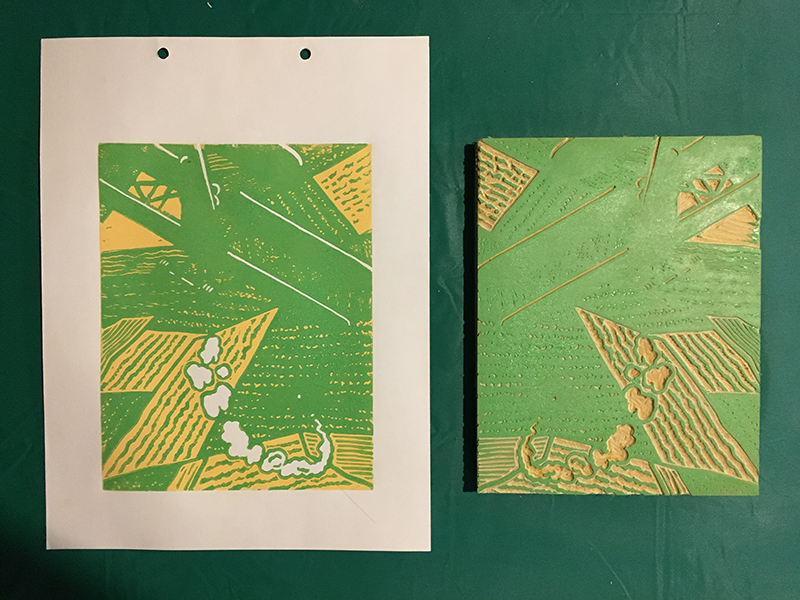
The next darkest color in my design is green. Once I finished carving the yellow parts I printed over the yellow with green. With the green in place, the yellow takes shape. With reduction printmaking, you are always carving away the color that was most recently printed.
I repeated this printing/carving pattern with both blue-violet and black, according to my original design. The small red plane in the design is so small and isolated that I painted it red by hand, after printing the blue-violet layer.
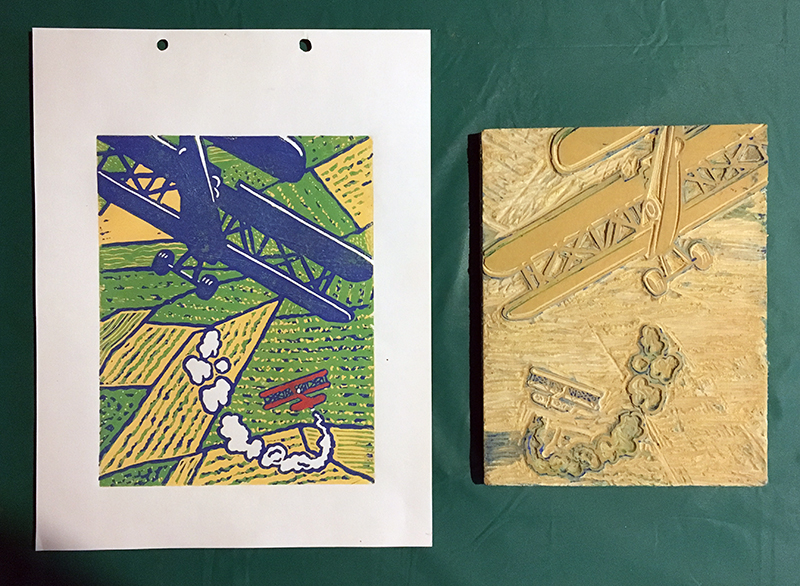
After carving away what needed to remain blue-violet, the block is reduced to it’s final state. Only black remains.
Final Thoughts
Reduction printing is a little more complex than creating a single relief print. If you haven’t made a print with a single color, then I’d start there.
Here’s a lesson on relief printmaking where we create a print with a single color… Relief Printmaking
When you “mess up” a single-color print (use too much or too little ink) you throw it away and print again – no problem. If you “mess up” a reduction print while applying the forth color, then you have to throw away hours or days of work.
A single-color print does not require registration so you can focus on your carving and inking skills until you feel ready to move on.
Printmaking is not harder than drawing or painting but it does require patience and attention to detail. Stay focused and you will soon have a colorful edition ready to share or sell.
If so, join over 36,000 others that receive our newsletter with new drawing and painting lessons. Plus, check out three of our course videos and ebooks for free.

Pastelmat Review and Demonstration
Materials
- Pastelmat Paper (affiliate link)
- Rembrandt Pastels (affiliate link)
First Impressions
This paper makes a good first impression, even before any marks are made on the surface. The paper is thick and heavy with a smoother surface. (I was surprised that the tooth is so smooth since it is designed for pastel applications.) It’s relatively heavy with a weight of 170 lb.
A cover sheet is included with each sheet of paper within the pad which is a wonderful surprise. It would be nice if other paper manufacturers did the same.
The pad that I purchased included four colors – Buttercup, Maize, Dark Grey, and Light Grey. The colors provided in this pad are quite nice. I especially like the Dark Grey, which is the surface I used for the drawing demonstration.
The paper only has one side that is suitable for drawing. The backside of the paper looks and feels much like poster board. This is likely not an issue for most folks, but it is a unique characteristic.
The paper is acid-free which is an important characteristic to look for with any surfaces that you use.
A Few Tests
Before creating a drawing, I decided to conduct a few tests to evaluate how Pastelmat may behave when pastels are applied. With pastel drawing, layering and blending are particularly important factors to evaluate. Since the paper is so heavy, I suspected that adding water to pastels on this surface may be a strength, so I decided to give that a go as well.
Here’s what I tested…
- Layering – The paper’s ability to layer, cover, and the intensity of color with each layer.
- Blending – How easy it is to blend colors and the control the artist has over blended colors.
- Rigidity – How the paper behaves when water is added to pastel applications.
Layering with Pastelmat
The smoother tooth of the paper had me a bit concerned about how pastels may layer on this surface. In most circumstances, a heavier tooth is better suited for accepting multiple layers of pastels. Layering is especially important with pastel drawing and a quality pastel surface should allow for many layers.
I was pleasantly surprised at how easily colors layered. With each layer, I had control over how much of the colors underneath were allowed to show through. If I desired, I could easily create an opaque layer over the colors underneath. The true test was layering white over the several colors I had in place. With very little effort, I was able to layer strong applications of white right over the colors. So even though the tooth of the paper is smoother, layering colors is very easy.
Where’s the Dust?
During my layering experiment, I quickly discovered that there was less dust produced by the pastels. Rembrandt pastels naturally produce less dust, but this was even less than usual. It seems the paper “locks” the pastel in place. This seems to make the color a little more intense and reduces the amount of dust produced, which is just fantastic.
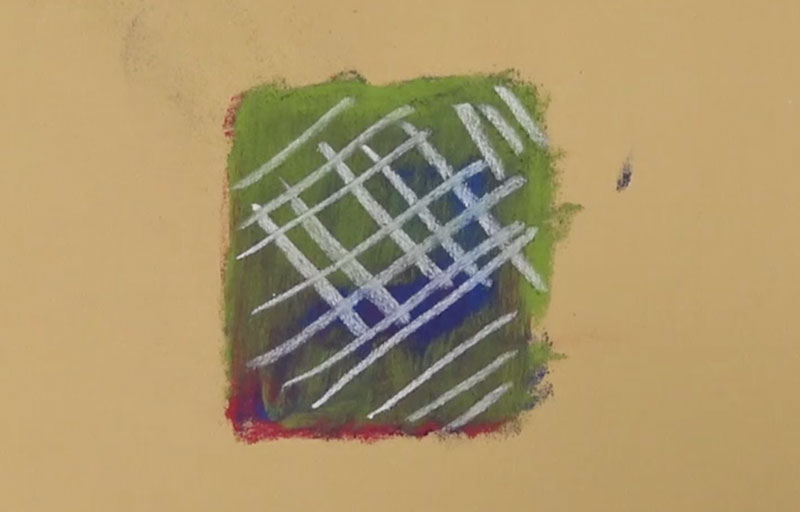
Blending on Pastelmat
Blending on Pastelmat took a little effort – more than usual. I really had to use some “elbow grease” to get the color to move. This may seem like a disadvantage, but it may be a benefit. With the resistance, I found that I had more control over what was blended and what wasn’t. Even using just my (fat) finger, I had quite a bit of control.
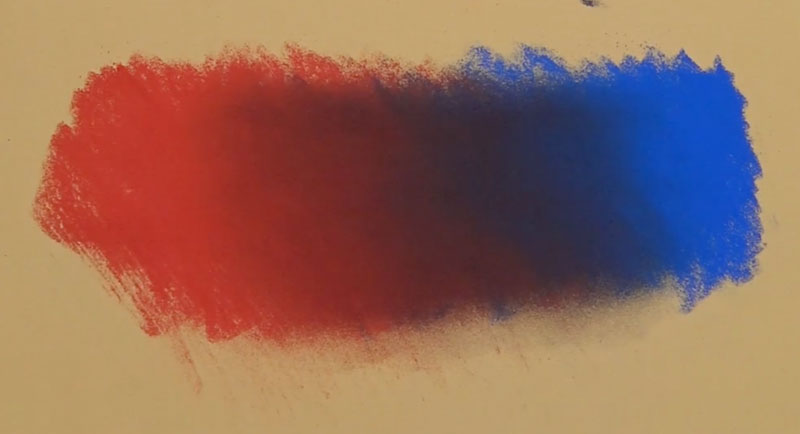
As I blended, the colors mixed as I expected. The blue and red produced a warm, dark purple.
Adding Water to Pastelmat
Pastels can be moved around and manipulated by adding a bit of water to them with a brush. This creates a nice painterly look, especially when used for backgrounds. The problem with most pastel papers is that they aren’t rigid enough to support much water without rippling or buckling.
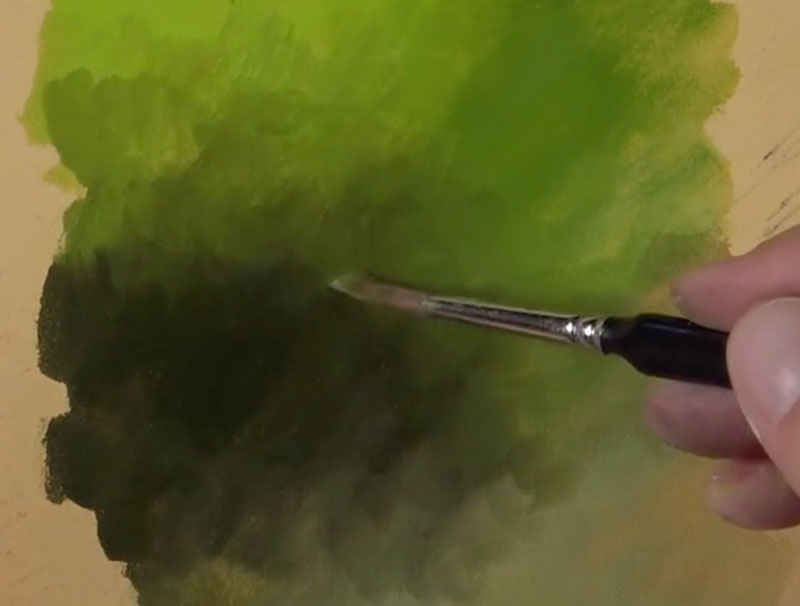
This isn’t the case with Pastelmat. At 170 lb., the paper is heavier than some watercolor papers. And with the sturdy backing, the paper is quite rigid and strong. It was easy adding a bit of water, applied with a sable brush, to pastel applications. The paper only bent slightly as the water dried, leaving a “painted” look to the pastels over which it was applied.
Creating a Drawing
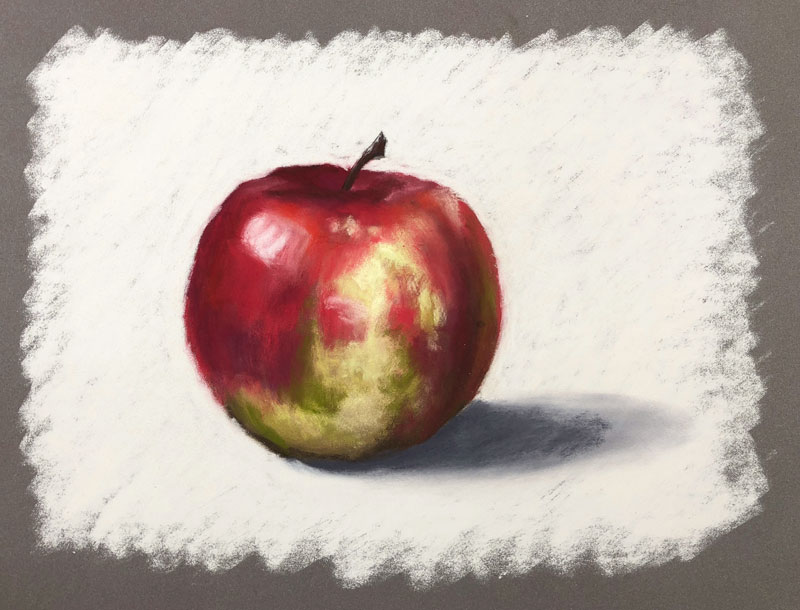
After my tests, I was eager to create a drawing on this paper. I usually choose a simple subject to draw when testing out a product that’s new to me. In many cases, it’s an apple.
I chose the Dark Grey surface to work on for my first drawing since I new the contrast would be strong.
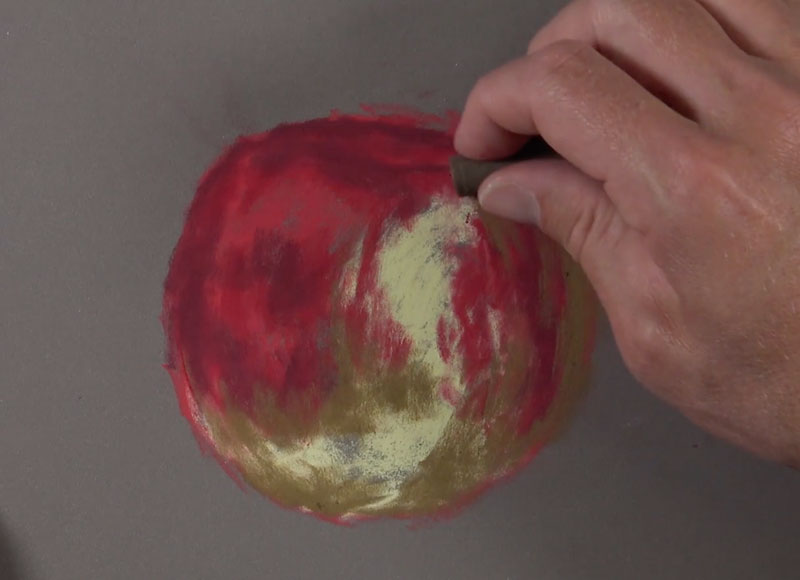
During my tests, I didn’t really pay much attention to how the marks felt when I applied them, but when I began a proper drawing – it was the first thing I noticed. Right away, I noticed how easily the marks spread over the paper. It felt very “buttery” and the pastel glided over the paper with ease. The marks were strong, but controlled.
On most surfaces, the act of drawing with pastels feels like drawing. We would expect the resistance of the paper against a dry, powdery medium like pastels to produce this sensation. With Pastelmat, however, the feeling was very different. It felt very soft, almost like I was making marks with a paint brush. It made the act of painting with pastels feel like – painting with pastels.
I began blocking in broad sections of color. Once these larger shapes of color were in place, I began working the values darker and lighter while adding in bits of related colors.
After a few layers of colors, it was time to do a bit of blending. As I expected, I had quite a bit of control over the blending. Sometimes, blending pastels can create a mess. This wasn’t the case here as I was able to mix and soften the colors I wanted without overdoing it.
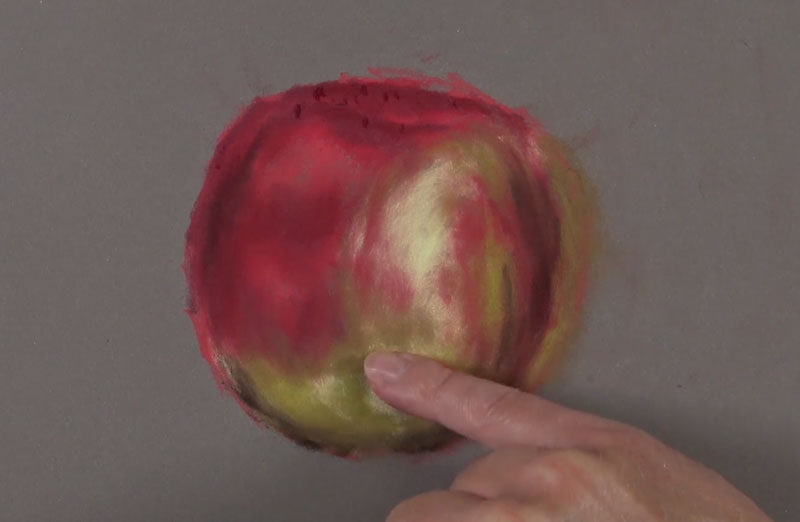
The blended applications worked as an underpainting as I next began layering additional colors over the top. I used a warmer red in a few areas and allowed the marks to sit on the surface without any blending. I was pleased to see how much depth this created in the drawing.
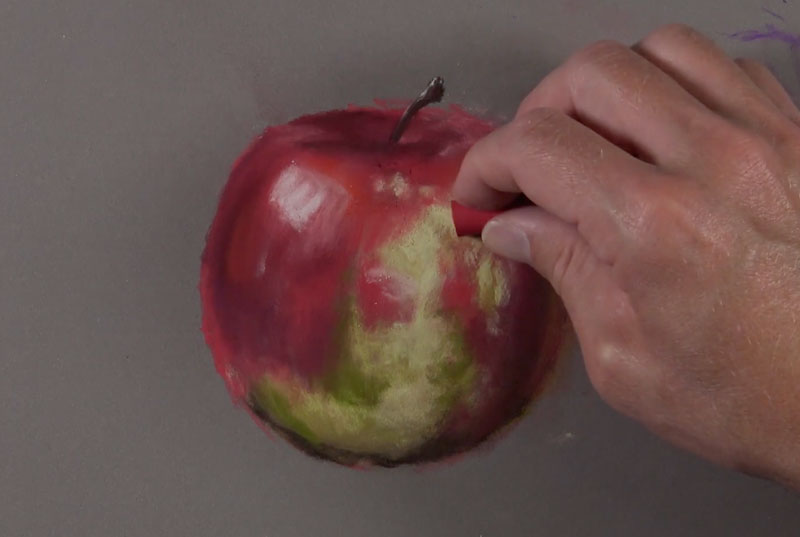
Once I was happy with the colors and value relationships on the apple, I was ready to frame out the subject and address the background. For this, I used a very light, creamy yellow, although it appears nearly white. During this process, I was able to clean up and address the edges of the apple. Against the light background and the contrast it provided, the values and colors of the apple became stronger.
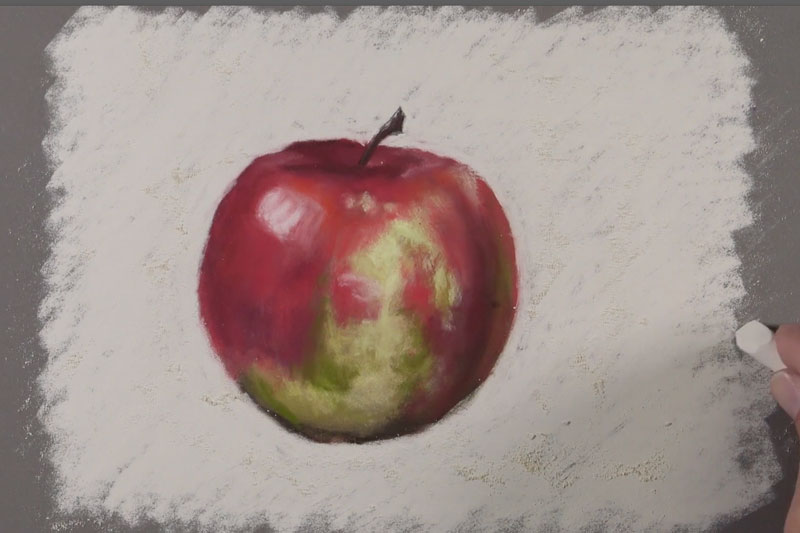
With the background in place, all that was left to do was to add a cast shadow underneath the apple. To contrast the warmer hues on the apple, a cooler dark gray was chosen. The outer edges of the shadow were softened with a finger, while the areas just underneath the apple received a heavier application, darkening the tone.
The Pros and Cons
After my tests and drawing, I was ready to look back and consider the pros and cons. Here’s what I think…
Pros
- Layers easily
- Blends with a lot of control and won’t make a mess of your paper
- Less dust – seems to “lock” the pastel in place
- Works extremely well with water and won’t buckle or wrinkle
Cons
- Expensive, but perhaps worth the investment
- Only one side of the paper is suitable for drawing/painting
- Limited colors compared to other papers made for pastel drawing
Have you used Pastelmat paper? What are your thoughts? I’d love for you to share in the comment section below…
If so, join over 36,000 others that receive our newsletter with new drawing and painting lessons. Plus, check out three of our course videos and ebooks for free.
10 Exercises for Confident Lines and Accurate Hatching
But before it becomes possible to create mind-blowing artworks, we have to spend some time with the basics. We simply cannot expect to communicate our ideas through a drawing without basic technical skills in place.
That’s why so many beginners unfortunately quit drawing only after a dozen or so unsuccessful attempts to capture a subject they like, but are too complex for their level. However, there are a few things that are important enough no matter how simple or complicated the subject is.
With any skill, we have to practice and build up our abilities. Drawing is no different. Practice plays an important role in developing ourselves as artists and should be a regular part of our activities – no matter what our current skill level.
This article is dedicated to short, yet effective drawing exercises that you can perform in just a few minutes every day. Musicians regularly practice their scales. A basketball player practices layups. We can think of these exercises in the same way. If you practice them regularly, your drawing skill will improve greatly.
Even if you are confident in your lines and hatching and pleased with the results, these exercises are still a fun exercise to practice. They provide a chance to focus your mind on a simple concrete action, which makes it easy to enter a state of “flow” (or a meditative submergence into the process).
The results of a five or ten minute warm-up, before even touching the big project you’re working on, may be surprising. Vocalists do various warm-ups before the ‘actual’ performance. We can use these exercises in the same – warming up the technical side of our artistic brains.
The tool for practice is up to you. It may be a graphite pencil, an ink liner, a nib pen, or any other mark-making tool. (I used ink liners just because they are my favorites; they provide clear, contrasting, and controlled marks on the paper.)
The paper can be any you like – ordinary printer paper is great because it’s so affordable and you can use as many sheets as you like.
Distinguishing Regular Lines From Hatching
On the surface, there isn’t a significant difference between a regular line used as contour and a hatch. Both are lines after all but each serve a different purpose.
Let’s expand the musical theme and make some comparisons. I see a contour line as a solo singer and a hatch – as a member of a chorus. Again, they are both lines, but they play different roles.
The role of a line is to convey the character and mood and in some cases – help the viewer differentiate the foreground from the background. They may communicate the light source in the scene. Lines become the contours in the drawing; they are a means of expression on their own.
A hatch is a part of a bigger system that acts as a whole. We may call this hatching (or cross-hatching, or contour hatching, depending on the character and the interaction of hatches).
To work together, hatches should be uniform. If some hatches break the visual pattern, attracting too much of the viewer’s attention, the final impression may be not as pleasant as we desired. Also, hatches are indispensable when it comes to working with values and creating an illusion of volume.
See also: Hatching and Cross Hatching
Working Your “Linear” Muscles
Drawing a line seems easy, but your mind and body work in a union to perform this task successfully. There is a difference in how we create shorter and longer marks and using the right muscles is crucial.
Take a sheet of paper and any tool you like. Draw a short line (something about 1 cm is enough) and observe how your fingers work together, moving slightly while holding your tool.
Then draw a longer line (4-5 cm). You’ll notice that your wrist becomes active to extend the line.
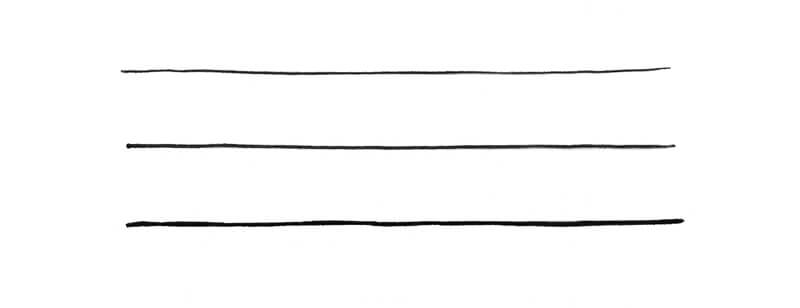
Now create an even longer mark (like 9-10 cm or more). This becomes possible thanks to your elbow muscles.
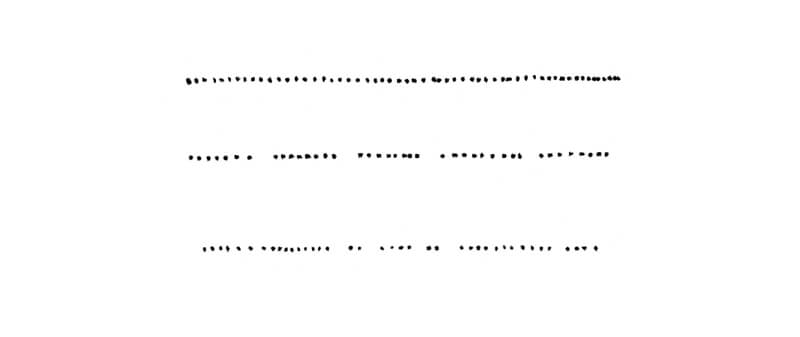
Below you’ll find an image with my lines (a – an “elbow” line, b – a “wrist” line, c – a “fingers” line):
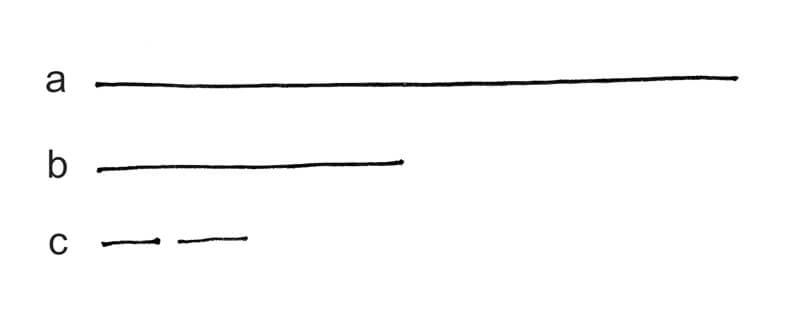
I’m sure that you’ve grasped the general idea of this exercise. Different lengths of line require slightly different movements. Keep that in mind and pay attention to the body’s behavior, especially if you feel like something goes wrong.
Using the right group of muscles provides the greatest control over your lines.
I’d say that the “wrist” or “elbow” lines are most commonly used for creating contours while the lines drawn by moving your fingers are better suited for adding hatching and refined details.
Another tip is to find out which direction of hand movement is most convenient for you: ‘away from yourself’ or ‘towards yourself’. This will vary from person to person, so I’d say that trying both ways and forming your own conclusion is important.
It’s great if you can make the marks appear the same, without any regard to the direction of the hand movement.
And the last tip for this section: check the surface that supports your paper. Any dents, bumps or a subtle texture may make consistent lines difficult, if not impossible.
“Hairy” Lines
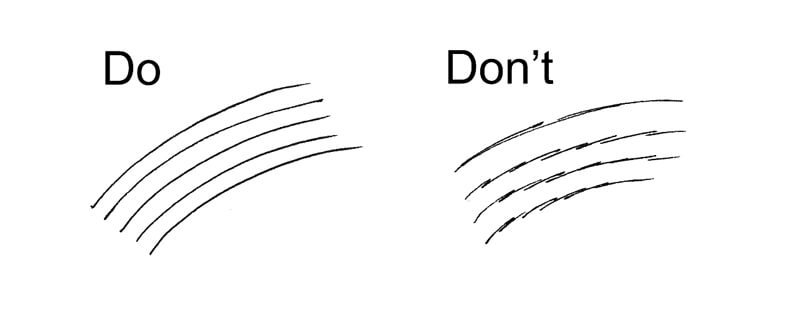
It’s completely normal to be cautious when you’re trying to draw a line that reproduces a contour of the object you’re observing. Especially, if you’re a beginner in art. When you’re overly cautious, you may draw a short line, then add another indecisive line, and so on. The contour becomes somewhat “hairy” and messy. There are many marks, but they look confusing or heavy.
This is different from drawing lots of lines quickly to “find” the proportions of the subject. We are specifically addressing “finished” lines when we are calling them “hairy”. It is still perfectly acceptable to begin with looser, fluid lines in the beginning stages of a drawing and refine the contours as you go.
If you’d like to develop more control over your “finished” lines, I’d recommend trying to use as few lines as possible, making them as long and “streamy” as possible. Free yourself from the fear of failure, relax your mind and hands. Trusting yourself is also a skill that can be developed!
Maybe you won’t draw the contours correctly on your first attempt, but you’ll get better at this skill over time. The more you practice, the better you’ll become.
Below you’ll find an illustration of what I’m describing in this section. Now we’re ready to start practicing!
Exercise 1 – Drawing Straight Lines
Let’s focus on drawing straight lines freehand, without a ruler. Please note that the goal is to explore our abilities, and nothing more! We’re not trying to create “perfect” lines.
If you feel unsure about drawing a straight line, I’d recommend outlining a line in pencil with a ruler. This line should be barely visible as it will serve as a reference.
When you’re drawing a line, pay attention to the pressure on the tool and the speed of movement. Don’t push too hard. You’ll notice that the starting and ending points of your lines depend on how lightly you touch the paper and how quickly your tool moves.
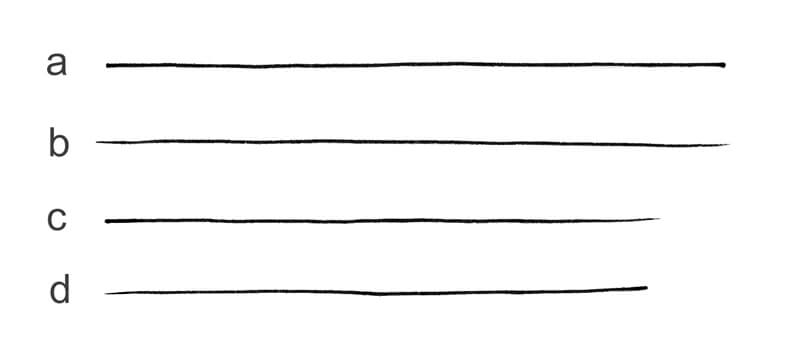
In the image below, you’ll find several lines:
a – a line with cut (thick) starting and ending points. I call them “full stop” lines because you should slow down a bit to make the ends look like this.
b – a line with sharp starting and ending points. This character of the ends is achieved by a lighter, swifter movement.
c – a line with a dense start and a light, pointed end.
d – a line with a sharp start and a “full stop” at the end.
To be fluent with your lines, I recommend repeating all four examples. Some will be more natural to you and some will require additional practice.
Please keep in mind that slowing your hand movements too much may cause unwanted effects, especially on thin paper. For example, if you leave an ink liner in one spot for several seconds, you can get a dark blob. So finding a balance is important!

To make the exercise more interesting, you can try any tool that provides a variety of line width, depending on the pressure (like a nib pen or a brush pen). Play with your tool and see how it behaves. Some drawing tools allow you to create a dramatic change in the line width.
In the image below, you’ll find my lines made with a brush pen. I’ve created some continuous lines and also lines with gaps.
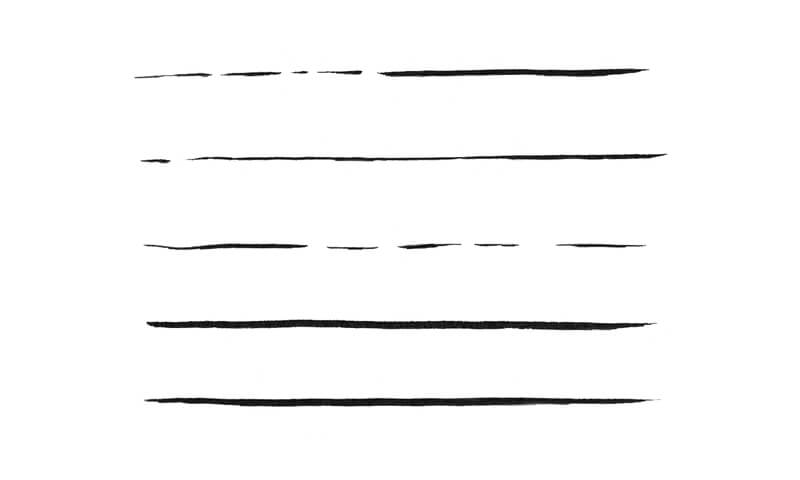
If you don’t have a brush pen or a nib pen, you could use various forms of the same tool. For example, you could use several ink liners or varying widths. Chances are, you’ll get to know your tools better and find out which one is the most comfortable to you.
Here are my lines created with the 0.1, 0.3 and 0.4 liners respectively…
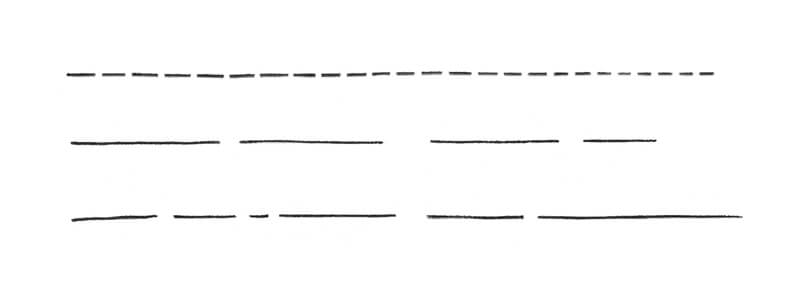
Exercise 2 – Drawing Lines with Gaps
Now let’s draw some dashed lines. The intervals may have the same lengths or have a touch of spontaneity.
Exercise 3 – Control and Accuracy Practice
The next exercise is more advanced. First, draw a line with a vertical direction – it can be straight or whimsically curved.
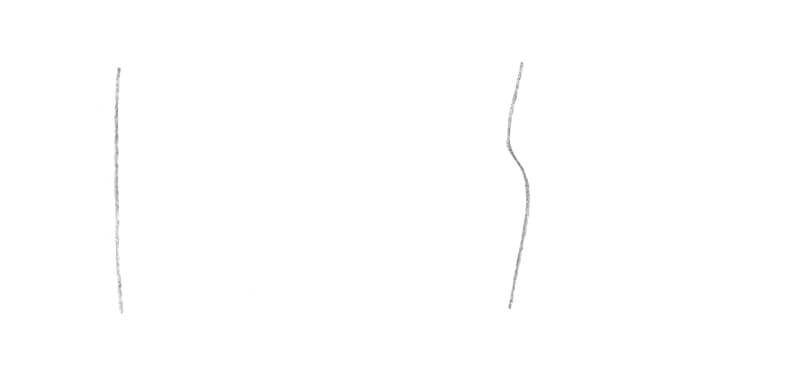
Then, add hatches – they should be located at the side of this line, or adjacent to it.
If you want to add a bit more of a challenge to this task, you can keep your hatches at a small interval, equal distant from the contour line. Or, you can draw another contour line and make sure all your hatches are ending on it.
This exercise is good practice for developing greater control.
Exercise 4 – Drawing a Dotted Line
Now we’ll create a dotted line – it may seem a bit weird, but a line may consist of dots, too! And the ability to create nice dotted lines may be very helpful in your creative process.
The goal of this exercise is to find a comfortable rhythm. Observe how your hand moves, don’t rush, and make sure you pull your hand away swiftly enough after you’ve created each dot. Each dot should have a clear shape, without any smeared ‘tails’.
Your dotted line can be continuous (the intervals between the dots are approximately equal) or have some irregularity.
Exercise 5 – Drawing Wavy and Zigzag Lines
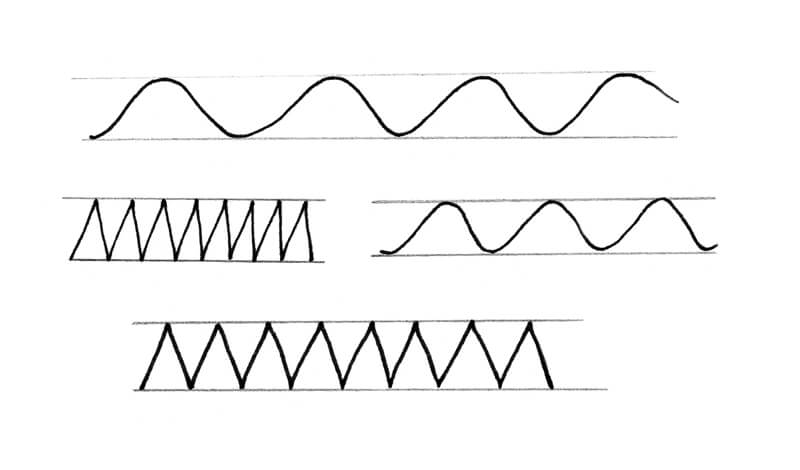
Let’s have some fun with some patterned lines, such as wavy and zigzag lines (but feel free to draw any other lines you like).
You can outline a couple of horizontal lines to create the borders, and add your lines within them. In the image below, you’ll notice how my lines are touching the borders.
Don’t strive for absolute perfection – the goal is the same as in the previous exercise; find a comfortable rhythm and a balance in the movements.
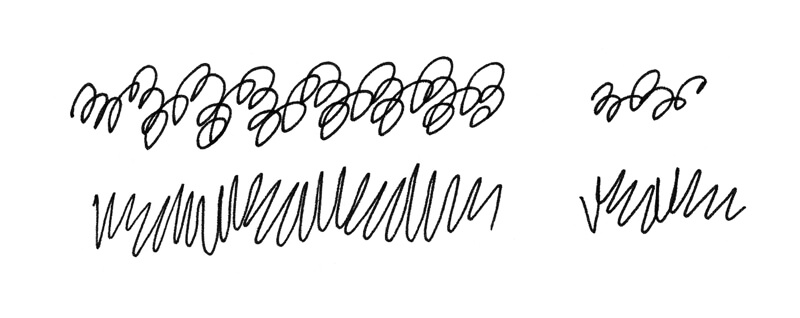
Exercise 6 – Scribbling
Drawing with precise control is important, but drawing looser and less precise lines is also an important skill to develop. So we’ll next take a break from drawing straight lines and loosen up with some scribbles.
There’s no right or wrong way to do it. Let your hand move and cast aside any expectations.
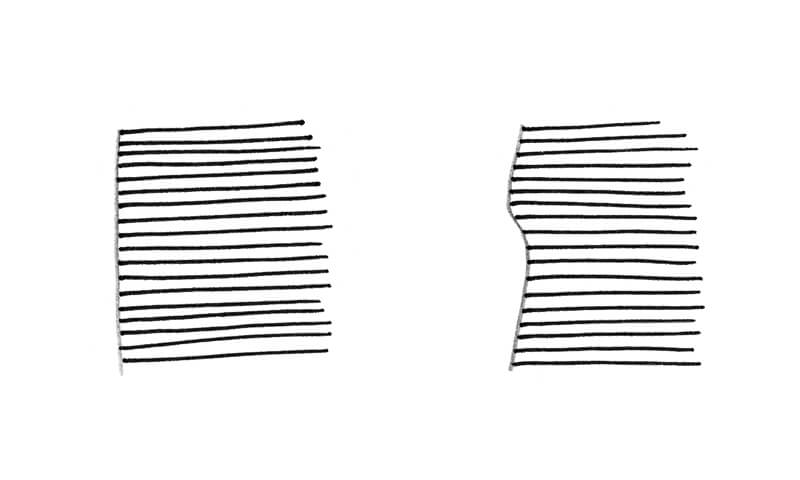
Exercise 7 – Developing The Skill of Accuracy
The next exercises are dedicated to hatching and cross-hatching.
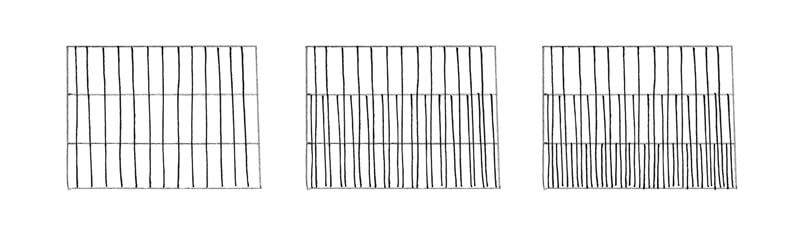
It’s useful to train your eyes and hand to place the new hatches into the gaps between the existing ones, not on top of them. To practice this skill, we’ll create a swatch like in the image below:

This image may seem confusing – so where should we start?
First, we need a rectangular shape divided into three parts (like three elongated rectangles adjacent to each other). I’ve drawn the three-part rectangular template with a graphite pencil and the hatching will be made with an ink liner.
The borders will help us differentiate the groups of hatches: the longest, medium length, and short. We start with the longest vertical hatches, filling the swatch with them. There should be some intervals between the hatches – don’t draw them too close to each other.
Then add the shorter hatches (the hatches of medium length).
Lastly, add the shortest hatches – they should occupy only one-third of the whole template.
Below you’ll find the step-by-step process of completing this exercise.
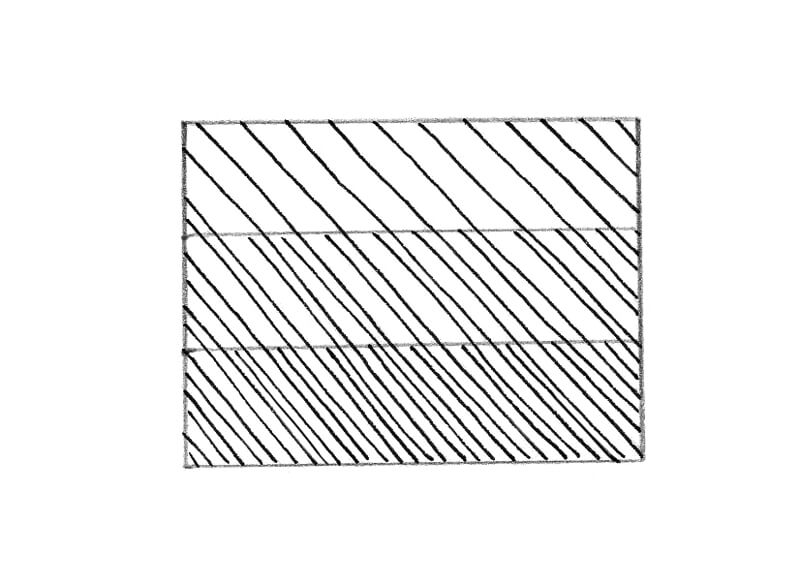
To make the task slightly more complex, repeat this exercise with inclined lines. The order of adding hatches is the same (the longest marks are added first).
Exercise 8 – Basic Hatching Practice
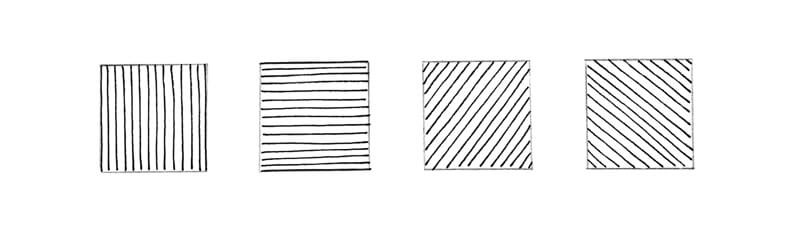
To practice hatching, you can use small squares/circles/rectangles that become the borders for the hatches, or just go at it without any borders at all.
Each one of your hatching swatches should have a uniform look and all of the hatches should flow in the same direction.
The hatches can be horizontal, vertical, or inclined at any degree. You can start drawing slowly, then create a new series of lines, moving faster and faster. However, the speed of drawing isn’t the focus of this exercise.
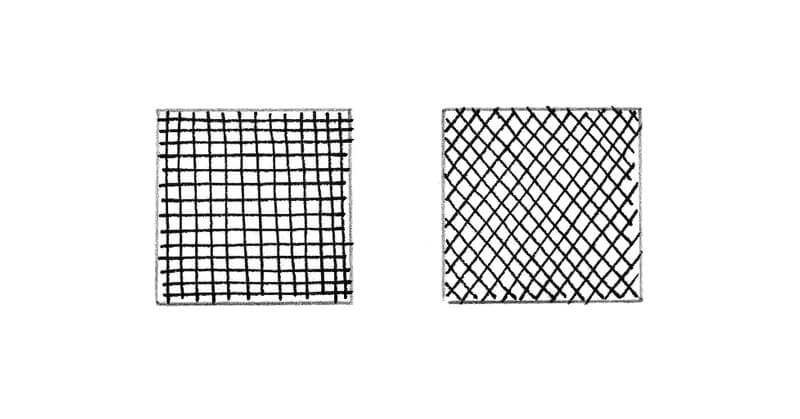
Exercise 9 – Cross Hatching Practice
This exercise is an extension of the previous one. This time, we’ll create one layer of hatching and then cover it with another one with a different direction of marks. The hatches are crossing, and we get cross hatching.
If you like this exercise, I’d recommend inventing as many examples and combinations as you can. Moreover, you can try different tools (several liners that provide different line widths) and analyze the effects that you get.
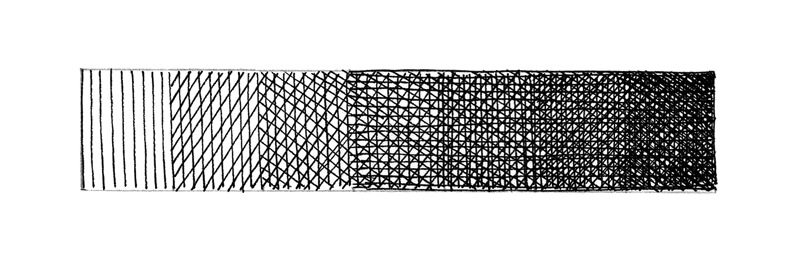
Exercise 10 – Create a Value Scale With Cross Hatching
Value is the darkness or lightness of a color. Value is incredibly important in creating the illusion of light, volume, and texture in a drawing. It’s important to practice creating a full range of value with cross hatching. Fo our tenth exercise, we’ll create a value scale using cross hatching.
Having a rectangular shape as a temple is useful. There’s no need to make it too long (the length of 9-12 cm is enough). You can also think beforehand how much space you need to create each value. A small amount of space is sufficient.
My process of completing this exercise will be the following:
- Fill the whole shape with vertical hatches.
- Add a layer of inclined hatching.
- Add a layer of inclined hatching (this time, of a different direction).
- Add horizontal hatching.
- The vertical hatches again, trying to fill the gaps.
- Inclined hatching again.
You can see the repeating pattern.
The goal is to create a nice, smooth transition from a lighter value to a darker one.
However, if some of your hatches look slightly uneven, don’t be discouraged. We want the marks to look as though a human made them – not a machine.
Your cross hatching value scale may look like this:
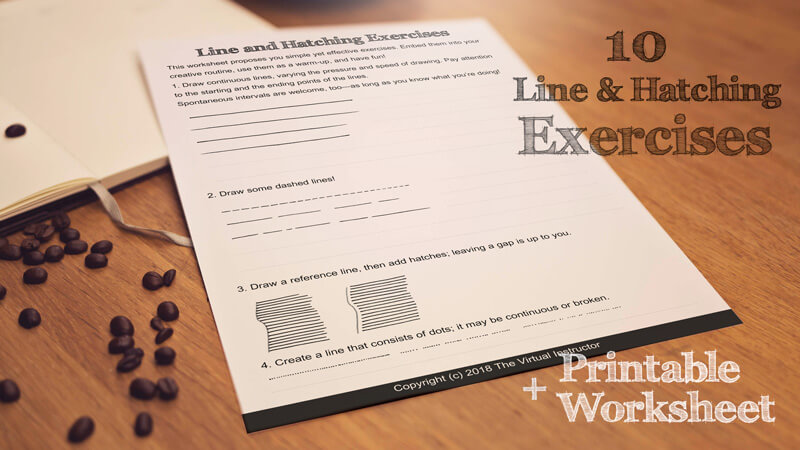
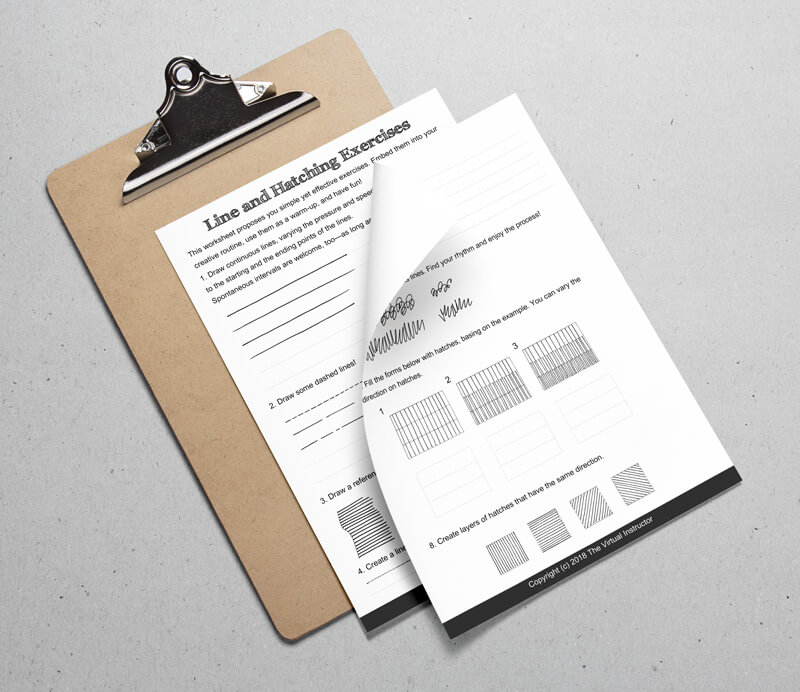
The Worksheet
I’ve compiled a worksheet to help you with your practice. You can download it and print it out so you can practice these exercises whenever you like.
A Creative Approach to the Line Practice
I hope you enjoyed the practice. These exercises are more powerful than they may seem. But don’t limit your practice to just these exercises. Let your imagination go wild and invent your own warm-ups and challenges.
Even just a small bit of practice will push your art skills much further! Many people like doodling when they’re talking on the phone or waiting. Take advantage of every spare moment.
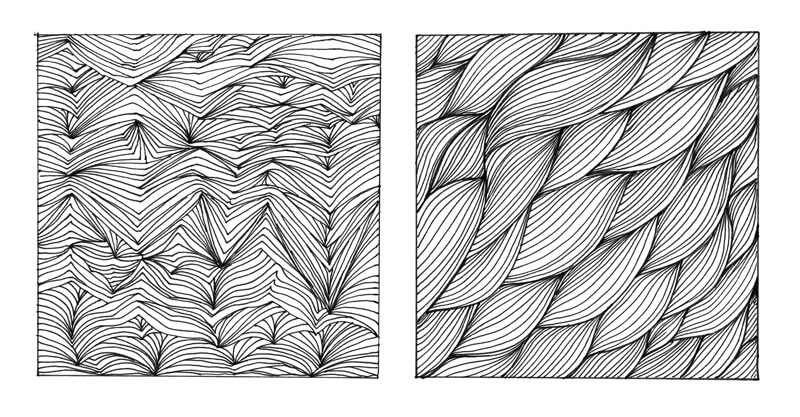
Doodling counts! Here’s a couple of mine…
Deliberate Practice
Before wrapping this lesson up, I’d like to add one more point about the way you approach your daily drawing practice. It’s completely OK to love doing the things you’re good at. But sometimes we avoid activities that seem challenging or mundane.
We often become attached to our strengths, avoiding anything that makes us feel awkward or uncomfortable. On one hand, developing skills that we’re already skilled in may make us even stronger. But anything worthwhile in life sometimes requires being attentive to some weaknesses that prevent us from moving forward with our skills (and all the amazing projects we have in mind). Art is no exception.
Let me give you an example. If an artist feels that their drawings aren’t as strong as they could be because of indecisive lines and inaccurate hatching, avoiding this weak point won’t improve their skills. They should devote some time to deliberate practice – that’s really the only way to improve.
If you know what to improve and how to practice, your success is a matter of time and effort. All the magic happens while you’re working and enjoying the process, even if there are some challenges.
Don’t be afraid to leave your comfort zone.
If so, join over 36,000 others that receive our newsletter with new drawing and painting lessons. Plus, check out three of our course videos and ebooks for free.
How to Paint Waves with Acrylics
Materials for this Painting
- Liquitex Acrylic Paints
- Gessoed Panel
- Nylon Brushes
- “H” Graphite Pencil
For this lesson, we’ll use Liquitex heavy body acrylics. These paints are pricier than some of the other options for acrylic paints. If budget is a concern for you, then I recommend substituting with Liquitex Basics.
We’ll work on a lightly textured, gessoed panel. This surface provides a nice tooth or texture for accepting the layers of paint and makes it a bit easier to create smooth transitions of color and value with the fast-drying acrylic paints.
There are a variety of different brush types that work well with acrylics. Some artists prefer the stiffer, hog bristle brushes over the softer nylon varieties. I personally prefer nylon brushes for most acrylic paintings, especially for surfaces such as panel. The hog bristle brushes are best when thick applications of color are to be made and are better suited for surfaces such as canvas. On harder surfaces, like the gessoed panel, the brush strokes may be too visible if bristle brushes were used. For this reason, we’ll stick with nylon brushes.
Mixing Teal and Turquoise
The painting that we’ll create features a variety of greens and blues. We’ll use a variety of pigments to create the teals and turquoises that we find in the waves and the muted sky. (Teal or turquoise is technically a blue-green.)
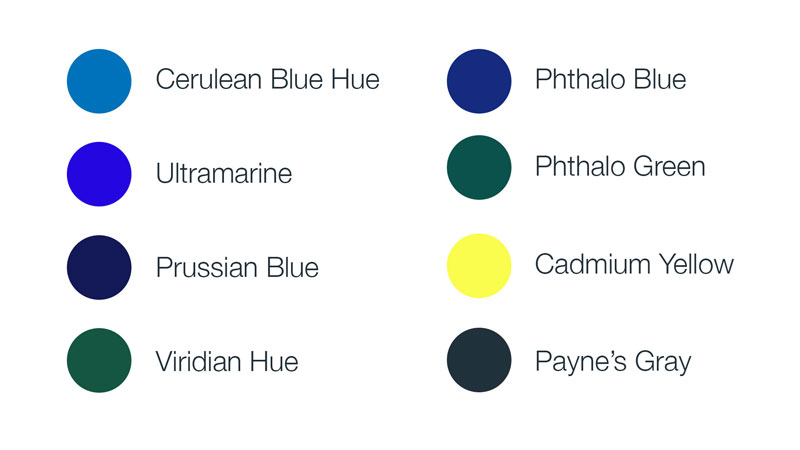
For the majority of the painting, we’ll stick with a combination of Cerulean Blue, Prussian Blue, and Viridian Hue. To adjust the values of these hues, we’ll use Payne’s Gray and Titanium White. Payne’s Gray is a dark, cooler gray that makes a great substitute for mixing over black. This is especially true in a painting like this where a cooler dark is required to create more natural, darker values.
Here’s a look at all of the pigments that are used (minus Titanium White)…
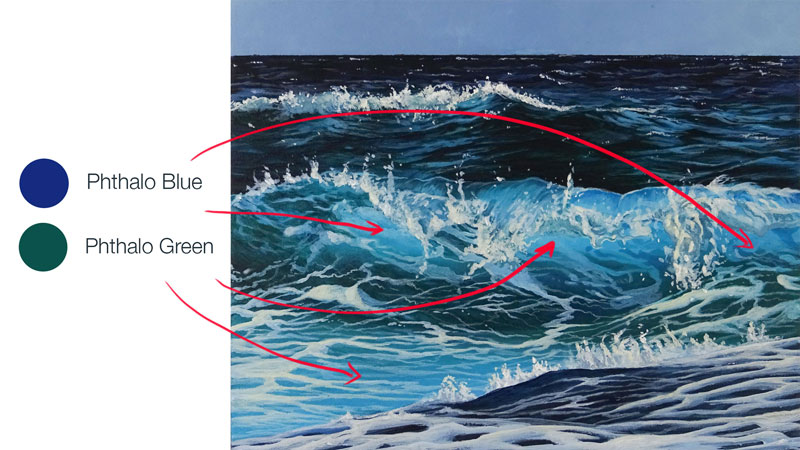
The dominant wave in the middle of the composition and areas just in front of it are much brighter and are slightly different in hue. We’ll need to mix a slightly different turquoise in order to be sure that this area contrasts with the areas around it.
To make a brighter turquoise, we’ll use a mixture of Phthalo Blue and Phthalo Green. To make this color the correct value, we’ll add a bit of Titanium White.
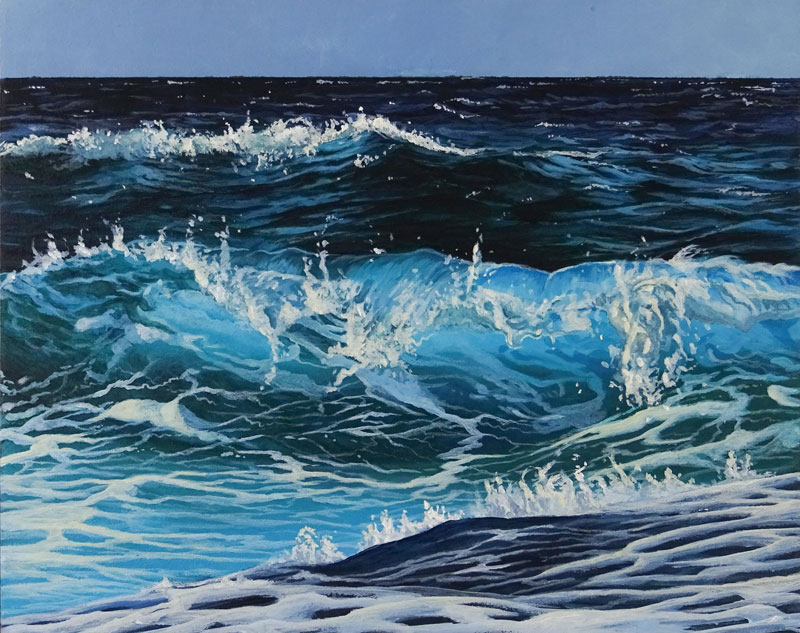
Here’s a look at the photo reference…
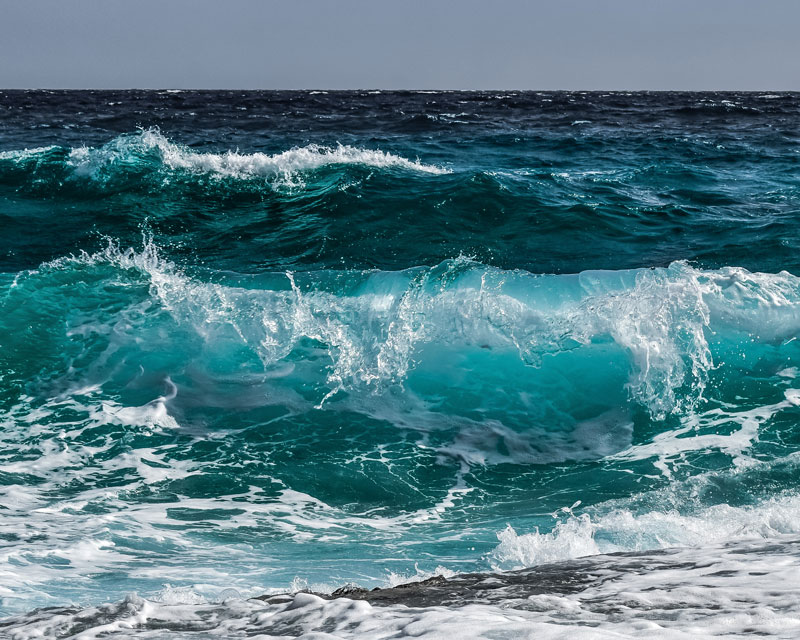
It’s important to note that with any drawing or painting that you create, you are not tied to the reference image. Our goal shouldn’t be to copy a photo. Instead, we should focus on creating a work of art – our own unique interpretation of the subject. We’ll use the reference image as a reference and use it to make decisions about values, shapes, and textures. But, we’ll also allow ourselves a bit of freedom and deviate from the reference as we feel necessary.
Planning Out Shapes of Color and Value
We’ll first plan the horizon and each of the larger sections of colors or waves. We shouldn’t be concerned with any details. Instead, we’ll simply draw loose lines with an “H” graphite pencil to indicate the locations of each of these features.
With these locations planned out with graphite, we’ll begin adding acrylic applications. We’ll begin with locations farthest away from the viewer and work our way forward.
The sky is quite muted and is addressed with a mixture of Cerulean Blue, a touch of Ultramarine, Prussian Blue, Payne’s Gray, and Titanium White. We’ll fill in the sky with a solid application.
Once the sky has dried completely, we can use painter’s tape to tape off the horizon line. This creates a nice, sharp edge where the water meets the sky.
Starting with the distant waters, we’ll begin applying dark blues. In the most distant areas, we’ll see mainly blues mixed with Prussian Blue and Payne’s Gray.
As we work to the upper middle of the picture plane, the blues become a bit greener. We’ll begin adding Viridian Hue to the mixture and allow the mixture to become a little lighter in value by using less of Payne’s Gray.
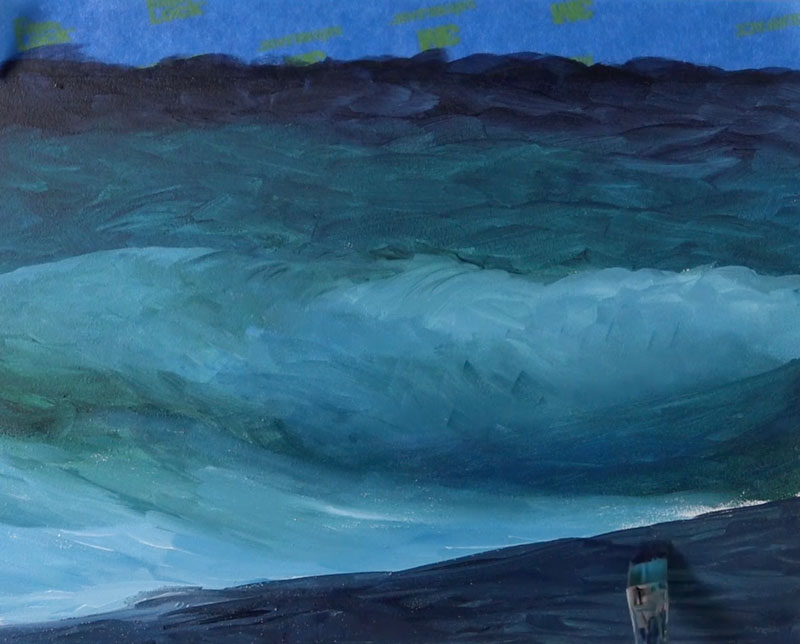
In the next section, working downward from the top of the picture plane, the values become lighter and the hue changes to a color dominated by Cerulean Blue.
In the extreme foreground, a dark wave slants diagonally across the bottom of the composition. This section is mixed with mostly Payne’s Gray with a hint of Prussian Blue.
Pulling Out The Distant Waves
After removing the painter’s tape, we can begin developing the illusion of distant waves. The illusion of waves, just like with any other subject, is dependent on the use of value. Value, or the darkness or lightness of color, creates the illusion of form and texture in a drawing or painting.
By positioning lighter and darker values, we can create the illusion of distant waves.
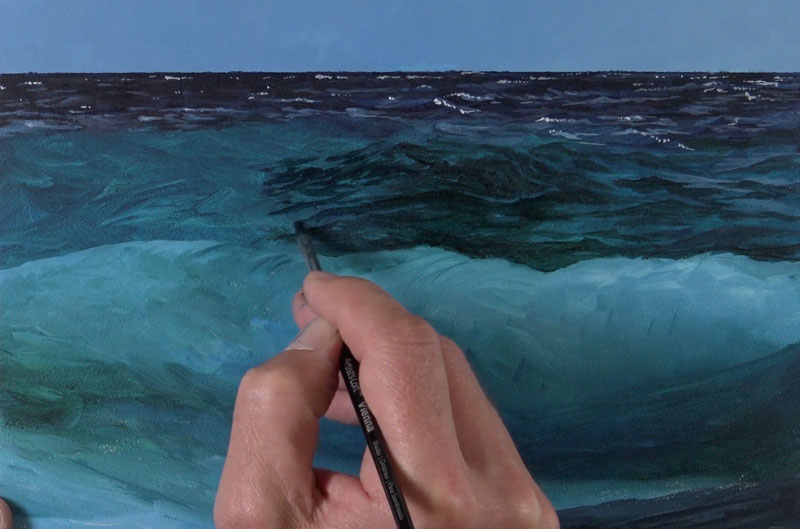
The darker and lighter brushstrokes applied for the distant waves are short and positioned close together, but as we work down the picture plane, they become larger with more space between them. In the middle ground, we begin to see clearly defined triangular shapes of darker tone with strong diagonal strokes of lighter value located on top.
It’s also important to note that as we work downward, we’ll use the hues that we established in the last step to create the lighter and darker values. For example, for the distant waves, we use Prussian Blue and Payne’s Gray, adding Titanium White for the highlights and Payne’s Gray for the shadows. But as we work to the middle ground, we begin to add Viridian Hue, adding Titanium White for the highlights and Payne’s Gray for the shadows.
Defining The Form Of The Waves
We’ll continue working with light and dark values to develop the illusion of the form of each of the smaller waves and ripples within the larger wave. As we continue to add slighter lighter and darker values, the form of the waves begins to take shape. This process of working the lighter and darker values is often referred to as “pushing and pulling”.
Once we have much of the upper middle wave defined, we can add a bit of sea spray along the top edge. To create this illusion, we can add a lighter version of the blue-green hue first, followed by progressively lighter values applied with a thicker application.
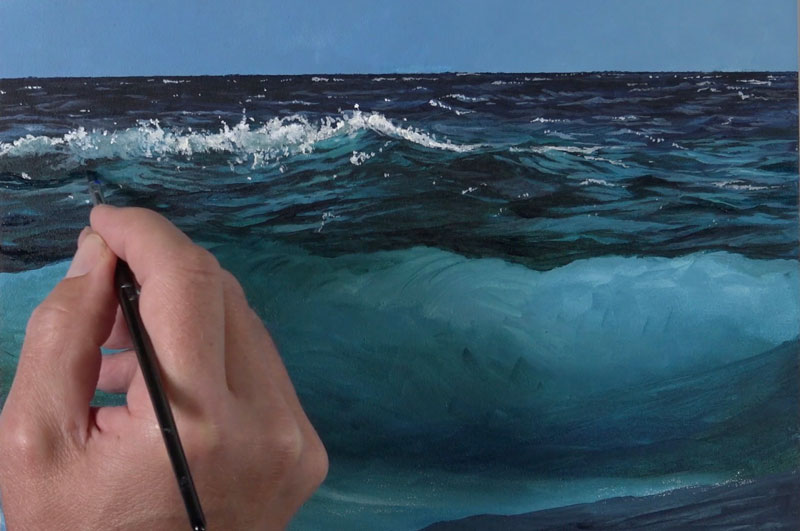
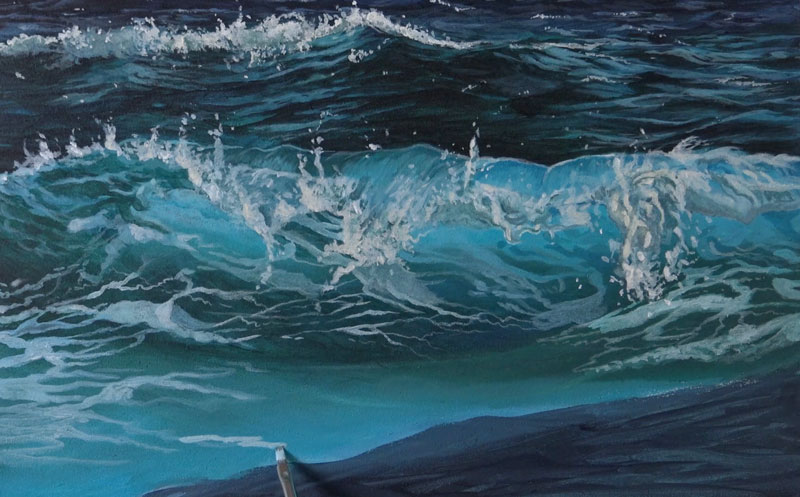
Establishing Colors and Values For The Middle Wave
Now we’re ready to move on to the lighter wave which will ultimately become the main focal point of the painting. The light source is originating from above and slightly behind the wave. This means that as the wave breaks and becomes thinner at the top, some light makes its way in from behind. This produces lighter and brighter values towards the top of the wave.
The hues are brighter, more intense, and slightly different than the colors that surround this wave. As we mentioned before, we’ll use a different turquoise to address this area. This turquoise is brighter and will contrast with the blue-greens that surround it.
This brighter turquoise is mixed using a combination of Phthalo Blue and Phthalo Green and then lightened with Titanium White. As we begin adding this color and values of it, we’ll first concentrate on basic shapes. As we layer additional applications of paint with a smaller brush, the details will gradually emerge.
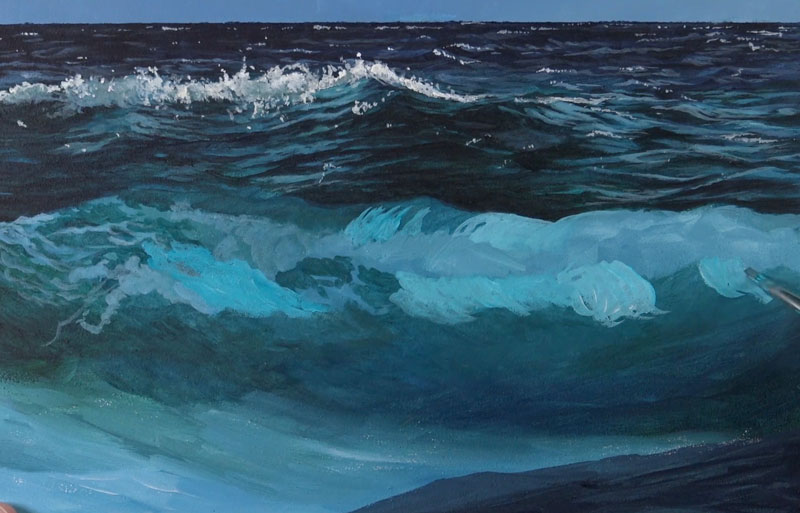
Adding And Refining The Details Of The Wave
We can now go over the basic shapes of color and value and begin refining the details. This process mostly involves adding directional brushstrokes and indications of the meandering sea foam. We’ll continue to work the values and subtle changes in color as we go.
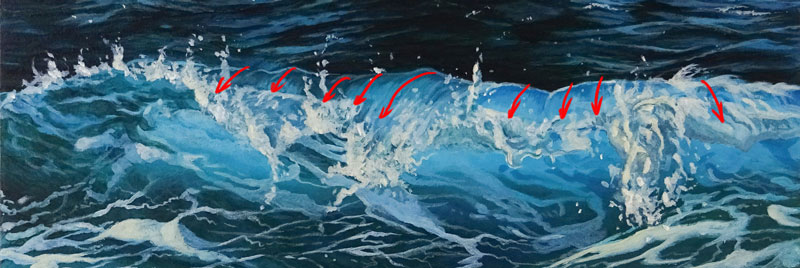
As mentioned earlier, the directional strokes produced by the brush play a role in how the waves are perceived. The water is moving and we want this feeling of movement to be evident in the painting.
In order to capture the movement of the water, we’ll change the directional strokes made with the brush according to the “flow” of the wave. We can see this concept illustrated below…
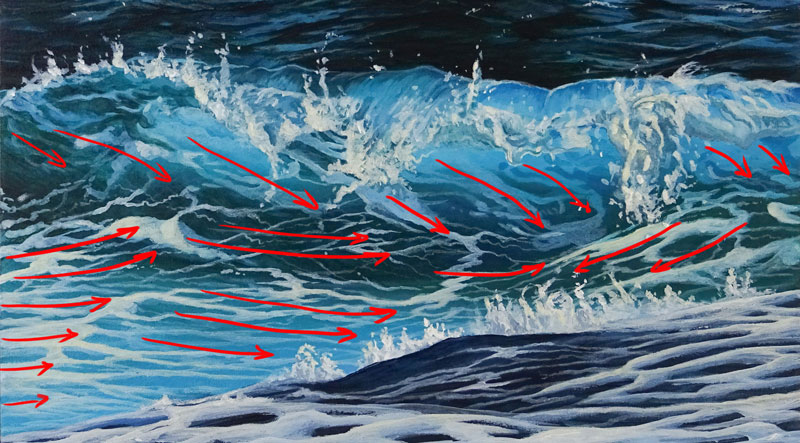
As the wave dips downward, the brushstrokes should also dip down. And as the wave moves upward, our strokes should do the same. Within the curve of the wave, the brushstrokes are mostly diagonal.
Directional strokes are also found on the top of the wave, as it gently folds over on itself. These brushstrokes contrast the diagonal strokes on the inside of the wave.
As we did with our first larger wave, we’ll add the sea spray right along the edge of the top of the wave. Notice how much this sea spray changes in shape, value, and color as it makes its way down the break.
To make the lightest areas of the sea spray stand out more, we’ll add just a touch of Cadmium Yellow to Titanium White. This subtle addition of yellow increases the contrast against the cooler blue-greens and gives an indication of the warmth of natural sunlight.
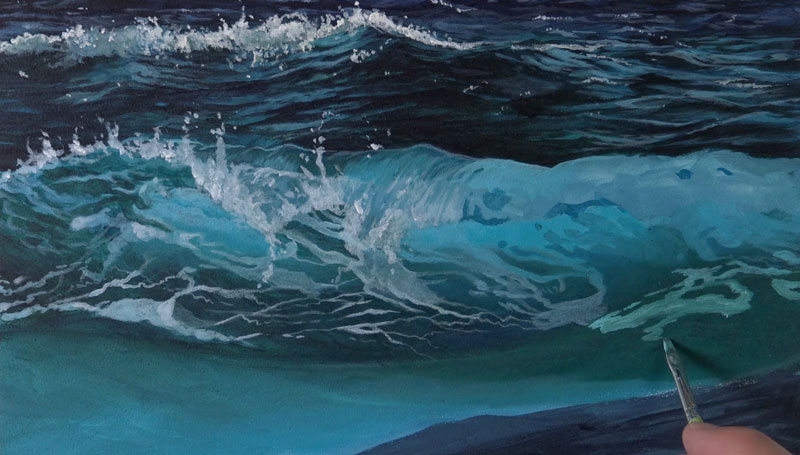
Painting The Sea Foam
The sea foam is painted using both a small flat and round brush. Mostly horizontal and slightly diagonal strokes are pulled across the form of the wave. A thinned mixture of blue-green is added first before being intensified with additional layers of progressively thicker paint. Within the curve of the wave, the values are slightly darker, but just outside where we run into some light, the values become lighter.
Just as we did with the sea spray, we’ll add a touch of Cadmium Yellow and go over a few areas to add a bit of warmth and contrast.
Painting The Wave In The Foreground
The wave found in the extreme foreground is much darker and bluer, but this doesn’t change how we approach developing the sea foam here. We’ll still apply a thinned application of Titanium White, but with a larger flat brush initially. A smaller round brush is used for the smaller strips of sea foam in between.
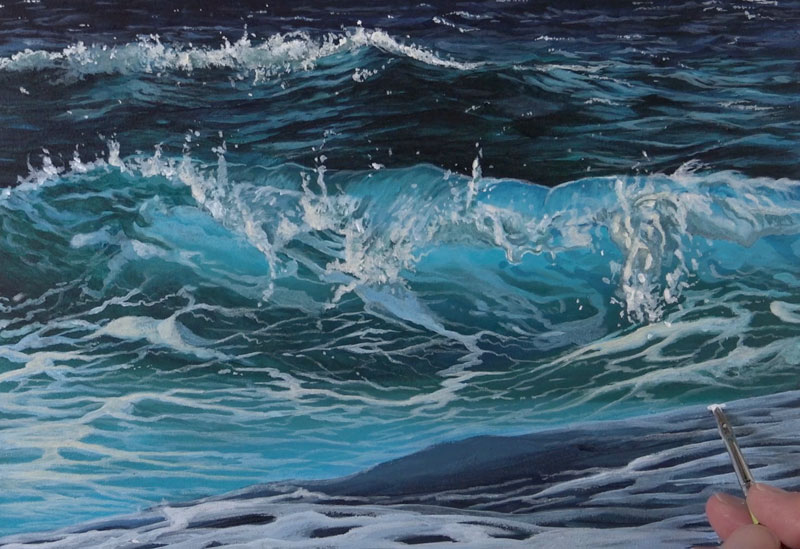
Over the top of our thinner applications, we’ll apply opaque applications of Titanium White. Then, like we did with the sea spray and the bits of sea foam in the middle ground, we’ll add a touch of Cadmium Yellow to the mix to make the color a slight bit warmer and make it contrast with the cooler blues.
Finishing Things Up
We’ll add a section of sea spray right along the upper edge of the wave that is closest to the viewer. Again, we’ll start with a thinned application and then become more opaque to create a range of value and create the illusion of form.
We’ll again add a touch of Cadmium Yellow to outer edges of the sea spray. To add a bit more contrast, we’ll darken the wave just behind the sea spray.
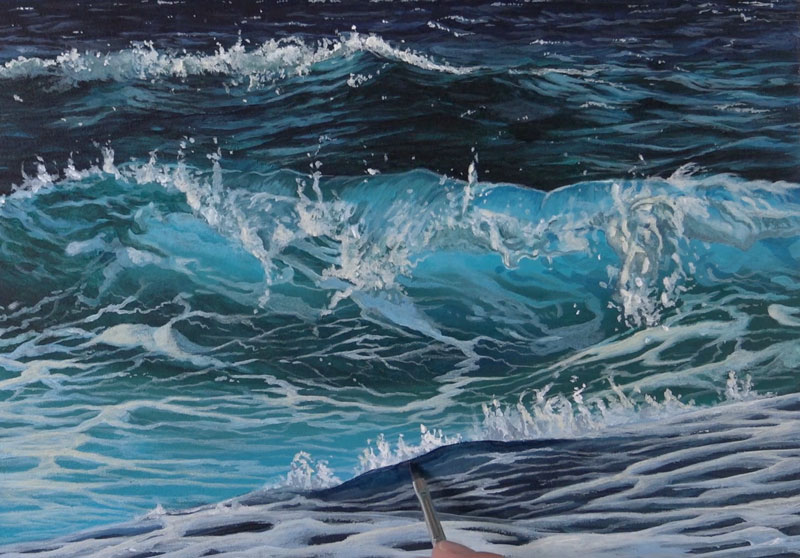
We’ve now patiently worked our way down the picture plane and our painting of waves with acrylics is complete. We’ve been patient, applied brushstrokes in a manner that makes sense with the movement of the water, and matched values as closely as possible. But at the same time, we’ve created a painting that isn’t a duplicate of the photo, but instead a work of art that is unique and interesting on its own.
If so, join over 36,000 others that receive our newsletter with new drawing and painting lessons. Plus, check out three of our course videos and ebooks for free.


Movement – A Principle of Art
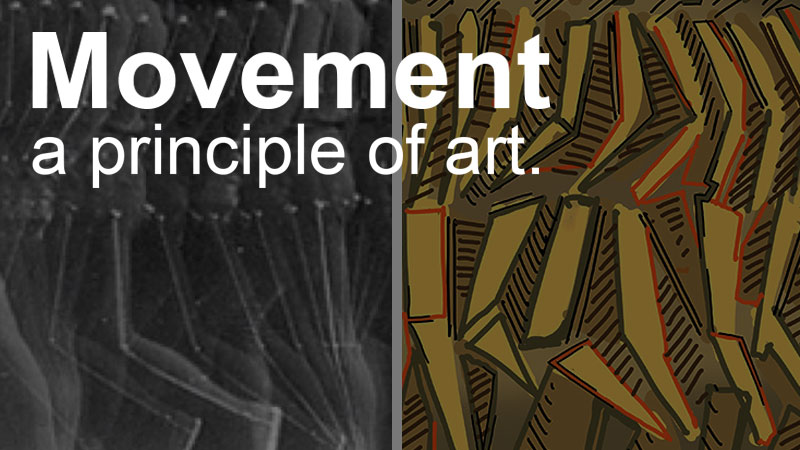
Visual movement is the principle of art used to create the impression of action in a work of art.
Movement can apply to a single component in a composition or to the whole composition at once. Visual movement is dependent on the other elements and principles of art. Rhythm, line, color, balance and space are all examples of elements and principles of art that can play a major role in developing movement in a work of art.
Creating Movement with Rhythm
In the arts, rhythm is most closely associated with music and dance. Musical rhythm involves a beat that is repeated over time. Visual rhythm is created by repeating shapes (a pattern), lines, colors, or any other visual component.
Visual rhythm is everywhere. Rows of windows and columns add rhythm to architecture. Books on a shelf and tiled floors add rhythm to daily life. Each of these examples have something that is repeated.
The repeating element is generally referred to as a motif. To create movement through rhythm, an artwork must have a motif.
If a motif is variable in size and spacing, then the rhythm is said to be irregular. An irregular rhythm feels natural. Trees growing in a forest have an irregular rhythm. Each tree is unique. Some are thin and some are wide, but all are trees.
If the motif is identical in size and spacing it is said to be regular. A regular rhythm feels organized and intentional. Lamp posts along a city street have a regular rhythm – each one the same as the next.
A motif acts as a guide through the composition. Our eyes move from one example of the motif to the next. The amount of space between manifestations of the motif set the tempo or speed at which our eyes move around the composition.
See also: 5 Tips for Better Compositions
Look at the images below. On the left is a photograph by Étienne-Jules Marey. This is a study of a person walking. The motif is obviously the person. The rhythm of the repeating person generates a feeling of movement in the composition. Notice the interesting, angular shapes between each frozen position of the figure.
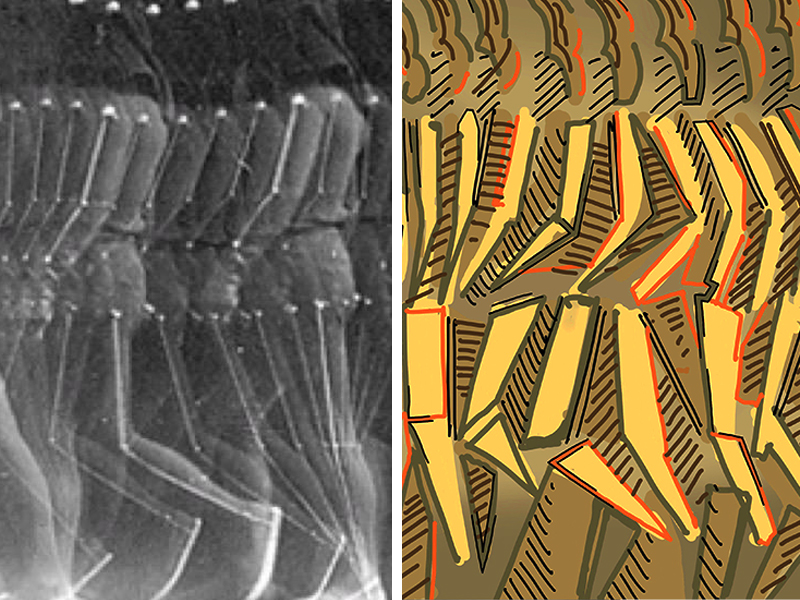
In the drawing on the left there is technically no person. The irregular, angular shapes from the photo are the subject. The progressive, repetition of the shapes generate movement in the composition. The drawing is directly inspired by Marey’s photograph and indirectly inspired by the work of Futurist artists from a century ago.
Futurists meant to capture movement, speed, and power. The Futurists were inspired by the motion of trains, motorcycles, athletes and the like. Futurism began in 1909 and continued through the 1920s. We can learn quite a bit about capturing movement by exploring the work of great futurists including Marcel Duchamp, Joseph Stella, and Giacomo Balla.
Creating Movement with Lines
We can think of lines as being either static or dynamic. Straight lines that are vertical and horizontal feel solid and stable. Most buildings utilize vertical and horizontal edges because of the real-world stability these lines provide when they meet at right angles.
Dynamic lines, on the contrary, do a much better job at implying movement. Dynamic lines are often diagonal to the edges of the picture plane and may zig-zag or become sweeping curves.
Lines can also communicate movement in another way. A drawn line is really the path. The locations where a line begins and ends reveal the movement of the artist’s hand. In art, a line is sometimes defined as a moving dot. Artists apply this unique concept of a line to “trace” the path something is taking through a picture. Look at the image below. The lines tell us that our Karate hero is moving upward and to the right.
Creating Movement with Color
Just as dynamic lines add movement to an otherwise “still” work of art, the dynamic use of color can enhance the feeling of movement as well. Like musical notes, “color notes” are sometimes described as either high or low key. A high key color is both light in value and strong in chroma (intensity).
Conversely, a low-key color is both dark and dull. The high contrast juxtaposition of these color types is louder and busier than a picture of limited key-range. The image below juxtaposes high and low-key colors. The colors and the dynamic lines are working together to impart a feeling of movement.

Implied Movement
Perhaps the best and most straight forward way to show movement in a work of art is to carefully study how things change when in motion. For example, how does a person change when walking versus standing still? Or, how does a person appear when running versus walking. By changing the balance point and posture of a person, the artist can convey a static standing figure or the movement of a person walking or running.
The painting, Spanish Dancer, by John Singer Sargent, clearly illustrates implied movement. See how the dancers head is well left of her feet and not centered over the feet. The relative orientation of the head and feet tells the viewer that she is in either motion or off balance. Gravity is taking her left. She is going to have to keep up by moving her feet or she will fall. Of course, she will not fall because she is, in fact, dancing.
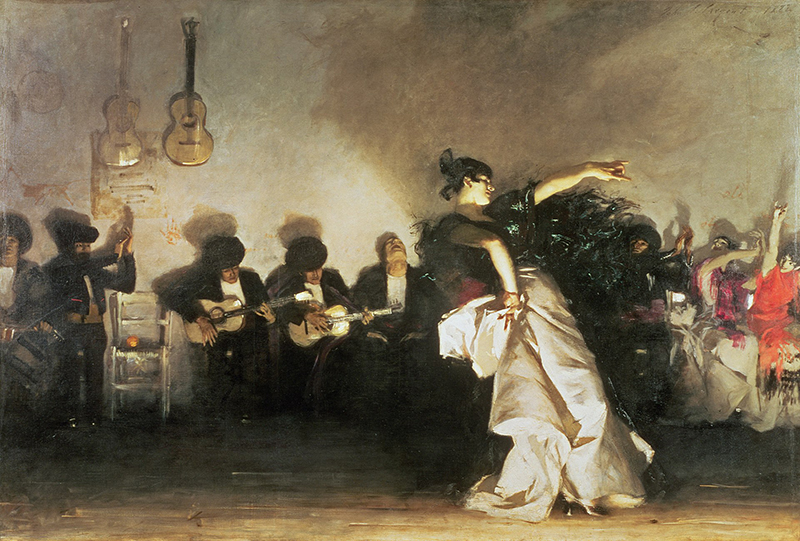
The artist can also imply movement by placing the subject in space in a way that only makes sense if it is moving. For example, a ball floating in the foreground must be moving if the background includes a person in a throwing position. Both the ball’s position in space and the context of the person throwing are enough to imply motion.
Creating Movement with Illusion
A few artists took the concept of compositional movement to a new level in the mid-twentieth century with the development of Op Art. Short for “optical art”, some Op Art artists created movement through repetition and contrast. Having no representational subject, Op Art makes use of the brain’s natural efforts to organize complex visual sensory information. We can think of this approach as overloading the sense of sight. Creating the sensory experience of movement in a still image is engaging and exciting to the viewer. Does the image below feel as though it is moving around a bit? Is it hard to focus on a single spot?
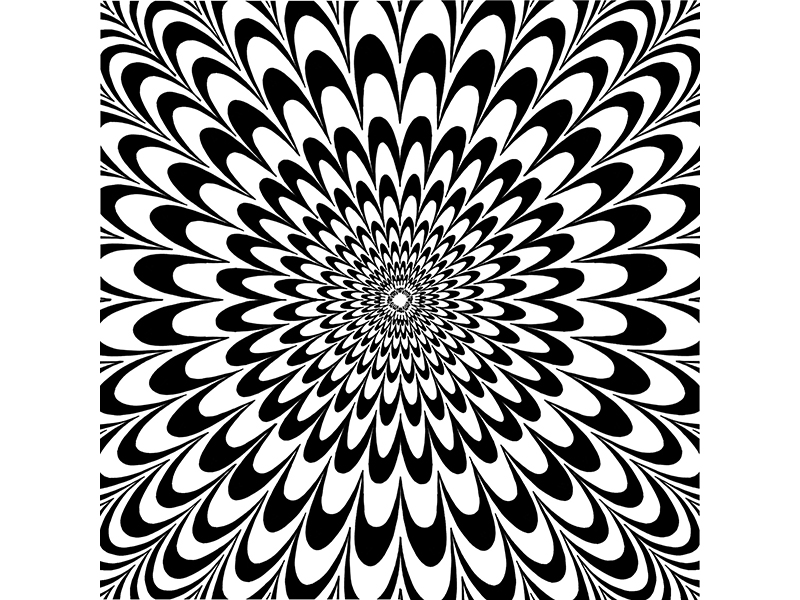
Conclusion
Movement is almost never boring. It adds excitement, drama, and overall compositional interest to art and design. Don’t shy away from subject matter that includes action. Instead, put the concepts described above into action.
If so, join over 36,000 others that receive our newsletter with new drawing and painting lessons. Plus, check out three of our course videos and ebooks for free.
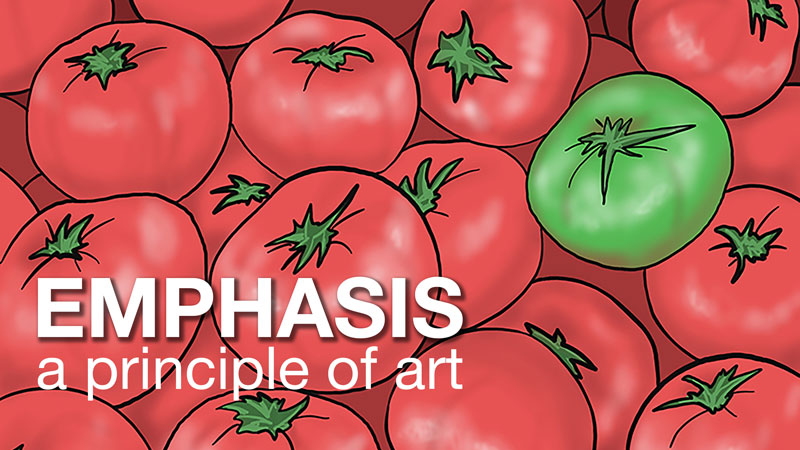

You’ve Voted. The Next Course Is…
At the conclusion of each course that is created for you, I reach out and ask you what you’d like to see developed next. Students are able to vote on course options by participating in a simple survey.
When the survey is complete, the results are analyzed and work begins creating the next course in which you have voted on.
Each course that is developed is lovingly designed and structured to maximize learning. Each course module includes a video and an accompanying ebook that is released to members every week or two until the entire course is complete. Each course that is created is archived and becomes a part of the ever-growing library of courses for members. There are currently 12 courses available covering the following topics…
- 25 Days to Better Drawings
- The Secrets to Drawing
- Pencil Drawing – The Guide to Graphite
- Pastel Landscape Mastery
- The Colored Pencil Course
- Oil Painting Master Series
- The Acrylic Painting Academy
- The Watercolor Workshop
- The Pen and Ink Experience
- Portrait Drawing The Smart Way
- Creative Mixed Media
- Basic Photoshop for Artists
Voting for the next course ended on July 5, 2018 and we have a clear winner. Thanks to all that voted!
And now for the results…
Here are the options that were offered…
- Option #1 – “Oil Pastels”
- Option #2 – “The Charcoal Drawing Course”
- Option #3 – “Line and Wash – Drawing with Ink and Painting with Watercolor”
- Option #4 – “Animals with Pastels”
- Option #5 – “Landscape Painting with Acrylics”
- Option #6 – “Landscape Painting with Oils”
- Option #7 – “Procreate – A Digital Drawing Adventure”
- Option #8 – “Watercolor Portraits”
And here’s a graphical breakdown of the results…
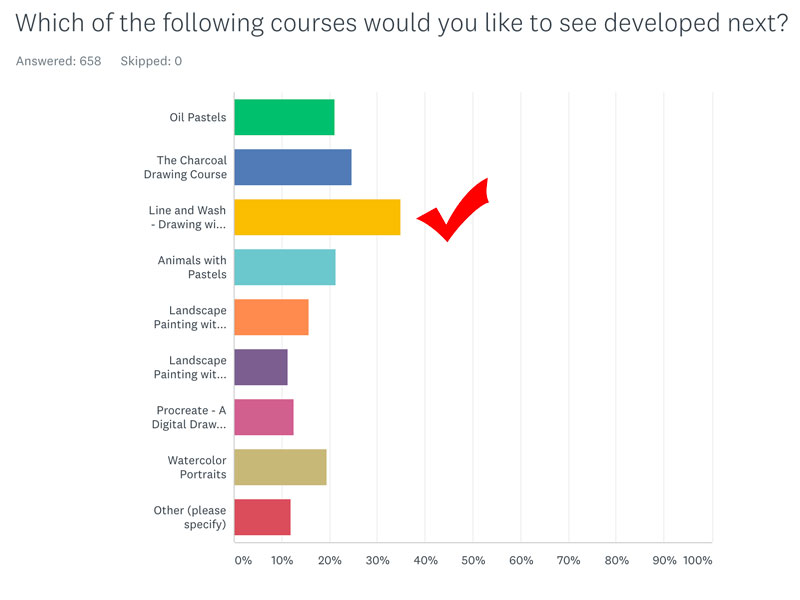
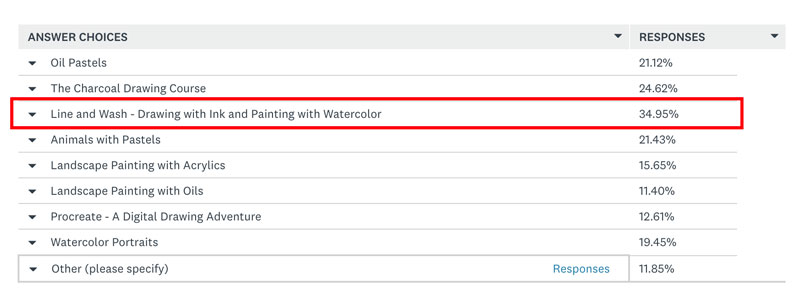
The clear winner is Option #3 – Line and Wash – Drawing with Ink and Painting with Watercolor .
So here’s a preliminary look at what will covered in the next course…
“Line and Wash – Drawing with Ink and Painting with Watercolor”
Course Description: Learn how to combine line drawing and painting as we develop a number of works using ink and watercolor. Like the other courses, this course will cover a variety of concepts and subjects using this specific combination of media.
Concepts and projects that will be covered include (but are not limited to):
- Materials and various surfaces for line and wash
- Simple techniques for drawing with line
- Handling value with line and wash
- Applying watercolor over an ink drawing
- Drawing landscapes with line and wash
- Architectural drawing with line and wash
- Still life with line and wash
- Loose and controlled approaches to line and wash
- Abstracting subjects
- Compositional strategies
I’m excited to get started and I hope you are too. I expect to release the first modules for “Line and Wash – Drawing with Ink and Painting with Watercolor” to members by the end of August, 2018. Of course, as each set of modules are released, I’ll be sure to let you know through the newsletter. If you don’t currently receive the newsletter, you can sign up it for here. (It’s free.)
Additionally, voters could write in an option if they didn’t like the choices that were offered. I was surprised to see how many folks wrote in “pencil drawing”, “watercolor”, “mixed media”, and “portrait drawing”. (We already have courses on these subjects.) You can check out all of our courses here.
Thanks again for voting! I’m excited about the new addition to the course library and I can’t wait to get started. As always, I’d love to hear what you think. Just leave your comment below…
If so, join over 36,000 others that receive our newsletter with new drawing and painting lessons. Plus, check out three of our course videos and ebooks for free.
How to Draw a Frog with Graphitint Pencils
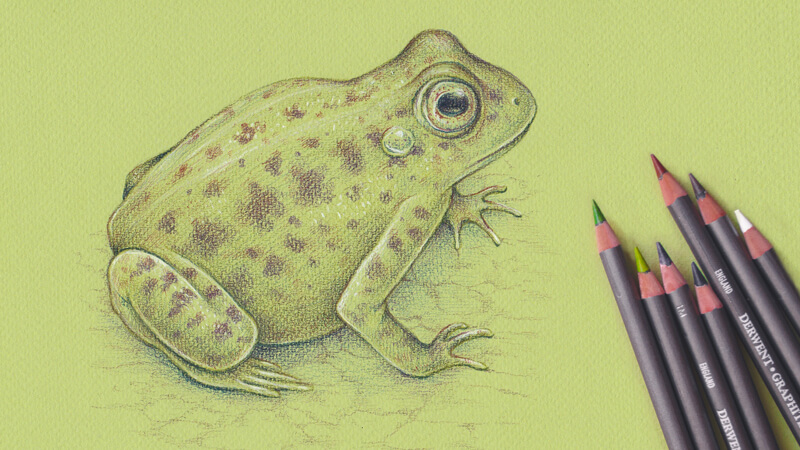
I invite you to a new artistic journey. Today, we’ll dive into the world of sketching with tinted graphite pencils. Along the way, we’ll explore the advantages of textured paper and using toned paper instead of the customary white! We’ll also discuss ways to make your artwork more believable by including cooler and warmer colors.
Also, I’m going to show you some useful tips and tricks on transferring your sketch to your final drawing surface and dealing with any unexpected issues that may arise with this technique.
The main goal of this project is to capture the essence of the subject we’re drawing and creatively use our knowledge of color and light to create a fun drawing!
The Art Supplies for this Project
Let’s first take a quick look at the pencils.
I’ll be using pigmented graphite pencils made by Derwent – Graphitint pencils. I’ll be using several pencils from a set of 24 colors. These pencils are best described as a combination of colored pencils, watercolor pencils, and graphite drawing pencils.
Here are some of the unique characteristics of Graphitint pencils…
- As opposed to ordinary graphite pencils, which are various shades of grey, each pencil is pigmented with color.
- The colors are quite muted.
- The pencils are water soluble – in other words, they can be activated with water, so the colors become richer and more intense.
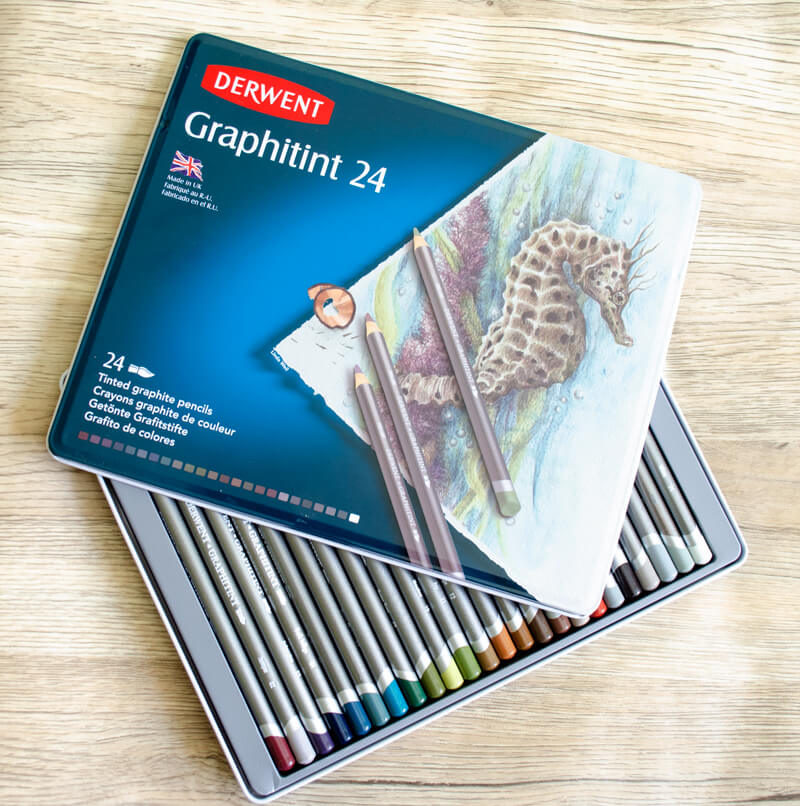
After applying water or “activating”, the mark becomes very difficult, almost impossible to erase (unless you use a rough eraser that removes the paper as well). We’ll need to keep this in mind moving forward.
Although erasing after activating with water is nearly impossible, you can soften the intensity of the covered area by applying water once again and dabbing it with a paper towel or a brush.
The choice of paper also affects the behavior of the pencils. Thin papers tend to soak too much and may create unpleasant wrinkles.
If you think that activating with water may add some charm and vibrancy to your artwork, but the paper you use is relatively thin, it’s still possible to intensify the colors with a slightly wet brush. The paper won’t get too much water and the colors will become more intense. You can wet your brush and then slightly dry it with a paper towel before applying to areas of color. A damp brush will still activate the color.
I personally admire the range of colors that Graphitint pencils provide. There are definitely some wonderful greens and browns to choose from! This palette is perfect for creating animal and nature-inspired illustrations.
By the way, this is one of the reasons why I decided to draw a frog for this project, but we’ll touch upon this topic later.
I’ve chosen just seven pencils from the set to limit myself and keep a sketchy appearance. The names of the colors we’ll use are:
- Meadow
- Ivy
- Ocean Blue
- Autumn Brown
- Juniper
- Cool Brown
- White
Of course, you can choose more pencils for your drawing, if you wish!
Please note that the indications of color on the body of Graphitint pencils may not correspond to the actual colors we get on paper. That’s why it’s useful to test all of your pencils before applying them to an actual drawing.
Below you’ll find a sample of strokes made with the selected pencils. The strokes demonstrate the changes in pressure (lighter at the bottom, heavier in the middle) and the effect created by this variation. The top parts of the color swatches are activated with water.
I didn’t show the White pencil because the strokes are almost invisible in the scanned image.
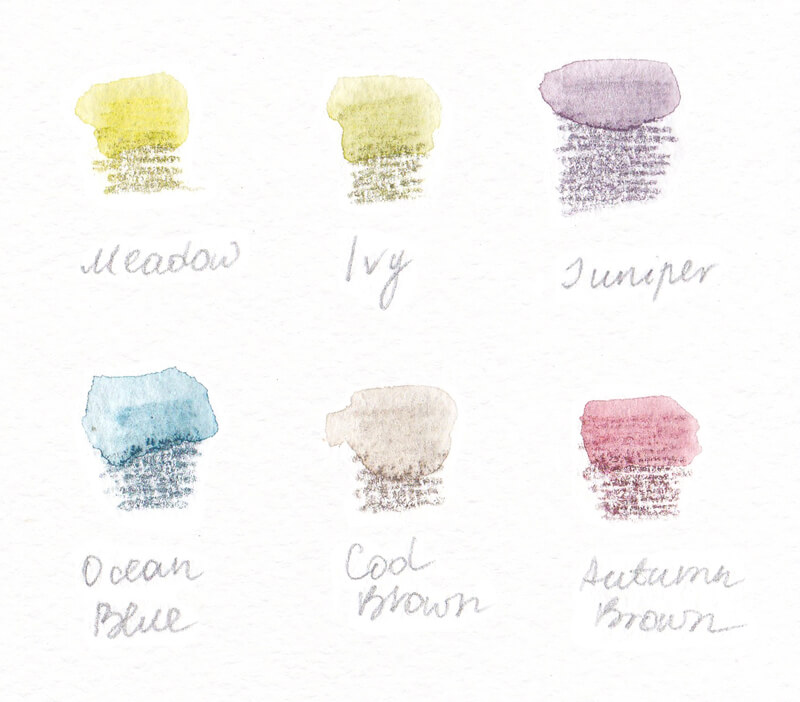
This sample (above) was created on a relatively thick, textured watercolor paper. This sheet had a creamy-colored tint. Just a moment ago, we were talking about the difference in how the strokes look on various types of paper, so I thought that I’d share another example.
The sample below is made on a sheet of thin drawing paper that is more suitable for ink liners, ordinary graphite pencils, or any other dry media. As you may notice, the colors are less intense after applying water (in the upper portions of the color swatches), compared to the samples created on a thicker watercolor paper.
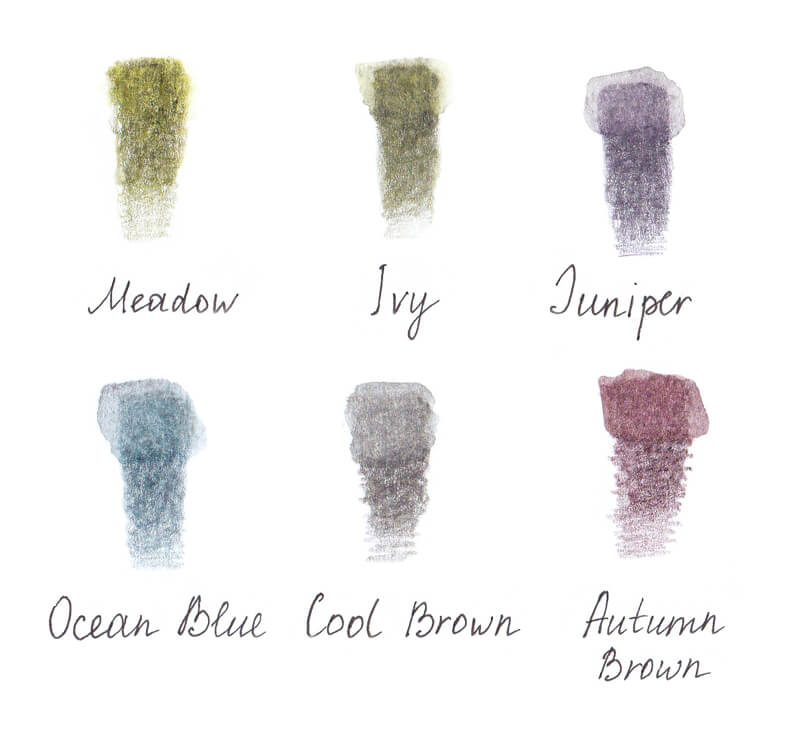
The color of paper affects the perception of the color. In the image below, you’ll find samples made with the same Graphitint pencils but now on green paper.
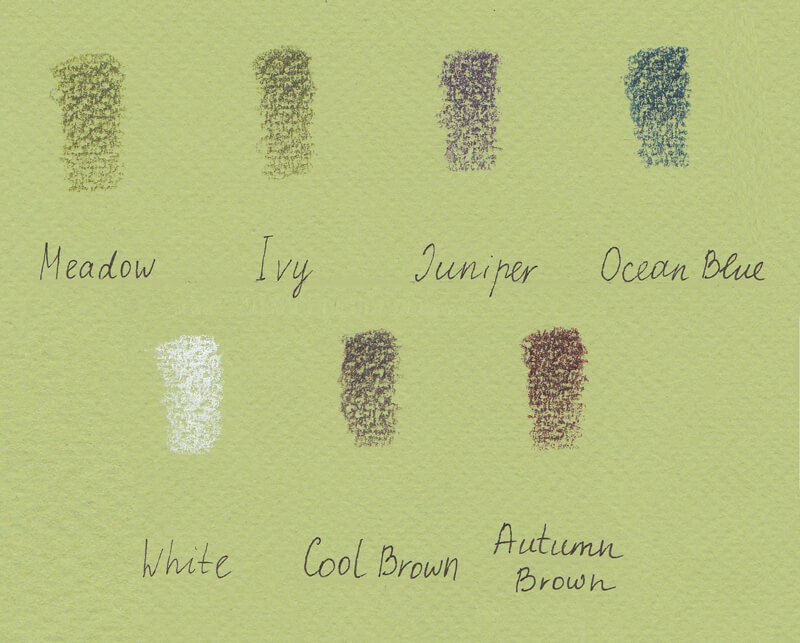
Derwent pencils are soft and require frequent sharpening. That’s why I recommend keeping a mechanical or an electric sharpener at hand.
A kneaded eraser is an excellent tool for softening lines and removing excess graphite. It may be useful to lighten the general contour lines of our final artwork but we’ll discuss this in detail in a moment.
We’ll also need an ordinary graphite pencil for sketching and creating a preparatory drawing.
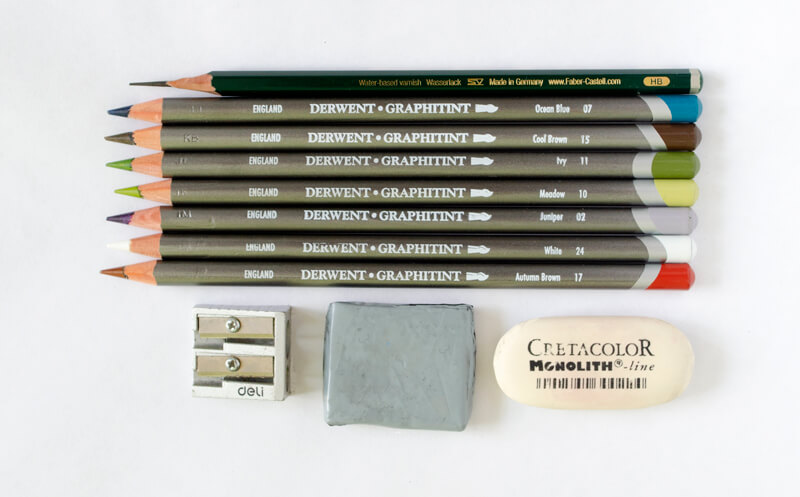
It’s a wonderful idea to have some drawing paper for sketching, just in case you choose to play around with a few ideas.
For our final drawing surface, I’ve chosen Daler-Rowney Murano A4 paper (“Apple”). It has a very pleasant green tint and a subtle texture.
This paper may be found at your local art supply store. You can buy sheets of various colors and try many different options. The possibilities are truly endless!
I’m going to use only a portion of the paper. The remaining areas can be cut off and be used for sample sheets.
The Idea
My goal was to find something that has a greenish, greyish or brownish color. I also wanted a subject that features an interesting texture and has a connection to the theme of summer and nature.
A frog isn’t the only subject fitting the requirements, but I find it especially promising. The combination of the tinted green surface and beautiful, muted colors of Graphitint pencils create a perfect color for the pattern of the frog’s skin.
In this case, we get a great ready-made green background. The tinted paper sets the basic tone, we’ll just add the darker and lighter values!
See also: Six Reasons to Draw On Toned Paper
The subtle texture of this paper produces a sketchy look which works well for this drawing. You can focus on other aspects other than just creating details and convincing textures. That’s why I recommend using this set of art supplies for drawing on location, directly from life. You may just find a real frog to draw!
I’ve already created a couple of drawings of a frog using the same tools – Graphitint pencils and tinted paper. Below you’ll find the examples…
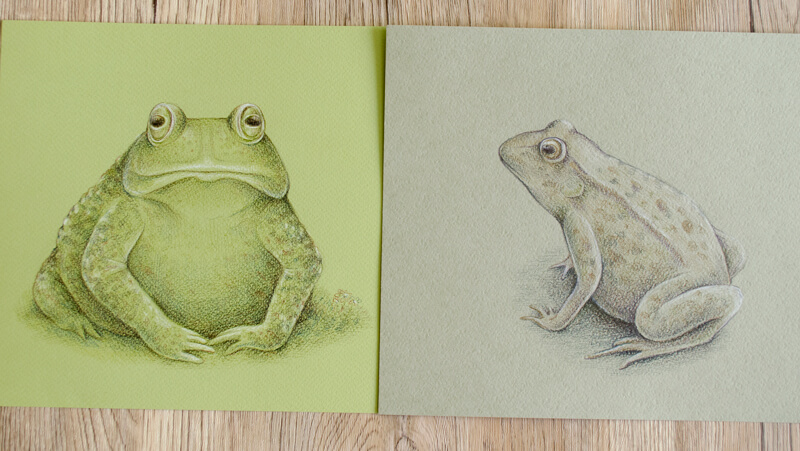
The drawing we’ll create here will make a nice addition to the series that I’ve already begun.
Since I’ve already explored this subject in the past, I can choose the pencils with more confidence. One of the previous artworks was made on paper of this greenish tint (“Apple”), so I already know that warm browns work just fine.
The subtle inclusion of the reddish brown and purple should make this drawing more interesting and different from the existing artworks.
Exploring the Subject and Creating a Final Version of Your Sketch
I start the work with some abstract, conceptual sketching. This step is especially useful if you’re drawing an object that is not familiar to you. In these cases, reference photos may help greatly.
I create quick sketches of poses and anatomy studies using the HB graphite pencil. I’d like to find an interesting pose that is easily recognizable and not too complex.

A frog is a relatively simple animal to draw. It has a large head with big round eyes, a bulky body, and relatively thin limbs. The best approach is to draw the rough shapes first while imagining each shape as a three-dimensional form.
Even if your drawing isn’t perfectly accurate, thinking in terms of three-dimensionality adds to the believability of your art.
When I have a general idea of how my frog should look, I start a final sketch that will be transformed into the tinted graphite artwork.
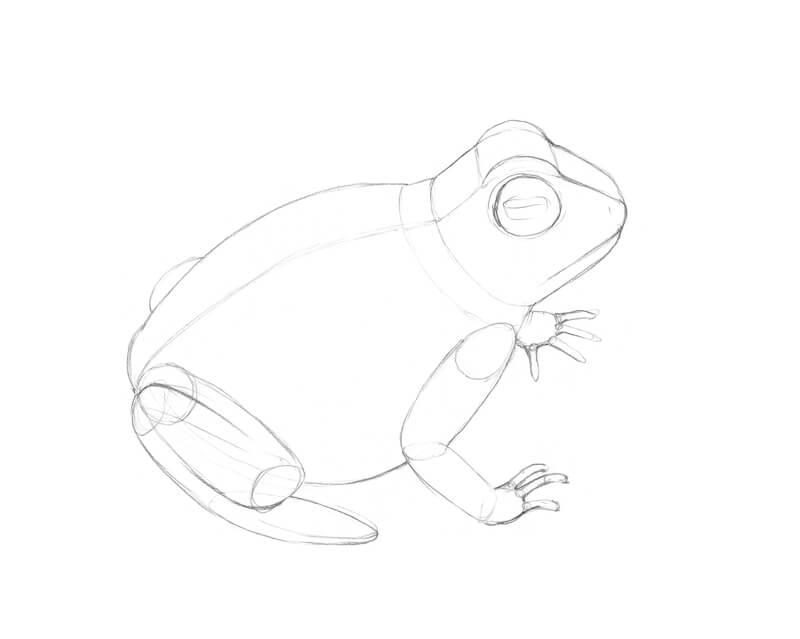
After the general lines are drawn, I accentuate the significant contours and erase the marks that are no longer needed.
I also add a pattern of the frog’s skin. This allows me to consider where I should place the spots in advance.

The final sketch is complete, but how do we transfer it to our green paper?
The first option is to redraw it from scratch. However, the lines should be light and limited. That’s why this method may not be the best for everybody.
In the next part of the tutorial, we’ll explore a couple of ways to overcome this obstacle.
Basic and Advanced Tracing Tips: How to Transfer the Sketch to a Clean Sheet of Paper
There are several ways to copy a line drawing if we need to duplicate, improve, or create a new artwork.
1) Use carbon paper – This is a special paper that you may be able to pick up at a local craft or stationery store.
Put this paper under your sketch and place your finial drawing paper underneath the carbon paper. Outline your sketch once again on top of the existing lines and you’ll get a nice transfer on the final paper.
Usually this kind of paper creates a print that consists of dark lines, but there are also colorful copying paper variations (yellow, red, green, etc.).
The main advantage of carbon paper is the ease of use. The main drawback is that sometimes it leaves unpleasant marks that are difficult to erase and conflict with the materials you’re applying.
2) Use a light board or window – Another great way to transfer your line drawing to another piece of paper is using a window pane during the day or a light table.
First, put a new sheet of paper above the sketch and place them on top of the plane that lets the light go through. This makes the lines visible and you can trace them.
This method works perfectly if the light is strong enough and the upper sheet of paper is not too dark or too thick. In my case, I have a great lighting but my green paper is quite thick and its tone makes the lines of the sketch barely visible. Alas, I have to find another solution!
3) Punching – Let’s talk about a way to trace a drawing called punching or denting (however, I feel like there may be other names for it).
Punching works best with thick textured paper; you put the paper under your sketch and outline the drawing once again, applying heavy pressure. It’s possible to use something like a stick with a sharp tip or a ball-point pen with an empty cartridge to trace the drawing.
After you’ve finished outlining, remove the sketch and study final surface. If the pressure on the tracing tool was heavy enough, you’ll see some dented lines. Most probably, they will be barely visible, which makes this method suitable for very demanding situations and creating a delicate copy (for example, if you need an extra clean outline with no graphite marks).
Please note that sometimes the dents you get by using this tip may cause some issues. For example, softer pencils may cover all the areas but not fill in the indentions.
If you prefer having a defined underdrawing before diving into the process, it’s possible to the redraw the drawing once again, following the pattern of dents. Or you can leave the dents as they are and proceed to creating applications of any medium you are going to use!
4) Graphite transfer – There is another method left. I’ll share my process of making a sort of copying paper with improvised means.
The first step is to turn over the paper with your final sketch; then, apply a layer of soft graphite to this side.
In the image below, you can see how I mimicked the contours of the frog, using the 4B pencil. Softer lines work better because they leave darker marks, but you can use any (preferably soft) graphite pencil you have.
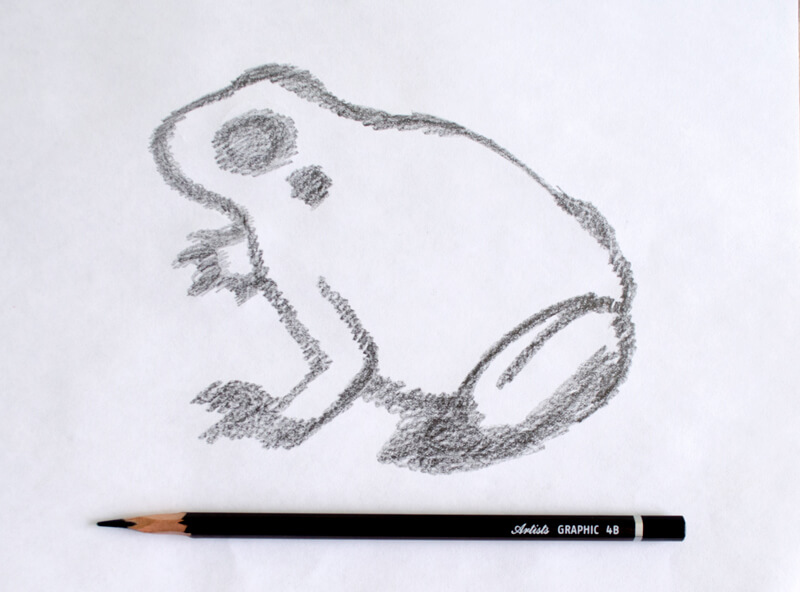
I applied the graphite stokes only to the contours because they are visible through the back of the paper. If your sketch is drawn on thick paper, you can just cover the whole area.
Now flip your sketch once again. Your drawing (the frog) should be on top and the graphite strokes on the underside. Put the clean copy sheet (in my case, it’s the green paper) underneath and trace the necessary lines using any tool you like. I used a red pencil to make new lines that contrast so I know where I’ve already made the outline.
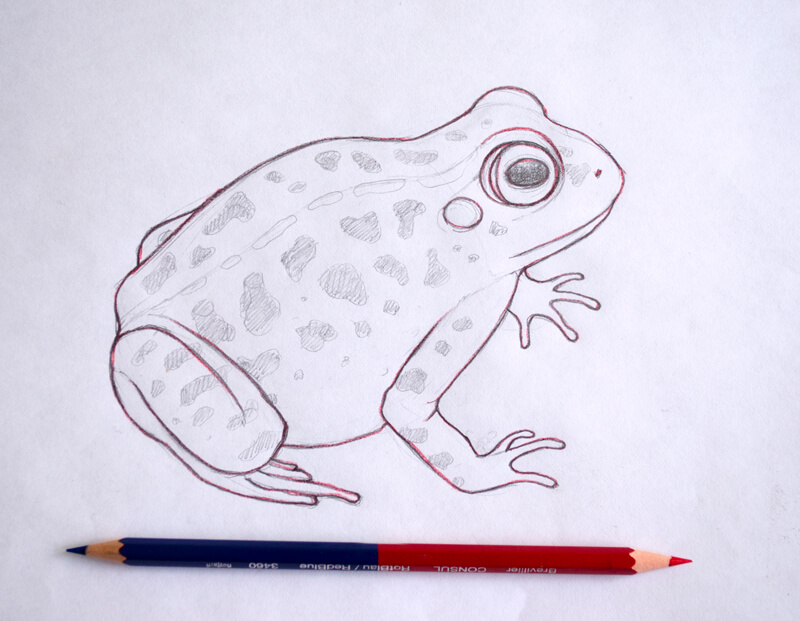
It works like magic! After you’ve finished tracing, you get a nice imprint on your clean copy paper.
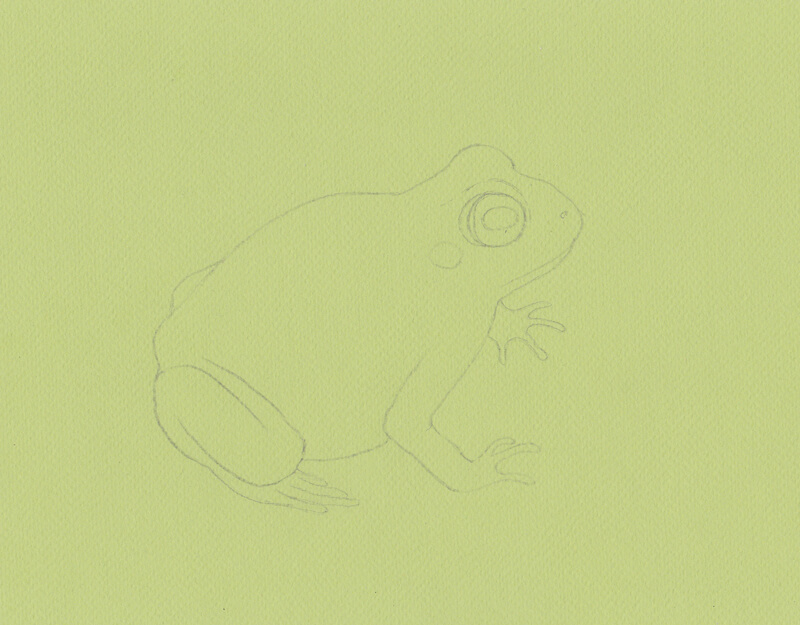
The resulting outline isn’t as elaborate as the preparatory sketch. The lines are slightly rough, but that’s not a problem. We now have something to work with – without guessing where the contours should be!
I didn’t copy the pattern of the frog’s skin in order to avoid overloading the underdrawing with information. My sketch will be at hand, so I’ll be addressing it any time I need.
Let’s proceed to the fun part – drawing with tinted graphite pencils!
How to Draw a Frog with Graphitint Pencils
First, I soften the graphite marks with a kneaded eraser. If the lines are too dark, they may conflict with further applications and create a ‘muddy’ feel.
With the Meadow pencil, I create a base for our tinted graphite sketch. I accent the contours of the frog’s body and create the illusion of a three-dimensional form by varying the pressure placed on the pencil. Since the back of the frog catches more light, I apply less pressure here.
I keep the pencil covering relatively light and transparent. This preserves the tooth of paper for the further applications. I mix application techniques, combining light hatches and soft circles that accentuate the texture of the paper.
It should also be noted that my pencil is sharpened, but not to a precise, pointed tip. I allow it to be slightly dull to produce smooth, soft strokes and cover more surface with less effort. However, feel free to sharpen your pencils as often and as much as you find necessary.
Meadow works so well with this tint of paper – it feels like they are designed to be together!
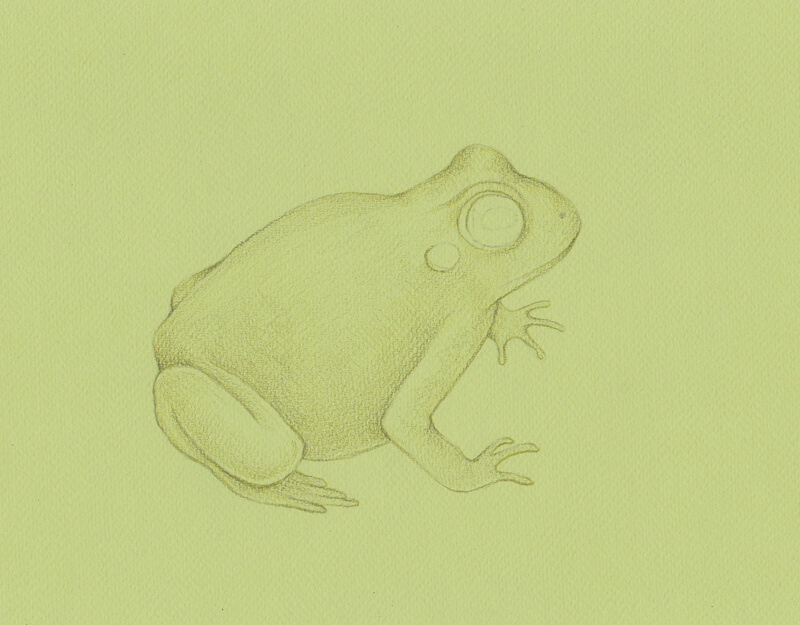
Now I apply Ivy to make the frog appear more solid. I accentuate the darker areas of the frog’s body, making sure that the new strokes blend smoothly with the existing ones.
You don’t necessarily need any blending tools. Just make your pencil applications soft and keep the pressure from light to medium.
The texture of the paper becomes clearly visible and adds to the believability of the frog’s skin texture.
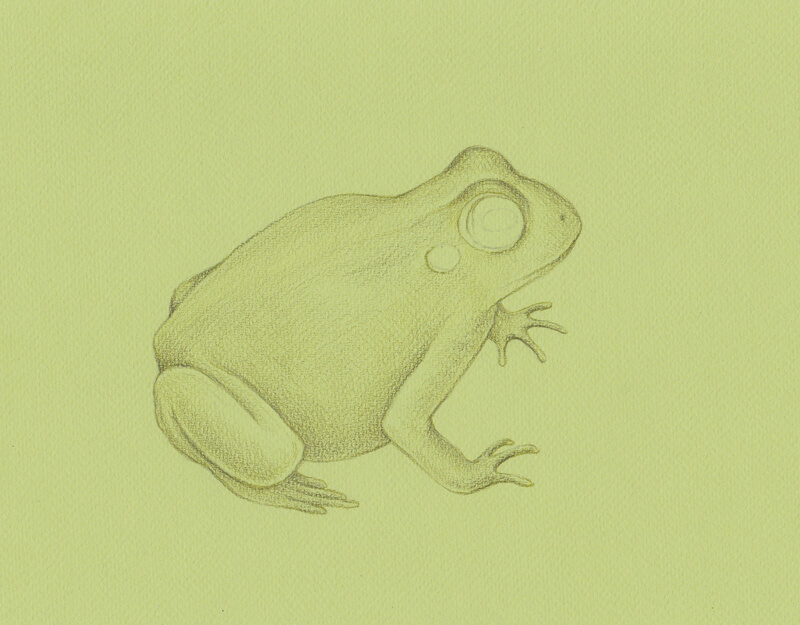
It’s time to add some highlights and reveal the lighter values. With White, I create a few highlights in the frog’s eye, on the head, and back. It’s also a great idea to add a few highlights to the limbs with this pencil.
I use both hatching and dots. Graphitint pencils are soft which makes creating dots (and short marks in general) an easy and enjoyable task.
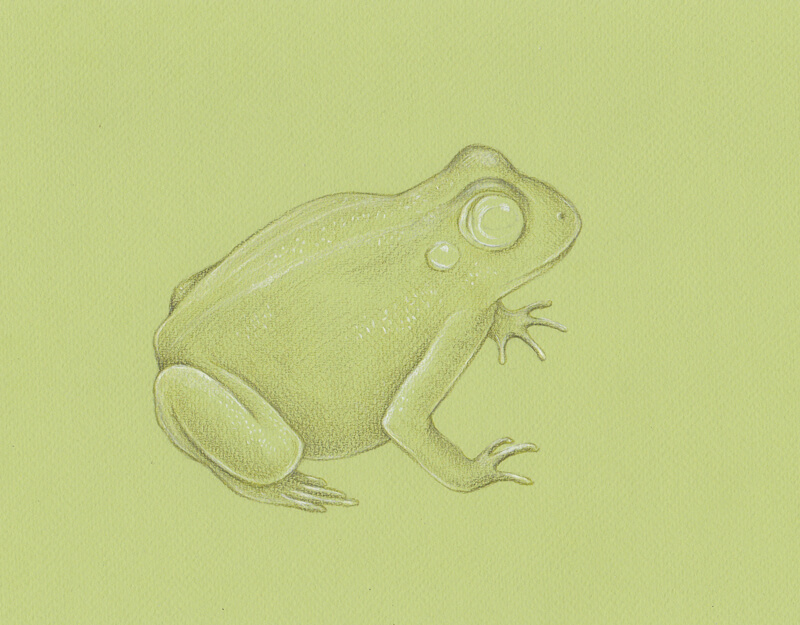
I apply some dark blue strokes with Ocean Blue. This color will serve as the darkest pencil for this drawing.
I avoid using black lines. Dark blue, mixed with other colors, will be much more interesting than just plain black.
I draw the pupil with Ocean Blue, accent the contours of the body and create a hint at a drop shadow. It’s important to be flexible with the pressure you apply.
I add some strokes with a very light pressure to the back of the frog. The back should reflect light from above (the sky) and it often has a blue nuance, especially in the late spring or summer.
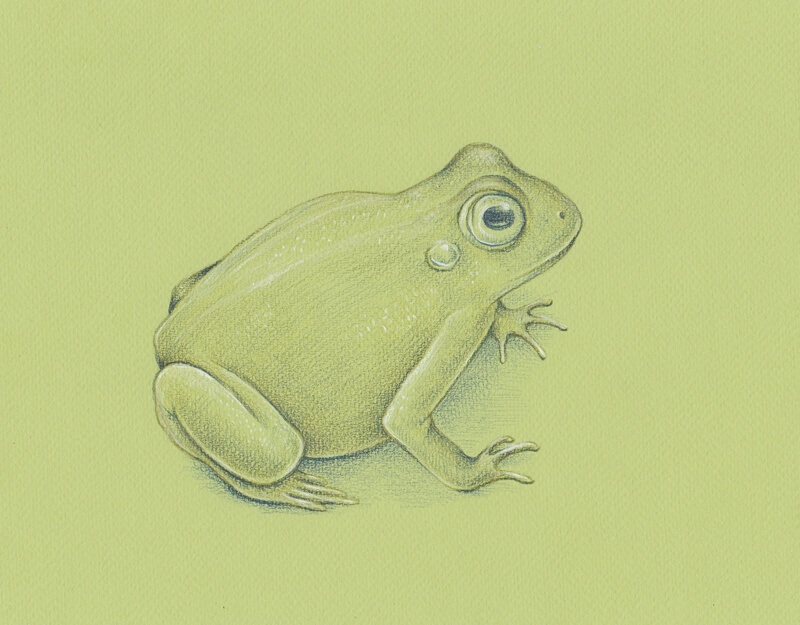
I use both Autumn Brown and Juniper to create beautiful spots on the frog’s skin. Since we’re addressing the details, I sharpen the pencils to get a precise tip.
At this step, it is useful to use the preparatory sketch as a reference. We can use it to transfer the pattern of the spots.
I use Juniper, which is a purple shade, mostly in the bottom part of the body, and Autumn Brown, which is reddish brown, in the upper part. Bigger spots feature a combination of both colors. I apply soft, smooth strokes in a circling technique.
With Autumn Brown, I also add some dots and short hatches to the eye of the frog to make it more interesting. To add depth to the pupil, I cover the existing dark blue applications with this reddish brown hue.
To make the cast shadow more varied, I lightly touch it with Juniper.
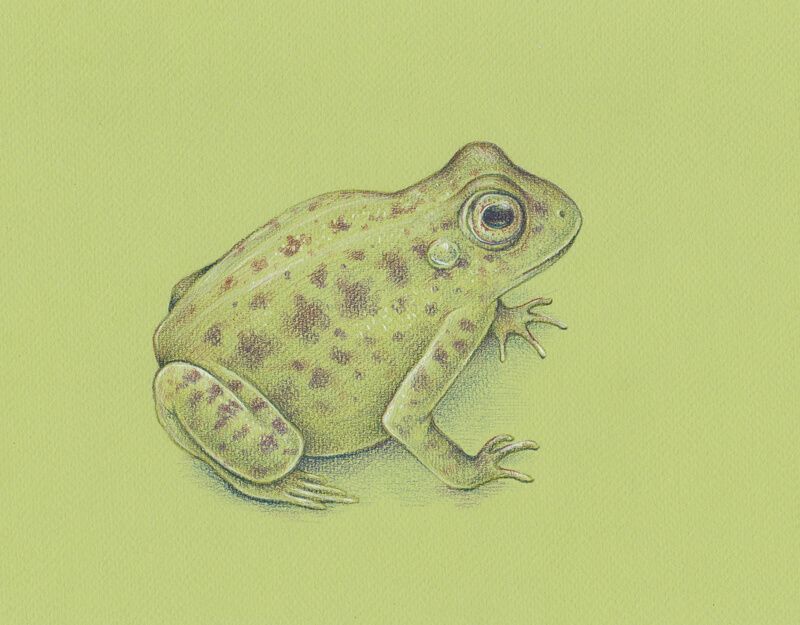
I use Cool Brown to draw the stones under the frog. I don’t want the pattern of stones to be too stark, so I avoid single lines. Instead, I develop the shadows between the stones with soft pencil strokes.
I also add dots and short hatches to the belly and the limbs of the frog. The light that is reflecting from the ground or soil often leaves a warm, brownish tint on the objects. Having the stroke of the same color on the frog and in its environment helps to unite the artwork and make it more harmonious.
Our quick Graphitint sketch is complete!

The Conclusion
It was a wonderful adventure! We’ve covered a lot of topics: working with tinted graphite pencils, several options for transferring a drawing onto another sheet of paper, playing with colors to make the artwork more believable. I hope you’ve enjoyed the process and become inspired!
It is said that a quick sketch a day may make life a little happier. This tutorial is an example of how something can be easy, expressive, and fulfilling at the same time. You need just a sheet of paper and several pencils!
Thanks for your attention! Have fun and please share your creations!
If so, join over 36,000 others that receive our newsletter with new drawing and painting lessons. Plus, check out three of our course videos and ebooks for free.