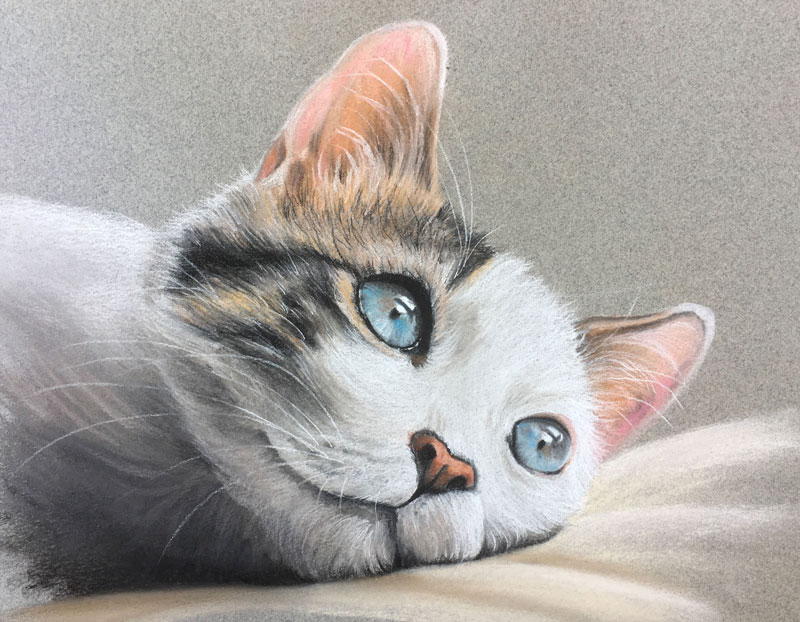
In this pastel lesson, we'll take a look at drawing a cat. Applications are primarily made with pastel pencils but for larger areas, we'll apply broader applications with traditional pastels. Pastel pencils allow the artist to develop a high level of detail without sacrificing the softer appearance of pastels.
Pastels, loved by artists for their painterly appearance, soft colors, and immediate results, come in several different forms. Traditional stick pastels are chalky and dusty but can cover surfaces quickly. Blending is a breeze with a finger, blending stump, or chamois. Colors are easily layered.
Despite these wonderful characteristics, some may find it difficult to control the medium. For those that desire quite a bit more control, pastel pencils are an attractive option.
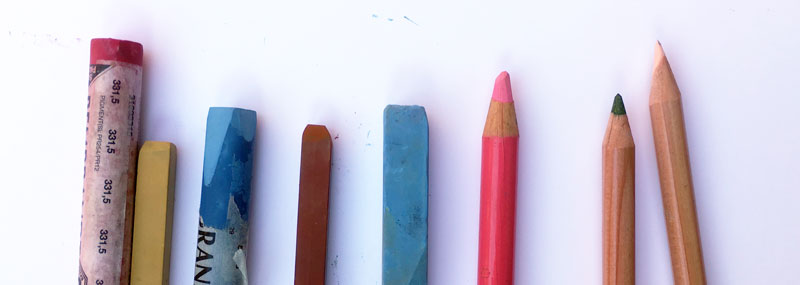
Just as the name implies, pastel pencils consist of the pastel medium encased within a wooden shaft. Because they can be sharpened to a fine point, details are easily achieved within a drawing. And just like with traditional stick pastels, colors are easily blended and layered.
When used together, traditional soft pastels and pastel pencils allow the artist to cover large areas without sacrificing precise details - or the painterly appearance of the finished work.
Since pastel pencils share many of the characteristics of traditional soft pastels, the surfaces in which they are applied are the same. Textured papers, with a bit of tooth, allow for multiple layers of the material. Although heavily textured papers are available, those with a medium tooth tend to perform the best.
Canson manufacturers a suitable surface for drawing with pastel pencils. Their Mi-Teintes pastel paper is available in various tones and features a heavily textured surface as well as a slightly smoother one. The smoother surface may be the best option if details are of the highest importance.
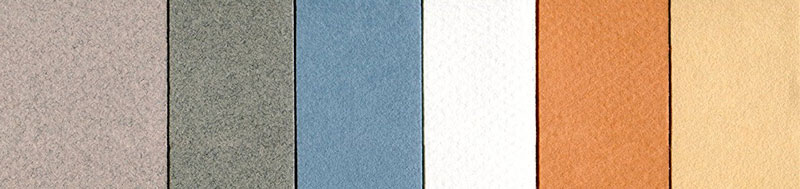
Although working on white surface may be your first instinct, toned papers typically provide the artist a bit of contrast as the colors are applied. This helps the artist to better evaluate the value relationships much earlier in the drawing process.
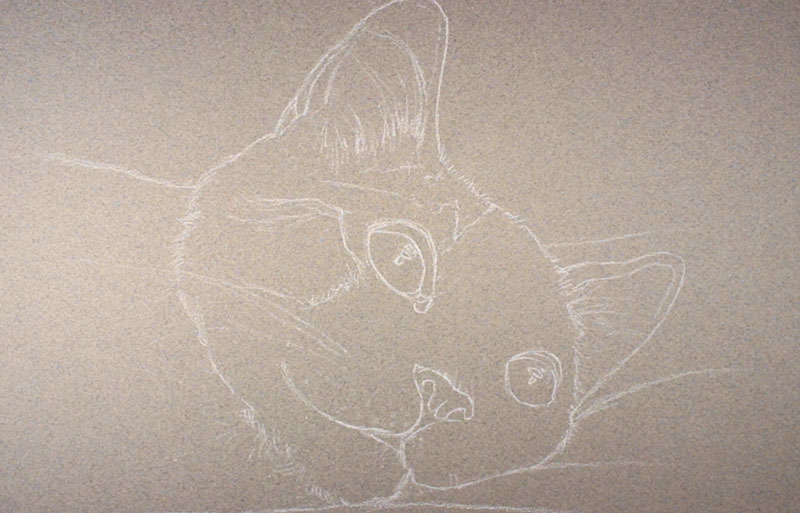
We'll start with a contour line drawing of the cat with a white pastel pencil. Graphite is avoided since it is likely to mix with the subsequent pastel applications producing unwanted grays. (General's Pastel Pencils are used in this demonstration.)
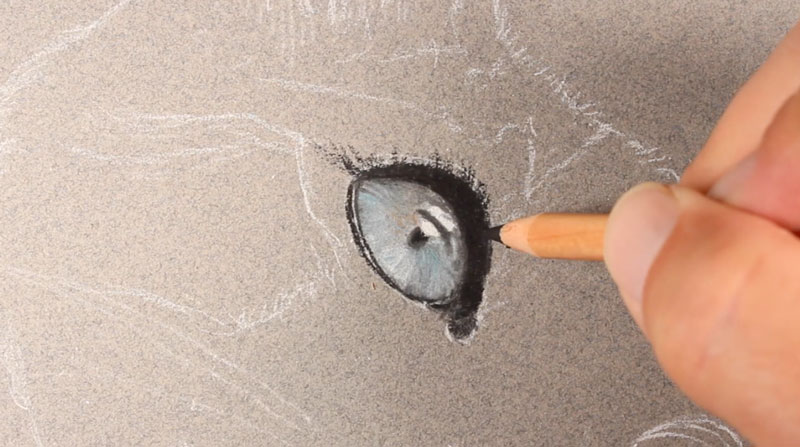
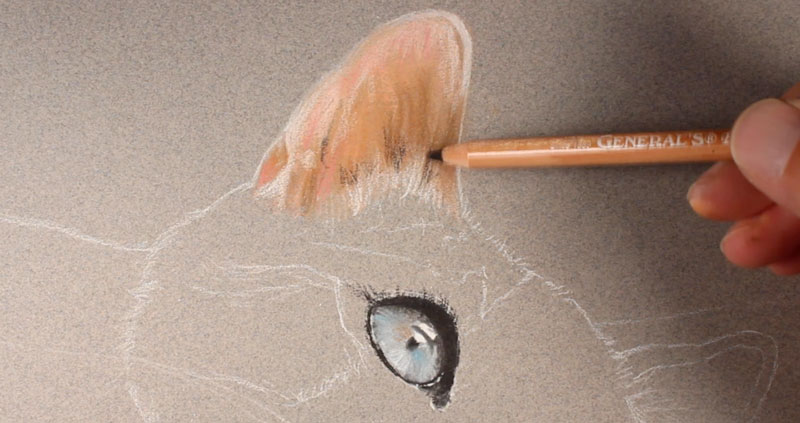
Since the eyes of the cat will become the focal point, we'll start with pastel applications in this location. Light Blue is applied to fill in the shape before applying a Dark Gray, Van Dyke Brown and Cobalt Blue over the top. Highlights are filled in with a heavy application of white and the lower portion of the eye is lightened. Black is used for the dark areas around the eye and for the pupil. A blending stump is used to blend the colors in areas resulting in a more natural appearance.
With the eyes complete, we'll move on to addressing the ear. Since we have a bit more room to work, we'll fill in the shape with soft pastels before applying pencil applications over the top. A flesh color is applied first along with a bit of Burnt Sienna. These colors are blended with a finger.
Burnt Umber is used to darken the lower portions of the ear while white is used to lighten the upper portion. A pink pastel pencil is used to add a "pop" of color, before layering white pastel pencils applications to strengthen the highlights. Light Flesh, Black and White are used to pull up marks from the lower portion in order to communicate the fur within the ear.
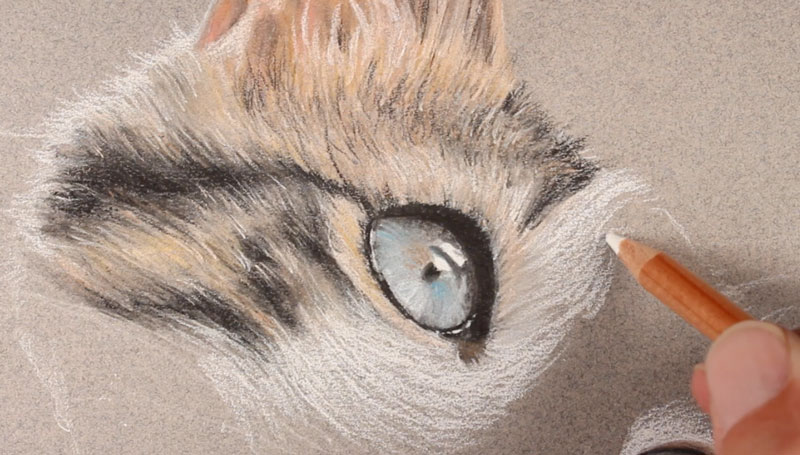
The darker fur on the upper left portion of the face is speckled with several colors. Yellow Ochre, Light Flesh, Black and White are all applied here.
Strokes are pulled to mimic the texture of the fur and then blended with a blending stump, before applying more deliberate strokes over the top. Strokes are also pulled so that flow with the direction that the hair grows in order to help communicate the form of the head.

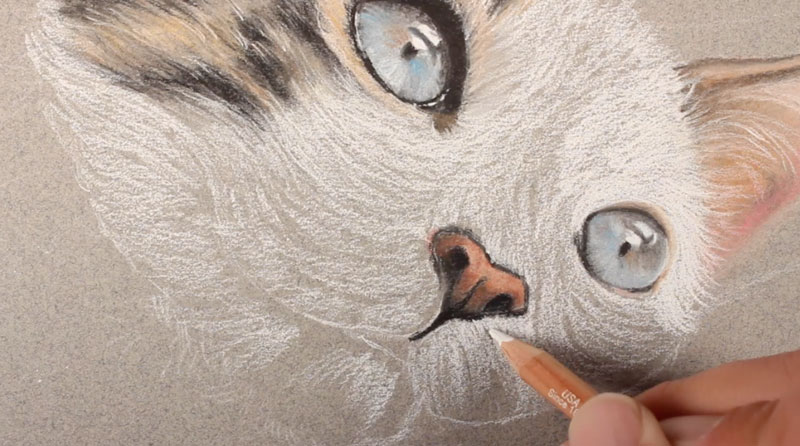
The nose is addressed with an application of Sanguine to fill up the shape before darkening areas with black. For the lighter upper portion of the nose, Light Flesh and a touch of White is applied.
Black, Gray, and White are applied to the body of the cat and just underneath the head to create a transition of value. These applications are made with traditional pastels and blended with a finger to smooth the transition.
Gray is applied over the darkest areas at the bottom of the body to indicate a bit of fur. Over the top of the midtone areas on the lower portion of the face, Light Flesh and White is applied with pastel pencils.
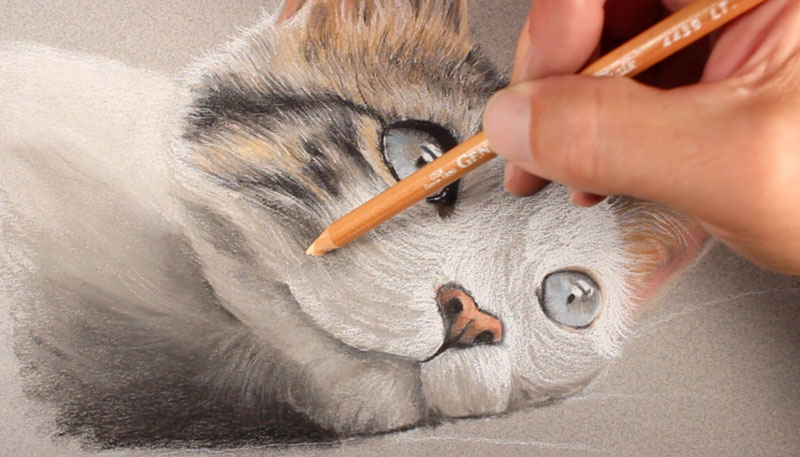
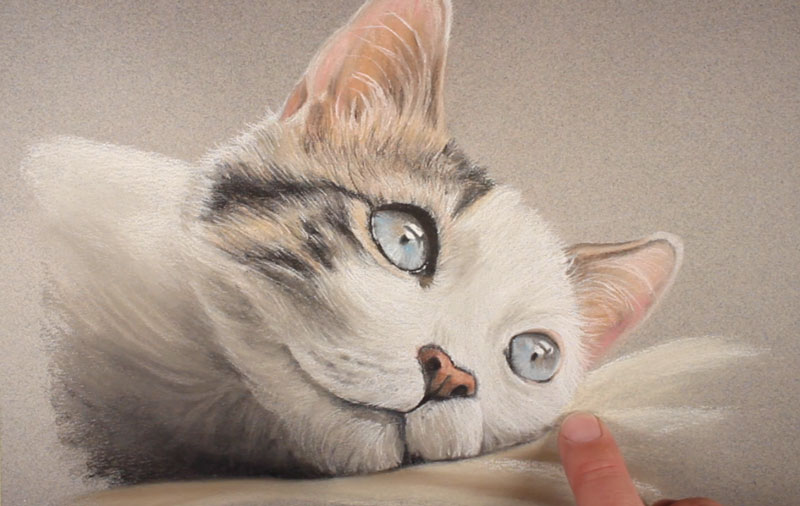
After blending the rest of the face and adding a few darker spots for the whiskers, color is laid underneath the cat. A Cream pastel is applied and blended. Burnt Umber is used to create a soft shadow while White is used to indicate a subtle highlight.
Additional stronger strokes are made with the White pastel pencil on the lower portion of the face to highlight the fur while the shadow underneath the cat is strengthened with black.
With a sharpened White pastel pencil, we can pull out longer, deliberate strokes for the whiskers.
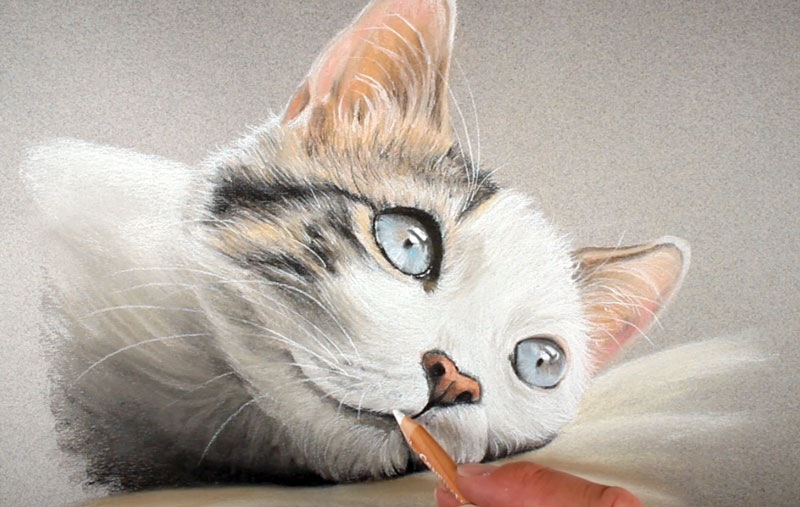
A few darker and shorter whiskers are also added to finish the drawing.