
Pastel is inherently a soft medium. Colors and values are easily blended and transitions are easily achieved. Edges are softened with a touch of the finger or blending stump. This "softness" makes pastel an excellent choice for drawing animals, portraits, and landscapes. The finished result often resembles a painting.
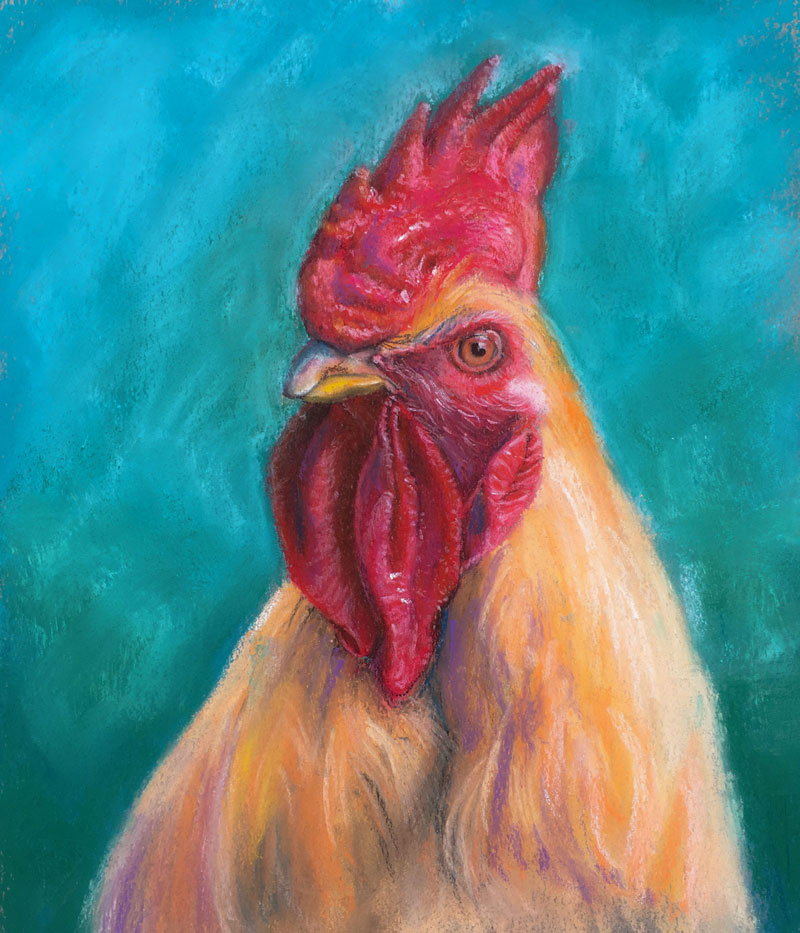
But there are other appealing features of this versatile medium that can be exploited to create exciting works - even when mundane subjects are chosen.
When pastels are used, experimentation with colors is easy. If a color doesn't work after it has been applied, the artist can simply layer right over the top. Bold colors can be applied with deliberate strokes over softer applications to create a bit of "pop" and emphasis.
We can build a drawing - starting with softer and looser applications before layering more precise applications over the top.
Pastels are powdery and loose by nature. While some may shy away from the medium for this reason, others will undoubtedly find it an advantage. Because of its qualities, pastel can be applied to cover large areas of the picture plane in a short period of time. And as mentioned before, pastels are easily blended and smudged.
But even though pastels are powdery, they can be used with control. It's important to recognize the order in which a pastel drawing can be developed in order to take full advantage of the medium.
For those of us most accustomed to precise drawing mediums such as graphite, pen and ink, and colored pencils - pastels may seem like a medium that is difficult to control. The key is recognizing that pastel drawing begins loose and progressively becomes tighter as it develops.
The artist may lay down broad applications of color - filling in basic shapes with a base color or the local color of the subject. From there, values can be developed through layering. As values and color intensities are adjusted with each layer, the drawing becomes more refined and details begin to develop. If we begin with the details, instead of the overall color, we may run into difficulties with this medium.
(Some of the following links are affiliate links which means we earn a small commission if you purchase at no additional cost to you.)
Toned papers are generally preferred for pastels since they help the artist to determine contrast in values and colors at an earlier stage in the process. When working on a white surface, evaluations on tone and color must be made after initial applications are in place.
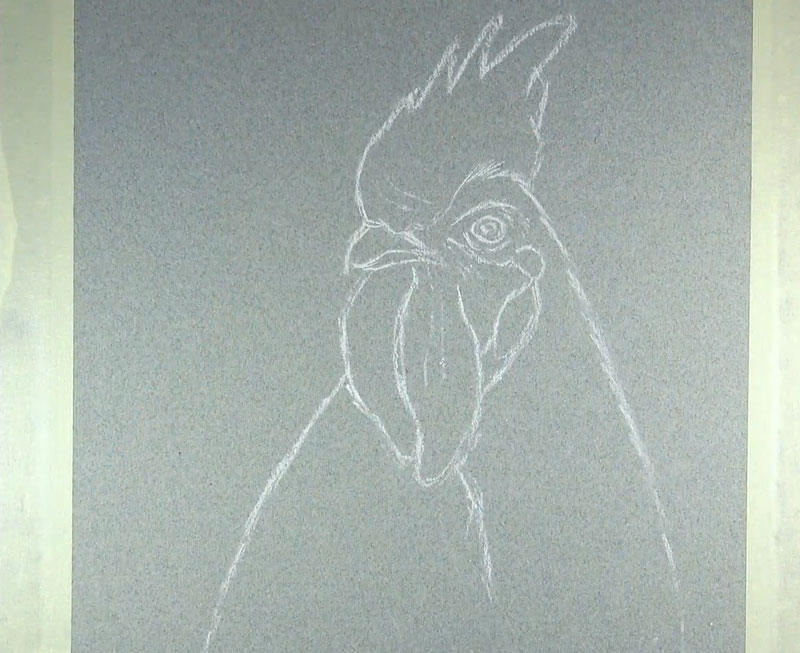
We'll begin here with a light sketch of the contours of the rooster on Canson Mi-Tientes pastel paper. The smoother side of the paper is used. The sketch is created using a white pastel pencil.
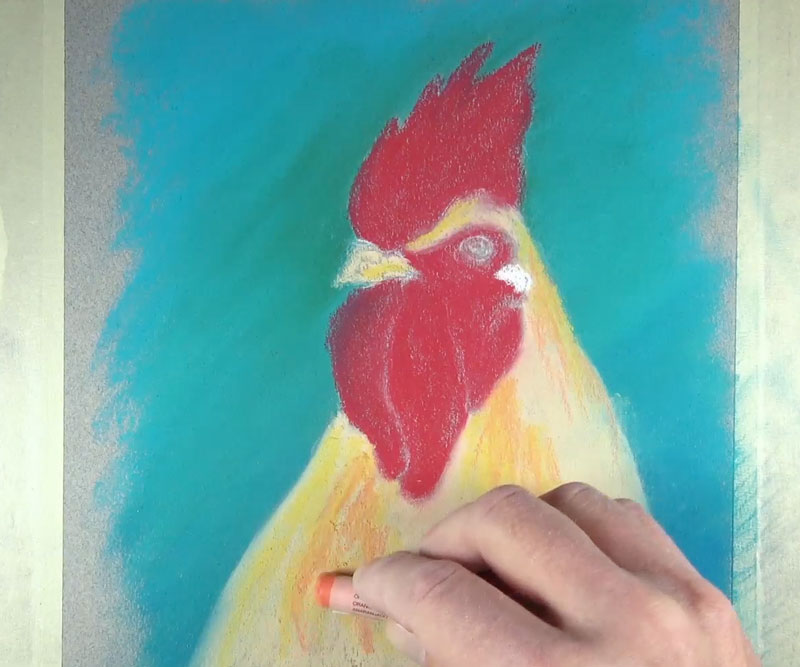
Behind the rooster, we'll apply a light cool blue, a bit of blue-green around the head, and a darker blue towards the bottom. These colors will serve as the background for now, but before the drawing is complete, the background will be developed further.
The base colors of the rooster are laid in next. A deep red is applied to the comb, around the eyes, and the waddle. Cream is used for the body and beak. A touch of white is added just underneath the eye and hints of orange and Yellow Ochre are applied over portions of the body.
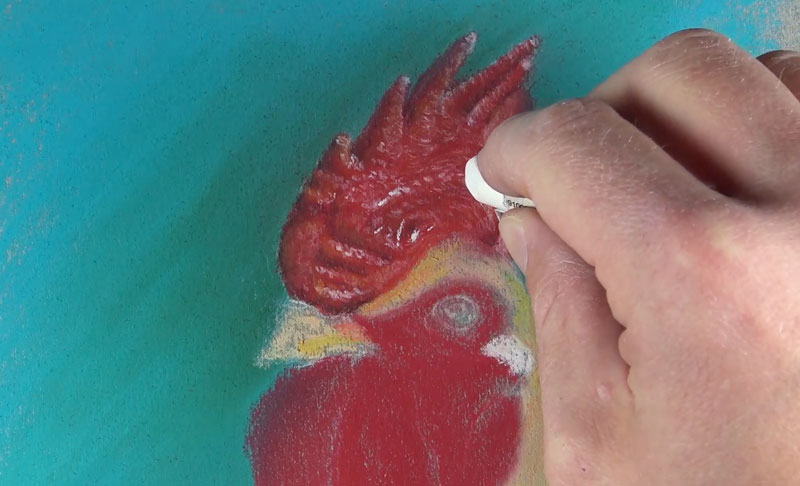
Details are developed on the comb. A black pastel pencil is used to establish a few of the shadows before applying reds over the top to tone down the contrast. The texture of the comb and highlights are addressed with varying intensities of white applied with a pastel pencil. Highlights are strengthened with a pastel and "pops" of color are added with a bit of light pink.
With much of the comb developed, we'll next move down to the beak and face of the rooster. The beak is developed by layering various colors including, blue, yellow, orange, light gray, and even a light violet. The shadows are added with black before these colors are layered on. Burnt Umber is applied to indicate a few imperfections.
The eye is colored with a black pastel pencil initially, leaving a small space for the highlight. The highlight is added with a strong application of the white pastel pencil. Orange, red, and Burnt Sienna are layered on the eye to make the "red" stand out from the reds around it. Darker values are then developed around it with black, red, and white.
Shadows on the waddle are addressed with black, then purple for color. Adjustments to the value are made with layered applications of red and white.
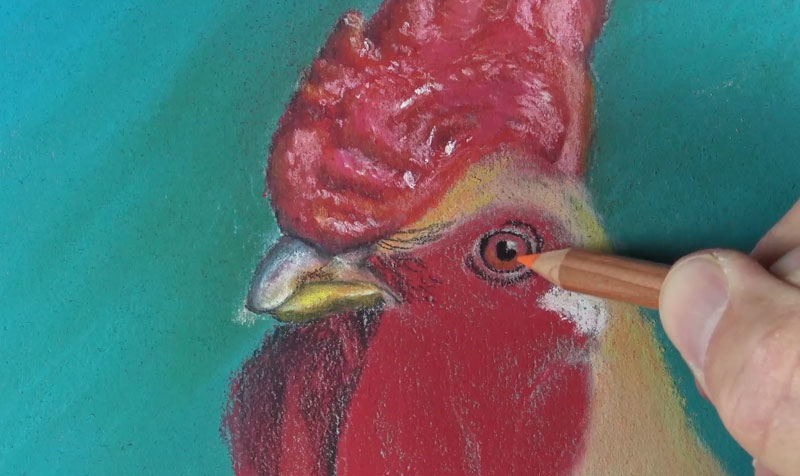
Small hairs around the eyes are added with a light peach pastel pencil. Highlights are strengthened with applications of a white pastel pencil. Bits of light pink are added for highlights on the waddle, while shadowed locations receive an application of purple.
The body of the rooster is developed with multiple applications of orange, Yellow Ochre, Cream, and White. Darker areas are defined with the black pastel pencil before adding a bit of color with a darker blue. Details are left loose in this location so that focus is not diverted from the head.
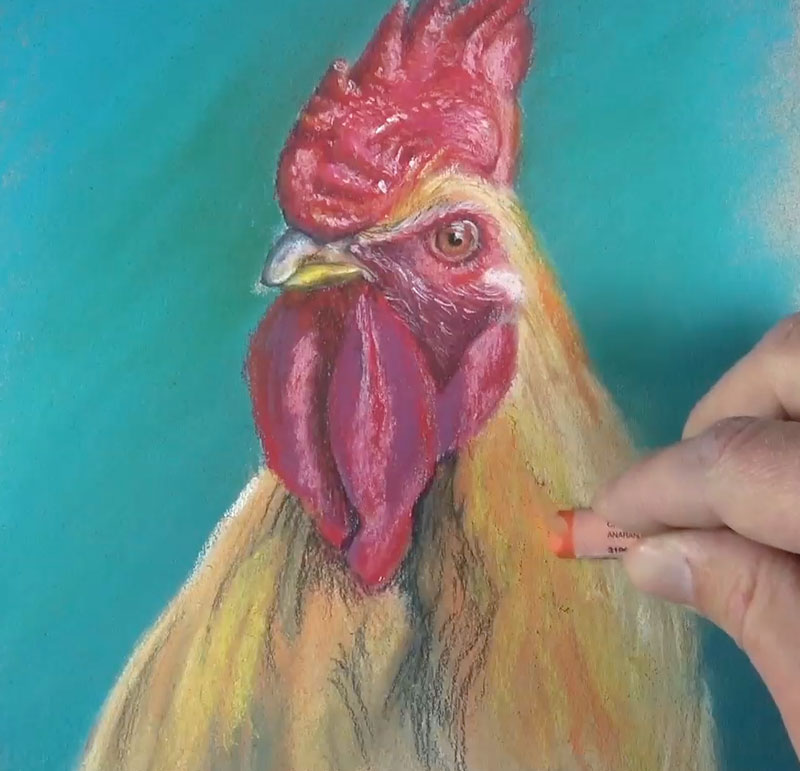
Details are developed on the waddle in the same manner as the comb. Shadows are strengthened with layered applications of the black pastel pencil, before muting with red. Highlights and textures are added with the white pastel pencil with varying intensities.
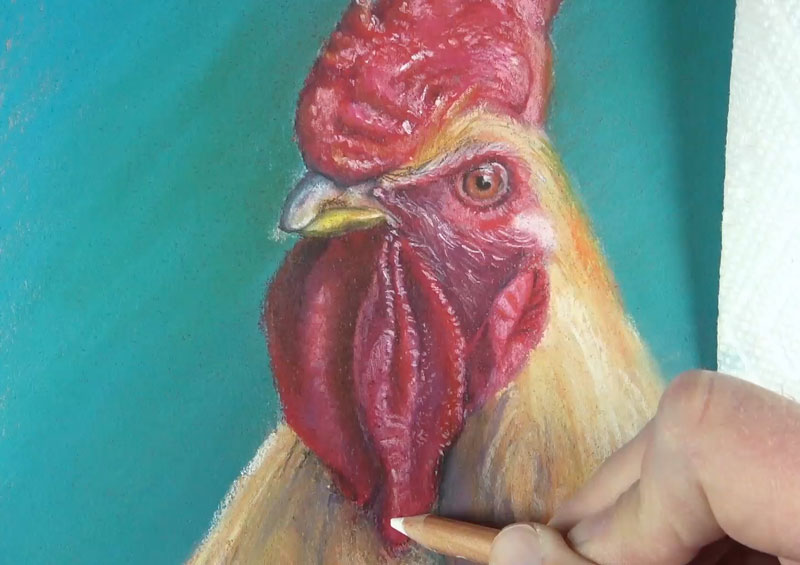
Finishing touches are added to the background. A light blue is used to add some texture and to lighten the overall value. This creates additional contrast between the rooster and the background. A bit more blue-green is added to the bottom portion to increase the contrast with the reds of the rooster.
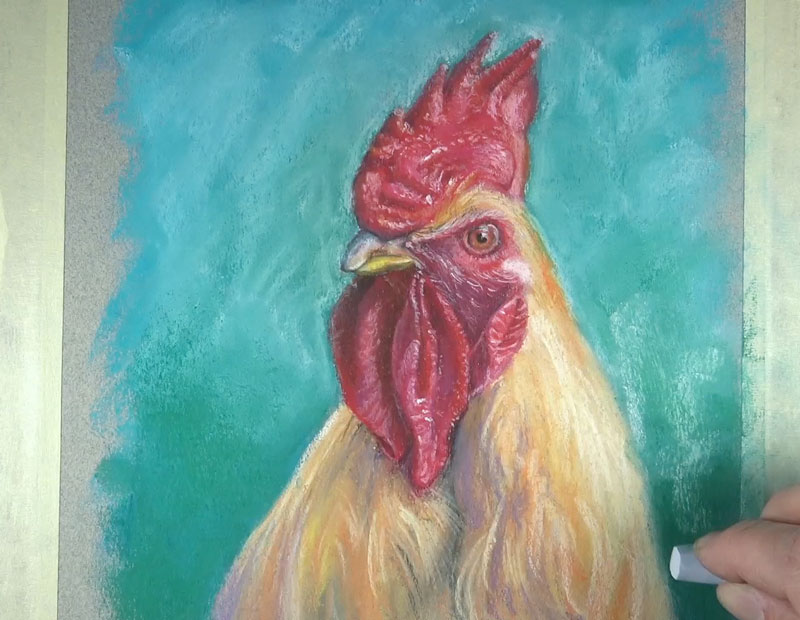
Additional splashes of color are added to the rooster. Purple is added to the shadowed areas on the comb, waddle, and body. Blue is added to a couple of locations within the waddle.

The finished drawing is a blend of softer hues and strong bits of color.