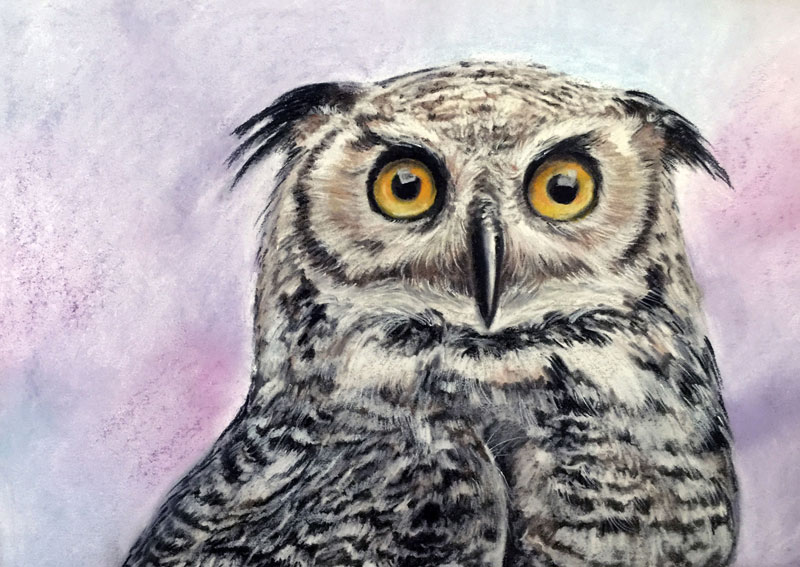
In this lesson, we'll take a look at drawing an owl with pastel pencils. Without sacrificing the look and feel of traditional soft pastels, pastel pencils provide the artist with a level of control and precision that is a bit harder to achieve with traditional sticks.
Just as with traditional pastels, colors can be layered, mixed, and manipulated on the surface. Complex colors are easily created with an added level of control, without sacrificing the painterly look that is associated with traditional pastel drawings.
(Some of the following links are affiliate links which means we earn a small commission if you purchase at no additional cost to you.)
For this demonstration, the subject is drawn on gray drawing paper. Starting with a toned surface allows the artist to make better decisions concerning values and colors. Instead of starting on a white surface, the artist begins in the middle of the value scale and can push values darker and/or lighter.
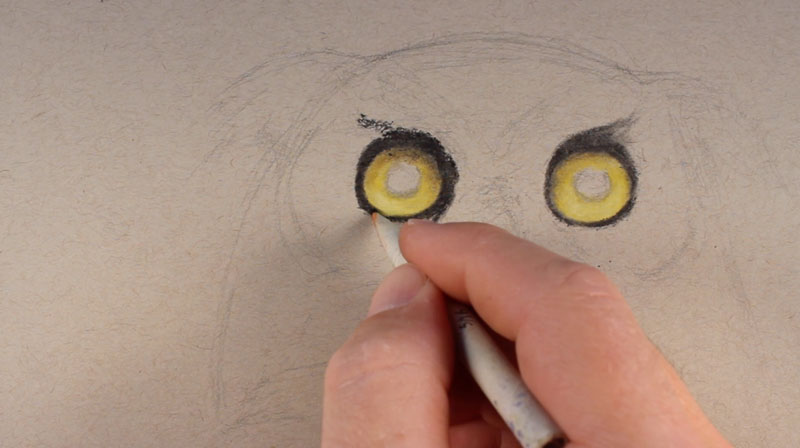
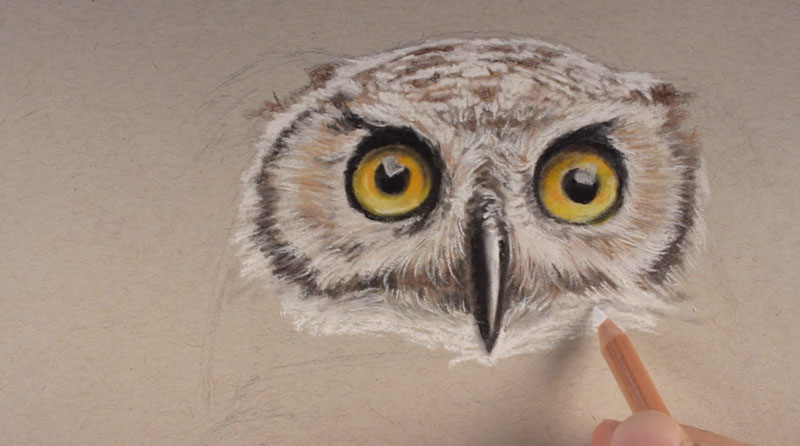
An "HB" pencil is used to lightly sketch the basic shapes and contours of the owl. The subject is placed slightly right of center in order to create a more dynamic balance of positive and negative space within the composition.
With basic shapes in place, applications of the pastel pencil begin. Layered applications are made, beginning with yellow. The values of the eyes are pushed by adding a bit of white to the lower portion and dark brown to the upper portion. A black pencil is used to establish the dark shapes around the eyes, before being blended into the surface with a blending stump.
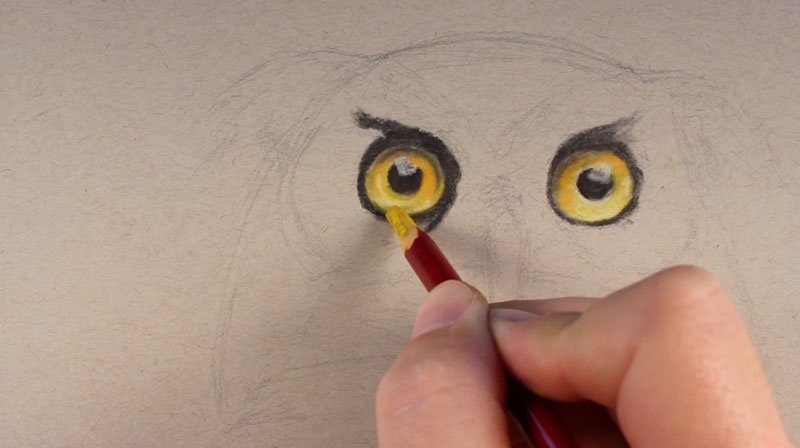
Work continues on the eyes by layering additional applications of color. A bit of orange is applied and the pupils are addressed with black. Highlights, overlapping the pupil and iris, are developed with the white pencil. Subtle highlights are also added to the lower portion of the eyes.
Working outward from the eyes, directional strokes are made with a white pencil to indicate the "furriness" of the face. Dark undertones are developed using a layered application of brown and black. These undertones are worked into the surface with the blending stump. The beak is developed with black and a strong highlight is added with white.
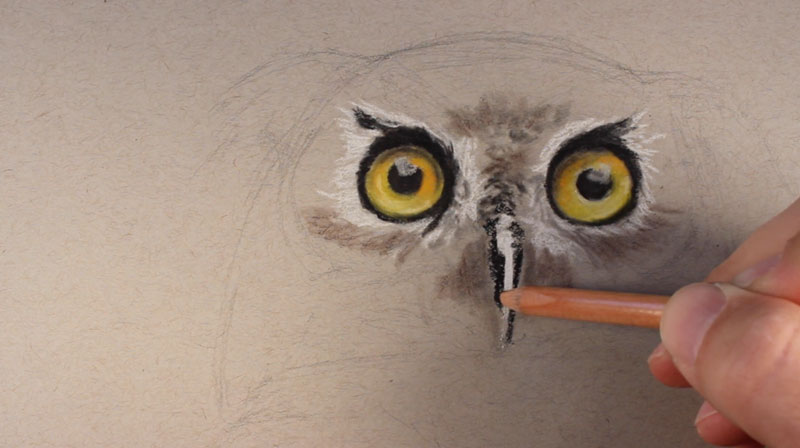
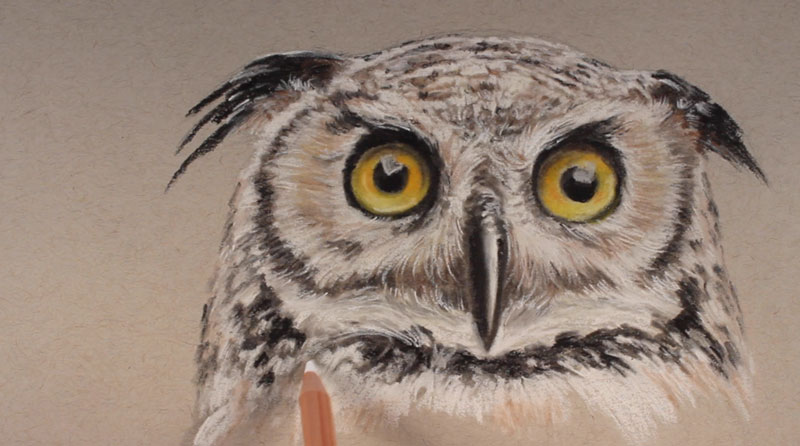
Additional applications of brown and black are applied and blended with the blending stump, creating an initial indication of the pattern on the top of the head. The darker areas around the outer portions of the eyes are also developed and blended.
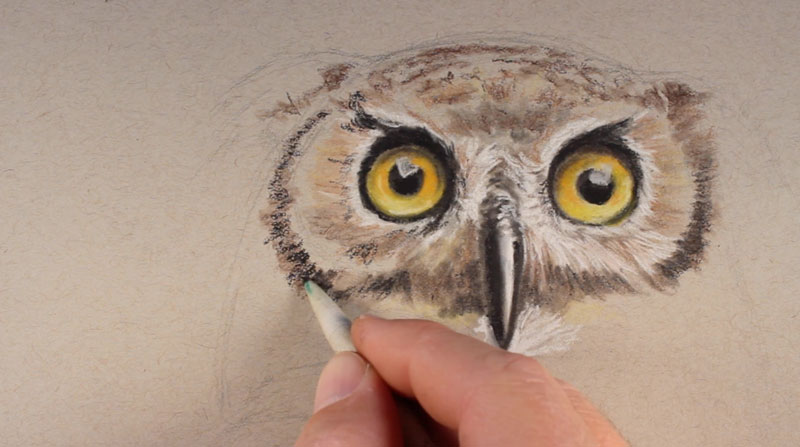
Now with a white pencil, directional strokes are made over the darker undertones. Stokes are pulled in the direction that the fur grows and left unblended, creating a more natural appearance.
The process of developing darker undertones with black and brown continues under the beak. Darker undertones are blended with the blending stump, before white applications are made over the top.
The sides of the body of the owl are slightly "off-white". A beige pencil is applied on either side, before darker tones are added. White is then applied over the top, mixing with the colors underneath.
The process of developing darker undertones and the pattern on the owl continues on the lower portion of the body. A bit of lighter brown is added in areas for added depth and variety. Spaces are left to allow for white applications. Again, these darker undertones are blended with a blending stump.
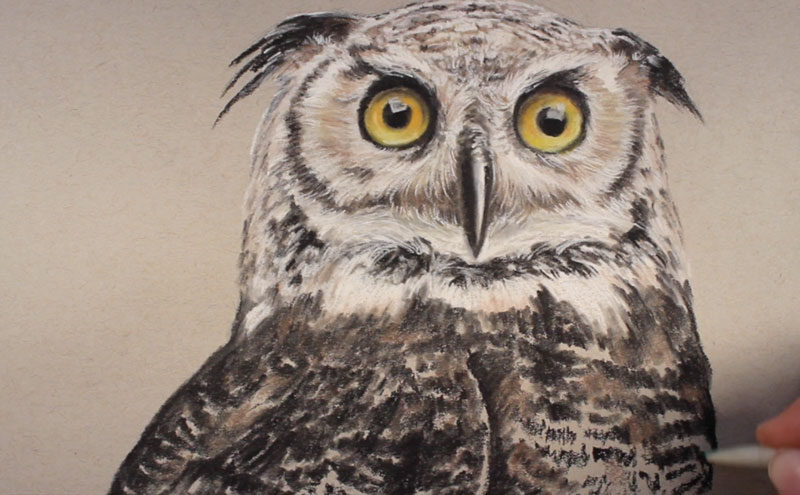
Again, white is applied over the top of the darker values creating the pattern. White applications are not blended and instead allowed to "sit" on the surface.
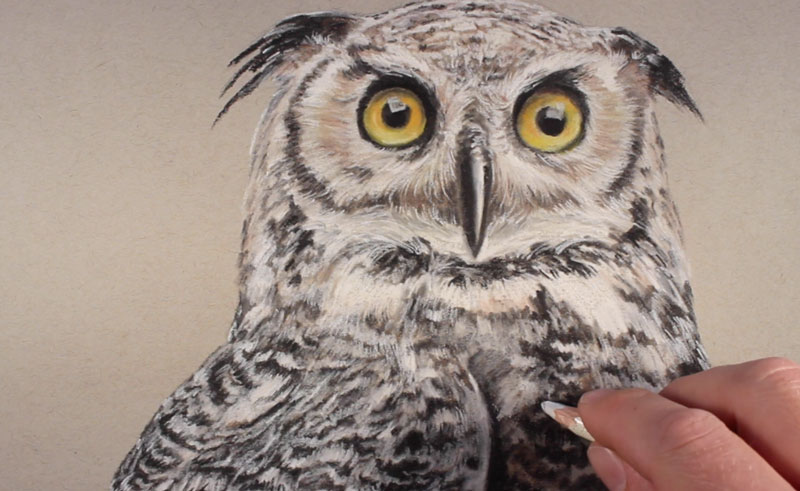

In order to create added contrast and focus on the eyes, the background is developed with a subtle undertone of violet. This color is chosen since it is the complement of the yellow found in the eyes. Violet, magenta, and a bit of blue is added first with traditional stick pastels. These applications are then blended into the surface with a finger.
White is added over the top of these applications, allowing for some of the color to show through.
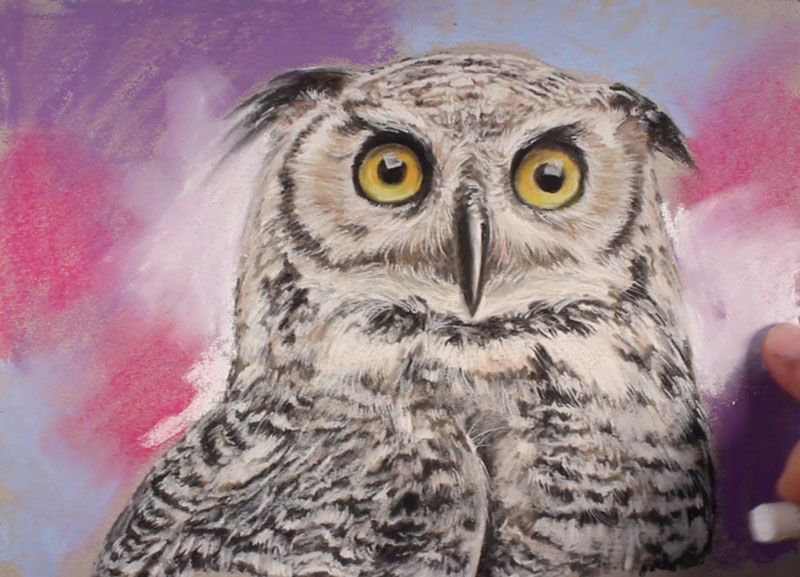
The edges of the owl are then cleaned with the white and black pencils. An outline is not created. Instead, the edges of the owl that were lost when the background was developed are simply redefined.

The completed image maintains the "painterly" and soft look of traditional pastels, but was developed with more control and accuracy.