by Matt Fussell
In this lesson, we'll take a look at creating a quick sketch of a bird using various forms of pastels including stick pastels (soft pastels), pastel pencils, and hard pastels.
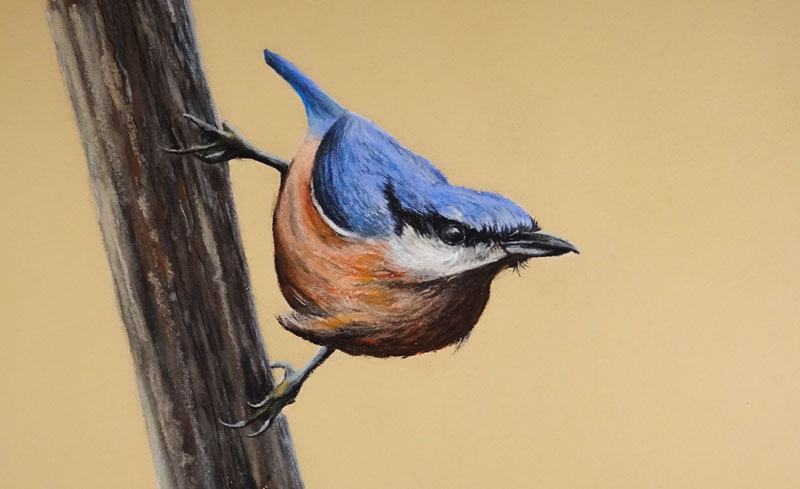
We'll start with a loose sketch of the contour lines using a pastel pencil before adding layers of pastel applications to build up the illusion of texture and to create a full range of tone and value. We'll also exploit a complementary color scheme consisting of orange and blue.
Soft pastels are traditionally available as sticks. Sticks are great for covering large areas within the picture plane. Usually, the color produced by applications made with a stick pastel is more intense compared with those made with a hard pastel or pastel pencil. Most stick pastels have broad tips, making it more difficult to develop details within a pastel drawing. Traditional soft pastels are also more powdery, making them easy to blend on the surface with a finger or blending tool. Some artists may find them to be too "loose" and would rather prefer the control provided by pastel pencils or hard pastels.
Pastel pencils provide the artist with the ability to develop details within a pastel drawing. Because a pastel pencil can be sharpened, precise details can be added. Although the intensity of color varies between pastel pencil manufacturers, marks made with pastel pencils are less intense than those made with the traditional stick pastels.
Hard pastels, as their name implies, are slightly harder and more dense than soft pastels. They provide the artist with slightly more control compared to traditional soft pastels. As a trade-off, the marks produced by hard pastels are slightly less intense.
For this demonstration, we'll be working on Canson Mi-Teintes pastel paper. This paper features a heavily textured side and one with a slightly smoother surface. For drawings where details and smooth gradations of tone and value are important, the smoother side of this paper may be the better option. For drawings where multiple applications of pastel are to be layered, and details are less important, then the heavier textured side of the paper may be used. For this drawing, we'll use the smoother side since the drawing is small and our development of details on the bird is important.
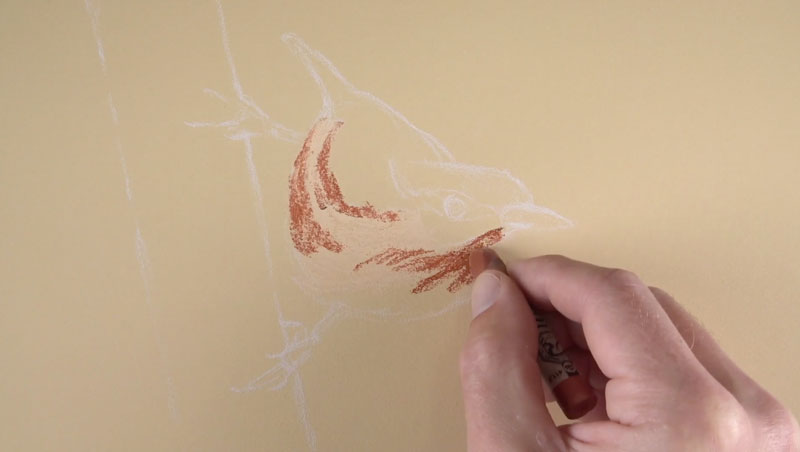
We'll begin with a light and loose sketch of the contours of the bird using a white pastel pencil. We'll also include a couple of loose lines to communicate the boundaries of the tree. A white pastel pencil is used so that our preliminary lines are easily covered with subsequent pastel applications.
On the breast of the bird, we'll begin applying our first layer of soft pastel. We'll start with a light Peach followed by an application of Burnt Sienna, pulling strokes around the form of the bird.
We'll continue layering various colors over the top of our base application, continuing to pull strokes around the curvature of the breast. We'll continue to switch between stick pastels and pastel pencils to develop this area. A lighter peach color is applied over the top of the burnt sienna, lightening some of the values. A black pastel pencil is used to develop the shadowed areas, while a white pastel pencil is used to accentuate some of the highlights.
Keep in mind, the texture and the illusion of feathers is developed through the relationship of dark and light values. We'll continue to push values darker and lighter, making small strokes with the pencil until the illusion of texture in this section is realized.


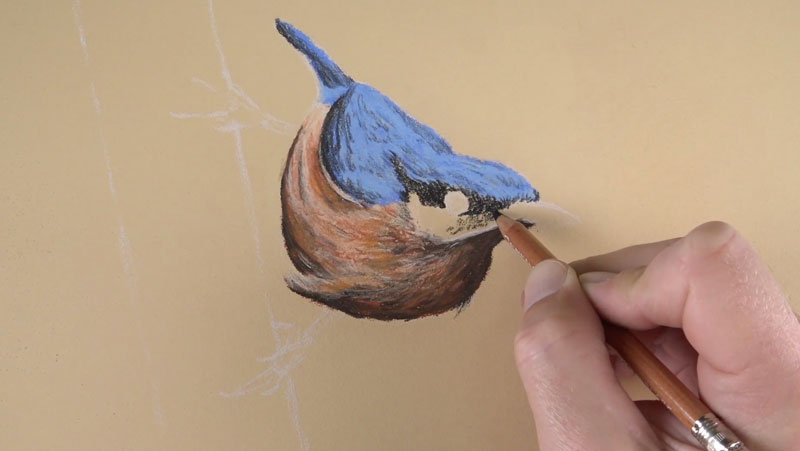
Next we can address the blue portion on the back of the bird. We'll start with an application of primary blue applied with the stick pastel. Over the top, we'll apply a lighter blue. To refine the edges, and slightly blend these applications, we'll apply a layer of light blue with a pastel pencil.
Then we can begin to develop the value relationships and the illusion of texture in this section. Again, a black pastel pencil is used to address the darker values. A light touch is used here, pulling strokes along the cross contours of the form of the bird.
Using the black pastel pencil, we can define the black shape that wraps around the head of the bird, leaving a space for the eye.
The details of the head and the areas around the eye are refined with applications made with the black pastel pencil. We can add a strong highlight in the eye with a white pastel pencil and then clean up the details with the black pencil. The white pastel pencil is also used to fill in the white section underneath the black shape. It is also used to reinforce the white stripe that flows along the side of the body of the bird, just underneath the visible wing.
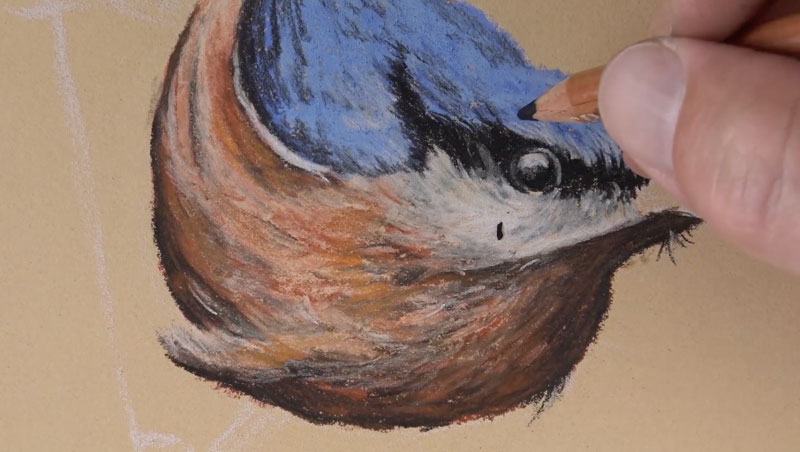
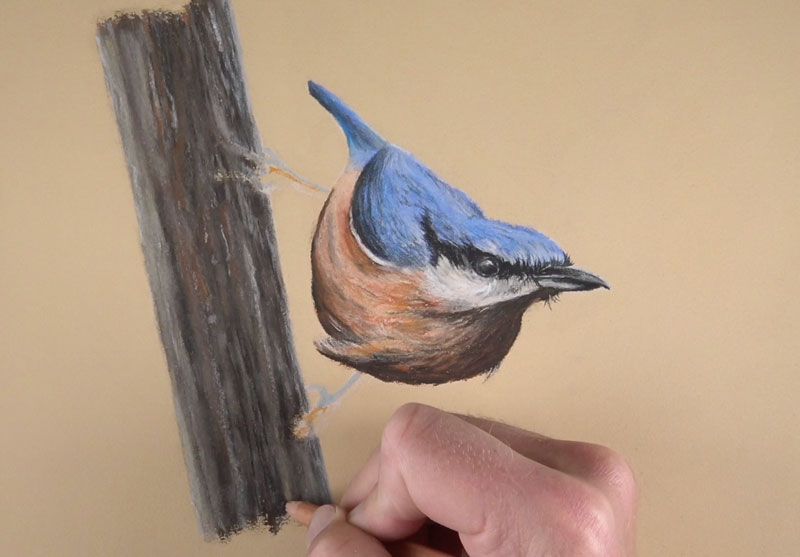
We'll add details to the beak by applying a bit of light blue to the highlighted portions and black to the shadowed areas. Because control and precision is required, sharpened pastel pencils are used.
Before developing the details of the tree, we'll define the talons with a couple of marks, but hold off on adding the details. Again, light blue is applied on the side of the talons closest to the light source. Since the light source originates from above, the highlights are found on the top side of the talon. A touch of orange is added as well.
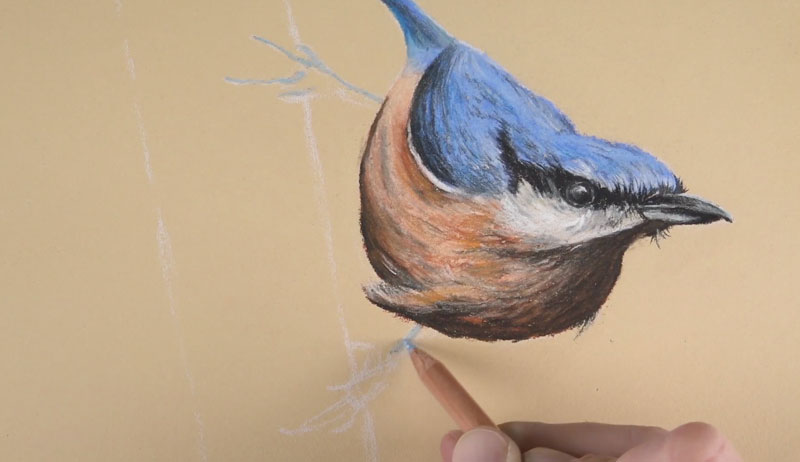
Burnt Umber and a variety of grays and browns are added to the shape preserved for the tree. Vertical strokes are made along the form. Light blue is applied to create a subtle highlight on the right side and a touch of orange is applied to closer to the center. Adding blue and orange to the tree trunk helps to unify the drawing.
Sticking with mostly vertical strokes, black is added in the center of the tree to increase contrast and develop the texture. Lighter gray is applied to the outer edges of the trunk.
With the tree defined, we can address the details of the talons. A black pastel pencil is used to fill in most of the shape, while a white pastel pencil is used for the highlights.
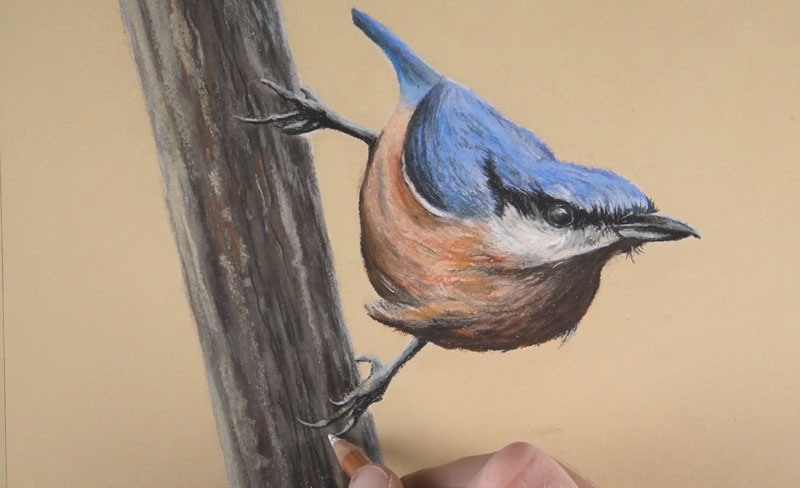
Stray pastel marks are then cleaned up using a kneaded eraser, completing the drawing.
Although this sketch is relatively quick without a developed background, it's still worth noting that layering pastel applications requires a bit of patience. We can't expect to develop the illusion of form and texture with just a few applications of the medium. We should be prepared to make multiple applications and consider the stroke that we make in order to create a convincing drawing.