Materials Used in This Lesson
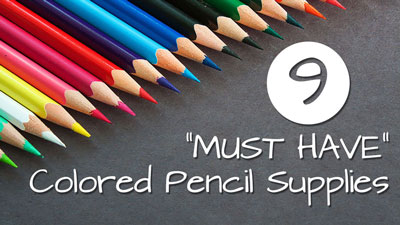
Oil-based pencils are used in this lesson. While similar results can be achieved with wax-based colored pencils, application techniques do differ slightly. Layering colors is important in any colored pencil drawing – no matter if the artist uses the more common wax-based pencils or the lesser available oil-based pencils.
The oil-based pencils encourage layering a bit more which often leads to stronger depth in the color. Applications made with the oil-based pencils are noticeably less intense and are also influenced a bit more by the tooth or texture of the paper. They are also quite a bit softer than some of the wax-based pencils available on the market.
More on colored pencils…
- Colored Pencil Lessons
- Colored Pencil Comparison Chart
- Oil-based vs. Wax-based Colored Pencils
- The Colored Pencil Course
(Some of the following links are affiliate links which means we earn a small commission if you purchase at no additional cost to you.)
Specific oil-based colored pencils used in this lesson series…
Clearly, the surface also plays an important role in the look and feel of the finished work. The surface is many times just as important as the quality of the material used. In this lesson series, Stonehenge paper is used. This premium paper features a light tooth.
Since the paper is 100% cotton, it is quite soft. The softness of the paper means that it is more susceptible to indentations that can be produced by a pencil when heavier pressure is applied. Artists should be aware of this especially if the initial sketch is created with graphite.
This particular paper matches nicely with the light applications produced by the oil-based pencils. The tooth of the paper combined with the softer oil-based pencil applications creates a grainy appearance that may be preferred by some artists.
Here’s a link to pick up Stonehenge paper…
If so, join over 36,000 others that receive our newsletter with new drawing and painting lessons. Plus, check out three of our course videos and ebooks for free.

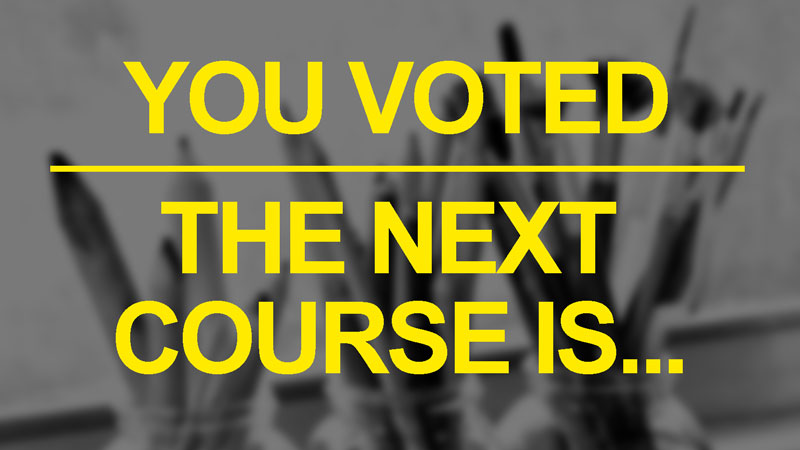
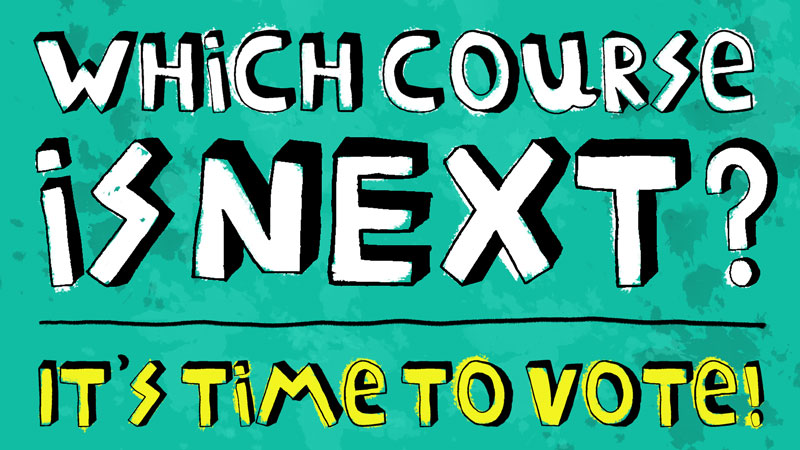
You Voted. The Next Course Is…
This site is designed, constructed, and lovingly crafted for you. It is my goal to serve you as student. A big part of achieving this is learning from you. I want to teach what you want to learn. For this reason, I reach out to you after each course has been developed and ask for feedback regarding which course you would like to see next. Each course that has been developed over the years has been the result of you telling me what you want to learn.
Based on your suggestions and results of previous voting, I construct a simple survey and send it your way. You guys give me your responses and I analyze the results. When the results are in, I get started developing the next course based on what you have voted for. Each module includes a video and accompanying ebook and is released to members every week or two until the entire course is complete. Each course that is created is archived and becomes a part of the ever-growing library of courses for members. There are currently 9 courses available covering the following topics…
- The Secrets to Drawing
- Pastel Landscape Mastery
- The Colored Pencil Course
- Oil Painting Master Series
- The Acrylic Painting Academy
- The Watercolor Workshop
- The Pen and Ink Experience
- Portrait Drawing The Smart Way
- Creative Mixed Media
Voting for the next course ended on February 12, 2017 and the winning course is quite clear. Thanks to all of you that voted. And now for the results…
Here are the options that were offered…
- Option #1 – The Graphite Drawing Course
- Option #2 – Digital Drawing and Painting
- Option #3 – The Ultimate Guide to Perspective
- Option #4 – The Ultimate Guide to Drawing Hands and Feet
- Option #5 – Composition
And here’s a graphical breakdown of the results…
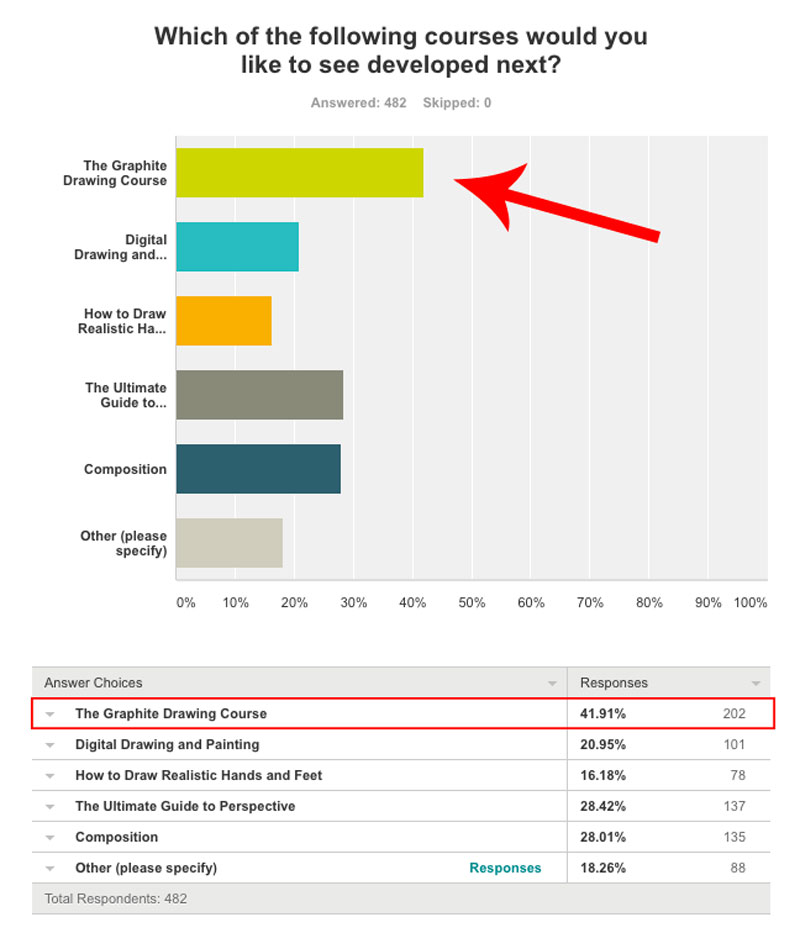
The clear winner is Option #1 – The Graphite Drawing Course.
So here’s a preliminary look at what will covered in the next course…
“The Graphite Drawing Course” (Working Title)
When most of us begin drawing, the first tool we reach for is usually a graphite pencil. Graphite is capable of producing a rich range of tone and a broad variety of textures. It is a versatile medium that can be used for quick sketches or highly refined and detailed drawings. It is perhaps the most fundamental medium for drawing. We’ll cover this medium extensively in this course and take a look at a variety of application techniques and subjects with graphite.
Concepts and projects that will be covered include (but are not limited to):
- Basic materials and surfaces
- Mark making
- Blending and transitions
- Creating textures
- The importance of tone and value
- Still life drawing
- Landscape drawing
- Botanical drawing
- Portraiture
- Figure drawing
- Water-soluble graphite
- Colored graphite
- Drawing with powdered graphite
I’m excited to get started and I hope you are too. I expect to release the first modules for “The Graphite Course” to members by the end of March, 2017. Of course, as each module is released, I’ll be sure to let you know through the newsletter. If you don’t currently receive the newsletter, you can sign up it for here. (It’s free.)
As a side note, voters could write in an option if they didn’t like the choices that were offered. I was shocked to see how many folks wrote in “colored pencils”, “pen and ink”, “pastels”, “portrait drawing” and “acrylics”. (We already have courses on these subjects.) You can check out all of our courses here.
Thanks again for voting! I’m excited about the new addition to the course library and I can’t wait to get started. As always, I’d love to hear what you think and what you’d like to see in the new course. Just leave your comment below…
If so, join over 30,0000 others that receive our newsletter with new drawing and painting lessons. Plus, check out three of our course videos and ebooks for free.
What Course Would You Like To See Next?
 “Creative Mixed Media” is now complete, making it the ninth complete course added to our library of courses – which are all available to members. The addition of this course brings the total of course video hours up to 35 with over 1000 pages of ebooks included. (Each course includes logically sequenced modules that include videos and downloadable ebooks.)
At the conclusion of each course, I reach out to you for input on the next course that will be developed. Everyone is able to vote! When the voting results are in, I share the results with you and begin work creating the next course. As each course is created, it is simply added to the library. Members don’t have to wait until the entire course is created however, since modules are released as they are completed (every week or two). (All courses are included with membership as well as all of the Live Lessons, Member’s Minutes, and lesson plans. So the library of educational content just continues to grow.)
It’s now time to vote…
Based on your suggestions and previous voting options, I have provided a list of possibilities for the next course. Below you’ll find a listing and brief description of each of the possibilities. After reading through, be sure to click on the “vote now” button to cast your vote. Voting begins January 1, 2017 and will end on January 28, 2017 February 12, 2017. The winning course will be announced on January 30, 2017 February 14, 2017. (You may vote for more than one, if you wish.)
Course Options
Option #1 – “The Graphite Drawing Course” – While we cover quite a bit of graphite drawing in “The Secrets to Drawing” and in “Portrait Drawing The Smart Way”, I though it may be nice to have an entire course devoted to the medium. This course would cover a variety of subjects all centered on application techniques for graphite drawing.
Option #2 – “Digital Drawing and Painting” – Use Adobe Photoshop to create digital drawings and paintings by following the principles of traditional practices. Learn the fundamentals of light and shadow, creating textures, and the illusion of form by applying a variety of brushes and effects.
Option #3 – “The Ultimate Guide to Perspective” – Take a journey into the world of linear perspective. Learn how to apply one-point, two-point, and three-point perspective to create the illusion of space in your drawings. Apply perspective techniques to multiple subjects including buildings, interiors, non-objective drawings, and the human figure.
Option #4 – “Composition” – Learn how to compose your drawings and paintings using a variety of strategies and techniques.
Option #5 – “The Ultimate Guide to Drawing Hands and Feet” – Some consider drawing hands and feet to be the most difficult of all subjects. However, even the most difficult subjects can be simplified and mastered by anyone. This course will focus on the basic principles of drawing hands and feet including multiple layout strategies, proportion, anatomy, and rendering realistic textures.
Don’t see a course possibility that appeals to you? You can “write in” a suggestion as well through the voting process.
I’m excited to develop the next course for you! Thanks for voting! Results will be released on January 30, 2017 February 14, 2017 and new course modules will be released starting in March 2017.
As a footnote, there is a course that I’ve been wanting to add for a while. Lots of folks have requested it and it’s not listed above. During January, while voting takes place, I’ll be hard at work developing this mystery course for members.
If so, join over 30,0000 others that receive our newsletter with new drawing and painting lessons. Plus, check out three of our course videos and ebooks for free.
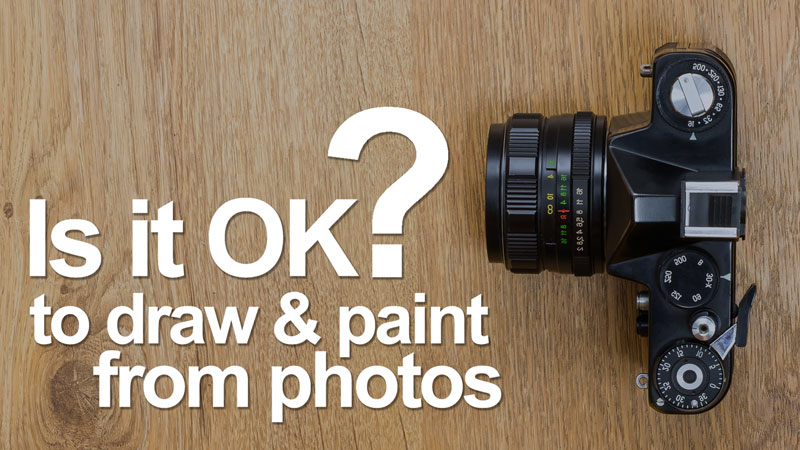
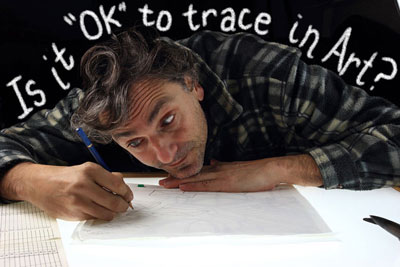
Is It OK to Draw and Paint From Photos?
The world of art has its fair share of controversies that extend beyond the realm of subject matter. Artists typically have their own opinions on process, ideas, and materials and many of them are extremely passionate over their beliefs. Some people believe that certain colors should be used in a palette and others excluded. Some artists believe that there is only one approach to drawing or painting that should work for everyone. And some artists believe that anyone that uses a photo as a reference is a heretic.
I’ve even heard people say that you are not an artist if you use a photo to aid in the creation of your work. Now that seems a little extreme, don’t you think?
In my years learning and teaching art, my opinions on matters such as these have changed and evolved. I’m sure that they’ll continue to do so as well. I’m much more “open” to new ideas and processes than I used to be. I have learned that one approach is never right for everyone – that materials, color choices, and processes are personal decisions and are never “black and white”. I’ve also learned that it is never a good idea to be so closed-minded to processes or approaches that I miss out on opportunities that could possibly expand me as an artist.
Why then are there so many artists and teachers out there so adamantly opposed to working with photographs when drawing or painting?
In this post, I’ll share several reasons why we should avoid using photographs as references but also the reasons why we should embrace photography as a tool for drawing and painting. I think you’ll find that the answers are not so “black and white”. There are good arguments on both sides and I’ll try to highlight them so that you can form your own opinion.
Why You Should Not Draw or Paint From Photos
1. It could hinder the development of drawing skills.
To better understand why drawing from photos could be a hinderance, we must first be clear on what’s happening when we are learning how to draw. When we are learning how to draw, we are actually learning how to see. Of course, mark-making and an understanding of the medium that we use is important, but understanding the objects that we are drawing is paramount.
We understand these objects visually and then communicate them in our drawings and paintings visually. Essentially, we are taking visual information, analyzing it, and then recording it on a flat surface to create an illusion.

When we draw from a photo, we are basically copying information that has already been flattened. In other words, some of the work has already been done for us. The visual information has already been simplified into shapes, values, and lines.
We still have to find them and record them when we draw, but less analysis is required. This means that we don’t have to fully understand the light, form, or spatial relationships of the objects – we just need to copy the information in the photo – matching colors, values, shapes, and edges.
This is not necessarily a bad thing because we still have to recognize what we are seeing. But if your goal is to improve your “seeing” as quickly as possible, it may be best to draw from life as much as possible. You may find that you don’t finish many drawings, but the growth comes from analyzing and training your brain and not as a result of finishing artworks.
2. Reference photos could limit you.
The best reference photos are the ones that you take yourself. You have control, in some cases, over the light, composition, and the vantage point. Creating reference photos is an art in itself and takes time and experience to perfect.
If your reference photo is less than optimal, then you could be limiting yourself and the potential drawing or painting that you create. If you rely heavily on a photo that is not successful on its own, then the resulting drawing or painting will not likely be successful either.
Because creating successful reference photos can be difficult, you may find yourself turning to professional photographs. Leaving the originality issue aside, you have even less control over the photo – since you didn’t take it. The light, composition, and vantage point have already been determined. You may crop the image or manipulate it with software, but you are still limited.
3. Photos often lie.
Despite what we may believe, photos don’t always provide truthful information. For example, if we observe a shadow from life, we may notice a subtle warmness or coolness. We may even see a hint of a color or combination of colors. In a photo however, these subtleties may get lost or flattened.
In this case, the photo is not telling us the full story. It’s not giving us all of the information that we could use.
Then there’s the flash. If a flash was used to take the photo, then the light within the scene is completely altered. The flash washes out the deep shadows and transitions of value, making the resulting drawing extremely flat.
Why You Should Draw and Paint From Photos
So now that we’ve looked at a few reasons why we should avoid using photos as references, let’s next look at the reasons why we should consider using them.
1. Using photo references expand what we can draw and paint.
Let’s face it, if we want to draw or paint an albino tiger, we can’t just go out and hire one to be our model. And even if we did find one to sit for us, the entire session would endanger our lives. I know that I’m being a bit extreme here, but I’m sure that you understand the point that I’m making.
For many subjects, only a photo reference will do. There are many subjects that we just cannot draw or paint from life – a photo is our only choice.
If you are of the opinion that photo references should not be used to create a drawing, then you are severely limiting what you can create.
2. Photos don’t move, get tired, or spoil.
When drawing subjects from life, without the aid of a photo, we are in a race against time. Figure models get tired and move. Still life arrangements with flowers and fruits eventually spoil. Unless carefully planned and controlled, the light will change throughout the day – even by the hour – producing different shadows and highlights.
A photo however, captures the moment and subject in time. The light, angle, and colors all stay consistent. When a photo is used as a reference, we are no longer in a race against time. Instead, we can work slowly and methodically. We can make comparisons between the reference and the drawing, correcting mistakes as we go.

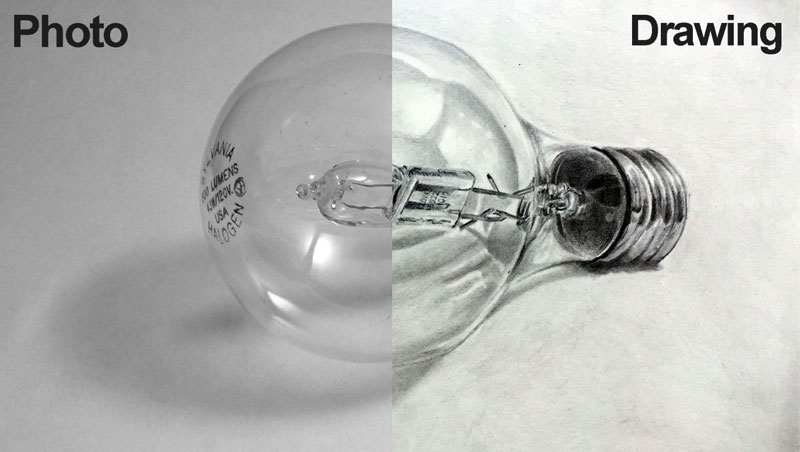
3. Photos provide a greater level of detail and accuracy
A camera captures details that the human eye overlooks. If detail and pinpoint accuracy is most important to you, then a photo of the subject is essential.
With digital photos, we can zoom in and observe textures, colors, and value changes that we would normally miss. (While all of this information is helpful, we must be careful that we don’t become overwhelmed with all of these details.)
Photos also allow the artist to use certain devices and approaches that lead to greater accuracy. The grid technique, used by artists such as Chuck Close, relies heavily on the photo. Without it, the process is simply not possible.
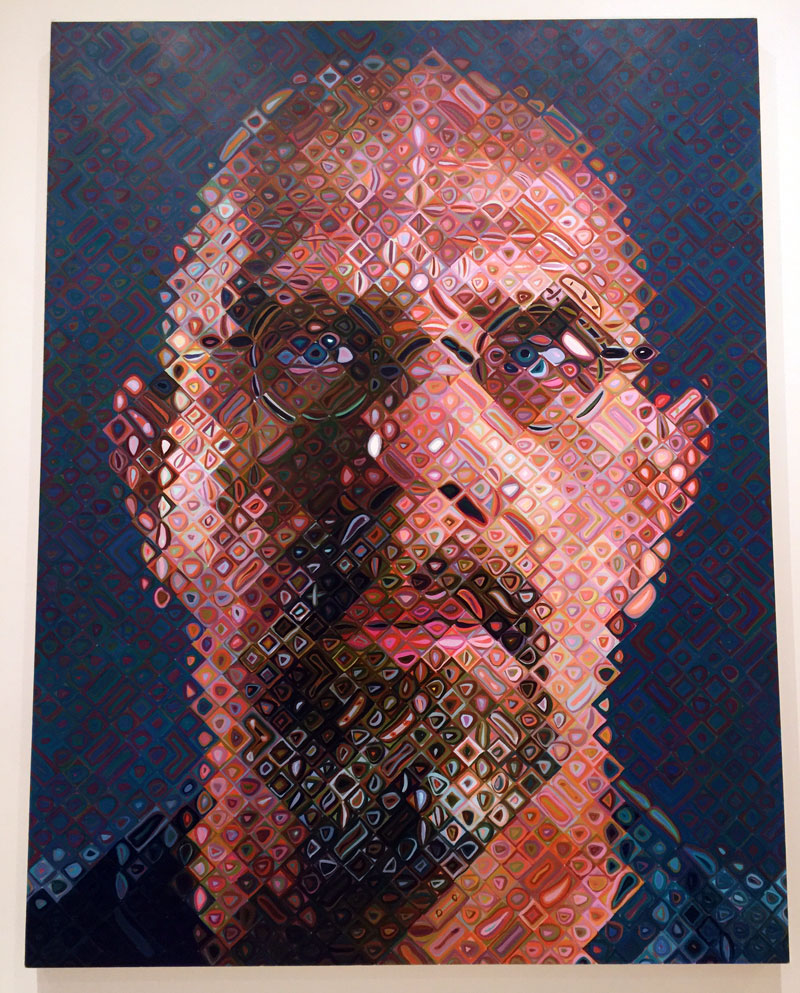
Photo or No Photo?
Clearly, there are great arguments for both sides of this “issue”. There are good reasons why we should avoid photos and excellent reasons for why we should use them.
Everyone will have their own opinion on which approach is the “best” and varied reasons for feeling the way that they do.
Ultimately, a work of art should be just that. It should communicate the subject, but do it in a way that is as unique as the artist that describes it. We’ll all achieve this using different approaches and processes. I think it’s best not to judge the approach and process of another artist. The artwork should be measure of quality not the process or resources that the artist used to create it.
If we work from photos, then the art that we create should always be more interesting than the photo. The quality of the work should never be judged by how well the photo was copied.
If so, join over 36,000 others that receive our newsletter with new drawing and painting lessons. Plus, check out three of our course videos and ebooks for free.

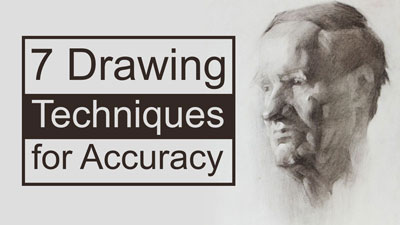

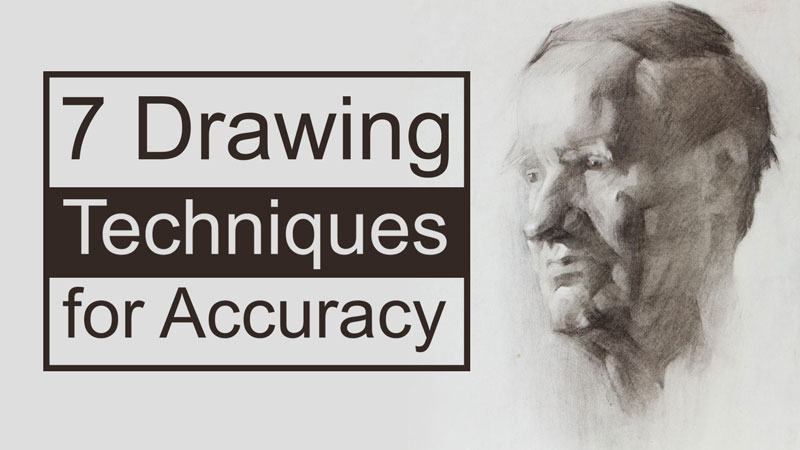
7 Drawing Techniques For Accuracy
It seems simple enough – “draw what you see”. We’ve all heard it before and it is a fine suggestion because it does work. We do need to draw what we see. But if you don’t know what to look for, or perhaps more importantly – how to look for it, then this statement can be frustrating.
Fortunately, there are several techniques we can use to help us see – thus helping us to improve our drawing.
These seven techniques are designed to improve your accuracy in your drawings. They aren’t a perfect solution and they do require a bit of practice in order to master them. But keep in mind that drawing is a skill that can be attained by anyone if they are willing to put in a little work.
Each technique is briefly discussed below with links to detailed lessons on the subject.
1. Sighting / Measuring
We can use “tools” to measure proportions of our subject in order to improve the accuracy of what we record in our drawings. We can use any tool that we wish, but a pencil works surprisingly well.
Here’s how it works. Begin by extending your arm out toward your subject with your pencil in hand. Be sure that your arm is extended completely without any bending at the elbow. Bring your line of sight down to your shoulder and close one eye. Use the end of your pencil (or the tip) and line it up with the top of the highest or widest point on the object. Use your thumb to mark the bottom.
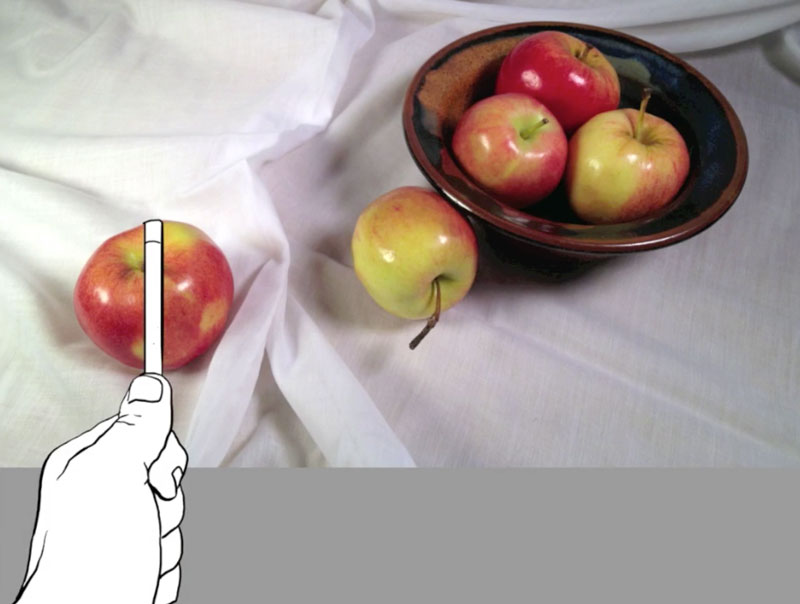 You now have a measurement “unit” that you can use to compare and record the size of the object on your drawing surface. You can use this measurement to record the object on the drawing surface or simply make comparisons to what you have already drawn.
You can use the pencil to measure other objects within the same scene in the same manner.
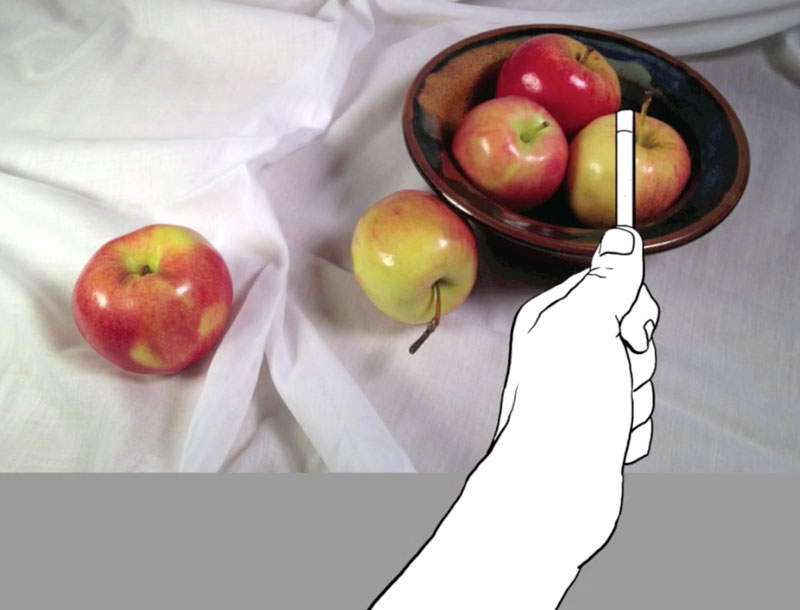
And use it to compare the proportional relationships with the other objects within the scene to ensure that the relationships are correct.
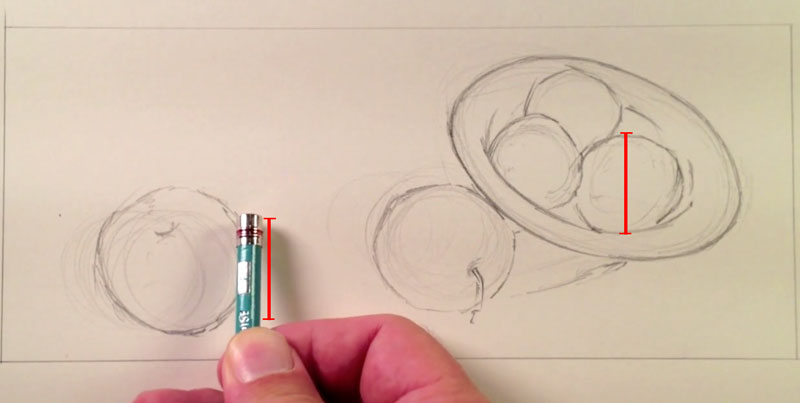
This technique works best when drawing directly from life. However, a modified version can be used when drawing from photos if the size of the photo reference is exactly the same size as the drawing surface. Simply take the measurement from the reference and bring it over to the drawing surface. There’s no need to keep your arm straight or close one eye since your paper is the same size as your reference.
- The Secrets to Drawing – Drawing From Life (Membership Required)
- Graphite Light Bulb Live Lesson Series (Membership Required)
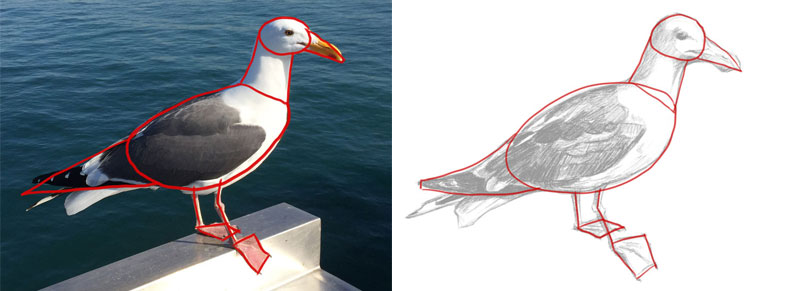
2. The Grid Technique
The grid technique is an approach to drawing that breaks the subject down into “bite-sized” pieces of visual information. A grid is drawn over a photo reference while a proportional grid is drawn lightly on the drawing surface. Each square within the grid on the reference corresponds to a square on the drawing surface.
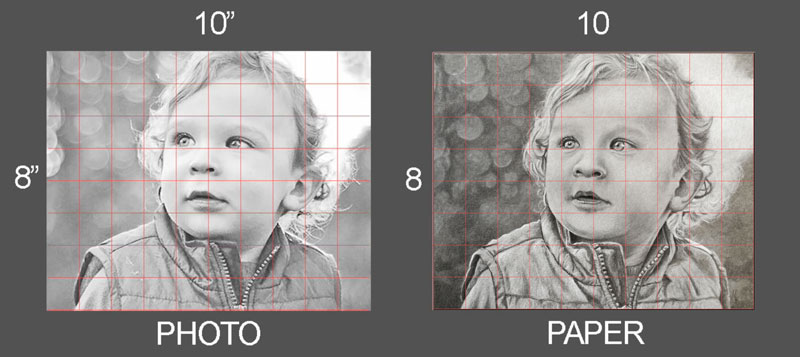
Since the subject is simplified into smaller squares, the lines, shapes, and values are also simplified making it easier to focus on what you are actually seeing.
This technique works for any subject that you draw, but it is most useful for portraits when accuracy is of the upmost importance.
When using this technique, be sure to draw your grid lines very lightly on the drawing surface. You don’t want the grid lines to be visible when the drawing is complete.
- How to Draw With a Grid
- The Secrets to Drawing – Drawing From Photos (Membership Required)
- The Colored Pencil Course – Transferring Images (Membership Required)
- Portrait Drawing The Smart Way – Grid Drawing Part One (Membership Required)
3. Triangular Grid Technique
An alternative to using the traditional grid technique is the triangular grid technique. This technique uses far less lines but requires a bit more from the artist.
With this technique, a grid made of triangles is created on both the photo reference and the drawing surface. This grid is created by dividing the length and width and then drawing lines diagonally from each of the corners. This creates eight triangles within the grid.
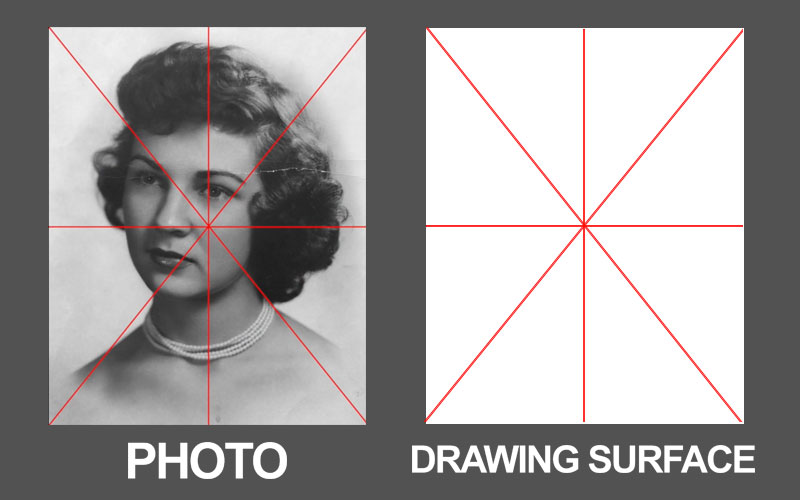
Using a compass or proportional divider, measurements can be taken from the photo reference and then transferred to the drawing surface. The end of the compass is positioned in the center as marks are made in locations where important bits of information cross over the lines of the grid.
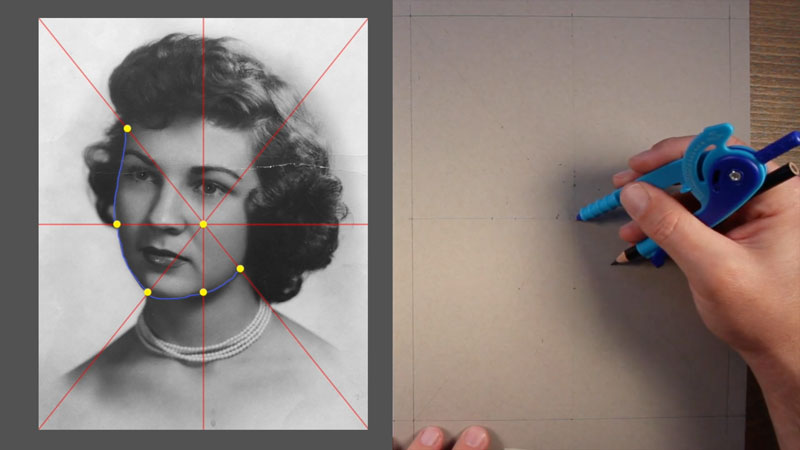
This essentially creates a collection of marks that can be used to draw the contour lines of the subject – somewhat like “connecting the dots”. Here again, this technique can be used for drawing any subject, but it is most useful for portraits.
- Portrait Drawing The Smart Way – Triangular Grid Part One (Membership Required)
4. Identifying Basic Shapes and Positive and Negative Space
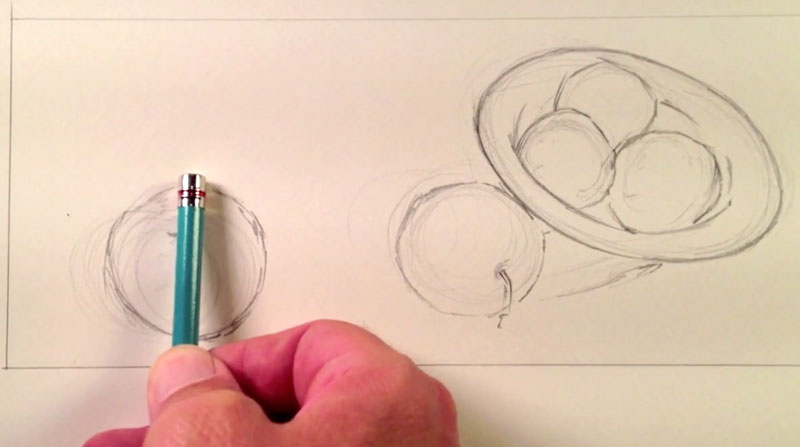
Many objects are quite complex, making them seem difficult to draw. However, even the most complex subjects can be simplified into basic shapes. When we break subjects down into basic shapes, it becomes easier to be accurate in our drawing. Instead of letting the details get in the way, we can focus on the simplified shapes and the relationships of those shapes – leading to greater accuracy in the drawing.
These shapes can be drawn loosely and as we become more confident with the shapes, we can add the details.
We can go even further with shapes when we lay out a drawing. We can pay attention to the relationships of positive and negative shapes (spaces) within the scene. The open areas around the subject form negative shapes.
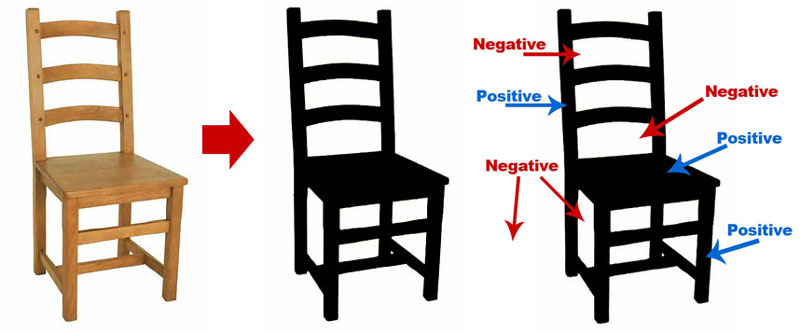
We can compare the relationships of the positive and negative shapes to ensure that the proportions are correct.
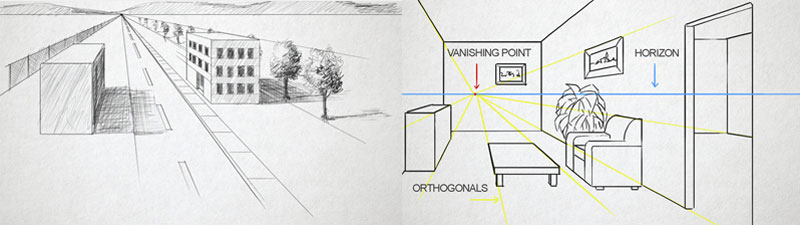
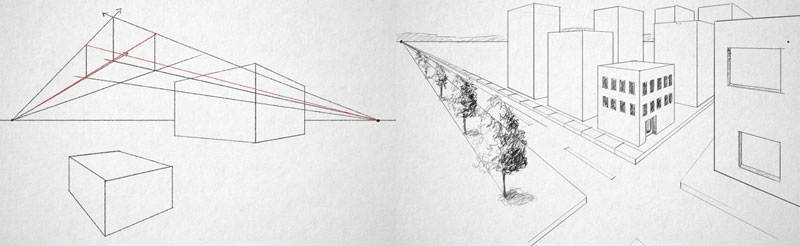
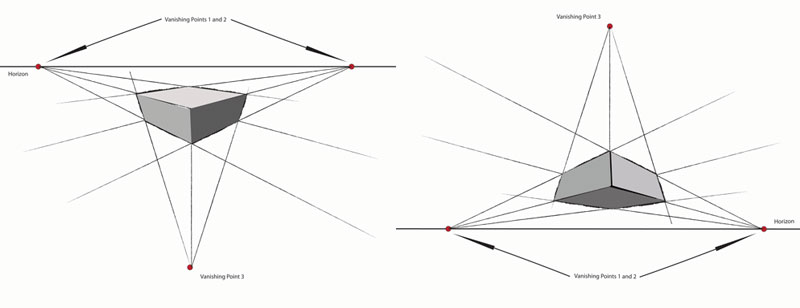
5. Linear Perspective
Linear perspective is a system that uses lines to aid the artist in creating the illusion of space in a drawing. It is a structured system that uses a vanishing point (or points) as a reference point for drawing forms. Although linear perspective can be used for drawing any object in space, it is mostly used for drawing architectural elements such as buildings, windows, doors, and interior scenes.
One Point Perspective – In this form of perspective, one vanishing point is placed on the horizon line. This type of perspective is typically used when the objects within the scene are viewed from a “flat” view. When this occurs, simple shapes (squares, rectangles, etc.) can be used to describe the objects. To create the illusion of depth, lines are drawn from the corners of objects back to the vanishing point.
- One Point Perspective
- The Secrets to Drawing – One Point Perspective (Membership Required)
- One Point Perspective – Recorded Live Lesson (Membership Required)
Two Point Perspective – Two point perspective differs from one point perspective in that it uses two vanishing points instead of one. Both vanishing points are placed on the horizon line with a good amount of space separating them. Instead of starting with the shape of the object like we do with one point perspective, the corner of the subject is typically drawn first. Lines are then drawn from each end of the corner back to each of the vanishing points to facilitate in creating the illusion of space.
- Two Point Perspective
- How to Draw a Maze with Two Point Perspective
- The Secrets to Drawing – Two Point Perspective (Membership Required)
- Two Point Perspective – Recorded Live Lesson (Membership Required)
Three Point Perspective – Three point perspective is used to a lesser degree since it is mostly reserved for drawings that feature extreme angles. When drawing the subject from a “worm’s eye view” or a “bird’s eye view”, three point perspective can be extremely useful. As the name implies, three point perspective utilizes three vanishing points. Two of the vanishing points are placed on the horizon line while the third is either placed far above or far below.
- Three Point Perspective
- The Secrets to Drawing – Three Point Perspective (Membership Required)
- Three Point Perspective – Recorded Live Lesson (Membership Required)
6. Basic Facial Proportions
Although every face is different, certain approximate facial proportions do exist. We can use these approximations to ensure that the features of the face are placed in the right locations and that the size of each of the features are natural. We still have to observe the face when drawing a portrait, but knowing the general locations of the eyes, nose, mouth, etc. can help us be sure that what we are putting to paper is “in line” with what we are observing.
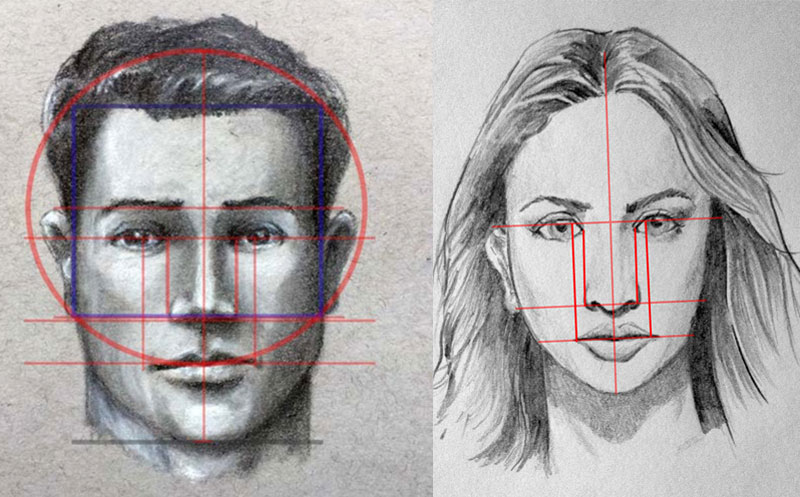
- Basic Facial Proportions – How to Draw a Face
- The Secrets to Drawing – Facial Proportions (Membership Required)
- Portrait Drawing The Smart Way – Facial Proportions (Membership Required)
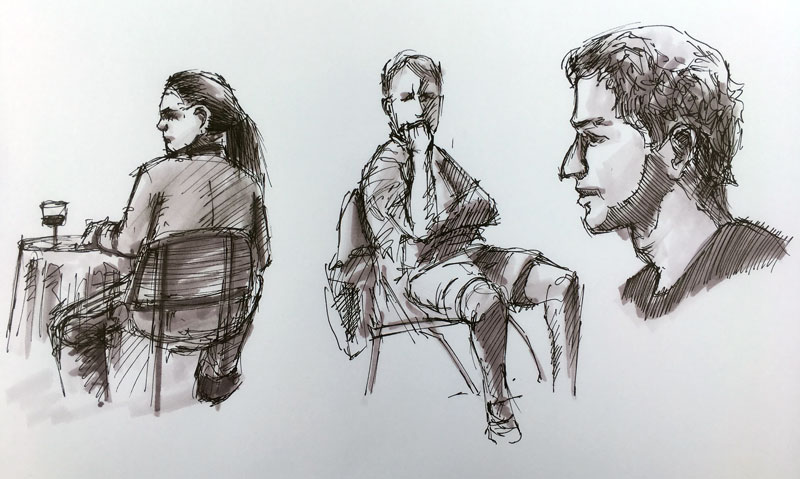
7. Figure Proportions and Gesture Drawing
Just as knowledge of basic facial proportions can be used to ensure accuracy in portrait drawing, knowledge of approximate figure proportions can aid in creating accurate figure drawings. Every figure is different so it’s important to recognize that there is no “one size fits all” solution to figure drawing. But combined with careful observation, knowledge of the basic proportions of the figure certainly helps in creating accurate drawings.
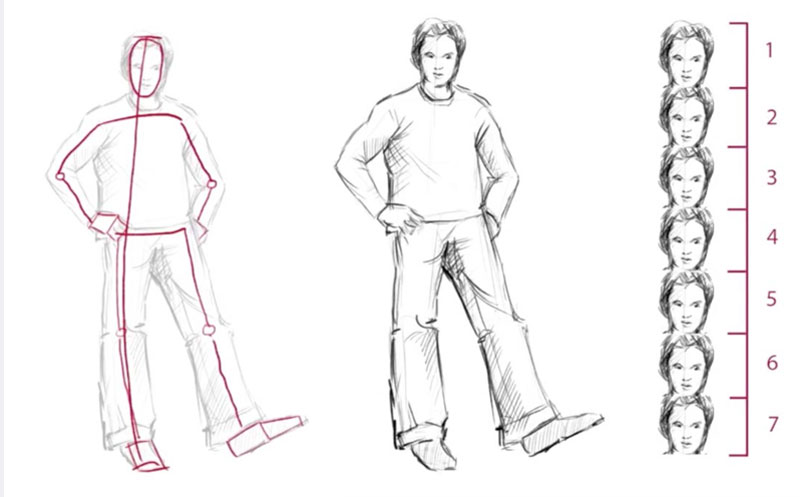
Gesture drawing can also be used to improve accuracy, especially when drawing the figure. Gesture drawing utilizes quick, loose lines and shapes to “find” the pose of the figure. Details are mostly omitted as the focus is to capture the weight and proportion of the figure in a short amount of time.
After the initial gesture is drawn, the artist can develop the details of the drawing after they are confident with the accuracy of the initial sketch. Gesture drawing is especially useful when the figure is in a position where the basic proportions are more difficult to recognize as is the case with foreshortening.
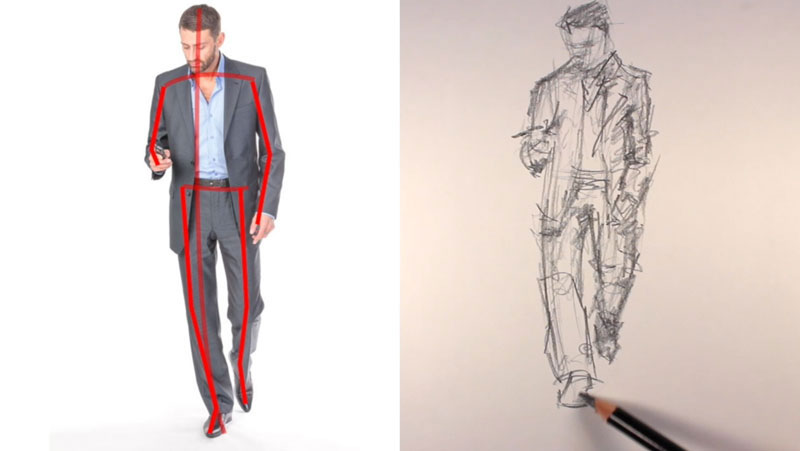
When combined, gesture drawing and knowledge of basic figure proportions often leads to success when drawing the human figure.
If so, join over 36,000 others that receive our newsletter with new drawing and painting lessons. Plus, check out three of our course videos and ebooks for free.
Why You Believe You Can’t Draw and What To Do About It
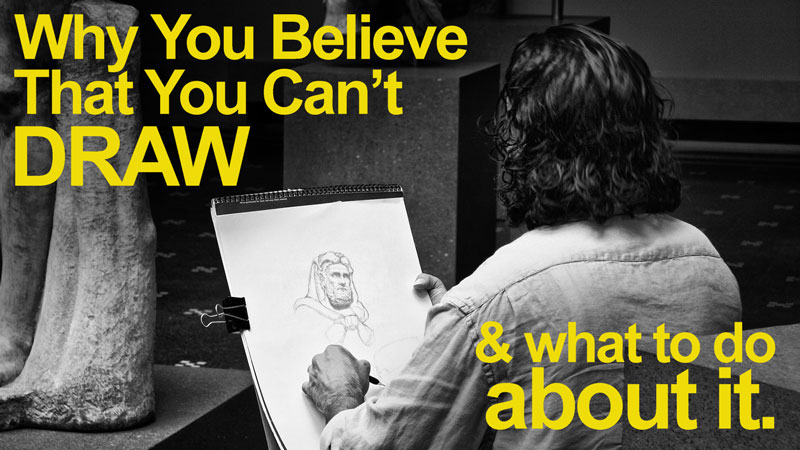
If you ask a room of one hundred average adults to raise their hands if they believe they can draw, only a handful will raise their hands. If you ask one hundred 5 year olds the same question, nearly all of them will raise their hands. What happens to us to make our opinions about ourselves change so drastically? Can this belief be changed and what can we do to change it?
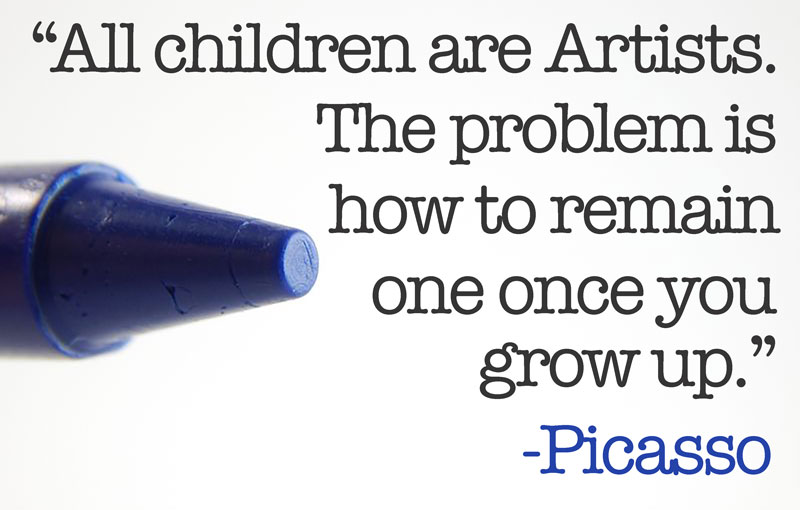
All Children Are Artists
Picasso is quoted as saying, “Every child is an artist. The problem is how to remain one once we grow up.”
As children, we truly are all artists because we believe we are. There’s no reason to believe otherwise.
Think back to first grade. What were your favorite activities? Beyond recess, and perhaps lunch, I’ll bet you that you enjoyed coloring or sculpting, or perhaps building things with blocks. You enjoyed creating because we are innately all creators in some form or fashion.
Drawing is the most foundational form of creating. For most children, the moment in which they are handed a crayon (without a coloring page) is the moment that they first create something. The marks made are far from representational, but they are pure – made without any preconceived notions or past negative experiences. They are created out of nothing, without limitations. It is a magical moment when this happens. We all experienced it at some point, without realizing the importance of the act.
Many of us continue on for the next several years, blissfully creating things without judgment from others. We may receive compliments that encourage us to continue, but we do not hear condemning comments.
But somewhere along the way, still while we are young, we start to notice something. We start to notice that some of our artistic peers receive more praise than we do for what they create. We wonder, whether knowingly or not, why we don’t receive the same level of praise.
Often this happens in children right before moving into adolescence and it doesn’t just apply to making art. It applies to athletics, performance arts, and anything else that is skill-based. We start hearing that some folks are “talented” because they are somehow “better” than us. We start wondering if we are “talented” and we start searching for our so called “hidden talents”.
The Age of Judgment
Adolescence also marks the beginning of a difficult and fragile period of life. At this point, we are quite impressionable and believe what imperfect adults tell us. We are also quite concerned with what others think of us, as we search for “our place in life”. We are quite sensitive to any form of judgment. Unfortunately, it is this sensitive period of life when judgment starts to play a major role in who we become.
Grades received in school start to matter with a greater weight. Athletic programs begin to cut players, performances require auditions, and children at this age are brutal to each other regarding physical appearance and social status.
Impressional students start to believe that there are things that they can do, but other things that they can’t and perhaps never can.
This is one reason why a middle school student may cover their drawings as they work. They fear the judgment that may come – either spoken or unspoken. They also may make excuses before you can even take a peek at their work, uttering things like, “I can’t draw, or mine looks awful.”
They may truly love the process of drawing, but the fear of judgment holds them back. Over time, if not righted, this love of drawing and creating becomes suppressed. The student begins to believe that they really cannot draw and they search for something else to make them accepted.
The Role of Stereotypes
The structure of our educational system also plays a role by forcing students into a “path”. Some middle schools require students to take band, chorus, or art – but not a combination of any two. Why can’t a musician also be an artist? We stereotype people and force them to fall into a category. If you are a football player, you can’t be a dancer. If you are an artist, then you also cannot be good at math.
Students accept these stereotypes because adults make them believe they are true. Students often carry on, accepting that they do have certain abilities, but others are simply not attainable.
Stereotypes, once engrained in our minds, are strong adversaries. Once cemented, they often follow us through life. While it is true that we are all different, with varied skills and interests, I’ll argue that who we are is the result of who we believe we are and not purely the result of a collection of proteins in our DNA.
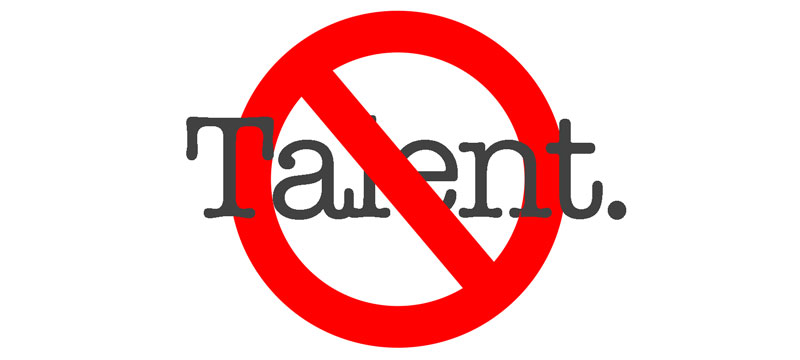
The Great Talent Myth
We’ve mentioned talent here several times already, but this great myth needs to be examined further. The belief in talent can take you very far or crush you before you even start.
Far too many of us believe that our life and who we are is determined largely based on our DNA. These people believe that we are either born with a “talent” or we are not, and that our abilities are somehow inherited by our parents, grandparents, or another ancestor. When in truth, this is just another limiting lie.
We all know “talented” people. Perhaps, you’re one of them. In most circumstances, talented people are labeled so because they have acquired a skill. It could be drawing, athletics, or perhaps they can play a musical instrument well.
Some people that are labeled as “talented” believe they are talented and the power of this belief fuels their work ethic. But many people who are called talented know the truth. This truth is that no skill is developed overnight, doesn’t require hard work, and is certainly not the result of inheritance.
Skills are acquired. Some skills require many hours of hard work and many years of training to reach a level competence. Drawing is one of these skills. The reality is that people that “can draw” have worked very hard to do so.
The good news is that any skill, and I mean any skill, can be learned and acquired by anyone wanting it. This clearly includes drawing.
But if you believe that it takes talent in order to so, then you will likely never overcome this hurdle. You’ll simply say to yourself, “I’m not talented” and give up far too early. The first challenge that you encounter will become your undoing.
“Talent” then becomes an excuse for why you can’t.
The development of a skill is a series of challenges that you overcome, one at a time. It is not something that just happens.
But if you stick with it, and face the challenges that await, and if you keep working and practicing, before long, people will be calling you “talented”.
The Power of Believing
Our beliefs guide our lives. If we truly believe that we can achieve something, then we are likely to be successful. The reverse is true as well. If we believe that we are incapable, then we probably are.
Henry Ford is quoted as saying, “Whether you think you can, or think you can’t – you’re right”.
If you started believing at some point that you can’t draw, then you’re right. However, if you believe that you can draw and you’re willing to work for it, then you’re also right.
“Whether you think you can, or think you can’t – you’re right.” – Henry Ford
If you truly believe, then you find ways to make it happen – no matter what the circumstances. When we believe and are faced with a challenge, we find a way to overcome it. We know that the goal will eventually be achieved, so we work through all of the obstacles to get there.
But if we don’t believe and are met with an obstacle, we say to ourselves, “see I knew I couldn’t do it” and we give up.
How to Change Our Belief About Drawing
It should be fairly obvious what needs to happen in order for us to change our beliefs about drawing. It is easier said than done, but if drawing well is a skill that is desired, you must alter your thoughts.
It all starts with returning to that outlook you had when you were a first grader. The outlook that included limitless possibilities and an endless supply of “I can”. It’s returning to that place where the world was a blank slate before you, waiting to be written on with your unique mark.
It’s letting go of judgments past that may have scarred you or made you believe things about yourself that weren’t true. It’s about defining your life for yourself, instead of letting others define it for you.
It’s about dismissing the falsehood of “talent” and realizing that any skill can be developed by anyone. That if the desire is there, and you’re willing to work for it, then anything is possible.
And finally, it’s about believing in yourself – that you can do this. You can do anything that you want.
We are given only one short life and it’s much too short to live wondering what might have been. It’s never too late to reach your goals and to be the person that you choose to be.
You can draw and you can start right now. The only thing in your way is you.
If so, join over 36,000 others that receive our newsletter with new drawing and painting lessons. Plus, check out three of our course videos and ebooks for free.
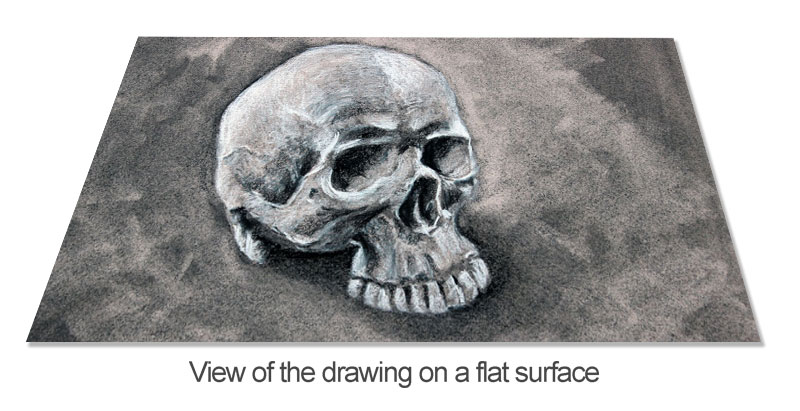
Drawing on a Flat Or Tilted Surface – Which is Best?

Some of us draw on flat surfaces, like a table, while others prefer to draw on a tilted surface, like an easel or a drafting table. But which is better? Which setup leads to more accuracy in our drawings? In this post, we’ll look at the pros and cons of each arrangement and I’ll let you decide which is best for you.
Considering Comfort When Drawing
It’s important to be comfortable when you are drawing. When your body is comfortable, you’re less likely to be distracted by your posture and you can devote more energy to the actual “act” of drawing. You’re more likely to focus on the lines, shapes, and values instead of that little pain in your lower back. No matter which arrangement works best for you, you should always consider your comfort.
Drawing on a Flat Surface
Since most of us start our artistic life drawing on a flat surface, it only makes sense that many of us are comfortable with drawing from this angle. We learn to write this way, so drawing in this manner seems like a logical approach.
This arrangement is also more accessible since most of us don’t have to look too hard to find a table. Everyone doesn’t have access to an easel or a drafting table after all.
Many folks are able to create amazing drawings working on a flat surface, but I’ve found that drawing on a flat surface can actual hinder your success.
To understand how this can happen, we have to understand how we are seeing the drawing and how the angle can affect the marks that we make.
We know how important “seeing” is to drawing. Drawing is largely about how we see and understand objects. The marks that are made are important as well, but knowing how to see as an artist is paramount.
When we observe the subjects and objects that we draw, we typically view them from a 90 degree angle. In others words, we position our head to view them directly. This is especially true when we are drawing subjects from life, instead of from a photo reference.
We then go to the drawing surface, remembering what we have seen, and make marks to reflect our observations. This, in essence, is the process of drawing.
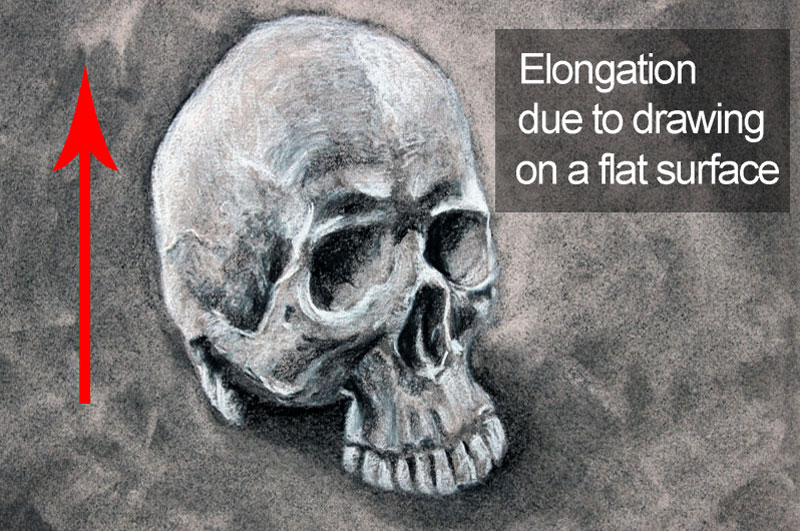
The problem arises when we start making marks on the drawing surface. Because we are working on a flat surface, the angle in which we view the paper is different from the angle that we viewed the subject.
This change in view point changes all of the angles that we perceive as we make marks, if only slightly. But slight variations in angles can lead to major distortion.
It helps to be aware of this, but small variations are almost unavoidable.
The most common form of distortion results in elongated drawings. The student may draw the subject from life, thinking that the work is accurate, only to lift it up and look at it directly, noticing the distortion.
Drawing on a Tilted Surface
An easel or a drafting table provides the artist the ability to tilt the drawing to better match the angle in which the subject is observed. This eradicates much of the distortion that can occur from drawing on a perfectly flat surface. Although the angle may not match the observed view exactly, it is much closer to what is actually observed by the artist.
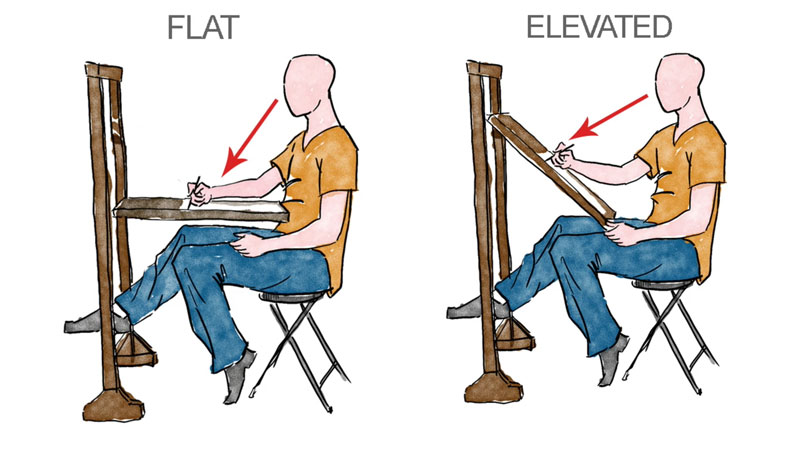
This is why most experienced artists prefer to work on a tilted surface. It’s all about understanding how we view the subject and the angle in which we record the information on the drawing surface. It’s much easier to record what we see when the drawing surface matches (or closely matches) the angle in which we view the subject.
Another advantage to working on a tilted surface is that it is much easier to step back from the work and make evaluations. Backing up and judging the progress of your work is important. This is often when we notice areas that should be addressed or mistakes that should be rectified.
When drawing on a flat surface, you may stand to look down on the work, but if you want to evaluate it properly, then you must set it up against a wall and back away. When working on an easel or drafting table, we can leave the work in place and simply back up.
It may not seem like a huge difference, but it does allow a bit more fluidity as we work, keeping our minds “in the groove”.
(Some of the following links are affiliate links which means we earn a small commission if you purchase at no additional cost to you.)
It may be difficult for beginning artists to make the shift to drawing on a tilted surface. It is clearly different than how we write and how many of us first start drawing. It may be uncomfortable at first, but the benefits of drawing on a tilted surface often outweigh the initial awkwardness.
What Drawing Angle is Best?
You may be wondering then, what drawing angle is best? If we accept that drawing on a tilted surface, although possibly awkward at first, produces better accuracy in our drawings, then it’s safe to assume that there must be an optimal angle.
Theoretically, the most optimal angle should match the angle at which you are viewing the subject. If you are drawing the subject from life, perhaps as still life arrangement, then you are most likely viewing the subject at 90 degrees. Therefore, the most optimal angle would be 90 degrees, with the drawing surface facing you directly.
But before we start setting up our easel as flat as it can go, we have to consider the first point – “comfort”. It simply isn’t comfortable to draw at 90 degrees. It is difficult to tilt your hand in order to make controlled marks on the lower portion of the drawing surface at this extreme angle.
So, although 90 degrees is theoretically the most optimal angle, practically it is not.
Therefore, we need find a “happy medium” between flat and 90 degrees and this varies from artist to artist. Some will prefer more extreme angles while others are satisfied with a slight angle.
In my case, my drafting table is set at 55 degrees, which is my “happy medium”.
Conclusion
In the world of art, experimentation is always your “best friend”. Experiment with your setup and discover what works best for you. Although the angle in which you draw is important and does affect your success, the most important thing is that you are drawing. Don’t let the absence of an easel or a drafting table keep you from that.
If so, join over 36,000 others that receive our newsletter with new drawing and painting lessons. Plus, check out three of our course videos and ebooks for free.
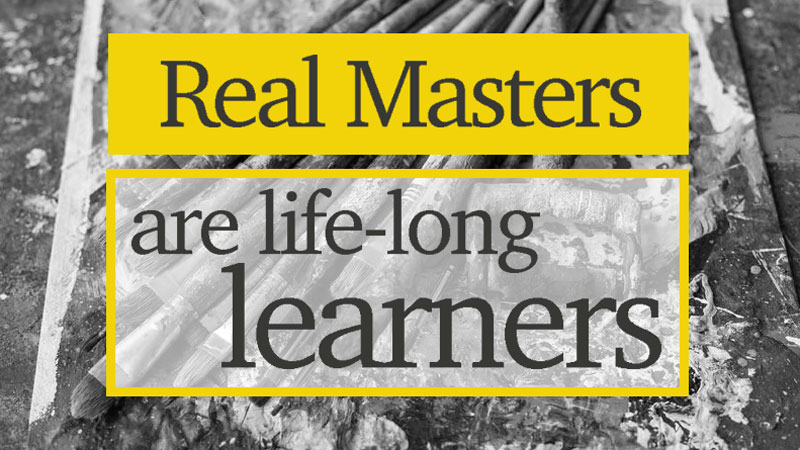
Real Masters Are Life-Long Learners
It’s true that there are those that proclaim to have found the “right” way to develop a work. Whether it be a drawing, painting, sculpture, or collage, these intellectuals deem their approach to be the best and thus designate it to be the “right” way to create.
Many of us “buy in” to this flawed determination, incorrectly believing that these gurus somehow know the “right” way to draw, paint, etc. without appreciating the truth. That truth being that are many paths and many “rights”. Many of these teachers truly believe that their way is the “right” and only way and thus, cease seeking additional knowledge – which is a flaw.
A visit to any art museum that houses influential works throughout time will confirm this truth. Each artist has found success in their own way, with their own process. They may borrow processes, use of media, or even ideas, but what hangs on the wall or stands in the space is uniquely their own. Most have had teachers, masters before them, while others have learned on their own. But each artist has found their own individual voice along paths that are as varied as their work. And the best of these, the true masters, continue to learn and evolve as they create.
As artists, we should never plan to reach a plateau. There is no summit, no peak in the development of an artist. It is an ever-evolving process of learning, whether through the guidance of a teacher or through self-discovery. We should never suppose that we have learned it all. We should never close our minds to new processes, new ideas, or new media.
By the same measure, we should never become content with what we know. We don’t know what we don’t know after all. Therefore, if the desire is become a master at our craft, we should constantly be seeking additional knowledge. We should thirst for it desperately and look to others for guidance and inspiration with open minds.
When our minds are open, they become filled. When they are closed, our minds cease to grow and begin to wither.
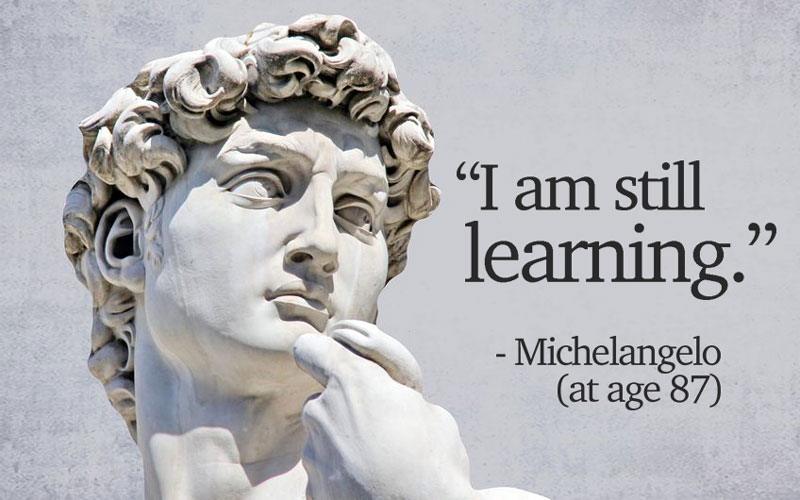
When I was a young man, I was confident in what I know. As I have become older, I recognize how much I still have to learn. I know now that artistic development is a life-long journey to a destination never to be reached. That it is the journey itself that is the reward, not the destination.
How To Continue Our Learning and Discovery
Since it is clear that our art learning should never cease and that our growth should be a priority, here are a few strategies to continue our learning even after we have attained an admirable level of skill…
Read Books (Not Just Instructional Books)
Books are clearly an incredible resource of information. And when it comes to developing ourselves as artists, our first assumption may be to look to instructional books for additional knowledge. Instructional books are plentiful and many are of good use.
Many instructional books however, read as manuals and illustrate step by step processes. And while this is beneficial, it is not always the best place to search for knowledge that is designed to propel us forward. Instructional books show us a process (which is valuable), but do very little in helping us to develop our own artistic voice.
Other books exist that provide concrete advice on advancing ourselves artistically. Some speak to the fundamentals while others speak to the struggles that we face as creatives. Books of this type should be included in our continued learning.
- The War of Art – by Steven Pressfield (Philosophy)
- Drawing on The Right Side of The Brain – by Betty Edwards (Drawing Theory)
Visit New Places and New Cultures
An unexpected benefit to traveling is renewed vigor in creativity. Every time I have traveled, I have returned with an urgency to create and often the work that I produce is improved. Exposure to new places and people expands the possibilities of creation and whenever possible, it should be a part of your growth as an artist.
The world is vast and filled with so many ideas and experiences. When we are exposed to them, it carries over into what we create.
Learn New Mediums and Approaches
We often become comfortable with a medium or the manner that we approach a work. This makes perfect sense, of course. When we experience success, we naturally repeat it. But far too often, we begin to shun new mediums or processes for fear of failure, forgetting that it is the failures that teach us most.
My favorite mediums today are not the ones that I started with. In fact, some are mediums that I desperately feared. If I had let fear of failure keep me from experiencing them, I would not know the joy that they have afforded to me.
Be careful placing labels on yourself. Do not say “I am a painter – I do not draw”. This statement does not make sense to a master. For painting is not a skill without drawing.
Instead, expand your capabilities. Learn and experience as many forms of art that your time will allow. Be open to failures, but approach them with the determination to succeed.
- It’ Time To Try a New Medium (Article)
Look at Our Own Art Critically
We can learn from ourselves, if we are willing to take a close look. Creating art is a process of puzzles and decisions. We make small decisions with very mark and brush stroke. As we work, we are free to make changes and correct imperfections as long as we continue on to a finished work. Even then, every decision that is made along the way is not always the best. This is true in any work, even if the final result is deemed successful.
Improvement and learning comes from analyzing these decisions and evaluating their results. When we have completed a work we should revisit it after some time away and decide how we could have improved. These evaluations should be direct. Instead of saying, “the nose is not right”, we should offer to ourselves a clear strategy for how it could be improved.
- The Importance of Critique (Article)
- Member’s Minute Critiques (Membership Required) (Student submitted art)
Intentional Practice
Drawing and painting are skills that are developed over time and any skill requires practice. The best form of practice is intentional practice. Practice of this type means that a goal is set and the outcome is clearly defined.
If your goal is to become faster at sketching, then time yourself and intentionally focus on enhancing your speed.
If your goal is to draw accurate portraits, focus on capturing the “likeness” of subjects through specific features of the face. Draw the eyes as many times as necessary in order to render them accurately. Then draw the nose until it is accurate.
An athlete spends many hours training and practicing before the big game. We don’t see the hours upon hours that are devoted to practice, we only see the performance in the game. In the same manner, an artist should spend time practicing in their sketchbook or through the development of studies. Then, when prepared, create the work.
- How to Develop a Drawing Habit (Article)
- Improve Your Drawing Skills in 6 Days (Article)
Take Classes
Never in the history of mankind has information been so easily accessed. We can learn any bit of obscure information in just a few seconds, thanks to the internet. New skills can be had by anyone if they are willing to simply look for them.
Online classes are everywhere and many are of high quality. Students can re-watch lessons, pause video, and work along with the instructor in real time. And this doesn’t just apply to art. Just about any skill can be learned today at very minimal costs.
So why not take advantage of this wonderful information? Take as many classes as you can and learn from as many people as you can. There is something to be gained from just about anyone willing to share. Soak it all up.
- Courses Offered at TheVirtualInstructor.com
- Membership Program (All courses, Live Lessons, and Critiques are Included)
- Search for local art classes
Visit Museums Filled With Influential Art Works
There is no substitute for viewing artworks in person. When we study reproductions we’re able to study composition and color usage, among other things. But there simply is no substitute for being present with a work of art.
Almost all of us have a museum or gallery that we can visit. It may be a few miles away in some cases, but it is always worth the trip.

Spend the day and study the works. Put yourself in the position of the artist. Consider the decisions that were made. Look for imperfections – you will find them. Borrow ideas, processes, and usage of media.
Conclusion
We all have the desire to excel. No one strives for mediocracy. Advancement, even at the level of “master”, requires continued learning and growth. We should never become content with where we are today. Instead, we should always be pushing towards a new milestone and this requires continued and constant learning.
If so, join over 36,000 others that receive our newsletter with new drawing and painting lessons. Plus, check out three of our course videos and ebooks for free.