I start this post discussing imperfections because we are as imperfect as artists just as we are as human beings. All of us are – no matter our skill level. We will never be perfect, no matter how “advanced” we become as artists.
We do improve over time and our mistakes become less pronounced, less evident – to the masses anyway.
Beginners make lots of mistakes. This is true in any field, with any skill. It’s part of it. And often as beginners, we aren’t even aware that we are making mistakes.
Looking back, I never really had anyone point out the mistakes that I was making. I had to discover them on my own, even though I had a fleet of teachers that had their chances to help. If only someone would have just pointed them out to me, I could have accelerated my learning.
So let’s take a look at the most common drawing mistakes made by beginners. I’ve noticed these common mistakes with my drawing students and I have committed them all myself as well. Hopefully, after reading this list, you’ll avoid making these mistakes. They are all avoidable after all, and not based on skill. Most are simply decisions that we can make.
1 – Choosing the Wrong Paper or Surface
It’s easy to get excited about the drawing process. Sometimes we can’t wait to start making marks and we completely forget about the surface. The surface of the paper is crucially important to the success of the work. Much like the foundation of a building, the surface is what supports the material. Choosing the wrong paper for the medium, or the effect that you want to achieve, dooms your chances of success right from the start, even before any marks are made.
Educate yourself about different types of papers. Experiment with different surfaces, textures, and colors until you find what works best for the medium that you suits you. Don’t assume that the paper doesn’t matter. It does.
2 – Setting Unrealistic Expectations
Far too many drawing students become frustrated too easily and often quit. I’ve seen it many, many times. After just a few minutes of drawing, the student balls up the paper and tosses it. A comment usually follows that has the words “I can’t”.
Why is it that we don’t see this as often with artists with more experience? Experienced artists also become frustrated, but often they work through it.
Frustration is often the result of not meeting our expectations. Beginners have this nasty habit of setting unrealistic expectations for themselves and as a result, frustration isn’t far behind. Frustration is crippling and should be avoided at all costs.
And how do you avoid frustration as a beginner? The answer is to realize that you are a beginner and drawing is a complex skill that cannot be mastered “overnight”. We all have to start somewhere and our personal expectations should be in alignment with our current skill level. We should expect to consistently improve, not become experts after just a few drawings or lessons.
3 – Failing to Develop a Full Range of Value
Value, in terms of art, is the darkness or lightness of a color. It is one of the seven elements of art and in my opinion, the most important. It is value that informs the the viewer about the light within the scene, the volume of the subject, and the textures in the image.
If our goal is to communicate the subject representationally, then we simply cannot do it without properly using value in the drawing.
Value is measured using a value scale which positions darker values opposite from lighter values. A value scale features a gradation of tones from dark to light, with black on one end and white on the other. Darker tones are referred to as “shades”, while lighter values are called “tints”.
We understand the world around us through value relationships and most of the time, what we see has a full range of value. In other words, our eyes see a full spectrum of darks and lights no matter what we are looking at. It therefore makes logical sense that what we draw should also feature a full range of value. Our drawing should incorporate the darkest darks, the middle grays, and the lightest values as well.
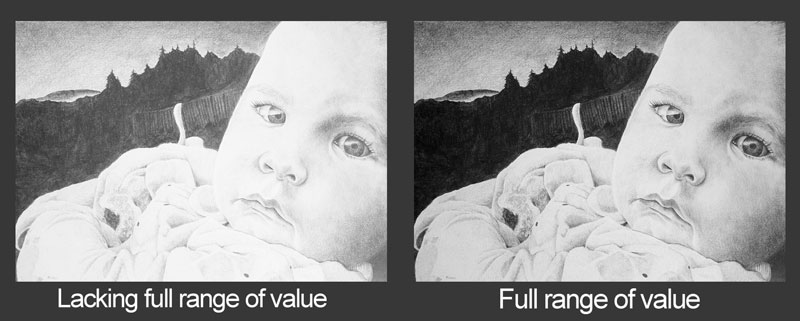
For many beginners this concept is difficult to incorporate. They may understand the concept, but may be too timid to apply it to their drawings. This mistake is often amplified because we typically work on white paper with a dark medium, forcing us to start from one end of the value scale to create a full range in the drawing.
One way to overcome this error is to practice drawing on a neutral toned surface, like gray drawing paper. Use both light and dark mediums to draw. Since you are essentially starting from the center of the value scale, it’s much easier to create a full range of value in the drawing.
4 – Failing to Consider Composition
Composition is the arrangement of elements within the picture plane of the drawing. It is crucial to the success of the finished work. While we may be able to skillfully render a subject, if the composition is weak, then the drawing will not be successful.
Strong compositions are the result of planning. Even if we know nothing of compositional theories, we can still find success with our compositions by creating thumbnails (small preliminary drawings) before making marks on the final surface. By testing multiple layouts of the subjects, we are likely to find a composition that is aesthetically successful.
Unfortunately beginning artists often skip this step and as a result, only find successful compositions when they get lucky.
5 – Drawing with Outlines
Our very first drawings, beyond scribbles, use outlines to communicate the subject. As we develop, we continue to use outlines to establish the edges of objects in our drawings. At some point however, we realize that using outlines to describe edges isn’t the best way to communicate in a drawing. It isn’t the way that we actually see the world. Instead, what we actually see is a contrast in values, made up of a collection of shapes.
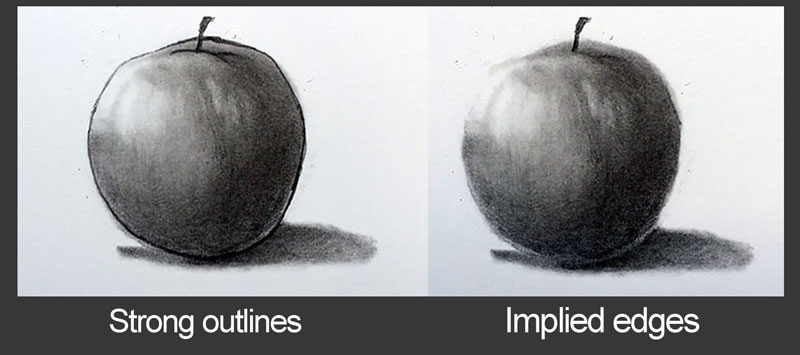
It can be difficult to move past “outlining”, but it is a crucial step in becoming better at drawing. To overcome the tendency to draw outlines, you may try drawing several subjects without using lines at all. In other words, complete the drawings using just the values that you see.
After a little practice, you can start to bring contour lines (outlines) back into the mix, when they are appropriate.
6 – Drawing Too Stiff
Sometimes the fear of making mistakes actually leads to making mistakes. This is what happens when we draw with too much control. I know this one well, since this is something I still struggle with.
When we apply marks with a “stiff hand”, the result is a drawing that appears stiff, unnatural, and “mechanical”. By loosing up and drawing loosely, especially in the beginning stages of a drawing, we actually have a better chance of communicating the subject with greater accuracy. I know it sounds counter-intuitive, but it’s true.
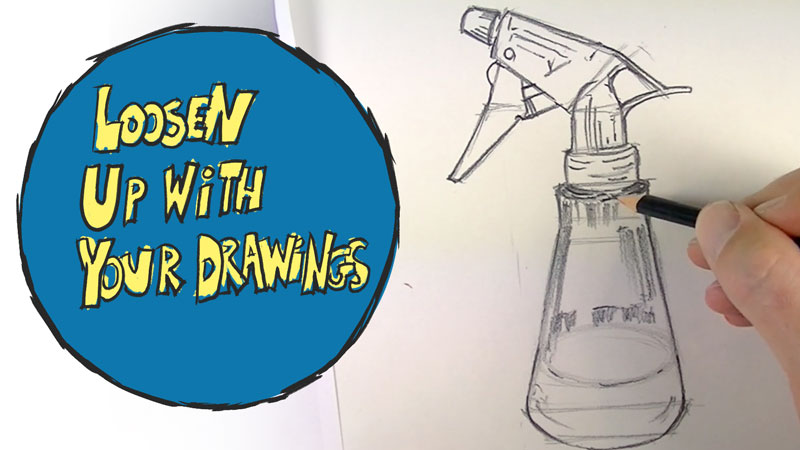
Try drawing several light lines when drawing the basic shape of the subject. You can always “tighten things up” later. You’re likely to find that your drawing speed and efficiency also improves. If you’re finding it difficult to “force” yourself into this practice, set up a timer and time your drawings. Try to create an entire drawing in just 10 minutes, then 5 minutes, and then in just 1 minute. You won’t have a masterpiece, but you will definitely loosen up.

7 – Thinking That You Are Already an Expert
Some beginning drawing students think they are already an expert. And because they think they have already figured everything out, they are not receptive to learning new skills. This is a very common mistake, especially among students that are slightly more skilled than their peers.
On top of this, they also think that they have already figured out who they are as artists. I can tell you and any other experienced artist will as well, we are constantly learning “who we are as artists”. It’s not something that you figure out as soon as you create a few drawings.
While confidence is great, over-confidence isn’t. It can greatly hinder your development. Instead, be receptive to many different styles of drawing and soak in as much instruction and experiences as you can. Keep in mind, that with art, there are always multiple solutions.
I have created countless drawings and paintings over the years, but I still learn something new every single week.
8 – Failing to Spend Enough Time on Your Drawings
Many beginning artists simply do not devote enough time to their drawings. Although listed last on this list, this is the #1 mistake I see committed by beginning artists and the easiest to remedy.
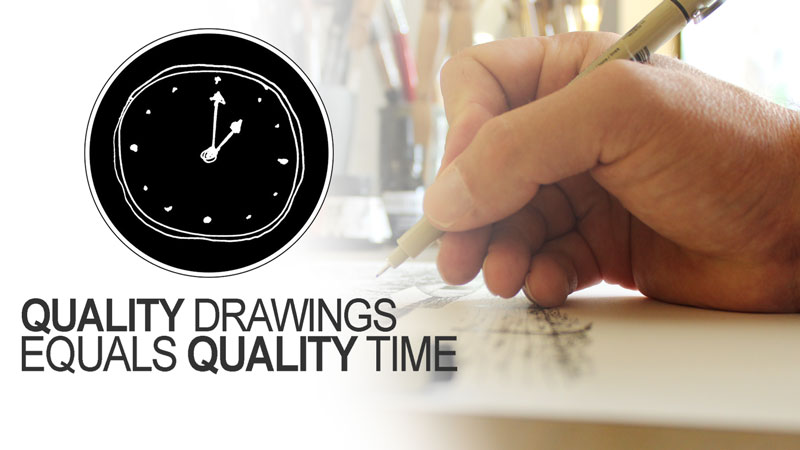
We live in a world where we have been groomed to expect instant gratification. It’s truly amazing that we can pull out our smart phones and access a world of information in just a nano-second. The world today is drastically different than it was just 20 years ago.
But instant, quality results are not a reality when it comes to drawing. We must put in the hours (not minutes) to create quality drawings. If we simply learn to slow down, and give the work the time and attention that it deserves (and requires) we are likely to find that our drawings drastically improve.
If so, join over 36,000 others that receive our newsletter with new drawing and painting lessons. Plus, check out three of our course videos and ebooks for free.