

The thing about drawing is that some of us still ascribe to the notion that it is an innate ability that a lucky few are born with. We believe that there is a certain level of skill that we are limited to, and once we reach that level there’s no more room for improvement. We make all kinds of excuses for why we can’t draw better – believe me I think I’ve heard them all.
Truthfully, drawing is a skill that just requires a bit of knowledge and sometimes lots of practice. (I know that many of you have heard me say this over and over again, but it does bear repeating.) There isn’t a ceiling on where you can take your skills.
The problem is that many of us simply don’t know how to improve our skills. We may accept that drawing is a skill that can be learned, we just don’t know how to learn it.
Some of us head off to YouTube to swim through an endless sea of videos that teach us a concept or demonstrate one artist’s interpretation of a subject. These folks may pick up something that “sticks” and that can be applied to their own work, but often times they’re just left feeling motivated without any real direction.
The truth is that learning drawing effectively is sequential. If drawing is learned sequentially, then concepts build upon each other and seem to make a bit more sense. If we learn concepts in “bits and pieces” without a defined order, it is a good bit harder to understand how they all fit together.
Think back to one of your early math classes. I’ll bet that you learned the concept of addition before you learned the concept of subtraction. I know that I certainly did. Can you imagine how hard it would have been to understand subtraction if you would have tried to learn it before you learned addition? It would have been impossible! You must learn addition before you have a chance of understanding subtraction.
Learning how to draw is the same. If concepts are introduced without a clear sequence, then improving your drawing can seem confusing and perhaps unattainable.
Since learning how to draw is more effective when it is learned in sequence, it only makes sense that practicing your skills should also be sequential.
Remember that math class. I bet you spent quite a bit of time practicing addition before you started practicing subtraction. Practicing is how concepts are made practical.
Honing and perfecting your drawing skills does require time, patience, and practice. But the good news is that we can often see dramatic improvement in a short amount of time if we take a sequential approach to our practice.
I’d like to share with you a 6 day approach to dramatically improving your drawing skills. Of course, don’t expect to become an expert in just under a week, but you should notice a clear improvement in your drawings after this time. Devote an hour or two a day to get the most out out of this experience. Keep in mind that these are exercises to practice – just like math problems, but a whole lot more fun and interesting!

Day One – The Mindset
Many people mistakenly believe that drawing is all about what happens in the hand. And while mark-making is certainly important and our hands are too, it’s not where the magic happens. Drawing is about what happens between your ears. It’s all about how your mind processes the world around you and how you communicate your understanding of it on a flat surface. So it only makes sense that we start by training our minds to understand the world as our eyes actually see it.
If you’ve ever been a part of an organized art class, then I’m sure you’ve heard the teacher say “draw what you see”. It sounds simple enough (assuming that you know what to look for). But if you don’t understand what you are seeing, then how can you draw it?
What happens is that our left brain tells us what the object we’re observing actually is. We try to recall a method for drawing that specific object and usually create a drawing that somewhat resembles the object, but also looks nothing like it. We are then clueless as to why our drawing doesn’t look like the object. We may even say things like “I can’t draw a (insert object here)” or “I wish I knew how to draw (insert object here)“.
The problem here is that our left brains are getting in the way. Don’t get me wrong, our left brains are great (we can’t do math without them), but we need to learn to intercept the information coming from our eyes before it reaches our left brains so we can truly understand what exactly we are seeing.
We see the world as a collection of abstract lines, shapes, colors, forms, values, and textures. Our brains process that information and make sense of it all. When we create a drawing, we use these things to create an illusion. We organize lines, shapes, colors, forms, values, and textures on a flat surface. If we organize them as our eyes see them, and not as our brains understand them, then we are successful. This is what it means to “draw what you see”.

(Some of the following links are affiliate links which means I make a small commission if you purchase at no additional cost to you.)
So, we need to start on day one by training our minds to see in this abstract format. To do this, we need to short-circuit our left brains and not give them any reason to lead us astray.
Perhaps, you’ve heard of the fantastic book, “Drawing on the Right Side of the Brain“. I love the title because it has a double meaning. We do draw effectively using our right brains, but it is also the correct “brain” to use. It’s listed among what I consider to be the best books for learning how to draw. A popular drawing exercise in this book is to draw an image upside down. When we do this, we short-circuit our left brains. Because the image is upside down, it’s harder to make sense of the subject. Therefore, we are focused on the abstract lines, shapes, etc. that we observe. The result is that you are more successful copying what you actually observe with your eyes on the drawing surface.
A few months back, I published a post with a couple of exercises designed to aid in training your brain to recognize lines and shapes without the distraction of the left brain. Because these are abstract compositions, your mind will not try to make sense of them and instead, you are forced to “copy” the lines that are actually observed. (You can read the full post here). Below, I’ve included the worksheets from this exercise.
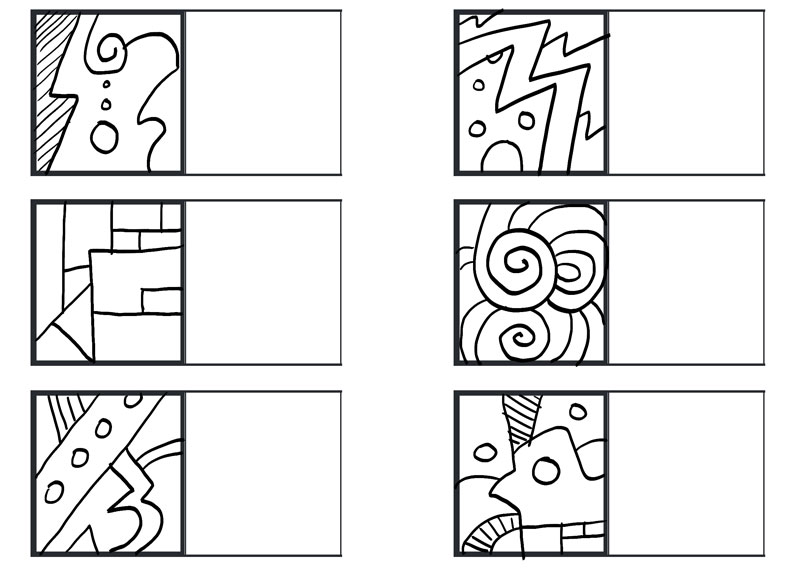
The first exercise is designed to put you in the mode of “seeing”. For exercise #1, simply observe the first box and find the box in the row that matches. No drawing is involved here. This exercise will only take a couple of minutes to complete and will get your mind thinking visually.
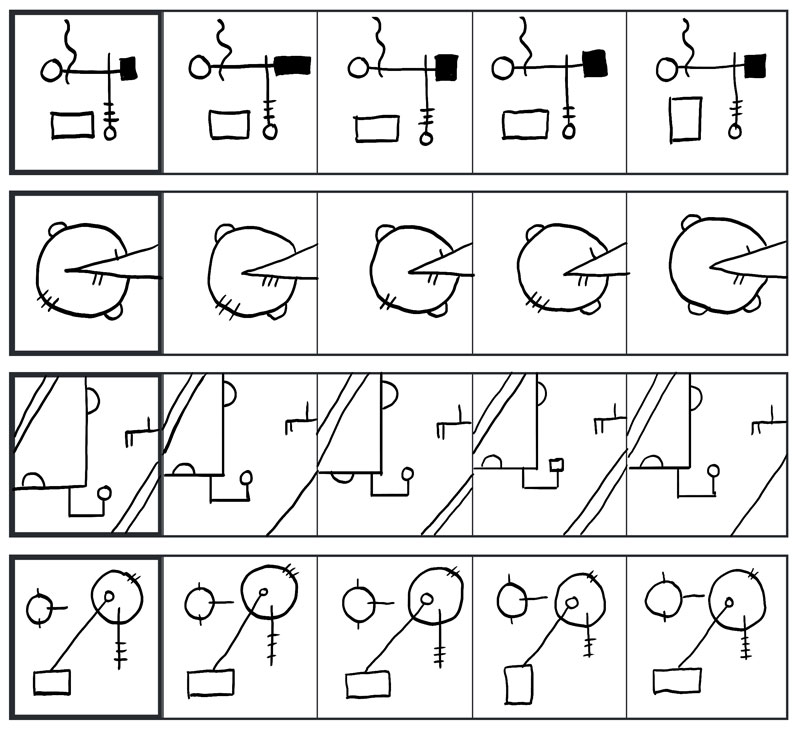
The second exercise is also straight-forward and borrows ideas from the exercise we discussed from “Drawing on The Right Side of the Brain”. In this exercise, simply observe the abstract lines and shapes in the bolded box and then copy what you see in the box beside it. Because the lines are abstract and no recognizable subject from reality exists, you are forced to draw exactly what you see.
Since the “magic” of drawing mostly happens in your brain and not on paper, we can practice drawing without making marks. Yes, you read that correctly. We are training our brains here after all.
Your third exercise for day one is simply to look at the world around you and notice the lines that you see. Imagine drawing the objects around you. Compare sizes and shapes, notice where lines begin and others end. You may even hold up your pointer finger and trace what you see. Imagine drawing what you see, but let the activity take place in your mind.
Spend some good time with this, maybe 20 minutes or more. You may feel silly at first, but drawing is about seeing. And if we don’t spend time training our minds to see, then we can’t expect to notice any improvement in our drawing skills.
So, let’s review day one…
- Exercise One (Above) – “Find The Box That Matches”
- Exercise Two (Above) – “Copy the Doodle”
- Practice observing subjects and visualize drawing them in your mind.
Day Two – Loosening Up
On day one, we got our minds focused on observation. Now, on day two, we can address the marks that we make based on what we see.
Our focus on day two centers on loosening up with our marks. Sometimes the tendency is to make controlled marks that appear stiff. We concentrate on drawing a precise line far too much and lose “the big picture”. When we draw lines with “forced control”, we also lose a bit of accuracy. It may seem counter-intuitive, but if we focus too much on drawing a perfect line, we sacrifice accuracy.
We need to loosen up a bit and allow our arms to move a little more. When we draw with too much control, the marks are made by moving our wrists. And while this is great for details, it isn’t quite as effective for getting the initial shapes of the subject on the drawing surface.
Instead, we need to allow the marks to originate from our elbows or shoulder. By keeping the wrist tight and moving the elbow to make a mark, we have a broader range of motion and more control.
We actually have a lot more freedom of movement in our shoulders and it’s much easier to control the mark.

Another aspect to consider is the number of marks that are made on the surface. Far too many of us try to get the “right line” in place with just one stroke. This is nearly impossible. Instead, we can try to find the “right line” by making several loose and light lines on the paper. With several lines on the paper, we have a better chance of getting the right line in place. We can always make the correct line a little darker and erase the stray lines away.
I compare this concept to playing the lottery. Most people buy more than one ticket when they play. So why would you try to make just one line and hope this it is the correct one?
So then, how do we practice loosening up? How can we force ourselves to make several marks when we may already be conditioned to draw with “forced control”? The answer is through gesture drawing.
Gesture drawing is usually associated with drawing the human figure. It is a method of creating loose lines or shapes to build the overall shape and possibly the form of the subject quickly. It is a form of drawing that is not focused on the details, but rather capturing as much information as possible, as quickly as possible on the drawing surface.
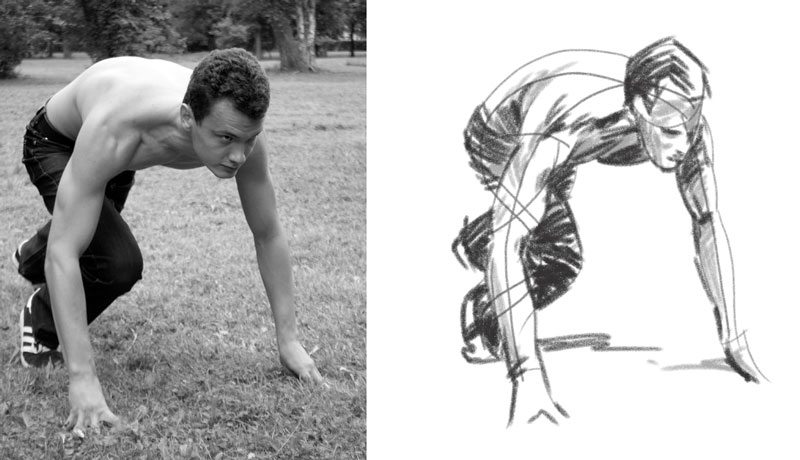
We can create a gesture drawing of anything, not just the human figure. We can create quick gestures of any object or landscape if we wish.
Now, since gesture drawing is also about speed, we need to consider imposing a time constraint. If you’ve never created a gesture drawing before, you may find this difficult in the beginning.
Set a timer for 4 minutes and draw an object, then another, and another. Then set the timer for 3 minutes and draw three more objects. Then 2 minutes, and finally 1 minute.
Draw loosely, using your whole arm. Keep your wrist tight and try to allow the marks to originate from your shoulder or elbow. Make several marks and leave the eraser in the drawer.
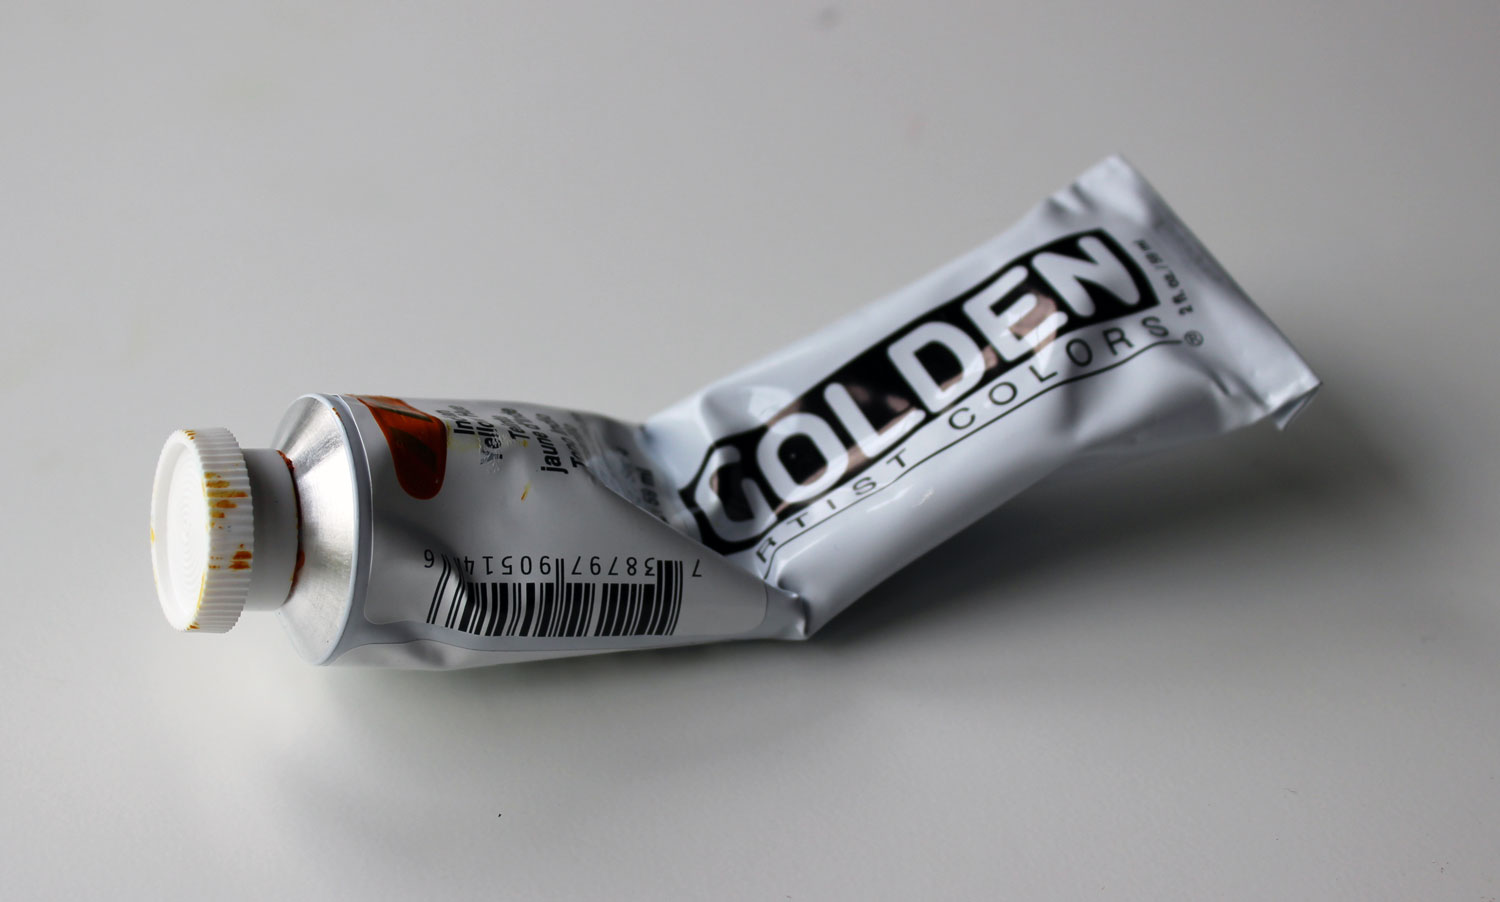
If you don’t have any objects laying around, I’ve provided a few references to get you started…


Spend at least an hour on this exercise. You can make a game out of it and see how many objects you can draw in that timeframe. Remember, our focus on day two is to loosen up – not to create a masterpiece.
If you find that you’re having trouble loosening up, then you may consider changing your grip on the pencil for this exercise. Changing your grip can help encourage looser drawings.
So let’s review day two…
- Practice drawing objects loosely and quickly
- Time your drawings. Start at 4 minutes and progress to just 1 minute for each drawing.
- Try to draw with your shoulder and elbow instead of just with your wrist.
- Don’t erase and just focus on capturing the form as quickly as possible.
Day Three – It’s All About The Shapes
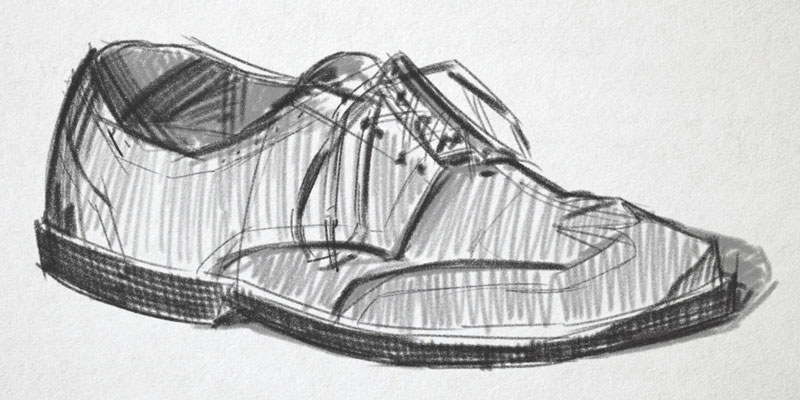
When many of us draw, we naturally start with the outlines of the subject. These outlines are called contour lines. We perceive that these lines exist around the edges of an object and form the boundaries of the details. Drawing a subject with just the contour lines is a great exercise, but it’s not the fastest and most accurate way to capture the subject in a drawing.
Instead of focusing on the contour lines in the early stages, we can focus on the basic shapes that make up the overall form of the subject. If we break the subject down into “easy to draw” shapes, then our speed and accuracy improves.
We can piece these simple shapes together to build complex forms and shapes. After which, we can focus on the contour lines. Drawing with contour lines after we have a structure of shapes in place makes drawing much easier.
The trick is learning how to recognize the simple shapes within a complex object. Developing and honing this skill results from practice and experience but it’s relatively easy to get your mind thinking in terms of shapes.
Our focus on day three is based on this concept. Draw a few objects from observation, but begin by drawing the simple shapes that make up the overall form of the subject. Once the basic shapes are in place, you can add the contours and any details.
You may start with a very simple object, like an eraser, and gradually build up to more complicated subjects. Try to “build” the subject with the most basic shapes (rectangles, circles, ovals, triangles, etc.).
Don’t worry about the value or shading, only concern yourself with drawing the basic shapes and defining the contour lines. As you draw the basic shapes, remember the concept that we explored on day two and stay loose. Draw with your whole arm and allow your marks to originate from your shoulder or elbow instead of your wrist.
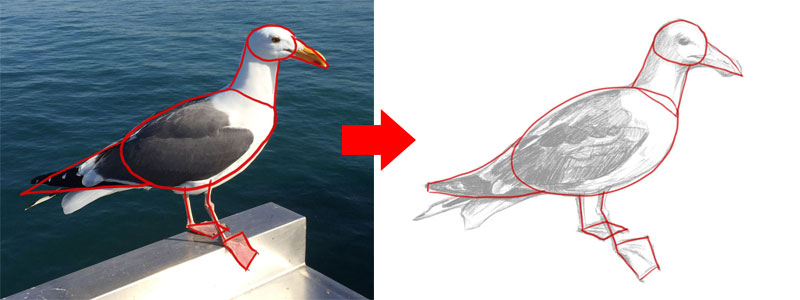
If you’re not sure where to start, here are few references to get you started…


So let’s review day three…
- Practice drawing objects by breaking them down into basic shapes. Piece the shapes together to create more complex shapes.
- After the shapes have been defined, draw the contour lines using the shapes as a guide.
Day Four – Form and Value
Drawing lines and shapes is one thing, but in order to create a convincing illusion of form, volume, and light in a drawing, we need to add shading.
Shading is a loosely used term. It implies that we are always adding darker applications, but this isn’t always the case. Shading refers to developing the illusion of light and form on the subject. This is accomplished by manipulating value.
Value refers to the darkness or lightness of a color. So “shading” is not just about the darker applications, but more about the relationship that is created between the darker and lighter areas on the subject. If we are using a darker medium, like graphite, then we create the illusion of lighter values by developing the darker values around them. So in essence, “shading” is simply developing a range of value on the subject.
Lighter values typically are used to communicate the highlights and locations where light is hitting the subject. Darker values are used to communicate the locations of shadow. The locations of the lighter and darker values on the subject inform the viewer about the light. And when the light within the scene is depicted in an accurate manner, then the illusion of the form of the object is also communicated.
This means that “shading”, or more accurately – adding value, is incredibly important to creating a successful drawing.
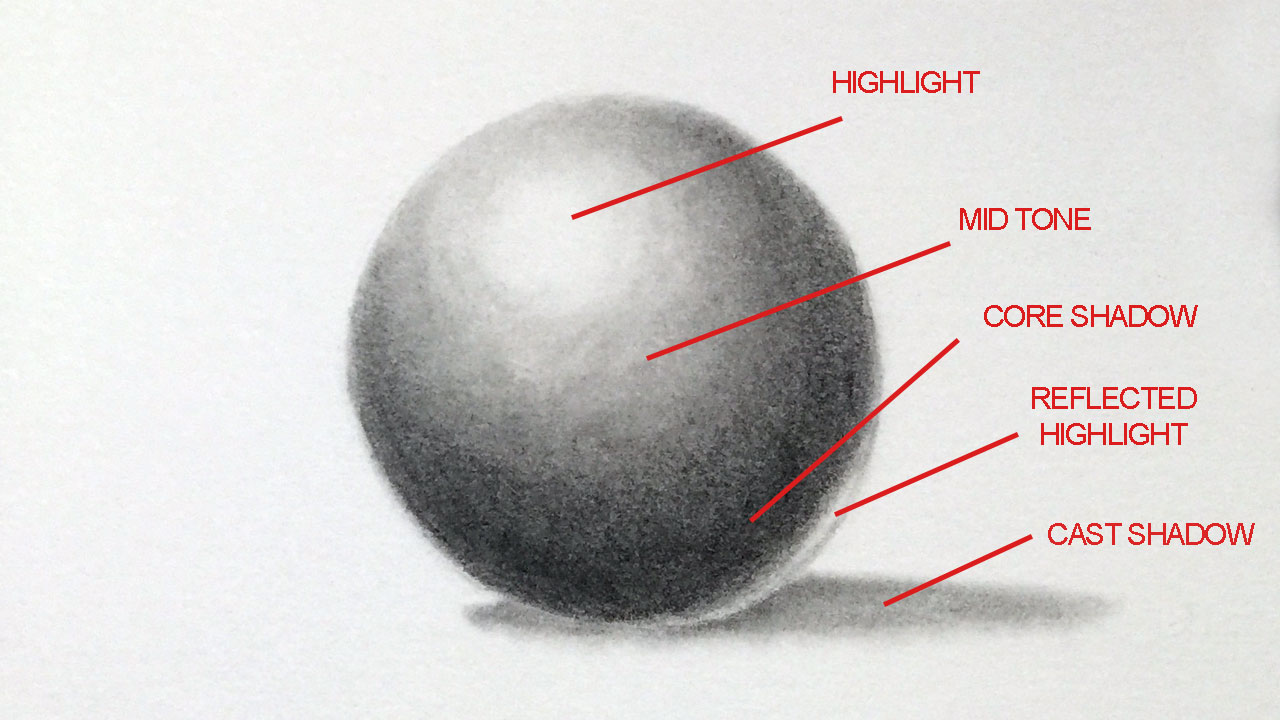
On day four, our focus is on value. More specifically, we’ll focus on drawing basic forms and use value to create an accurate illusion.
This may seem like a simple exercise (and it is), but it is also very effective. Concentrate on creating accurate value as you draw these forms. Also, pay attention to creating a full range of value. In other words, be sure that each one of the forms that you draw has dark values, light values, and mid tones.

Also, pay special attention to the shapes of the cast shadows that are created. You can use the value scale below to make comparisons to values that you observe and what you add to your drawing.

Below you’ll find a reference photo that you can use to practice drawing basic forms…

So let’s review day four…
- Practice drawing basic forms.
- Create a full range of value (shading) to create an accurate illusion of light and form.
Day Five – Drawing Within The Box
The subjects that we draw are 3-Dimensional. In a drawing, we must create the illusion that they are actually 3-Dimensional. We do this partly through the use of value. But it may be helpful to recognize the simplified form of the object first.
Think back to what we covered on day three when we discussed finding the simplified shapes within a more complex subject. If we simplify the form of the subject initially, then we have a better chance of creating the illusion of its form in the drawing. Just like with the basic shapes, we can simplify the subject down into basic forms.
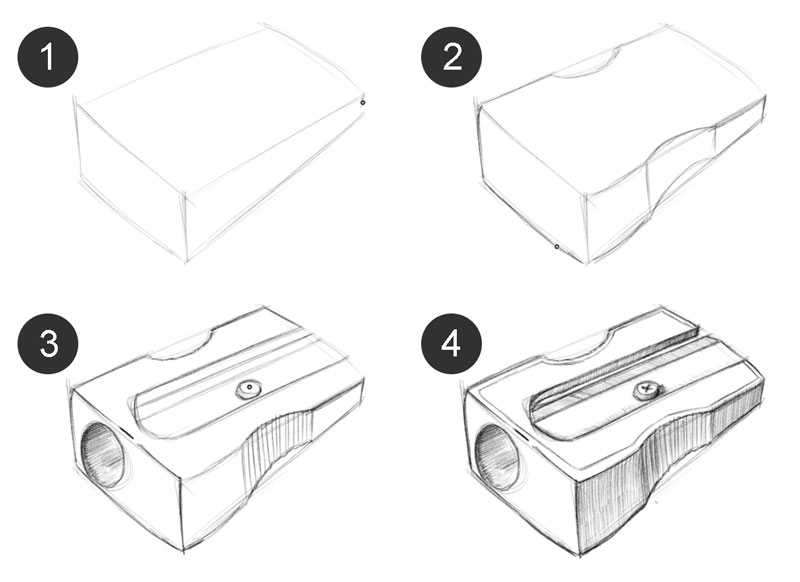
Long ago, I was a Cub Scout and one of the popular activities for scouts is to build a pinewood derby racing car. You are provided with a solid block of wood that you would use to carve out the shape of your car. The bulk of the car remained rectangular, but by removing pieces of the wood, you could develop a sleeker and faster vehicle. We can apply this idea to drawing.
We can draw the basic form first and “carve out” the details as we add the contours. I like to think of this as “drawing within the box”.
Now this idea doesn’t have to be limited to rectangular forms. We can also apply it rounded subjects by drawing cylinders and spheres. And just as we pieced basic shapes together, we can also combine simple forms to build a more complex form that more closely resembles the subject.
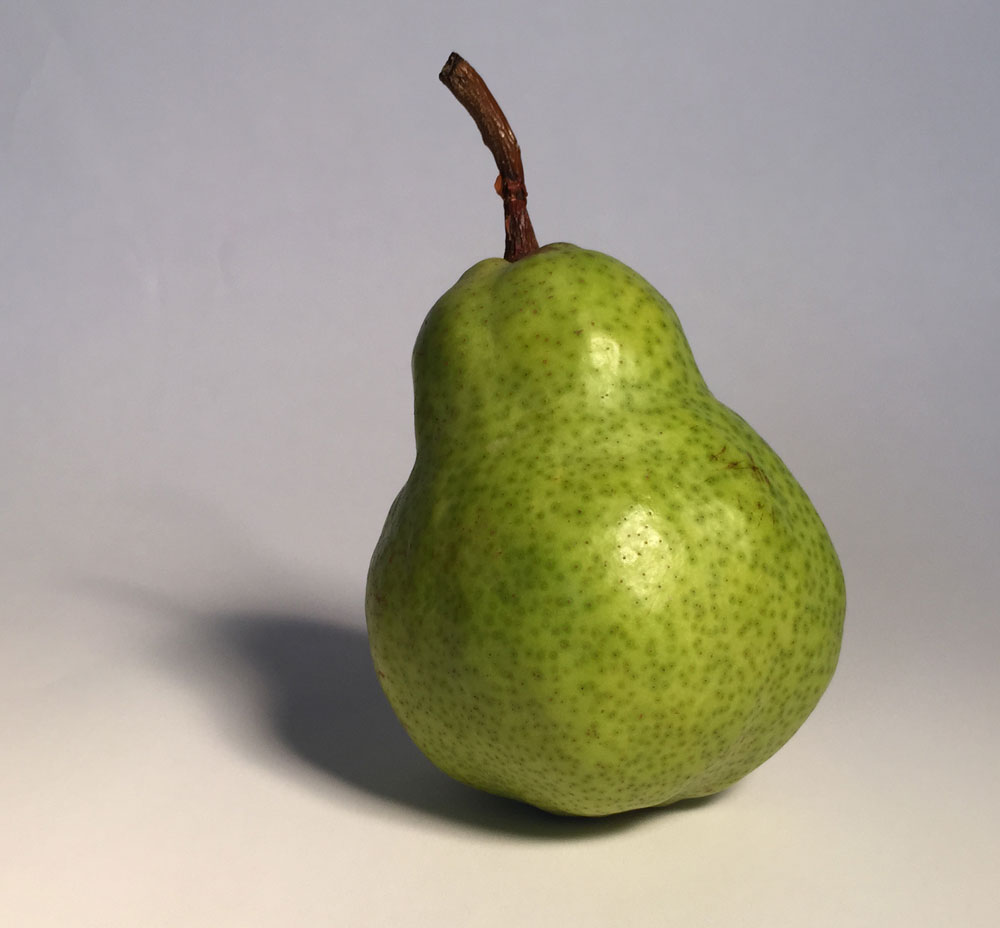
Below, you’ll find a few subjects to practice with on day five. You can add shading if you like, but the most important part of this exercise to to draw the basic forms and “carve out” the contours.


So let’s review day five…
- Practice drawing objects by breaking them down into basic forms.
- Draw the basic forms loosely and then “carve out” the details by adding the contour lines.
Day Six – Putting It All Together and One Final Tip
At this point, over the course of the last five days you have spent time learning what to look for and how to “see”, loosening up and drawing with your elbow/shoulder, breaking complex objects down into basic shapes, manipulating value to create the illusion of form, and drawing basic forms to build up more complex forms. Now, on day six, it’s time to put all of these concepts together and create a complete drawing.
You can draw whatever you like, but if you want to measure how much you have improved, draw that very first object again (the one that you put away and haven’t peeked at). But this time, consider all of the concepts that you have explored over the last five days.
When you’re finished with this drawing, pull that very first drawing out and compare it. Perhaps make notes on how you improved and how you may improve even more.
And now for a final tip – slow down and work patiently. I often find that some students expect to create incredible drawings in unrealistic timeframes. Quality drawings take time to create. Sometimes many, many hours of work are involved in creating a small drawing. Remember, most of drawing takes place between your ears. So slow down and think about the decisions that you make as you draw.
If so, join over 36,000 others that receive our newsletter with new drawing and painting lessons. Plus, check out three of our course videos and ebooks for free.


Lesson Discussion
Comments are closed.
I want toen subscription again forum Free e books andere newsletter. Thans you
This was so helpful! Because of moving from one state to another I hadn’t done any drawing for a few months and had lost my confidence. This course was great for getting me grounded in the basics and starting again
awesome
great, i am so happy for being looking this page and i want to learn drawing. really it makes me hopeful, i will follow you.