 by Matt Fussell
Linear perspective is a method of creating the illusion of space on a two-dimensional surface using lines. Linear perspective is often used in conjunction with one or more of the other six ways to create the illusion of space. There are three types of linear perspective with each method having a different appropriate use.
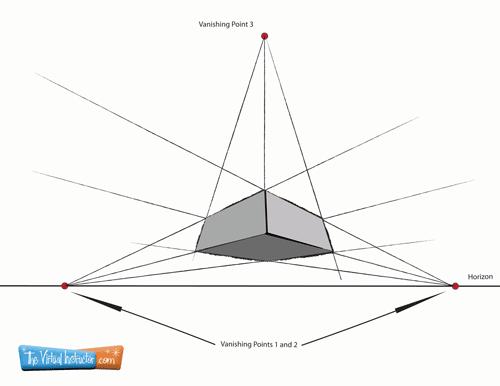
This page is about three point perspective. Three point perspective is actually the least used form of linear perspective. This is ironic since three point perspective is actually closer related to how we actually see things. In the world of drawing, however, three point perspective is most commonly used when the viewer’s point of view is extreme.
good way to consider this viewpoint would be to imagine you looking up at a very tall building or perhaps looking down from a very high distance. These extreme vantage points would best be depicted using three point perspective.
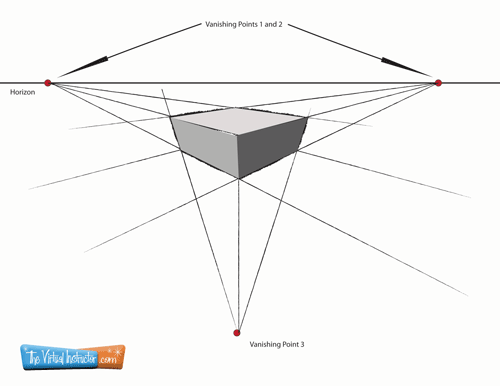
The main distinguishing factor present in three point perspective is in its name. One point perspective makes use of one vanishing point. Two point perspective uses two vanishing points. It should come as no surprise that three point perspective uses three vanishing points. The third vanishing point in three point perspective is not placed on the horizon line as seen with two point and one point perspective. Instead the third vanishing point is placed under or above the horizon line. Often the bottom vanishing point is placed off of the picture plane.
Like the other two forms of linear perspective, the first step is to define the horizon line. If you plan on placing the object below the horizon, be sure to draw the horizon on the top portion of the paper. If the object that you are drawing is to be placed above the horizon, be sure to place the horizon line near the bottom portion of the paper.
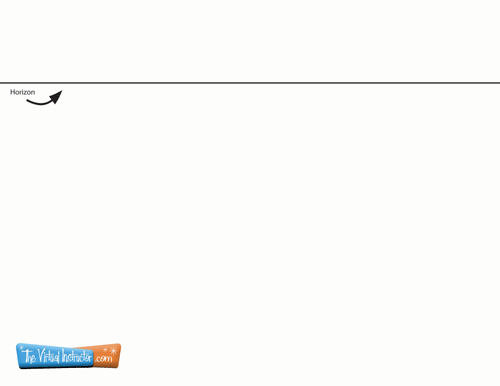
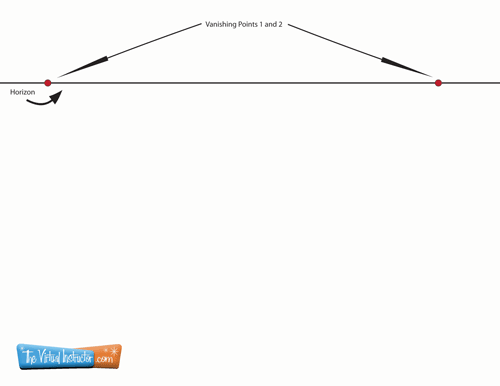
Next, place two vanishing points across from each other on the horizon line. You’ll want to be sure to space these vanishing points out. If you place them too close to each other, your resulting drawing will be distorted. Also, be sure that both vanishing points are placed on the horizon line. It’s okay if the vanishing points are not on the paper, just on the horizon line. (Remember the horizon line continues on off of the paper.)
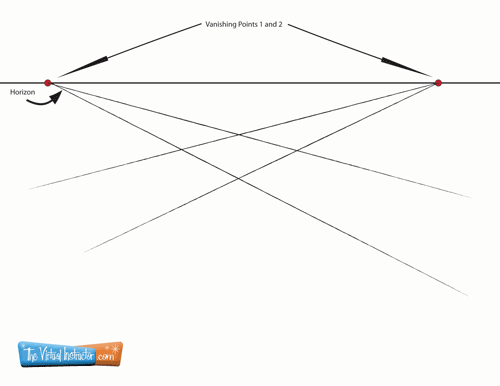
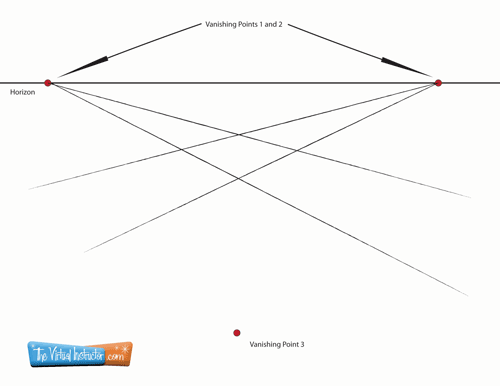
Now draw two lines from each of the vanishing points so that each set of lines intersects below the horizon line. If you do this correctly, it will resemble two intersecting roads.
Next, place the third vanishing point below the intersecting lines. The closer that you place the vanishing point to the intersecting lines, the more extreme your perspective will become. If you place the third vanishing point too close to the intersecting lines, you will create unwanted distortion.
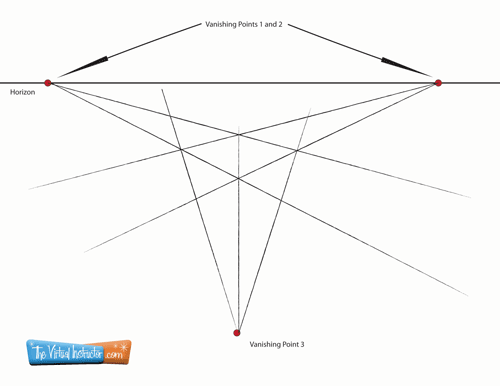
Now, draw lines upward from your third vanishing point so that they intersect with lines that intersected in the previous step. Extend these lines out far enough to “hold’ the form that you are drawing.
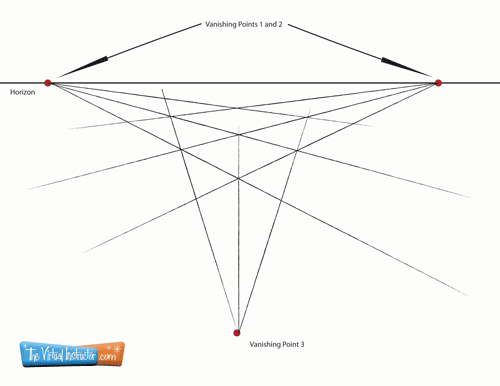
Next, close off the top of your object by drawing lines that extend beyond the tips of the lines that extend from the bottom vanishing point. These lines should originate from the other two vanishing points
Now you can darken up the lines that you will keep and erase the lines that you no longer need to reveal your form.
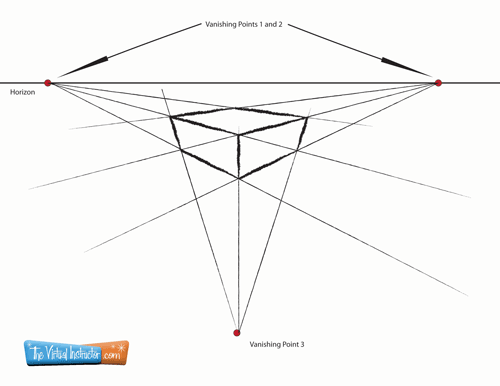
Lastly, you can add value to the sides of your object to create the illusion of space further.
You can also follow the same steps to create a vantage point from the ground by placing the horizon line low on the picture plane and placing the third vanishing point above the horizon line.
