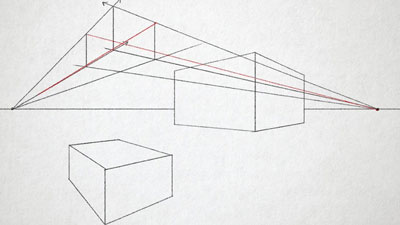
Linear perspective is a drawing technique that utilizes vanishing points, lines, and an a horizon line to create the illusion of space in a drawing or painting. Originally "discovered" by Filippo Brunelleschi during the Renaissance, linear perspective falls into one of three categories - one point, two point, or three point.
Linear perspective can be used to create drawings of observed subjects and make judgments concerning the positioning of elements within a drawing. But it also can be used to create drawings or paintings of structures that are imagined.
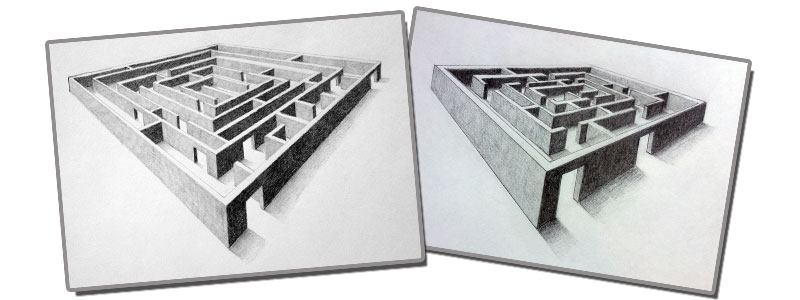
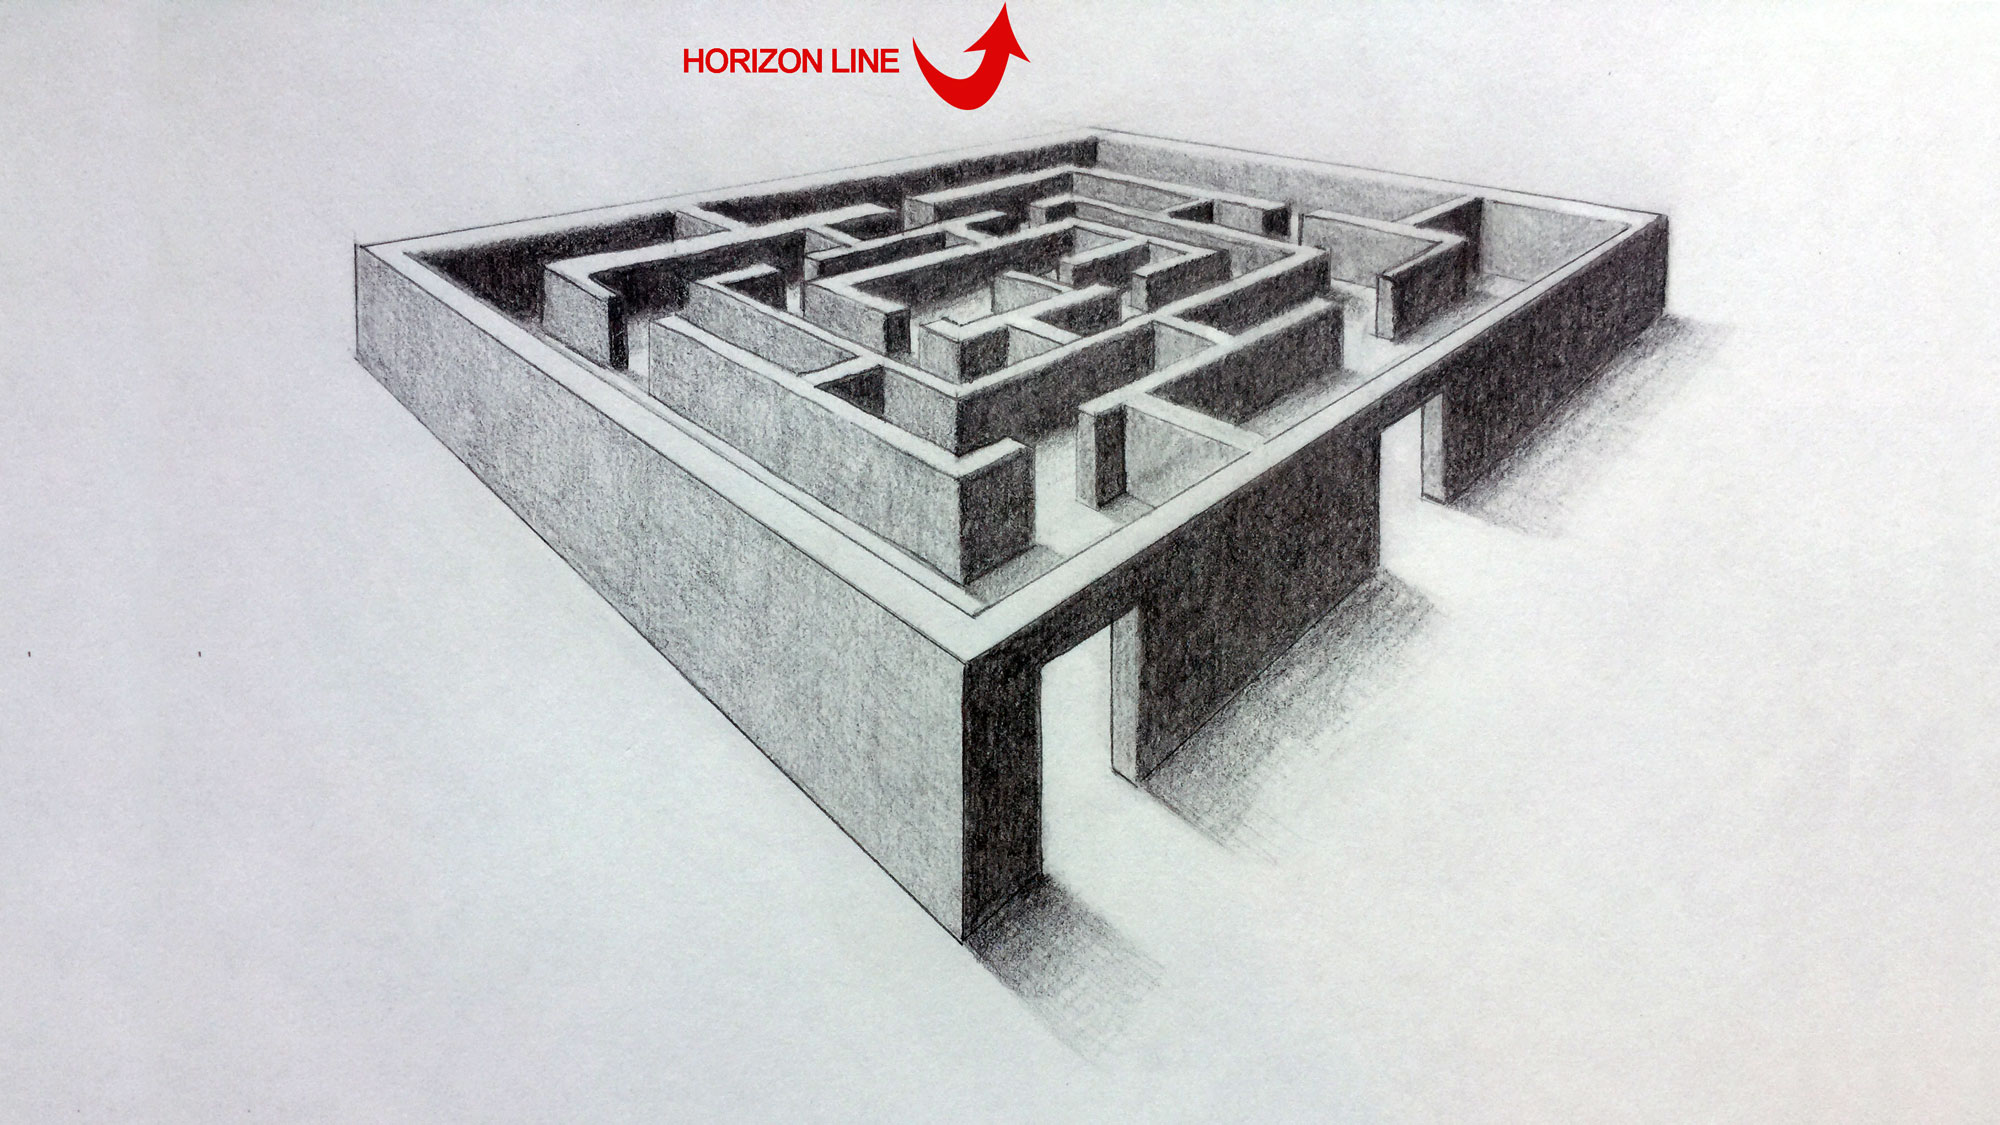
As a child I loved creating mazes for my friends to figure out. Of course, these mazes were of the flat, 2D variety. However, with the magic of two point perspective, we can create 3D versions of imagined landscapes (like a maze) and create drawings that are not only aesthetically successful, but also interactive.
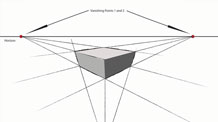
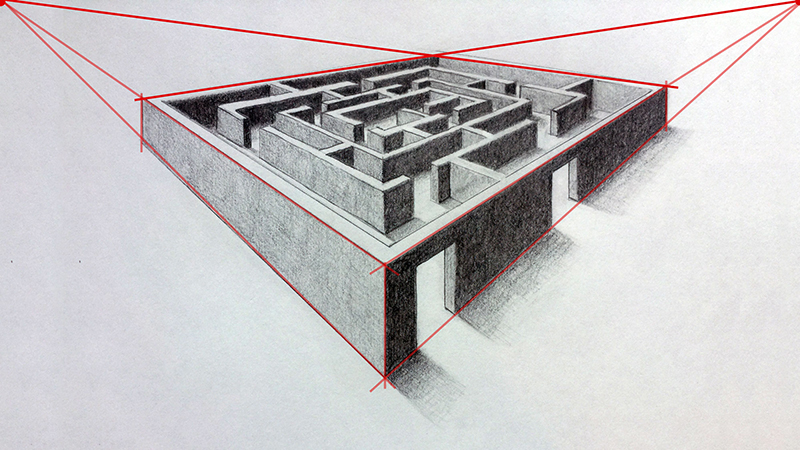
The first step is to define the horizon line. For this example, we'll simply use the top of the paper as the horizon line.
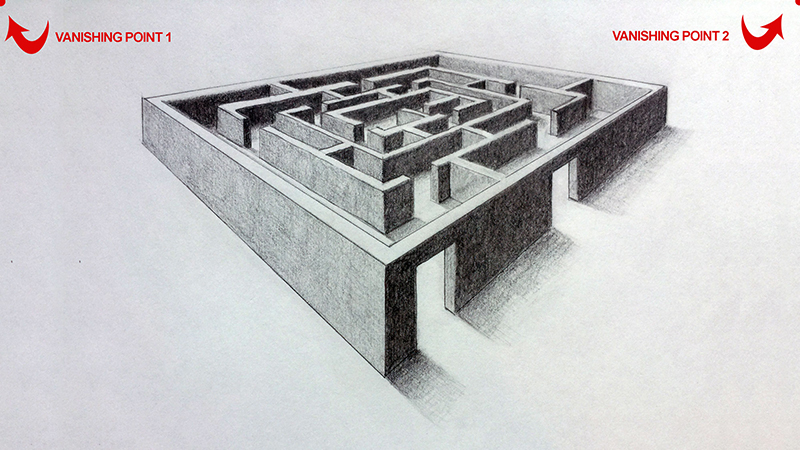
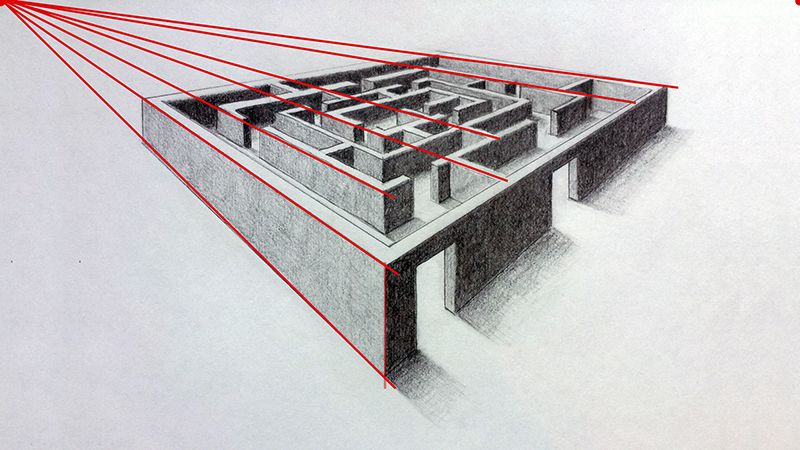
Next, we'll place two vanishing points on the horizon line. Since we are using two point perspective, 2 vanishing points are used. To simplify the process, we'll use the corners of the paper as the vanishing points. This means that all of the lines of perspective that recede back into space will be drawn to one of these two vanishing points.
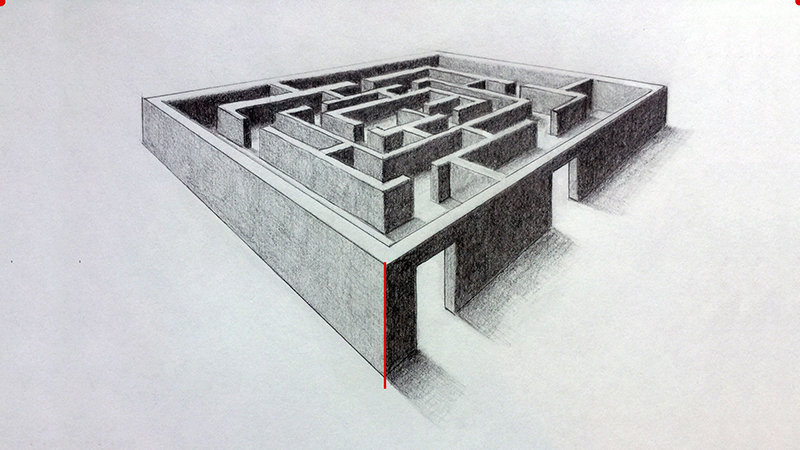
Once we've established the horizon and the vanishing points, it's time to start drawing the maze. We'll start by defining the corner of the maze. The corner is drawn with a vertical line and is placed low enough on the picture plane so that the viewer will be able to see into the maze. (If the corner is placed too high on the picture plane, the viewer will not be able to see into the maze because the angle will be too flat. )
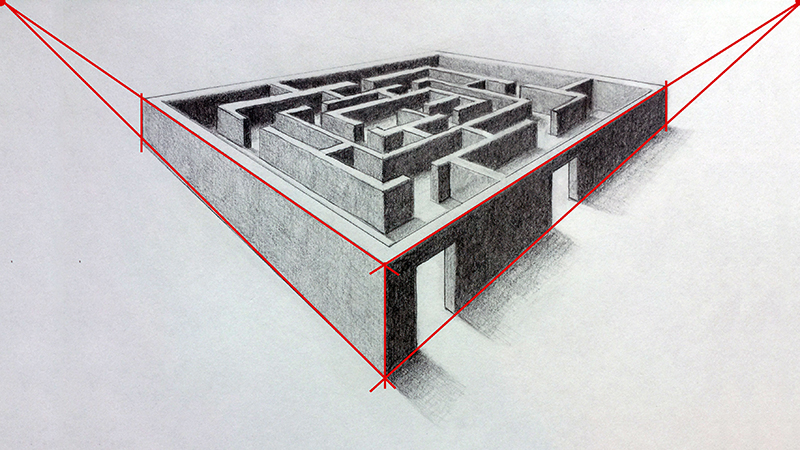
Next, lines are drawn from each end of the corner to both of the vanishing points.

From here we can determine where the maze should end back in space. Vertical lines are drawn to indicate the back edges of the maze.
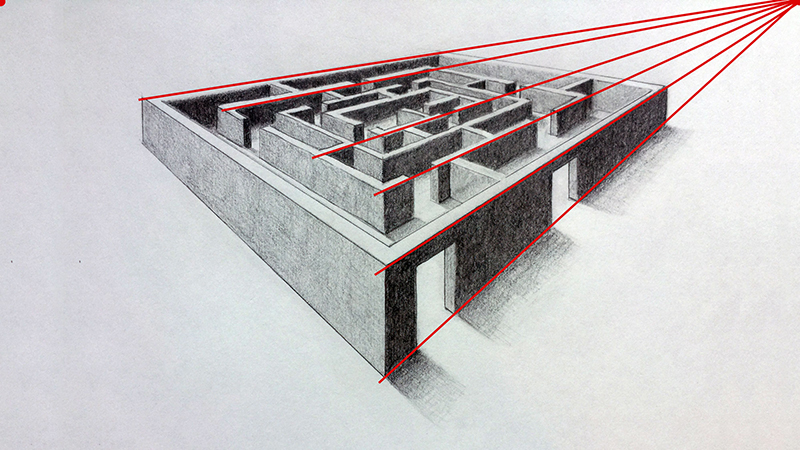
Using the back edge and the vanishing points, we can draw the back wall.
The back corner is drawn where these lines intersect and then the bottom edges are added.
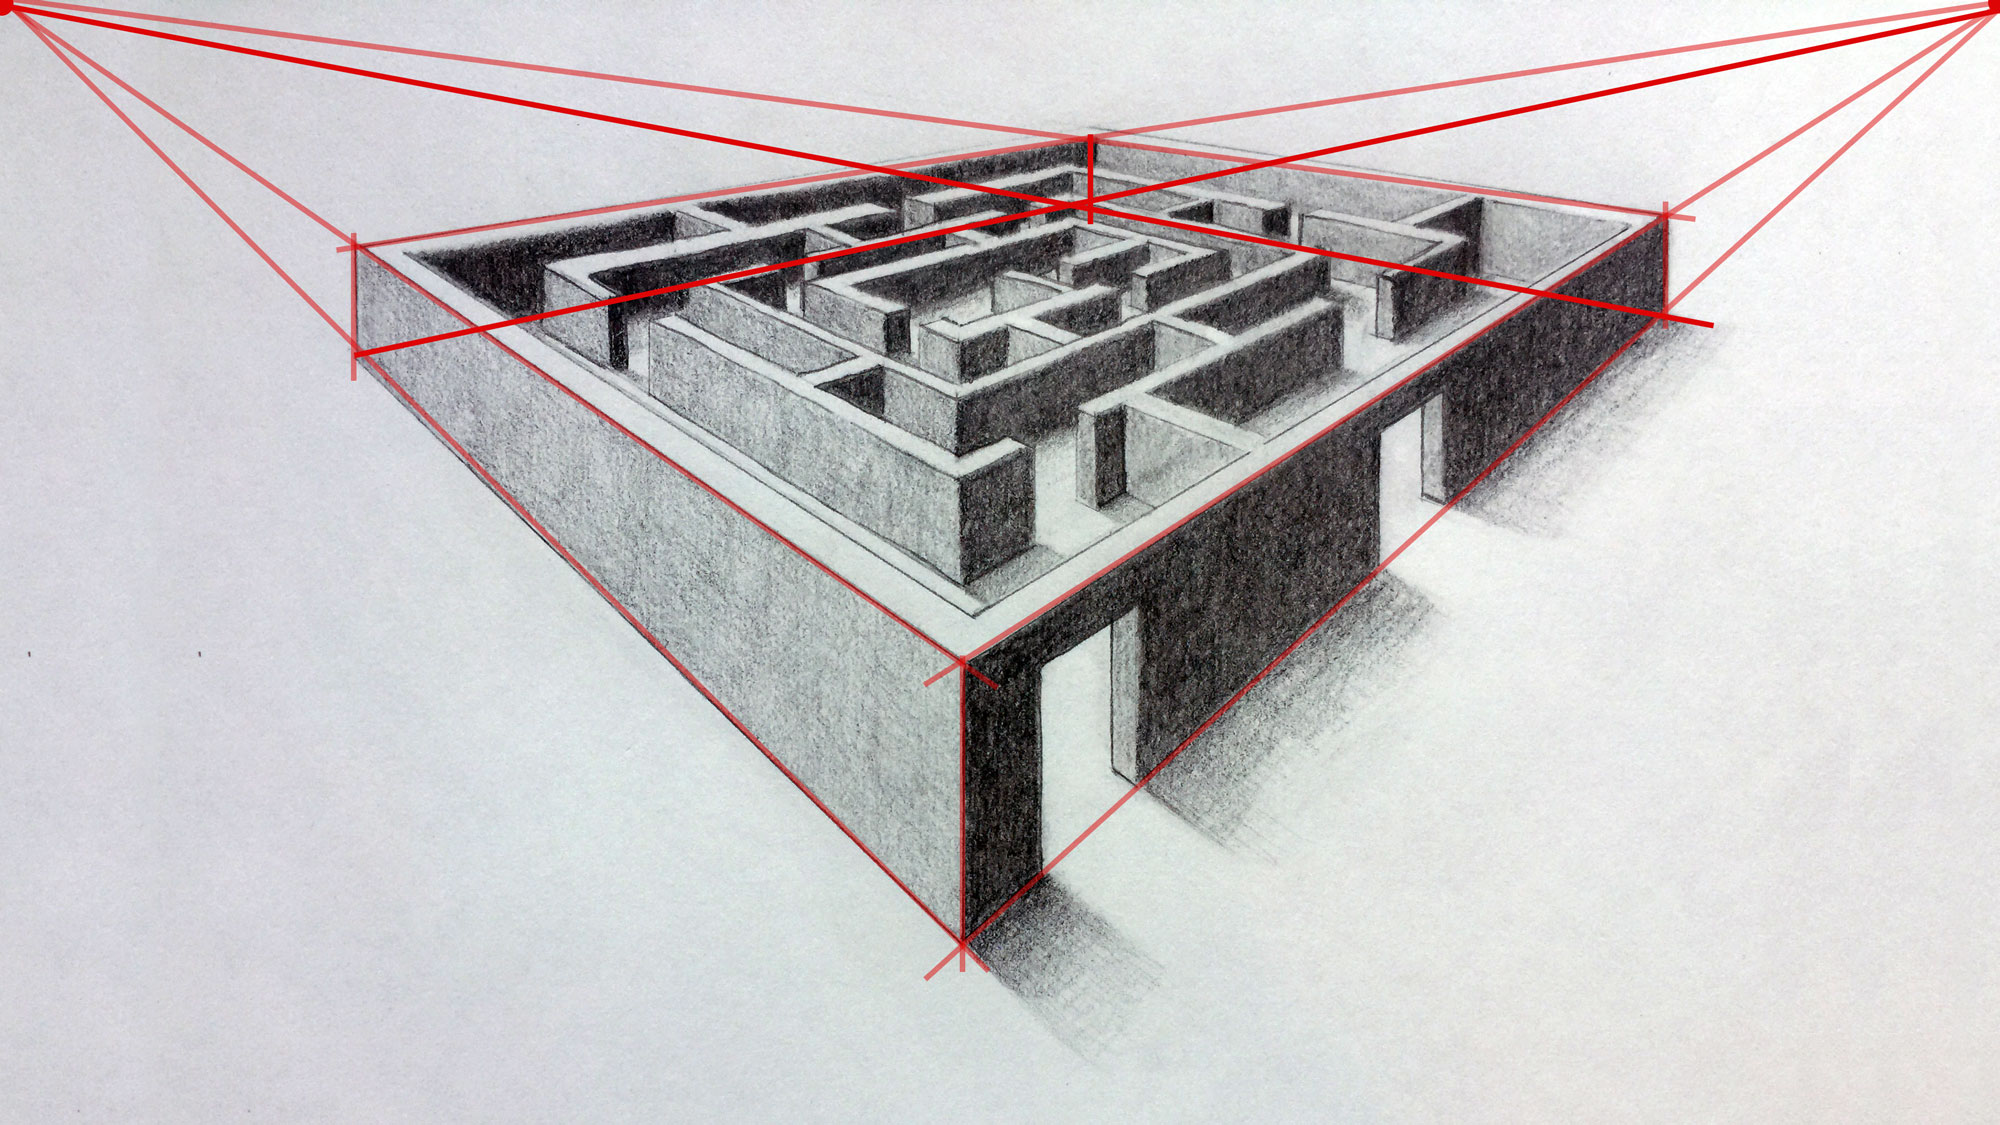
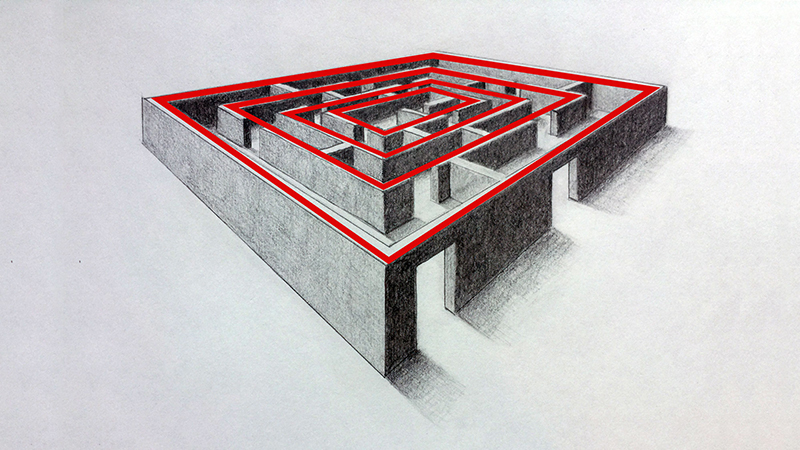
After adding extra lines to make the walls appear a bit thicker, this process is repeated to create a series of "boxes" within the original structure.
Additional walls and openings are added to complete the structure of the maze. All lines must go in one of three directions. Corners and edges are drawn with vertical lines.
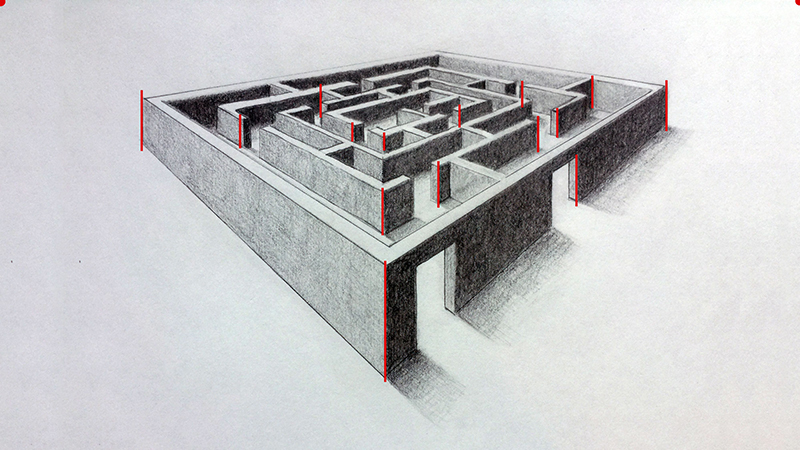
All walls on the left side of each corner or edge are defined by lines drawn to the left vanishing point.
All walls on the right side of each corner or edge are defined by lines drawn to the right vanishing point.
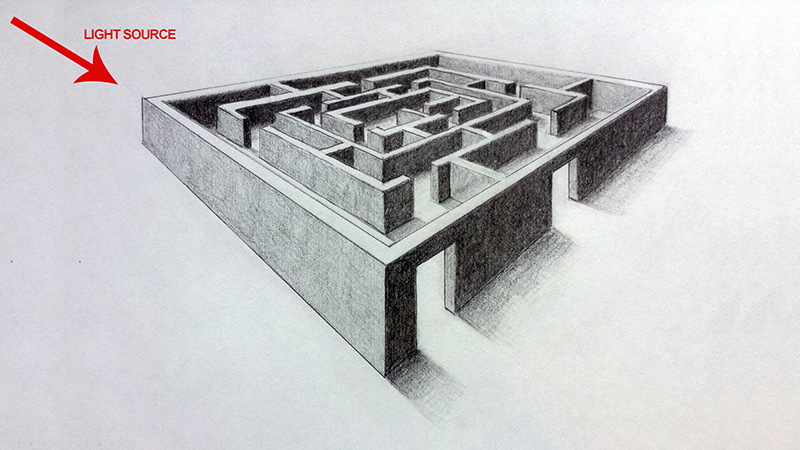
Next, it's time to define the light source and further create the illusion. The light source for this image originates from the upper left corner.
This location produces core shadows on the right side of walls. This is the location of darkest value in the drawing.
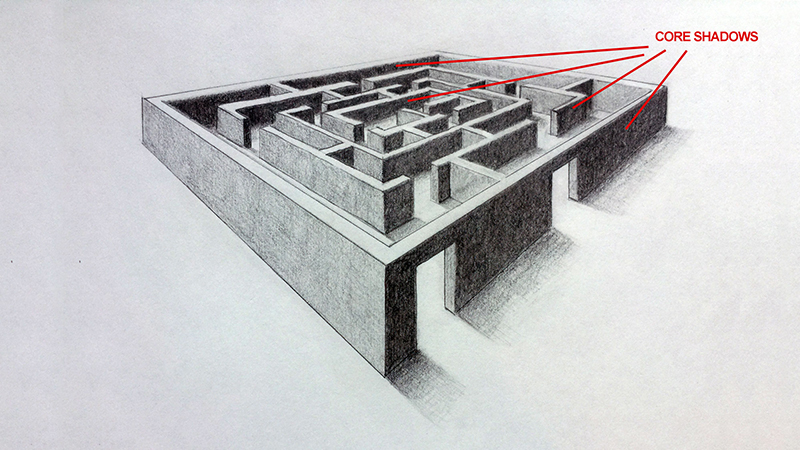
Mid tones are found on the left side of the walls. This is represented by a medium value.

Highlights are found on the tops of the walls. No value or shading is added in these locations.

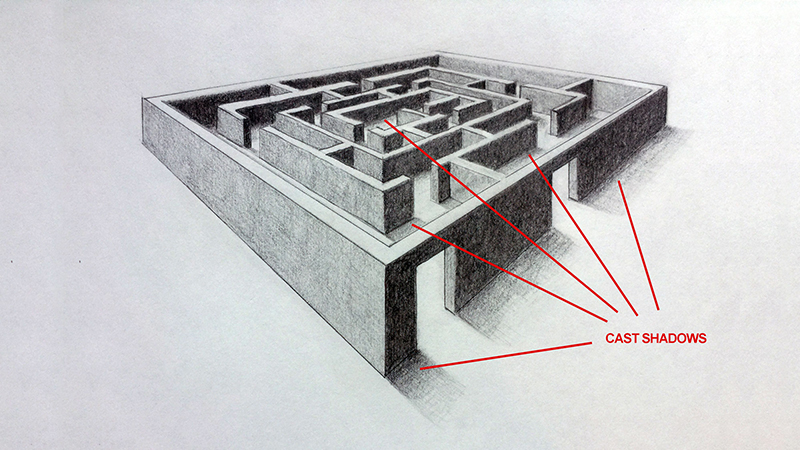
Cast shadows are found behind the walls on the right side. A gradation of value, from dark to light, is added in these areas.
This drawing is a great exercise for developing your drawing skills with two point perspective. The end result is a fun work that encourages a level of interaction with the viewer.