
Watercolor pencils, Inktense pencils, colored graphite, and pastel pencils are all pencils that feature a colored medium enclosed in a wooden shaft, but technically none of them are true colored pencils.
So what are “true” colored pencils and why does it matter?
Colored pencils feature a wax-based or oil-based binder. The binder, as its name implies, holds the pigment together and allows it to be spread on the drawing surface.
Most commonly, the binder found within a colored pencil is wax-based. Oil-based colored pencils behave in a similar manner as wax-based pencils but the binder within the pencil is different.
Now, while it’s great that there are two options when it comes to the binder of the colored pencil, it can cause a bit of confusion. (And you thought the world of “colored pencils” was confusing before.)
It can be difficult to choose which type of colored pencil is best for your particular application. And while I have my favorite, the only way to know for sure which you prefer is to experiment.
Experimentation can get quite costly, so I’ll point a few of the key differences between the two binders and how they behave so that you can make a more educated decision before you buy every pencil available out there.
What’s The Difference Between Oil-Based Colored Pencils and Wax-Based Colored Pencils?
We have established that it is the binder that differentiates a wax-based pencil from an oil-based one. Wax-based colored pencils utilize a waxy binder, while oil-based pencils utilize an oil-based binder.
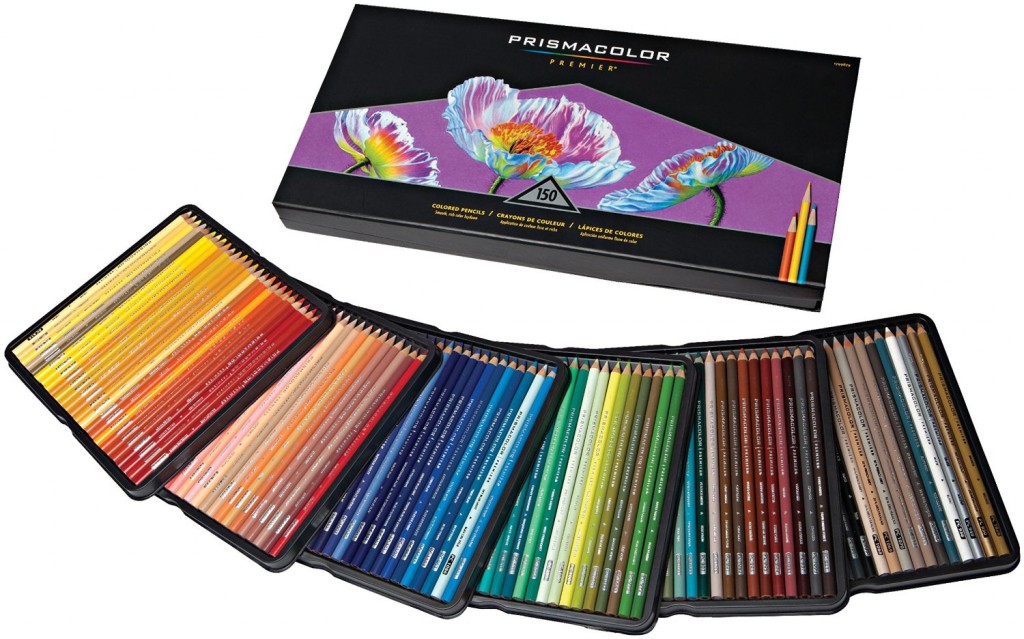
Wax-based pencils are far more prevalent and most brands that you find fall into this category.
(Some of the following links are affiliate links which means we earn a small commission if you purchase at no additional cost to you.)
Wax-based pencils are generally easier to erase than oil-based pencils and are usually softer. (Harder core versions of wax-based pencils are also produced, such as Verithin by Prismacolor.) They layer nicely and reach a state where burnishing occurs relatively quickly, provided you are using a quality brand. When applied fully, wax-based pencils can produce an almost “buttery” surface that is conducive for blending, layering, and mixing.
However, wax-based pencils are prone to wax bloom, a process where the waxy binder slowly evaporates to the surface of the drawing over time. This produces a light, waxy film over the surface of the drawing. Wax bloom that develops on a drawing can be easily wiped away with a damp cloth, so many consider this to be a minor drawback.
Since wax-based pencils are softer than oil-based pencils, the cores tend to break easily. The simple act of allowing a pencil to roll off of a table onto the floor may shatter the core, and thus ruin the pencil.

Oil-based pencils are less prevalent and may be harder to find at your local art store. They are generally only produced as a premium line of pencil. As a result, oil-based pencils are a bit pricier than their waxy counterparts.
The core of oil-based colored pencils are a bit harder than wax-based pencils, making them less susceptible to breakage. For this same reason, the pencil keeps a sharper point for a longer period of time.
Although they can be layered with ease, they will seldom reach the same “buttery” consistency that can be achieved with wax-based pencils. Although this waxy build up is desired by many colored pencil artists, others prefer to apply controlled layers that never reach this consistency.
It should come as no surprise that oil-based pencils do not produce wax-bloom, since the binder is not wax-based.
Similarities in Technique
A vast majority of beginning colored pencil artists do not use the medium to its fullest potential. The tendency of the beginner is to mark lightly and use the white of the paper to create lighter values. This is natural since most of us first use a darker medium when we learn to draw. In this case, we must rely on the “white” of the paper to create lighter values and mid tones. Colored pencils, however can be layered and applied with solid applications to create a look not dissimilar to a painting. We don’t need to approach colored pencils in the same way that we would approach graphite drawing.
Throughout the years, I have always presented to students five keys to using colored pencils most effectively. They are as follows:
- Layer colors – Colored pencils layer nicely, allowing the color that’s layered on top to alter the appearance of the color underneath. This allows the artist to create depth in color, alter the color temperature, the value, and intensity through multiple applications.
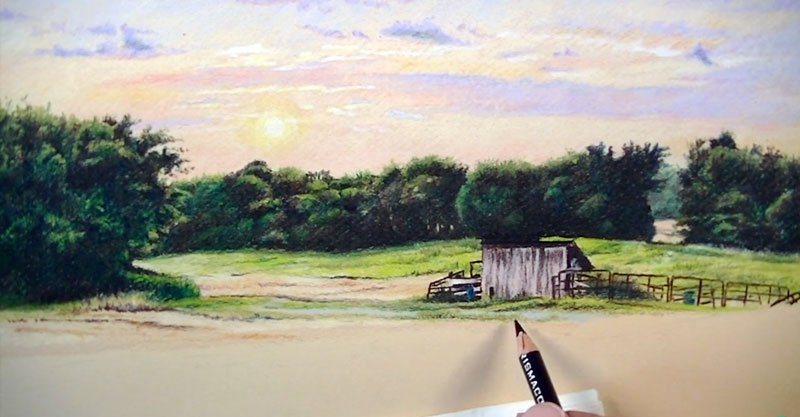
- Mix colors – As colors are layered, they naturally mix. Softer binders allow this to happen quickly. Whenever possible, we should look for opportunities to mix colors through layering instead of using a pre-mixed color. Colors that are mixed will have a bit more variety in them and look a bit more natural. For example, if we need a green for that grassy field, it may be better to layer yellows over blues to create a variety of greens. We can always use that pre-mixed green over the top if the mixed green isn’t quite right. If you’re not sure how the colors will behave when layered, use a test strip of paper before making marks on the drawing surface.
- Build up to a heavy application – Colored pencils, when used to their full potential, can resemble paintings. The key to creating this effect is to build up layered applications. When applications are layered heavily, the binder allows the colors to move and blend in a manner that is similar to painting, logically resulting in a look that is not dissimilar to a painting. When the medium has reached this state, burnishing happens easily.
- Fine tune details and “outlines” last – Details are important, but with colored pencils, they can be defined and refined later in the drawing process. They do not have to be addressed in the early stages. You may plan for them, but details are best developed after some of the medium is on the surface.
- Take your time – Colored pencils are a medium that require a time commitment. While they are a “slow” medium, the trade off lies in the detail and control that can be achieved in a drawing. Slow down and take your time. Enjoy the process and the level of control that you have with them.
These five keys are true no matter what type of colored pencil use choose to use. They work for both oil-based and wax-based colored pencils.
Differences in Technique
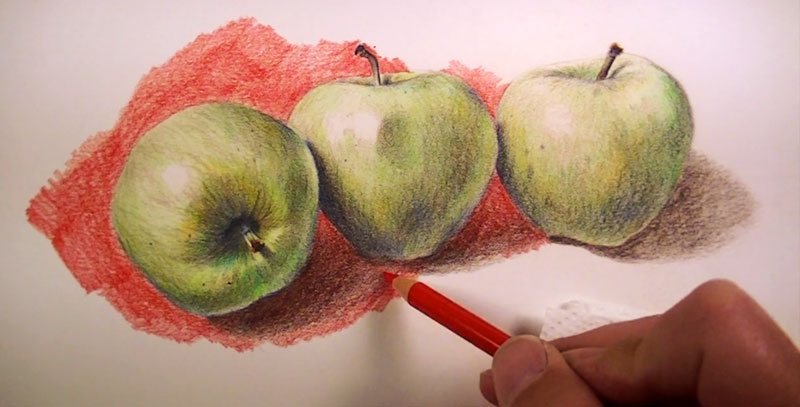
The key difference in technique between oil and wax-based colored pencils boils down to burnishing. Burnishing is the act of exploiting the binder of the pencil to blend and work the medium into the tooth of the paper, creating an even appearance of application. It can also be used to blend and mix colors.

Since the binders are different in wax-based and oil-based colored pencils, the most effective burnishing techniques also differ. It should be noted that all burnishing techniques will work with both types of pencils.
Burnishing Techniques
- Colorless Blender – A colorless blender is either a wax-based pencil absent of pigment or a marker that thins the pigment. The waxy binder in the pencil is worked over applications of color, mixing and blending the medium into the tooth of the paper. This results in an even appearance of color. This burnishing technique is best suited for wax-based pencils.
- White or Cream Colored Pencil – A lighter pencil is used to work colors already applied to the surface working the medium into the tooth of the paper. One major drawback to this technique is that it lightens the value of the color. This burnishing technique can be used with both types of pencils.
- Solvent – Solvent can be applied with a brush to colored pencil applications, thinning the medium. This results in an even application of color. This burnishing technique is best suited for oil-based pencils.
Can Oil-Based Colored Pencils Be Used With Wax-Based Colored Pencils?
Some mediums just don’t work well together. For example, we can only expect catastrophic results by painting with acrylics over oils. But oil-based and wax-based pencils are not such polar opposites and can be used interchangeably without any issues.
If so, join over 36,000 others that receive our newsletter with new drawing and painting lessons. Plus, check out three of our course videos and ebooks for free.

Improve Your Drawing Skills in 6 Days
The thing about drawing is that some of us still ascribe to the notion that it is an innate ability that a lucky few are born with. We believe that there is a certain level of skill that we are limited to, and once we reach that level there’s no more room for improvement. We make all kinds of excuses for why we can’t draw better – believe me I think I’ve heard them all.
Truthfully, drawing is a skill that just requires a bit of knowledge and sometimes lots of practice. (I know that many of you have heard me say this over and over again, but it does bear repeating.) There isn’t a ceiling on where you can take your skills.
The problem is that many of us simply don’t know how to improve our skills. We may accept that drawing is a skill that can be learned, we just don’t know how to learn it.
Some of us head off to YouTube to swim through an endless sea of videos that teach us a concept or demonstrate one artist’s interpretation of a subject. These folks may pick up something that “sticks” and that can be applied to their own work, but often times they’re just left feeling motivated without any real direction.
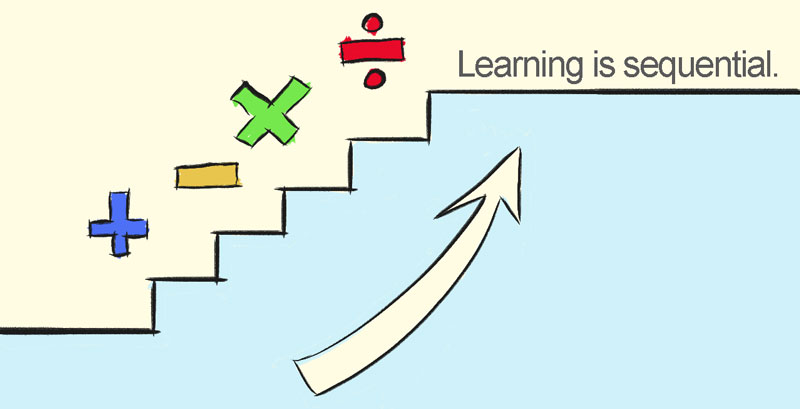
The truth is that learning drawing effectively is sequential. If drawing is learned sequentially, then concepts build upon each other and seem to make a bit more sense. If we learn concepts in “bits and pieces” without a defined order, it is a good bit harder to understand how they all fit together.
Think back to one of your early math classes. I’ll bet that you learned the concept of addition before you learned the concept of subtraction. I know that I certainly did. Can you imagine how hard it would have been to understand subtraction if you would have tried to learn it before you learned addition? It would have been impossible! You must learn addition before you have a chance of understanding subtraction.
Learning how to draw is the same. If concepts are introduced without a clear sequence, then improving your drawing can seem confusing and perhaps unattainable.
Since learning how to draw is more effective when it is learned in sequence, it only makes sense that practicing your skills should also be sequential.
Remember that math class. I bet you spent quite a bit of time practicing addition before you started practicing subtraction. Practicing is how concepts are made practical.
Honing and perfecting your drawing skills does require time, patience, and practice. But the good news is that we can often see dramatic improvement in a short amount of time if we take a sequential approach to our practice.
I’d like to share with you a 6 day approach to dramatically improving your drawing skills. Of course, don’t expect to become an expert in just under a week, but you should notice a clear improvement in your drawings after this time. Devote an hour or two a day to get the most out out of this experience. Keep in mind that these are exercises to practice – just like math problems, but a whole lot more fun and interesting!

Day One – The Mindset
Many people mistakenly believe that drawing is all about what happens in the hand. And while mark-making is certainly important and our hands are too, it’s not where the magic happens. Drawing is about what happens between your ears. It’s all about how your mind processes the world around you and how you communicate your understanding of it on a flat surface. So it only makes sense that we start by training our minds to understand the world as our eyes actually see it.
If you’ve ever been a part of an organized art class, then I’m sure you’ve heard the teacher say “draw what you see”. It sounds simple enough (assuming that you know what to look for). But if you don’t understand what you are seeing, then how can you draw it?
What happens is that our left brain tells us what the object we’re observing actually is. We try to recall a method for drawing that specific object and usually create a drawing that somewhat resembles the object, but also looks nothing like it. We are then clueless as to why our drawing doesn’t look like the object. We may even say things like “I can’t draw a (insert object here)” or “I wish I knew how to draw (insert object here)“.
The problem here is that our left brains are getting in the way. Don’t get me wrong, our left brains are great (we can’t do math without them), but we need to learn to intercept the information coming from our eyes before it reaches our left brains so we can truly understand what exactly we are seeing.
We see the world as a collection of abstract lines, shapes, colors, forms, values, and textures. Our brains process that information and make sense of it all. When we create a drawing, we use these things to create an illusion. We organize lines, shapes, colors, forms, values, and textures on a flat surface. If we organize them as our eyes see them, and not as our brains understand them, then we are successful. This is what it means to “draw what you see”.
(Some of the following links are affiliate links which means I make a small commission if you purchase at no additional cost to you.)
So, we need to start on day one by training our minds to see in this abstract format. To do this, we need to short-circuit our left brains and not give them any reason to lead us astray.
Perhaps, you’ve heard of the fantastic book, “Drawing on the Right Side of the Brain“. I love the title because it has a double meaning. We do draw effectively using our right brains, but it is also the correct “brain” to use. It’s listed among what I consider to be the best books for learning how to draw. A popular drawing exercise in this book is to draw an image upside down. When we do this, we short-circuit our left brains. Because the image is upside down, it’s harder to make sense of the subject. Therefore, we are focused on the abstract lines, shapes, etc. that we observe. The result is that you are more successful copying what you actually observe with your eyes on the drawing surface.
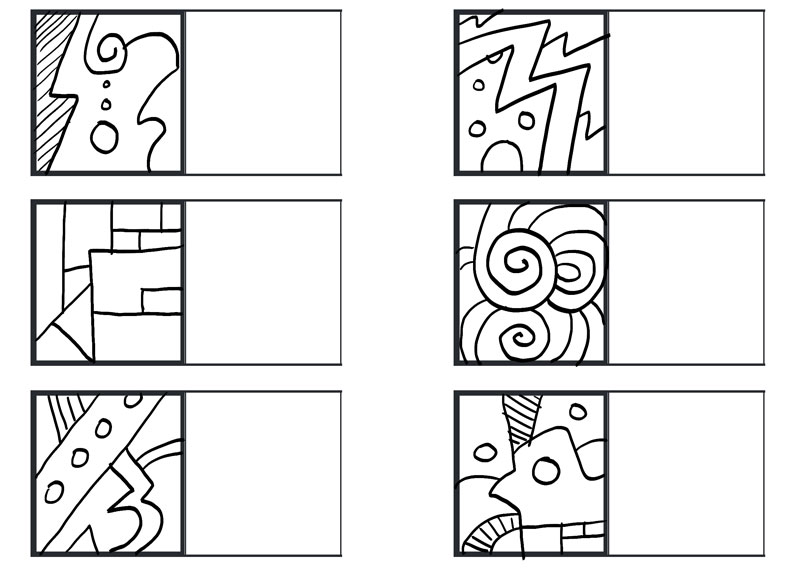
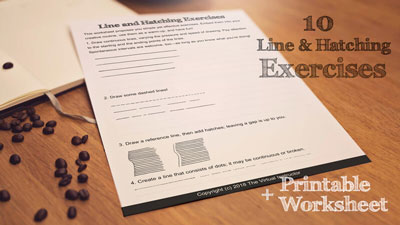
A few months back, I published a post with a couple of exercises designed to aid in training your brain to recognize lines and shapes without the distraction of the left brain. Because these are abstract compositions, your mind will not try to make sense of them and instead, you are forced to “copy” the lines that are actually observed. (You can read the full post here). Below, I’ve included the worksheets from this exercise.
The first exercise is designed to put you in the mode of “seeing”. For exercise #1, simply observe the first box and find the box in the row that matches. No drawing is involved here. This exercise will only take a couple of minutes to complete and will get your mind thinking visually.
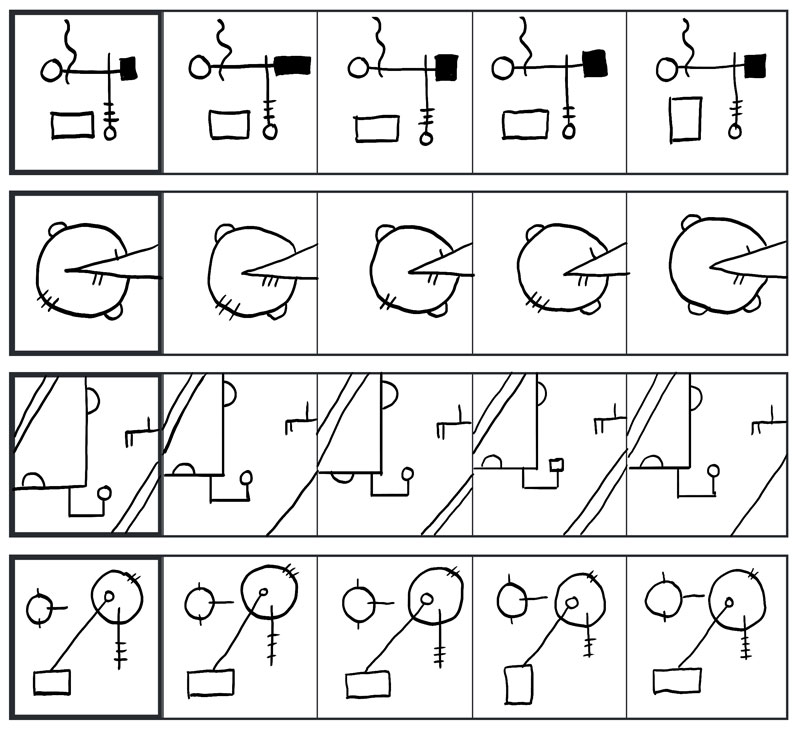
The second exercise is also straight-forward and borrows ideas from the exercise we discussed from “Drawing on The Right Side of the Brain”. In this exercise, simply observe the abstract lines and shapes in the bolded box and then copy what you see in the box beside it. Because the lines are abstract and no recognizable subject from reality exists, you are forced to draw exactly what you see.
Since the “magic” of drawing mostly happens in your brain and not on paper, we can practice drawing without making marks. Yes, you read that correctly. We are training our brains here after all.
Your third exercise for day one is simply to look at the world around you and notice the lines that you see. Imagine drawing the objects around you. Compare sizes and shapes, notice where lines begin and others end. You may even hold up your pointer finger and trace what you see. Imagine drawing what you see, but let the activity take place in your mind.
Spend some good time with this, maybe 20 minutes or more. You may feel silly at first, but drawing is about seeing. And if we don’t spend time training our minds to see, then we can’t expect to notice any improvement in our drawing skills.
So, let’s review day one…
- Exercise One (Above) – “Find The Box That Matches”
- Exercise Two (Above) – “Copy the Doodle”
- Practice observing subjects and visualize drawing them in your mind.
Day Two – Loosening Up
On day one, we got our minds focused on observation. Now, on day two, we can address the marks that we make based on what we see.
Our focus on day two centers on loosening up with our marks. Sometimes the tendency is to make controlled marks that appear stiff. We concentrate on drawing a precise line far too much and lose “the big picture”. When we draw lines with “forced control”, we also lose a bit of accuracy. It may seem counter-intuitive, but if we focus too much on drawing a perfect line, we sacrifice accuracy.
We need to loosen up a bit and allow our arms to move a little more. When we draw with too much control, the marks are made by moving our wrists. And while this is great for details, it isn’t quite as effective for getting the initial shapes of the subject on the drawing surface.
Instead, we need to allow the marks to originate from our elbows or shoulder. By keeping the wrist tight and moving the elbow to make a mark, we have a broader range of motion and more control.
We actually have a lot more freedom of movement in our shoulders and it’s much easier to control the mark.

Another aspect to consider is the number of marks that are made on the surface. Far too many of us try to get the “right line” in place with just one stroke. This is nearly impossible. Instead, we can try to find the “right line” by making several loose and light lines on the paper. With several lines on the paper, we have a better chance of getting the right line in place. We can always make the correct line a little darker and erase the stray lines away.
I compare this concept to playing the lottery. Most people buy more than one ticket when they play. So why would you try to make just one line and hope this it is the correct one?
So then, how do we practice loosening up? How can we force ourselves to make several marks when we may already be conditioned to draw with “forced control”? The answer is through gesture drawing.
Gesture drawing is usually associated with drawing the human figure. It is a method of creating loose lines or shapes to build the overall shape and possibly the form of the subject quickly. It is a form of drawing that is not focused on the details, but rather capturing as much information as possible, as quickly as possible on the drawing surface.
We can create a gesture drawing of anything, not just the human figure. We can create quick gestures of any object or landscape if we wish.
Now, since gesture drawing is also about speed, we need to consider imposing a time constraint. If you’ve never created a gesture drawing before, you may find this difficult in the beginning.
Set a timer for 4 minutes and draw an object, then another, and another. Then set the timer for 3 minutes and draw three more objects. Then 2 minutes, and finally 1 minute.
Draw loosely, using your whole arm. Keep your wrist tight and try to allow the marks to originate from your shoulder or elbow. Make several marks and leave the eraser in the drawer.
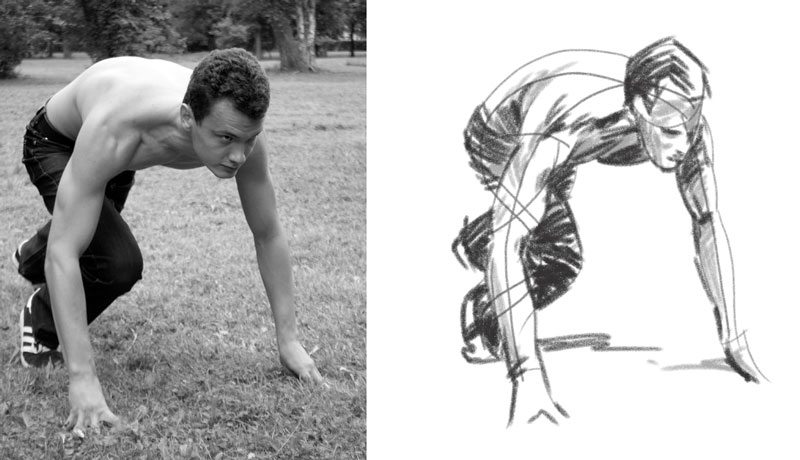
If you don’t have any objects laying around, I’ve provided a few references to get you started…


Spend at least an hour on this exercise. You can make a game out of it and see how many objects you can draw in that timeframe. Remember, our focus on day two is to loosen up – not to create a masterpiece.
If you find that you’re having trouble loosening up, then you may consider changing your grip on the pencil for this exercise. Changing your grip can help encourage looser drawings.
So let’s review day two…
- Practice drawing objects loosely and quickly
- Time your drawings. Start at 4 minutes and progress to just 1 minute for each drawing.
- Try to draw with your shoulder and elbow instead of just with your wrist.
- Don’t erase and just focus on capturing the form as quickly as possible.
Day Three – It’s All About The Shapes
When many of us draw, we naturally start with the outlines of the subject. These outlines are called contour lines. We perceive that these lines exist around the edges of an object and form the boundaries of the details. Drawing a subject with just the contour lines is a great exercise, but it’s not the fastest and most accurate way to capture the subject in a drawing.
Instead of focusing on the contour lines in the early stages, we can focus on the basic shapes that make up the overall form of the subject. If we break the subject down into “easy to draw” shapes, then our speed and accuracy improves.
We can piece these simple shapes together to build complex forms and shapes. After which, we can focus on the contour lines. Drawing with contour lines after we have a structure of shapes in place makes drawing much easier.
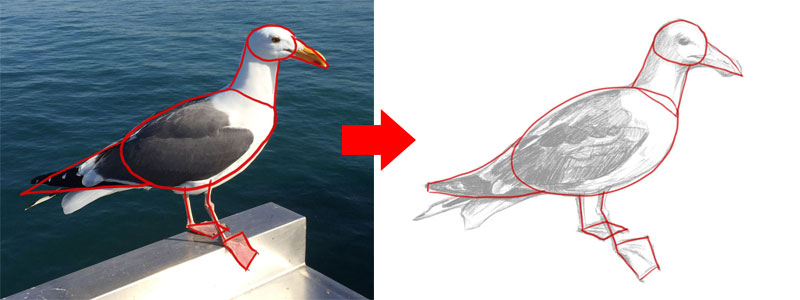
The trick is learning how to recognize the simple shapes within a complex object. Developing and honing this skill results from practice and experience but it’s relatively easy to get your mind thinking in terms of shapes.
Our focus on day three is based on this concept. Draw a few objects from observation, but begin by drawing the simple shapes that make up the overall form of the subject. Once the basic shapes are in place, you can add the contours and any details.
You may start with a very simple object, like an eraser, and gradually build up to more complicated subjects. Try to “build” the subject with the most basic shapes (rectangles, circles, ovals, triangles, etc.).
Don’t worry about the value or shading, only concern yourself with drawing the basic shapes and defining the contour lines. As you draw the basic shapes, remember the concept that we explored on day two and stay loose. Draw with your whole arm and allow your marks to originate from your shoulder or elbow instead of your wrist.
If you’re not sure where to start, here are few references to get you started…

So let’s review day three…
- Practice drawing objects by breaking them down into basic shapes. Piece the shapes together to create more complex shapes.
- After the shapes have been defined, draw the contour lines using the shapes as a guide.
Day Four – Form and Value
Drawing lines and shapes is one thing, but in order to create a convincing illusion of form, volume, and light in a drawing, we need to add shading.
Shading is a loosely used term. It implies that we are always adding darker applications, but this isn’t always the case. Shading refers to developing the illusion of light and form on the subject. This is accomplished by manipulating value.
Value refers to the darkness or lightness of a color. So “shading” is not just about the darker applications, but more about the relationship that is created between the darker and lighter areas on the subject. If we are using a darker medium, like graphite, then we create the illusion of lighter values by developing the darker values around them. So in essence, “shading” is simply developing a range of value on the subject.
Lighter values typically are used to communicate the highlights and locations where light is hitting the subject. Darker values are used to communicate the locations of shadow. The locations of the lighter and darker values on the subject inform the viewer about the light. And when the light within the scene is depicted in an accurate manner, then the illusion of the form of the object is also communicated.
This means that “shading”, or more accurately – adding value, is incredibly important to creating a successful drawing.
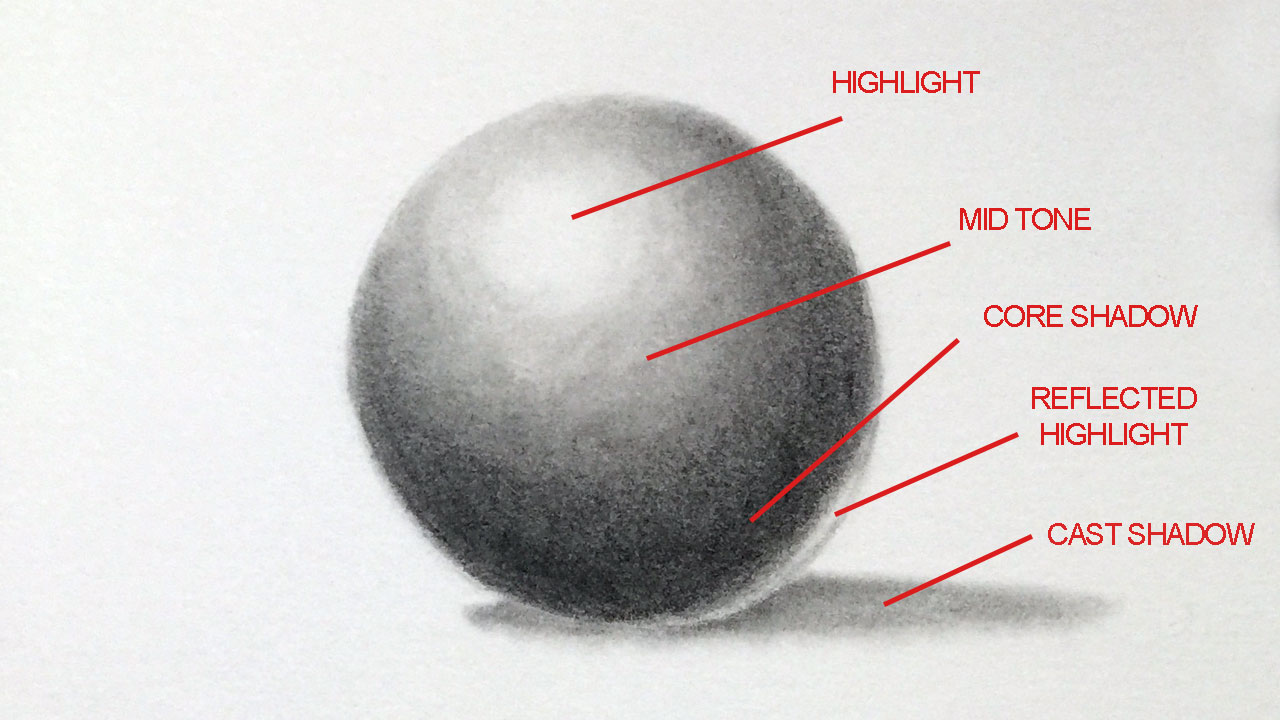
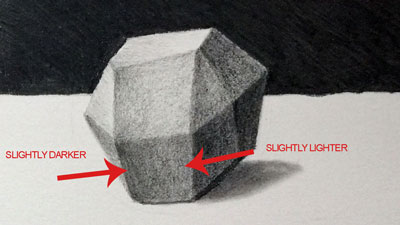
On day four, our focus is on value. More specifically, we’ll focus on drawing basic forms and use value to create an accurate illusion.
This may seem like a simple exercise (and it is), but it is also very effective. Concentrate on creating accurate value as you draw these forms. Also, pay attention to creating a full range of value. In other words, be sure that each one of the forms that you draw has dark values, light values, and mid tones.

Also, pay special attention to the shapes of the cast shadows that are created. You can use the value scale below to make comparisons to values that you observe and what you add to your drawing.

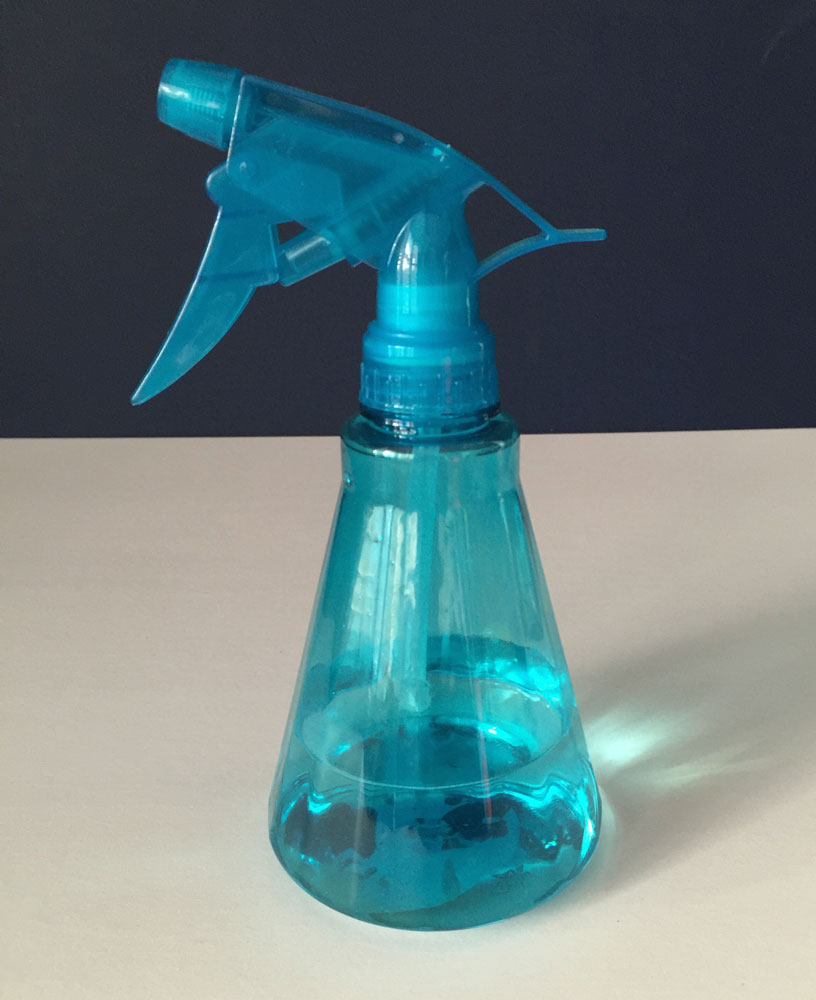
Below you’ll find a reference photo that you can use to practice drawing basic forms…

So let’s review day four…
- Practice drawing basic forms.
- Create a full range of value (shading) to create an accurate illusion of light and form.
Day Five – Drawing Within The Box
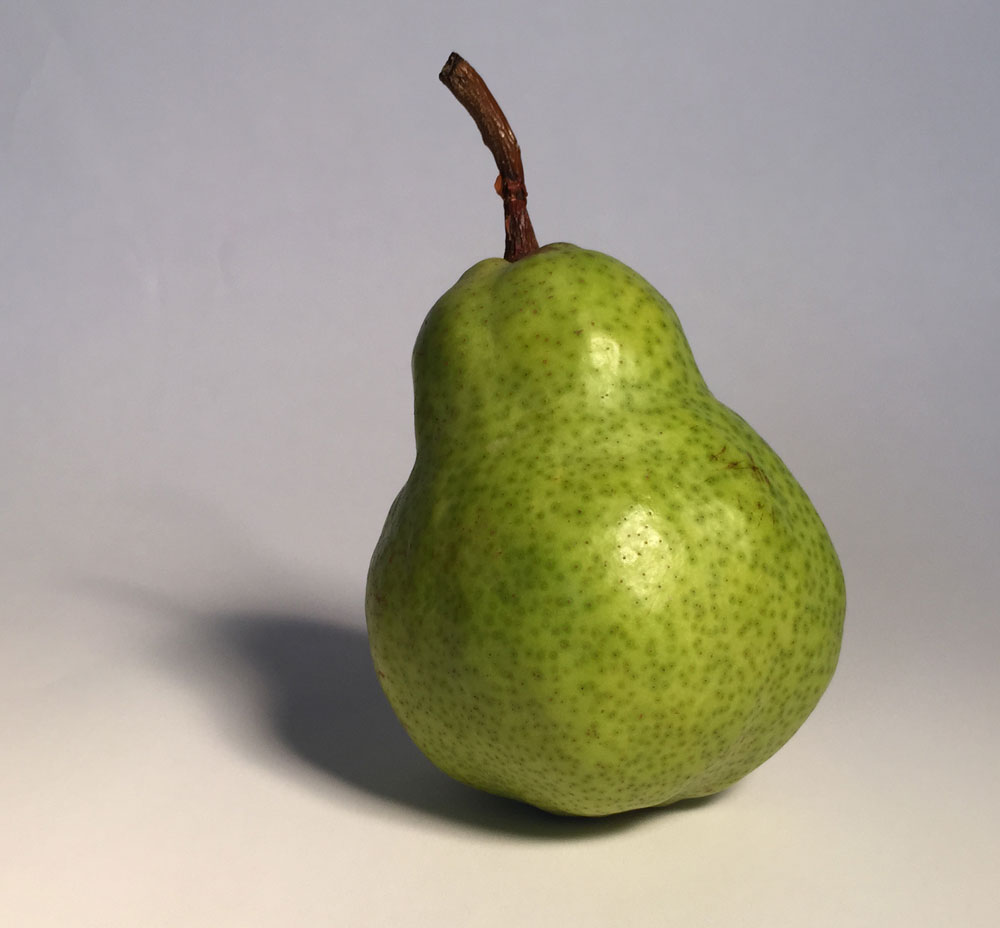
The subjects that we draw are 3-Dimensional. In a drawing, we must create the illusion that they are actually 3-Dimensional. We do this partly through the use of value. But it may be helpful to recognize the simplified form of the object first.
Think back to what we covered on day three when we discussed finding the simplified shapes within a more complex subject. If we simplify the form of the subject initially, then we have a better chance of creating the illusion of its form in the drawing. Just like with the basic shapes, we can simplify the subject down into basic forms.
Long ago, I was a Cub Scout and one of the popular activities for scouts is to build a pinewood derby racing car. You are provided with a solid block of wood that you would use to carve out the shape of your car. The bulk of the car remained rectangular, but by removing pieces of the wood, you could develop a sleeker and faster vehicle. We can apply this idea to drawing.
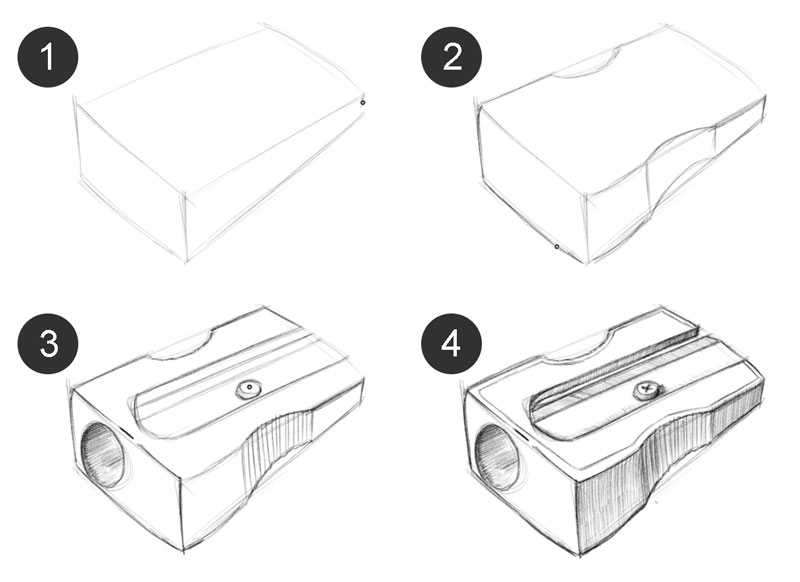
We can draw the basic form first and “carve out” the details as we add the contours. I like to think of this as “drawing within the box”.
Now this idea doesn’t have to be limited to rectangular forms. We can also apply it rounded subjects by drawing cylinders and spheres. And just as we pieced basic shapes together, we can also combine simple forms to build a more complex form that more closely resembles the subject.
Below, you’ll find a few subjects to practice with on day five. You can add shading if you like, but the most important part of this exercise to to draw the basic forms and “carve out” the contours.


So let’s review day five…
- Practice drawing objects by breaking them down into basic forms.
- Draw the basic forms loosely and then “carve out” the details by adding the contour lines.
Day Six – Putting It All Together and One Final Tip
At this point, over the course of the last five days you have spent time learning what to look for and how to “see”, loosening up and drawing with your elbow/shoulder, breaking complex objects down into basic shapes, manipulating value to create the illusion of form, and drawing basic forms to build up more complex forms. Now, on day six, it’s time to put all of these concepts together and create a complete drawing.
You can draw whatever you like, but if you want to measure how much you have improved, draw that very first object again (the one that you put away and haven’t peeked at). But this time, consider all of the concepts that you have explored over the last five days.
When you’re finished with this drawing, pull that very first drawing out and compare it. Perhaps make notes on how you improved and how you may improve even more.
And now for a final tip – slow down and work patiently. I often find that some students expect to create incredible drawings in unrealistic timeframes. Quality drawings take time to create. Sometimes many, many hours of work are involved in creating a small drawing. Remember, most of drawing takes place between your ears. So slow down and think about the decisions that you make as you draw.
If so, join over 36,000 others that receive our newsletter with new drawing and painting lessons. Plus, check out three of our course videos and ebooks for free.


7 Must Have Pen and Ink Supplies
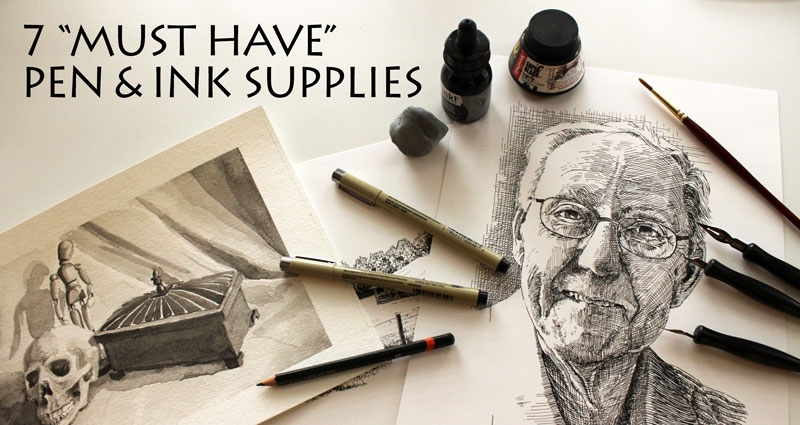
The appeal of pen and ink drawing is found in the strong contrast, the emphasis placed on the mark, and the challenge of permanence since ink cannot be erased or altered much after it has been applied. Pen and ink artists are often drawn to the precision of the medium as well. The enjoyment found in creating a well-executed and clean drawing with pen and ink is quite satisfying.
Perhaps, you’ve been creating pen and ink drawings of your own for a while, or perhaps you’re just starting out. Either way, there are few materials that I feel are essential for any artist. Compared to other mediums, the list of supplies is relatively short and most of the materials are inexpensive and easy to find at any art store.
1. Ink
Inks for drawing generally fall into two categories. Ink is either pigment-based or dye-based. Pigment-based inks are technically a suspension in which pigment particles are included, while dye-based inks are a solution in which the ink is infused.
When pigmented inks are applied to the paper, the pigment sits on the paper, coating the surface. When dye-based inks are applied, the surface is dyed and may be absorbed into the paper. Typically, pigment-based inks are much stronger in intensity than dye-based inks.
For this reason, I suggest using pigment-based inks for drawing. Dye-based inks may be used for tinting surfaces, but for making marks, it’s best to stick with pigment-based options.

(Some of the following links are affiliate links which means we earn a small commission if you purchase at no additional cost to you.)
There are lots of options and brands for pigment-based inks. I have found that Speedball’s Super Black India Ink is very strong and suited for drawing with precise lines as well as creating an ink wash of values. Another quality ink is Liquitex’s Professional Acrylic Ink.
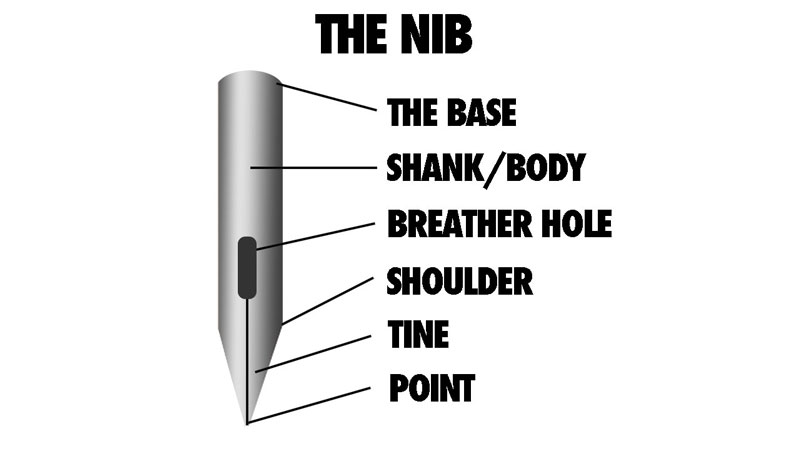
2. Nibs and Handles
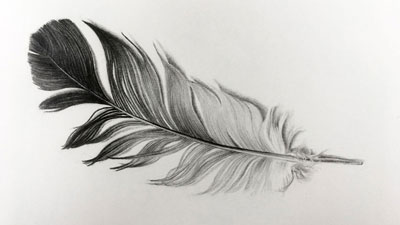
Traditionally, pen and ink drawing has consisted of dipping a tool into ink and then using the tool to make marks on the surface. Throughout history, the tool used to make these marks has evolved. Sharpened bird feathers where once used as well as sharpened reeds. Today, the artist has quite an arsenal of tools at their disposal. While many modern pen and ink artists prefer to stick with technical pens, which we’ll discuss in a moment, some still prefer to use the traditional approach.
For those that prefer to create pen and ink drawings in this manner, a variety of nibs are available. Nibs are simply reservoirs that feature a variety of widths, capable of producing a wide variety of marks. Nibs vary in flexibility as well. Stiffer nibs produce a consistent mark, while flexible ones can vary line width based on pressure placed on the pen. Nibs are placed into a handle and then dipped into a container of ink.
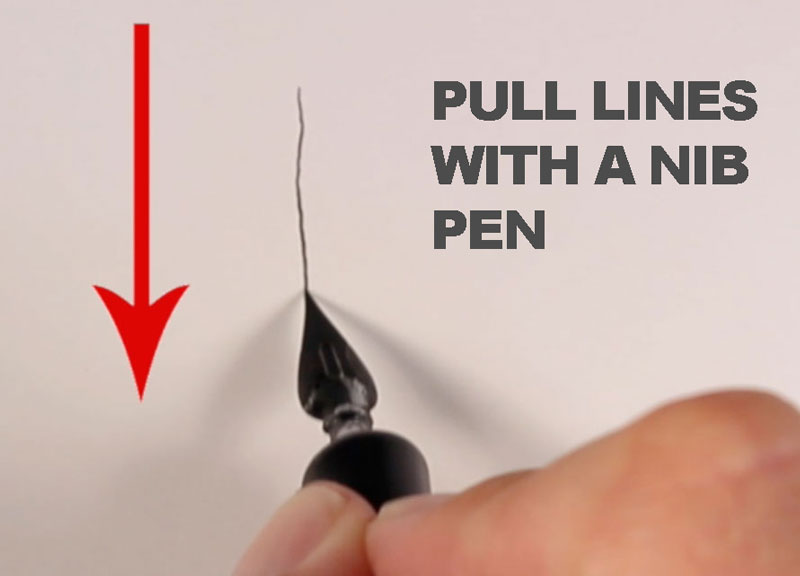
Marks are pulled on the surface to produce intricate line work in a drawing. If the nib is pushed away from the artist, splattering may occur. Of course, this is one drawback when using the traditional approach, but this often considered a trade off for those that find that nib pens produce a cleaner and more precise look to the finished drawing.
Speedball produces a great inexpensive set that includes two pen handles and a variety of precise nibs for drawing.
3. Technical Pens
For those that do not want the hassle of dipping a pen over and over again into a bottle of ink, risking spills or splatters, technical pens offer another solution. Just like nibs, technical pens are produced in a variety of widths. Unlike nib pens, technical pens are either pre-filled with ink or are refillable.
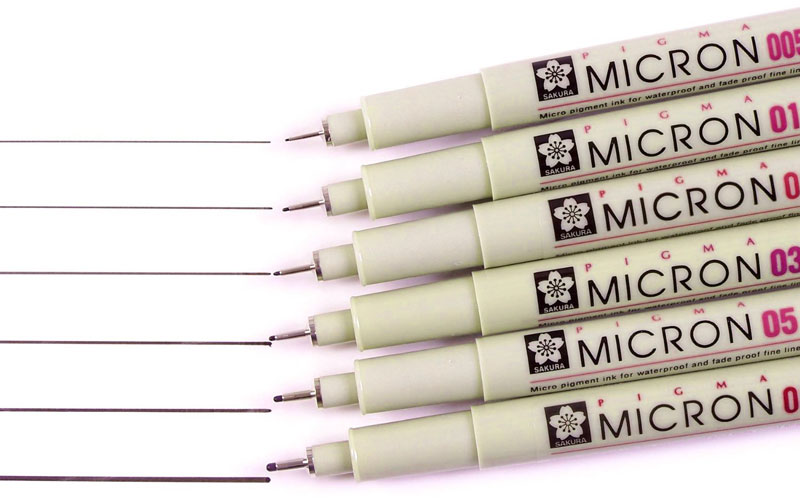
Technical pens vary greatly in price depending on what the artist requires. Pigma Micron pens, by Sakura, are disposable and are very popular. They can be found at most art stores and are very inexpensive. The quality of this pen is very high for such an inexpensive solution.
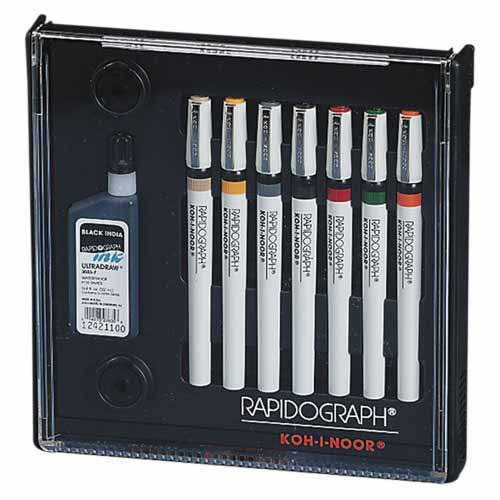
Refillable options are more expensive, but you may end up saving in the long run if pen and ink is your medium of choice. Rapidograph pens by Koh-I-Noor feature refillable cartridges and sturdy pen casings. These pens produce consistent marks but do require care and occasional maintenance.
No matter which technical pen you choose to use, it is advised to use a pen that features ink that will not fade and will last the “test of time”. Here are a few things to look for…
- Archival – Archival inks are permanent, acid-free, and resistant to chemical breakdown over time. Pens that feature archival inks are labeled as “Archival”.
- Fade-Resistant – Fade-resistant inks are, as the term implies, resistant to fading when exposed to light. Lesser quality inks will lighten over time when exposed to natural light conditions.
- Water-Proof – Water-proof inks are especially important when watercolor or ink washes are to be applied over the line drawing. The last thing you want is to apply watercolor washes over an ink drawing only to watch your lines bleed and mix with the paint.
- Fast-Drying – Most inks found in archival pens will be fast-drying. Inks that dry faster as less likely to create smudges during the drawing process.
4. Surfaces and Paper
The paper or surface is often overlooked as a factor for success. However, the surface is just as important as the pen that you use to apply the marks. For precise drawings, most artists prefer to work on a smooth surface.
Smoother surfaces feature a weaker tooth (or texture). A weaker tooth reduces the chances of paper filaments from being lifted or scarred from pen and ink applications. Bleeding is also less likely and the marks are more consistent.
Bristol paper provides an excellent surface for precise line work. This paper is heavy, like card-stock, and is available in two different surface textures. The “vellum” surface is quite smooth but provides enough tooth for some resistance as marks are made. The “smooth” surface is very smooth but some may find it is too “slick” for much control.
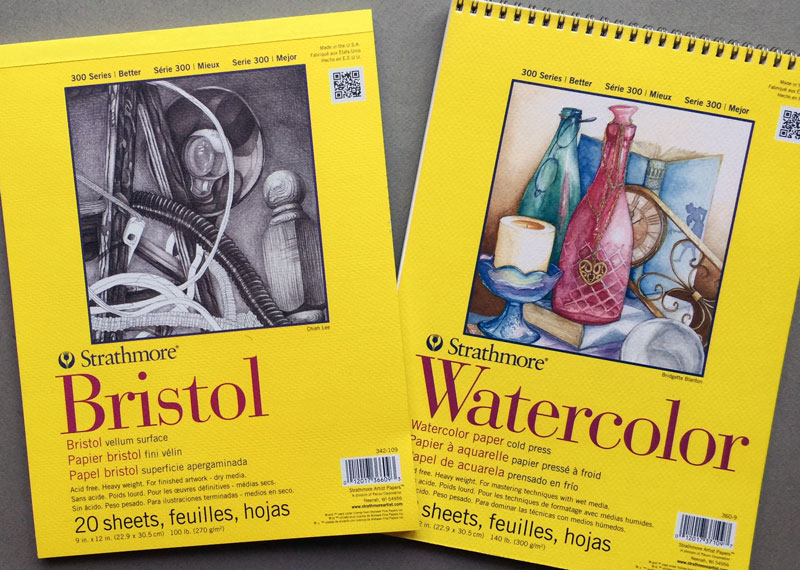
When ink wash or watercolor washes are to be combined with pen and ink line work, watercolor paper is an acceptable solution. Watercolor paper is available in three different textures: rough, cold press, and hot press.
Rough surfaces may be too rigid for most pen applications. Cold press papers feature a course texture, but are still suitable for line work. Hot press papers are smooth and provide consistency in line, but brush strokes made with ink or watercolor washes will be visible. When I combine ink or watercolor washes with pen and ink line work, I typically stick with cold press papers.
5. Nylon Brushes
Beyond using a pen, ink can also be applied with brush. Larger areas can be addressed quickly and gradations of value can be created. Natural hairs can also be used, but for the most control, I suggest a synthetic brush.
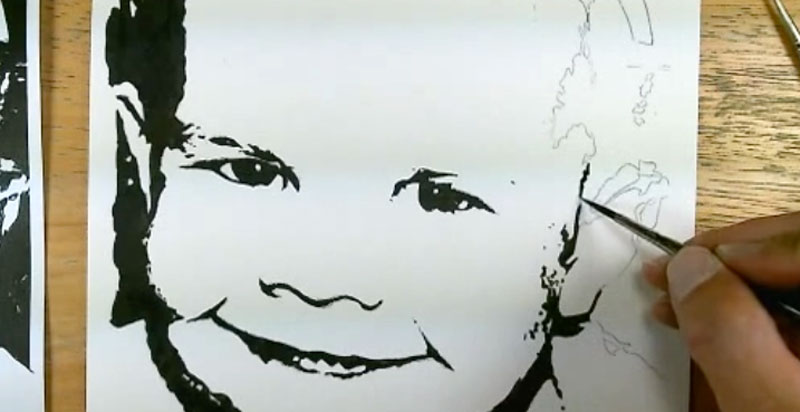
If you’ve ever tried to fill in a large area of solid black with a pen, then you know how long this process can take. Not to mention all of the visible lines that are created by the pen that detract from the drawing. A quicker and more consistent approach is to apply the ink straight from the bottle with a brush. If you are concerned about control, you may be surprised just how much control you can achieve with a quality brush. Edges can easily be cleaned with a pen.
Gradations of value can also be created by adding water to the ink to create an ink wash. When this approach is taken, the ink behaves like watercolor paint. However, for stronger, pigment-based inks, you’ll find that quite a bit of water must be mixed with the ink to create lighter values. (Mixing with water should occur on a palette or plate instead of adding water to the ink directly in the bottle.)
I prefer to use Goldenedge watercolor brushes by Grumbacher for ink wash applications. These brushes are also my choice for watercolor painting. They provide superior “spring” and control.
6. Graphite Pencil
Believe it or not, including a graphite pencil in this listing of materials may spark a bit of controversy. There are those that believe that a pen and ink drawing should consist only of ink and that preliminary marks made with a graphite pencil is somehow cheating. I am not of this belief and consider a graphite pencil to be a tool that no pen and ink artist should be without.
It is common practice to create a light graphite sketch of the subject before developing the value, texture, and detail with ink applications. Since graphite applications are to be erased out after the ink has dried, the type of pencil that you use is important.
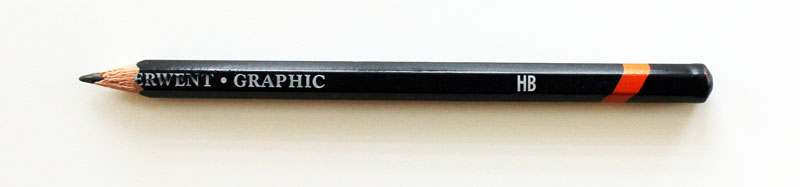
You may already know that graphite varies in softness. “B” pencils are softer, producing darker marks, while “H” pencils are harder resulting in lighter marks.
The common assumption may be to use a lighter “H” pencil to make preliminary marks. However, since these pencils are harder, the chances of producing unwanted grooves in the surface of the paper is greater. Subsequent marks made the ink may not fill in the grooves left by the harder pencil resulting in broken lines.
The softer and darker “B” pencils will typically not produce these grooves, but are harder to erase. In order to preserve a clean appearance in the finished work, it is important that all traces of graphite be removed.
It will vary from artist to artist as to which graphite pencil is best to use, but I suggest staying close to the middle of the graphite grades. I typically use an “HB” pencil for preliminary sketching. If your mark is typically heavier, I would try an “H” or “2H”, but be wary of placing too much pressure on the pencil. If your mark is typically very light, you could try a “B” or “2B” pencil.
7. Kneaded Eraser
When the ink has dried completely, any graphite marks left from the preliminary sketch can be removed. A kneaded eraser is able to lift the graphite from the surface without disturbing the tooth of the paper or smudging the ink.
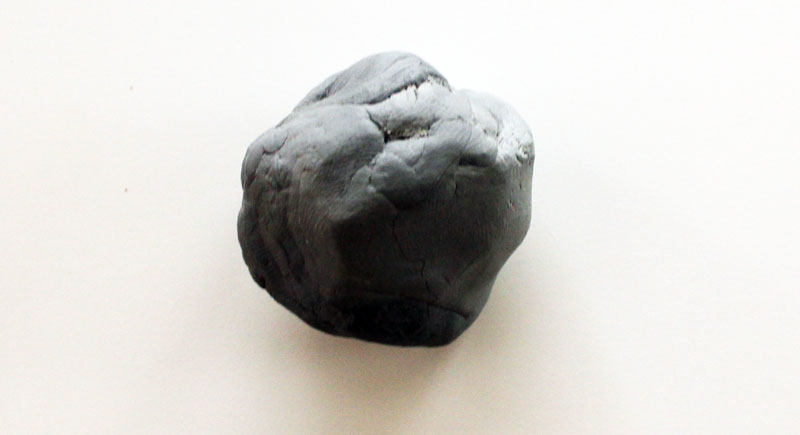
Stronger erasers, such as a rubber eraser or plastic eraser, may tear the surface or cause smudging. This wonderful eraser should be found in any pen and ink artist’s tool kit.
If so, join over 36,000 others that receive our newsletter with new drawing and painting lessons. Plus, check out three of our course videos and ebooks for free.
Colored Pencils vs. Watercolor Pencils vs. The Others
What’s the Deal with All of Those Colored Pencils?
It’s great that there are so many different forms of colored media out there for artists to use. Many are produced in pencil form, attracting the multitudes already conditioned to the feel and familiarity of using a pencil. Pencils filled with a colored medium can be found almost everywhere. I’ve even seen colored pencils sold at a gas station.
Because manufacturers are constantly engineering new products and packaging them in pencil form, the options for the artist continues to grow. It is exciting for sure, but a new problem arises out of such diversity, and that problem is confusion.
The tendency is to categorize all of these new products as “colored pencils”. After all, a pencil that has a colored medium encased in wood is a pencil that is colored – right?
I wish it was this simple, but it’s not. All of these “new” products are not technically “colored pencils”.
You see, the medium that you use dictates the manner in which it should be used to reach its full potential. And while it should be noted that you can use any medium that you wish, in any manner that you wish, there are limitations and methods which are optimal for performance. In order to get the most from the medium that you use, it’s important to “know” the medium that you are using and how to get the most from its use.
In this post, we’ll explore a few of the many choices of “colored pencils” that are available for the artist. I use the term colored pencils in quotations because as you’ll see, they are not all colored pencils in the traditional sense.
Understanding Binder
Most colored mediums feature a binder that holds the pigment together, allowing it to be transferred to a surface. The binder is extremely important as it dictates the methods used to apply the medium.
The binder is what ultimately defines the type of “colored pencil”. Because different types of pencils use different binders, the approach taken by the artist is also different.
Traditional Colored Pencils
Let’s first define “true” colored pencils. Traditional colored pencils vary greatly in quality, but all of them either have an oil or wax-based binder. Wax-based colored pencils are far more common.
(Some of the following links are affiliate links which means we earn a small commission if you purchase at no additional cost to you.)
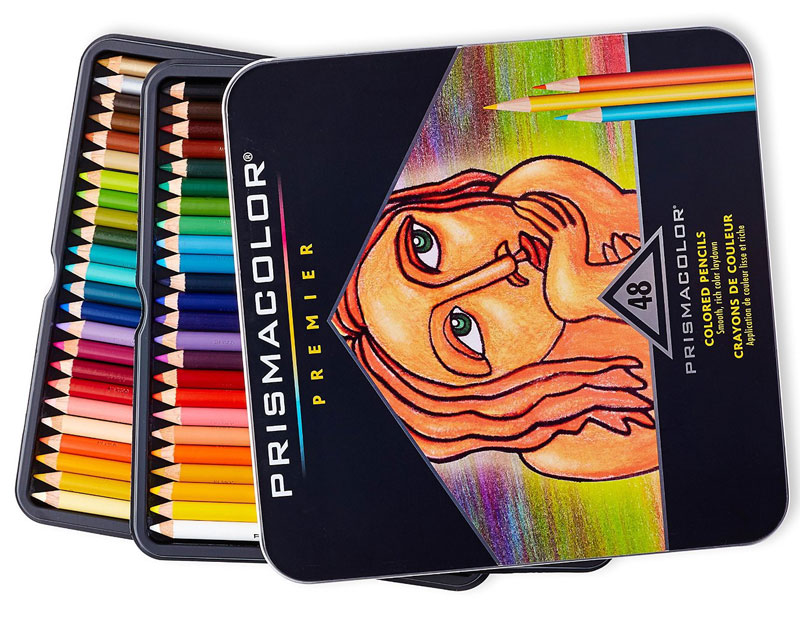
The quality of the pigment used and the ratio of binder to pigment affects the quality of the pencil and the resulting mark.
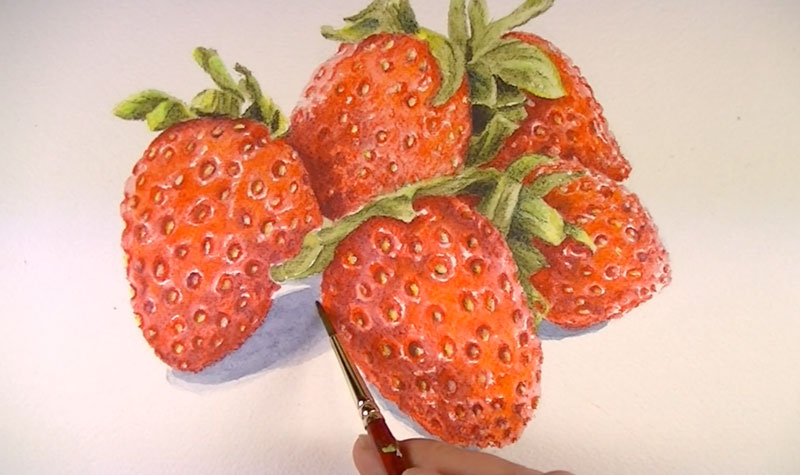
Colored pencils can be easily layered and mixed directly on the drawing surface. After multiple layers have been applied, colors can become quite complex.
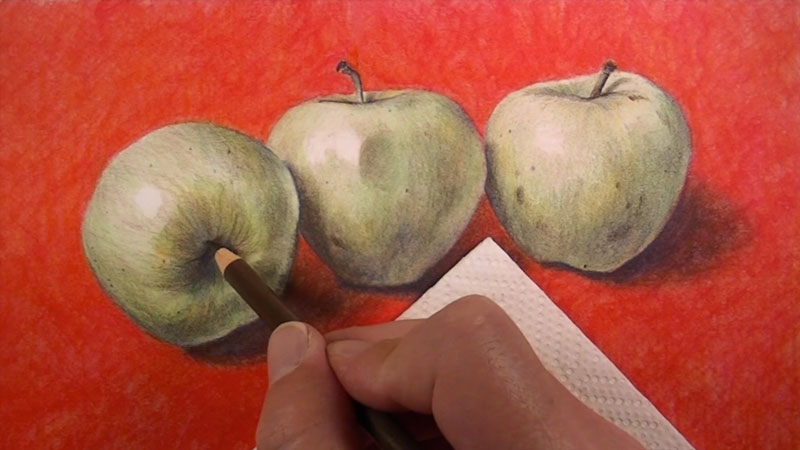
Perhaps the most appealing characteristic of traditional colored pencils is the fact that the color can be burnished. Burnishing is the process of building up a heavy application that fills the tooth of the paper, exploiting the oil or waxy binder to produce images that resemble paintings.
Burnishing is accomplished through a number of methods including:
- Layering a light pencil (white, cream) over applications
- Applying a solvent (Turpenoid or alcohol) with a brush
- Applying a colorless blender pencil
To get the most from burnishing, you still need to be aware of the binder of the pencil. For example, oil-based pencils react more effectively to applying solvent (Turpenoid). Wax-based pencils react more effectively to using a colorless blender.
Neither wax-based or oil-based colored pencils are water-soluble, as we’ll see with the rest of the “colored pencils”.
More resources…
Watercolor Pencils
Watercolor pencils are not traditional colored pencils. And if the artist tries to use watercolor pencils as colored pencils, they are likely to become frustrated. Watercolor pencils do not layer in the same manner as colored pencils and they cannot be burnished in the same manner either.
This is simply because watercolor pencils feature a different binder. This means that watercolor pencils are technically a completely different medium all together.
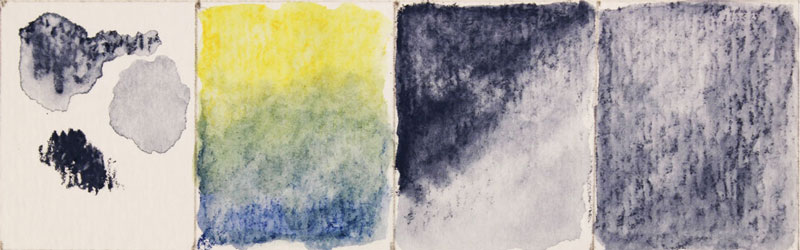
Watercolor pencils feature a water-soluble binder that disperses pigment when water is added. Color can be added to the surface with the pencil and then brushed with water to “activate” the medium. This produces a look that is very similar to a watercolor painting.
The pencil can also be wetted with a brush or dipped into water before making marks on the surface, producing intense color.
Watercolor pencils can be used with colored pencils, BUT it is advised to use traditional color pencils over the top of watercolor pencil applications, after they have been activated (unless a “resist” is desired).

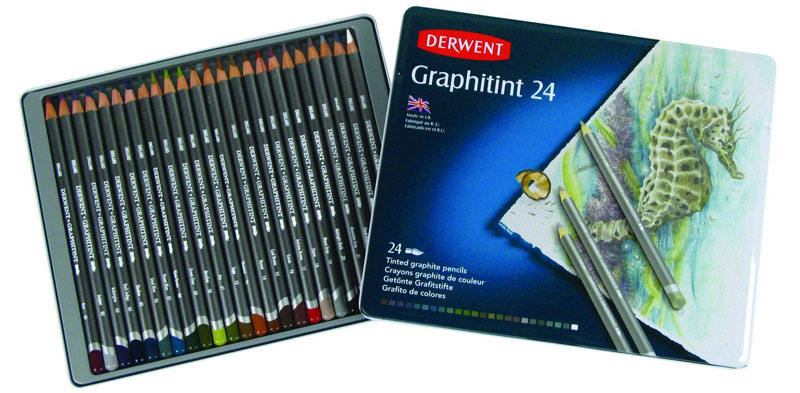
Water-Soluble Graphite Pencils
A third category of “pencils” exists called water-soluble graphite. Mostly, this medium is produced as traditional graphite – in a value range of grays. Softer forms produce dark values when activated with water, while harder varieties produce lighter values. Since water-soluble graphite is mostly produced as grays, I am hesitant to include them in this listing.
However, there is a product produced by manufacturer, Derwent called “Graphitint Pencils” that feature a range of colors. Because this medium is tinted graphite, most of the colors are quite “earthy”. Bright colors, such as yellow and orange, are not included.
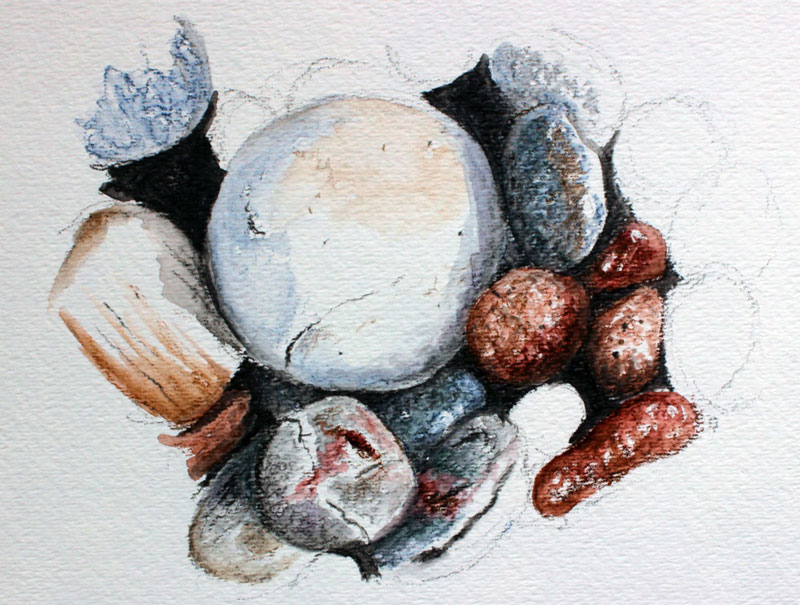
Like watercolor pencils, Graphitint pencils can be activated by applying water with a brush.
It is important to note that since these pencils are technically graphite, the binder is different, making them neither traditional colored pencils or watercolor pencils. Instead, they should be considered a unique medium of their own.
Water-Soluble Ink Pencils
Derwent also manufacturers a product called “Inktense” pencils. Inktense pencils behave in a similar manner as watercolor pencils when applied dry, but when activated with water, the color is much more intense.
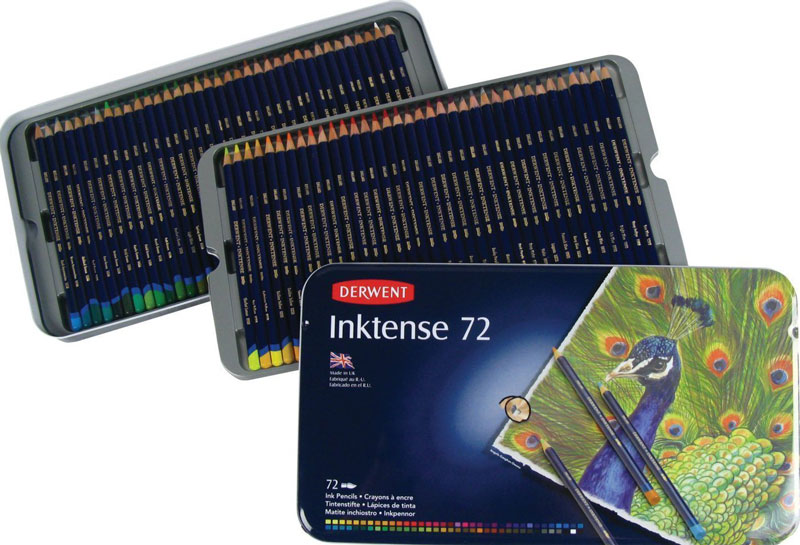
Inktense pencils are labeled as water-soluble ink pencils, meaning that the binder is different from watercolor pencils. Once activated layers have dried, they become permanent like ink. This allows for additional layers to be applied over the top, producing a glazing effect that is a bit more difficult to achieve with watercolor pencils.
Because of this permanence, Inktense pencils can be used to color fabrics such as silk and cotton. To cover larger areas, blocks of the medium are also available.
Inktense pencils make a suitable base for creating “underpaintings” in which traditional colored pencils, pastels, and watercolor pencils can be layered over the top.
Although closely related to watercolor pencils, Inktense pencils are yet another unique medium often categorized as a “colored pencil”.
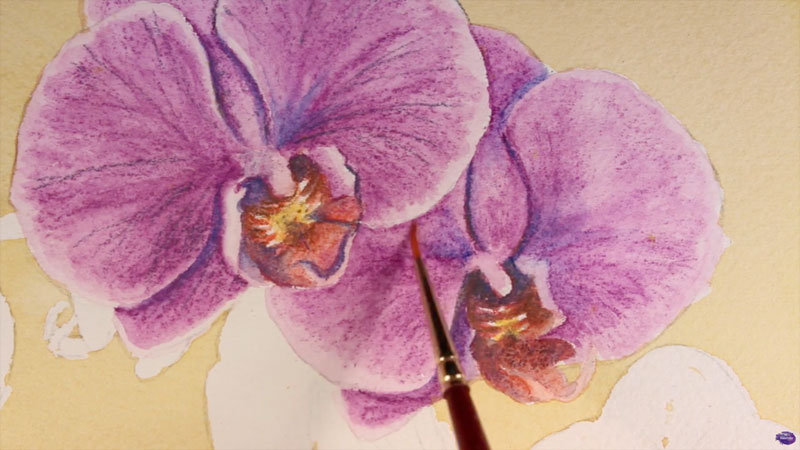
Pastel Pencils
Yet another type of “colored pencil” is a pastel pencil. Here again, pastel pencils are not traditional colored pencils. Pastel pencils feature compressed pastel material with a pencil. The medium is simply a form of pastel.
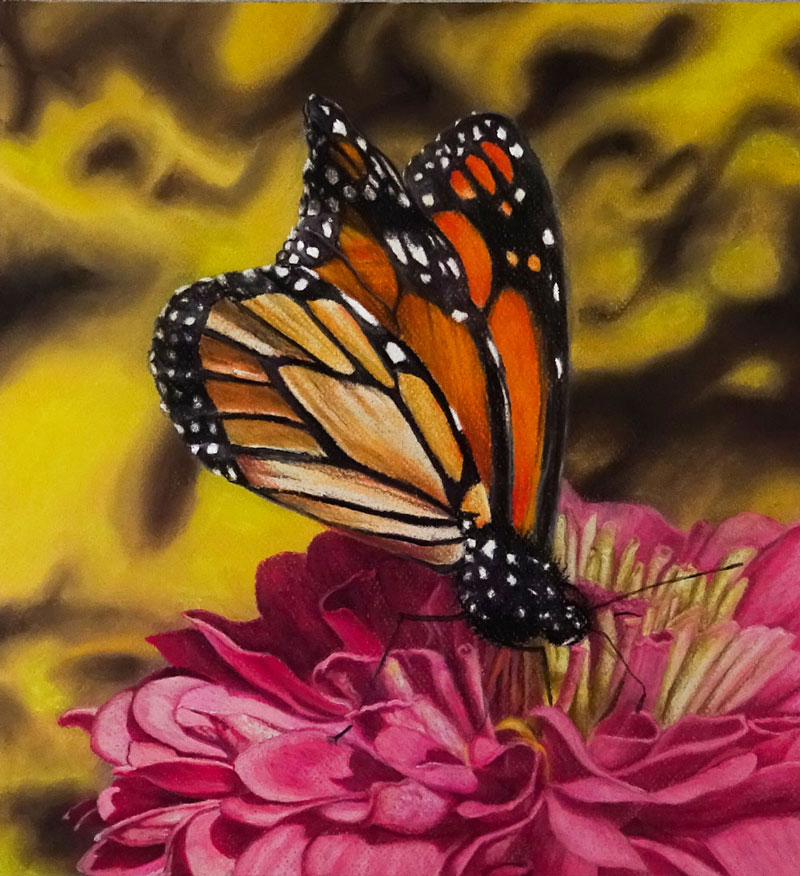
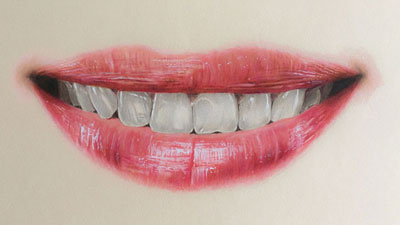
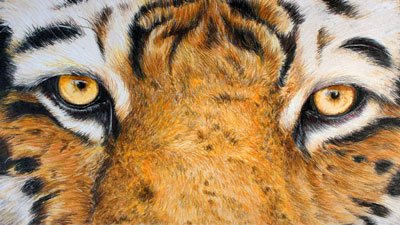
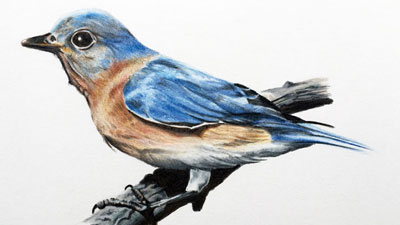
The drawing above was created as part of a lesson series available to members. You can view this lesson series here.
Some find it difficult to develop details with traditional soft pastels. A pastel pencil allows the artist to develop details within an image without sacrificing the versatility of traditional pastels.
Since pastel pencils are simply pastels, they can logically be used in conjunction with traditional soft pastels.
Conclusion
As we can clearly see, there are a variety of different pencils out there that are “colored”. The tendency is to label them all as “colored pencils”. But as we can see here, each type of these “colored pencils” is clearly different from the next. Understanding the binder, and how it behaves, will make all the difference in your applications and in your pieces of artwork that you create with them.
If so, join over 36,000 others that receive our newsletter with new drawing and painting lessons. Plus, check out three of our course videos and ebooks for free.
Is It OK to Trace in Art?
And when it comes to tracing or transferring images, every artist has an opinion on whether or not it’s appropriate to do so. Some are very passionate and vocal about their feelings.
Some feel that it’s actually “cheating” to transfer or trace contour lines onto a canvas or a drawing surface. But is it?
Tracing or transferring images has been a technique used by artists throughout the years to save time and ensure accuracy in representational art. It is used by more artists than you may realize. Are all of these artists “cheaters”?
Is It Cheating To Trace?
Let’s first examine the opinion of those in the “cheating” camp. Why is it that these folks believe that tracing is cheating?
Argument #1 – Learning to draw requires the refinement of observation skills. We learn to see as artists and make marks to reflect what we observe. This process requires practice and trial and error. As we practice, the accuracy of the marks that we make improve and our drawings become more precise. Drawing gradually becomes intuitive.
When the artist traces the subject, this process of improving is hindered. Tracing does not directly improve our observational drawing skills. Tracing is not the path the artist should take if improving drawing skills is the desired result.
Argument #2 – When you learn to draw, you learn to observe and translate what you observe into lines, shapes, values, textures, etc. When the artist traces, the translation of the lines are not made by the artist. Instead, they are simply transferred to a surface.
Because the artist did not translate the observed contour lines, some believe that this is cheating. If the artist does not translate the subject completely, then the work must somehow not be completely the artist’s interpretation of the subject.
These are valid arguments and it’s clear that tracing should not be the regular practice of an artist that is just learning to draw.
Why It’s Not Cheating To Trace
As I mentioned before, many artists throughout history have used some form of tracing to create works. Many artists today also use tracing as part of the process of creating – more than you may realize. Clearly, these artists do not feel that it’s cheating to trace. So, when might tracing be appropriate?
For many artists, the product of the finished work of art is most important. The quality of the work outweighs the process. Patrons, art directors, etc. often don’t mind what process the artist uses to arrive at a successful piece. If tracing is a part of that process, then so be it.
Speed also plays a role. Most professional artists need to produce art quickly. For commercial artists, time is money. And if art is your business, then making money from it is clearly important. Any tools or processes that save time, without sacrificing the product, are utilized. Tracing saves time. If the artist is a professional, then drawing skills are likely already developed. If the artist wanted to draw the contours accurately, they could do so. But this would slow the process and not affect the finished result.
Therefore, tracing becomes a tool of the professional artist. And it does not make sense not to use a tool that saves time.
Those that feel that tracing is cheating sometimes do not fully understand the full process of drawing and painting. They may feel that if the contour lines are traced, then “the hard part” of the drawing process has been completed.
Tracing may be used to establish the contours, but the task of completing the work is far from over. Skill is required to complete the piece. The “hard part” of completing the work is still ahead of the artist, even if some form of tracing has been used.
“Tracing does not aid with any of these aspects. If the artist is not skillful, it will be painfully obvious in the final work.”
Let’s assume that an artist lays out the subject on canvas in preparation for finishing with acrylic paints. The artist uses a graphite transfer to do so – a method of tracing. While the contour lines may be established through tracing, the work still must be finished through skillful application of paint. The artist must be knowledgeable of light and shadow, texture, form, color mixing, and application of the medium. Tracing does not aid with any of these aspects. If the artist is not skillful, it will be painfully obvious in the final work.
This applies to any medium that the artist may use to complete their work. Every medium requires a level of skill to finish. It is never a process of simply “coloring” a traced outline.
Artists That Trace
Most artists that use or have used some form of tracing are clearly representational artists. For most, the accuracy of the subject is important. Portrait artists, working on a commissioned piece, must be sure that the work looks like the subject. And while tracing does not guarantee that it will, it certainly helps in the beginning stages of the work.
A short list of artists “accused” of tracing…
Artist David Hockney and physicist Charles Falco researched artists throughout history and concluded that many used some form of tracing to develop their work. Published as the Hockney-Falco thesis, their findings led them to believe that the following artists also used some form of optics to trace…
Is It Right For You To Trace?
So then, what should you do? Should you trace the contours of your subject or should you be “pure” about it and avoid using this controversial tool?
I think that it ultimately depends on where you are in your artistic development and how you view the process of creating.
“Drawing is fundamental and you should be studious about continuing your development, no matter what your current skill level may be.”
If you are still developing your drawing skills, it is my opinion that you should avoid tracing. Focus on pure drawing from observation. Draw from life as much as possible. Once your drawing skills have developed, then tracing can become a tool that saves time. One that you do not have to use.
If you have developed your drawing skills and have the ability to draw the subject accurately, then tracing ultimately doesn’t affect the resulting work. Be cautious that tracing does not become a “crutch”. Reserve it for subjects that require the upmost accuracy.
And even if tracing does become a tool in your artistic toolbox, your drawing skills should be practiced and honed continually. Drawing is fundamental and you should be studious about continuing your development, no matter what your current skill level may be.
If you view the act of creating to be more about the process, then you are likely to believe that tracing is some form of cheating. However, if the product outweighs the process in your mind, then you’re likely to view tracing as an acceptable part of the process. So your perspective and feelings about art will influence what you personally believe.
If so, join over 36,000 others that receive our newsletter with new drawing and painting lessons. Plus, check out three of our course videos and ebooks for free.
Dealing With Artistic Frustration – When Things Don’t Go Your Way
Perhaps you’ve started a painting and all has gone well. You’ve found yourself to be “in the zone” and every mark is cooperating. You’re working almost intuitively, and each decision that you’ve made has been “spot on”. The colors are working, the composition is strong, and the materials are almost an extension of your body. Your work is coming together and the excitement is starting to grow. Then it happens.
You’re faced with a turning point in the painting and for some reason, you make an unwise decision.
All of a sudden, your “flow” is gone. It feels as though you have been punched in the stomach and the excitement that you felt has now turned into dismay.
Perhaps you feel foolish. You ask yourself, “How could I have thought that this work would be strong?” You begin to question everything that you’ve done to this point and you begin to feel like a failure.
You don’t know what to do, so you give up and walk away. The feeling stays however and begins to fester.
Does this sound like you?
If you’ve ever experienced this feeling, then you’re definitely not alone. We’ve all experienced it at some point. Some of us more than others, but it’s something that we all struggle with occasionally.
“We all risk failure when we take on anything that’s worth doing.”
We shouldn’t try to avoid it, because it does and will happen. But, we should be prepared to handle it when it does. If we let the emotions that we feel dictate who we are as artists, then we may find ourselves on a slippery slope.
Why We Get So Frustrated
When artistic frustration sets in, our emotions about our work and ourselves can run unchecked. We must understand why we become so frustrated when things don’t go our way so that we can overcome these feelings when it happens.
Any form of creating, whether it be drawing, painting, or anything else, is a deeply emotional experience. We create from a “different place”. Our work becomes an extension of our emotions and we often place our worth on what we create.
This is why we feel pride when we are successful and why we hide works or throw them away when we fail. This is why the frustration is so strong, especially when our identities are often tied to the label of “artist”.
We must learn to separate our emotions from the work that we create. Though not entirely possible, we must learn to look at our work objectively and not emotionally.
You Are Not What You Create
The first step in overcoming these feelings of frustration, no matter how heavy they may feel, is to recognize that you are not what you create.
Your painting or drawing is not who you are. It is not always a reflection of your potential, your skill level, or your effectiveness as an artist. We all have artistic hiccups.
It’s often difficult to separate ourselves from our works, but we must. Our art is a product. Some products are successful and some are not.
Experimentation is a part of every piece that we create, and some experiments unfortunately do not work. We learn from them and grow as a result.
If we allow ourselves to become too emotionally attached to our work, then it becomes almost impossible to evaluate our work objectively. This also limits the risks that we decide take, which are crucial to artistic growth.
With every work that we produce, we are hoping for success, but we must recognize that failure is a possibility.
We all risk failure when we take on anything that’s worth doing.
Take a Break
We shouldn’t avoid frustration, because often it is a sign of growth. We sometimes feel frustration when we are on the cusp of discovering a new strength. But I have found that I often make bad decisions in a work (which leads to frustration) at specific times in the creative process.
I’ve found that I often encounter frustration when I am forcing the work to happen. Instead of allowing myself time to create at my own pace, I am trying to “produce”.
I almost override my creative intuitiveness in order to simply “finish”. Bad decisions are almost always the result.
We must take breaks from time to time to give our creative mind room to breathe. Great art is not forced, it is allowed out.
So, take a break. Step back from the work for a few minutes or maybe even a day. Go for a walk. Do something else. Give your mind a rest.
Come back with a fresh perspective and look at the work objectively – as a product. Evaluate what you are doing well and where you can improve.
Don’t Quit
Sometimes we instinctively want to quit when that overwhelming feeling of frustration sets in. This is the easy route, but definitely the wrong one to take. We create for a reason and we shouldn’t deny the urge.
The creation of art is not easy. There are plenty of “bumps in the road”. But it doesn’t mean that it’s time to leave the path. You must carry on.
If you are at a point where the work is unsalvageable, then learn from the mistake and put the work away. More often then not, the work can be saved and does not need to be discarded. Fix the mistake and continue.
Success Is Victory Over Adversity
Things in life that are worthwhile are inherently full of challenges. Art is no different.
You will face adversities when you create and when you take risks. It is how we react to these adversities that matter.
Many of our successes, whether they be art-related or otherwise, are the result of facing adversity and working through it. Frustration is simply one of these.
If so, join over 36,000 others that receive our newsletter with new drawing and painting lessons. Plus, check out three of our course videos and ebooks for free.
11 Must Have Watercolor Supplies for Beginners
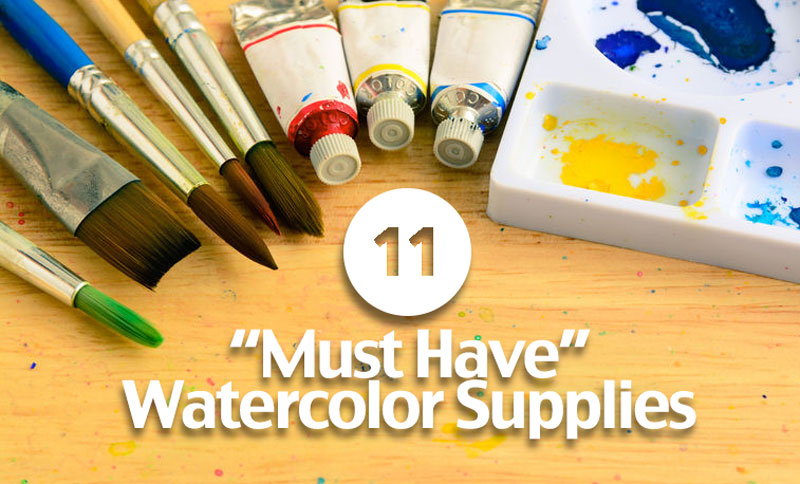
1. Watercolor Paints
Well there’s no doubt that you’ll need watercolor paint. But what brand and what type you should use really becomes a personal choice. Let’s look at your options…
First, a note on low quality brands of paint. There are plenty of low quality brands of watercolor. Watercolor can be made very cheaply and for the lower quality brands, the price reflects this. You’ll see the price that you pay reflected in the quality of your painting as well. Using low quality paints will just lead to frustration, so my suggestion is stay away from the cheaper brands.
Watercolor is produced in two main forms: Tube or Cake (or Pan). All watercolor consists of pigment (color), a material such as gum arabic (binder), and water (solvent). Other materials are added to extend the paint.
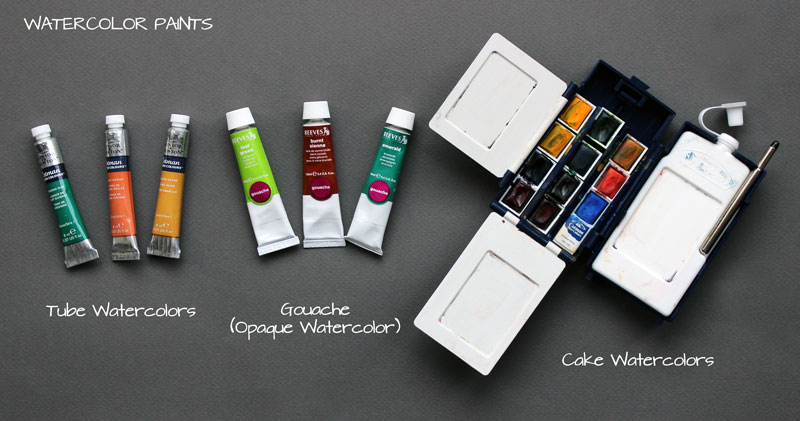
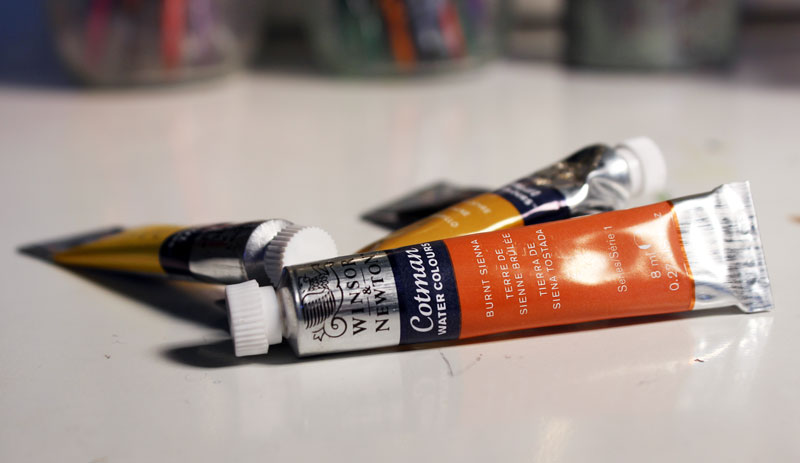
Tube Paints
The watercolor paint found in tubes is thick. It can be squeezed out on a palette and thinned with water in order to apply translucent applications. When tube paints dry, they can be reactivated just like cake or pan watercolors.
Tube paints are best for intense colors. The color is naturally more concentrated than the cake form of the paint. “Muddied” colors are less likely to occur with tube paints since contamination is less likely to occur. Mixing colors is bit easier as well.
Cake (or Pan) Paints
Cake watercolors are concentrated blocks of pigment and binder. When water is added, the color becomes activated. Colors are lifted out of the pan and applied to the surface. In many situations, cake watercolors are preferred. If you are painting “on location”, or just “sketching”, cake watercolors are a perfect solution. They’re easy to maintain and use.
One drawback to pan watercolors is that color can become contaminated rather easily when going from pan to pan without washing your brush.
Gouache
Many people consider gouache to be its own form of paint. Gouache is really an opaque form of watercolor. It’s capable of producing results similar to opaque paints like acrylics or oils. It can also be thinned to mimic watercolor. Some artists create paintings exclusively with gouache, but it can also be used in conjunction with watercolor to strengthen highlights or intensify colors.
(Some of the following links are affiliate links which means we earn a small commission if you purchase at no additional cost to you.)
I recommend starting out with Winsor & Newton’s Cotman Watercolors for tube paints. The colors are strong and intense but won’t break the bank.
For cake watercolors, I love my Winsor & Newton artist watercolor field box set . It’s a little pricer, but the pans last quite a while.
For those just starting out with gouache, Reeves makes a good set. They are very competitively priced and the quality is very good. For a more professional set of colors, you might try Winsor & Newton Designers’ Gouache introductory set.
2. Brushes
The brushes that you choose are also a personal decision. Many artists find a particular brand that they prefer. You’ll also find that particular brush types and shapes will produce different results which can be used for specific applications.
Softer bristles are generally preferred by most artists. Sable and goat hair brushes are very soft and both are popular options. Sable bristles have a bit more “spring” than goat hair, providing the artist with a bit more control.
Soft nylon brushes are preferred by many artists for the excellent spring and control of the stroke. I actually prefer to use nylon brushes for most applications.
Stiffer hairs, such as hog bristle, are mostly avoided. In some circumstances, stiffer bristles are used for special textural effects.
For more on choosing your brush, you may try this guide – How to Choose The Right Paint Brush
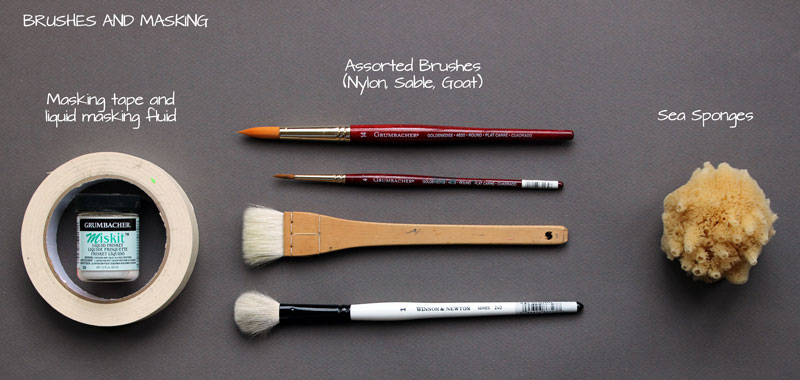
3. Masking Fluid
Masking fluid is a latex-based fluid that can be applied to the surface to preserve areas of the paper or previously applied washes of color.
While masking fluid is great for added control in layering colors, it should be noted that it can destroy a paintbrush. It is advised to use an old brush to apply masking fluid or a rigid tool, such as toothpick. (Masking fluid in action.)
Once the masking fluid has served its purpose, it can be removed by gently rubbing with a finger, leaving preserved areas on the surface.
4. Masking Tape
For smaller paintings, masking tape can be used to adhere and stretch watercolor paper on a rigid surface. For larger paintings, staples and a stronger tape (gummed paper tape) may be used.
5. Sea Sponges
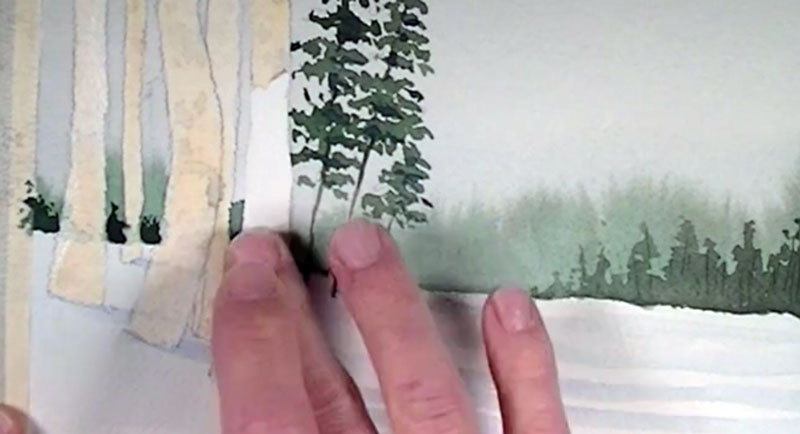
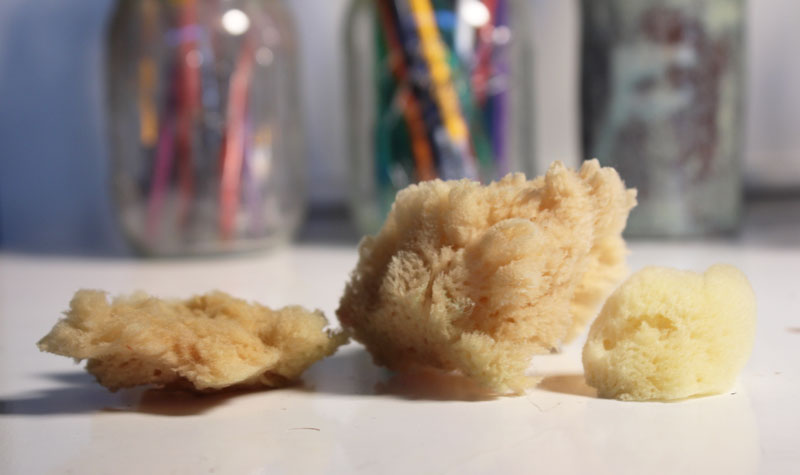
Sea sponges are absorbent and feature interesting surface textures. For watercolor painting, sea sponges can be used to create textured applications. Sponges can be dipped in the paint and dabbed on the surface, transferring the physical texture of the sponge to a flat pattern on the painting surface. Because sea sponges are each unique in their texture, many artists prefer to have several in their collection.
6. Watercolor Paper
The surface that you choose to work on is just as important as the brush and the paints. Watercolor paper is absorbent, allowing for multiple applications of washes without much buckling. Watercolor papers are quite varied, but there are three main forms. Each form of watercolor paper is categorized according to its manufacturing process and the weight of the paper.

Cold Press
Perhaps the most popular form of watercolor paper is cold press paper. It is referred to as “cold press” since the paper is rolled on cold cylinders during the manufacturing process. This process produces an irregular dimple pattern in the paper.
Hot Press
Hot press papers are a bit smoother in texture since the paper is rolled on hot cylinders during the manufacturing process. Brush strokes are usually visible on hot press papers.
Rough
Unlike hot press and cold press papers, rough papers are not rolled on cylinders at all. Instead, they are hard pressed, or not pressed at all. The resulting texture is a heavy tooth of an irregular pattern.
Papers are also categorized according to their weight. Heavier papers are usually desired because they are more rigid and capable of holding many washes of color. The weight of the paper refers to the weight of a ream of paper (500 sheets).
Typically, watercolor papers are available in three different weights…
- 90 lb (180 gsm) – Thick enough to absorb wet applications.
- 140 lb (300 gsm) – Thicker paper capable of absorbing multiple applications with little buckling.
- 300 lb (640 gsm) – Very thick paper capable of absorbing multiple applications without any buckling.
Usually, heavier weights of paper are more expensive and are considered higher quality.
For more on paper surfaces, you can check out this post.
7. Support Panel
Most artists prefer to adhere watercolor paper to a support. This can be any type of rigid surface that will provide a heavy backing and which the watercolor paper can be adhered. I prefer to use masonite panel for this. Masonite can be picked up at any local hardware store and is usually inexpensive.
When a support is used, the work can be propped on an easel. For those that prefer to work on a flat surface, a support panel allows you to lift and tilt the painting, directing the wet paint to flow into desired areas on the surface.
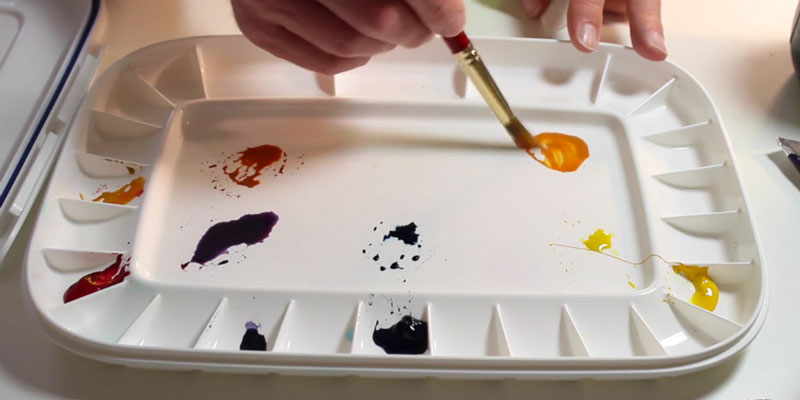
8. Palette
If tube paints are used, then a good palette is essential. Disposable palettes, such as palette paper, can be used but tend to be a bit wasteful. Dried watercolor can be reactivated with water, so it doesn’t make sense to use a disposable palette in most circumstances.
Manufacturers produce a variety of palette solutions for the watercolor artist. I prefer to use a plastic palette that is sealable. Palettes that can be sealed keep the paint wet for a much longer period of time. But as I just mentioned, this is not always necessary with watercolors. Plastic palettes allow for easy removal of the paint when dry and are water resistant.
The palette that I prefer to use features a tray of sections that surround a flat area for mixing.
9. Graphite Pencil
While some artists go straight to the painting surface with paint, most prefer to sketch out the subject or scene with a graphite pencil first. Typically, these applications are loose and generally light. Some artists, however, prefer to allow the pencil applications to play an important role in finished work. Both approaches are perfectly acceptable and are reflective of your personal style and preference.
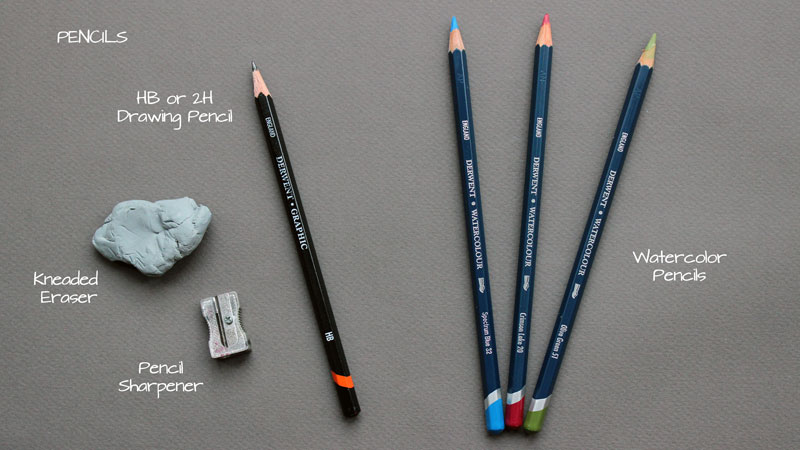
Some harder pencils can create depressions in the surface which could influence subsequent applications of watercolor. For this reason, it is advisable to apply pencil applications with a softer or medium grade pencil. If you do not wish your marks to be visible, I would suggest not going any harder than a “2H” or much softer than a “2B” pencil. Although the pencil that you use is ultimately determined according to the amount of pressure that you place on it.
It should also be noted that a quality pencil sharpener is important. I’ve worked my way through multiple electric pencil sharpeners throughout the years. All of them have broken at some point. These days, I stick with a simple metal hand-held sharpener. I’m yet to break one.
10. Kneaded Eraser
Graphite applications that are too strong or are still visible after painting can be lifted from the surface with a kneaded eraser. Kneaded erasers are soft and pliable and will not disturb the tooth of the paper when they are used.
11. Watercolor Pencils
Watercolor pencils could be considered their own medium since the manner in which they are applied is very different than traditional watercolors.
Watercolor pencils can be applied in a few ways:
- Applied to the surface dry and then activated with water. (Most popular application technique.)
- Applied to moistened areas.
- Moistening the tip of the pencil prior to making applications, either by dipping the pencil in water or by applying water with a brush.
- Pulling color off of the tip of the pencil with a brush and then applying the color with the brush (like a cake watercolor).
Not all watercolor artists will have a need for watercolor pencils, but they are a unique form of watercolor that is fun to use and provides a good amount of control.
My favorite watercolor pencils are Derwent watercolor pencils. They have a great selection of colors that are very natural and brilliant when activated. (For some watercolor pencil brands, the colors tend to look synthetic.)
If so, join over 36,000 others that receive our newsletter with new drawing and painting lessons. Plus, check out three of our course videos and ebooks for free.

Observation Drills to Improve Representational Drawing
Drawing representationally is centered on observation. Therefore, observational skills are crucial to success with realistic drawing.
If we want to capture an object or subject the way that it appears, then we must look at the subject. We must understand and record the relationships of the lines, shapes, textures, etc. that we see in order to communicate them to the viewer.
It wouldn’t make sense to expect to take a photograph of a subject without pointing the camera at it. It also doesn’t make sense to draw a subject representationally without looking.
Misconceptions About Realistic Drawing
Some people believe that in order to be an artist, you must be able to draw or paint without any reference. This could not be any further from the truth. Artists throughout history have used models, painted on location, and a few even used the Camera Obscura to capture their subject.
Of course, whenever we draw from observation, we are improving our observational skills. However, there are a couple of quick drills or exercises that we can practice to improve our skills of observing. Coupled with actually drawing from observation, these drills can improve your observation skills. And with better skills of observation, you’re sure to see improvement in your drawings and paintings.
Observation Exercises
In the first exercise, you are presented with five squares. In the first square, you are presented with the “original doodle”. Your job is to find the “match” from the other four squares that follow. One of the four squares has a drawing that is very similar to the original, while the other three have a doodle that is different. Not only should you find the “match”, but also notice how the other doodles are different.
No drawing is involved here – just pure observation. Remember, representational drawing is 50% observation.
Click here for a printable PDF file
In exercise 2, you are presented with two boxes. The first box has a non-objective doodle. In the second box, your task is to draw a “copy” of the doodle.
Since the drawings are non-objective, you are forced to observe purely the lines and shapes without allowing the subject matter to influence your drawing.
Click here for a printable PDF file
Have a friend create a few of these for you and keep practicing (it doesn’t require much drawing skill to create). Don’t stop with just this page! Take a few minutes and practice every day or two. These drawing exercises are rather simple and don’t require much time.
Put them to work and you will improve your observational skills. You’ll see the results carry over to your representational drawing and painting skills.
If so, join over 36,000 others that receive our newsletter with new drawing and painting lessons. Plus, check out three of our course videos and ebooks for free.