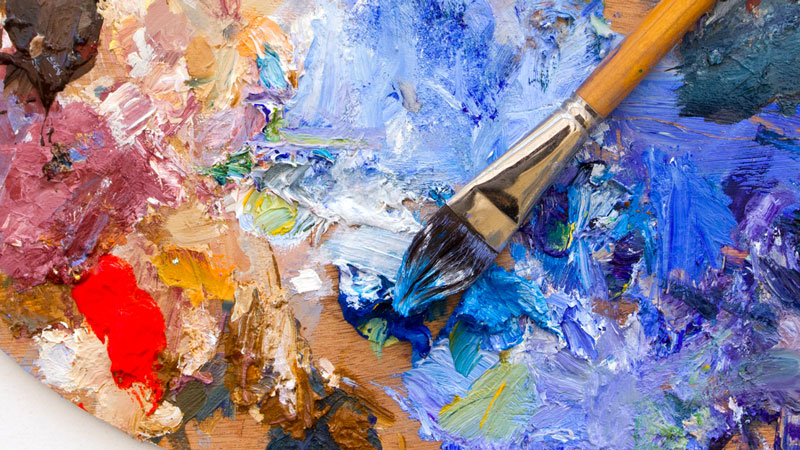
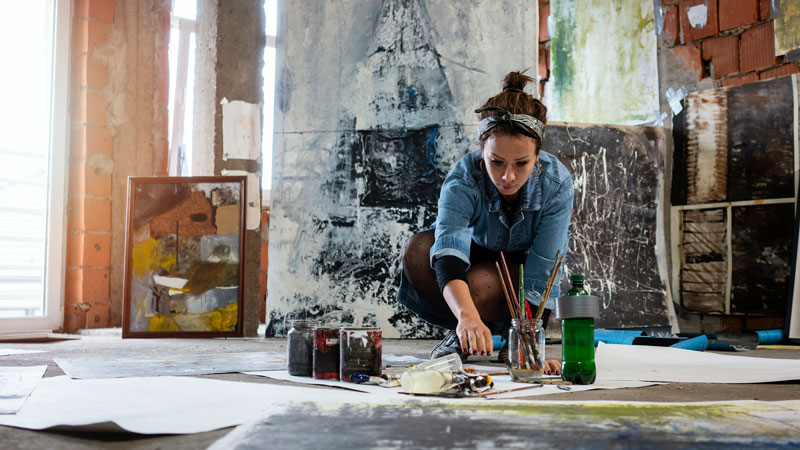
It is equally important that all students of art learn the basics of color theory.
I think most of us agree that choosing colors for a composition should never be guesswork. Instead, a color combination should be well planned and executed. This can only happen by having a good understanding of the basics of color theory.
I personally think that color theory is very interesting. The way that the color wheel fits together like a puzzle is incredible.
Imparting that “coolness” to students and getting them excited about color theory can be difficult. Color theory, when not presented in an exciting way, can be boring – not to mention confusing.
Over the years, I have experimented with different ways to teach color theory to students. I also observed the way other teachers teach the concepts of color theory to their students. Our students, or well maybe my students, are engaged in learning most when they can interact with the concepts that I’m trying to teach to them.
Sure, mixing colors with paint, and filling in a color wheel is interactive. This is an activity that all students should participate in. I’m not suggesting that this activity be scratched. But I felt like my students needed a tool that would answer their questions about the basics of color theory in a more immediate way, something that they could could interact with. A tool that they could have access to, and that would reinforce the traditional concepts that I taught them would be more effective for learning.
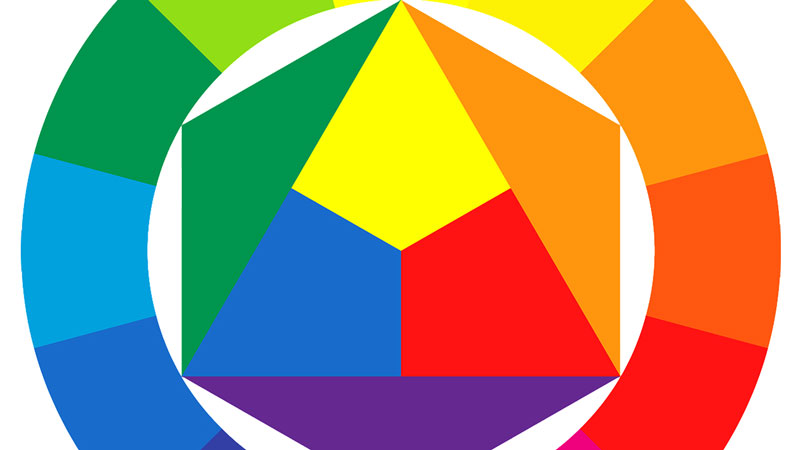
I searched for some color wheels on the internet and wasn’t satisfied with the results, so I decided to make my own.

So here it is, an interactive color wheel that students can access on a classroom computer. It gives basic information about color theory as well as information about each color. It breaks down the complementary color of each color, the immediate analogous colors, the split complements, a color triad, and a color tetrad.
It also explains the different types of colors on the color wheel and the role of the neutral colors. I hope that you find useful for yourself as an artist or for your students.
If so, join over 36,000 others that receive our newsletter with new drawing and painting lessons. Plus, check out three of our course videos and ebooks for free.


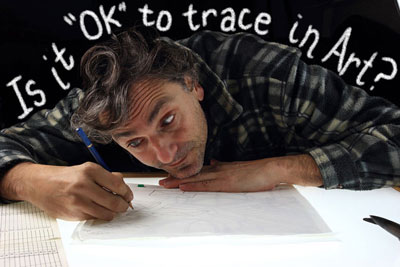
Is Illustration Art?
He is trained as a painter, but I was still shocked to find out that he did not consider Illustration as a form of Art. What, illustration not an art? Needless to say, I was shell-shocked. Being an illustrator, I know first-hand that it is truly a form of art.
But why did HE feel this way? After our argument, I decided to figure out where his opinions came from.
We attended different schools within the same state but both of us were, of course, art majors. Each school has a decidedly different approach to Art School. His school has a more traditional approach, teaching drawing, painting, and sculpture as the core institutions of art making. My school takes a more commercial approach.
The traditional disciplines of drawing, painting, and sculpture are given their due, but students are encouraged to explore commercial endeavors such as Graphic Design, Photography, Architecture, and Illustration.
During our discussion, he pointed out that he had certain professors that scoffed at illustration being an art form. I think that this plays a role in his opinion. He argued that since the idea originates with someone else as is the case in illustration, then the finished product is not art. Instead, the idea should come from the artist, in order for it to be actual art. I pointed out to him that commissions are not the artist’s ideas, but rather those of the client.
He argued that perhaps, this was illustration.
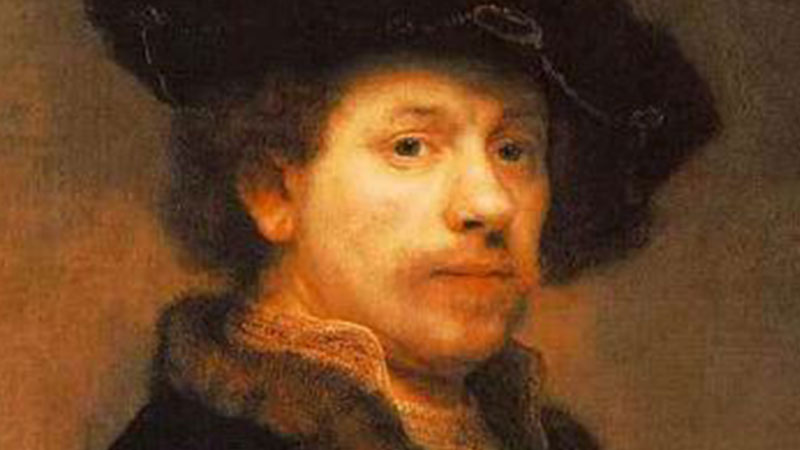
Many artists throughout history created what a client imposed upon them. Take Michelangelo and the ceiling of the Sistine Chapel, for example.
Was this Illustration?

The Pope commissioned Michelangelo for this work.
Society of Illustrators director Terrence Brown says, “People think illustrators are hired hands–[they’re] anything but, They’re artists, and they want to put themselves into everything they do, even though it has to be a picture of George Bush; even though it has to be vertical because TIME magazine is published vertically; even though it has to have the top 20 percent relatively detail-free so that the T-I-M-E shows.”
He points out that illustrators must work under tight time constraints within deadlines. “There’s no downtown gallery painter who even has a chance of doing that,” he said.
The focus of Fine Art may be design with the subject becoming secondary. While illustration’s primary focus IS the subject, with design becoming secondary. But should Illustration be excluded from the world of fine art because of the focus? I think not.
My friend pointed out that Illustration is commercial, and that since it is commercial, it is about money and not the art. My argument is this: fine artists WANT to sell their artwork.
They may sell it in a gallery or through another avenue, but ultimately they want money for their work. If they didn’t, they would give it away.
It’s ALL commercial. Illustration just has the ability to reach a broader audience because it is created to be printed.
I read somewhere that the division between commercial art and fine art began when illustration and photography really began to take off in the early 1900’s. Fine artists and critics began to distinguish themselves from commercial artists by arguing that commercial art was a lower form of art. I don’t know if this is true or not, but it wouldn’t surprise me.
Illustrator Alex Rosmarin states, “…illustration and drawing are two different categories and can’t be compared in a straightforward way. ‘Drawing’ includes ‘illustration’. Drawing is a universal human activity. Illustration is something you might want to do with your drawing skills. It’s like comparing ‘playing music’ and ‘playing rock’. One compares rock and jazz, not music and rock, or music and jazz.”
Perhaps we should just make art and forget all the snobbery.
Resources:
http://www.artopic.org/?p=468
http://findarticles.com/p/articles/mi_m0HMU/is_6_31/ai_n6116676/
If so, join over 36,000 others that receive our newsletter with new drawing and painting lessons. Plus, check out three of our course videos and ebooks for free.
Why Isn’t My Artwork Selling?
Well there are several possible answers to this question. Determining the reason why you’re not selling your artwork is the first step in actually making a sale, if you haven’t made on yet. For many artists not making any sales or very little sells, can be quite demoralizing. Let’s take a look at a few reasons why your art may not be selling.
Reason #1 – You need more practice
This reason is pretty harsh, but it needs to be recognized. Take a look at what some other artists in your target market are creating. Is your work on the same skill level as theirs? If not, then you may need to spend a little more time practicing and get your work to that level.
Reason #2 – You have not targeted the right niche
Okay, so you’ve determined that your work is quality, but you’re still not making those sells. Perhaps you haven’t targeted the right niche or any niche at all.
Take a look at your portfolio. Is it all over the place with a variety of subject matter and media? If so, then you need to target a niche. Pick your favorite subject matter or media and develop ten works in that niche. Then your customers will know exactly what to expect from you.
Reason #3 – You do not have enough exposure
So, your work is quality and it can be categorized into a specific category, but it’s still not selling.
Do people know about your work? Have you visited galleries and asked about showing your work? Have you exhibited at local arts and crafts shows? Have you passed out cards and advertised in papers and magazines? Do you have a website? Do you need an agent?
Sometimes exposure is everything. If people don’t know about you, then they definitely won’t be buying any artwork from you. Sometimes it’s okay to “toot your own horn”. Let the world know how great you are.
Reason #4 – You have overpriced yourself
Your art is quality within a specific niche and you’ve got great exposure, but your art is still not selling. Perhaps you’ve overpriced yourself. Sure, wealthy art collectors will pay quite a bit for original works of art. But in reality, most of us aren’t wealthy art collectors.
Maybe you are charging more than people are willing to pay. Pricing your artwork can be pretty tricky and finding a nice balance between your efforts and your rewards can be a hard thing to do. But if your art isn’t selling, it may be time to lower your rates a bit.
Not interested in lowering your rates for original art?
Check out the print market. You could try creating prints of your original art. Many people can afford prints and are more willing to pay for them. Plus, if you have a work that is appealing to a large audience, you could end up selling lots of prints and make quite a bit from one painting or drawing.
All of these are common reasons art doesn’t sell. Any apply to you?
If so, join over 36,000 others that receive our newsletter with new drawing and painting lessons. Plus, check out three of our course videos and ebooks for free.
Talent is a Myth
Basically, what they think, and what many people think, is that “talented” people are just born with special skills that they just weren’t born with. Hogwash! As one of these “talented” people, I am here to tell you that that is not what “talent” is. Talent is a myth!
Now why on earth would I be writing an article on how “talent” does not exist when I, myself, have been labeled as one of these special “talented” people.
Am I crazy? No, on the contrary, I am realistic. Many talents are actually skills. Skills are developed. Becoming good at any one skill takes desire and then practice. Saying that you are not “talented” is an excuse.
Let’s take art, for example. You have two small children, one that colors inside of the lines and one that doesn’t. The one that colors inside of the lines may be labeled “talented”, while the other child is told that they may just not be “talented” at art. The kid labeled as “talented” continues to draw, and what happens? They get better and better, making them more and more “talented”. The “non-talented” child finds something else. Something that they are “good at”. Eventually, they may even say, “I can’t draw.”
Let’s look at music. No one ever just picks up an instrument and is an expert at playing it. It takes practice and lots of it. It’s not a matter of “talent”, it’s a matter of desire, discipline, and practice.
It really is true. You can do whatever you want to in life, even of it is something that you have not been labeled as “talented” in. Don’t let other people’s limitations, limit you.
The word “talent” really should be looked as meaning “desire”. If you have the desire, then you can do it. No excuses.
If so, join over 36,000 others that receive our newsletter with new drawing and painting lessons. Plus, check out three of our course videos and ebooks for free.

How to Price Your Art

You feel exhilarated at first. Someone has found value in what you create! This is a milestone in any artist’s journey and you should soak it in and enjoy it.
But after that initial burst of joy, you may feel a small twinge of fear and uncertainty. Don’t worry, this feeling is perfectly normal.
If you’ve never sold your art before, you likely don’t know how to price it. In this moment, you may be asking yourself a few questions…
- Is my art good enough to sell?
- Do I want to sell my art?
- What’s a fair price?
- Can I create a commissioned work that will make the client happy?
- How do I price a commissioned work of art?
All of these questions are valid and should be asked. Pricing and selling your art requires a little introspection and there are several variables to consider.
Is My Art Good Enough to Sell?
Most of us first sell our work to a friend or family member. This isn’t always the case, but it’s fairly common. This makes things a little more complicated when it comes to pricing.
If it’s a friend or family member, it can make you wonder if your art is even good enough to sell. You may think they’re just trying to be nice and make you feel good about yourself.
But if they’ve expressed interest, then it’s a great opportunity for you to practice with your pricing. Treat them as if they’re a regular patron and price your art as if you were selling it to a stranger. (Keep in mind that they may be buying from you because they love you and the public may have a different opinion on your art.)
It’s normal to wonder if your art is good enough to be sold. We often doubt ourselves as artists, especially if we’ve never sold anything before. But if someone has approached you about buying your work, then your art is indeed good enough to sell.
You have to get over any insecurities and not allow those feelings to influence your pricing. The last thing you want is to sell your work and then regret the low price that you assigned to it. This happened to me with my first commissioned painting and I learned from it.
Do I Want to Sell My Art?
Creating art can be a personal experience. We pour ourselves into what we create. It can sometimes feel as though part of our souls are ingrained in what we produce. How do you place a price on this?
It can be hard to let go of your art, even for a hefty price tag. There are works that I’ll never sell. They’re too important to me personally. This is completely fine and true for most artists.
You need to ask yourself if you really want to sell your art before considering how to price it. You may need to consider your emotional attachment to your work in your pricing, if this applies to you.
It’s much easier to let go of a commissioned work than a work you created from your own inspiration. If this is something you struggle with, you may consider only working on a commission basis.
However, not all of us feel this way and many artists see their art as a product.
What’s a Fair Price for My Art?
The price you place on your art depends on several variables. These variables may lead to a broad range of prices for the same work.
Here are a few of the variables to consider…
- Are you selling through a gallery?
- Is this a commission?
- Is this an illustration that will be reproduced?
- Is the work large or small?
- What is the medium?
- Are you framing the work?
- Will it be shipped?
Selling Your Art Through a Gallery
Galleries make money from your art. They are essentially a “middle man”. They take a percentage of the sell, which is sometimes as high as 50%.
Galleries do a lot of the marketing work for artists, which is why they charge a commission. They help to connect the artist’s work with a pool of patrons that are willing to pay. Most galleries tend to represent artists with a similar style. They often have newsletters, hold gallery hops, and special openings to keep patrons abreast of new works or new artists.
Many artists aren’t interested in marketing their own art. They’d rather make art and let the galleries handle the work of selling.
See also: How to Market Your Art
If you’re pricing your work and considering working with a gallery, you’ll need to consider the commission that they’ll take from the sale.
If, for example, you expect to make $600 on a work of art and the gallery demands a 50% commission, you should price the work at $1200. You’ll need to ask yourself, “Will this work sell for $1200?”. If the answer is “no”, you may need to lower your monetary expectations, change galleries, or look into other options.
Some galleries have a reputation as an influencer in the art world. In other words, artists may want to pursue these galleries since it will help them gain recognition in the art world.
Some artists are turned off by the idea of a gallery, mainly because of the commissions they have to pay. But galleries can help an artist gain respect, find buyers, and expose an artist to a specific region.
Pricing Art for a Commission
Working on a commission basis can be very lucrative for an artist. The patron or client gets a unique work of art suited to their taste and the artist usually doesn’t have any problem parting with the work.
Commissions usually only come once the artist has produced several works and has gained at least a little notoriety, but not always.
My first commission was for an acquaintance. Someone saw the work in her house, and soon I had another commission – then another. Before long, I had my first international client. At one point, I had so many inquiries, I had to turn people down.
Pricing commission work can be a little tricky. There are several things that can wrong during the process.
Communication between the artist and the patron is very important. You need to be clear with what they expect and they need to be clear with what you expect. This all needs to be worked out from the beginning.
Here are a few things that both parties should agree on…
- The subject and medium of the work.
- The size of the work.
- Estimated date when the work will be completed.
- Will the work be framed?
- How much will you be paid?
- How will the work be delivered?
- How will you be protected?
The Subject and the Medium
Obviously, you’ll need to clarify with the client what medium and subject you’ll be working with. When I was still accepting commissions, I mostly worked with graphite and created house portraits. Occasionally, I would have a pet portrait commissioned.
My clients knew exactly what to expect. My style was defined and the medium was graphite. I also worked on the same paper (charcoal paper). The only thing that changed from work to work was the size and the level of detail.

The Size of the Work
The size of the work influences the price that you can demand. Clearly, you can charge more for larger works. They require more time and materials.
For clarity, I included a simple pricing table on my portfolio site of estimated pricing based on size. The larger works were priced higher. I would adjust the price based on the level of detail required. Images that were more detailed took longer to complete, so I could charge more for them.
Estimated Date When the Work Will Be Completed
Clients need to know when to expect the completed work. You’ll need to communicate this with them up front. Be sure to give yourself plenty of time to complete the work and then surprise your client by finishing early. Do not create an unrealistic timeframe for yourself. You don’t want to feel rushed – or worse – miss your deadline.
Will the Work Be Framed?
Are you planning on framing the art? If so, you’ll need to factor in the cost of the materials and the time it will take for you to frame it. It may be best to provide a few choices of basic frames and matting options. It’s perfectly acceptable to add a little mark up and make a little profit from the framing as well.
How Much Will You Be Paid?
The price should also be very clear from the start. You should never start a work without agreeing on a price. A patron doesn’t want to be surprised by the cost as they may refuse to pay it.
I suggest providing an estimate and sticking to it. If you agree on a price before the work is completed, this price shouldn’t change after the work is done.
When I accepted a commission, I would examine the reference photos and consider the detail and size. Based on my experience, I would estimate the number of hours it would take me to complete the work. Then, I would factor in my hourly rate and multiple the number of hours by my hourly rate. This gave me an objective price that could be justified.
When I fist began, my hourly rate was a meager $35. This rate increased with each piece that I completed. With each new commission, I would add another $5-10 per hour. When I first started, here’s what the math looked like for a work that would have taken 10 hours to complete…
Sometimes, the work took longer than what I estimated. Sometimes, it was shorter. No matter how long it took, I always charged the client the original estimate. Once, I estimated that a work would take 8 hours, but it ended up taking 14. I lost a little bit of money and time, but I learned that it’s better to over-estimate than to go too low.
You’ll need to decide how much your time is worth and decide on an hourly rate that you feel is fair. Remember, creating art is fun, but it’s still work. Make sure that your hourly rate is what you deserve and don’t sell yourself short.
How Will the Art Be Delivered?
I have yet another story that you can learn from. It’s a little lengthy, but it’s important to know what can go wrong…
The holidays were always a busy time for commissions. It was during the holiday season that I created a work for a client in state far from own and had only corresponded with this client through email. I had finished her house portrait two weeks prior and sent it off to her address.
I had received confirmation that it was indeed delivered a few days after I had sent the work. (I always made sure I was fully paid before sending the work, so I wasn’t concerned and assumed everything was fine.) I usually received an email of gratitude after the work was delivered – but in this case, I didn’t. This should have been a “red flag”.
A few days later, I received an email from the client asking me where the art was and if it was finished yet.
Panic set in quickly! I had no idea what I was going to do!
I always insured the work when sending through a delivery service and always required a signature. I reviewed my receipt and noticed that the package was left by the front door – the delivery person did not get the signature!
Before contacting the client, I called the delivery service and let them have it. They assured me that it was insured and that I would be compensated for the missing package.
But what about the client? What about the art I spent so much time on? How could that be replaced?
It was time to “bite the bullet” and call the client. I was shaking when I called. I knew that she’d be so disappointed.
When I called, I offered a refund and began explaining my conversation with the delivery service. While I was in mid-sentence, she broke in with, “What are you talking about? I got your art and it’s framed above our fireplace. I sent you an email – we absolutely love it.”
Now I was really confused. Here’s what happened…
The client had ordered two artworks – one from myself and another from different artist. She had received my art, just as my receipt of delivery confirmed. But, she had emailed the other artist thanking them for the work that I created. (I bet they were confused too.) She sent me the email that should have gone to the other artist instead.
It was the other artist that missed their deadline – my art had been safely delivered.
My work had been received but most importantly – the client was happy. All of that stress was for nothing. Well, not completely. I did learn that lots can go wrong after your precious package leaves you.
Here are some things you can do to ensure the safe delivery of your art…
- Require a signature upon delivery.
- Insure your package.
- Track your package and share the tracking info with your client.
- Contact your client after they have received the work.

Protecting Yourself
Some clients commission art but don’t appreciate the amount of time and effort it takes to create it. The last thing you want is to spend hours on a piece only to have the patron refuse to pay for it. In order to keep this from happening, you’ll need to take a few preventative steps.
First, you should have everything in writing. It’s not usually necessary to draw up a formal contract, but you can if you wish. Usually a professional printed (or printable) estimate is enough.
This estimate should include the agreed subject, medium, and size. It should include your cost of materials, your hourly rate, and the estimated number of hours that it will take you to complete the work. It should also outline how the work will be delivered and when you’ll be finished with the work.
Once both parties have agreed on the estimate, you may ask for a non-refundable deposit before you begin on the work. A deposit isn’t required, but it does ensure that the client is serious and if they decide to skip out on paying you – you aren’t completely left out to dry.
Communicate with the client while the work is being developed if you wish. You may send them images of the work in progress. This way, if they want you to make any changes, you can do so while you’re still working the piece. Don’t bug them however and leave some of the work to be a surprise.
I never did this and never had any issues. I liked the idea of the art being a complete surprise. But keep in mind, my style was clearly defined and there were lots of examples I had already produced. My clients knew what to expect.
When complete, you can send a low resolution image of the work to the client. The resolution should be high enough to appreciate the work, but not so high that it could be printed or reproduced. You could also send a high resolution image with a watermark of your name or logo, but I think that detracts from the client’s first impression.
Only send the original art to the client after you’ve received full payment. If paid by check, cash the check before sending the work.
Pricing Art for Illustrations
Art that is sold or purchased in order to be reproduced is considered illustration. Pricing illustration work can be handled as a commission (see above), but there’s more to consider such as the rights of the creative work. With illustration, the artist gives consent for their art to be reproduced by the client and sometimes the artist may be required to sign over exclusive rights to a publisher. If this is the case, then it should be figured in the price.
Because illustration can be complicated, a contract is almost always involved. The publisher and the artist come to an agreement over the rights of the art and the monetary compensation the artist will receive. Most illustration work is considered freelance, where an artist creates one or several works for a specific project.
The agreement made between the publisher and the artist varies greatly.
I once worked as a staff illustrator for a company that makes children’s clothing. I was completely remote and worked entirely from home. I was paid a flat fee for each month of employment. One month, I was asked to create 12 illustrations, but most of the time it was just 4 or 5. A few months, no illustrations were needed but I still got paid!
This isn’t the norm, but it’s an example of how varied agreements can be between publishers and artists.
Here’s another example…I once illustrated a children’s book. In this case, I was paid a flat fee for the entire book. However, with this project, I felt as though I was taken advantage of. The publisher asked for several revisions because they didn’t have a clear idea of what they wanted. They also increased the number of pages in the book, which meant more illustrations. I didn’t get paid for the extra illustrations because I had already agreed on a flat fee for the entire project.
I share these two examples with you to illustrate just how varied contracts can be and how you can be taken advantage of if you’re not careful.
Many illustrators work with an agency. An agency represents the artist (much like a gallery), helps them find projects, and helps to negotiate contracts. Working with an agency will usually protect you from the sharks in the publishing world.
How the Size and Medium Affects the Price of the Art
Bigger is better – right? You probably know that this isn’t true with art. (Some of the most remarkable works of art are small – the Mona Lisa is only 30″ by 21″.) But the perceived value of larger works is much higher than those of a smaller stature.
So the size of the work should play in to how much you charge for it. For larger works, you can charge more – even if you spent less time on them compared to a much smaller work. You can get away with this because the general public prefers bigger over smaller.
The medium that you use also influences the price that you can charge. Some art mediums are viewed as “more valuable”. For example, you can charge more for an oil painting than you can for a watercolor painting of the same subject with the same dimensions.
As an artist, this may seem unfair. I personally believe that watercolor is the most challenging art medium. I see oils as one of the easier painting mediums. But the perceived value of an oil painting is higher than that of a watercolor painting so you can demand higher prices.
Other Factors
We’ve already touched on some of the other factors to consider when pricing your art, but we’ll review them here.
You’ll need to consider the cost of the materials, including a frame if you provide one. Typically, higher quality materials lead to higher quality results. If you’re creating art for a client, use high quality materials and factor that into your pricing.
If you’re shipping your work, your client could pay for that too. You can include that in the price or you could offer free shipping as an incentive.
Conclusion
Pricing your art can be tricky. You want to quote a price that reflects all the hard work that you put into your art, yet you want to name a price that will also result in a sale. As you can see there are many variables to consider.
So how much do you charge? Well, that question can only be answered by you.
The bottom line is that you should charge what you think is fair and try to approach pricing your art as objectively as possible. Some artists charge too much and seldom make a sale, while others charge too little and are overworked and underpaid. The key lies in finding the happy medium between the two – where you are paid fairly and your patrons are happy too.
If so, join over 36,000 others that receive our newsletter with new drawing and painting lessons. Plus, check out three of our course videos and ebooks for free.
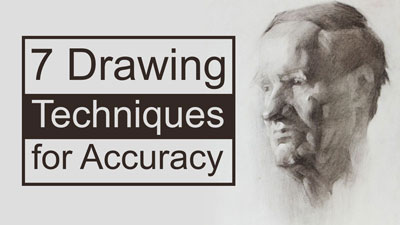
Try Something New in Your Drawings
Developing your drawing skills requires practice. Most of the time practicing drawing is fun, but sometimes it can become a task. Why not make it an adventure by trying something new.
Here are a few things that you can try in your drawings (or practice sessions) to make things a little more exciting…
1. Try a New Medium
We’ll start with the most obvious thing you can try and that’s a new medium. Are all of your drawings in the same medium? If so, why not try a different one. If you typically only draw with graphite, why not try a few drawings with charcoal or pen and ink? How about colored pencils?
As I entered art school, I considered myself to be a “black and white” artist only. I preferred to use ink or graphite and I would tell people that color didn’t interest me. The reality is that I was a little afraid of color and I didn’t fully understand the full potential of it.
I learned that I loved color, but only after I was forced to use it. I learned that colored pencils were a wonderful medium and they quickly became one of my favorites. I wish I would have learned these things earlier.
See also: It’s Time to Try a New Medium
If you insist on trying and using only one medium, you may be missing out on a lot. So try a new medium – it may become your favorite. But you’ll never know unless you try.
2. Try a New Surface
Sometimes the drawing surface is an afterthought. In fact if you’re a beginner, you may not even think about it too much at all. But the surface is important and the one in which you choose to work influences how your medium behaves.
Of course, the world of drawing papers and surface is vast and not all are created equal. Like trying a new medium, trying a new surface may open a new world to you. You may find a new surface that you just fall in love with.
Experienced artists are devoted as much to their surfaces as they are to the mediums that they use. They know how much the surfaces matters to their success.
I still remember the first time I used Bristol paper for pen and ink drawing. It made a lasting impression – as if a new realm of possibilities had been opened up to me. Yes, a paper can have that strong of an impression.
So why not try a new surface? Have you ever worked on toned paper? What about charcoal paper, which features a laid pattern? Or perhaps, Stonehenge paper – which is made of 100% cotton?
See also: All About Drawing Papers
3. Explore a Different Subject
Is there a subject that intimidates you? Is there something that you avoid drawing when you can? If you answered “yes”, then it’s time to face that subject head-on.
Perhaps portraits intimidate you. If they do, commit yourself to drawing three different portraits. Watch how you improve with each one. By the time you’ve drawn the third one, you won’t be so intimidated by them any more. In fact, you may even discover that you love drawing portraits and wonder what kept you from them for so long.
4. Draw with Non-traditional Drawing Tools
Who says we have to use pens and pencils to make marks? Why not grab a bit of ink and try making marks with other things. You can get as creative as you wish, but here a few substitutes you may want to try…
Draw with Sticks
Why draw with the same old tools? Ditch those pens, pencils, and brushes for a day and give sticks a try. Surprisingly, using non traditional drawing tools can produce beautiful results. Grab a couple sticks (free) and some ink (not free) and make some interesting marks.
Often times, we can become too rigid with our drawings which can lead to stiff, overworked imagery. When you allow yourself a bit more freedom to make organic marks, the results can be quite cool.
A stick can make a variety of marks that just can’t be duplicated with pen or pencil.
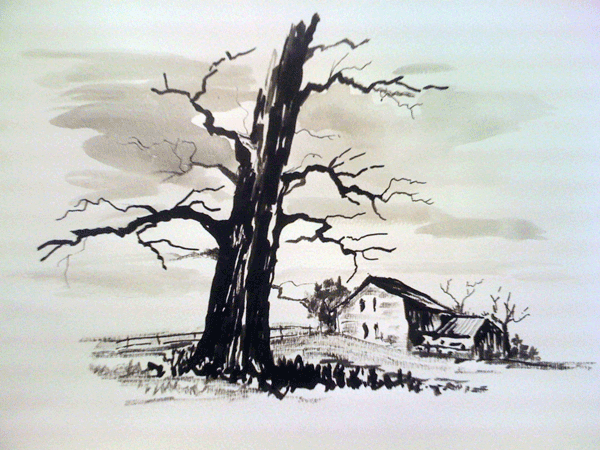
Here’s a quick sketch that was created using only sticks and ink…
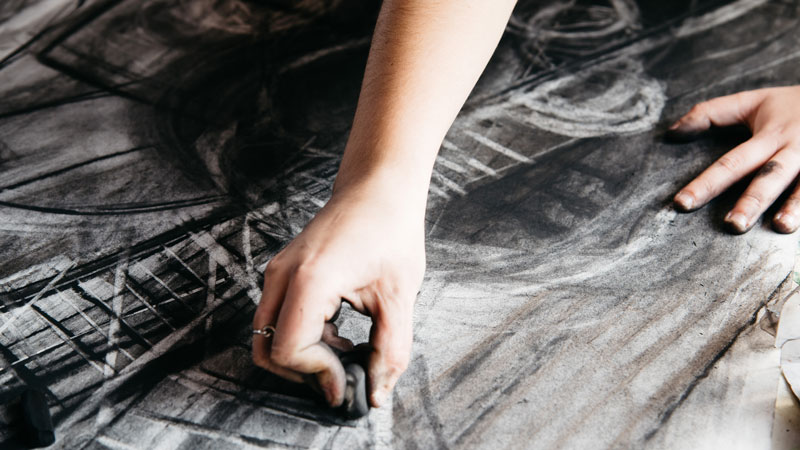
Sketch with Rocks
While you’re out picking up sticks, be sure to pick up a few rocks and stones too. Dip them in ink and make marks on larger sheets of paper. Create a looser drawing or roll the rocks over the surface while loaded with ink to create a non-objective experimental drawing. Let your creativity go wild.
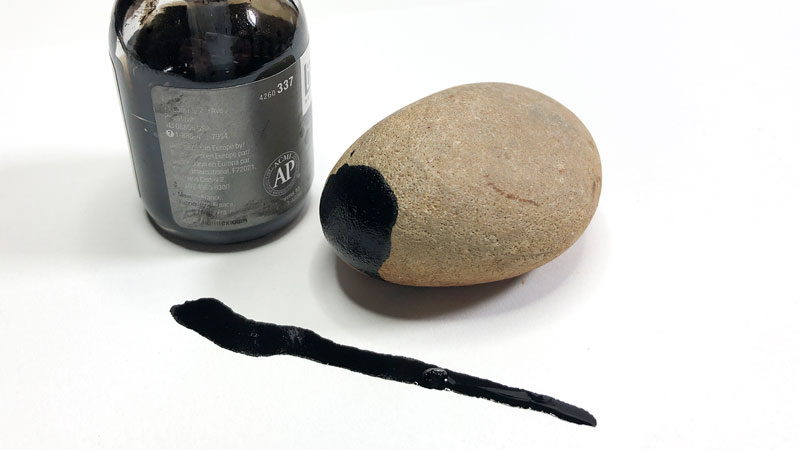
Paint with a Feather
Grab a nice long feather at the craft store and use the softer side as a mark making tool. Gently dip the end of the feather into a little ink on a plate and brush the feather over the drawing surface. See how many textures you can create.
5. Think Outside of the Box
Students at Rutgers University Roger Mason School of Art created machines to create repetitive marks. The intent was to create machines to make marks that humans couldn’t normally make. Another part of the exercise was the creation of guitars made of cardboard.
The instructor of the class, Jeff Thompson, would play “cheesy” metal music at the end of class, and students would strum their guitars with pencils.
The intent was to show students that using deliberate lines is not the only way to draw, and that loose lines are effective as well.
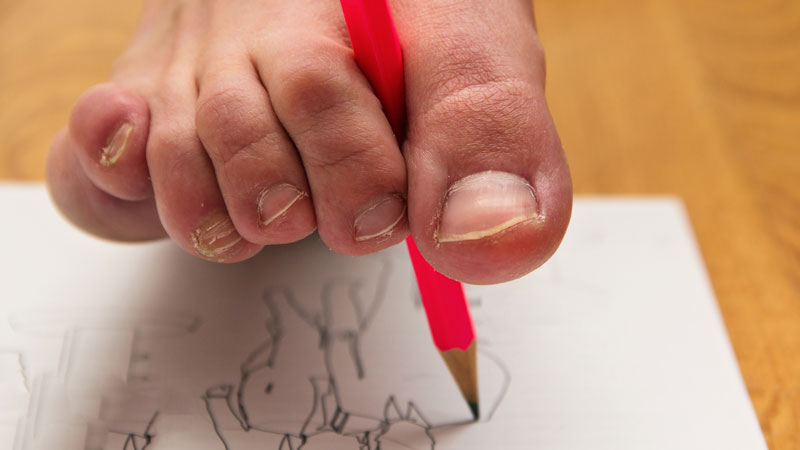
6. Use Your Feet
Go ahead and put that pencil between your toes and try to create a drawing from observation with your feet. Hint: Sit in a chair and tape the paper to the ground. You may be surprised at the range of lines that you make. You may be really surprised how much your drawing resembles what your subject.
With this exercise, your eyes are so far away from the drawing surface that it forces you to see your drawing in a different way. There’s no leaning in for a closer look here.
7. Draw with Your Non-Dominant Hand
This exercise is related to drawing with your feet. If you’re right handed, put the pencil in your left hand and draw from observation. Again, you might be pleasantly surprised at how much you are able to record what you see.
It will be a real challenge at first, but you’ll likely find that you actually spend more time looking at your subject. This leads to deeper observation, which ultimately leads to greater accuracy in your drawings.
Conclusion
So what not try something new in your drawings? Don’t be afraid of something that you’ve never tried before. As we’ve seen here, trying something new not only spices things up but it may also open some new artistic doors and inspire you in new ways. But you’ll never know if you’re not willing to try something new.
If so, join over 36,000 others that receive our newsletter with new drawing and painting lessons. Plus, check out three of our course videos and ebooks for free.

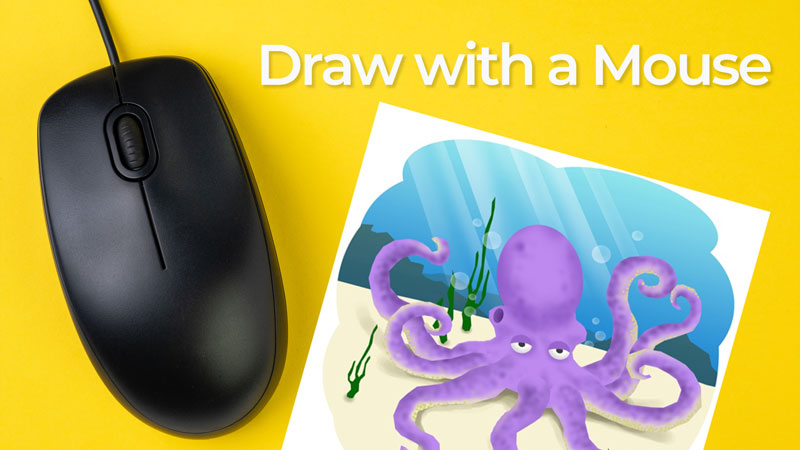
No Tablet? Draw with the Mouse
I remember when I first started using Photoshop for drawing. It was many years ago. Drawing tablets like the ones made by Wacom did not exist. And when they did make their appearance, they were too expensive.
Things have changed since then and now drawing tablets are very affordable. But even though the prices have dropped, a drawing tablet may not be in your budget or may not be practical.
But all is not lost! You can still draw using only the mouse.
Thinking in Terms of Shape
The process is different. You have to think in terms of shapes and gradations of value instead of thinking in terms of traditional drawing. With a drawing tablet, you can draw in a traditional manner. The output is digital, but the thought process is the same as traditional drawing.
So when we draw with the mouse, our thinking simply shifts.
We can use tools such as the selection tool to draw basic shapes. These shapes are layered to form more complex shapes. Gradations are added using the gradient or brush tool. It requires some planning and multiple layers, but it is possible.
I worked as freelance illustrator for a clothing company for a while. During that time, I was asked to create digital illustrations for their magazine and calendars. These illustrations were intended for children so they were brightly colored and playful. Each illustration needed to incorporate a “heart” in some way.
I used Photoshop for all of the illustrations, but used only a mouse to create them.
Here’s a look at one of those illustrations…
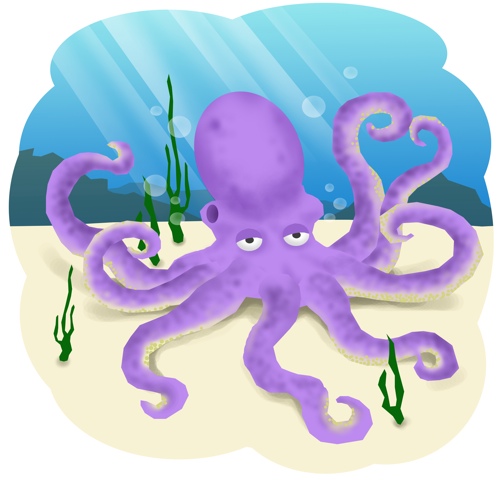
As you can see, the resulting image is based on shapes. The gradations in tone were developed using the brush tool after selecting areas (to make sure that the brush tool only made marks where I wanted it to).
Here’s a look at another illustration for the same company…

I even illustrated an entire children’s book using just the mouse and Photoshop. So, yes – it’s possible to use the mouse to draw.
A Few Lessons to Get You Started
These days, there are tons of lessons on drawing with Photoshop that will help you get started. I’ve created a few of these, although they use an older version of the program. I’ve grouped them all together on one page and I have a lesson on drawing with the mouse using Photoshop. This lesson walks you through the steps of drawing a sphere using a mouse.
You can check out these lessons here: How to Use Photoshop for Beginners
Conclusion
There are plenty of tools in Photoshop that will help you draw with a mouse. You can’t use a lack of a drawing tablet as an excuse any longer. It does take a little bit of practice but you will be amazed at how easy it can be.
You don’t have to have Adobe Photoshop in order to draw with the mouse. There are plenty of other drawing and painting programs for you to explore and have fun with. Gimp (free) is one of those programs, if Photoshop is out of your budget.
If so, join over 36,000 others that receive our newsletter with new drawing and painting lessons. Plus, check out three of our course videos and ebooks for free.
The Steps to Art Criticism
It is important for us to be able to evaluate art. If we’re artists, we must recognize what is good and what is bad, so that we may become more successful at our craft.
If we’re patrons, we must be able to discern success from failure as well.
If we’re teachers, we must teach our students the mental process that people naturally go through when they look at a work of art. This way our students are better equipped to create successful artwork on their own, and understand why and how their artworks are digested.
See also: The Importance of Critique
How Do You Evaluate Art?
This question is answered differently by just about everybody. What really constitutes “good” art? We all know that opinion plays a major role in what a person may feel is “good”. But should it? Should there be a defined framework for what good artwork is? Should there be a standard? What would that standard be?
I often ask students, “What is Art?” The range of answers I get to this question is staggering. One answer keeps rearing its ugly head, however. “Art is whatever you want it to be.”
What??? Is that what art is? Whatever you want it to be?
My skin cringes when I hear this statement. Why? Art is NOT whatever we want it to be. It is a discipline that requires study, dedication, and practice. It takes knowledge to produce good artwork.
How can we evaluate art when we think it is “whatever”?
Evaluate yourself before you evaluate art. Do you like the expressive qualities of a work art, the message it conveys, and the emotional qualities within? Do you find that artworks that strive for realism suite your fancy? Do you place most importance on the use of color theory, use of line, composition, shape, form and so on?
Or perhaps you find all of these attributes to be important in good artwork?
We can categorize ourselves according to how we evaluate art.
Are you an Emotionalist?
If you find the expressive qualities of an artwork to be most important, you may be an emotionalist. An Emotionalist looks for the message the artwork conveys, evaluates how the artist has communicated this message, and proceeds to evaluate the artwork’s success on this notion.
Are you a Realist?
Do you find the realistic qualities of a work of art to be the most interesting? Are you the type that looks at a work of art and says, “That doesn’t look like a person”? Or maybe you look at a drawing and become amazed at how much the artist has made it look like a photo. If this describes you, then you probably are a realist and evaluate the success of artwork based on its realistic qualities.
Are you a Formalist?
Do you look for the color scheme, the use of the elements and principles of art, the composition and other formal qualities to evaluate the artwork? If you do, then you probably are a formalist.
Evaluating artwork is different for everyone. We will all look and see artwork differently. We will find merit in different places because we are different people. Should there be a standard for evaluating art? What do you think? Are you a formalist, emotionalist, realist, or a mixture?
The Steps to Critiquing Art
There is an accepted four step process for critiquing art. We generally go through these steps when we evaluate a work of art in our minds, but it’s helpful to know exactly what is happening. And if you’re teaching this process to students, it’s important to teach them this process so that can use it to evaluate their own works and the works of others.
Understanding the steps to critiquing art allows you to evaluate a work in more objective manner. So whether you’re an emotionalist, realist, or formalist, you can still appreciate the art – even though it may not be in the style that you enjoy the most.
The four step approach is…
- Description
- Analysis
- Interpretation
- Judgment
When I teach the steps of art criticism to my students, I have them say this word – “DAIJ”. Yes, I know-“DAIJ” is not a real word. I am very ridiculous about it. I say silly sentences like, “Have you guys played any DAIJ ball this summer?” The students may think that I’m crazy, but they remember that word-“DAIJ”. DAIJ is simply an acronym for the steps of art criticism.
Description
The first step in art criticism is description. When we look at a work of art, our minds naturally take notice of the general information that’s present. If we take The Mona Lisa for example, we notice, “Hey, this is a painting of a woman.”

We start with just a simple statement of observation. We should try to keep ourselves from judging the quality of the work until we have gone through all of the steps.
Analysis
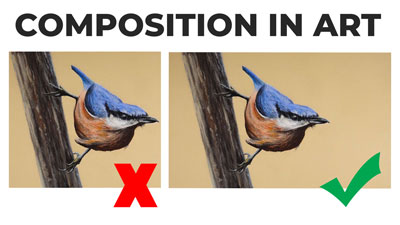
Analysis refers to how the elements and principles of art are used in the work. In this step, our minds take in the lines, values, and colors of the artwork. We also may take notice of the balance, proportion, rhythm, and unity found within the work.
See also: Composition in Art
In a critique, students should point out what is happening with these specific elements and principles. Many times, the formal qualities of the art are what makes the art successful. Students should understand how these qualities work and what makes them successful in artwork. They should also be able to discern when these formal qualities are unsuccessful as well.
Interpretation
Often times, we’ll instinctively skip to this step. We look for meaning in everything, so this is perfectly natural. In this step, we explore the meaning of the art. What is the artist trying to communicate to us? There are no wrong responses here. The artist may have a meaning that they intended in the work, but how we interpret it is completely up to us.
Judgment
The last step in art criticism is judgment. Is this work of art successful? If we’re teaching students, it;’s important to guide them in this step. Remind students that the work of art may not be their favorite, but it may still be successful. This way, we teach students to appreciate all forms of art, even if we personally do not like it.
Conclusion
Understanding the steps to art criticism and implementing them in a structured way in critique, will lead to stronger artworks. If you’re teaching students, then these steps are vital. These steps help us to appreciate all forms of art, including the works that we may not appreciate at first glance. All forms of art have their place and all deserve a fair approach of evaluation.
If so, join over 36,000 others that receive our newsletter with new drawing and painting lessons. Plus, check out three of our course videos and ebooks for free.