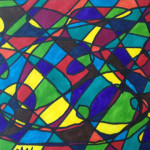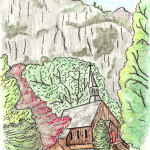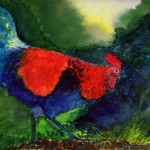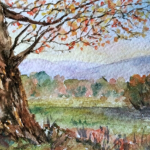
You see, it’s easy to make excuses for not taking risks. We can describe ourselves as “specialists” in certain subjects or media, and remain safe from judgment when we venture into mediums or subjects beyond are those categorizations. And when we are met with any form of failure, no matter how small, we cower back to our “specialization”.
This thinking stifles our artistic growth and limits our potential – especially if we are learning art and discovering ourselves as artists. In actuality, we are always learning and discovering – no matter what level of achievement we have attained. But if we compartmentalize ourselves as artists, we have truly done ourselves an injustice. After all, experimentation and risk are part of it. These are core constituents to artistic growth. We need to embrace what we find foreign from time to time. Experiment with media and subjects that exist outside of our “comfort zone” – outside of our specializations. Embrace the “risk of failure” and see it instead as a “risk of success”.
Don’t Limit Yourself as an Artist
Renoir is quoted as saying…
“One must, from time to time, attempt things that are beyond one’s capacity.”
We truly need to look for opportunities to experience things that we may feel that are beyond our abilities. The truth is we don’t know until we try.
And often trying once is simply not enough. Our first experience with a new medium, technique, or subject is not typically going to produce amazing results. We should be accepting of this and be willing to invest some time and effort in order to see results.
Approach new media and subjects in your art like a child. Be open to “shortcomings”. But be willing to work through them.
What’s Next?
So, what new medium, technique, or subject are you going to explore today? You may find a new love – if you are willing to take a risk.
If so, join over 36,000 others that receive our newsletter with new drawing and painting lessons. Plus, check out three of our course videos and ebooks for free.
Photo References for Drawing and Painting – Fruit

Let’s Be Practical
That being said, it’s not always practical to draw from life. You can’t always be at those locations that you may want to draw or paint and you can’t always get that person to sit for hours for you as your subject. Photographs should be a welcome resource for creating art. (It drives me a bit crazy when some people hold distain for artists using them.) Artists throughout history have embraced the technologies of their time – so why should we be any different.
So, if we embrace the photograph as a welcome tool for creating art, then we must be aware of the resource itself. It’s a good idea to take the photos yourself. But again, this is not always possible or practical. This can make finding good resource material a real challenge.
I recently took several photos of fruit for reference and I thought that I’d share them here. You, of course are free to download these and use them as resource images in your own art.
Why Fruit?
So why draw fruit? Fruit is a great subject for practicing drawing (or painting). It is organic in form and shape. It has interesting textures and contrasting colors. These are reasons that fruit and vegetables can be found in countless still life paintings throughout history. But most importantly, I think that fruit is great to draw because it is non-formulaic. You have to look at the fruit to draw it accurately. In fact, you have to look at it closely.
In the end, drawing is all about observation and any subject that enhances our observation skills is a good subject to draw.
These images are best suited for colored media like colored pencils, pastels, watercolor, oil, etc., but you can use them anyway you like.
If so, join over 36,000 others that receive our newsletter with new drawing and painting lessons. Plus, check out three of our course videos and ebooks for free.
8 Painting Websites and Resources

To save some time and effort for you, I have compiled 8 of the best painting resources that I’ve come across recently. (Of course, don’t forget that there are plenty of free painting tutorials right here on this site – thevirtualinstructor.com.) A few of the websites are provided for inspiration, while a few more are on the list for their free and paid tutorials and resources.
I hope that they help you out with your painting endeavors…
Oil Painting Websites
For Inspiration…
Oil Painters of America

Oil Painters of America is a society of painters that are focused on representational art. This site is the official website of the organization. Take the time to look around this site and you’ll find an information-packed blog, links to educational resources, a gallery locator, and even a critique service. This site is a great place to find some inspiration for your next oil painting!
Oil and Acrylic
Techniques and Tutorials…
Richard Robinson

This site features a few free video lessons, under “Free Stuff”. But the truly great stuff can be found in the workshops. He truly has a unique approach to teaching painting. The workshops are a four step approach which include a painting challenge, a demonstration, and a critique of some of his students’ work. (Be sure to check out the “far out” testimonials.)
Tutorials and Techniques…
Bill Martin’s Guide to Oil Painting

Bill Martin was a world-renown artist that passed away in 2008. His lessons are now left behind for us to study thanks to this site. Be sure to check out “Oil Painting Exercises”. These simple tutorials are great for those just starting out with oils.
Watercolor Painting Websites
Tutorials and Techniques…
John Lovett

John Lovett is an artist and a teacher. He has a few paid tutorials on his site, but he also features several great free resources here too. Search under “Lessons” for the free step by step demos. My favorite is “Paris with Gesso Glazes”
Tutorials and Techniques…
WatercolorPainting.com

This site features excellent step by step demonstrations. Look under “Tutorials” and you’ll find resources categorized into “Basic Watercolor Skills”, Advanced Skills 1″ and “Advanced Skills 2”. This site is a great resource for those just starting in watercolor as well as those who already have gotten their “feet wet”.
Acrylic Painting Websites
For Inspiration…
The International Society of Acrylic Painters

This site has a great collection of excellent acrylic paintings. Just look under “Exhibitions” and scroll down to the Online Shows. The acrylic work is sure to get you inspired.
Tutorials and Techniques…
Will Kemp Art School
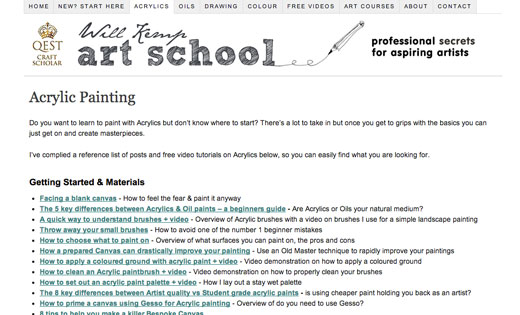
This site has more than just acrylic tutorials, but the “Acrylics” section is extensive. Quite a few of the tutorials include videos too. It’s worth a look. Will Kemp is an excellent teacher as well.
If so, join over 36,000 others that receive our newsletter with new drawing and painting lessons. Plus, check out three of our course videos and ebooks for free.
Artist Postcard Results

It was very difficult to choose a winner. But in the end, a tough decision had to be made. And the winner of the postcard contest is…
Karen M. from Alberta, Canada!
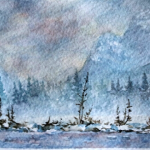
Karen’s work entitled, “Snowstorm over El Capitano and Merced River, Yosemite Provincial Park” can be seen below…
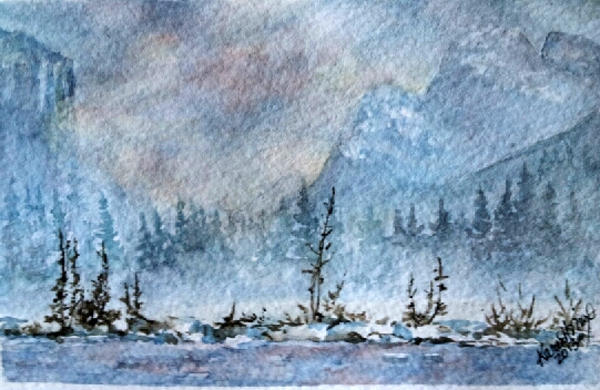
Congratulations to Karen! She will receive a dozen General’s Layout Pencils, a 12 Prismacolor Premier pencil set, a sketchbook, kneaded erasers, Alphacolor Pastels, and a lifetime membership to TheVirtualInstructor.com Members.
All of the postcards that I received can be viewed below…
Thanks again for your participation! Look for a new contest coming soon!
If so, join over 36,000 others that receive our newsletter with new drawing and painting lessons. Plus, check out three of our course videos and ebooks for free.
Teaching Art – 7 Ways to Start the Year Off Right

1. Establish the Classroom Rules / Procedures
A classroom needs a clearly defined set of rules and procedures. These rules should be beyond the “school rules” and should be unique for the specific classroom. Students need parameters. They need guidance and although they may not admit it, they desire discipline.
Students need the rules to be clear and easily accessible. This means that the rules to your classroom should be clearly posted so that everyone can see them and knows where they can find them.
Students need clear rules that are easy to understand and follow. Vague rules, like “Take care of supplies” should be avoided. Instead, “Clean and return all materials and tools like you found them” is a clearer statement that is easier to measure.
The rules should not be overwhelming. Don’t overload your list of rules. Often, 5 well-thought rules are plenty.
Go over the rules on the first day, and be clear on the consequences. Clear rules should have clear consequences.
2. Discipline Early and Consistently
Once the rules and procedures are established, it won’t take long for a student to test them. Perhaps it will be the first day or maybe the first week. But, it will happen. And when it does, you need to be ready to discipline. Remember, students want discipline. Students want to know that an adult is in charge and will keep the organization of the classroom in tact. When you are tested as a teacher – pass the test. Follow through and discipline the student following the procedures that you laid out.
You are the teacher, not the friend. Students respect teachers that “do what they say”. They lose respect for teachers that don’t.
Remove yourself from the equation when disciplining the student. You can simply say,
“Johnny, you broke the rules. I have explained the consequences. I now have no choice but to punish you.”
This makes it clear to the student that you are simply doing your job. The students will respect this and you will have less disciplinary actions as a result.
3. Learn Students’ Names Quickly
Students want to know that you respect them and who they are as individuals. You can demonstrate this to them by learning their names quickly. Make it a game, if it helps.
The simple act of learning a student’s name and addressing them by their name will show students that you care about them as individuals.
4. Be Visible and Greet Students at the Door
This is a small tip that will go very far. Simply greet students as they enter the room. Stand at the door and welcome them into your classroom. Say, “Hello” to them. This is a practice that shouldn’t end after the first week, either. You should do this every day, for every class.
Saying “Goodbye” as they leave is just as important as well.
5. Take Your Discipline Seriously
Students will respond to your lead. If you give any indication that you don’t take what you teach seriously, then your students won’t either. As an art teacher, this is a battle that you may already have to fight. There’s no reason to add fuel to this fire. Show your students the value of what you teach by demonstrating to them that it’s important to you.
6. Set an Example
You, as the teacher, are the example in the classroom. If it is important to you for your students to follow the rules, then you need to too. Students watch what you do and take notes. If the rules state, “No Food or Drink in the Classroom”, then you shouldn’t be walking around with your coffee. Students respect teachers that also follow the rules and lose respect quickly for teachers that don’t.
7. Be Yourself
Students appreciate and respond to authenticity. Trying to be someone that you’re not will be “sniffed” out by students quickly. Be authentic and let your personality be a part of your teaching. You don’t have to be the most charismatic person in order to be an effective teacher. You simply just have to be yourself.
If so, join over 36,000 others that receive our newsletter with new drawing and painting lessons. Plus, check out three of our course videos and ebooks for free.
Understanding Abstract Art

Before I go on, I must confess that I am a representational artist. In my own works, I attempt to represent some respectable level of realism and I often judge the result against this measure. However, just because my works are representational doesn’t mean that I should turn a blind eye to the aesthetics of other forms of expression including abstract art and non-objective art.
Most people tend to shun what they don’t understand. Often, this ignorance turns into outright mockery. Unfortunately, this happens sometimes with abstract art. People don’t understand what they are seeing. They don’t understand the intent of the artist, or the thought behind the work. Instead, they measure the merit of the work against what they consider to be success, and often that criteria includes realism.
What is Abstract Art?
Abstraction is a deviation from representation. It’s goal is to change the perception of reality. The change or abstraction takes place in the mind of the artist and is communicated through the work of art. The goal is to give us a new perspective, the artist’s perspective, on a particular subject – not demonstrate how technically skilled the artist is in reproducing what is seen. The goal of abstract art is clearly different from representational art, so the way that it is evaluated should be too.
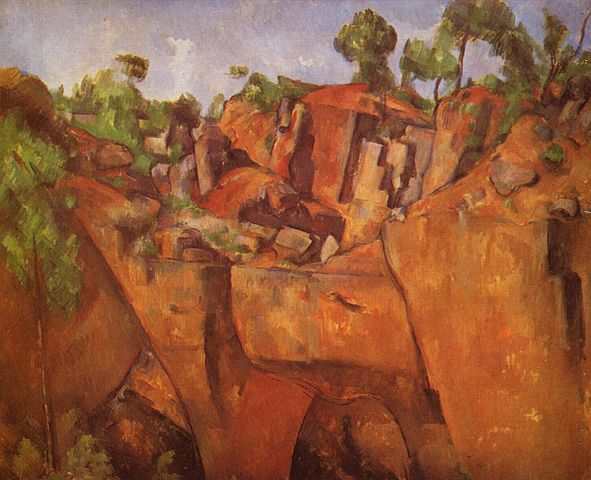
An artist may decide to interpret a subject differently than how it is seen. Any way that an artist presents this view that deviates from reality is considered abstraction. If an artist decides to paint a portrait that is representational in every way with the exception of the skin tones being blue, then this is abstraction. If an artist chooses to break down every object in a painting into its simplest shapes, then this is abstraction (Minimalism).
It requires a different way of “seeing” the artwork in order to appreciate the artwork. Aesthetics should play a role in the evaluation of abstract art, but the intent and communication by the artist are also factors to be considered.
How Subjects are Abstracted in Artworks
The way abstraction is presented is up to the artist. Some artists approach abstraction with a predetermined methodology. For example, Minimalism seeks to simplify forms into basic shapes, while Cubism seeks to present subjects from multiple viewpoints. Other artists abstract subjects without methodology, instead producing artwork that “borrows” from reality but is arranged in a way determined by the artist’s “whims”. Others seek enlightenment through abstraction, with Abstract Expressionists exploring subjects such as the sub-conscious and emotion.
No matter the path to abstraction, the end goal is the same. And that is to create an aesthetic work that provokes thought.
If so, join over 36,000 others that receive our newsletter with new drawing and painting lessons. Plus, check out three of our course videos and ebooks for free.
How to Mix Skin Tones

Mixing Skin Tones
Why is it that mixing skin tones is so darn difficult? Mixing beautiful greens for grass is easy enough. Mixing realistic blues for skies and water is easy enough, but skin tones – that’s a different story. So, why are they are hard to mix and how can we make it easier on us all?
The truth of the matter is that skin tones are complex colors. Simply mixing two colors with equal parts is not going to get the job done. It will take several colors to get the color “right”. The complexity deepens when you consider that a range of values and color temperatures can exist on one face. And let’s not forget that no two skin tones are exactly the same. It’s easy to want to reach for that pre-made “flesh tone” at this point, but resist the temptation!
Let’s step back for a moment and simplify things a bit. But before we do, let me make this disclaimer – Portrait artists approach painting in different ways, so the way of mixing I present here may not be best for you, it’s simply how I approach mixing skin tones.
Establishing Your Base Tone
The first color that should be mixed will establish a base tone for the face. This color should be the general tone of the subject and will be the foundation on which we build the values and temperatures in the portrait. While all skin tones are different, a blend of the colors red, yellow, brown, and white will result in a suitable foundation color. Some skin tones will require more red, while others will require more white and so on. But for most subjects, a mixture of these four colors works nicely.
A little saying that I use to help my students remember the colors used for base skin tone mixing is… “Red, yellow, brown, and white – that’s how to mix your skin tones right.”


Getting the Values Right
Just like with painting or drawing any other subject, light will react on the surface of the face. The light will affect the values and color temperatures that should be found in your painting or drawing. We can create these values and temperatures by adjusting the base tone that we created.
Let’s start with the values. The first suggestion is to throw out your tube of black. You don’t need it. Mixing black with your skin tone will just muddy the color, making it look gray. Instead, the colors that should be used to make values darker are brown (burnt umber, raw umber) and blue (phthalo). A mixture of blue and brown will create a “natural black” that will produce natural looking tones. An added benefit is control over the temperature. If you need shadows that are cooler in temperature, mix your darker values with more blue. If a warmer shadow is what you are after, add more brown.
Lighter values should be mixed by adding white with the base tones. However, be cautious. White can mute colors when over-used and “wash out” natural tones. Seldom is an area on a face “white”.


Color Temperature
Color temperature is the warmth or coolness of the color. It doesn’t have to be complicated. The more that you add a warm color to your base tone, the warmer it gets. The more that you add a cooler color to your base tone, the cooler it gets. The trick is recognizing whether a color is cool or warm, and it all starts with your light.
Not all light is warm. And not all highlights are warm. You may find areas on your subject where the light is very light, but slightly cool in temperature. For most highlights, the color temperature will be warm. For shadows, the color temperature varies from warm to cool.
Areas of the face will change in color temperature. For example, areas around the nose and checks tend to be more red, making the temperature warmer. Pay close attention to subtle changes in color, value, and temperature and include them in your work. Don’t be afraid to be bold with contrasting these areas. It’s the contrast in value, color, and temperature that leads to the illusion of form.
If so, join over 36,000 others that receive our newsletter with new drawing and painting lessons. Plus, check out three of our course videos and ebooks for free.
Prevent Colored Pencil Wax Bloom
Wax Bloom?
Ever completed a colored pencil masterpiece only to find it covered with a white, waxy haze a few days later? That white, waxy haze that develops on some colored pencil drawings is called wax bloom. This mysterious phenomenon makes some color pencil artists wonder if they did something wrong in the drawing process, or that the colored pencils that they used were low quality. Fortunately, neither of these reasons are to blame and wax bloom is easy to fix and prevent.
Why Does it Happen?
Wax bloom occurs because of the waxy binder inherent in colored pencils. As the material in the pencils “settles” on the surface, the waxy binder slowly rises to the surface on the drawing, producing the light white haze on the surface. This usually happens with heavily layered drawings that have been drawn with waxy pencils. Some brands of colored pencils are more wax-heavy making them more prone to wax bloom. The trade-off being that waxy colored pencils layer easier and are generally more brilliant in color.
Removing and Preventing Wax Bloom
So how do you remove the haze? Fortunately, removing the haze is rather easy. A soft cloth will do the trick. Be careful though, if too much pressure is applied, some of the pigment could accidentally be removed as well. Light swiping is recommended to gently remove any waxy build-up. If you are concerned that you may accidentally remove pigment from the surface, use a cotton swap or a q-tip instead of a cloth.
To prevent wax bloom from appearing on your work, use a colored pencil fixative. Fixative is available in an aerosol can and is applied to the drawing using swift passing sprays. Fixative can come out of the can in unpredictable ways, so do a test spray before applying to your drawing. Fixative can also change the color of your drawing slightly. If this concerns you, create a test sheet using the same colors as your drawing and spray this area first. Light applications of fixative is always recommended.
If so, join over 36,000 others that receive our newsletter with new drawing and painting lessons. Plus, check out three of our course videos and ebooks for free.

