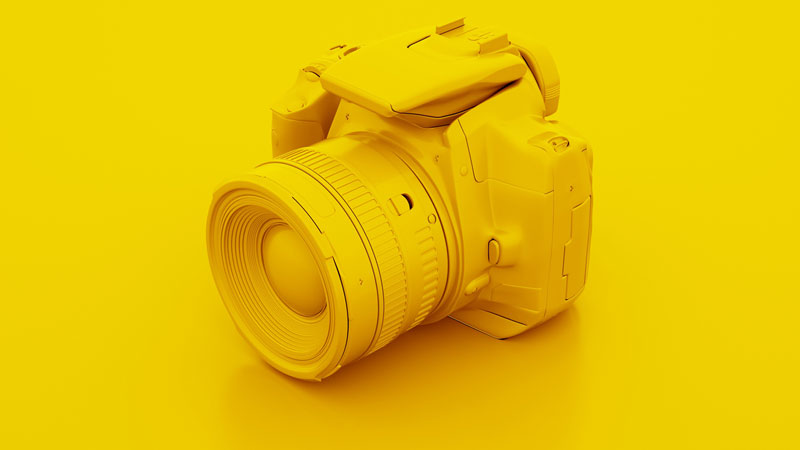
Luckily, modern graphics programs like Photoshop and Gimp allow us to edit images of our artwork and make them look like the original.
Here are the steps that I take when photographing artwork and here’s how I make it look more like the original…
Step 1 – Photographing the Artwork
In ideal situations, you can set up the proper lighting, use a fancy DSLR camera, and set the artwork on an appropriate easel. However, most of us are lacking this type of equipment. Fortunately, you can still get results that are similar without all of this equipment.
Obviously, one of the most important factors in photographing your artwork is the light. Natural light (sunlight) is always the best light. So, taking the photo outside or by a window is a must. (Just watch out for cast shadows.)
If you have a suitable easel, it’s preferred to use one. But, if you don’t, you can simply lay the artwork down on a flat surface.
Frame the artwork inside of the camera viewfinder so that the entire image is inside of the frame. Try to keep the camera as “square” to the image as possible. To gauge this, look for any curving on the image through the camera viewfinder. If you see that the edges of the image look curved, then adjust the camera so that it is “square”.
Do not use a flash when you take the photo. The natural sunlight will be more than adequate.
Before moving away from your setup, make sure that you have a crisp image on your camera. If the image is blurry, take another photo.
Step 2 – Importing into Photoshop
Open up the photo using Photoshop (or Gimp). The first thing that you’ll want to do is to crop the image. You can do this by using the rectangular marquee selection tool to select the boundaries of the artwork. Then go to “Image” > “Crop”. Check to make sure it is cropped cleanly before moving on.
Next, you will need to change the image size. Most cameras will take the photo at 72 DPI, which is a low resolution. You want your image to be the highest resolution possible, so you’ll need to change the resolution. To do this, go to “Image” > “Image Size”. There you will have the option to change the resolution from 72 DPI to 300 DPI. Here you can also change the physical size of the image to an acceptable size in inches or cm.
Step 3 – Adjusting the Image
There are several options that you can use to adjust the image of the artwork to look more like the original. The first to try are the “Auto” adjusters. For most situations, these will work fine. These are found under “Image” in the top menu. I like to try “Auto Color” first, then “Auto Contrast”, and then lastly “Auto Tone”. Usually one of these options will get your artwork looking great, but if it doesn’t, we have a few more options.
If the “Auto” adjustments don’t seem to do the trick, then it’s time to try some manual adjustments. These are found under “Image” > “Adjustments”. The first I like to try is the “Brightness/Contrast”. When this is selected, sliders are used to adjust the brightness and contrast in the image. This is very similar to “Auto Contrast”, but you have all of the control. You can also manually adjust the curves, levels, and exposure, but for nearly all of the images that I adjust, the “Auto” adjusters or the manual “Brightness/Contrast” does the trick.
Step 4 – Save the Image
Now that your artwork is looking good, it’s time to save the work. It’s best practice to save your image as .jpeg, or.jpg. This will allow it to be opened on every computer and every device. To save the image, go to “File” > “Save as”. Then in the pop up menu, change the “Format” to “JPEG”.
If so, join over 36,000 others that receive our newsletter with new drawing and painting lessons. Plus, check out three of our course videos and ebooks for free.
Improve Creativity by Changing Your Thinking
Creativity is like a muscle. The more it is worked, the stronger it gets. This is great news, because it doesn’t matter how uncreative you feel, you can become more creative. This is because our brains are capable of change and we can control this change. For brain scientists, this is called “Neuroplasticity”. There are steps that you can take or exercises that you can do to become more creative. Just like working a muscle, growth happens when you exercise. By exercising your creativity, you will become more creative. The more creative that you become, the better you become at creating art, problem solving, and generating ideas.
But, the benefits don’t end at creating art.
Creativity is Important
Creativity is not just vital to success for artists, but it’s incredibly important in other professions as well. Throughout history, the most successful people, no matter their profession, have been the most creative. Just look at a list of the most successful people in history for proof. You’ll notice that every single person has “fixed” or created a solution for some kind of problem. Notice the keyword in that last sentence – “created”. Creative people create.
Not Every Artist is “Creative”
It is a misnomer that if you can draw or paint well, then you are creative. Although, we do often find a connection. Why is this when drawing and painting are skills and creativity is a “state of mind”? In my opinion, the reason is because drawing and painting are skills of problem solving, which require creativity. When we exercise and grow our creativity, we are able to find the path to a “creative state of mind” easier. People who frequently draw or paint are constantly working their “creative muscle” (if you will), making it stronger and stronger.
For those of us that don’t exercise our creativity, there seem to be roadblocks in place that prevent us from reaching that state of mind. For some of us, there seem to be limitations on solutions that we can offer. Our creativity seems to have limits.
Let me show what I mean with this creativity enhancing exercise.
Exercises for Improving Creativity
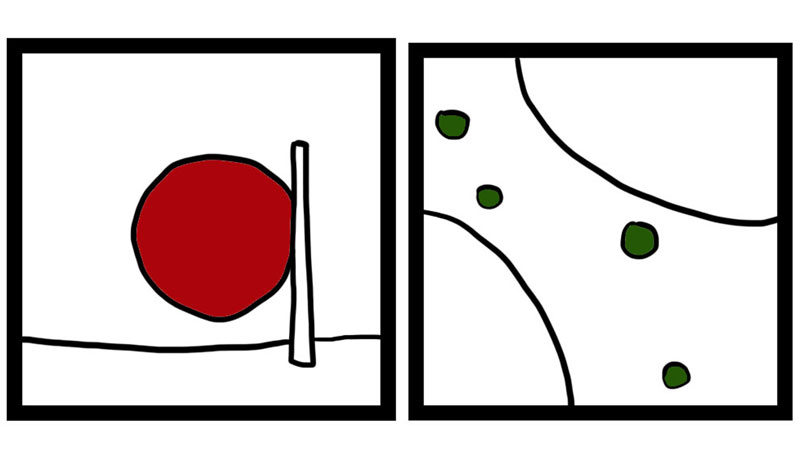
I have created 4 drawings below. These drawings do not represent anything from reality. They are simply random drawings. In fact, there is a name for them. These drawings are called “droodles”. The goal in this exercise is to look at the drawings and come up with as many solutions as possible for what these drawings could be. In other words, what do you think these drawings represent? Take 2 minutes for each drawing and list all of the solutions that you come with.
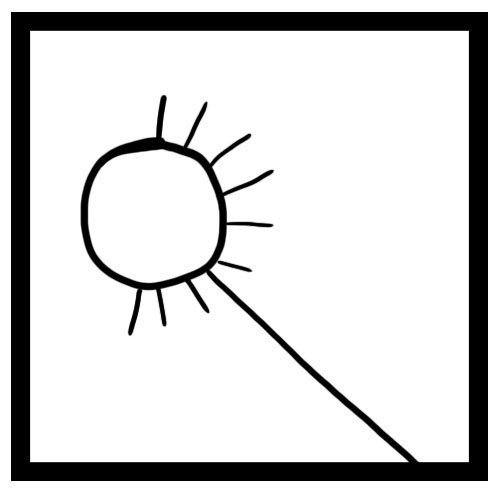
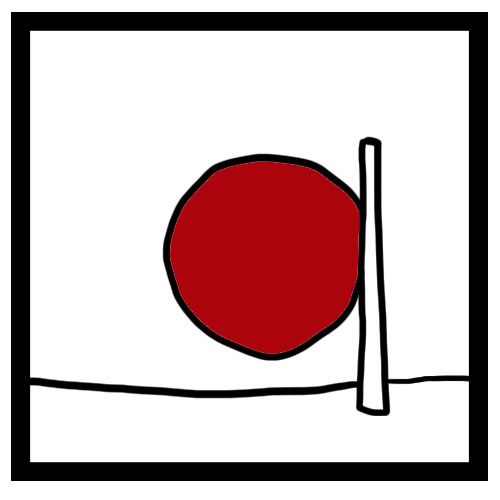
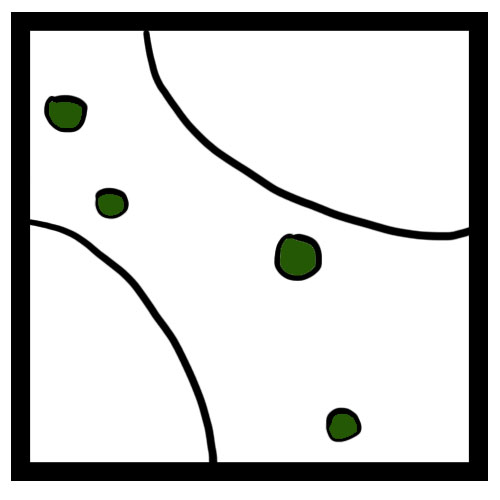
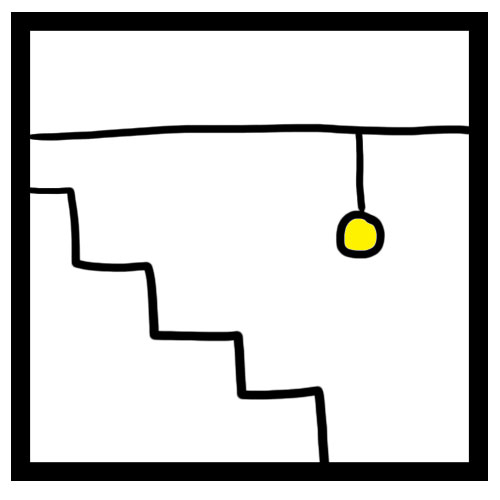
So, how many did you come up for each “droodle”? If you are an adult, I bet not too many. In fact, research suggests that most adults, even the creative ones, struggle to come up with more than 2 or 3 solutions for each of these drawings.
Now, show these images to a child and have them come up with ideas for each drawing.
You may be surprised to find that children will come up with many more solutions than the average adult.
Does this mean that children are more creative than adults?
Well, yes and no. Children are not necessarily more creative than adults, they just are more apt to find the path to the “creative state of mind”. It’s easy for them. In fact, a lot easier.
In this exercise, adults reason with the images that they see, and remove possibilities, limiting the solutions that are “possible”. This is why adults are limited in their responses. They simply have “ruled everything out”. Children however, look for possibilities in the drawings instead of limitations. They include every possibility, even the ones that us adults think are not possible.
So how do we become more creative? How do we train our brains to find the path to that “creative state of mind”? The answer should be obvious by now.
To be more creative, we need to learn to think like children. This obviously requires some practice, so let’s practice.
Take a look at the 4 drawings above again for 2 minutes each. But this time, think like a child. Offer every possibility that comes to mind, no matter how “impossible” it seems. Don’t attempt to reason with your responses, just go with them.
How many were you able to come up with this time? Was it more than before? Was it easier this time?
Creativity is a muscle. You have to use it, or you will lose it. In order to exercise our “creative muscle”, we need to look at solutions as a child would. We need to embrace possibilities and not create limitations for ourselves.
Now, go get creative.
If so, join over 36,000 others that receive our newsletter with new drawing and painting lessons. Plus, check out three of our course videos and ebooks for free.
Drawing Tips – The Winner
And the winner is…Mary Beth Harrison.
Here’s her drawing tip…
“My tip is to allow yourself to make mistakes and create drawings you will never want to look at again. Do not put pressure on yourself to make every drawing worthy of framing or selling. By allowing myself to try new techniques or attempt drawings that may be beyond my skills, I have learned so much and always feel eager to draw or paint, knowing that there is no pressure to ‘succeed’ but just to enjoy the moments spent in creating, no matter the result.”
I think what Mary Beth says here is very important. New artists sometimes put unnecessary pressure on themselves to create amazing drawings every time they sit down to draw. This just doesn’t happen. Even experienced artists create drawings that they’d rather not share with anyone else. When new artists experience these “failures”, they often become discouraged, and some even stop drawing all together, even it’s something that they really love to do. The pressure to succeed can be a burden, but it shouldn’t be.
Instead, we should approach drawing as a journey. Each drawing that you create is a step towards your destination. Learn from the drawings that you create but don’t dwell too much on them. Allow the mistakes that are made and welcome them as growth and development. Don’t be afraid to make them and experiment as much as you can. This is where development happens.
For her drawing tip, Mary Beth will receive a copy of Veronica Winters’ instructional book entitled, “Master Realist Techniques in Colored Pencil Painting in 4 Weeks: Projects for Beginners”.
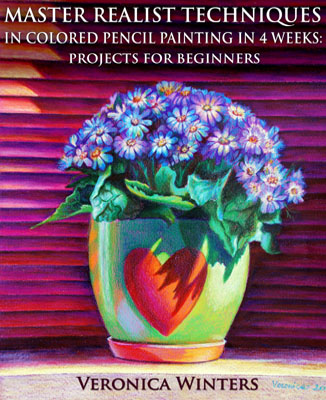
You can pick up a copy for yourself, and check out Veronica’s other instructional tools by visiting her website here.
Look for more contests, prizes, and giveaways here on the blog this summer.
If so, join over 36,000 others that receive our newsletter with new drawing and painting lessons. Plus, check out three of our course videos and ebooks for free.
Interview with Artist Veronica Winters – Book Give Away
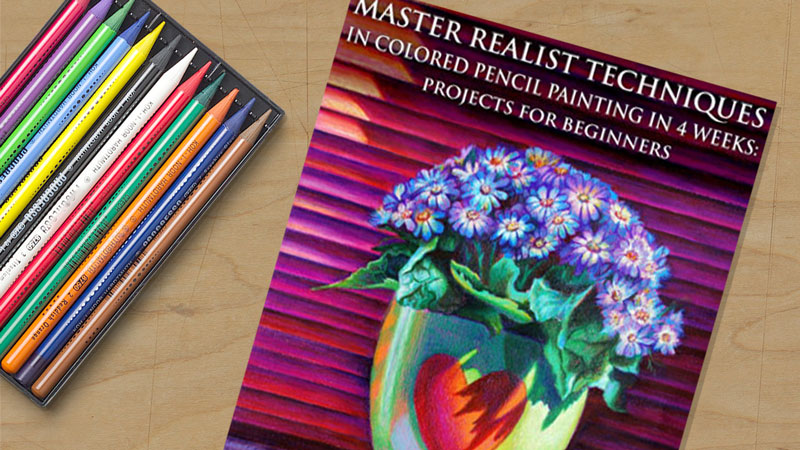
Veronica is also an instructor with several published books under her belt. The one I’m most excited about is “Master Realist Techniques in Colored Pencil Painting in 4 Weeks: Projects for Beginners”. I’ve had a chance to take a look at this book and I have to say that it is the most thorough and complete instruction book on colored pencils that I’ve ever had in my hands. Everything is covered in this book of 146 full color pages.

Veronica has graciously agreed to give away one copy of her book to one lucky reader of the blog (Thanks, Veronica). To win the book, simply leave your best drawing tip in the comments at the end of the post. On June 7, I’ll pick one of the tips as the winner and mail you Veronica’s book.
I was honored to ask Veronica a few questions about her work and her journey into the art world. What follows are her responses to my questions.
1. When did you first start drawing?
“I started drawing when I was a kid, probably around the age of 7. I looked at my mom’s art who was a good amateur artist herself. I liked copying her drawings at first, then illustrations in art books, then drawing my own imaginary scenes. It’s funny now to remember how I drew popular cartoon characters for almost everyone in my high school class. Those characters were from American cartoons, ‘novelty’, foreign depiction of the world that had just entered our TV screens…
My parents were always artistically inclined. We often went to see art shows in Moscow and we also saw many ballet and other performances. It was a cumulative experience for me. Russia has a very strict, rigorous training in the arts and the performers were best of the best in Moscow. Now I understand how hard it must have been for artists to remain on top of things, especially the ballet dancers… I wanted to become an artist after high school but I graduated in 1993 when Russia, my native country was on the brink of turmoil and long-lasting economic and political downfall. It would be very stupid of me to pursue my art degree knowing I wouldn’t be able to make it financially.”
2. What inspired you to start creating art?
“I think my art was always a lot more about communication than inspiration. I do get inspired by other artists and art but I create it because of inner need to do so, not because I’m waiting for Muse to come down from above and visit me. Also, art is so much work, rather than inspiration…Art is personal language. When it’s difficult to say something verbally, it’s easy to paint it. I always kept my thoughts and emotions bottled up inside and art was a natural way for me to communicate. I remember looking at color plates of masterpieces when I was a kid and I liked to visit museums in Moscow.
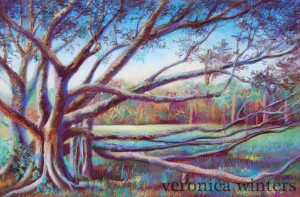
As of now, inspiration comes from many different sources, like environment (landscape), travel, books, literature, art magazines, architecture, other artists’ work, and my imagination. My personal (surreal) art is about my struggles, emotions, psychology of the human being. It’s something that doesn’t sell as opposed to flowers or landscapes but there are people out there who understand this kind of art and feel a strong connection to a piece(s).”
3. Did you have any teachers that were inspirational to you?
“I was always interested in understanding how to paint what I saw (realism so to speak). Jack Titus was one of my professors at the Oklahoma State U. He created life-size drawings of people in colored pencil and graphite and he was one of the teachers who really encouraged me to apply to the Master’s program. He was one of few artists/teachers who believed in me. Not everyone saw me do it back then. Before that I had got a good start at Tulsa Community College, from which I retained many good memories . After graduation with my MFA in painting from Penn State I began going to New York once in a while taking classes from artists I really admired. I took classes at the Art Students League of New York and the Grand central Academy of Art with Michael Grimaldi and Dan Thompson, Jon deMartin and others. These artists were trained in classical tradition and their art is inspirational to me. It was there where I began to put all the pieces together forming my understanding of classical drawing techniques. I had had lots of information but no “glue” or consistency to hold it all together. By studying with these artists I saw the approach to classical painting and drawing. There are no short-cuts here. It’s lots of work and effort on daily basis for many years to come…”
4. What artist(s) inspired you?
“I have a long list of artists that gets longer and longer. I love the brushwork of Sargent and Rembrandt; The beauty of female figure by Bouguereau, Bellini, Titian and contemporary Russian artist- Serge Marshennikov. I really like contemporary painters-Rob Gonsalves (cp), Brad Kunkle, Anthony Ryder, Collin Bogle, etc.”
5. What subject matter and media are you most interested in?
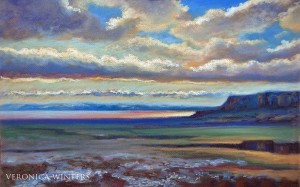
“Although I was trained to draw in any dry media (pastels, charcoal, pencil, ink, colored pencils and watercolor,oil and acrylic) I prefer to focus on colored pencils and oils. I like the precision, detail, control and color layering with colored pencils. My favorite brand is Prismacolor Premier although there are a few more good ones available on the market. I love oils for spontaneity and experimentation. It’s also more durable and can be painted huge. There is also so much history to oil painting. Although I know I couldn’t possibly compete with the Masters, I feel excited to be in their shadow.
My favorite subject is surreal depiction of reality. It’s when I’m able to achieve realistic feel of the scene that doesn’t exist but could possibly exist out there..”
6. What advice can you give to new artists?
“To be patient with yourself. Based on my teaching experience, students often want to become really good in a few lessons, which is impossible! I’ve spent 14 years learning and I often feel like I know almost nothing about painting. Also, painting from life is essential to the learning process. Students bring 3″ x 3″ pictures at times and want to paint from them. That’s not a good start…It’s about studying your subject, observing it from various points of view, learning to extrapolate information in front of our eyes to see it as artists do. Learn to slow down and spend time thinking about your subject, studying it, controlling the light and seeing shadows in your still life.”
7. What advice can you give to experienced artists? < tough one >
“It is a tough one. I’d say to be open to changes and innovation. I think many good artists just stop re-inventing themselves at some point and it becomes the same thing over and over again. I don’t think it’s bad as the style is found and established. Also, experienced artists could be very helpful to others in developing their craft, in my opinion. They could be advocates for the arts.”
8. Do you ever get frustrated with your art, and how do you work through it?
“Oh, yes. I do get frustrated with it quite often. Sometimes, I have to start all over again with a piece if it doesn’t come out the way I want it to be. But there are times when I just work through it and it turns out well, although it might look different from my original intend. It often happens in oil painting… The more planning I do drawing though, the better my chances are at succeeding either drawing or painting. Happy mistakes are rare. I must envision (study, plan, organize,) my finished piece before I even touch it with either pencils or paint. The more realistic you want it to be, the more studying and planning is involved.”
9. What made you start creating instructional materials?
“My students led me to it…Sometimes I even get requests to create an online class… I often caught myself explaining the same concepts to every single student over and over again and it led me to seeing and understanding what students needed/lacked in their art. Also, it was such a struggle for me personally to learn the craft (and I’m still learning every single day) that I know what students really want and expect to receive from me as their instructor and thus I began developing short demos first that became articles in Leisure Painter and my books. Although my books are not perfect they do lay out several very basic concepts every student must know about drawing. There is a lot of “stuff” to read, comprehend, and practice that students want to skip, proceeding to demos. It diminishes their results. We often have no patience with ourselves and want to cut corners. So, I do lay out several important concepts, such as light direction, the importance of taking good pictures, understanding of values, positive/negative space, etc,I also give practical tips on how to pay attention to edges or draw ellipses correctly or mix colors in unexpected ways.”
“Master realist techniques in colored pencil painting in 4 weeks” was my first big attempt to collect and organize information that I wanted to communicate with my students about colored pencil drawing. Besides having basic concepts that I’ve mentioned above, it features my drawings and has many demos with different skill levels. In those demos I show how I approach drawing fabric, fruit, glass, landscape, crystal and so on. I think there are many excellent colored pencil artists out there who strive for amazing photo realism. I’m different in this regard as I communicate through color and interpretation, so my work (and demos) reflect this liberty taken at interpretation of things. I’m interested teaching realism that is based on understanding of classical concepts, yet allows for personal intuition and freedom (for instance, you can come up with unique textures through your personal “handwriting”/drawing). This is reflected in my drawing and teaching.”
Here are a few ways that you can connect with Veronica…
Facebook: facebook.com/veronicasart
YouTube: youtube.com/veronicasart
To visit Veronica’s website and purchase instructional materials: Visit Veronicasart.com
If so, join over 36,000 others that receive our newsletter with new drawing and painting lessons. Plus, check out three of our course videos and ebooks for free.
5 Reasons Why You Can’t Draw
The truth is, I believe that anyone can draw. It simply takes overcoming a few misconceptions about drawing and dispelling a few myths.
Here are some common reasons that people struggle with drawing and how you can overcome them. No matter what the “pitfall” may be, you can overcome them and draw well. Let’s identify the most common reasons people struggle with drawing….
Reason 1 – You Need More Practice
This is probably the most common reason why people struggle with drawing. They simply need more practice to get better. Drawing is a skill and like with any other skill, you can’t expect to get better without practicing it. So many people think that drawing is just something that some people can do and others can’t. This simply is not true. Anyone can draw, but you have to want it enough to practice it. And practice includes making mistakes – lots of them. You’ll learn from your mistakes and your drawing skill will improve. But first you have to be willing to invest some hours of practice.
Reason 2 – You Haven’t Learned How to “See Like an Artist”
Seeing like an artist is different from simply seeing. Artists see the world as lines, shapes, forms, colors, and values. They are able to simplify the complex objects around us into abstractions that are closer to how our eyes actually “see” things.
Artists are able to block out what their brains (or left brains anyway) are telling them and focus only on the abstract light that their eyes are actually recording. Artists are then able to take this abstract information and organize it on the surface using a medium in the manner that their eyes have recorded it, thus creating an illusion that translates to the brain of the viewer as reality. An artist, for example wouldn’t draw a chair. Instead, they would draw the lines, shapes, values, and colors that make up the chair in the manner that they are observed. The result is an illusion of a chair.
Fortunately, like drawing, seeing like an artist is a skill that can be learned and developed. It can be practiced. There are drawing exercises that you can try to help you learn how to see like an artist. For example, drawing an image from an upside down reference photo will help you block out distractions and focus only on the lines, shapes, colors, and values. Or blocking out a photo reference using a grid, and then drawing only one square within the grid. Any drawing exercise that helps you block out the content and only focus on the observed will improve your skill in this area.
Reason 3 – You Need More Experience With Specific Media
Each drawing medium has its own set of characteristics. Knowing and understanding how a specific medium will behave and how to control it on a drawing surface is absolutely essential to drawing success. Graphite should be applied and handled differently than other drawing media, like for example, soft pastel. Experience with each drawing media comes from practice and experimentation. It cannot be expected to pick up a medium and become an expert on the first use. Yet many new artists give up on a medium after just one use. Gaining knowledge of the appropriate uses, techniques, and surfaces of the media will improve your drawing. Practice and experimentation within a specific medium will naturally enhance these skills.
Reason 4 – You Simply Need to Spend More Time on Your Drawings
There’s a reason why it’s called art “work”. It takes work to create a strong drawing. It can be fun work – but work nonetheless. Time often needs to be invested into a drawing in order for the drawing to be successful. Slow down and concentrate on smaller areas of the drawing for longer periods of time and I guarantee that you will see noticeable improvements in your drawing.
Reason 5 – You Believe in “Talent”
Perhaps the reason you can’t draw is because you believe in talent. You have been told your whole life that some people can draw and some people can’t. So the first time you meet any challenge in developing drawing skill, you give up and blame it on lacking talent. Drawing is a skill that is taught, learned, practiced and developed. It’s just like any other skill such as playing a musical instrument, or learning a sport. It takes knowledge and practice to develop it. Anyone can learn how to draw, including you.
If so, join over 36,000 others that receive our newsletter with new drawing and painting lessons. Plus, check out three of our course videos and ebooks for free.
How to See Like an Artist
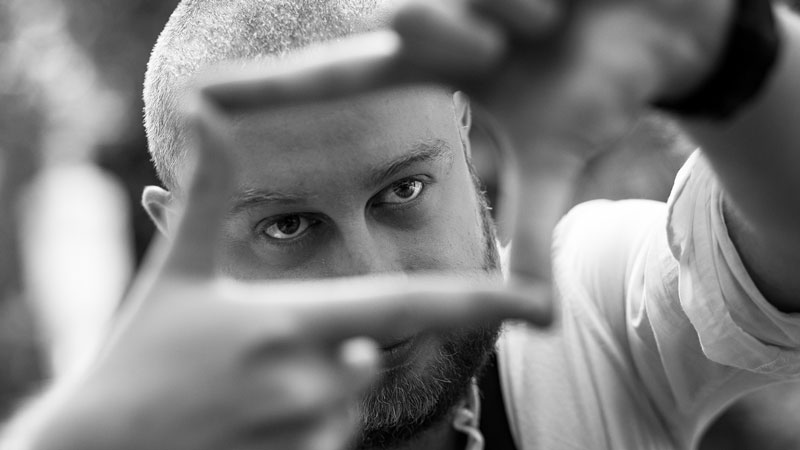
So how can we learn to see like an artist?
Is this even a skill that can be learned, or is it an innate ability that some of us have and some of us don’t? Well, the good news is that it is a skill that can be taught, learned, and developed. Anyone can learn to see like an artist, but first we have to further our understanding how we actually see and process information in the first place.
Most of us attribute how we see to our eyes. And while it is true that our eyes play an integral and required part of the seeing process, it is what happens in the brain that is most important. It is the way information is processed in the brain and understanding how this process works that will lead to improved artistic skill.
This is How Drawing Works…
Light enters the eye after reflecting off of objects in the natural world around us. The light that enters the eye is then directed to a nerve at the back of the eye. This nerve acts like a superhighway of lines, colors, shapes, and forms, sending information to the brain where it is processed. The eyes actually don’t “see” anything. Instead, they are simply “light gatherers”. It is in the brain, where the “seeing” actually happens.
Here, the light information is pieced together to form the world that we recognize around us. The brain tells us what it perceives from the light information gathered from the eyes. In essence, the brain is “guessing” based on past knowledge and experience at what we are actually seeing. (This is why it is so easy to “trick the eyes”)
This process happens constantly and requires a hefty amount of energy. How much energy is unclear. Perhaps, this is why it is so restful to close your eyes for a moment. You are actually not resting your eyes, but your brain. The eyes, how they work, and how our brain processes information is clearly more complex and detailed than what I’ve outlined above, but it is important to have a general idea of how this process works.
We Must Manipulate The Illusion
If our goal is to create artworks that are representational, then we must learn to manipulate what “light” enters the eyes and travels to the brain of the viewer.
Our goal is not to trick the eye, but in essence to trick the brain of the viewer. To do this in a drawing, we must break down the information that our brains are “seeing” into the abstract “light information” (simple lines, shapes, values, etc.) that our eyes are gathering.
Then, we simply mimic the information on the drawing surface. If the lines, shapes, values, etc. are translated by the artist to some level of accuracy, then the drawing will communicate the subject to the brain of the viewer.
To improve this skill, we must practice observing objects as they are seen before they are processed by the brain. This, of course, is the challenge when drawing representationally. Our minds are conditioned to “make sense” of the objects around us. It doesn’t help that many of us have been conditioned with methodologies to draw specific things either. This just intensifies the complexity of the challenge.
Know What to Look For in A Drawing
If you practice looking, and you’re clear on what you are looking for (lines, shapes, values, etc.), you will begin to see like an artist. And seeing like an artist will lead to better drawing skill. After all, drawing is about seeing. But more than that, it’s knowing what to look for.
If so, join over 36,000 others that receive our newsletter with new drawing and painting lessons. Plus, check out three of our course videos and ebooks for free.
Create an Environment That is Best For Teaching and Learning Art
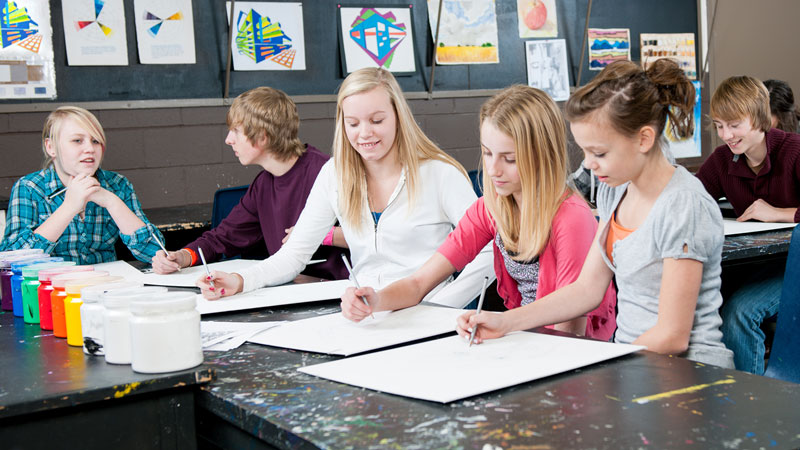
Unfortunately, self doubt wins out with many students and the satisfaction of the creation process quickly transforms into frustration. The struggle that many art instructors face involves the inner battle that happens within the art students themselves. Doubt of skill and ability and the fear of failure often lead many students to stop pursuing art.
All art instructors, if they desire to be effective, must confront this issue with their students and learn how to overcome it so that their students can succeed. Drawing is, after all, a skill that is learned and developed. It is practiced, and mastery takes time and patience. Over time, students will gain confidence in their art and their work will naturally improve.
It is the challenge of the teacher to keep the confidence of the art student in check but be honest about specific improvements the student can make. Teachers who possess the ability to balance this approach are often the best art teachers.
Creating an Environment for Learning Art
Environment is also important in nurturing and developing artistic skill. Many students are turned away from art simply because of a poor environment for learning. Learning and developing artistic skill is unlike the impersonal learning of mathematics or science. Artistic activities, such as drawing, are inherently personal.
Student artists connect with their work and when it is judged, or even perceived to be judged, it can be intimidating and stifling to artistic progress. Many adults have long believed that they are incapable of drawing or creating good art because of an experience that they may have had many years ago in poor learning environment.
Often, these experiences have occurred in a judgmental environment. It is important for art instructors to create an environment that is conducive for developing artistic skill in students. For developing artists, this environment needs to be non-competitive and especially non-judgmental.
A non-competitive environment allows the art learner to be creative, spontaneous, and most importantly – “free to make mistakes” and take chances. These factors are important to artistic development, and when they are missing, artistic progress is hindered, rather than helped.
Structure still needs to exist to encourage artistic progress. Expectations need to be established, whether this comes from the art teacher in a classroom, or from the self-taught artist. The goal should be to set expectations to provide students or yourself with enough structure to measure success, but enough freedom to allow for creativity.
Whether you are the teacher, the student, or both, learning artistic skill is unlike learning any other skill or discipline. It is fragile. Understanding how to nurture and grow the abilities of your students or those of your own is important to success. Create an environment for your students or for yourself where judgment is kept “in check” and where creativity and mistakes are free to happen.
If so, join over 36,000 others that receive our newsletter with new drawing and painting lessons. Plus, check out three of our course videos and ebooks for free.
The Difference Between Sketching and Drawing
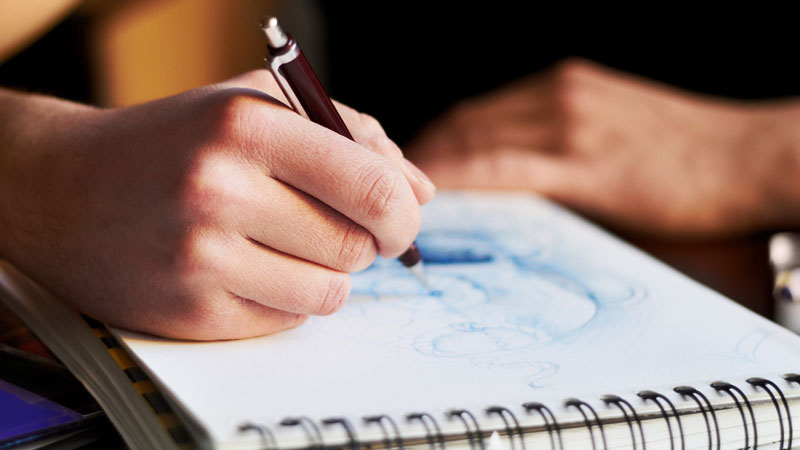
Most people consider sketching to be a looser, less refined form of drawing.
Sketches are typically created as preliminary drawings in order to prepare for a more finished work of art. Sketches are typically created with quick marks and are usually lacking some of the details that a finished drawing may have.
Often, the “nuts and bolts” of a finished drawing is worked out in the sketching stage of the artistic process. Composition, balance between values, and proportion can all be worked out in a quick sketch, rather than jumping right into a finished drawing, risking mistakes.
Sketching vs. Drawing Mediums and Surfaces
Another consideration is the medium. Graphite, charcoal, ink and conte can all be considered as media that may be used to create a sketch, whereas pastels and colored pencils may be considered more finished media for a “drawing”. Sketches are also usually considered to be smaller than drawings, although many small “drawings” exist. Surface is another area where we can distinguish sketches from drawings.
Mostly, sketches are created on lower quality papers such as newsprint, while finished drawings are created on higher quality surfaces, like Bristol paper, rag paper, or drawing paper. But this definition of sketching isn’t quite complete. There are no rules here, just assumptions and generalizations.
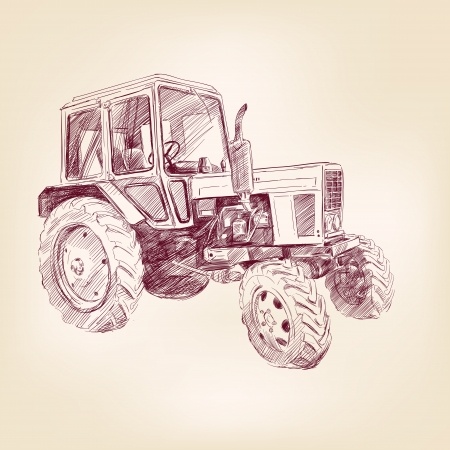
The confusion can get intensified though when you consider that many sketches are quite significant and can be considered as “works of art” on their own. We see plenty of “sketches” by master artists in our art history books. These loose works are now considered “priceless” works of art, instead of lowly sketches. To blur the lines further, artists will often approach finished drawings with the intent of making them loose-much like sketches. Then there are the sketchpads and drawing pads. Can you sketch in a drawing pad or draw in a sketchpad? Why are they doing this to us?
Overthinking It?
I think we may be over thinking this one, so let me offer an analogy. Let’s compare sketching and drawing to eating dinner. You can approach this meal in any number of ways. You can hang around the house and eat some burgers, or you can get all dressed up and go out for a fancy dinner. Either way, you are eating dinner.
My opinion is that it’s all art. Sketching is just a less formal form of it.
If so, join over 36,000 others that receive our newsletter with new drawing and painting lessons. Plus, check out three of our course videos and ebooks for free.

