
How much and how often do you consider the surface itself?
Often neglected in the art-making process is the surface that the art is created upon – in essence, the very foundation of your work. And like the foundation for a building, the foundation for your artwork is critical.
The tallest building in the world, Burj Khalifa in Dubai, measures 2,717 feet tall. (That’s over a half mile). It is truly an engineering marvel, a masterpiece of construction. But without its foundation, it would be the largest mass of rubble on the planet. The foundation for this structure is equally impressive. Deep into the earth, 164 feet down, 58,900 cubic feet of concrete supports the building. It took over a year to build the foundation alone.
Your art deserves the same attention to the foundation that it is built upon. It’s time to carefully consider the surface, so let’s take a look at your options and how they will affect the mark.
What is Paper Made Of?
Paper can be made out of a variety of materials. Papers are made by turning fibers into moldable pulp. Most commonly, these fibrous materials originate from timber (wood) or cotton. The pulp that is produced is molded together, most often pressed, and dried to produce the paper. The molding, pressing, and drying process all affect the finished surface.
Lower quality papers are typically made from wood pulp. Wood pulp is highly acidic and will degrade over time. Newsprint and lower quality drawing papers will fall into this category.
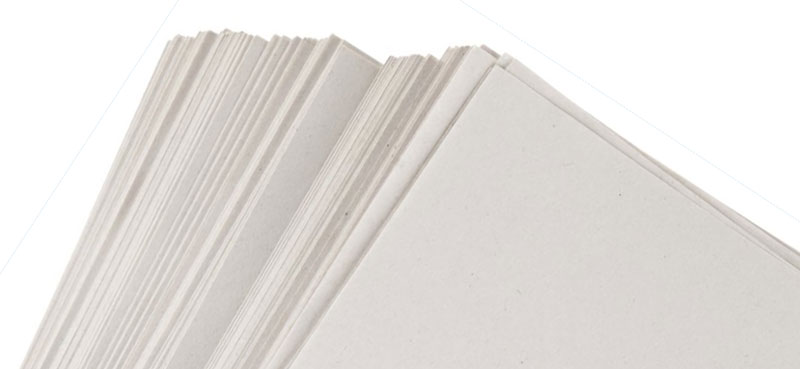
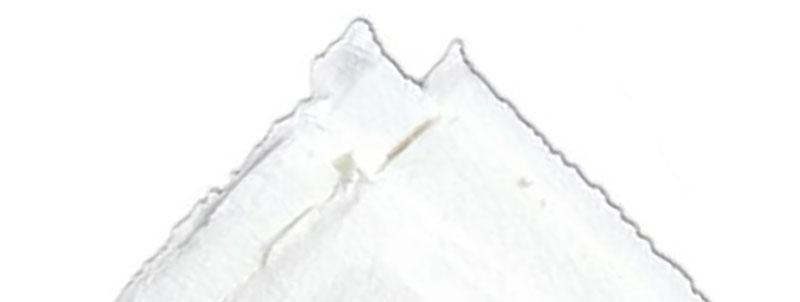
Higher quality papers are made entirely from cotton and/or linen fibers making them more resistant to chemical break-down over time. These papers are commonly referred to as “rag” paper. These papers are usually “hand-made” and feature a deckled edge along with an embossed watermark. Papers such as Arches and Stonehenge will fall into this category.
Many papers fall somewhere in-between and are made with a mixture of wood and “rag” fibers. Often, chemicals are added to the papers to slow or prevent pH changes over time. Many mid-priced papers fall into this category.
Acid Free Vs. Archival
Papers that are labeled “acid-free” means that they are acid neutral. Many papers are treated to make them “acid-free”. If the paper has been treated, it will wear off over time and the paper will begin to deteriorate (along with your art). Papers that have been treated will be labeled as “acid-free” but may be missing the “non-archival” mark up.
Archival papers are also acid-free but are by nature, non-acidic. An example of this would be “rag” papers that are less likely to break-down over time.
In the end, “archival” papers are best, “acid-free” papers are good, and the rest are best used for sketching.
Understanding Paper Weight
Drawing papers are designated by weight. This can be confusing if you don’t know why they have a weight designation. The weight gives the artist an idea of the thickness and stability of the paper. It is most commonly dictated according to pounds. The weight designation is the physical weight of a ream of paper, which is 500 sheets.
Logically, 500 sheets of heavy watercolor paper will weigh more than 500 sheets of thin tracing paper.
Example: Strathmore 300 Series tracing paper is 25 pounds, while Strathmore Cold press Watercolor Paper is 140 pounds.
Understanding “Tooth” or Paper Texture
All papers have a surface texture that influence the mark. This surface texture is commonly referred to as “tooth”. The tooth of the paper is produced according to the process that is used to create the paper. “Cold press”, “Hot press”, and “Rough” are designations assigned to watercolor papers. (Watercolor papers are not just for use with watercolor. Many artists prefer them for drawing as well.)
Coldpress Papers
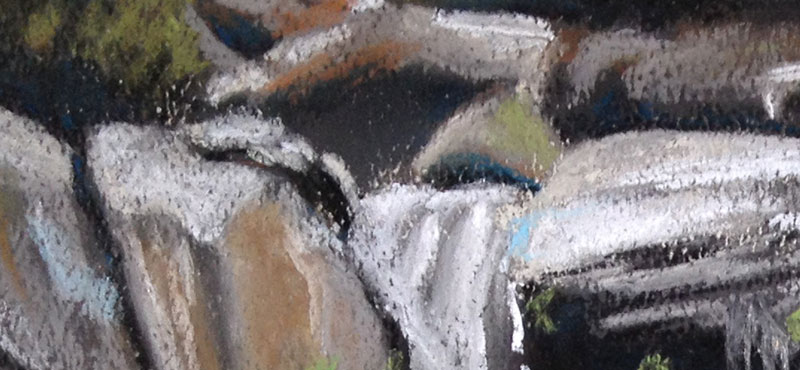
Coldpress papers typically feature a coarse tooth. They are referred to as “Coldpress” because unheated cylinders are used to press the paper as it is manufactured. This results in small, irregular indentions in the surface of the paper.

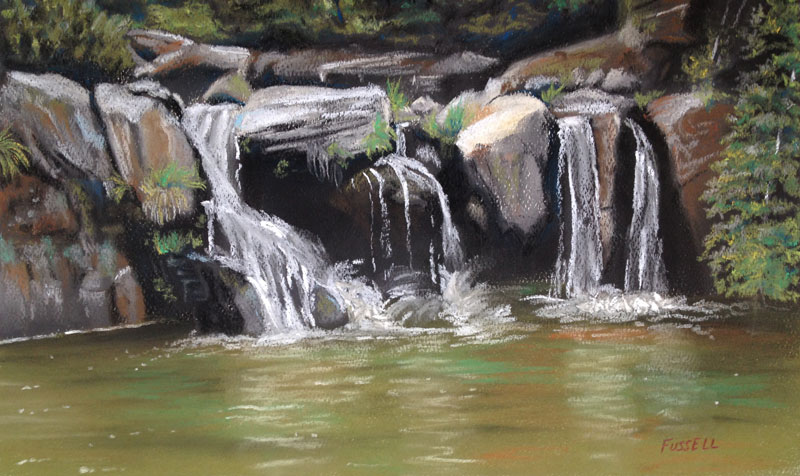
Cold press papers are typically preferred by watercolor artists, pastelists, or anyone looking to exploit the surface texture. Since Cold press papers have a heavy tooth, watercolor paints can easily be controlled. Pastels can be heavily applied and layered.
Hotpress Papers
Hotpress papers feature a smooth tooth. They are referred to as “Hotpress” because the cylinders that are used to press the paper during the manufacturing process are heated. The heat causes the paper to conform to the smooth mold producing a smooth surface.

Hotpress papers are preferred by artists wishing to have control over precise marks, such as with pen and ink or detailed watercolor paintings.
Rough Papers
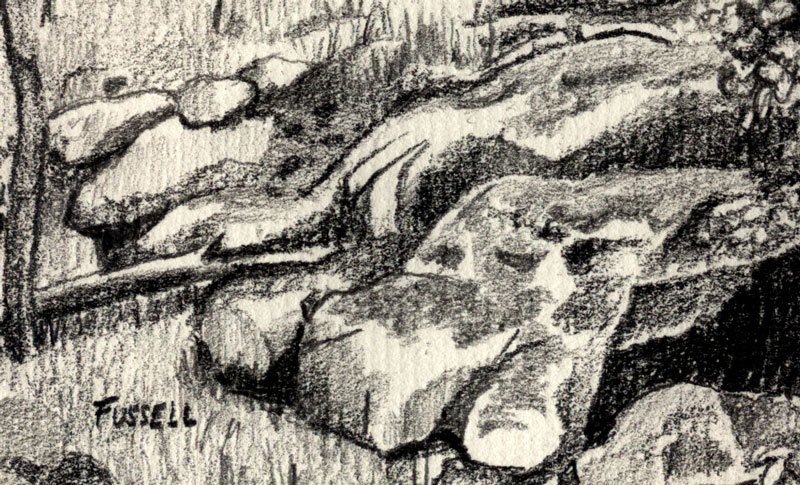
A third category of surface texture, conspicuously referred to as “Rough”, exists among paper types. Rough papers are not produced by cylindrical pressing, like Hotpress or Coldpress papers. Instead, they are flat-pressed mechanically or not pressed at all. The result is a very heavy tooth. Rough papers can stand up to multiple washes of watercolor or heavy applications of pastels.
Other Textures
Not all papers are designated as “Hot press”, “Cold press”, or “Rough”. Some papers are manufactured to purposely feature a regular textured pattern. (Cold press and Rough papers have an irregular pattern.) These papers are pressed by machine to create the pattern.
An example of paper that features a regular pattern is Canson Mi-Teintes paper. The dimples are equally spaced apart and are equal in depth.
Laid Papers papers also feature a regular textural pattern. Instead of dimples, this paper features a linear pattern.
An example of paper that uses a laid pattern is Strathmore charcoal paper. (This paper is my preferred surface for House Portraits)

Upon close inspection, the laid pattern is clear…

Bristol Board Textures
Bristol board or Bristol paper (named for the town in England) requires its own category for texture. Bristol board is a heavier paper, much like card stock. It is suitable for a variety of media and features two different types of “tooth”, both of which are fairly smooth.
“Plate” surfaces are supper smooth and are best for use with pen and ink applications. “Vellum” surfaces feature a weak tooth, but are still quite smooth. The weak tooth, however is still present and is best for use with graphite, charcoal, or colored pencils.
Illustration Board
Illustration board is manufactured as “Cold press” or “Hot press” like watercolor paper. Cold press illustration board is slightly textured. The tooth of cold press illustration board is very similar to that of Vellum Bristol Board. Hot press illustration board is very smooth with an almost waxy surface.
Illustration board differs from Bristol board in rigidity. Only one side of illustration board is suitable for marks, unlike Bristol board. The backside features a heavy board for support.
Because of its rigidity, a variety on media can be used on illustration board including graphite, ink, watercolor, acrylics, charcoal, and colored pencils. Because it can accept such a wide variety of media, it is a suitable surface for mixed media applications.
Sandpaper For Drawing
Many paper manufacturers produce light sandpapers for drawing/painting. These papers allow for heavy applications of media while maintaining the tooth of the surface. These papers are mostly used for colored media applications such as colored pencils or pastel.
Drawings or paintings that are created on sandpapers usually have an ethereal, “smoky” look as the paper is usually still visible in areas.
Vellum
Vellum is a smooth paper that is created by combining plastic with cotton or wood pulp materials. The material is translucent making it suitable for tracing. This type of vellum paper should not be confused with Bristol paper that has a “vellum” surface.
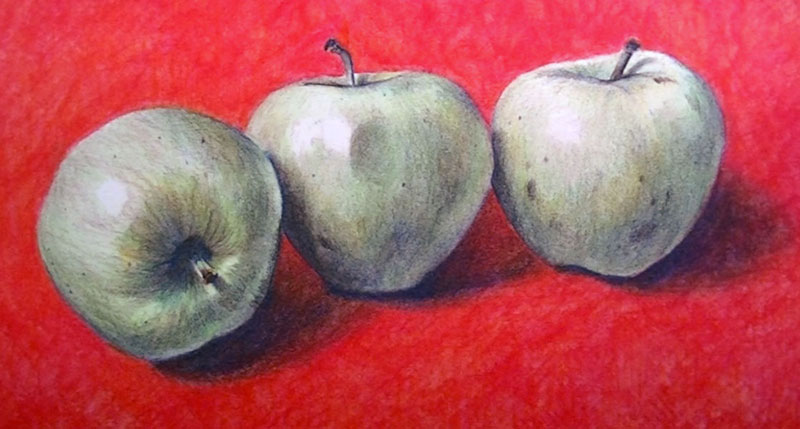
This surface is suitable for ink drawings and preliminary drawings and it is also widely used for colored pencil drawing. It is quite easy to get a smooth surface with colored pencils working on vellum paper.
Specific Paper Brands and Characteristics
I do think it’s helpful to look at specific brands and their characteristics, so let’s have a look at a few popular surfaces…
Strathmore Drawing 300 Series
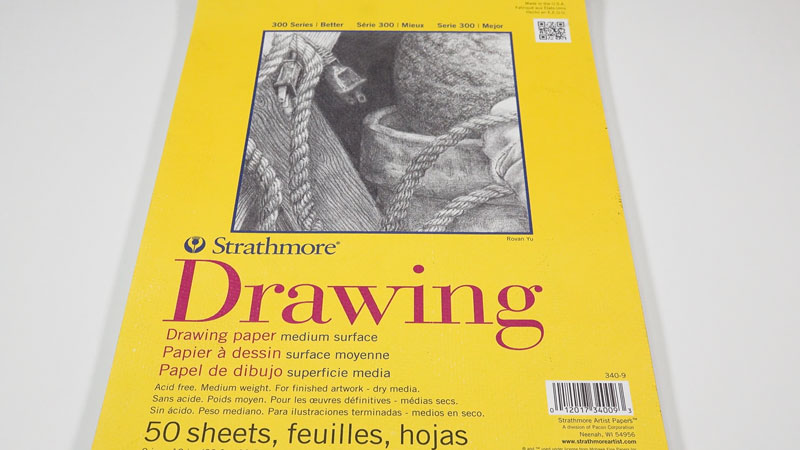
This medium-toothed paper is acid free and is priced on the lower end of the pricing scale. It is available in large and small pads and is my preferred surface for sketching.
Paper Information…
- Acid Free? Yes.
- Paper Weight: 70 lb.
- Price: $
- Recommended Mediums: All dry drawing media. (Best for sketching although it can be used for finished work as well.)
Stonehenge by Legion
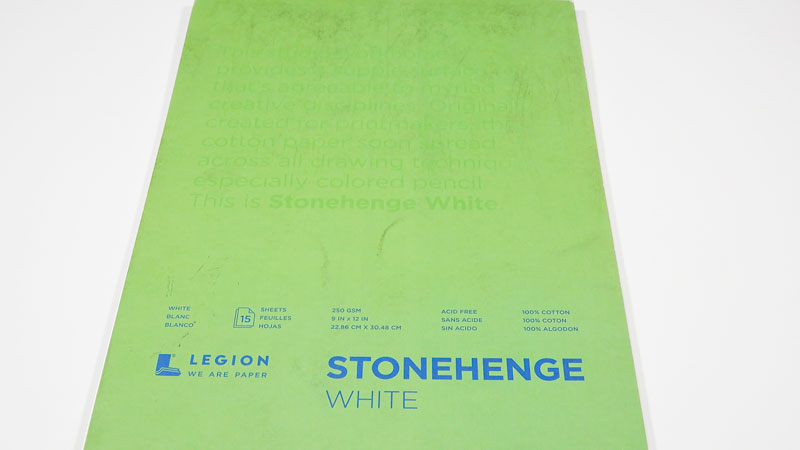
This paper features a slight, medium tooth that is capable of accepting a variety of media. This archival surface is considered a “professional surface” and is best used for finished artworks.
Paper Information…
- Acid Free? Yes.
- Paper Weight: 250 gms
- Price: $$$
- Recommended Mediums: Graphite, colored pencils, charcoal, and pastels.
Strathmore Bristol Paper
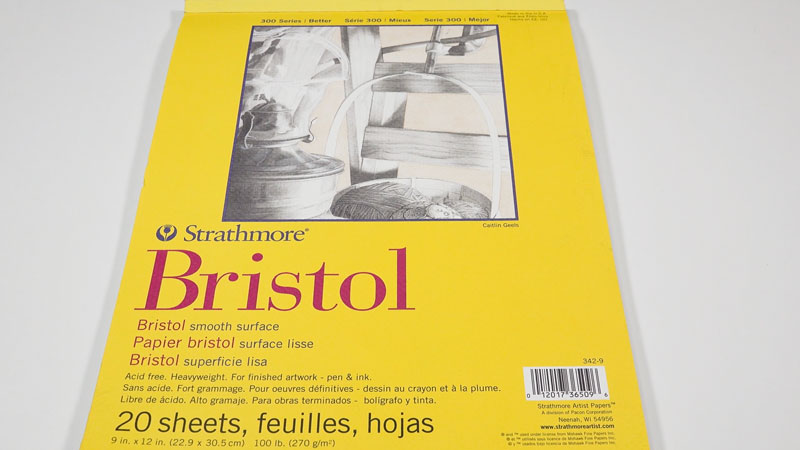
This mid-priced paper is available in two varieties of tooth – vellum and smooth. The vellum surface features a weak tooth that is slightly stronger than the smooth surface which is weaker. Both papers are rigid and similar to card stock.
Paper Information…
- Acid Free? Yes.
- Paper Weight: 100 lb.
- Price: $$
- Recommended Mediums: Pen and ink, graphite, colored pencils, and markers.
Canson Mi-Teintes Pastel Paper
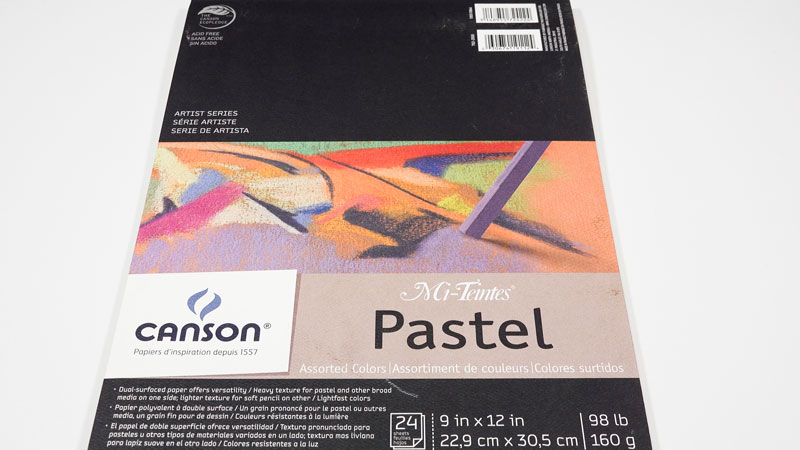
This mid-priced paper features two distinct surfaces. The front side of the paper features a heavy tooth, while the back features a slightly weaker one. Both sides of the paper can be used for finished artworks.
Paper Information…
- Acid Free? Yes.
- Paper Weight: 98 lb.
- Price: $$
- Recommended Mediums: Pastels, colored pencils, and charcoal.
PastelMat Paper by Claire Fontaine
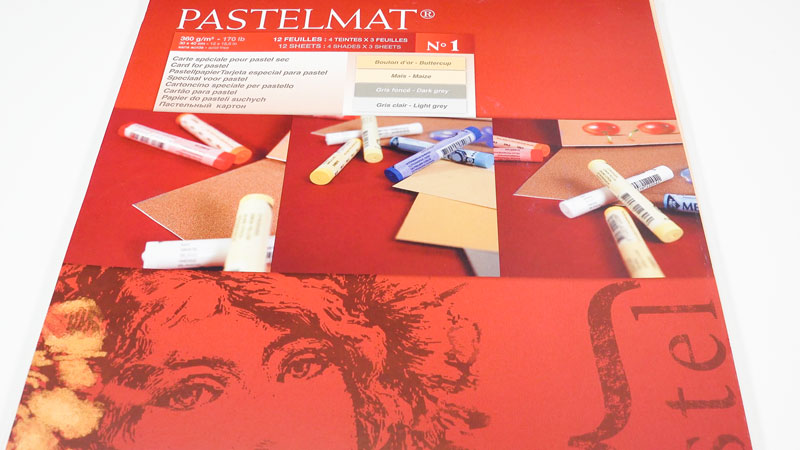
This paper is relatively new on the “art scene”. This higher-priced paper is a professional surface that features a reinforced backing. Each sheet also conveniently includes a waxy cover sheet to protect your work.
Paper Information…
- Acid Free? Yes.
- Paper Weight: 170 lb.
- Price: $$$
- Recommended Mediums: Pastels, colored pencils, graphite, and charcoal.
Marker Paper
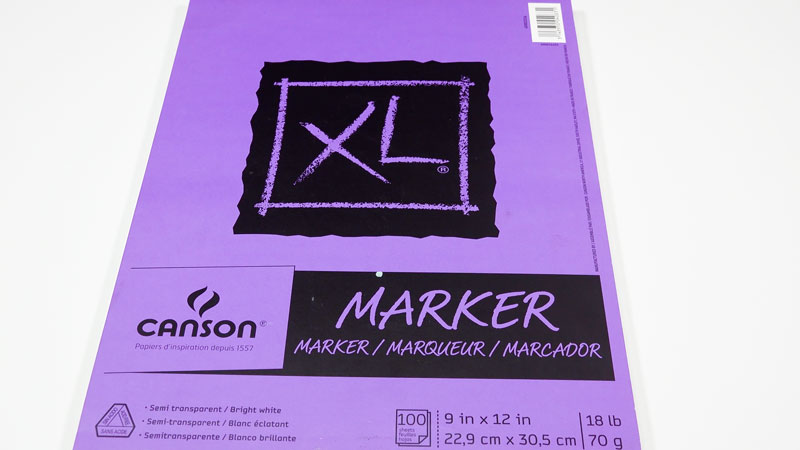
This thin paper (18 lb.) is semi-translucent and features a very weak tooth. This paper is designed to reduce bleeding that often occurs when a wet drawing medium, such as markers or ink, are applied.
Paper Information…
- Acid Free? Yes.
- Paper Weight: 18 lb.
- Price: $
- Recommended Mediums: Markers, pen and ink, and colored pencils.
Recycled Papers (Artagain Paper by Strathmore)
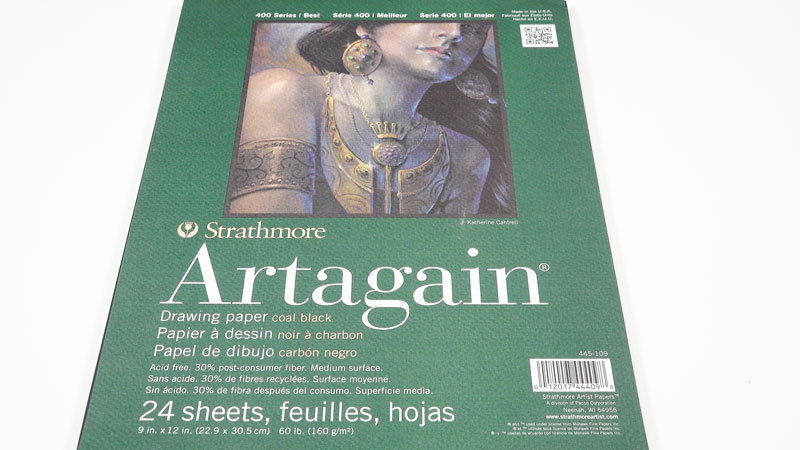
Recycled papers can be used for finished artworks, but not all of them are acid free. If you’re creating a drawing that you want to last a while, be sure that the recycled paper you choose is labeled “acid free”. These papers are available in a variety of tones. Black paper is featured in the video above, but gray papers are also available.
Paper Information…
- Acid Free? Yes.
- Paper Weight: 60 lb.
- Price: $$
- Recommended Mediums: Graphite (gray-toned paper), white charcoal (gray and black-toned papers), colored pencils, gel pens/colored ink, and oil pastels.
Cold Press Watercolor Paper
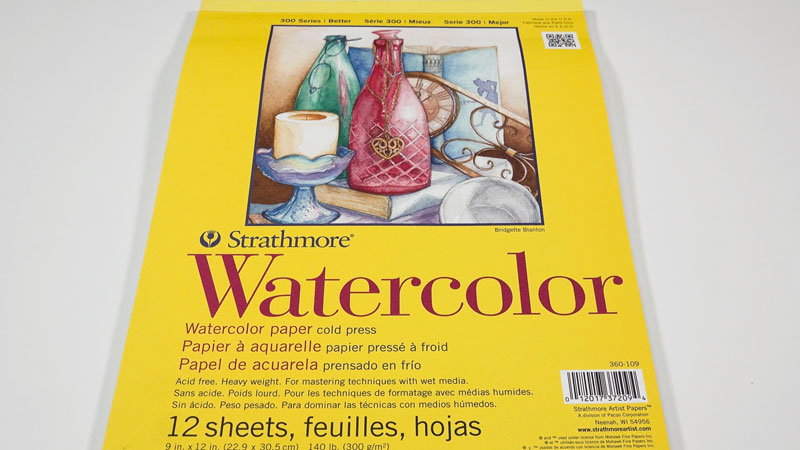
Despite the name, watercolor papers can be used for a variety of drawing media. Cold press papers feature a heavy tooth making them suitable for artists looking to exploit the surface texture.
Paper Information…
- Acid Free? Yes.
- Paper Weight: 90 lb., 140 lb., 300 lb.
- Price: $ – $$$
- Recommended Mediums: Watercolor pencils, Inktense pencils, colored graphite, charcoal, pastels, ink, and water-based painting mediums.
Hot Press Watercolor Paper
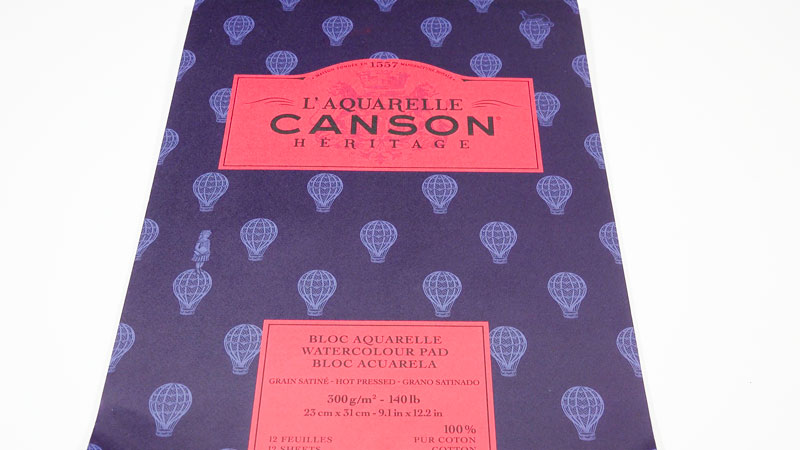
Hot press watercolor papers feature a much weaker tooth compared to cold pressed papers. This makes them more suited for drawings created by combining watercolor and pen and ink – especially when the pen and ink applications dominate.
Paper Information…
- Acid Free? Yes.
- Paper Weight: 90 lb., 140 lb., 300 lb.
- Price: $ – $$$
- Recommended Mediums: Watercolor pencils, Inktense pencils, colored graphite, pen and ink, and water-based painting mediums.
Paper Suggestions
There are far too many paper manufacturers and types to examine each brand, but having a bit of knowledge about paper in general should help you in choosing what’s best for your application.
Some people will tell you that you need to use a specific type or brand for a specific medium or technique. You won’t hear this from me. Your choice of paper is as unique as the mark that you make. Only through experimentation will you find what works best for your artistic voice.
If so, join over 36,000 others that receive our newsletter with new drawing and painting lessons. Plus, check out three of our course videos and ebooks for free.


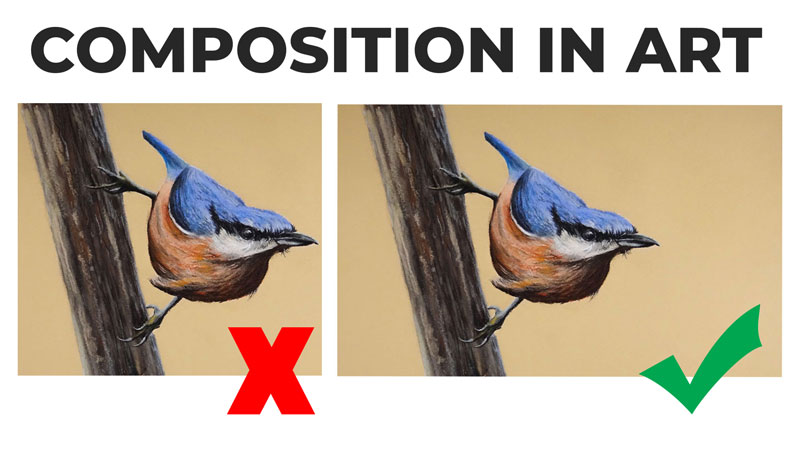
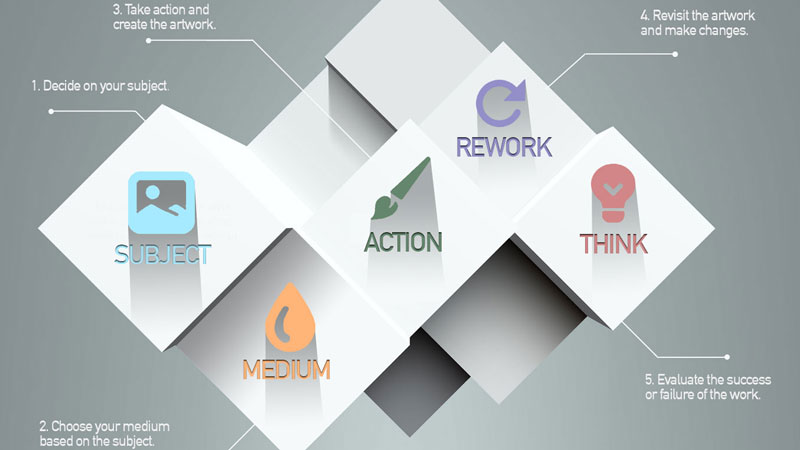
5 Tips For Better Compositions
Imagine playing in a band that just wanted to “wing it”, without any structure or practice. Clearly this would be a disaster. In this scenario, each musician in the band would play their own version of the song, perhaps in different keys, at different tempos. The resulting sound would naturally be repulsive.
Thankfully, successful musicians recognize the importance of planning a song from start to finish. They practice the arrangement until every band member is clear on the structure and order of the piece before performing the song to an audience.
Compositions in art should not be that different. We cannot expect to get great results from just diving into an artwork without planning. We cannot just “wing it”.
However, many beginners do just that. And when the work is done, the composition becomes an afterthought. But at that point, it is too late to make changes.
Instead, composition should be paramount to the art-making process. It should be considered and planned right from the start.
Five Strategies For Strong Compositions
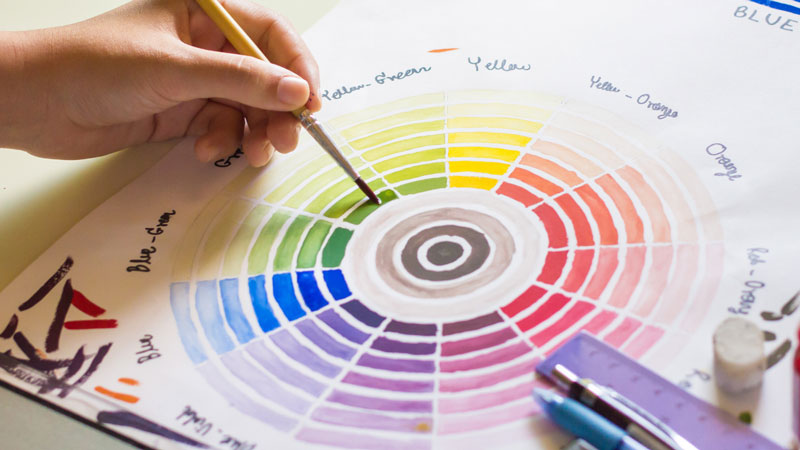
1. Create Thumbnails – Thumbnails are small preliminary drawings that serve as a roadmap of sorts. These are small, loose, and quick drawings. It is important that thumbnails are proportional to the finished surface.
Thumbnails allow the artist to make comparisons between shapes, values, and space that will manifest in the finished art. Compositional issues will show themselves in a thumbnail drawing and changes can be made early in the process.
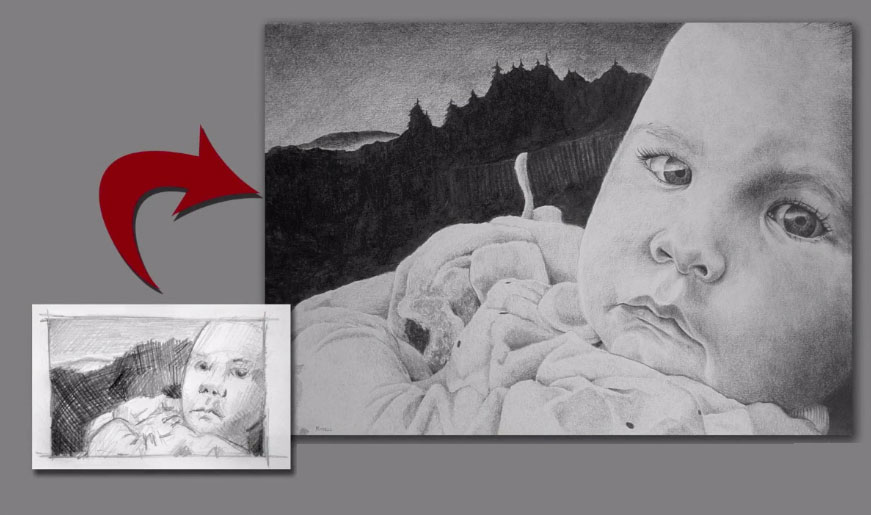
While there are no rules concerning how many thumbnails to make, I would suggest to making at least “3”, even if you are convinced that the first one that you draw is the best.
The more that you create, the more creative opportunities will reveal themselves to you.
2. Consider Balance – Every element that you include in a composition will have a visual weight. Larger objects that occupy more pictorial space will be “heavier”, while smaller objects will be “lighter”. Compositions should be balanced based on the visual weight of the elements within the picture plane.
A good way of thinking about this balance is by comparing it to a teeter-totter.
Visually “heavier” elements will need to be balanced by negative space and “lighter” elements.
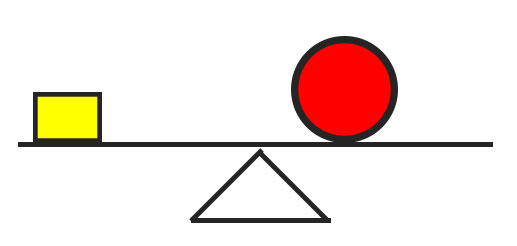
In the above example, the red circle is placed closer to the center of the composition to balance the smaller yellow square on the far left of the picture plane. Ample negative space is left on both sides to balance the weight.
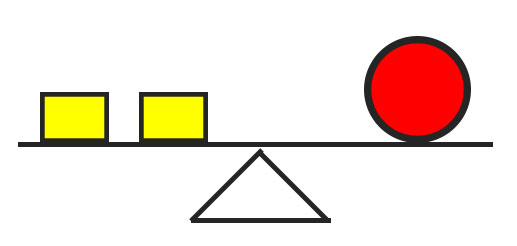
In the second example, an additional yellow square is added. To balance the composition, the red circle is moved to the right, since it is visually “heavier”.
3. Create Eye Movement – Eye movement refers to the manner in which a viewer interacts with an artwork. Your eye typically “enters” the work, flows through the piece, and then exits the picture plane at some point.
As artists, we can control (to an extent) how our viewers “move” through the work. The arrangement of subjects and elements within the picture plane can affect the “flow”.
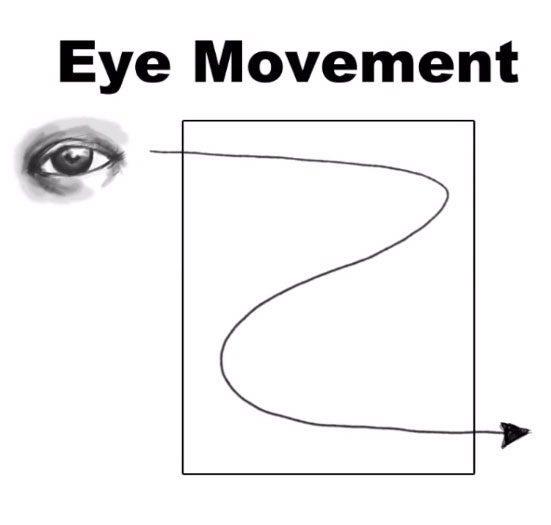
Ideally, you will want the arrangement to pull the viewer’s eye around the entire composition. Avoid having a centralized focal point which cause the viewer to get “stuck” in the piece.
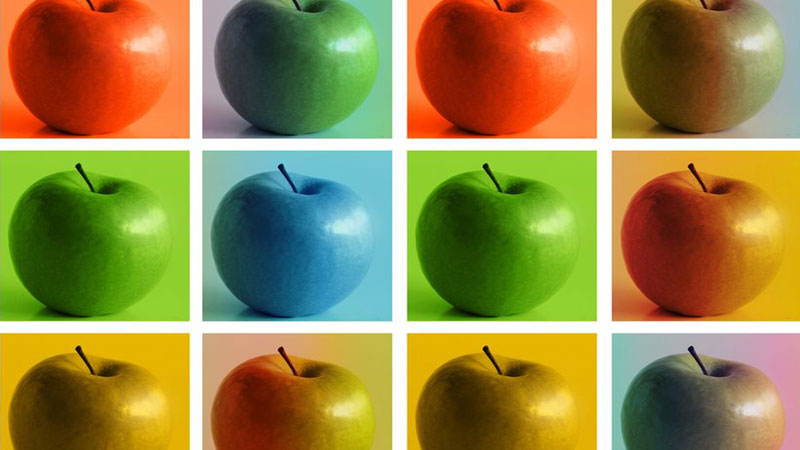
4. Create Unity By Repeating Colors – Good compositions are unified. One of the best and easiest ways to create unity is through repetition. Repeating elements or “motifs” in an artwork will almost always lead to a harmonious arrangement.
Of course many different elements can be repeated – line, shape, textures, etc. However, some people overlook the importance of repeating colors.
If a color is used in one location of the artwork, it should probably be used in another location of the piece. This action balances the use of color and helps to harmonize the composition.
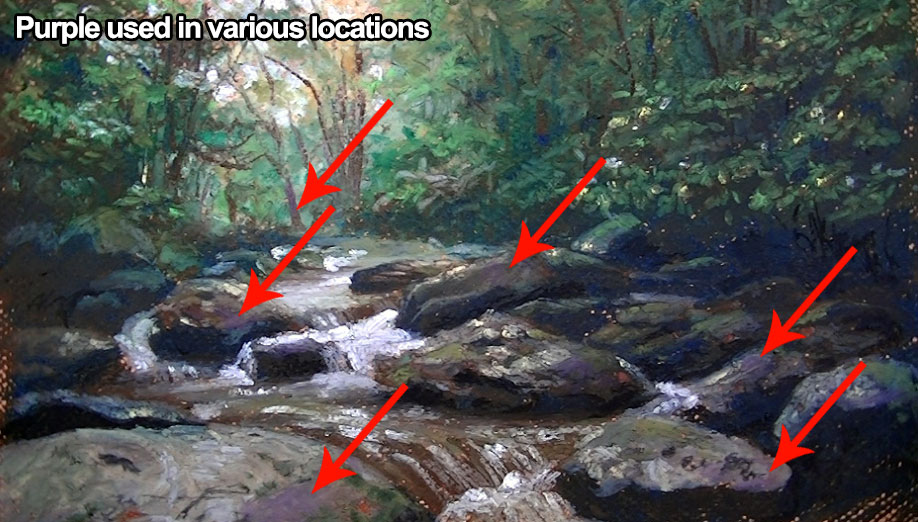 In the above example, light purple is used throughout the composition. It is placed on a variety of objects in order to unify the color usage in the work.
5. Check Your Composition in a Mirror – Throughout the process of planning your composition, you should always be checking the success of your decisions. It’s easy to get caught up in the “artistic process” and not see your work with a “critical eye”.
To give yourself a fresh perspective, try holding your composition up to a mirror. You will see a reverse image of your arrangement and often see mistakes that were missed.
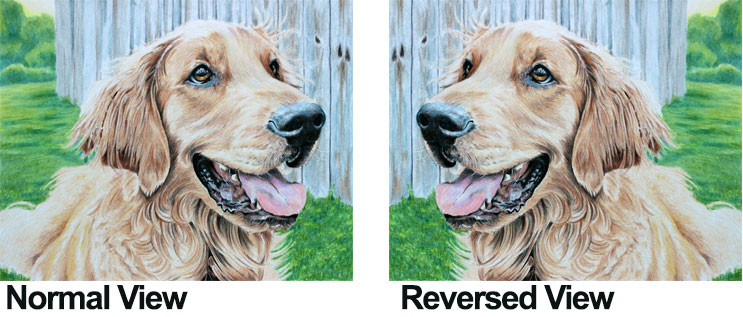
Strong compositions are typically strong no matter which way they are viewed. So, if your composition passes the “mirror test”, then it’s probably safe to assume that you have a strong composition on your hands.
Next time that you sit down to create, consider your composition. Thoughtful planning can go a long way in improving your compositions and your success as an artist.
If so, join over 36,000 others that receive our newsletter with new drawing and painting lessons. Plus, check out three of our course videos and ebooks for free.
The Best Books for Learning How to Draw
Instructional videos are great for learning because the artist can demonstrate techniques in real time and explain their actions and thought process throughout the video. Instructional videos meet many styles of learning and for this reason are a popular platform for learning. Videos are also more accessible than ever. Just about any skill can be learned by watching a series of videos on the internet.
Now that videos are part of our everyday lives, it’s easy to overlook the wonderful information that you can get from traditional books.
Books are Special
There’s something to be said about holding a book in your hands. The thickness – the weight. The stiffness of the binder. A book is like a new adventure in your hands. There’s a special intimacy with a book. I had my favorites growing up (art related and non-art-related). I can still remember spending hours with certain books, studying the pictures over and over again. As much as I love technology, some experiences you can only get from a physical book.
Along my journey of drawing, several books have had a great influence on me and have helped along the way. I’d like to share with you three of the books that I have most enjoyed and provide a little insight on why they were helpful.
Books for Drawing
(Some of the following links are affiliate links which means that I earn a small commission if you purchase at no additional cost to you.)
Drawing on the Right Side of the Brain
No book has a greater influence on my drawing development than Drawing on the Right Side of the Brain by Betty Edwards. I was first introduced to the book when I was about 11 or 12 years old but overtime it has helped to mold my opinions about drawing.
The book presents an analytical approach to drawing. It suggests that drawing is an activity that happens in your brain and that anyone is capable of drawing well. The book explores how our mind sees and understands the world around us. By understanding how we see, we are better equipped to communicate subjects in our drawing.
The book includes drawing exercises and case studies while providing the knowledge and mindset for success in drawing. This book is highly recommended for anyone wanting to improve their drawing skills.
Click here to buy Drawing on the Right Side of the Brain
Drawing Course – Charles Bargue and Jean-Léon Gérôme
A 19th century classical drawing course which presents a series of “plates” to copy. It is a presented as progression of drawing exercises. Each exercise builds upon the last. The entire “course” is focused on observational drawing from a classical perspective. Many of the plates are drawings from cast sculptures. It is incredibly detailed-oriented.
The course eases the student at the start with line drawing exercises but becomes extremely rigorous. I can honestly say that a beginner may become discouraged and put the book down, so I would recommend this book for intermediate and advanced artists.
If you are serious about drawing, then this book needs to be in your collection.
Click here to buy Drawing Course – Charles Bargue and Jean-Léon Gérôme
Drawing for the Absolute and Utter Beginner
This book is a fantastic book for beginners. I have this book in my collection and I still refer to it on occasion. You’re not going to find elaborate drawings that are overwhelming for the beginner. Instead, you’ll find straight forward strategies for finding success with drawing with examples that are actually manageable for beginners.
Lessons within the book are logically sequenced so that each lesson builds upon the last. The book is beautifully laid out and easy to follow along with. What I especially like about the book is that it clearly points out common beginner mistakes with illustrated examples. It then clearly explains how these mistakes are resolved.
These are just a few of the books in my collection that I refer to often and cannot do without. They have helped me along my drawing journey and I am sure will help you along yours.
Click here to buy Drawing for the Absolute and Utter Beginner
Do you have any drawing books that you absolutely love? Share them in the comments below.
If so, join over 36,000 others that receive our newsletter with new drawing and painting lessons. Plus, check out three of our course videos and ebooks for free.
We Can All Be Masters
It’s mesmerizing to watch masters work, layering mark after mark with such speed, grace, and accuracy.
Unfortunately, for someone with less experience drawing, watching a master work can also be discouraging.
We watch the master work and think to ourselves, “I’ll never be able to that”. We make the assumption that the master has an ability that we don’t have – often referred to as “talent”.
And when we dismiss the skills of the master as a “talent”, then we cut ourselves off from ever attaining the level of skill that we are all capable of.
The reality is that we can all be masters. The problem is most of us simply don’t believe this.
Let’s take a look at a few examples. Maybe they will help to silence the voice of the doubters.
Case Study #1 – Mozart
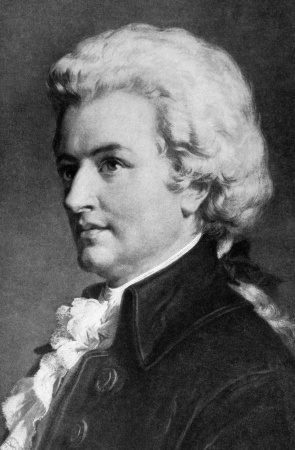
Wolfgang Amadeus Mozart composed over 600 works in his short life. He was considered by many to be a prodigy, composing his first work at the tender age of 5. He has influenced countless composers and is clearly considered a “master” in his field.
It’s easy to brush off Mozart’s accomplishments as acts of “talent” – that he was simply born with this skill. After all, how else could anyone compose at such an early age?
It’s when we look deeper into Mozart’s life that we find the real secret to his mastery.
Mozart’s father, Leopold Mozart, was an accomplished composer himself. Not only was he a composer, but he was also a teacher. He even wrote a textbook on the violin. (Coincidently one of Mozart’s first instruments.)
So, this begs the question, would Wolfgang Amadeus Mozart have ever become the great composer from history if it were not for his father’s instruction?
Case Study #2 – Picasso
No introduction is necessary for this master. We all know the accomplishments and fame of Cubist artist, Pablo Picasso. He is, perhaps, the most influential artist of recent history.
Like Mozart, Picasso was considered a prodigy, showing great artistic skill at a very early age.
But it was by no accident! Like Mozart, Picasso’s father, José Ruiz y Blasco was also a drawing teacher at the Escuela Provincial de Bellas Artes. He guided his young “soon to be famous” son to art and helped to develop his skill.
Case Study #3 – A College Mate – It’s Never Too Late
It’s easy to dismiss the examples of Mozart and Picasso. It’s easy to point out that they started so early, convincing yourself that it’s just too late for you.
Luckily, it’s never too late to become a master. I have personally watched a person grow from a true amateur to a master in just four short years.
In art school, students are always comparing their skills to those of their classmates. It’s a competition of sorts, especially when your specialty is in illustration, as mine was.
I remember meeting Sean (Not his real name) in one of my drawing classes during my first year in the program. He was terribly shy and awkward.
I wish that there was a nice way to say that Sean’s work was terrible. But there isn’t, so I’ll leave it at that.
I remember thinking to myself, “What is this guy doing in this program?”
I knew that he wouldn’t make it and by year’s end, he’d be majoring in “Business”.
But every time I came to the studio, Sean was there. In a back corner of the room, he would sit, talking to no one, but drawing intensely. Late at night or early in the morning, it did not matter. Sean was there and he was working.
Over the next four years, Sean’s work improved. It was gradual, but it was noticeable.
His improvement was a direct result of hard work. It was his desire and commitment.
Each graduating class issues an award for the most outstanding student. Sean won the award for “The Most Outstanding Illustrator” for our class. He was clearly the best.
Sean had become a master.
The Master’s Hand
When we see the master make marks in a drawing, we are watching the expertise that has been developed after hours upon hours of practice. There’s nothing magical or mystical about it.
Over time, the ritualistic practice of the craft turns into intuition. Marks are made with speed, grace, and accuracy. In the beginning stages however, they were slow, awkward, and inaccurate.
Michelangelo is quoted as saying, “If people knew how hard I had to work to gain my mastery, it would not seem so wonderful at all.”
The question isn’t whether or not you’re capable of becoming a master – the question is how hard are you willing to work to become one.
If so, join over 36,000 others that receive our newsletter with new drawing and painting lessons. Plus, check out three of our course videos and ebooks for free.


Why Art Teachers are The Most Important Teachers in the School
Let me first be clear – ALL teachers are important.
I think, however, that there is a tragic misconception when it comes to art teachers, and other teachers in the Fine Arts for that matter. Some schools refer to these teachers as “Specialists”, which is a bit derogatory. Referring to them in this way, makes them sound expendable. And unfortunately when budget concerns come up, they are often the first teachers to be cut. This practice simply has to end, because our future is at stake.
The World Has Changed
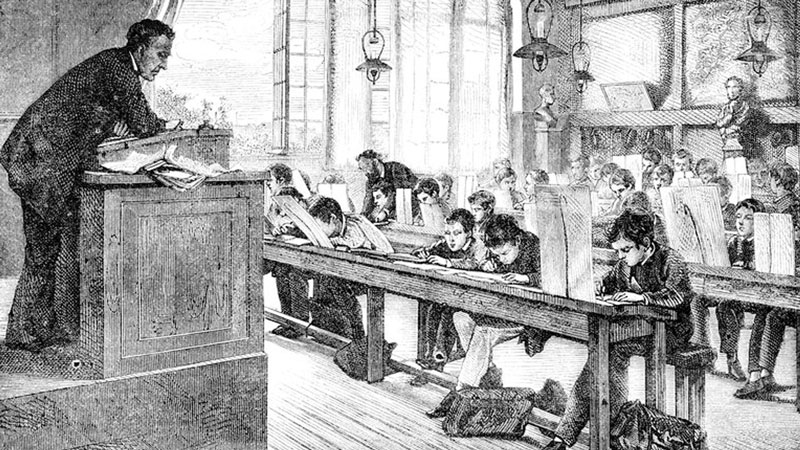
In the last decade, our world has changed dramatically. If you look at the changes that have taken place in just the last twenty years, it is even more overwhelming. Yet educational philosophies and practices have been painfully slow to keep up. We are teaching students today in the same manner that we taught them twenty years ago.
Preparing them for a world that simply doesn’t exist anymore is a massive mistake.
We are starting to see the results of this educational debacle in the number of young people that are college educated, yet cannot find a job. Twenty years ago, if you were qualified, jobs were easy to find. You went to work for a corporation, firm, factory, or service industry and earned a nice paycheck. These jobs still exist, but they are fading away. Our world has changed, and if we don’t wake up, our future generations will suffer greatly.
We are teaching students to go to college to learn how to work for someone else in positions that are disappearing. It’s no wonder why we have so many “qualified” young people that are jobless.
The following video by Seth Godin, one of the most influential thinkers of our period, nails it…
Why Are We Testing So Much?
Our students are tested far too much. The result is that students want to know the answer so that they can put it on a test. We have taught them to believe that there is just one right answer to a problem and if it’s not on the test – it’s not important. The world doesn’t work this way. Testing has its place, but it should be a measure of the teacher’s success or failure in teaching the material – not a measure of the student.
The problem is that our students are not learning to be thinkers. Instead, they are learning to be memorizers, which is pointless in the new Information Age in which we exist. Students possess the world’s collective intelligence at their fingertips, many of them carry it around in their pockets, yet so many schools ban the use of cell phones.
The Internet Has Created a New Period in Human History
The internet and related technology has changed the world and should change the manner in which we approach educating students. The internet has made it possible to accomplish things that were not dreamed before its inception. It has changed the way commerce works and it has changed the world economy for which we are preparing students.
We should be preparing students for the new world, one that harnesses the technology that exists, one that pushes humankind forward. The key is creativity and innovation, and teaching these two things are the art teacher’s specialities.
The New Renaissance
Never in the history of mankind has there ever been a better time to be a “creative”. It is the creative individuals that are finding success today. Simply look at at the world around you, and you’ll quickly notice the opportunities that exist for those willing to be creative, to take chances, to innovate.
It is my opinion that we have already entered into a new Renaissance, one in which true artists are flourishing and will be for the foreseeable future.
What Art Teachers Do
Art teachers teach creativity and innovation. They teach multiple answers to problems. They encourage mistakes and experimentation. They teach students to be thinkers – not memorizers.
Art teachers are teaching the essential skills that are necessary for students to be successful in this new age.
So why are we cutting the most important positions from our schools?
If so, join over 36,000 others that receive our newsletter with new drawing and painting lessons. Plus, check out three of our course videos and ebooks for free.
Linear Perspective That Is Truly Moving

The most common forms of linear perspective include:
- 1 Point Perspective, which uses one vanishing point placed on the horizon.
- 2 Point Perspective, which uses two vanishing points placed on a horizon line.
- 3 Point Perspective, which uses two vanishing points placed on a horizon line, and another placed either above the scene or below it.


The Italian architect, Fillipo Brunelleschi is credited with “discovering” linear perspective early in the 15th century. It has been used by countless artists, architects, and designers throughout history.
Perspective, being a rigid and calculated approach to drawing, has the potential to produce drawings and paintings that may translate as “stiff” and “stale”. If the artist is not careful with its use, the work can look manufactured or synthetic.
But what if the painting itself seemed to move according to your viewing angle?
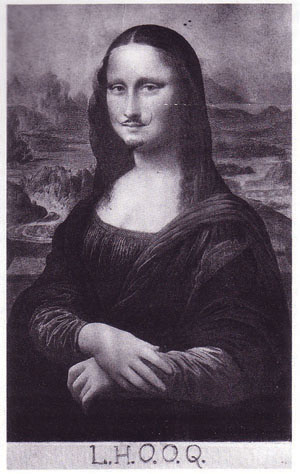
“Reverspective” by Patrick Hughes
Patrick Hughes, a London-based artist, has managed to make truly moving paintings using perspective. He is recognized as the creator of “Reverspective” – an approach to painting that creates an optical illusion. As the viewer approaches and views the painting, the imagery appears to move according to the viewing angle. As the name implies, it is accomplished using perspective, but in reverse.
Have a look at this video in which Mr. Hughes explains the paintings and be amazed at how your brain and eye reacts to them…
Here’s How it Works
The works are produced as relief paintings. The areas of the painting in which you would expect to recede towards the vanishing points, actually protrude instead. This is accomplished by creating a painting surface using raised surfaces that are cut and assembled at precise angles. Everything that is rendered in the painting is done so according to the rules of perspective. The result is a painting that appears to move according to the viewer’s angle.
If you are looking to try this out on your own – a resource and a warning for you.
UPDATE: The resource is no longer available, but the warning is important!
Now for the warning…Patrick Hughes is the creator of “Reverspective” and is protective over his creation. He seeks out artists that copy his methodology, and according to his website, sues them. He also posts a listing of the artists that use his idea, adding written insults about them on his site. You can read them here.
Additional Resources
You can check out more about Patrick Hughes at his website…http://patrickhughes.co.uk/
Mr. Hughes is also an author and has published several books. You can take a look at his books and purchase here.
If so, join over 36,000 others that receive our newsletter with new drawing and painting lessons. Plus, check out three of our course videos and ebooks for free.

Perfectionism – The Enemy of the Artist
Do you find yourself not finishing a drawing or painting because it’s “not right”?
Do you frequently start over?
If you answered yes to any of these questions, then you are facing a mighty enemy – an enemy of the artist.
This enemy robs your productivity. It steals your creativity. It can make you question yourself as an artist. It can leave you feeling discouraged. It can ruin your artistic journey – if you let it.
Most artists have wrestled with this enemy at some point. The successful ones overcome it.
Know Thy Enemy
The enemy of the artist is perfection.
It will never be achieved in a work of art. Nor has it ever been achieved in any work of art that has ever been created.
If we approach the surface with an expectation of perfection – then we are doomed from the start. We will get stuck. We will not finish. We will start over.
Perfection is unattainable.
As soon as imperfection is accepted – or even embraced – then our work improves. Our growth is renewed because the restriction of “perfect” is lifted.
Ironically, it is the imperfections that draw most of us to creating. It is the imperfections that pull us into artworks – and make us stay there. The brushstrokes, the marks, the visible “hand” of the artist. It is all imperfect.
Artistic Excellence is Not Perfection
We should strive for artistic excellence, but not confuse this with perfection. Perfection is unattainable. Excellence is achievable.
The definition of excellence in a work is different for everyone. Every critic, every artist, every person will define excellence on their own terms. The only definition of excellence that matters to the artist is the one that they define for themselves.
Excellence does not happen when perfectionism is in the way. There are no excellent unfinished works. Excellence occurs from study, practice, and execution. Excellence is born from mistakes.
How to Defeat The Enemy
If you are one of the many artists that is struggling with perfectionism right now, let me offer an approach to defeat it.
1. Recognize That Your Work Will Never Be Prefect – You must first accept the notion that your work will never be perfect. Not only accept this idea, but embrace it. Remember, it is the imperfections that pull others into our work.
2. Finish Every Work – Make a commitment to yourself to finish every work that you begin. Work through the imperfections, even with simple sketches in your sketchbook. At all costs, form this habit.
3. Strive for Excellence, Not Perfection – Excellence is developed over time and only happens as mistakes are made. Therefore, mistakes should be embraced – they are a sign that growth is happening. Don’t ignore them, but allowing them to stop you leads nowhere.
You Are Not Alone
When the enemy rears its ugly head, remember that you are not alone. We all struggle in our battles against it. It is one of the biggest killers of creativity. It is a powerful enemy – but one that can be defeated.
If so, join over 36,000 others that receive our newsletter with new drawing and painting lessons. Plus, check out three of our course videos and ebooks for free.
30 Day Sketchbook Challenge
It’s time again for the annual contest here at TheVirtualInstructor.com. Each year, about this time, I host a contest. Past contests include a book give away and an artist’s postcard event. This year’s contest is…“The 30 Day Sketchbook Challenge”.
The Challenge
The challenge is simple. For the next 30 days commit to draw at least one sketch in your sketchbook from observation every day. Each sketch should represent 20-30 minutes of attention (it can be more). It can be any subject matter that you wish, but it should be drawn from observation. Any medium is acceptable.
How it will Work…
If you chose to take on the challenge, draw a sketch in your sketchbook every day for the next 30 days. Choose one of your sketches and post it over at the forum. I have created a special thread for you to do so here. (If you are not registered at the forum, you will need to do so before posting – it’s free.)
You do not have to wait until the end of the contest to post your work. If you complete a drawing today, and want to share it – go for it. You can share as many of your sketches as you like. (But please keep them clean and appropriate. I will remove any images that violate the terms and conditions of this site.)
On September 10, 2014 the contest will end and I will choose one winner at random from the posts on the thread.
The winner, which could be you, will be notified by September 15, 2014.
What You May Win
If you are the winner, you will get the following…
- Lifetime Membership at TheVirtualInstructor.com (If you are already a member, you will become a lifetime member and all recurring fees will be canceled.)
- TheVirtualInstructor.com T-shirt
- Sanford Prismacolor Premier Drawing Kit
- Hardbound Sketchbook
- Prismacolor NuPastels set of 24
If so, join over 36,000 others that receive our newsletter with new drawing and painting lessons. Plus, check out three of our course videos and ebooks for free.