Let’s Have Some Fun
I decided to bring in my 11 year old daughter, Avery into the studio to create a painting with me. In this case, we decided to combine watercolor with pen and ink applications to create a line and wash image. In this lesson, you’ll watch Avery and I go through this entire process. So grab your pens and watercolor and join us in this adventure.
The Reference Photo
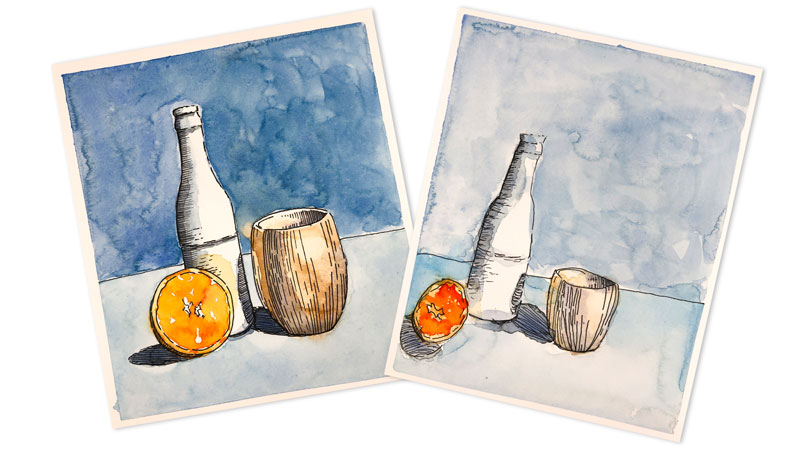
Let’s first discuss the photo reference that we’ll be using. In this case, I found a reference image on pixabay.com. This is a simple still life, featuring only a few objects. Since the subject is relatively simple, almost anyone can complete this project.
The original photo featured a small blue cup. But the since the cup was blue, it was getting lost in the background. I decided to add a bit of contrast to it by changing the color to a brown. This was easily accomplished using Photoshop. Changing the color of the cup made it stand out against the blue background.
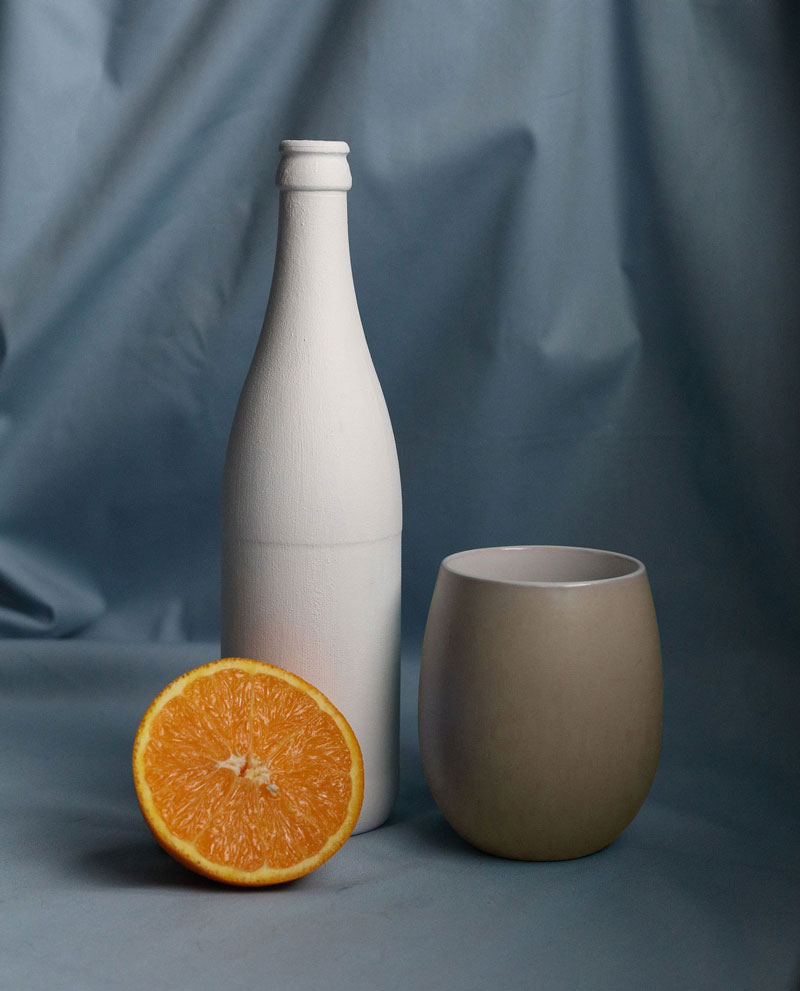
This particular layout features a triangular composition. A triangular composition, like the one we see here, encourages the viewer’s eye to move around the work. We also see that this particular layout features a variety of sizes and shapes, while still staying relatively simple.
I was also drawn to the color combination. As we can see, we’re dealing with mostly blues and oranges. Blue and orange are complementary colors. This means that they are opposites from each other on the color wheel. This provides a high level of contrast, while keeping our palette simple.
Materials That We’ll Use For This Painting
The materials we’re using for this project are fairly simple and most likely, you already have access to.
You’ll need a simple graphite pencil to create the initial sketch. I suggest using a lighter pencil, like an “H”, if you have access to one.
We’ll be working on hot press watercolor paper, which features a smoother surface compared to cold press watercolor paper. Since we’re combining pen and ink with watercolor, we want our lines to be smooth. Hot press paper provides a smoother surface and is better suited for pen and ink applications. If you don’t have hot press watercolor paper, you can substitute it with any thicker paper that will accept watercolor applications.
We’ll be using ink pens to create the pen and ink drawing over our graphite sketch. You can use any ink pens that are water resistant. Stay away from felt tip pens as they will bleed once watercolor is applied.
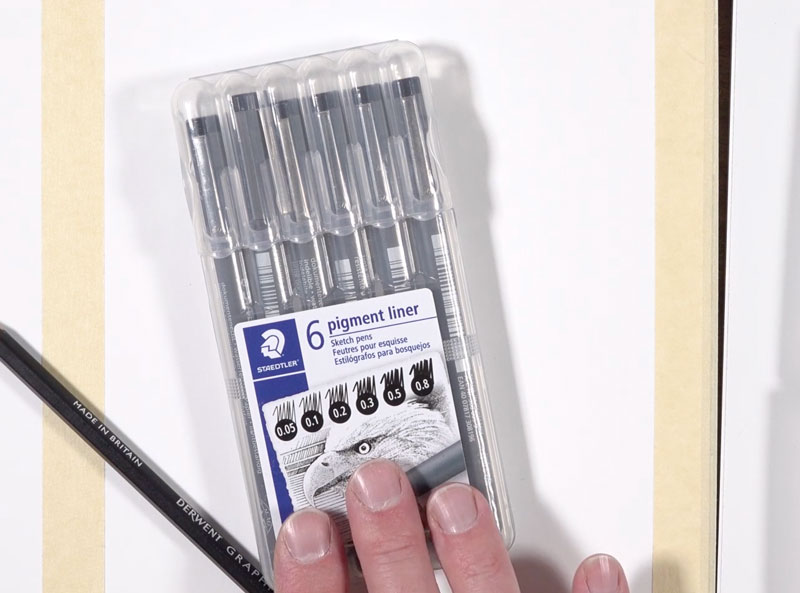
We’ll be applying color with watercolor paints. In this case, Avery and I will be using my Cotman watercolor set by Winsor and Newton. Feel free to substitute any watercolor paints that you wish.
Start With a Sketch
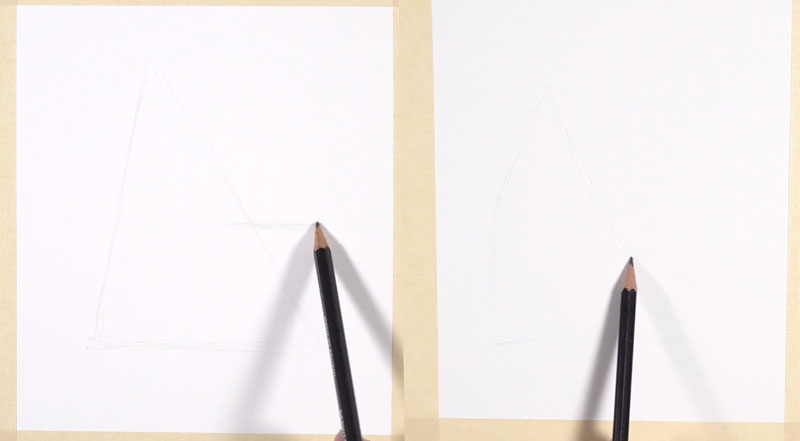
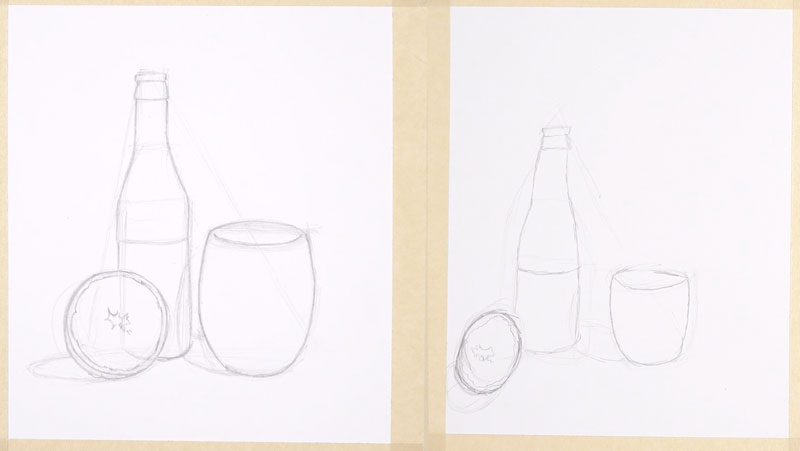
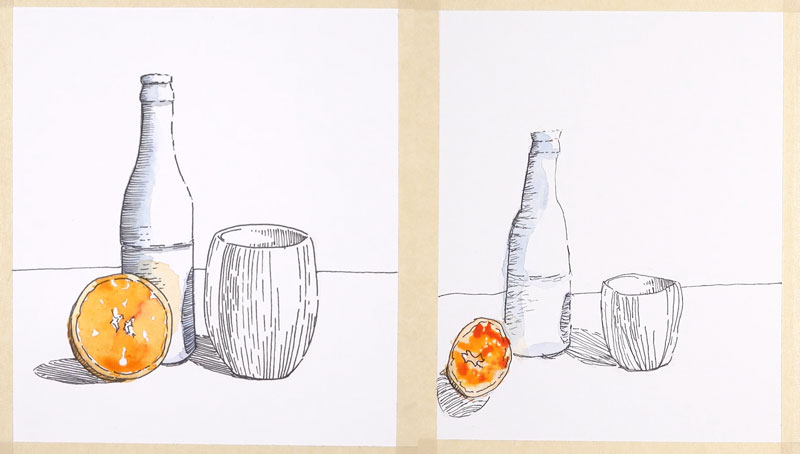
We’ll begin by first sketching out our subject with a graphite pencil on a watercolor paper. We’ll begin by first looking at the basic shapes that we see. In this case, we’ll start with a loose triangle. The top of the triangle can be found at the top of the bottle. The bottom edges are found at the bottom of the orange and the bottom of the cup.
Will also draw a line to indicate the top of the cup coming off of the triangle.
With our basic shapes in place, we can now concentrate on smaller shapes. Will begin with the basic shapes of the bottle. We can see that the bottle is made up of three basic shapes – a longer rectangle at the top, a trapezoid underneath that, and a larger rectangle at the bottom.
The orange is simply a circle. The cup consists of an ellipse at the top, and a rounded rectangular shape underneath. Be sure to draw loosely and lightly in these early stages.
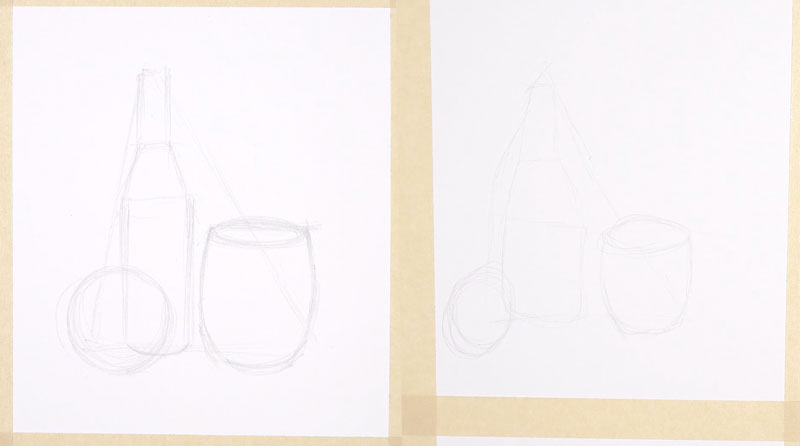
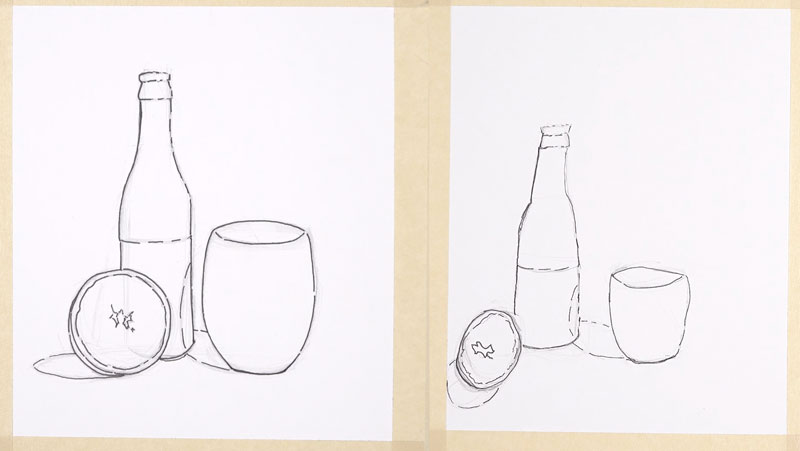
With our smaller shapes in place, we can begin drawing the contour lines. Contour lines are simply another name for outlines.
Using our smaller shapes as a guide, we’ll add the contour lines with a more deliberate mark.
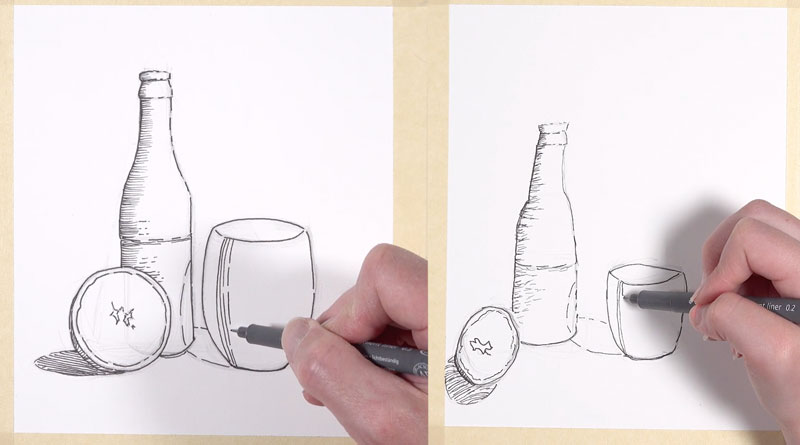
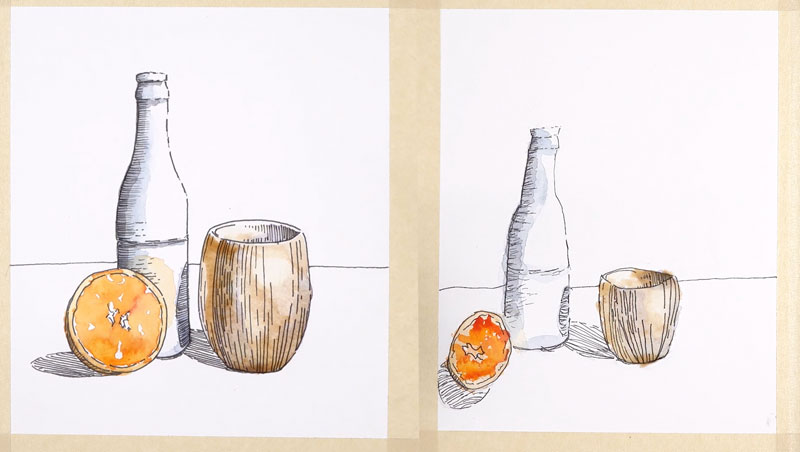
Adding Ink
Once the contour lines are in place, we can begin adding pen and ink applications over the top.
You can use any width of line that you prefer. Since this drawing is relatively simple, a thicker line is fine.
As you add the ink, be aware of the location of the light source. In this case, our light source originates from the upper right-hand corner. This means that we’ll use a broken line on the right side of our objects and a solid line on the left side of our objects.
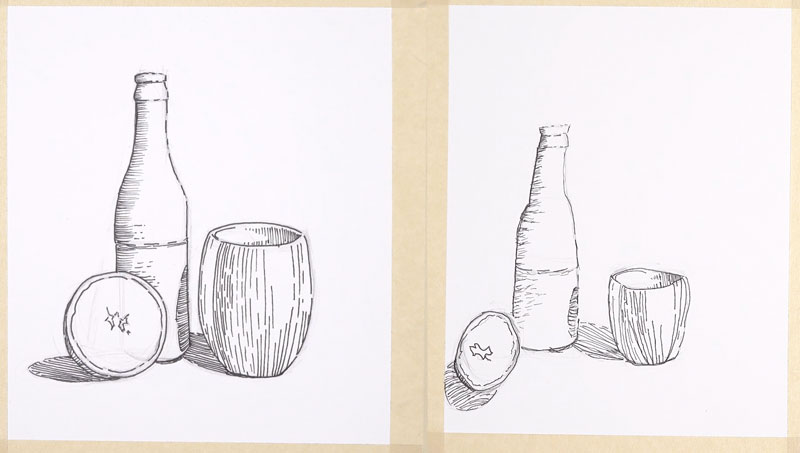
Once all of the contour lines have been established, we can begin adding shading using hatching.
Hatching is a method to add shading to a drawing using lines that do not cross over each other. The closer we place these lines together, the darker the value or shading. The more space that we allow between each line results in lighter values.
Since our light source originates from the upper right-hand corner, most of our shadows will exist on the left side of our objects.
We’ll begin adding shading to the bottle. Starting at the top of the bottle, we’ll add horizontal stroking to indicate the shadow on the left side.
On the orange, we’ll only add shading to the small part of the rind visible on the lower left portion. However, there is a cast shadow behind the orange. To address this area, we’ll add hatching within the shadow shape. Be sure to keep your lines flowing in the same direction.
On the cup, we see that the strongest shadow can be found on the outside, near the left side. We also see that there’s a strong shadow on the inside of the cup. But in this case, it’s on the right side which is closer to the light source.
To add the shading for the cup, will also use hatching. This time, we’ll use vertical hatching. Again, will concentrate marks where we see the darkest value. We can also use broken lines to indicate medium tones and transitions.
There’s a cast shadow behind the cup as well. This cast shadow also makes its way onto the bottle. Again, we’ll use hatching to create the shadow.
After we’ve addressed all of our pen and ink applications and let the ink dry, we can gently erase any remaining pencil marks with an eraser.
Now our pen and ink drawing is complete and we’re ready to begin with watercolor applications.
Adding Watercolor
We’ll begin with our watercolor applications on the bottle. Since the bottle is mostly white, we’ll concentrate only on the area of shadow on the left side. Instead of using black, we’ll combine a blue and a brown. The blue we’ll use is Ultramarine and the brown is Burnt Umber. This combination of colors produces a more natural looking black.
See also: Watercolor Painting Tutorials
After adding a bit of color to the shadowed side of the bottle, we’ll move our way down to the orange. Carefully avoiding highlights, we’ll add orange, yellow, and red to the middle portion of the orange. We can let the colors bleed and mix together.
After letting this area dry, we can address the rind with a slightly lighter and more yellow mixture. The outside portion of the rind is addressed with Cadmium Orange.
There is also a little bit of orange that we can see on the bottle. This is light that is reflecting off of the orange onto the bottle. We’ll add it with quite a bit of water so that it remains light.
Now it’s on to the cup. We’ll start by addressing the darkest areas. In this case, we’ll use a bit of purple to add some color to the shadow. To make our purple, we’ll combine Purple Lake with Ultramarine. This color is added to the areas of darkest shadow.

Once this application has dried, we’ll add a bit of brown over the top of the entire cup. This brown is made by mixing Burnt Umber with a bit of Cadmium Orange and a touch of Yellow Ochre.
Now we’re ready to move on to the background. We’ll use a darker blue for the top and the lighter blue for the bottom. Using broad strokes, with a good amount of color on the brush, we’ll fill in both the top and bottom sections of the background with watercolor.
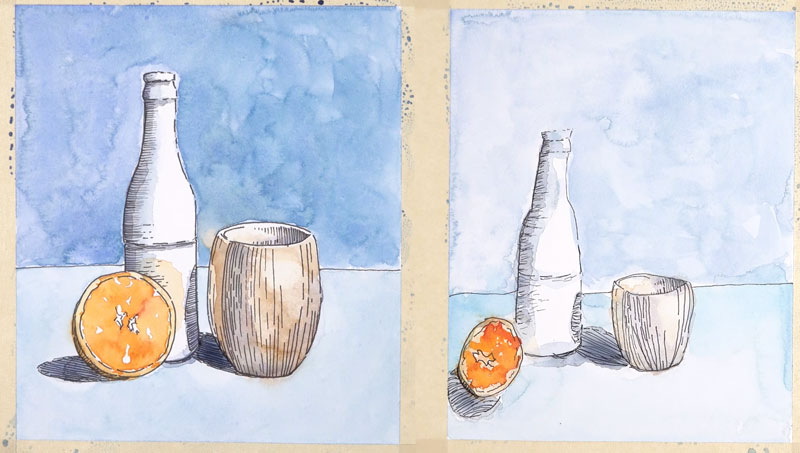
After letting the watercolor dry completely, we can remove the masking tape to reveal our line and wash image of a simple still life.
See also: How to Remove Tape From Your Art Without Tearing
Conclusion
I hope you enjoyed this simple demonstration of combining pen and ink with watercolor. Perhaps, you have a younger student in your house that you can share this lesson with and have a bit of fun together.
If so, join over 36,000 others that receive our newsletter with new drawing and painting lessons. Plus, check out three of our course videos and ebooks for free.