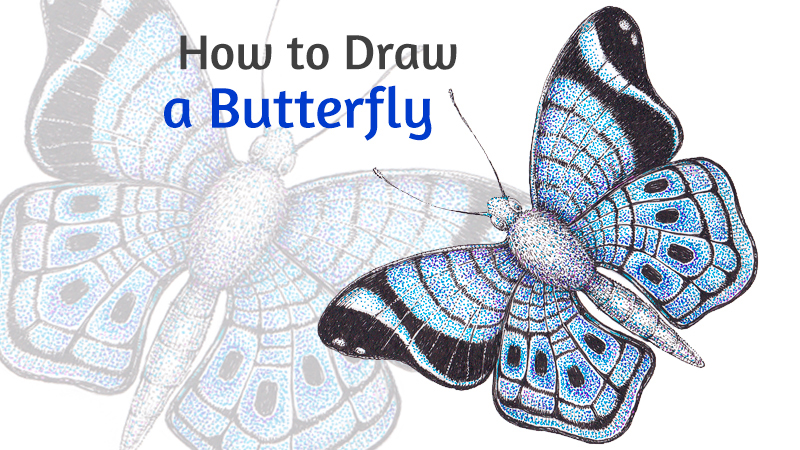
Did you know that butterflies can be found everywhere in the world except Antarctica? I think this fact is just mind-blowing. Actually, these insects have some surprising features and abilities. Let’s learn more about them while drawing!
I’ll show you my process of creating a stylized artwork. By the way, this butterfly drawing can be used as a wonderful decoration for a greeting card. What do you think?
I’ll be using an ordinary an graphite pencil and a couple of black ink liners (mine have the numbers 0.1 and 0.2). A nib pen instead of liners is a nice option, too.
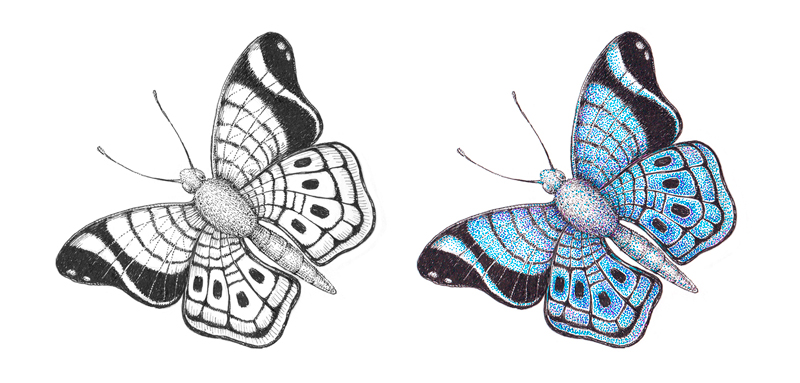
To be honest, I intended to keep this project within the traditional black and white style that presents a visual image in such an elegant manner. However, I found myself thinking about including some color in the middle of the process. That’s why you’ll see two versions of this butterfly drawing at the end of the post. It’s up to you to decide which one is closer to your personal preference!
If you like working with color and enjoy vividness in your art, arm yourself with some colorful tools like gel or ink pens. Anything of that kind will work, and the colors are up to you. My choice was bright blue, dark blue and violet.
Drawing a Butterfly with a Graphite Pencil
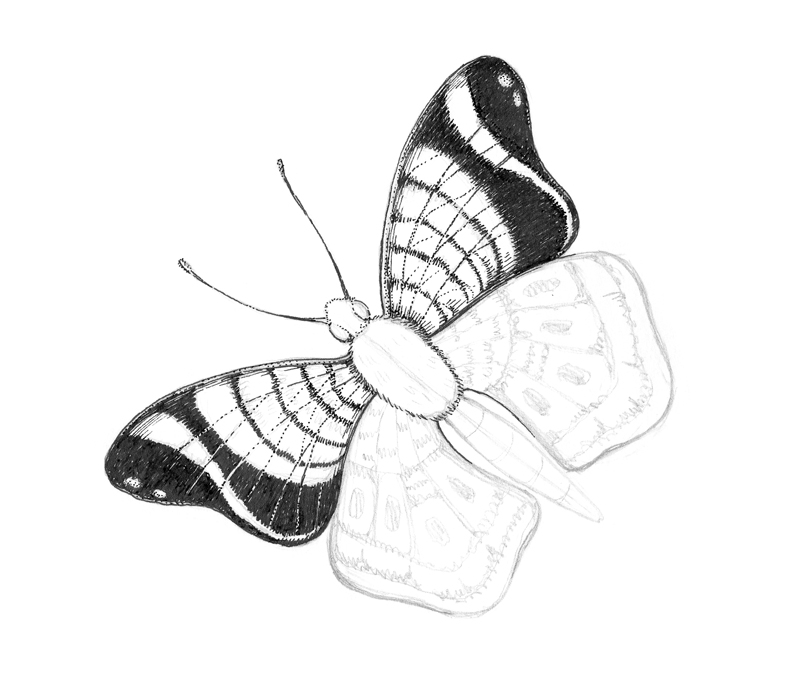
As usual, we’ll start with an underdrawing. This will make the inking process much easier and allows us to work with confidence. Feel free to take a moment and imagine the butterfly that you are going to draw. Think about its pose, pattern, and the composition. Don’t feel that you have to copy what I’m doing exactly. Use what you learn here and apply it to your own drawing.
If you’re going to depict a specific species, having a reference image is crucial. However, my goal is to draw rather a generic butterfly or a composite image.
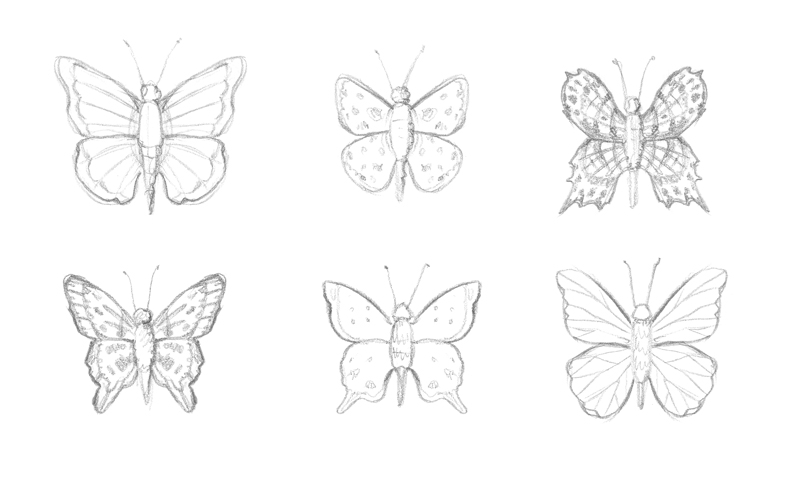
The preparatory stage of the process can be creative. For example, you can sketch some miniature butterflies that have different wing shapes and patterns. Which one is your favorite?
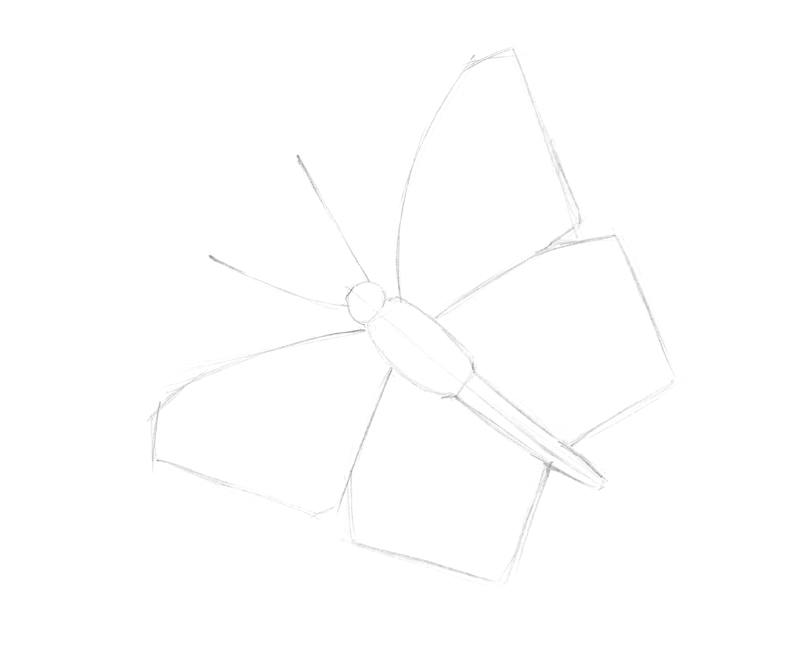
The figure of a butterfly, including the wings, can be divided into symmetrical halves. This symmetry is clearly visible if you observe a butterfly from above, when it is holding its wings flat.
To ensure that we have this symmetry in our drawing, we’ll start with a lightly drawn center line. It will help to take measurements and check the symmetry. If you decide to go for a more complex position of your butterfly, you may still choose to draw a core line. Just note that this line may be drawn at a diagonal.
The butterfly’s body consists of a small head with antennae, a thorax, and an elongated abdomen. Butterflies have six legs but, in my case, we can’t see them because of the overlapping wings. By the way, butterflies taste with their feet – or, more precisely, with special receptors that are located there.
There are two fore wings (the upper ones) and the hind wings (the lower ones). Usually, butterflies hold their wings vertically above their bodies when they rest.
I roughly sketch all the listed body parts. This loose sketch doesn’t have to be perfect – we can refine it later. Actually, even symmetrical objects may have irregularities. A human face is an example of this. This is called approximate symmetry.
To make the drawing more interesting, I position the butterfly in a way so that one set of wings is directed towards the viewer.
I next refine the contours of the wings, making the lines smooth and organic.
The body parts need refinement and additional details too. There are two large compound eyes on the head. These eyes are capable of distinguishing flower shapes or motion. Color perception of a butterfly is exceptionally good, especially in the blue and violet range.
I next add some thickness to the antennae. Butterflies use them to test the air for wind and scents.
The thorax and abdomen usually have a number of segments, but I allow a touch of stylization here. My goal is a drawing of a simplified model of a butterfly, rather than an accurate representation of any real species.
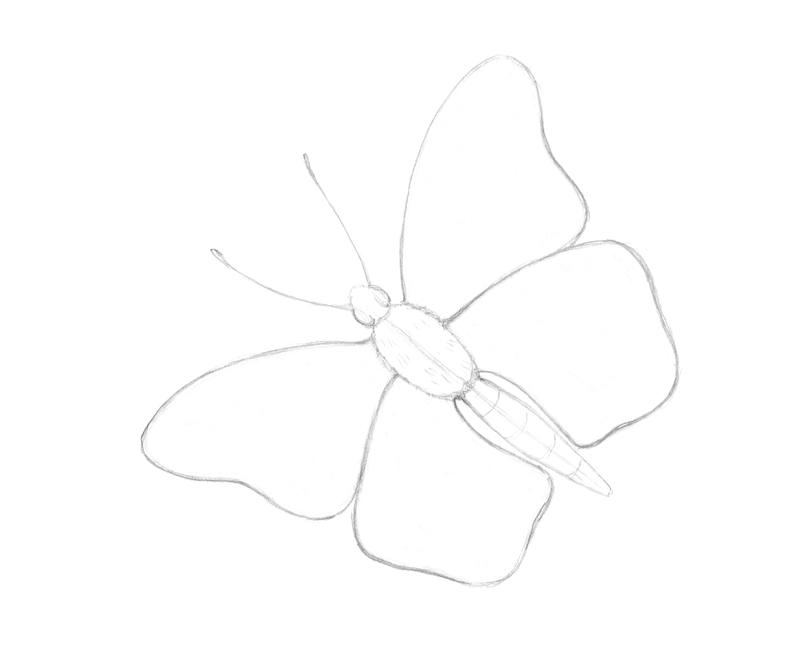
I add an improvised pattern of the wings, based on imagination and various patterns that I have seen on butterflies. This pattern should be more or less symmetrical, so the wings are mirroring each other. Of course, a complex pose may create minor distortions.
By the way, the colors and patterns we see on the wings are made by the reflection of the tiny, pigmented scales that are covering them.
With our pencil sketch complete, we’re ready to add ink to our drawing.
Drawing a Butterfly with Ink
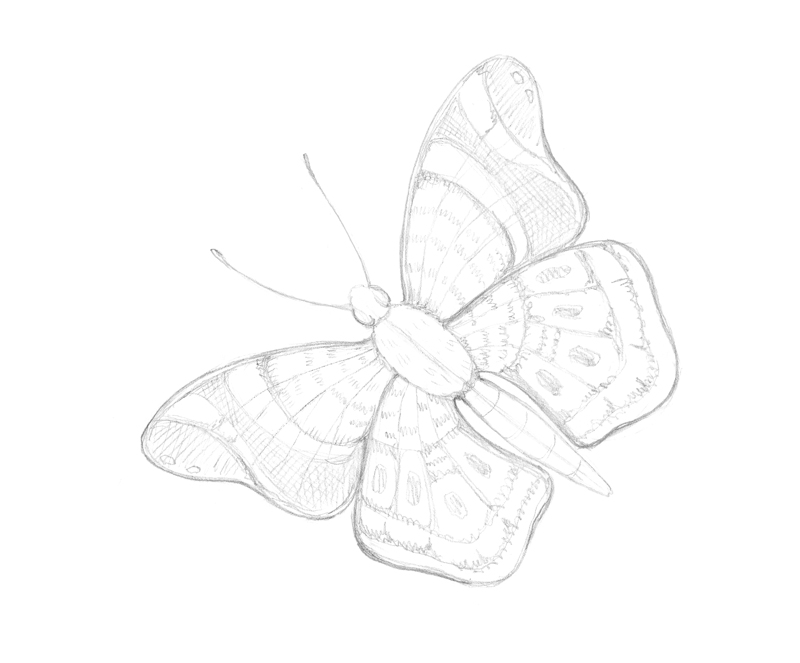
As mentioned above, my goal is to create a stylized, decorative drawing. That’s why I’m going to simplify the drawing, filtering out the visual information that may be too excessive.
With a 0.2 ink liner, I outline the general contours of the upper part of our butterfly. The head and thorax have a “hairy” texture, so I draw their contours as a sequence of short hatches.
Moving the liner back and forth, I create the darker areas in the pattern of the wings. This application is quite dense. As you can see in the image below, these areas don’t have a solid, clear contour, which makes the pattern appear more natural.

Tiny gaps are left open between the ink marks. This creates the illusion of a texture that has a fleecy or velvety quality. I find this to be much more interesting than just a flat texture formed by an even, almost printed-like covering.
The veins on the wings are thin, so we have to be delicate with our applications. I use a dotted line to mark them.
Now it’s time to work on the hind wings and the abdomen.
Using the same approach, I outline the contours and darken some areas of the wings’ pattern. Both sets of wings, the upper and lower ones, should look like an congruent system.
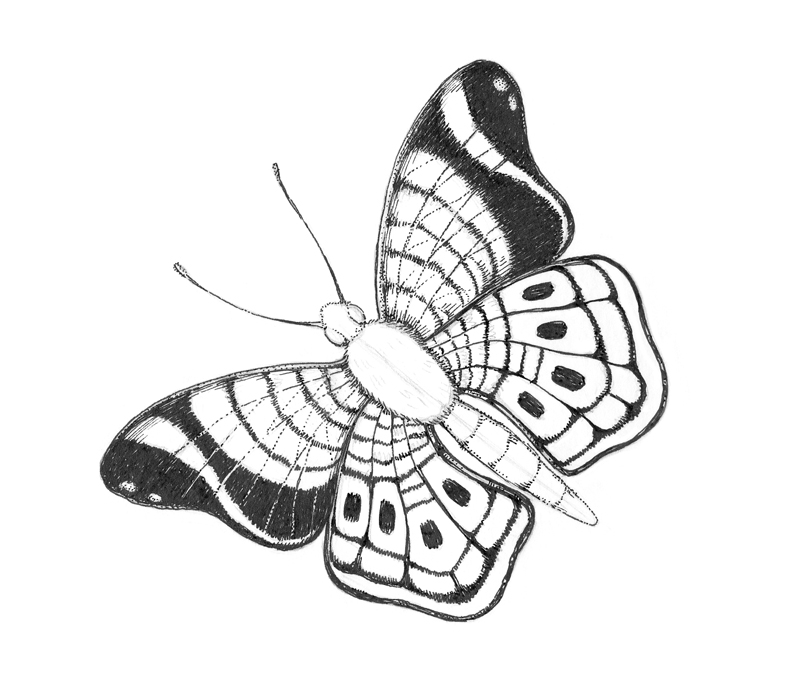
With a 0.1 liner, I add hatching to the wings. The goal is to make a visual connection between areas of strong contrast.
Also, I fill the body (the head, thorax, and abdomen) with short hatches and dots. The sides of the body become slightly darker to give the butterfly more volume. The head and abdomen of our insect have a rough texture, so the direction and length of hatches should reflect this.
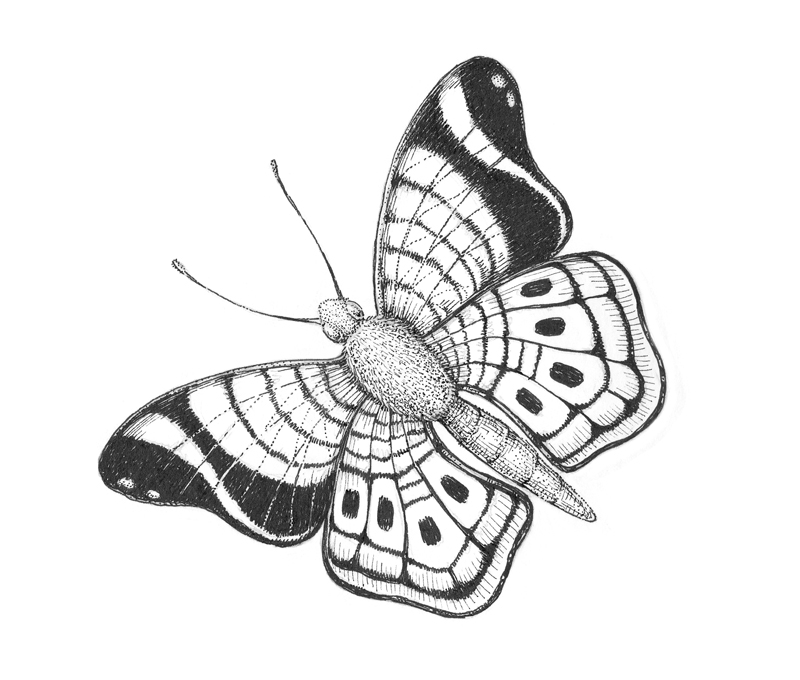
It was at this stage that I got the idea to bring in some color. If I decided to complete this artwork with only black and white, I would add more fine hatching and dots to the wings, probably making them just a bit less flat and stylized.
However, as we turn to color, I put aside the black liners. When it comes to adding any type of color media to black ink art, balance is very important. This balance is achieved in a different way in artworks. But, leaving your drawing at a slightly unfinished state is much better than overdoing it right in the middle of the process. At least, this principle applies to traditional media in which you don’t have the “Undo” button.
So, are you excited to add some color? Let’s do it.
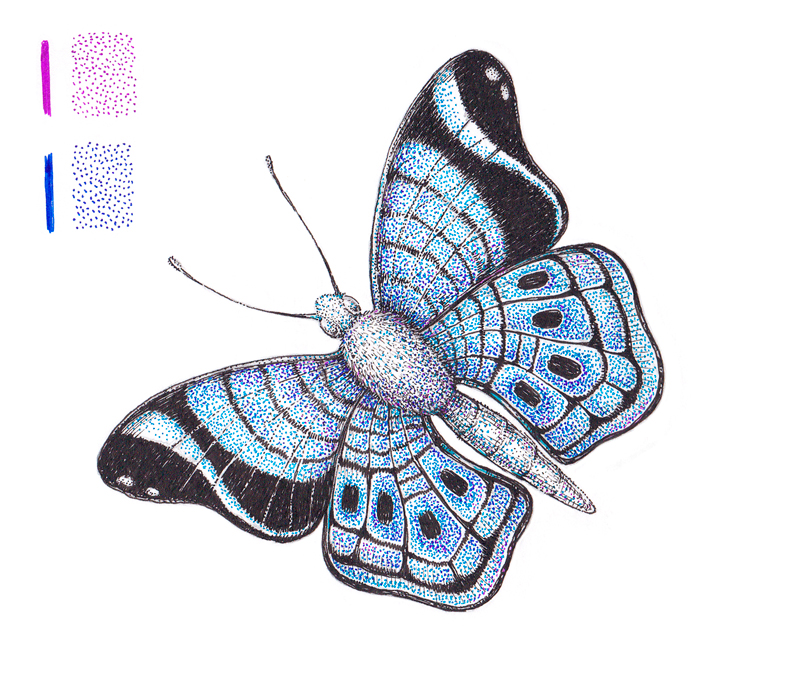
Adding Colorful Stippling to the Butterfly
With a bright blue pen, I add dots to the wings. Stippling is a great technique as it gives the artist control over the density of marks. The density of the marks gives us control over the value and intensity of the color.
For example, there is a wide curved shape in the fore wings’ pattern. I cover just one side of it with dots, creating a gradient from white to bright blue.
I also encircle the black spots found on the hind wings with a dense collection of dots to emphasize these areas.
Generally, I leave some gaps between the dots allowing the white paper to show through. This allows the drawing to “breathe”.
A moderate quantity of dots may be added to the body of our butterfly to create visual unity.

I add more dots with dark blue and violet. There aren’t any rules telling us the particular way or order of combining stippled marks of color. All the hues I picked are close to each other on the color wheel, so they harmonize with each other.
See also: Color Theory – The Elements of Art
I strengthen the inner edges of the wings (those closer to the body), alternating between dark blue and violet. The dark blue dots create an illusion of depth, replicating a soft shadow.
When it comes to the small segments of the wings’ pattern, I choose one side of each segment and insert new dots there. Again, the opposite wings should mirror this, so we’ll repeat this applications on the other side.
Colorful stippling may also be applied to the body parts of our butterfly if so desired.
The artwork is complete!
Conclusion
Thank you for being with me on this creative journey – I hope you had some fun in the process!
It is fair to say that we have two artworks as a result. Both of them have a stylized, decorative feel. However, there is a huge difference in perception, which depends on the presence or absence of color. I’d say, there is no “better option”. These artworks (or, more precisely, two stages of the same process) are just different. Some will prefer the black ink drawing, while others will prefer the colorful drawing.
Which variant do you prefer? Please let us know in the comments!
I wish you much inspiration and luck with your art projects and your pen and ink drawings!
If so, join over 36,000 others that receive our newsletter with new drawing and painting lessons. Plus, check out three of our course videos and ebooks for free.