Perhaps you’re an artist looking for a new way to express yourself. Or maybe you’re an art teacher looking for a project that practically guarantees success across multiple grade levels. A plaster relief sculpture is an excellent way to express yourself and a wonderful project for art students.
Drawing inspiration from found object sculptures made popular by artists such as Pablo Picasso and Marcel Duchamp, this process is both an introduction to relief sculpture and mold-making.
The process is very simple. Here’s a quick overview of the steps involved…
- The artist chooses several small objects as inspiration. (These objects need to be strong enough to be pressed into clay.)
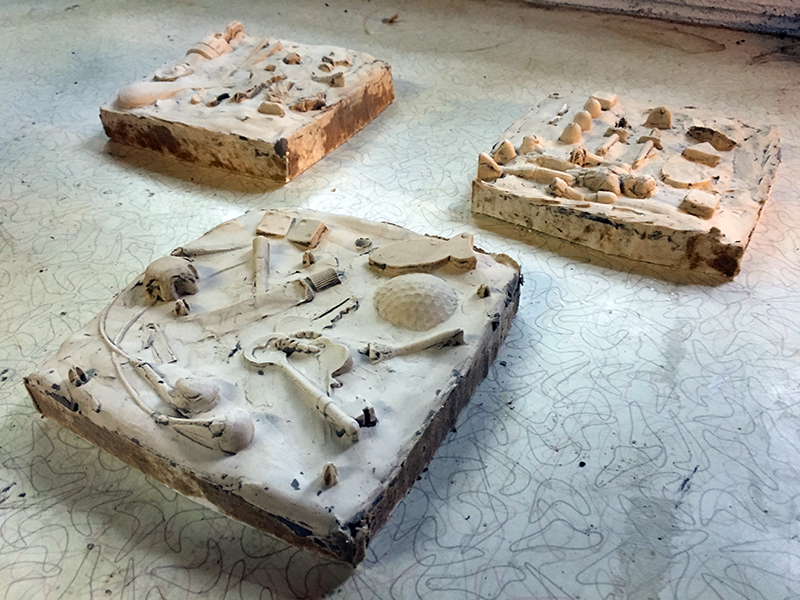
- The objects are then pressed into a layer of earthenware clay to create a mold.
- Plaster is poured into the mold to create a cast.
- The clay is removed once the plaster hardens.
- The resulting plaster cast is painted, hung, and displayed flat on a wall.
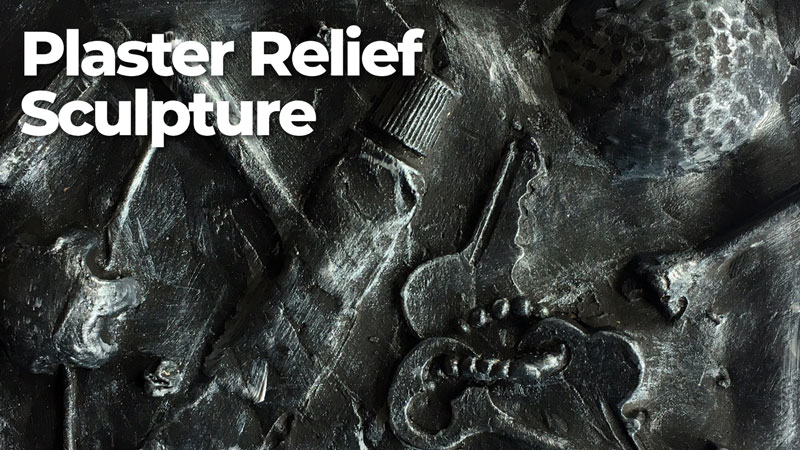
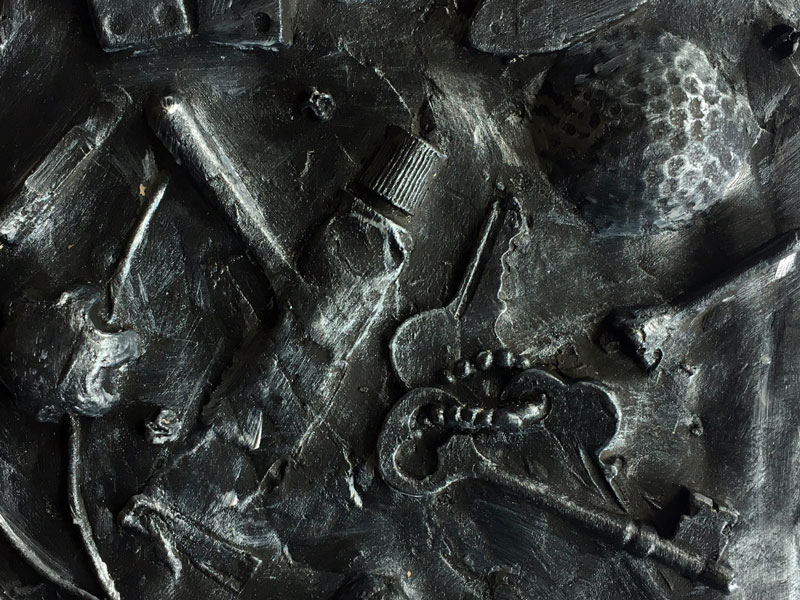
Here’s a look at the plaster relief sculpture that we’ll create in this tutorial…
Vocabulary
Before we go into the steps of this process in detail, let’s take a look at a few important terms…
Relief Sculpture – A type of sculpture in which forms project from a flat surface. This type of sculpture is usually viewed from the front, like a painting.
Mold – A hollow cavity that can be used to produce a cast. Molds are usually created by the impression of an object. Fluid mediums that harden can be poured into the mold. (molten metal, plaster, rubber, etc.).
Cast – The resulting form created by the use of a mold.
Found Object – a natural or man-made object that is found by an artist and kept because of some intrinsic interest the artist sees in it.
Materials Used to Create a Plaster Relief Sculpture
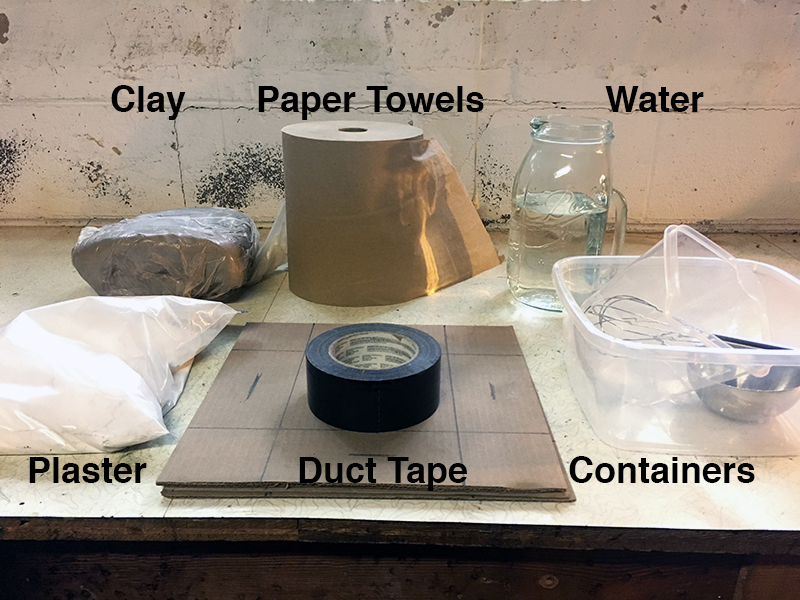
Next, let’s have a look at the suggested materials that you’ll need to create your own plaster relief sculpture…
- Cardboard or Foam Core (12″x12″, or another size)
- Clay (earthenware)
- Plaster of Paris
- Plastic container in which to mix plaster
- Water
- Scissors or a Hobby Knife
- Tape
- Found Objects
- Straw (optional)
- Black and metallic paint (optional)
- Rasp/file (optional)
Planning a Relief Sculpture with Plaster
As is the case with any work of art you create, planning is important. There are two important aspects to consider during the planning process.
The first thing to consider is a possible theme. The artist could explore a thematic concept by choosing related objects. Examples include self-identity, world hunger, family, immigration, etc. In this way, the objects tell the story.
Secondly, the artist may consider a principle of art to incorporate in their design. For example, the artist could demonstrate unity by choosing similarly shaped objects. The artist could demonstrate rhythm by repeating an object across the relief. Or, the artist could demonstrate emphasis by having one object in higher relief that the others.
It’s always a good idea to have a vision of your finished product in mind before you begin. Your sculpture will likely evolve as you create it, so allow yourself some creative freedom.
Creating a Plaster Relief Sculpture Step by Step
Now, we’ll take a closer look at each of the steps involved. There is a little prep work, so we’ll start here.
Step 1 – Create a Box to Hold the Mold
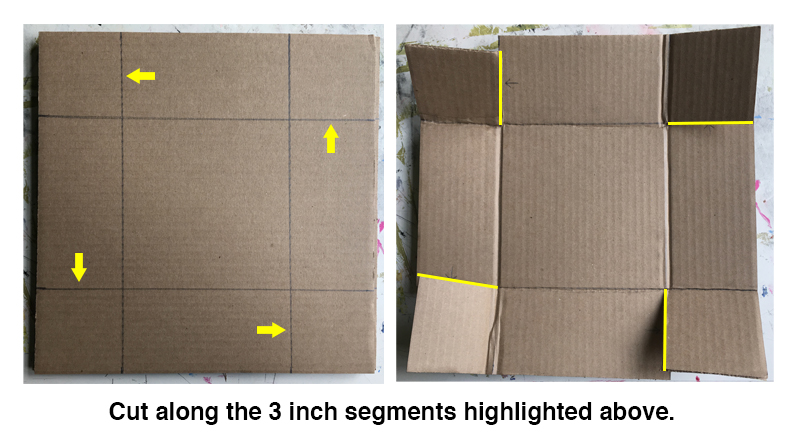
Determine the finished dimensions and cut cardboard to make a box. This box will hold the mold and the cast. The box will need 3″ tall sides at the very least. The example sculpture illustrated here is 6″ by 6″ each. The cardboard dimensions were, before folding into a box, 12″ by 12″. So, add 6″ to the desired finished dimensions. If a sculpture is meant to be 8″ by 10″, then a sheet of cardboard cut to 14″ by 16″ would suffice.
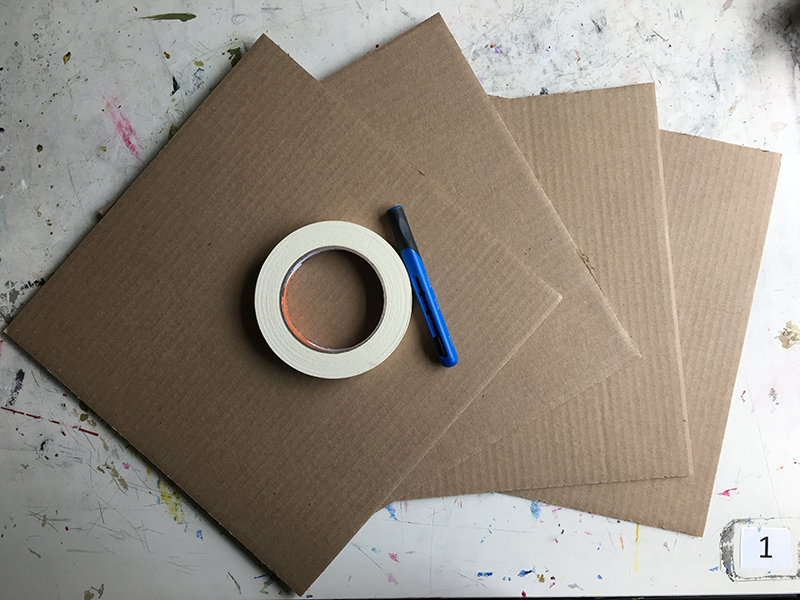
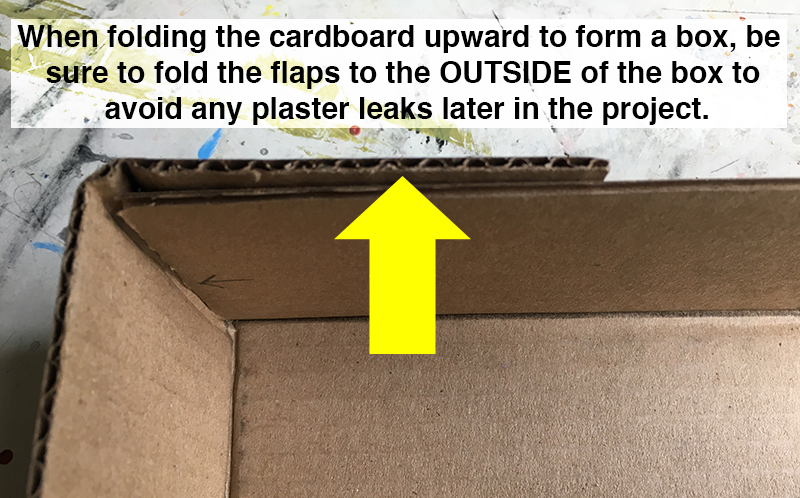
Once the cardboard has been cut to the correct size, we can build the box. Draw a line 3″ in from each side of the cardboard. Look at where the lines cross near the corners. Cut one 3″ segment near each of the four corners. Now bend or crease the cardboard along the drawn lines. Fold the sides upward and wrap the cut portions around the outside of each corner. Tape the flaps down well. It’s a good idea to wrap the tape around the entire outside of the box for added stability.
Step 2 – Add a Layer of Clay for the Mold
Pack the bottom half of the box with regular earthenware clay. Check that the clay fills the bottom 1.5″ of the 3″ deep box. Smooth and even the surface of the clay with clay tools or just use your fingers.
Step 3 – Press Found Objects into the Clay to Create a Mold
Now it’s time to press objects into the clay. Before doing so, decide if the artwork will hang on a wall or rest in a display stand. If the finished work will hang, then press a straw into the clay square about .5″ from one edge (see below). Be sure that the straw is taller than the top edge of the box. Once the cast is made, the straw can be removed, leaving a hole through the sculpture for hanging.
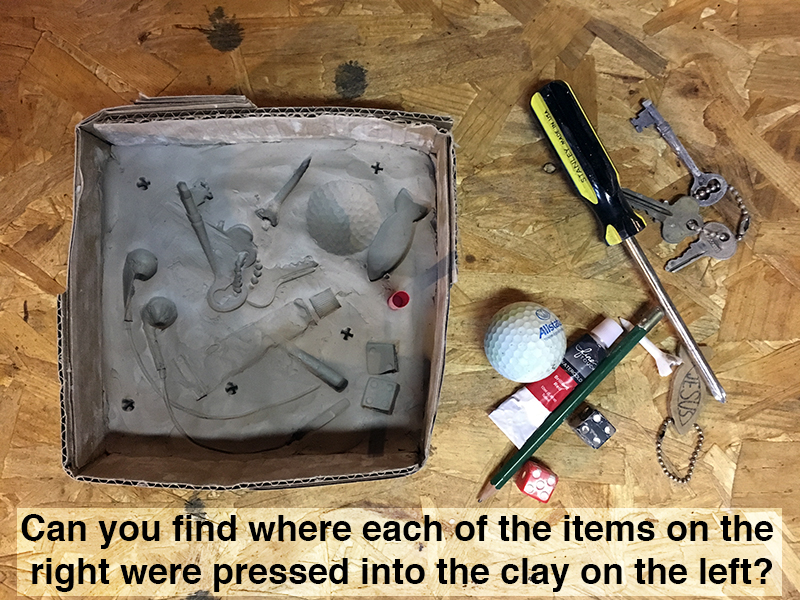
Now begin pressing objects into the clay. Consider the angle and depth of the impressions. Strive for variety – deep/shallow, complete/partial, level/tilted, etc.
Consider the negative space. Do you want emptiness between the objects or would you rather overlap objects to create a dense mesh of imagery?
Step 4 – Pour Plaster in the Mold
Satisfied with the clay mold? Then it is time to mix the plaster.
Mix 2 parts plaster to 1 part water. Do so by first pouring water into a mixing container, then add the plaster. Adding plaster to water will result in less clumps. There will still be clumps, so get your hands in there and squeeze the clumps away. Don’t mix too long. The plaster will begin to thicken and must be poured into the box before it becomes a thick paste.
Starting in a corner, pour the plaster into the mold, allowing it to find its own level. By doing so, you will avoid creating any air pockets.
Fill most or all of the remaining 1.5 inches of the box with plaster. Let the plaster sit until the next day. The plaster will solidify in a short period of time but will harden completely over the course of about a week. Waiting a full day to remove the cast from the mold will ensure that the plaster is hard enough to retain the small details while removing the clay.

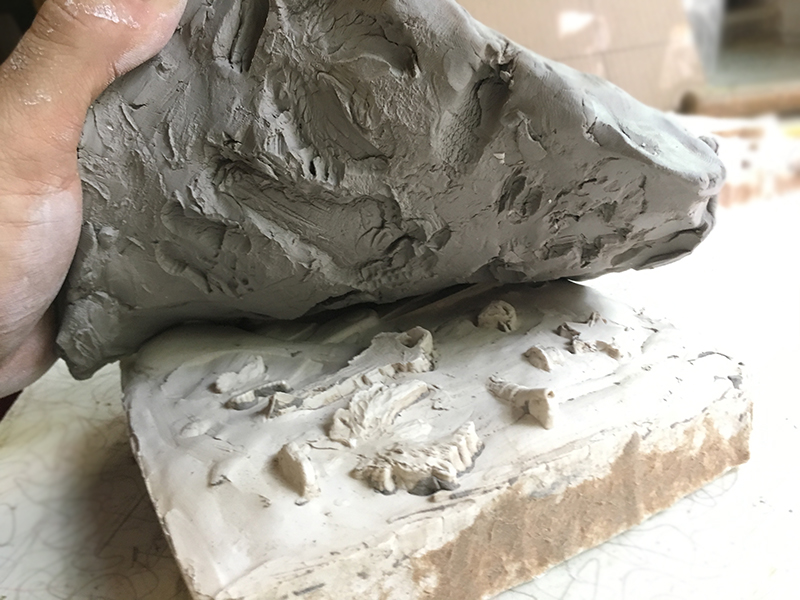
Step 5 – Remove the Cardboard and Clay
After a day has passed, simply remove the tape from the box and fold down the sides. Turn the block of clay and plaster on its side and peel away the clay. It easily separates from the plaster.
Step 6 – Finish the Sculpture with Paint or Leave a Natural Surface
The form is finished but the surface is not. Scrape away any cardboard that might have remained on the sides of the plaster cast. Use a tooth pick or other small, pointed tool to pick away any remaining clay if you would like to leave the sculpture in its “natural white”.
Finishing Options
There are a few options for finishing the surface of the relief sculpture. You could leave the sculpture in its natural finish, but adding a little color will make the sculpture appear a bit more “polished” and add additional interest.

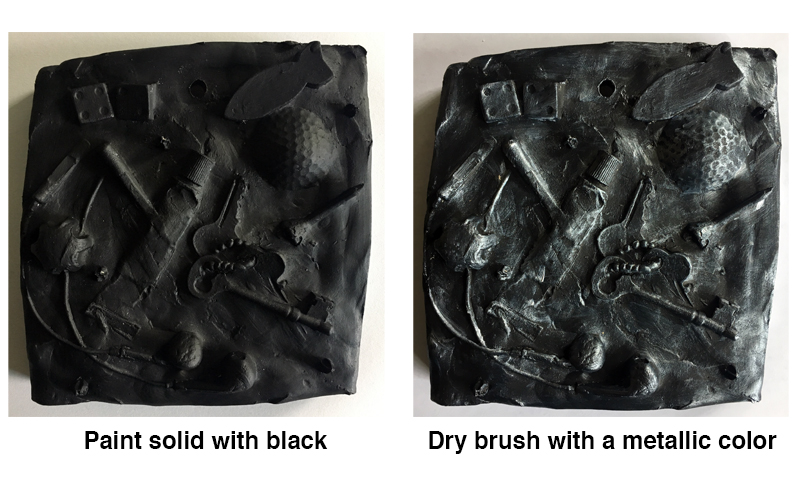
One option for finishing with paint is to create a metallic look with a two-step painting treatment. This is accomplished by first painting the entire sculpture with a thin coat of black paint. You can use tempera, poster, or acrylic paint. Acrylic paint is recommended since it is more permanent and water-resistant.
Once the first coat is dry, you can dry brush over the raised elements with a metallic color (silver, bronze, copper, etc.). By using a dry brush technique with metallic paint, the black layer will remain visible in the recesses, creating a pleasing, high contrast surface treatment.
Dry brush refers to the process of applying paint with a nearly dry brush. Paint is loaded on the brush, then wiped on a paper towel or cloth, removing most of the paint from the bristles. A small amount of paint still remains in the bristles. The brush is gently passed over the raised surface with a brisk motion. The raised surface catches the paint, accentuating the texture.
Once the surface of the sculpture has been treated, the artwork is complete and ready to hang or display. The possibilities are limitless with this form of relief sculpture, so have some fun and allow your creativity to go wild!
If so, join over 36,000 others that receive our newsletter with new drawing and painting lessons. Plus, check out three of our course videos and ebooks for free.