Roses are cultivated for their beautiful flowers. They exist in a variety of colors – and the palette is truly extensive! The coloring ranges from white through various yellow, orange, and pink tones to dark crimson, maroon, and purple.
The roses’ delightful fragrance and soft, velvety petals are an inspiration, too. These flowers provoke creativity! It’s hard to find an artist who has never drawn a rose in their life.
Today’s lesson is dedicated particularly to wild roses – close relatives of well-known garden roses. The Rose (Rosaceae) family also includes apples, peaches, pears, strawberries, raspberries, blackberries, and many other species.
It is interesting to know that fossil records show the rose to be one of the most ancient flowers. All garden roses are descendants of original wild roses.
Wild roses can be found in a variety of places, such as open woods and prairies. They often grow along the roads, and also in wet soils along streams and swamps.
Uncultivated plants grow naturally, without the benefit of fertilizer or supplemental watering. The need to adapt to harsher conditions was amplified by millions of years of evolution. As a result, wild roses developed superior vigor and endurance.
These flowers are known by a variety of common names, including pasture rose, prairie rose, dog rose, eglantine, sweetbriar, and others.
Are you excited and inspired? Let’s begin your creative journey – we’ll learn more interesting facts along the way!
Drawing a Wild Rose – The Art Materials
We’ll create a vivid drawing of a wild rose using alcohol-based markers and colored pencils. This combination of media has several benefits.
For example, markers allow making a solid base of color in no time. They also have a wonderful ability to create smooth gradients of color. This medium is easy to use – it gives the artist full control over the creative process.
On the other hand, colored pencils can produce very accurate, precise marks. When it comes to adding details, a sharp pencil may be the best possible option. Also, layers of colored pencil applications are semi-transparent. This feature helps to create subtle color nuances and various textural effects.
For many artists, summer is an opportunity to spend time outdoors, enjoying sunny days and beautiful nature. Bright seasonal flora is a source of constant inspiration!
See also: How to Draw a Rose
However, depicting natural objects (especially from a real model) requires speed and efficiency. Used together, alcohol-based markers and colored pencils streamline the process.
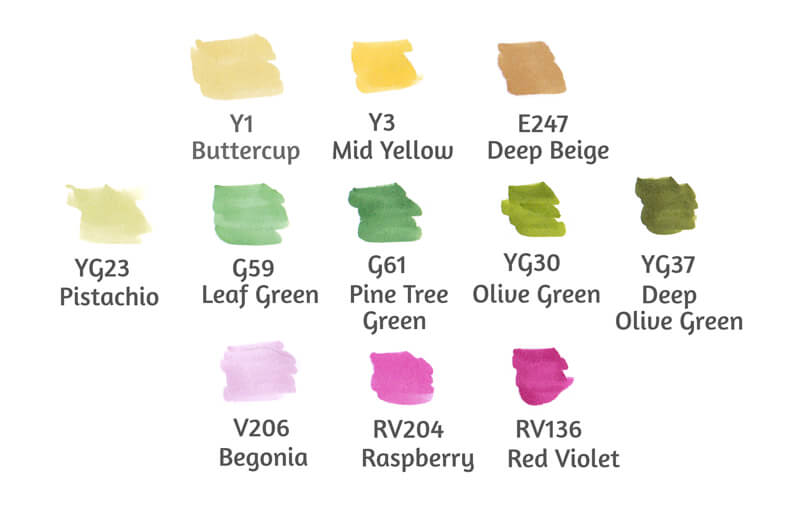
My markers are Finecolour. Each marker has two tips; a brush and a chisel. I’m going to use the brush nib only as its softness and flexibility allows for creating varied, organic lines.
In the image below, you’ll find the chosen colors.
This project can be completed with fewer markers. Make sure that you have at least one yellow, three cool reds (light, medium, dark), and two greens (medium, dark). Unfortunately, a limited range of markers can’t provide for a significant hue variation, but it is always possible to compensate for such limitations with additional colored pencils.
If you need more information on alcohol-based markers, please check out this post. It provides thorough explanations on the types of nibs, color families, and marker techniques.
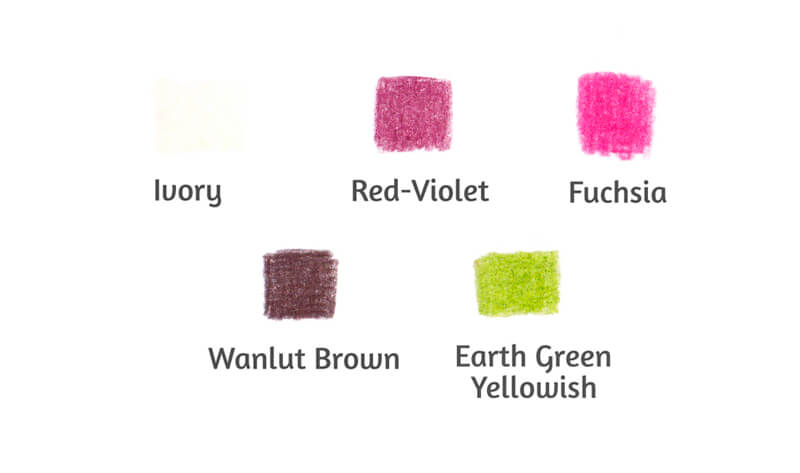
And here are the colored pencils – they’ll be applied to refine the drawing. My pencils are oil-based Faber-Castell Polychromos.
Also, keep a graphite pencil at hand – we’ll use it to create an initial outline. A couple of erasers (a plastic and a kneaded one) will help us to remove or soften the pencil marks.
See also: 9 Must Have Colored Pencil Supplies
I’ll be drawing on an A4 sheet of smooth marker paper. Its back side has a coating that prevents inks from bleeding through.
A spare piece of ordinary thin paper will be used to create a miniature sketch.
The Appearance of a Wild Rose
First, let’s observe the plant that we’re going to draw.
The flowers of wild roses are single and wide-open. They usually have five petals.
The most common color of petals is pink. The tone may vary from pale to bright. It is also possible to find flowers that sport white, red, or yellowish petals.
Multiple stamens and a pistil form the central part of the flower. (See point a in the image below.)
The sepals are the modified leaves that can be found beneath the petals. Usually, there are five sepals of green color. They may be long enough to be visible when a flower is viewed from above. Sometimes they appear as greenish points alternating with the petals.
Also, sepals form an envelope that protects the developing flower bud. (See point b in the image below.)
The shape of petals may vary from species to species. In most cases, a petal is rounded and divided into two distinct lobes. (Point c.)
Wild roses also have hips. (Point d.) They are berry-like structures of a rounded or slightly flattened shape. The color of hips usually ranges from red to orange. Rose hips of some species are edible. They are very rich in vitamin C and antioxidants.
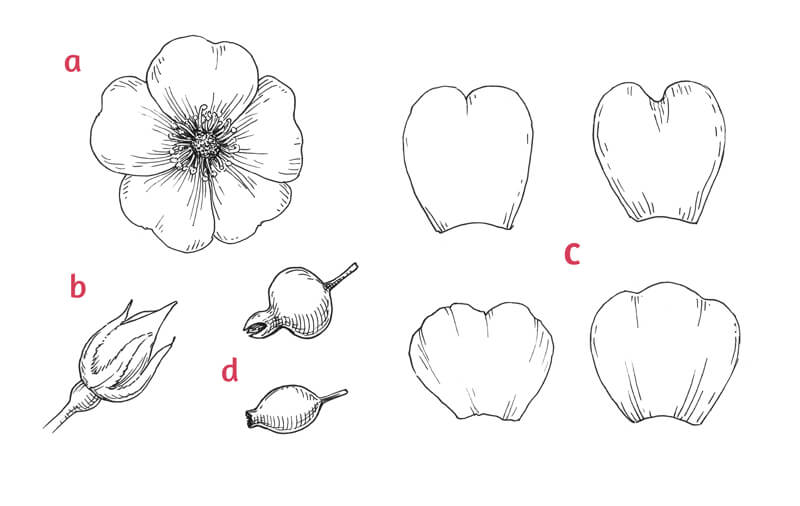
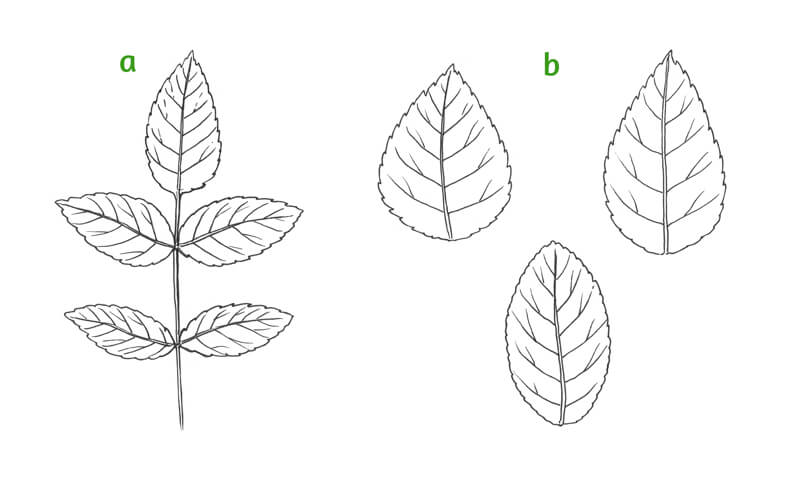
The leaves are compound (comprising several small leaflets) and alternately arranged along the stem. In most cases, wild species have seven or nine leaflets. The leaflets are located close to the stem.
There are pairs of leaflets at the sides of the stem and a single leaflet at its end. The ending elements are often slightly larger than their neighbors. (See point a in the image below.)
The leaf blades are dark green. They have one large mid-vein. (It is also called midrib.) There are from six to thirteen secondary veins that are diverging from the midrib. They form opposite pairs.
Usually, the leaflets have an oval shape and are sharply toothed. Just as in the case with the petals, the shape of leaflets may vary. (Point b.)
Now we know enough to draw a wild rose!
Developing the Composition
I create a miniature sketch first. The goal is to transfer the concept that I have in mind onto paper. Then we’ll evaluate the result in terms of composition and balance.
It takes several minutes to create a rough sketch, which may seem like an unwelcome distraction, but the importance of such work cannot be overstressed. A preparatory sketch helps to see the image as a whole. We can rearrange the elements of the future artwork until the final composition looks just right.
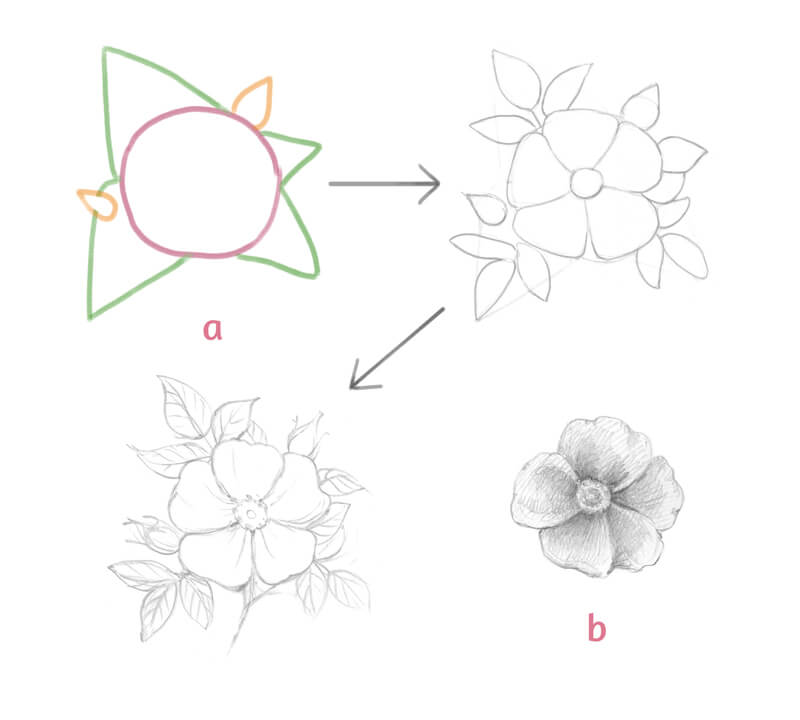
I start with general shapes – the masses. I’ve given them different colors for your convenience. The red rounded shape marks the position of the wide-open flower. The orange shapes are the buds. The green borders show areas that will be taken by the foliage. (See point a in the image below.)
I allow some asymmetry – it makes the composition more lively and organic.
The upper-left corner of the sketch has some empty space, but I think that a big pink bud can become a nice eye-catching accent. The final artwork must look balanced enough.
After the general masses are arranged, we can refine the objects within the shapes. You can change your drawing at any stage of the process. Add or remove the elements if that feels necessary. The final sketch doesn’t have to be very detailed.
Also, it may be a good idea to add shading to some elements of the miniature. It will help you to determine where the lights and shadows should be in your final artwork. (Point b.)
The petals of wild roses can’t boast of a whimsical value pattern that is created by various bents and drop shadows. Compared to their cultivated relatives, the flowers of wild roses look somewhat flat. Usually, there is a soft shadow near the flower’s center. The petals may cast drop shadows on their neighbors.
Creating an Underdrawing of a Wild Rose
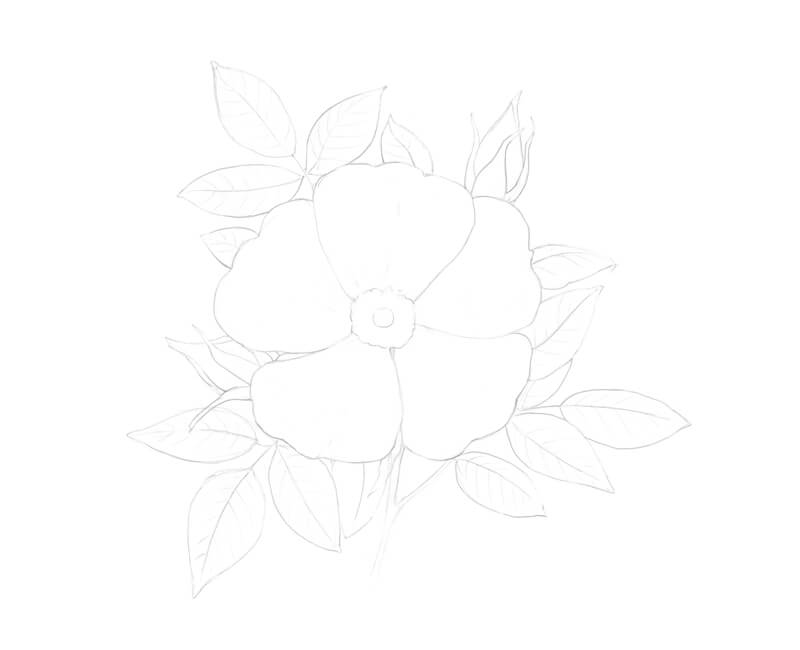
It’s time to start on the final drawing. Let’s outline the contours of our flower.
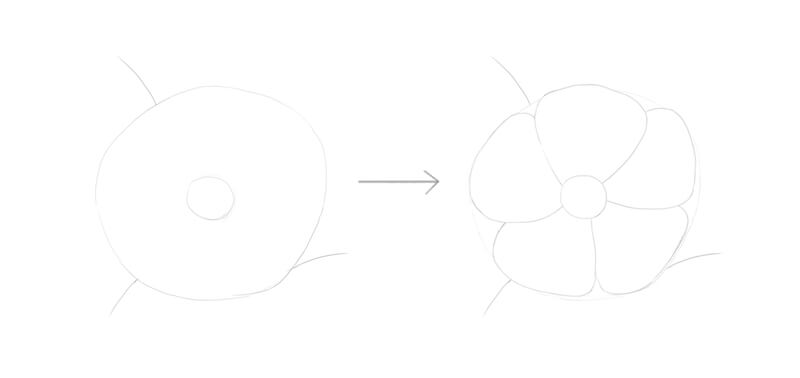
I draw a rounded shape that marks the rough borders of the rose. A smaller circle within this shape indicates the area of stamens. We can add separate petals later.
Three lines go from this rounded shape to the periphery of the drawing. These lines mark the directions of the leaf stems.
I keep my preliminary mini sketch at hand and refer to it now and then.
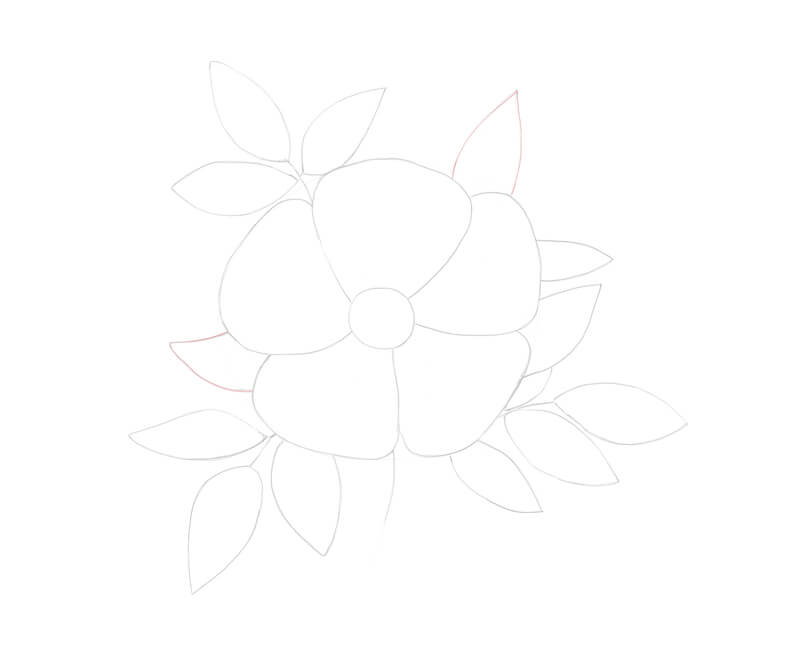
I mark the leaflets. They have an elongated shape with pointed tips. The goal is just to arrange the elements. We’ll add the details later.
There are two buds. In the image below, I’ve marked them with a reddish color for your convenience.
I refine the drawing. The contour line of the petals becomes curvier. I mark the pistil and define the area of stamens more precisely.
I add the veins of the leaflets and the sepals surrounding the buds. I also mark the stem in the lower part of the drawing, under the flower.
I don’t draw every single vein or stamen, keeping only the most significant details. Excess graphite may contaminate further applications. I’m going to remove it with a kneaded eraser, so the tiniest bits of visual information will be lost anyway.
Applying Alcohol-Based Markers
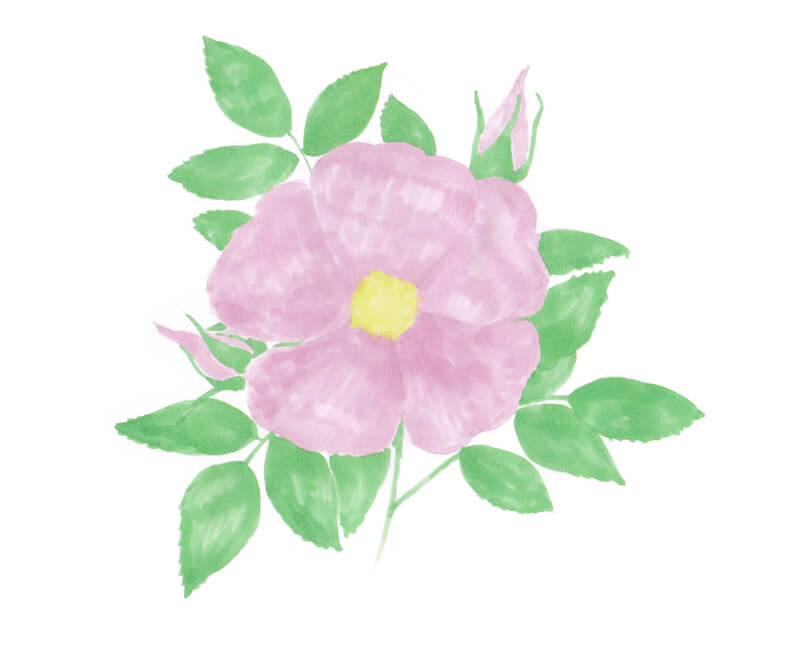
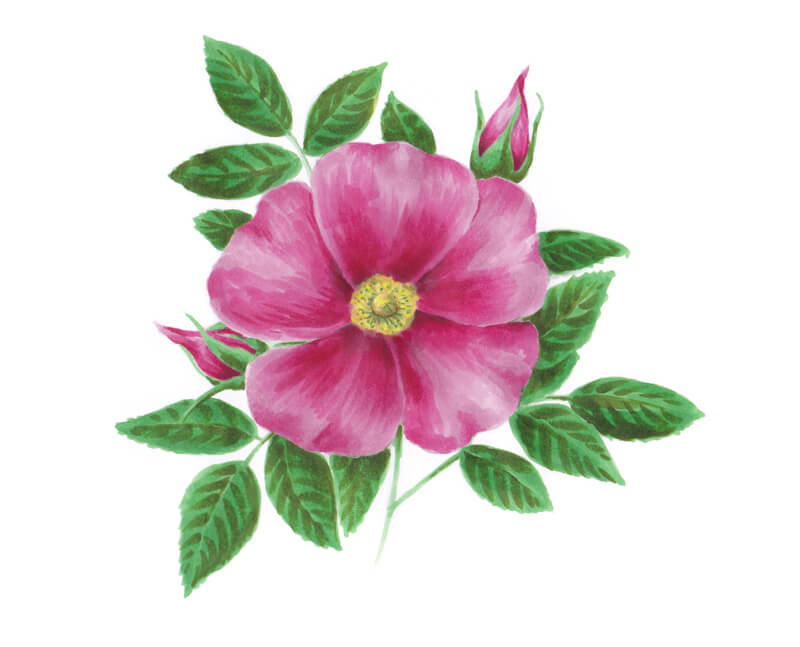
With Buttercup, I cover the whole area of the flower’s core with a single flat layer.
Then I apply Begonia to the petals and buds. I work with broad marks, using the brush nib. The strokes go from the center of the flower to its sides. The first layer’s covering is somewhat striped, so I add another one.
I add some Buttercup to the border between yellow and pink colors to blend it. If the pink applications are still wet, you’ll get a smoother transition. Such soft gradients usually make the artwork more vivid and picturesque.
See also: How to Draw with Markers and Colored Pencils
I cover the leaflets with Leaf Green. (Apply a second layer if necessary.)
I touch the edges of the leaflets, creating an effect of a toothed margin. My movements are swift. I don’t aim to be perfectly precise as this first applications is done in a sketchy manner.
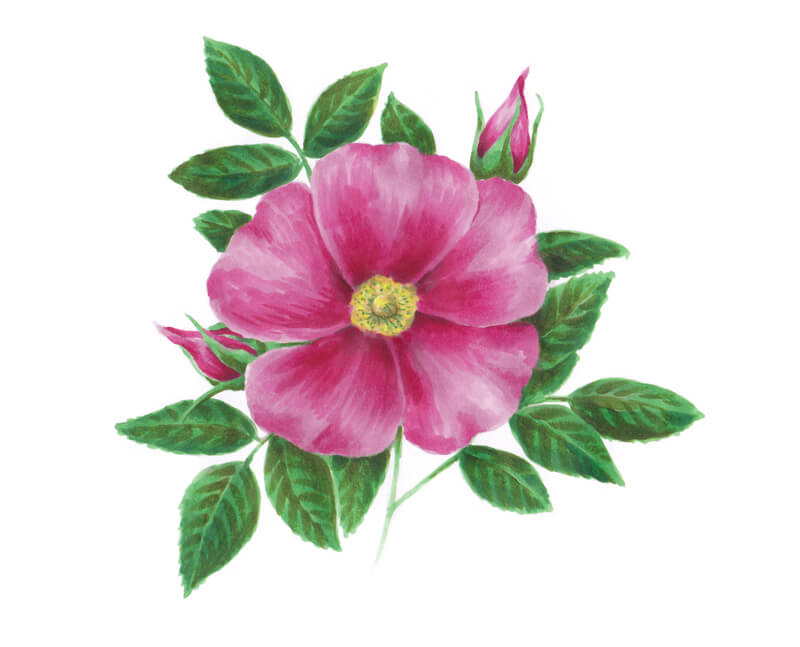
I include Raspberry in the darker areas of the petals that are near the stamens. I also add some strokes to the buds and the petals’ tips. The strokes follow the direction of the objects’ cross contour lines.
I apply Begonia on top of the “seam” between the colors of different values, blending these applications. As usual, if the existing layer is still slightly wet, you’ll get a softer transition. It’s possible to reapply the inks to moisten and reactivate the covering.
We’ll be working in the same manner throughout the tutorial. The lighter marker will be used to blend the border between the colors that present different values. (And, sometimes, hues.)
I use Deep Beige to mark the stamens with long curved lines and dots. I also accent the area under the pistil, making this element more prominent.
I touch the flower’s center with Mid Yellow to vary the colors. The marks are short, almost dot-like. I make them with the side of the marker’s brush nib.
Please note that marker applications may look different before and after drying. Sometimes it’s a good idea to wait for a minute. Let the inks dry completely before evaluating the color intensity or smoothness of blending.
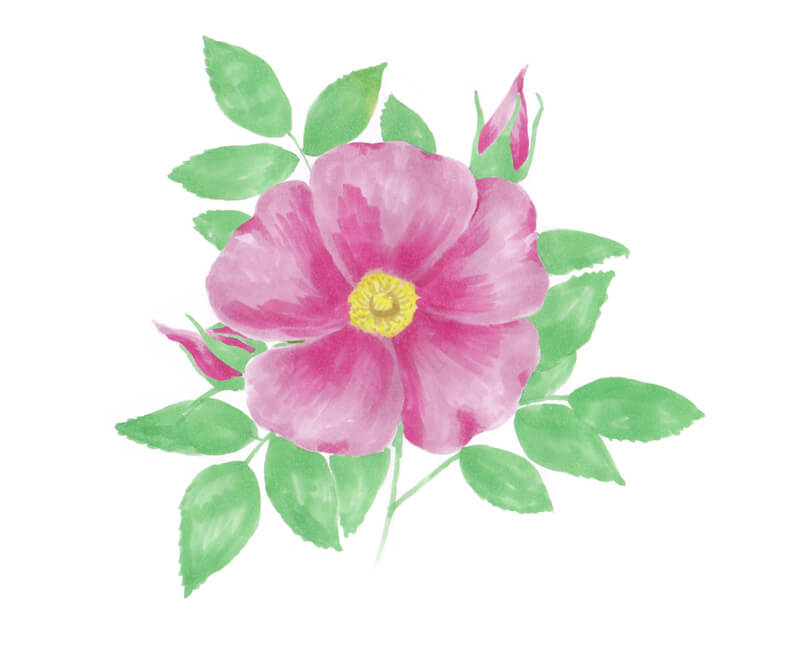
I add broad sketchy strokes of Deep Olive Green to the leaflets. They mark the pattern formed by the secondary veins. I also use this marker to cover the darker areas of the leaves.
I blend the applications with Leaf Green.
I add Red Violet to the darker parts of the petals and buds, increasing the contrast. The strokes follow the contours of the elements. They are made in a similar swift, sketchy manner.
I use Raspberry to blend the applications.
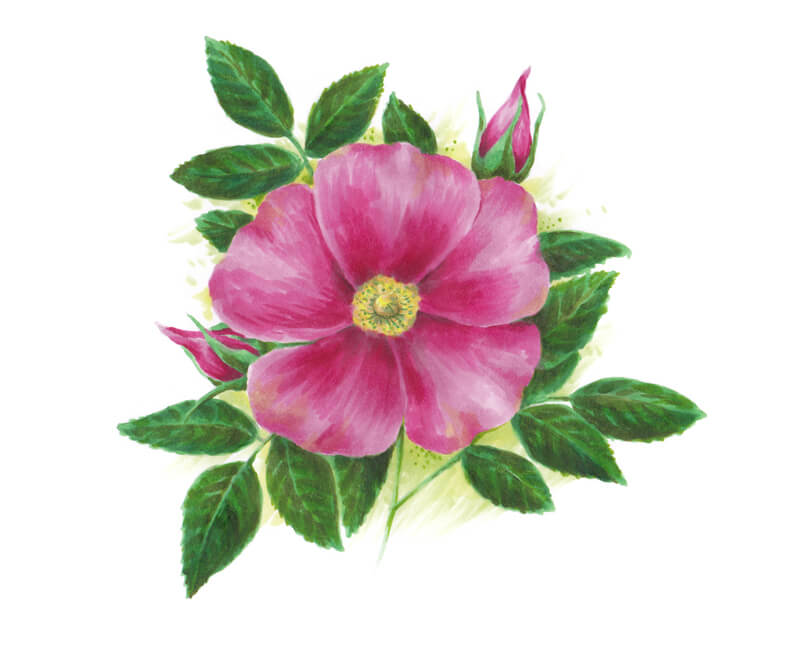
Let’s add some Begonia to the petals. This tint creates a smooth gradient from medium to light pink. We can also apply it to the yellowish core of the flower. This inclusion will unite the artwork in terms of color.
I add Pine Tree Green to the foliage. This cool shade creates a nice color variation. It also softens the transition between the contrasting darker olive strokes and the lighter base.
I use Leaf Green to blend the applications. I also add this color to the shadowed areas of the petals. Layering such colors (that are contrasting in hue) decreases the saturation of the resulting tone. We get a nice complex color that looks more realistic.
I add some Olive Green to the leaflets, aiming mostly at the lighter areas and the midtones. This warm color livens up the artwork.
I also create more teeth at the leaflets’ edges, touching the paper with the tip of the nib.
As usual, Leaf Green may be used for blending any stripes or borders in the colors of the green family.

Let’s add some color to the area that is surrounding the object. I apply broad strokes with Buttercup and Pistachio. These tints are close in value, so they blend easily.
My wrist (not the fingers!) makes this free and quick movement. Sometimes I add single hatches and large dots. I just let the marks happen naturally.
Optionally, we can add some Leaf Green or Olive Green to this base while it’s still wet. These darker marks will become blurry and blended to a certain extent.
I also add some Buttercup to the tips of the petals to unite the elements in terms of color.
Refining Our Wild Rose with Colored Pencils
We’ve created a wonderful color base. Now it’s time to add the details. We’ll also spend some time working on the textures.
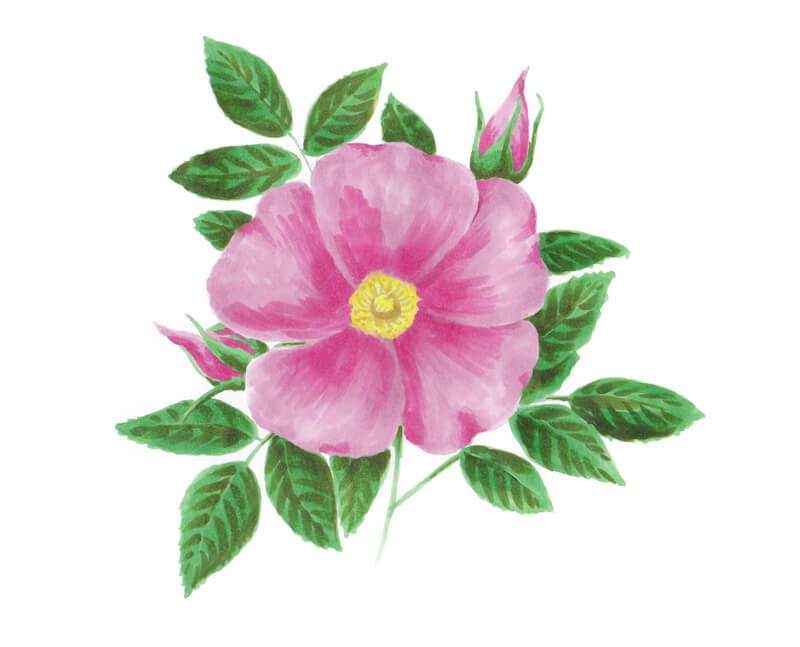
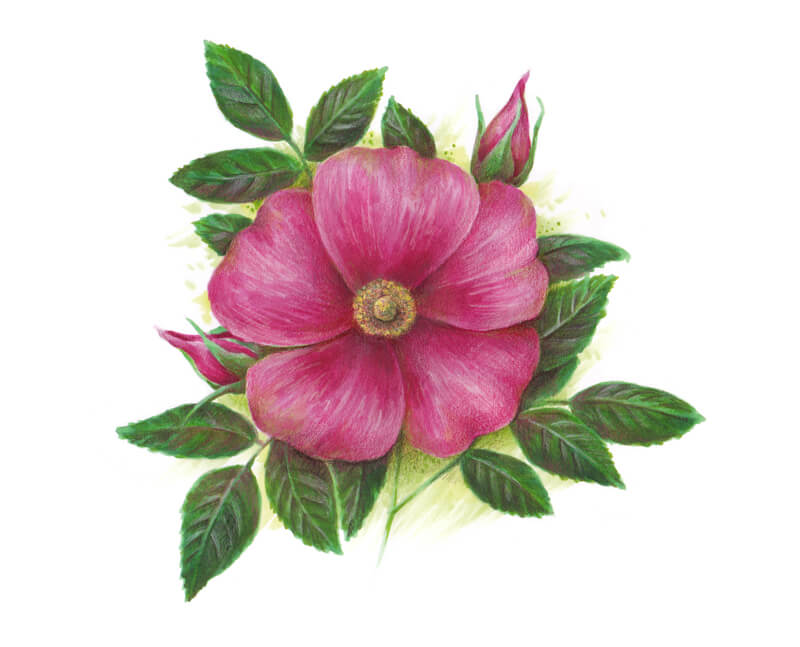
I apply Fuchsia to the petals and buds. I’m softening the transition between different pinks.
Petals of a wild rose aren’t perfectly smooth. They have a subtle texture. I leave soft, loose strokes with a slightly dull pencil to convey the desired feel. The lines may be longer or shorter – this creates a pleasant variation.
In this case, pencil marks are placed on top of marker applications and smooth marker paper. This combination of materials gives the pencil strokes a slightly rough, chalky look. It is similar to dry pastel. This character of marks adds some pleasant charm to the artwork. It accents the textures, too.
I use Earth Green Yellowish to soften the color transitions in the green areas. I also refine the leaflets’ contours where necessary.
To unify the artwork in terms of color, I add some pink strokes to the foliage. They create an illusion of a reflected light on the glossy leaflets.
Similarly, I add some green strokes to the petals. The colored pencil applications are semi-transparent, so the initial color won’t change much.

I deepen the petals’ core shadows, using Red-Violet. The covering is smooth. My pencil moves in small circles. It’s also possible to add longer lines that imitate vein-like structures.
I also strengthen the shadows in the flower’s central area.

I use Walnut Brown to draw the veins of the leaf blades. I deepen the shadows, accenting the interesting relief of the leaf blades.
I use this shade to refine the stamens. I add short lines and dots to the flower’s center. The inclusion of this color makes the drawing more realistic. I also apply a thin layer of this shade to the flower’s environment, close to the petals.

With Ivory, I accent the lighter areas of petals, where the slight bent is. I work mostly with long lines to show the texture.
I lighten the midribs and the areas near the secondary veins. I accent mostly the leaflets that are close to the flower, which is the focal point. Elaborate details usually attract the viewer’s attention, so let’s make sure that it is led to the bright, accentuated petals.
It’s time to evaluate the artwork and add or refine anything that needs a final touch.
Drawing a Wild Rose with Markers and Colored Pencils – Conclusion
Congratulations – we’ve created a wonderful artwork! I hope that you enjoyed the process and also appreciated the advantages of mixing media.
These simple yet effective techniques may be used in a variety of cases. It doesn’t matter whether you draw from nature or from a reference photo, outdoor or indoors.
I wish you much inspiration for your future art projects!
If so, join over 36,000 others that receive our newsletter with new drawing and painting lessons. Plus, check out three of our course videos and ebooks for free.