Drawing a Snowy Landscape with Figures
As many of you know, I absolutely hate the winter. I hate the cold. I hate the short days. I hate the gray days. I hate winter. But about the only thing that I can tolerate with winter is probably the snow. And fortunately, around here, we don’t get much snow. But when it does snow, it’s quite the event. And recently it snowed quite a bit here and that meant it was time for a fun snow day on our sledding hill. I wanted to capture that in a drawing and I’m going to share with you that process in this lesson.
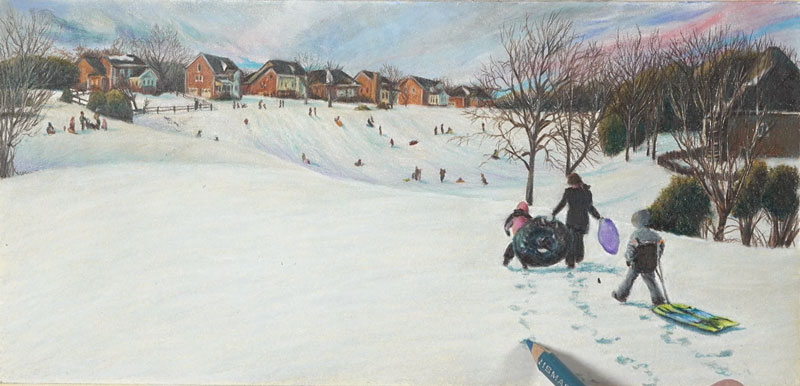
Here’s a look at the completed drawing…

Materials and Surface
For this particular drawing, I use Prismacolor Premier colored pencils, which are wax-based pencils. You can use any brand that you wish and get similar results. I also used just a bit of PanPastel. This is not required, as I use the PanPastel material to basically create an underpainting or a base in which to apply colored pencils over the top.
This drawing is created on Stonehenge paper, which is a wonderful surface for colored pencils. It’s 100% cotton and very soft, but it does require the artist to apply multiple, layered applications with colored pencils. If you want to build up lots of depth in color, layering is very important and this paper encourages it and helps you do it.
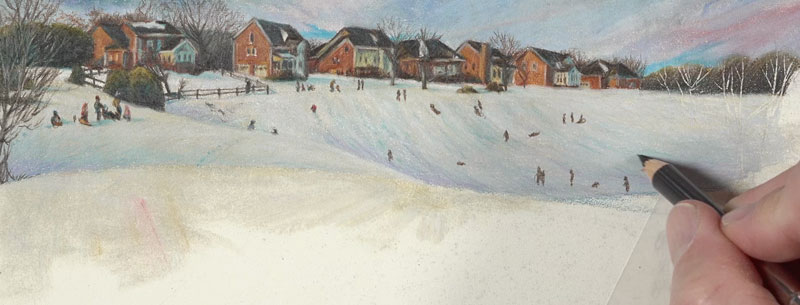
Photo Reference and Composition
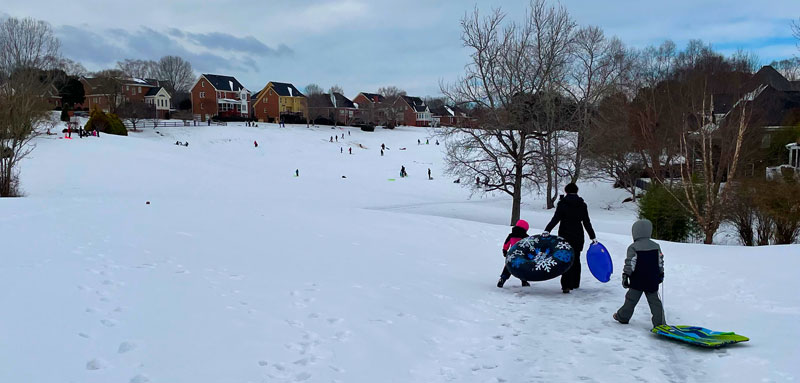
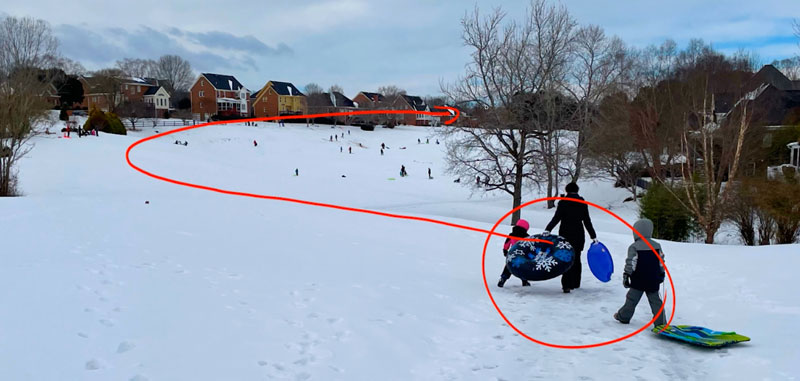
A photo reference is used to create the drawing. Here’s a look at the reference image…
When we’re dealing with composition, we’re talking about the way the elements are laid out within the picture plane. Composition influences the way a viewer interacts with your piece.
When I look at this image, my eye comes into the picture plane at the focal point and then moves its way to the back of the sledding hill and these distant houses. Part of that is because of the layout of the land and the way that we have these little hills that overlap each other. I wanted to accentuate that in the final drawing, or at least capture that in the final drawing, of course.
See also: Composition in Art
Sketching the Landscape
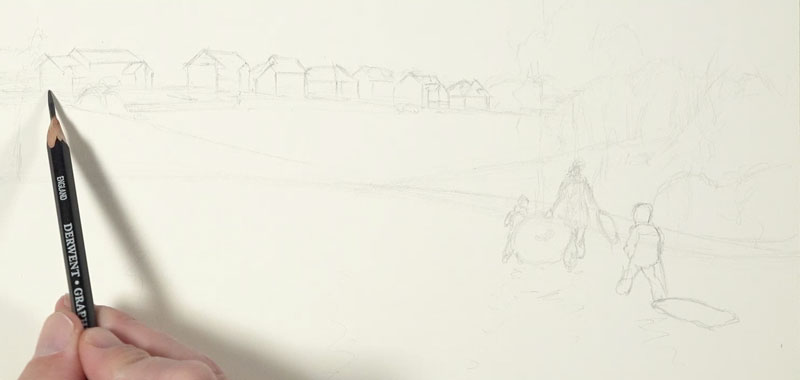
We’ll begin here on Stonehenge paper using a light graphite pencil. In this case, I’m using a 2H graphite pencil. This is light enough so that it doesn’t overpower the image, but I can still put a little bit of pressure on the pencil to make the marks dark enough so that I can see them.
Initially, I’m just finding where the horizon line is and drawing some basic shapes for some of the distant trees before drawing some shapes or each one of the individual houses.
Adding Color
With our loose pencil sketch in place, we’ll begin with PanPastel applications. A variety of blues and muted colors are added, before adding a bit of material for the snowy hill. These PanPastel applications provide a base for colored pencils.
With a bit of PanPastel on the surface, we can begin with colored pencils. I decide to start along the distant horizon line on the left side of the picture plane developing each house and the trees and bushes in between.
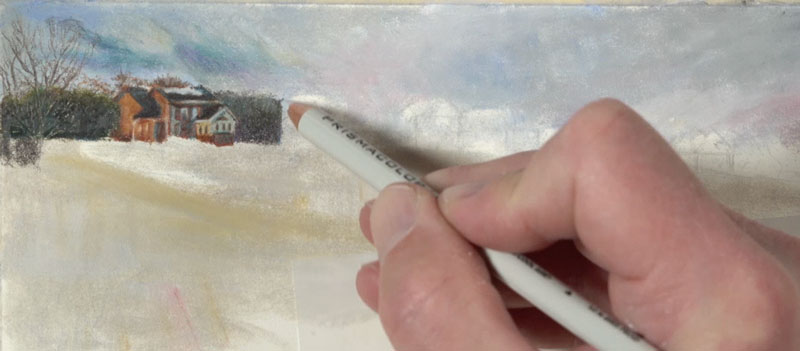
I found myself sharpening the pencil quite often. After just a few marks, the pencil becomes fairly dull. A variety of colors were used – but mainly Terracotta for the bricks of the house. An Espresso pencil, a dark warm gray, was used for the roofs and darker areas.
See also: How to Sharpen Any Pencil
I wanted to create a warmer light in the scene. I used a Yellow Ochre pencil for the sides or the planes of the houses that faced the light source, which is originating from the left side of the picture plane. For the shadowed side of the houses and for the shadows throughout the image, I chose to use a blue – somewhat of a cerulean blue.
This contrast between warm and cool helped to make the light feel warmer and the shadows, cooler.
When we work with colored pencils, we need to keep in mind that it does require a level of patience. One of the easiest areas that you can improve in your drawings, or I should say one of the areas where you can see improvement the quickest is to just increase your patience a little bit. For some of us that’s going to be a little bit harder to do, but of course, if you just focus on slowing down and not trying to be in a hurry to finish your art, I think that you’ll see improvement happen naturally.
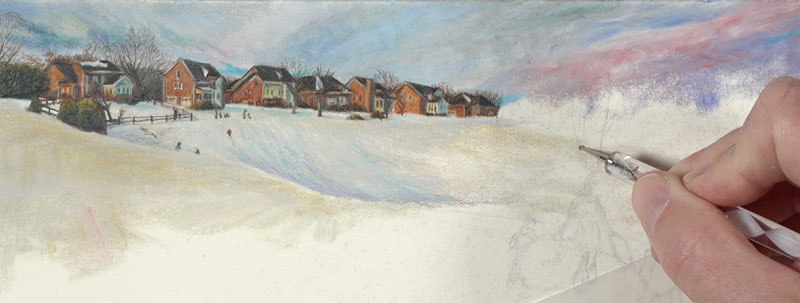
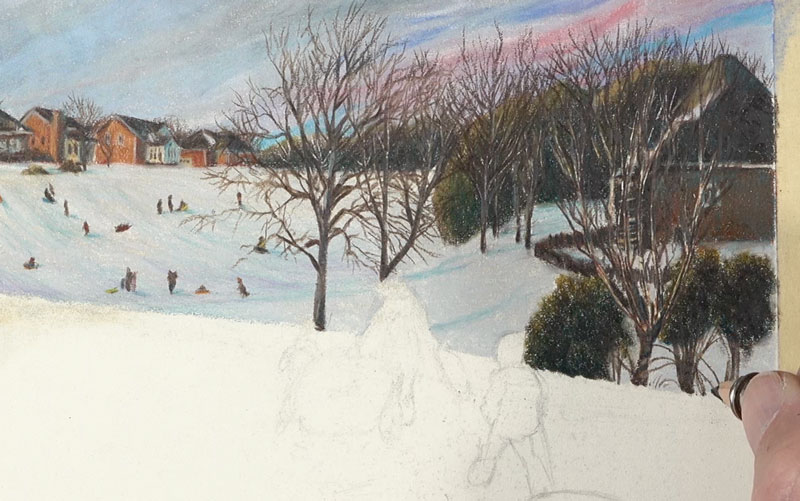
As we move to the right side of the picture plane, I preserve some of the areas where we see trees that are in the middle ground. I’m using the indention tool to preserve these areas. The lines that are preserved are not evident until you start making marks with colored pencils over the top of those areas that you indented.
Small Figures within the Landscape
This landscape is covered with figures. And since these figures are located in the distant middle ground and the foreground, there’s quite a difference in the size that these figures should be rendered.
We have to be mindful of proportion. We want to make sure that – proportionally speaking, the shapes that we draw here make sense with the distant figures and, of course, the figures that we’re going to add in the foreground.
After developing the shapes of the figures with the dark Espresso pencil, bits of bright color are added over the top. These bits of color add life and make the figures make sense.
I gradually and patiently work my way to the houses, trees, and bushes in the foreground. Here we see a higher level of contrast in value due to the fact that these areas are closer to the viewer.
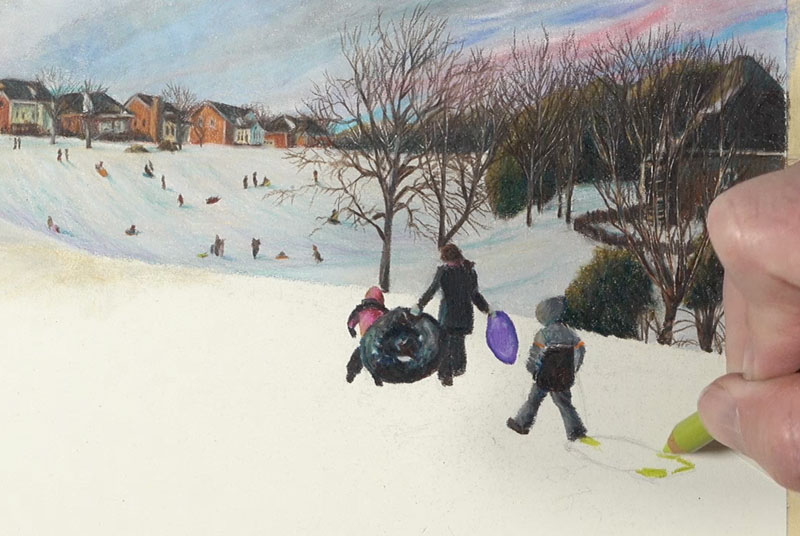
Drawing the Figures in the Foreground
From here, I continue to work down the picture plane to the larger figures. We’ve finally made it to the focal point. Since these figures are in the extreme foreground, we’ll notice the highest level of contrast in value. But even here, the color black is avoided. Instead, a layered combination of a dark brown and blue are used to develop the darkest tones.
After the figures are in place, it’s back to PanPastel applications, filling in the remaining spaces of snow.
After burnishing some of those applications with a bit of the 10% Cool Gray, I went back to the figures and made some final adjustments here, making the contrast a little bit stronger and adding a few bits of shadow here and there to the backside of some of the clothing.
I decided to make the lower portion of the left side of the picture plane a little bit cooler. I did this with a bit of lighter blue on the snowy hill closest to the viewer.

Finishing Touches to the Winter Landscape Drawing
Then, of course, when the drawing is complete, it’s time to tear away the tape. This can be a nerve-wracking experience. You’ve spent all this time with the drawing and you don’t want the tape to tear, but if you pull it away at a 90 degree angle, usually you can pull that tape off without any tearing.
Here’s another look at the completed drawing…
Winter Landscape Drawing with Colored Pencils – Conclusion
Colored pencils provide us with exceptional precision. But there is a tradeoff. This tradeoff comes in the form of time and patience. Work slowly, build up colors gradually and watch your drawing come to life.
If so, join over 36,000 others that receive our newsletter with new drawing and painting lessons. Plus, check out three of our course videos and ebooks for free.