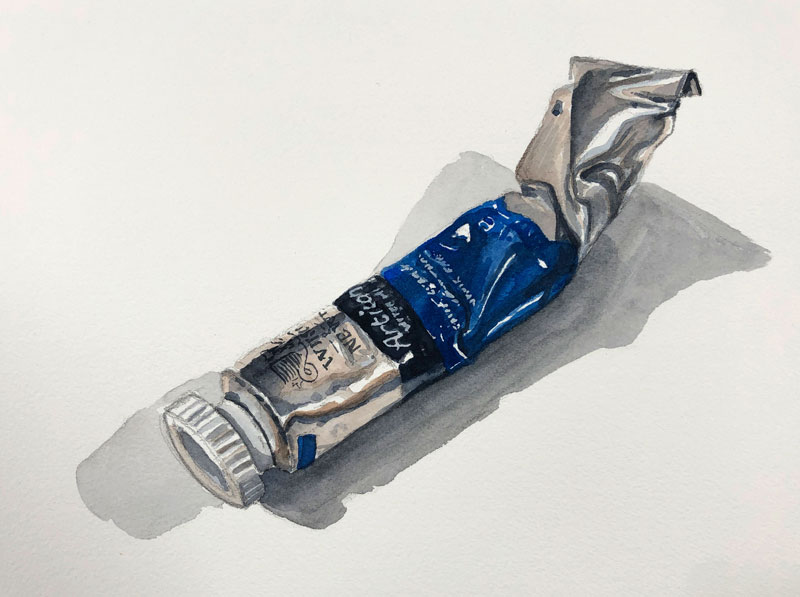
An Unexpected Challenge
In this watercolor painting lesson, we’ll take a look at painting a simple paint tube. Although this subject may seem simple, we find unexpected challenges such as the reflections, wrinkles, and text. We’ll explore how to handle these challenges with watercolor and see how basic subjects such as these can greatly improve your painting skills.
Materials for this Lesson
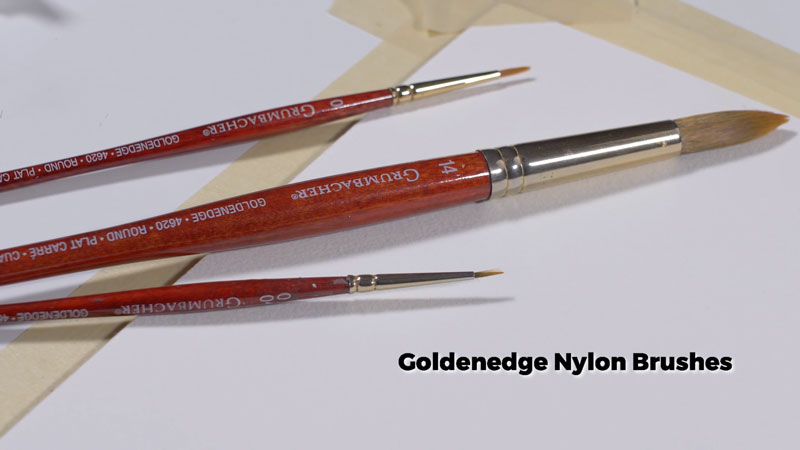
The materials used for this demonstration are basic. All you’ll need to follow along is cold press watercolor paper, a graphite pencil, a few watercolor paints, a bit of white gouache, and a few round nylon brushes.
It’s not necessary to use the same brands of materials that we use here. This lesson is designed to be an exercise, so think of this as practice. But if you do want to use the same materials, here are a few links to purchase these products…
(The following links are affiliate links which means that I make a small commission if you purchase without an additional cost to you)…
- Cotman Watercolor Paints
- 140 lb Cold Press Watercolor Paper (Arches)
- Grumbacher Goldenedge Nylon Brushes
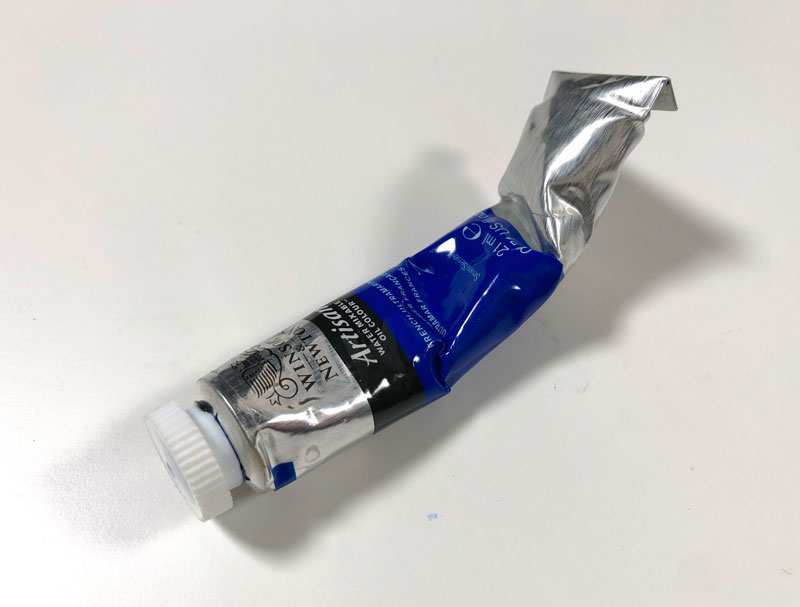
The Photo Reference
We’ll work from a photo reference for this painting. In this case, I set up the paint tube so that it is at a diagonal which makes the composition a little more interesting. I also bent the tube to create a few more interesting wrinkles.
See also: Composition in Art
Here’s a look at the photo reference used in this painting…
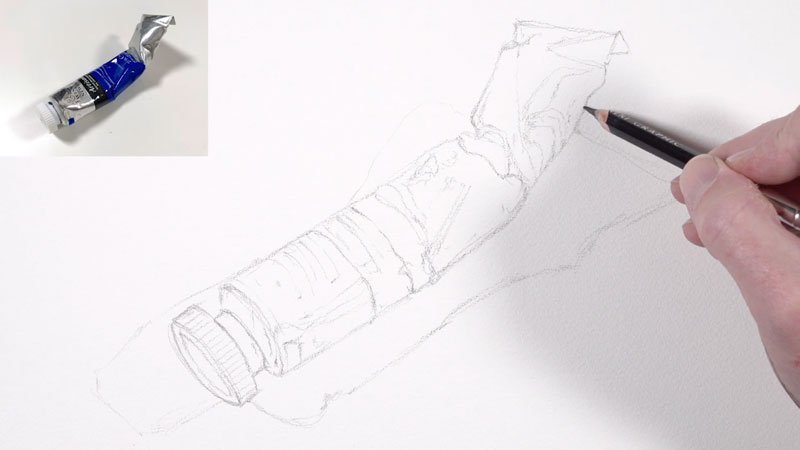
Start with a Sketch
We’ll begin with a loose graphite sketch of the paint tube on watercolor paper. This sketch is rather loose and completed with an “H” graphite pencil. This lighter pencil ensures that the majority of the graphite marks will be hidden in the final painting.
It’s ok to draw with several different lines. Don’t feel as though you need to make “perfect” lines and include all of the details.
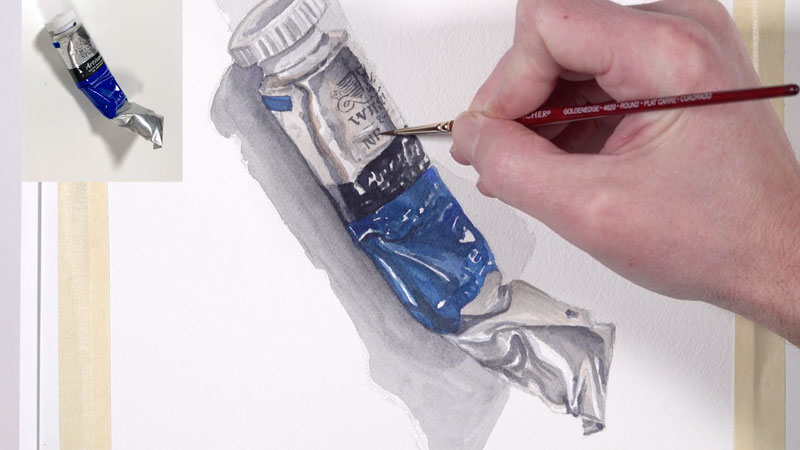
Establishing the Grays
Our paint tube consists of a reflective surface and shiny surface. With exception of the strong blue section on the label and a dark band, the majority of the tube is made up a various grays and neutral colors. We can see both warm and grays in these areas.
See also: Warm vs. Cool Grays
We’ll first address the cool grays by mixing Payne’s Gray with a touch of Ultramarine. Payne’s Gray is a cool gray on its own, but adding a bit of blue cools it even further.
We’ll apply light, translucent applications of our cool gray to portions of the top and bottom of the tube, taking care to leave open spaces for the strong highlights.
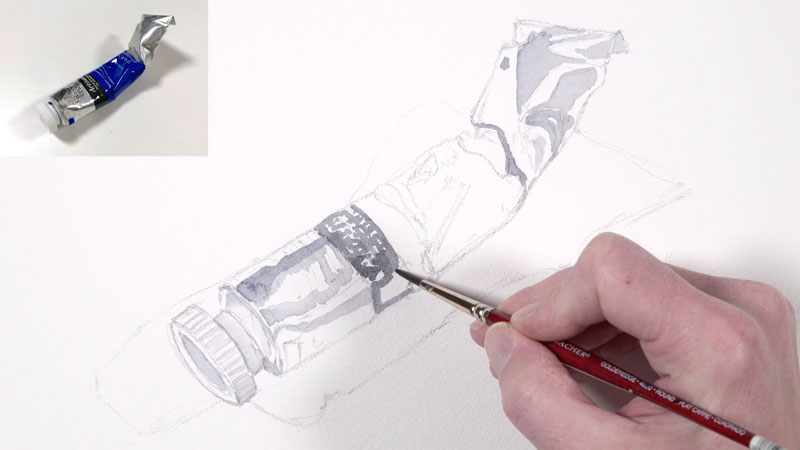
Next we’ll mix up a bit of warm gray and begin layering it over the top of the cool gray areas but also in open areas. Our warm gray is mixed by combining Burnt Sienna with a bit of Payne’s Gray.
When the warm grays are added, we can clearly see the contrast in color. Next to each other, the cool grays look very blue, while the warm grays appear orange.
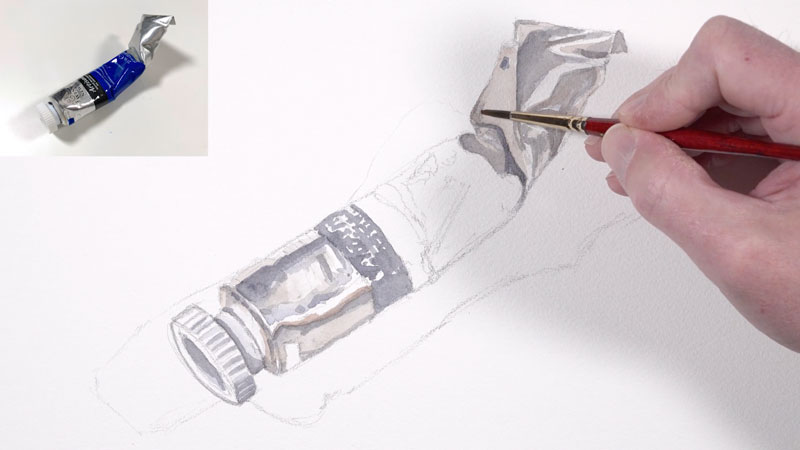
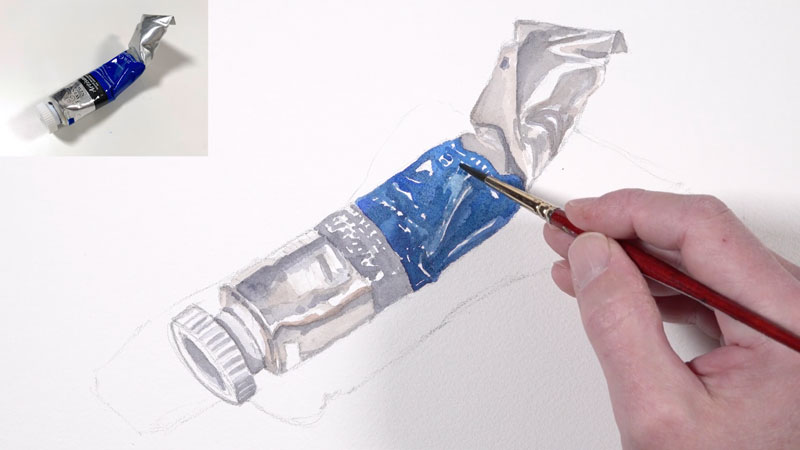
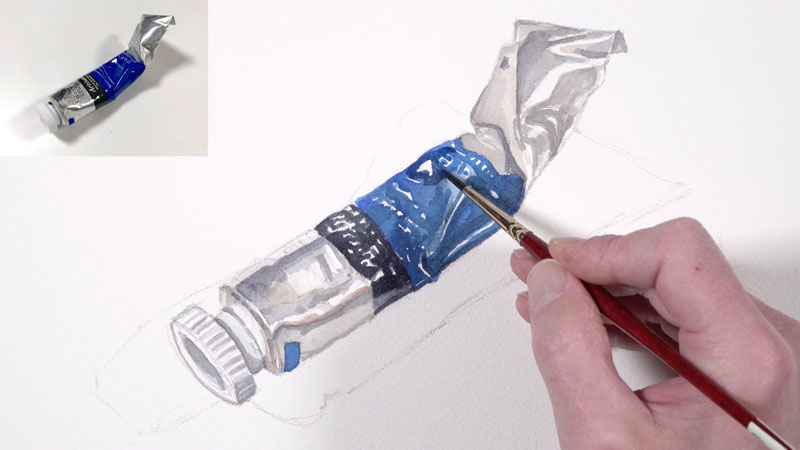
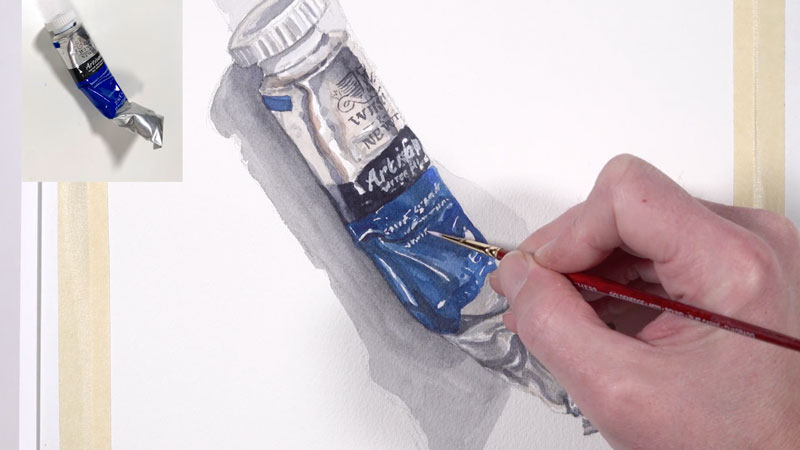
Pushing Values
With our initial applications of watercolor in place, we can begin layering darker values over the top, gradually extending the range of value. At the same time, we’ll add some of the bolder colors like the deep blue on the label. This blue is simply a mix of Cobalt Blue and Ultramarine. As this color is added, care is taken to preserve some of the text and the strong highlights.
Using Payne’s Gray, values are made darker and layered over in the areas of shadow. The form of the tube begins to make more sense as the range of value is extended.
Once most of the colors are in place on the tube, we’ll add a couple of cast shadows underneath. Since we’re dealing with two light sources, we’ll see this cast shadow on both sides of the paint tube. The light originating from the left is a bit stronger so the cast shadow on the right front is darker. The second cast shadow behind the tube is weaker.
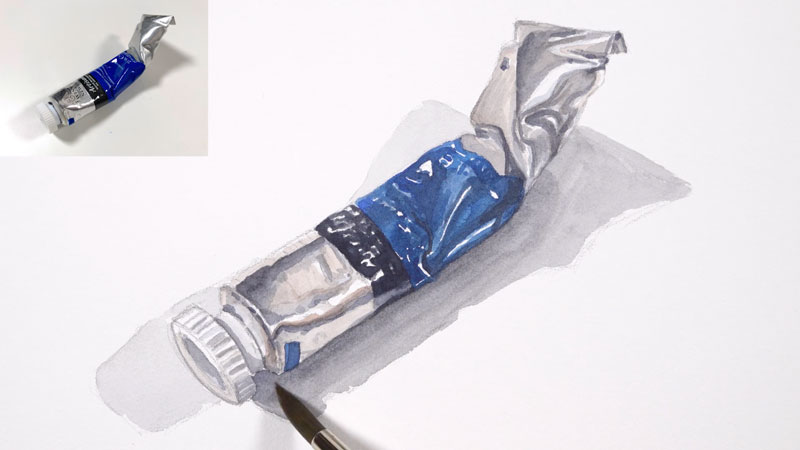
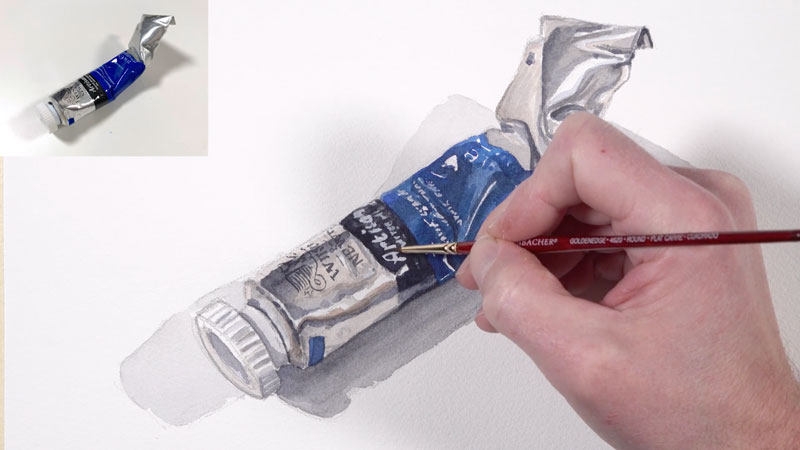
Painting Details
Now we’re ready to add the detailed text. This step may seem intimidating, but as long as you have a paper towel at the ready to lift mistakes, you can proceed with confidence. Since the text is rather small, we’ll use the 0 brush and tilt the board so that we can “write” in a more natural manner.
We’ll start with the dark text, using mainly Payne’s Gray.
Then it’s on to the white text. Ideally, we would have left open all of the areas of white text. In this case however, we need to add the text with a bit of gouache. Gouache is opaque watercolor and layers nicely over the color already in place.

Finishing Touches
All that’s left at this point is to clean up the painting a bit. Using a darker mixture of Payne’s Gray and Ultramarine, we’ll refine the darker areas around the white text and add a few more touches of darker tone to enhance the contrast.
Painting a Watercolor Paint Tube with Watercolor – Conclusion
As you can see, this subject is full of unexpected challenges. The wrinkles, text, and details each contribute and make this simple paint tube a little more interesting than it may seem at first glance. But by taking on challenges, like those presented by this subject, we grow as artists and our skills improve.
Thanks for joining for me in this watercolor adventure.
If so, join over 36,000 others that receive our newsletter with new drawing and painting lessons. Plus, check out three of our course videos and ebooks for free.