Drawing a Boat on the Water with Pastels
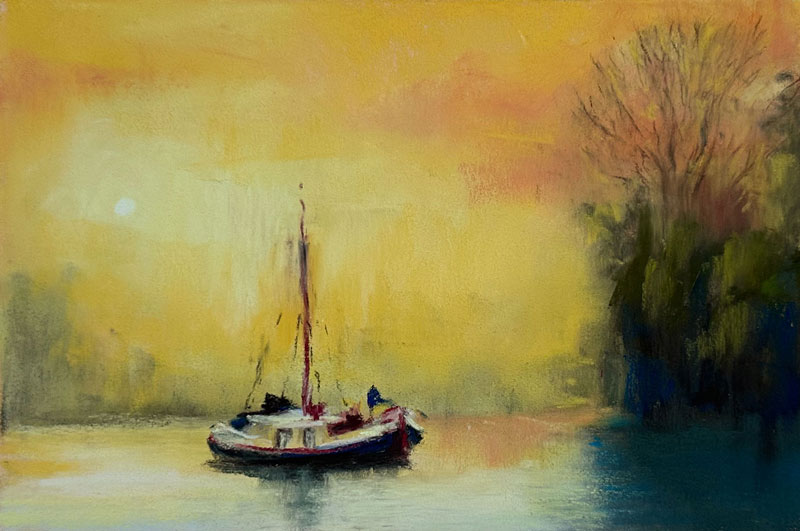
In this pastel drawing lesson, we’ll draw a boat on the water. This is a timed sketch and we’ll spend only about an hour. Here’s a look at the finished drawing…
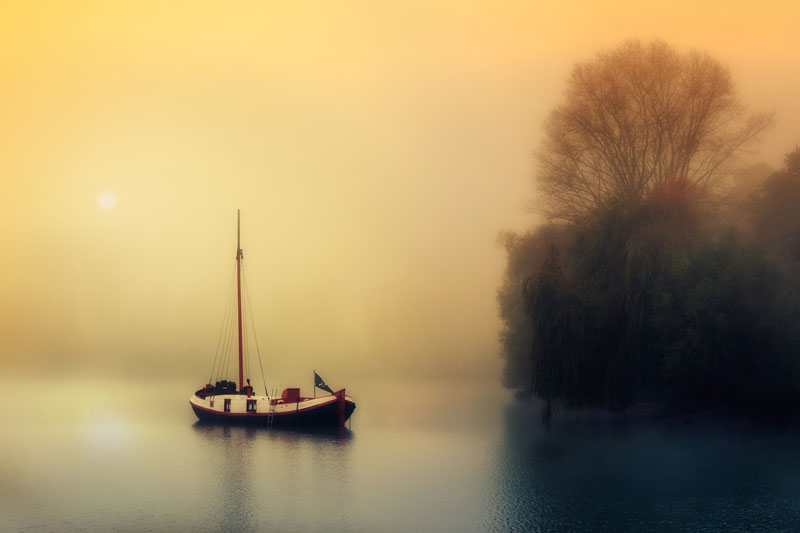
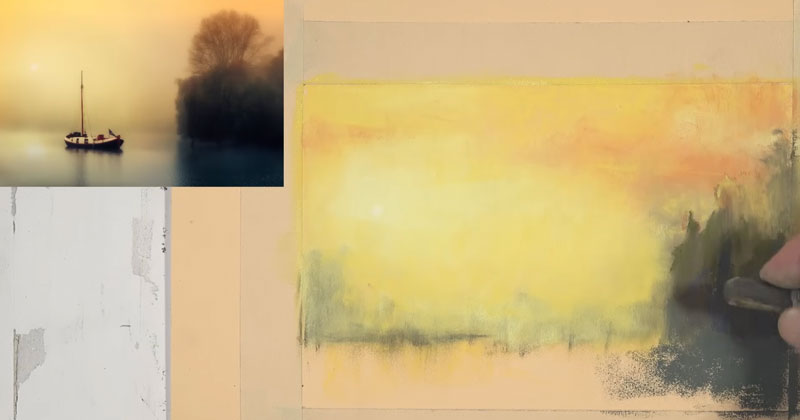
We’ll use a photo reference to complete the drawing. Here’s a look at the photo reference…
Drawing Materials
In this lesson, we’ll use soft pastels by Rembrandt on PastelMat paper. Rembrandt pastels are a high quality soft pastel that layer and blend easily. PastelMat paper features a heavy tooth that allows for many layers of pastel applications. For this drawing, we’ll use the “Buttercup” color of the paper.
Painting the Sky
We want to create somewhat of an atmospheric feeling to the drawing, so we’re going to be spending quite a bit of time on the sky. Then we’ll move to the trees on the right, and then finally, we’ll address the boat on the water.
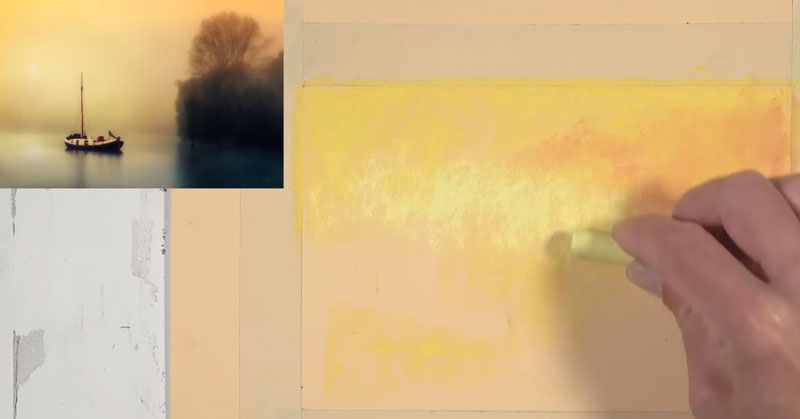
We’ll start with an application of yellow that is very close to a primary yellow. Then we’ll add a bit of a lighter orange. Over the top, we’ll go back to our primary yellow and work that material so that we create a gradation. We’ll also bring a bit of that yellow down into the water. We’re going to create lots of layers in the sky. Some mixing will occur with each color that we add.
Then, we’ll switch to a cooler yellow that is closer to a lemon yellow, and add this color close to where the sun is located within the picture plane. We’re also going to bring this color straight across and allow it to mix with the orange and primary yellow that we’ve already applied.
Drawing The Trees
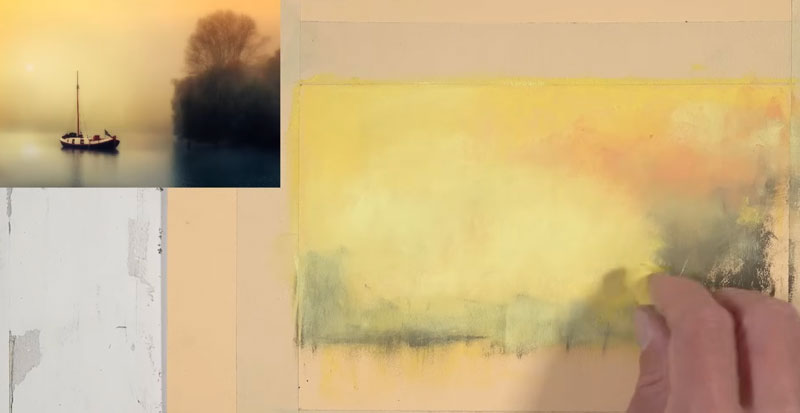
Now that we’ve got some base applications for our sky, we’re going to go ahead and indicate the distant tree line and the trees on the right side of the picture plane.
We’ll do so with a raw umber which has a pretty dark value. It’s close to brown, but it’s more neutral than a typical brown. We’re concentrating only on shapes. After these intitial shapes are defined, we’ll go back over the top of our umber applications with the primary yellow. This will mix with the colors underneath and create more of a smoky atmospheric effect. We can use our finger to do some blending and some smudging. Just make sure that your finger is nice and clean. I like to keep a wet paper towel on hand to keep my fingers nice and clean for those situations where I need to do some blending with my finger.
Then it’s back to the lemon yellow. We’re going to bring that right over the top of the edge of the shape of trees that we’ve created on the right side of the picture plane. It’s important not to hurry this process. Even though this drawing is only an exercise for about an hour, we still want to take our time and be deliberate with our applications.
Now we’re going to go back to our umber, and we’re going to reestablish the tree line here, and since the tree line is closer to the viewer, we’re going to see more contrast in this area, but we still want to keep that smoky look. We want to create an impression of the trees instead of defining everything with details.
I switched over to a color that’s close to terracotta. This will create a little bit more variety. We can see that there are some trees with some leaves that are changing color, so the terra cotta will help communicate this. Then it’s back to the raw umber before switching back to a yellow to soften the edges of the trees. As we apply these colors, we can blend and smudge with our finger in between applications.
I’ll remind you that we don’t really need to think about details. We only want to think about the colors that we see, the values that we see, and the shapes of those colors and values.
With a darker yellow-green, we’ll establish some of the highlights. These are very faint highlights that exist primarily on the left side of the trees.
We’re going to add just a touch of a darker blue-green. We’re going to use this color quite a bit here in the lower part of the picture plane. We’re just establishing some of those cooler shadows that exist on the bottom portion of the trees. We’ll go ahead and use this color to establish the initial shape for the shadow that’s cast on the water, and then we’ll apply more of it in the trees themselves, mainly in the shadowed locations. Green is made by mixing blue and yellow, so in the shadowed areas, we’re going to add a little bit of blue, adding more interest to the color. Then over the top, we can add a bit more of the umber, darkening it while still being able to clearly see some of those blues.
Drawing the Water
We’ll go ahead and put some colors down in the water. We’re going to start here with a very, very light yellow. This is the same color that we used in the center of the sky. Since the sky is reflected in the water, we’ll use the same colors that we see in the sky with an exception of a couple of blues.
Even though our colors are very similar to what we see in the sky and the water, we can differentiate the sky from the water with our horizontal stroke-making. A few more highlights are added to the trees on the right using an even lighter green. Then it’s back to our dark blue-green, defining the cast shadow on the water. I’ll bring in just a bit of blue here to further differentiate the sky from the water.
We’ll refine the edge where the highlighted part of the water meets the shadowed part. We’re getting some good variety and color in the water, but there are some oranges that should be reflected in our water. A bit of orange is added, followed by a cooler blue. This blue is more like a phthalo blue. It leans a little bit more towards green. Then we’ll make some of the cast shadows and shadows underneath the trees a bit stronger with our very dark brown.

Hopefully, you can see why patience is important when working with pastels. Oftentimes, you need to add multiple layers to build up the color that you need.
We’ll continue to refine the edges of the trees just a bit and add a few open areas where some of the light is getting through.
We do see some branches that are extending up. To add the branches, I’m going to start with a brown. I use the edge of the pastel to create these lines. If you’re not comfortable with this, you can always use a pastel pencil.
I can also roll the edge to create some very light marks. Then, we’re going to give this a very light smudge to keep the atmospheric look that we’re after. For a bit of variety, I’ll switch over to a darker brown and apply this mostly to the area of the trunk. We’ll add a bit more yellow in between some of the branches and also some touches of orange as well. We’ll make our sky a little bit more interesting by pulling a bit more of the orange over to the center of the picture plane and also applying it in the reflection in the water.
Drawing the Boat on the Water
Our scene is starting to come together and it’s time to add the boat which is the main focal point. We’ll start with a very dark umber to frame out the contours of the boat. If you feel more comfortable using a pastel pencil for this, you’re more than welcome to do so. This boat features dark blues and dark reds. After I’ve framed out the basic shape, I’ll go back into the shadowed areas and add a bit of blue. Then we’ll darken the blue with our umber. We’ll use our very, very light yellow to start establishing some of the white shapes of the boat. (The reason I’m not using a pastel pencil here for this is because I want to preserve this looser impressionistic feeling in this particular drawing.)
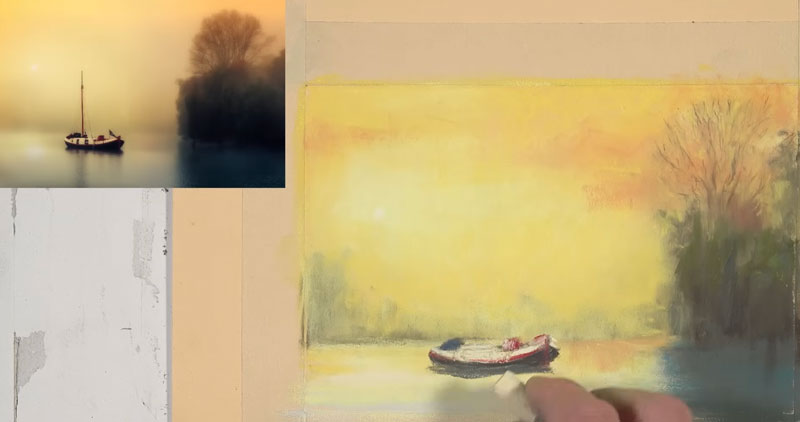
A bit of gray is added for the cast shadow on the surface of the water before switching over to a bit of red to start adding some of the red elements on the boat. This includes the stripe that goes along the side. We can clean up that line with a bit more of the very light yellow. We can add shadows with the dark umber and then continue to adjust these colors and values as much as we wish. We’ll continue to refine the overall shape of the boat before taking that dark red or terracotta color to create the mast.
Using our dark brown, we’ll add a few more details like the windows on the side of the boat. Then it’s back to our darker red, refining the stripe along the side. A few more highlights are added with a very light yellow. Then it’s time to make the cast shadow in the water. We’ll use a warm gray for this initially.

A bit more warmth is added with a bit of yellow and a few more details are developed with the terracotta. We need to make the cast shadow underneath the boat stronger.
Boat Drawing with Pastels – Conclusion
At this point, I’ve spent about one hour on the drawing and I determine that it is complete. It’s time to remove the tape. Be careful and pull the tape away at a right angle to prevent tearing. Here’a look at the completed drawing…
If so, join over 36,000 others that receive our newsletter with new drawing and painting lessons. Plus, check out three of our course videos and ebooks for free.