Elephant Drawing with Charcoal
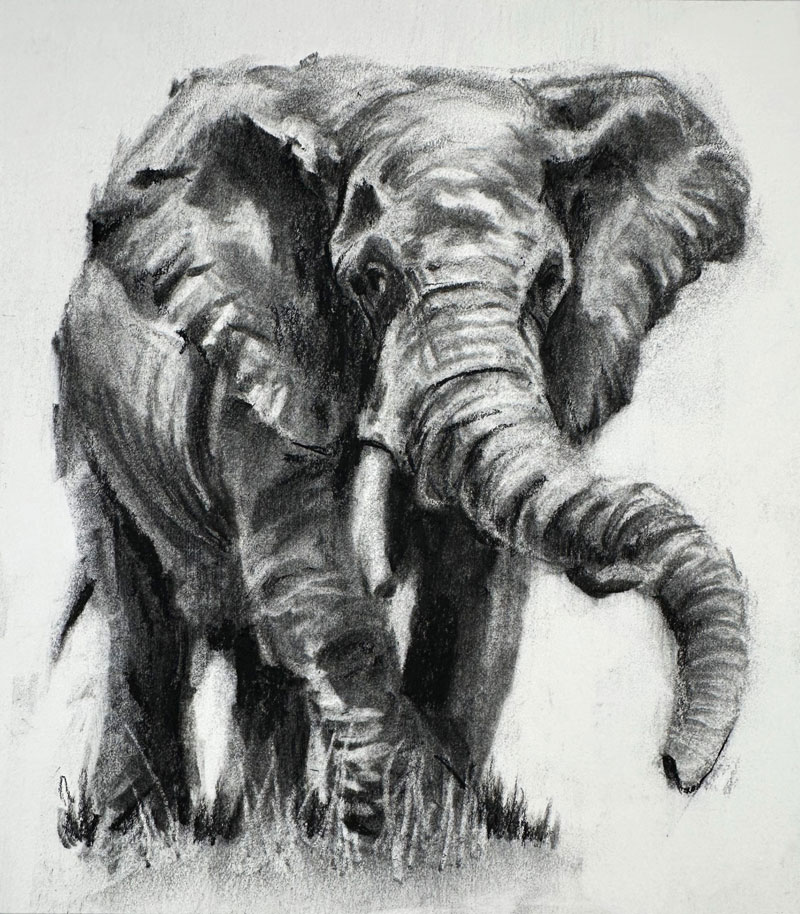
In this charcoal drawing lesson, we’ll draw an elephant with charcoal in about an hour. Here’s a look at the finished drawing…
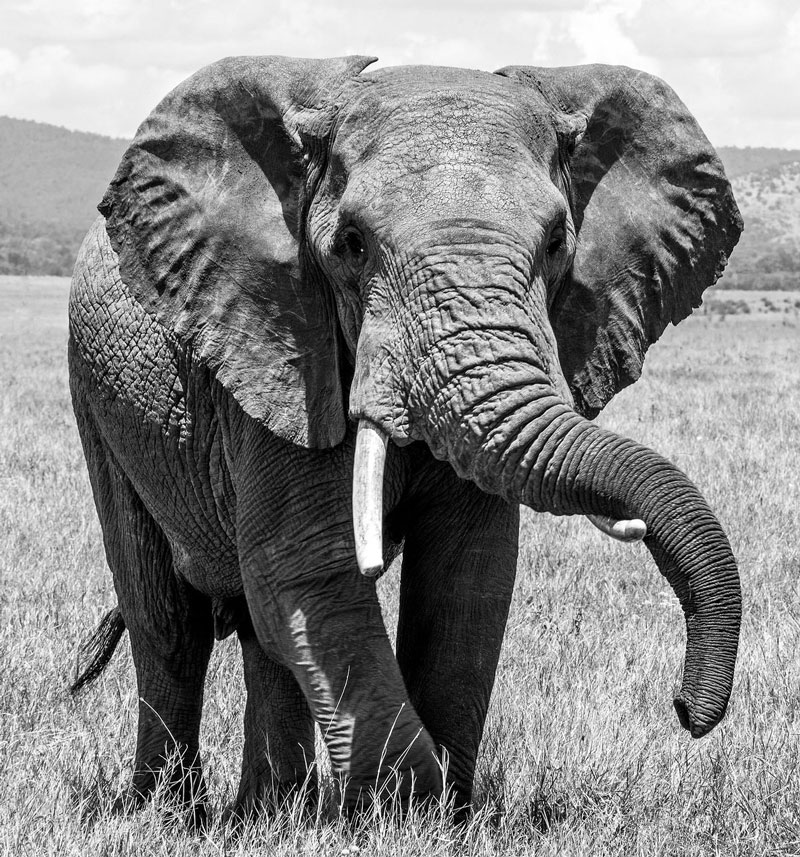
We’ll use a photo reference to complete the drawing. Here’s a look at the photo reference…
Benefits of Drawing with Charcoal
Maybe you’ve used charcoal before or maybe you’ve seen charcoal drawings and been intimidated. If you’ve used charcoal before and thought it was just a super messy medium that’s hard to control, I get that. But I really like charcoal because it is the most forgiving drawing medium out there and it forces you to think more like a painter. If you’re looking for a medium to transition from traditional drawing to painting, especially with an opaque painting medium like oils or acrylics, charcoal is a wonderful gateway medium to do so.
For this drawing, we’ll use vine or willow charcoal applied to Strathmore 400 series white sulfate drawing paper. We’ll also use compressed charcoal in the form of a charcoal pencil to make the values as dark as they need to be. We’ll use a blending stump to manipulate the charcoal on the surface, as well as a couple of erasers. We’ll use a kneaded eraser and we’ll also use a vinyl eraser for precision erasing.
Sketching the Contours of the Elephant
We’ll begin here with a small, skinny stick of vine charcoal. I’m going to start at the top of the picture plane, locating the top edge of the elephant. I’m going to make little small marks and indications where the edges of the ears are located and where they begin in relationship to the edges of the picture plane. I’m using the edges of the picture plane, which is proportional to the photo reference, to analyze the negative space between the edges of the picture plane and the edges of the elephant to find these initial marks.
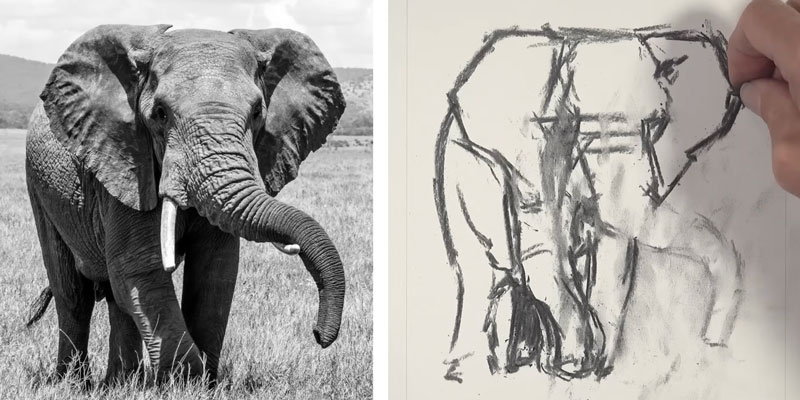
We’ll begin working our way down from our initial marks, continuing to define the edges of the ears and also the beginnings of the head of the elephant. I’m holding my stick more like a pastel instead of like a pencil. This allows me to move my arm a little bit more freely and make looser marks. In fact, this drawing is going to be fairly loose and it’s going to go through multiple stages. We don’t need to worry about getting everything perfectly right because the vine charcoal is easily smeared and smudges very easily.
We’ll go ahead and get an indication of where the broken tusk is located and also the edge of the leg of the elephant. We started at the top of the picture plane making comparisons with the edges of the picture plane to find the ears and the head and the trunk, and then as we work our way down, we can use the shapes of the ears, the trunk, and the head to find the rest of the edges of the elephant, including the back edge of the body of the elephant and one of the rear legs.
I can’t express to you how important it is to remain loose and not try to be too controlled with these initial applications. Follow your instinct and make a mark where it feels right. You can always change these marks later in the process as you’ll see that I do very frequently.
At this point, you can see some of the smudging that’s occurring from the edges of my fingers by running over the top of the vine charcoal. Again, vine charcoal is so soft and easily manipulated that it is going to smudge a bit, which is completely fine. We can clean up the drawing later.
Shading the Drawing of an Elephant
Now we’ll smudge the marks that we made initially. These lines are too hard and the edges are too rough and defined. When we do this, we’re also creating some areas of middle value, so we’re starting to push that value range already in this early part of the process.
With a larger piece of vine charcoal, I’m going to start looking at some of the broader shapes of darker value. Value is the darkness or lightness of color. It’s the most important of the elements of art. Value tells us about the form of subjects. It also can tell us about the texture, the intensity of the light source and the location of the light source. Value is incredibly important. At this stage of the drawing, instead of looking for edges, I’m looking for shapes.
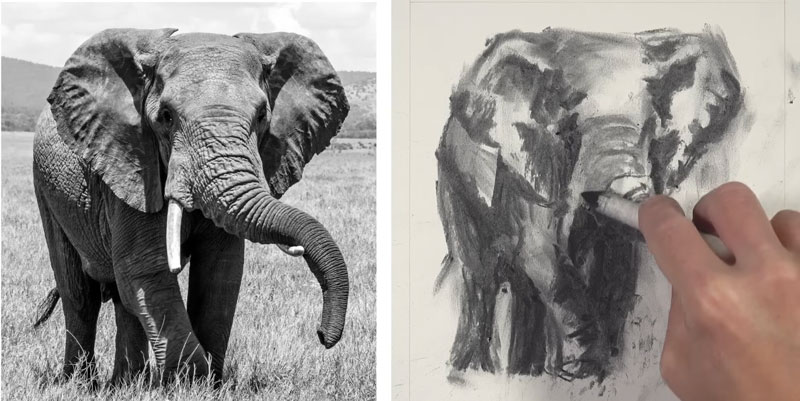
We’re starting to define the areas of shadow, and at the same time we’re also defining some of the areas of highlight. It’s okay to get really dark at this stage. We’re going to go back and make some lighter marks using an eraser.
If you’re having trouble seeing the areas of dark value or the shapes of dark value, it might be helpful to squint at the subject that you are analyzing, in this case our elephant. If you squint your eyes a little bit, it’s a little bit easier to see the shapes of darker value.
Since we’re concentrating on the shapes of value that we see, we need to make sure that we don’t get overwhelmed by the details. It’s easy to look at a subject like this and see all the wrinkles, all the details and get overwhelmed, especially if you’re used to drawing with graphite or pen and ink or some other medium that requires precision. With charcoal though, it’s more of a process that’s akin to painting, where we’re looking for shapes of value in order to create the illusion of form.
Now, we need darker values, we need middle values, but we also need those stronger highlights. With a kneaded eraser, we can begin erasing out highlights.
Most of these lighter values exist on the upper portion of the elephant because the light source is coming from above, but we are still going to see some hints of lighter value at the bottom of the body as well where light is hitting some of the legs.
For a lot of people who are new to working with charcoal, going through these different stages may seem frustrating and it may seem like your drawing is not developing in the way that you want it to be, especially if you’re a detail-oriented person. But you have to trust the process and you have to go through these stages in order to create a drawing that’s loose and somewhat expressive. Allow the process to happen and don’t allow yourself to get obsessed with the details. Again, just concentrate on the relationships of values and the shapes that you see and allow the drawing to slowly emerge from the paper.
As you might imagine, cleaning up your drawing as you go through the process is important as well. You don’t want your finished drawing to look messy or disheveled, so cleaning up stray areas of charcoal on the surface is important as well.
It’s time for a little bit more precision. For precision erasing, I use a Tombow MONO eraser. This is a vinyl eraser that has a precise tip for an eraser. This will allow me to begin the process of erasing out some of the smaller shapes of value, which will translate into details.
The drawback to using this eraser is that it does leave some eraser shavings on the surface, and since our surface is so delicate at this point, when you wipe away some of the eraser shavings, it is going to move some of the charcoal around. But thankfully we can go back and make changes as we have throughout the process to fix these little areas of smeared charcoal.
Then it’s back to our larger stick of vine charcoal. Again, reestablishing some of those darker tones. At this point, we’re starting to get a broader range of value, and slowly the form of the elephant is starting to take shape.
Developing Details on the Elephant
Like with any drawing or painting that you might create, it’s important to be patient and allow the process to play out. Try not to allow yourself to be frustrated. Again, this is a sketch that I completed within an hour, so this is not a completed drawing by any means. This is a sketch, so keep that in your mind while you’re working and don’t put too much pressure on yourself to feel like you need to have a nice drawing at all of the stages of the process.
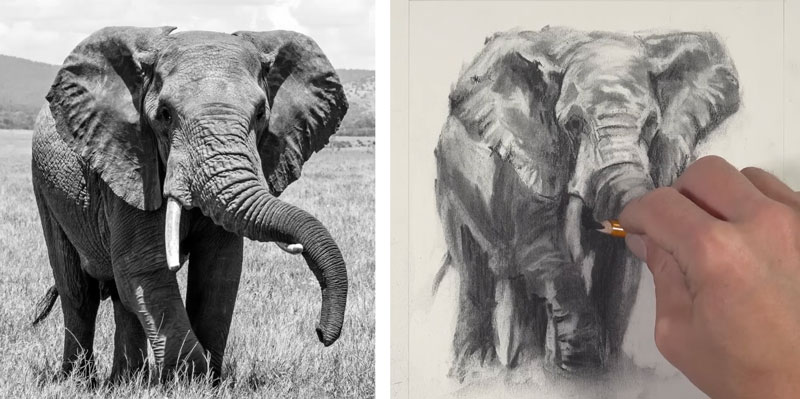
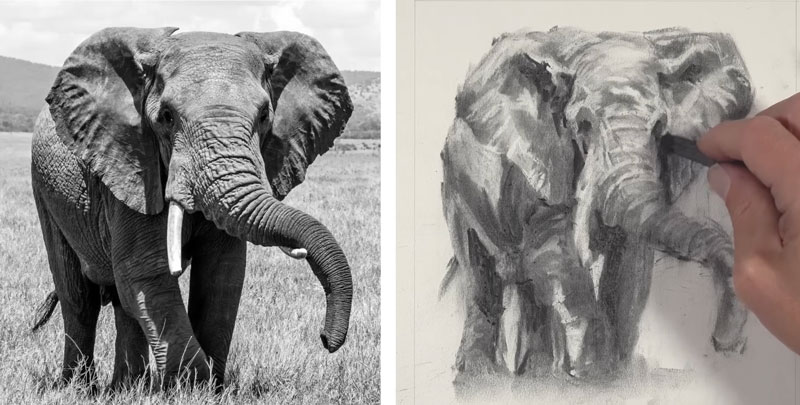
At this point in the drawing, I have enough of a base application of vine charcoal. It’s time to switch to compressed charcoal. Compressed charcoal is considerably darker than vine charcoal. It’s also more difficult to erase. I am applying this compressed charcoal using a charcoal pencil. This is going to allow us to define some of the details. But we also have to do so with the understanding that erasing these marks is going to be considerably more difficult. That’s why I like to reserve compressed charcoal applications for the end of the drawing process.
We basically have created somewhat of an underpainting with our vine charcoal applications and now we’re refining the drawing with the compressed charcoal. You’ll notice how much considerably darker the compressed charcoal is compared to the vine charcoal. This is going to allow us to create rich areas of dark value where the shadows are at their strongest.
Creating a drawing like this may feel like you’re creating lots of different drawings because you go through so many stages when you’re developing the image, which is perfectly acceptable. Each time you go over an area you’ll see new details and new bits of information that you can add to the drawing to make it more representational.
We’ll continue adding our areas of darkest value using the compressed charcoal pencil. As we apply this compressed charcoal, we can see that the contrast in the image is starting to get stronger. This makes the illusion of the light source even stronger as well, and it increases the intensity of the light within the scene.
At this point in the drawing, our drawing of an elephant is actually starting to look more like an elephant. The details are starting to emerge from the surface and we have created a more broad, full-range value, and the form is also translating pretty nicely as well.
Completing the Drawing of an Elephant
We can continue to work back and forth between the compressed charcoal applications and also the eraser to continue to clean up the drawing and also add additional details.
We’ll use the compressed charcoal at the bottom to add some of the grass blades and smooth those applications with the blending stump. We’ll also use the precise eraser to pull out some lighter marks. You can see that grass blades in the extreme foreground are overlapping the bottom portion of the elephant, so we can use this eraser to pull out some of these lighter grass blades. Again, we’re not going to get too wrapped up in the details here. We want to just give the impression of some grass at the bottom.
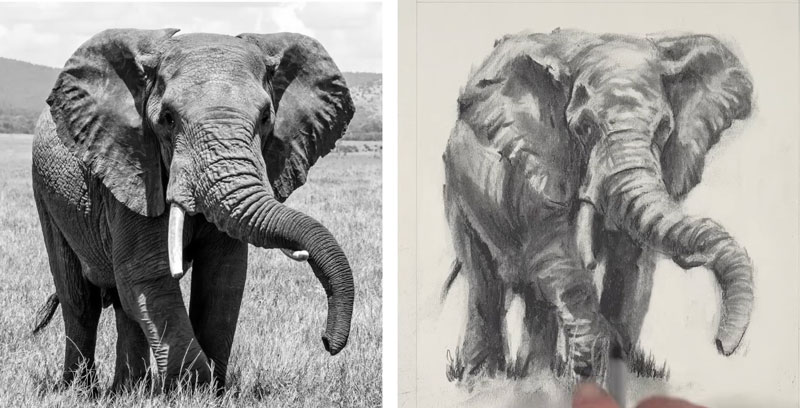
Then we’ll continue to refine some of the areas a bit further with the compressed charcoal pencil. We’ll add a few smaller indications of some wrinkles and also darken up some of the areas around the eyes. Then we’ll pull out a few more highlights using the precise eraser.
You can bring your drawing to as much detail as you wish, continuing to look for the areas of dark and light value, but at this point, I’ve decided that my drawing is finished since I’ve spent an hour on it already.
Charcoal Drawing of an Elephant – Conclusion
Now our drawing is complete. I hope that if you followed along, you see how forgiving charcoal can be and what a wonderful medium it is for drawing. If you’re patient, allow for some “messiness”, and concentrate on shapes of value instead of details, you’ll find success with this traditional drawing medium.
If so, join over 36,000 others that receive our newsletter with new drawing and painting lessons. Plus, check out three of our course videos and ebooks for free.