Drawing Reflective Metal Surfaces
In this drawing lesson, I’m going to show you how easy it can be to draw a seemingly complex subject in a realistic manner. The secret to drawing reflective surfaces, like metal, is to pay close attention to the contrast in values. Often, we see dark values right next to light values. If you get this contrast right and the shapes of different values, then your drawing will look representational.
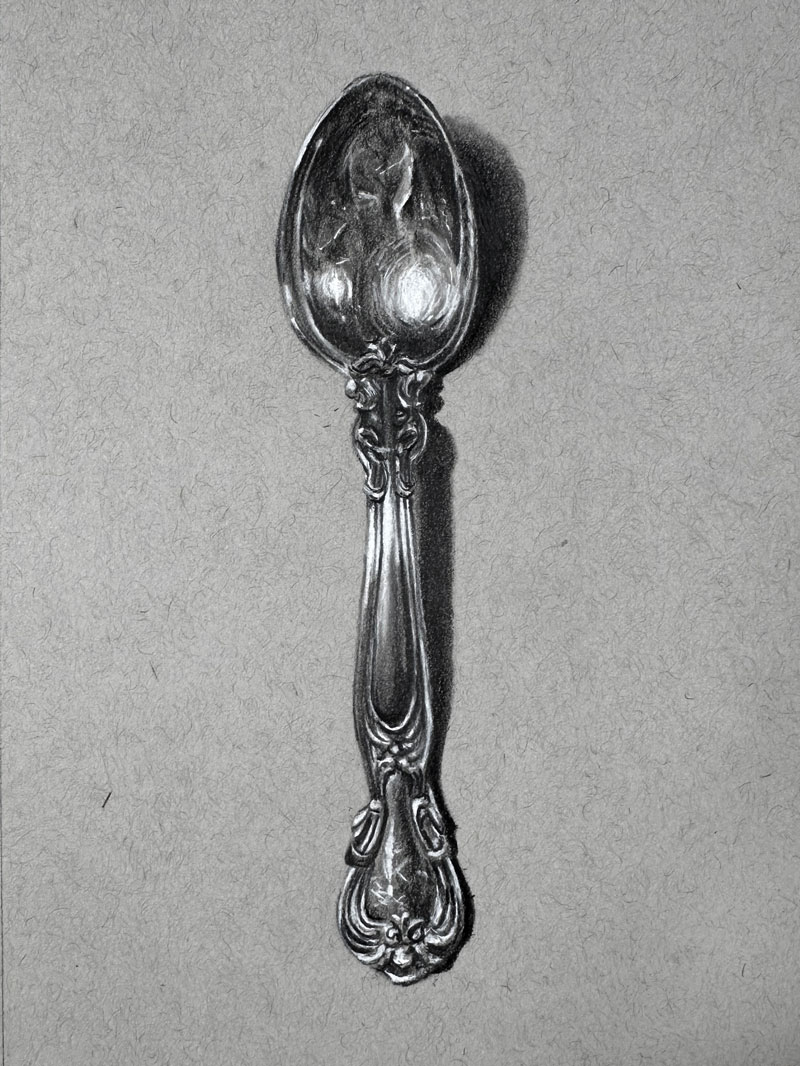
Here’s a look at the completed drawing…
Materials and Surface
For this drawing, I’ll be working on Strathmore toned gray sketch paper. This is a wonderful work surface to work on, especially when you’re using white and dark media together. This provides a nice medium toned surface to work from, so that’ll allow us to push our values lighter and darker throughout the process. Initially, I’m going to be sketching things out with just a simple H graphite pencil, but then we’ll switch over to Staedtler Mars Lumograph black pencils. We’ll start with the HB pencil initially, before switching over to the 4B, and then finally the 6B. And I’ll also be using a white charcoal pencil for the light values, and for blending, I’ll be using an assortment of blending tortillons.
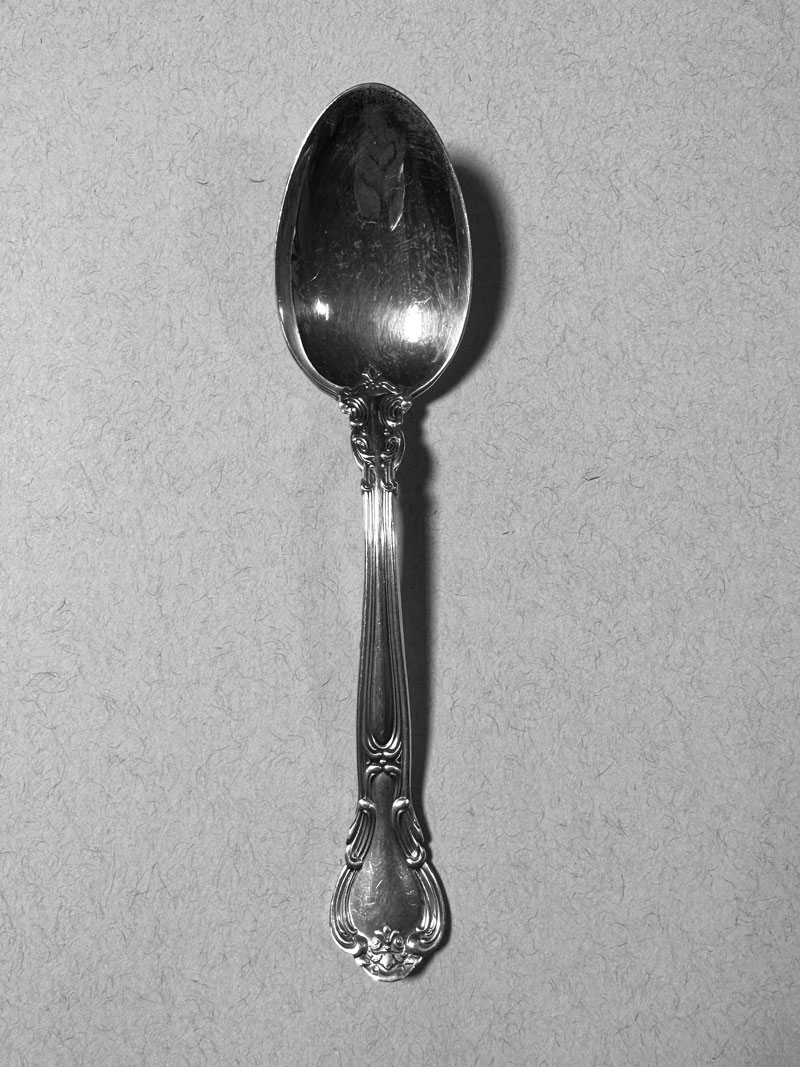
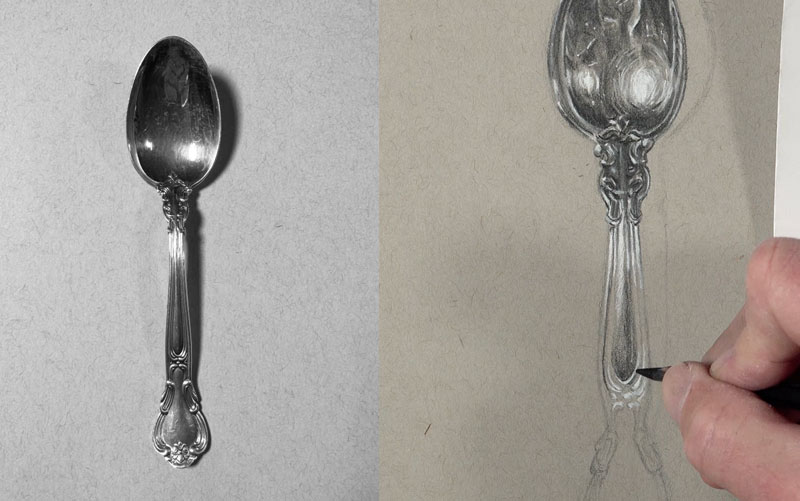
The Photo Reference
I’m going to be working from a photo reference that I took of a spoon that I actually own. Here’s a look at the photo reference…
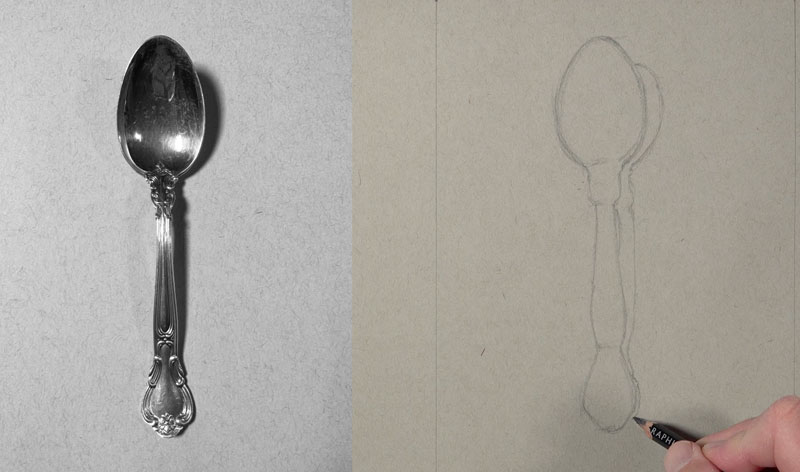
Drawing the Contours of the Spoon
First, I mark the top of the spoon, and then I mark the bottom of the top part of the spoon. Then finally, we find where the lower handle ends. I mark the width with just a couple of loose marks of the top of the spoon, and also the bottom of the spoon.
Once I have these measurements in place, I can confidently start at the top of the spoon with the H graphite pencil, sketching out the difficult shape. This is somewhat of an egg shape, but you can see it flattens out quite a bit at the bottom. So I’m using looser strokes here, making multiple marks on the surface so I can find the correct mark. Next, I simplify the edges of the outer contour of the spoon as I work down.
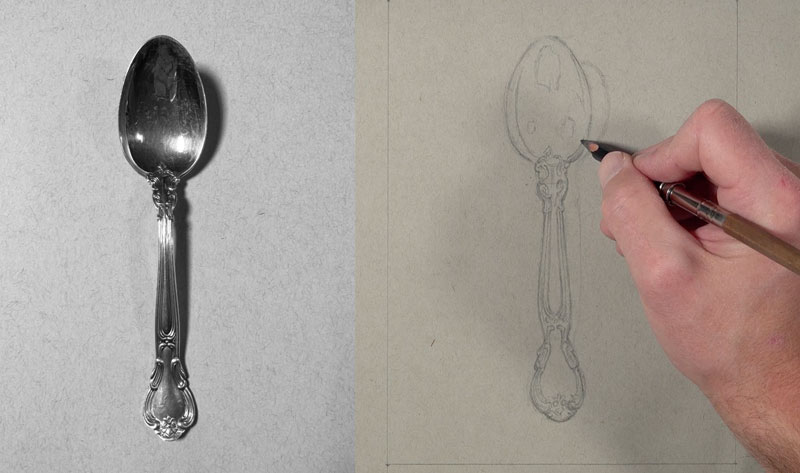
I’ll go ahead and draw a few contour lines for the shadow and the cast shadow that exists behind the spoon. Our light source is originating from the left side, this is going to create an area of cast shadow on the right side. With a sharpened H pencil, and a little bit of a slower approach, I can begin to refine the sketch.
See also: How to Sharpen Any Pencil Like a Pro
Now this is a very complex subject, even though it is just a simple spoon, there is quite a lot of changes in value. Instead of trying to figure out the patterns that I see I’m focusing on areas where I see contrast in value. So in other words, where I see a dark right next to a light, I’m sketching a quick loose line there. We don’t have to draw all those little tiny intricate lines that we see. Just plan out the areas of contrast.
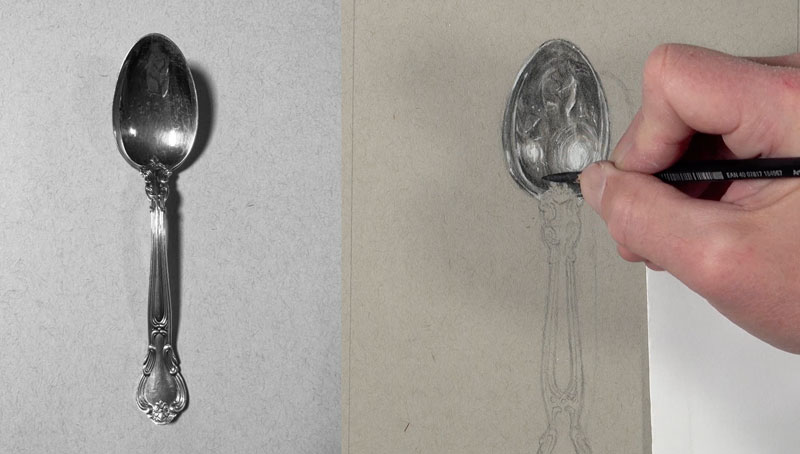
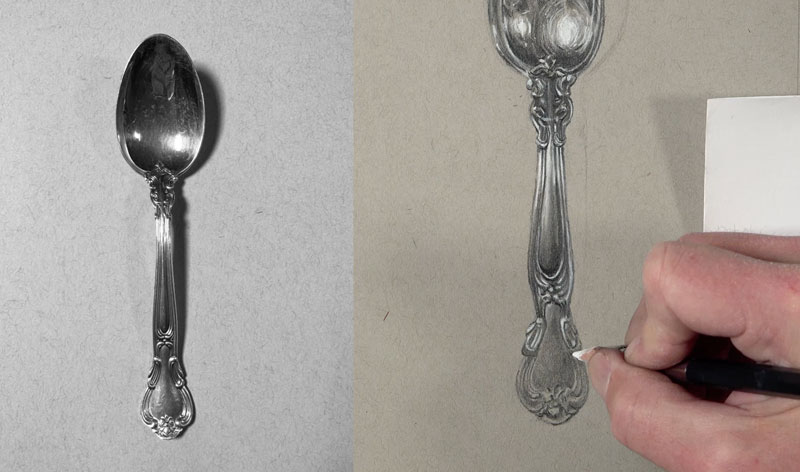
Developing the Values on the Spoon – Shading
I’m going to start with the HB black pencil with a very light application. One of the things that you need to keep in mind if you do decide to tackle this drawing is that you have to have some patience, so this is going to take a little bit of mental energy.
What I like to do is work very slowly for about 10 or 15 minutes, and then take a three to five minute break while looking at my drawing. This allows me to take the drawing in pieces, which makes it a little bit more easy to complete the drawing. This gives my mind a little bit of a rest. As I’m adding this very light application of material on the surface, I’m thinking about the darker values but I’m also leaving open the areas of highlight because the white charcoal will not cover over the top of a graphite pencil or this black pencil. We have to be mindful of where these highlights are located so that we can add the white charcoal in those locations.

You can see I’m starting to plan out some of the slightly darker areas with another application of the HB graphite, before switching over to the blending tortillon. I’m going to start blending some of the material into the tooth or texture of the paper, creating more of a smoother appearance. But even though I’m using a blending stump here, I am thinking about the blending stump being a mark-making tool. I’m continuing to go back and forth between my photo reference and the drawing surface, continually making comparisons between what I see and the marks that are developing on my paper.
Before we go any darker, we’ll go ahead and switch over to the white charcoal pencil. I’m going to use this pencil to put down those strong highlights that exist at the top of the spoon and I’ll also start to put in some of the subtle highlights as well.
I can switch over to the 4B black pencil and start making some of the values a bit darker. In this part of the process, I’m going to start creating some of those subtle changes in value in some of the dark locations. I’m going to bump up the contrast just a little bit so that there’s a little bit more detail visible in my reflection.
This next section underneath the top part of the spoon is quite a bit darker, so I’m starting here again with the HB graphite pencil. But I’m applying a bit more of the material here initially. In this section, we don’t have to really worry about the details, we just allow the details to come out of the drawing. I’m just concentrating on darks and lights that I see and I’m placing those darks and lights in a similar location on my drawing. I’m not getting wrapped up in all of those intricate details. If you do, you’ll either end up with a drawing that appears really stiff and maybe even a little bit cartoony looking. So allow yourself some freedom, but also just pay attention to the darks and lights, the shapes that you see, and place them in your drawing in a similar location.
Working our way to the lower part of the handle of the spoon, we’re going to start with the HB pencil. We’ll work our way all the way to the bottom. There is quite a bit of detail, but instead of focusing on the detail, we’re going to focus on the relationships between darks and the lights and the shapes that we see. So it might be beneficial to put out of your mind that you’re drawing a spoon or even that you’re drawing this detailed relief section on the spoon. Instead, just concentrate on the shapes that you see. This is absolutely fundamental to drawing and painting.
Now our spoon looks like it’s floating, so let’s add a shadow to make this a lot more realistic. For this, I’m going to go ahead and start with the 6B pencil. You’ll notice on the cast shadow underneath the top part of the spoon there is a little bit of a transition. I’m going to release a bit of pressure as I go outward from that area. The rest of the shadow is pretty solid. It is slightly lighter in the middle portion where a bit of light gets underneath the spoon.
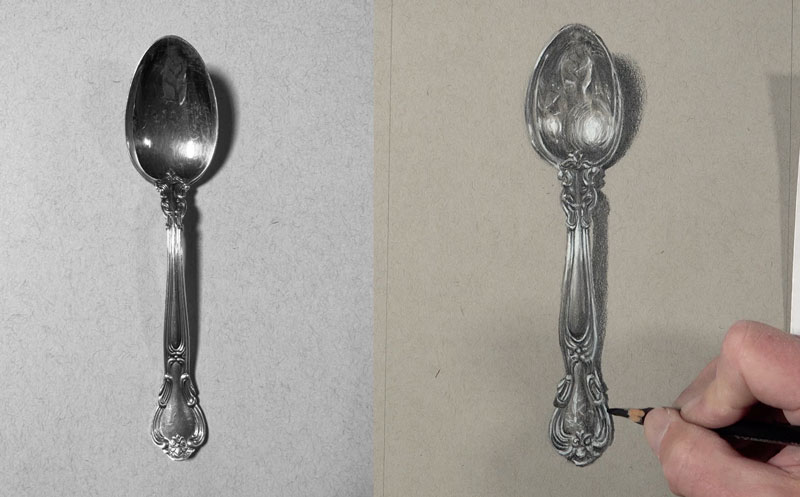
Drawing a Metal Spoon – Conclusion
Now our drawing of a spoon is complete. And even though we didn’t focus on details, we can clearly see them defined in the final drawing. Here’s another look at the completed drawing…
If so, join over 36,000 others that receive our newsletter with new drawing and painting lessons. Plus, check out three of our course videos and ebooks for free.