Improve Your Drawing Skills with Exercises
In this drawing lesson, I’ll share eight drawing exercises guaranteed to improve your skills. Drawing is a skill that anyone can learn and develop. It requires some knowledge and a lot of practice. Unfortunately, some of us don’t really understand how to practice drawing. But hopefully, these drawing exercises will get you on the right track.
Drawing Exercise #1 – Continuous Line Drawing

With a continuous line drawing, you start by making a mark anywhere on your surface but you don’t lift your pencil at all. You continue to make a continuous line, moving your pen or pencil from one section to the next within the drawing. This exercise helps to improve hand eye coordination and also your observational skills. You get accustomed to moving your eyes over the subject that you’re observing and also making marks that reflect what you see. You can use any medium that you wish for this exercise. It doesn’t take very long, and it’s an excellent exercise for your sketchbook.
See also: Continuous Line Drawing
Drawing Exercise #2 – Cross Contour Line Drawing
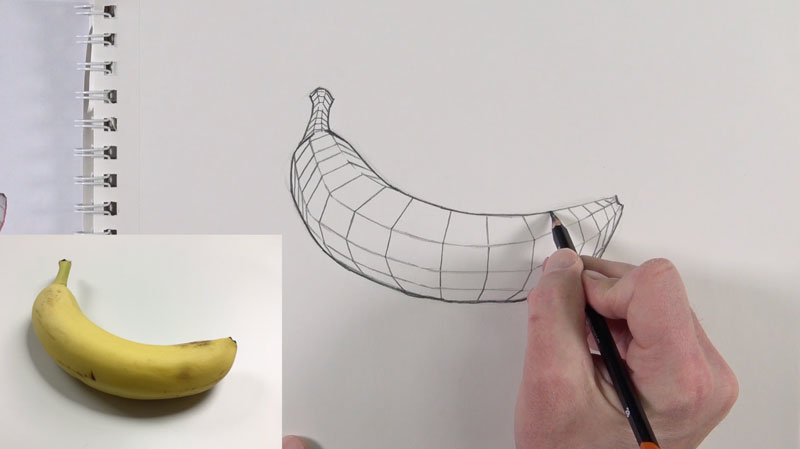
Contour lines are outlines. They typically define the edges or the edges of details within a subject. Cross contour lines however, flow over the form of the subject. Cross contour lines are sometimes visible on the subjects themselves, but mostly these lines are implied lines. You can imagine cross contour lines if you were to take your finger and move it over the form of the subject. These lines can be both horizontal or vertical.
Understanding cross contour lines and applying them to a drawing is very important. We can use cross contour lines to define form and value. You can practice drawing and understanding cross contour lines with any subject that you wish. With this drawing of a banana above, we’ve drawn the contour lines. Then we drew cross contour lines over the length of the banana, followed by cross contour lines over the width of the banana. You can see that this helps us better understand the form of the banana in three-dimensional space.
Drawing Exercise #3 – Upside Down Drawing
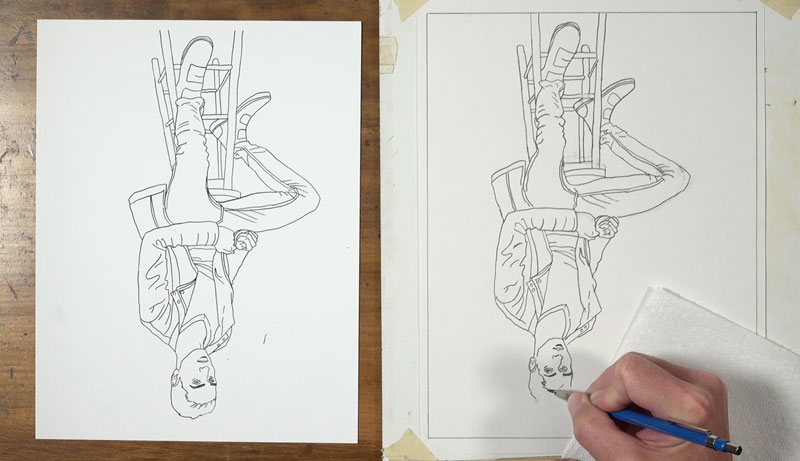
With this drawing exercise, you are to draw the subject upside down. Simply turn your reference upside down and draw what you see. This forces your mind to pay special attention to the shapes and relationships that you see, enhancing your observational skills. It takes the part out of your mind that makes you want to draw what you think you see instead of what you are actually seeing.
Drawing Exercise #4 – Value Study
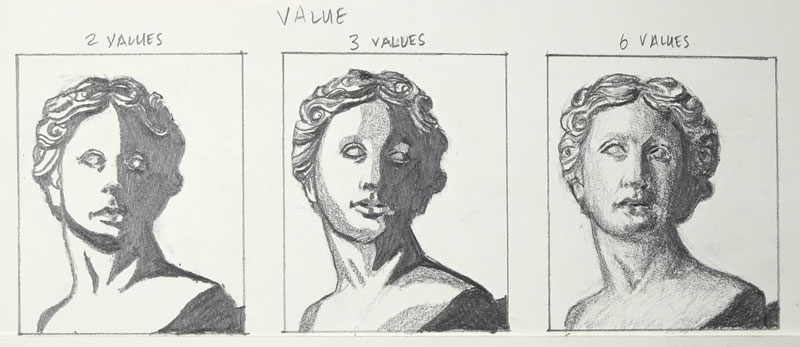
For this drawing exercise, begin by creating a value scale and then three small swatches. Value is the darkness or lightness of a color. A value scale represents (in this case) six different values, from the darkest dark to the lightest light.
For your first drawing, you’ll draw a subject using only two values. This means that if your values exist on the lower portion of the value scale, we assign the darkest value. If your values fall anywhere on the upper part of the value scale, or a lighter value, then we assign white as the value. You end up with a two-tone drawing of black and white shapes.
For the second drawing, you’ll draw the same subject, but this time we’ll assign three values. So we’ll still have white as a value and black as a value, but this time we’ll incorporate our middle value on the value scale to represent the middle values that we observe. This forces us to decide which value needs to go darker or lighter and which value needs to be assigned a middle value. In this case, we end up with a drawing with three values – black, white, and a middle gray.
For your third drawing, you’ll use all six values on the value scale. This means that we’ll assign the values based on the values that we actually see. So for this third drawing, we can have gradations or slow changes of value from dark to light. This is a complete drawing. But if you do this in order, you’ll notice that you pay special attention and closer attention to the values that you observe and you better replicate them in your drawings. Value is the most important element of art, so this drawing exercise is especially important if you want to get better at drawing.
Drawing Exercise #5 – The Square of Patience
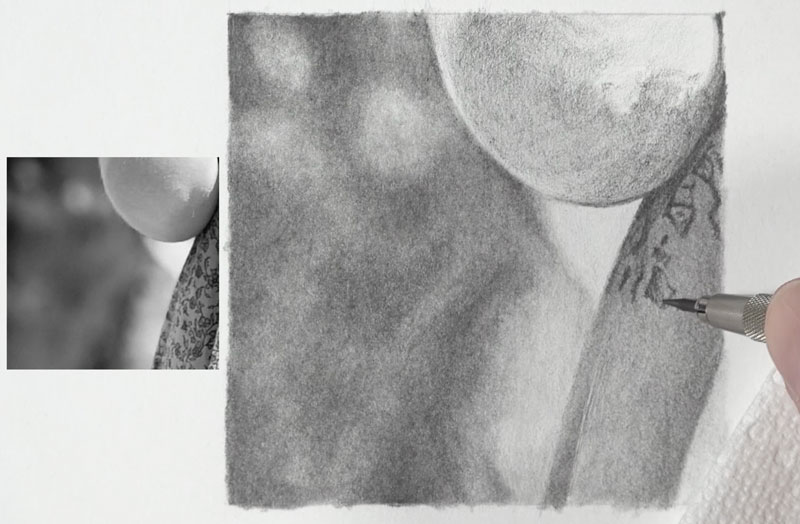
For this drawing exercise, take any photo that you wish and take a small square out of that photo. Then create a three inch by three inch square on your drawing paper and spend at least two hours drawing that one three inch by three inch square. What you end up with is a small portion of a larger drawing. This exercise makes you realize how important it is to be patient and work slowly in your drawings.
Drawing Exercise #6 – Timed Drawings
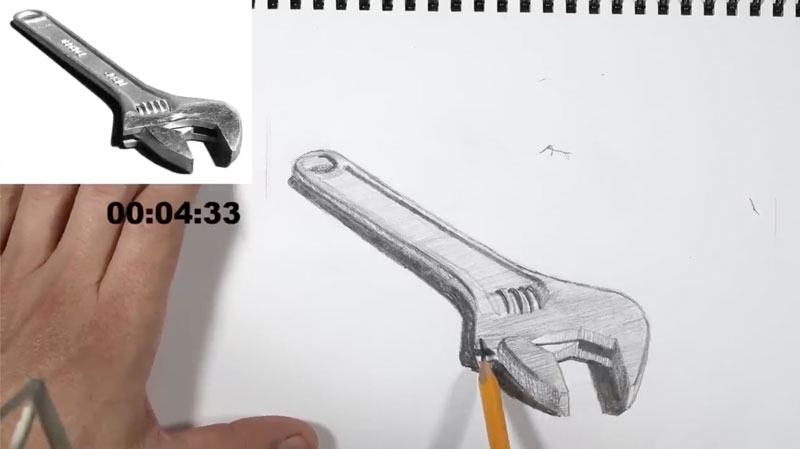
For this exercise, we’ll create three drawings of the same subject, each with different timed amounts. For the first, you’ll just spend one minute on the drawing. For the second drawing, spend five minutes. And then for your third drawing, spend 30 minutes.
This drawing exercise helps us out in a couple of ways. One, it improves our drawing speed. It helps us understand what elements we need to include and what elements we can leave out in order to communicate a subject to the viewer. It also helps us with our observational skills. If we do this in order, starting with the one-minute, then the five-minute drawing, and then finally the 30-minute drawing, we notice things in our 30-minute drawing that we might not have noticed initially with our first drawing. In other words, it helps us to see as an artist. We notice details and changes in values that we might not have noticed originally.
Timed Drawing Exercise – Gettin’Sketchy – Season 9
Drawing Exercise #7 – Gesture Drawing

Gesture drawing typically refers to drawing the human figure quickly. Sometimes we can create a gesture drawing with just one mark. Here again, timing your drawings is especially important. Start with a one-minute or five-minute or even 10-minute drawing, using just a few lines to describe your figurative subject. The point of gesture drawing is not to create a finished drawing. Instead, it’s to create a line or a series of lines that represent the pose or position that the figure is in. You can use a gesture drawing as a base for a more complete drawing, or as a simple exercise.
Gesture drawings can be created with any medium that you wish. Gesture drawings aren’t meant to be long drawings. Instead, they’re meant to be quick sketches. Gesture drawing will undoubtedly improve your figure drawing skills, but it will also improve your skills in drawing in general. You’ll get better at observing the shapes that you need to replicate in drawing and you’ll also get faster at drawing.
See also: Gesture Drawing
Drawing Exercise #8 – Black Drawing Paper
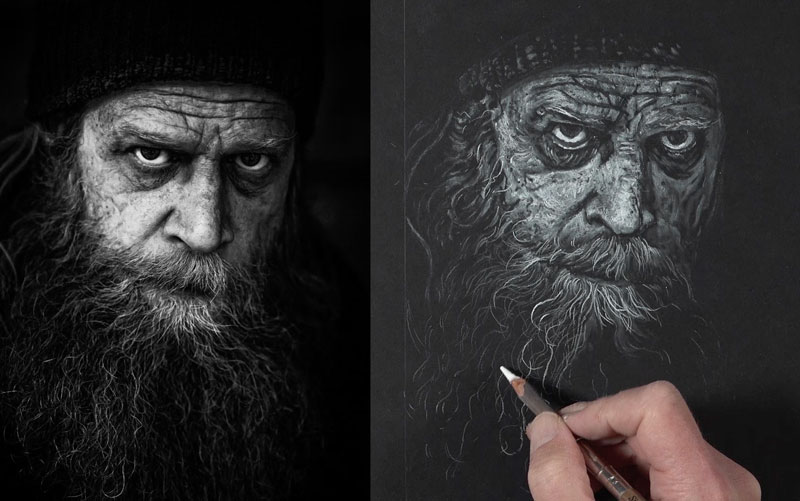
We’re all accustomed to making dark marks on a white surface. This is traditionally the way all of us start drawing. But drawing with a white media or colored media on black paper forces us to pay attention to the highlights and all of the values that we see, not just the dark values. At first, drawing on black paper with a white medium takes some getting used to. But once you get accustomed to it, it improves your drawing overall. You get better at observing and understanding the values that you see. Value is the most important element of art. You get the value right, you’re going to get your drawing right.
See also: Drawing on Black Paper
If so, join over 36,000 others that receive our newsletter with new drawing and painting lessons. Plus, check out three of our course videos and ebooks for free.