Waves with Pastels
In this pastel lesson, we’ll take a look at drawing waves with soft pastels on Canson Mi-Teintes pastel paper. We’ll try to capture the power and beauty of the ocean through bold mark-making and strong colors.
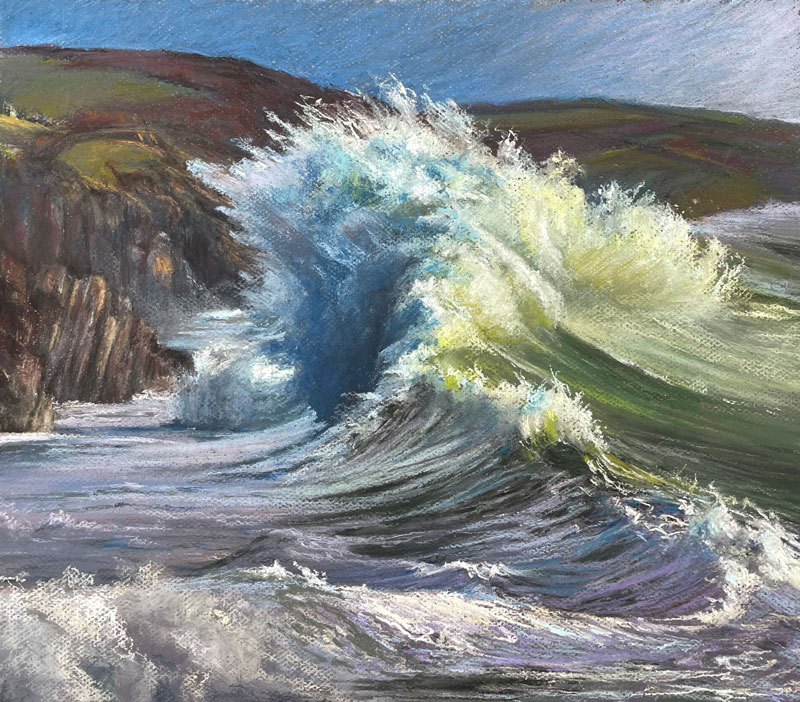
Here’s a look at the completed drawing…
Considerations for Composition
A photo reference from Pixabay.com was used to complete the drawing. Only slight alterations to the color and contrast were made in Photoshop. Here’s a look at the photo reference…
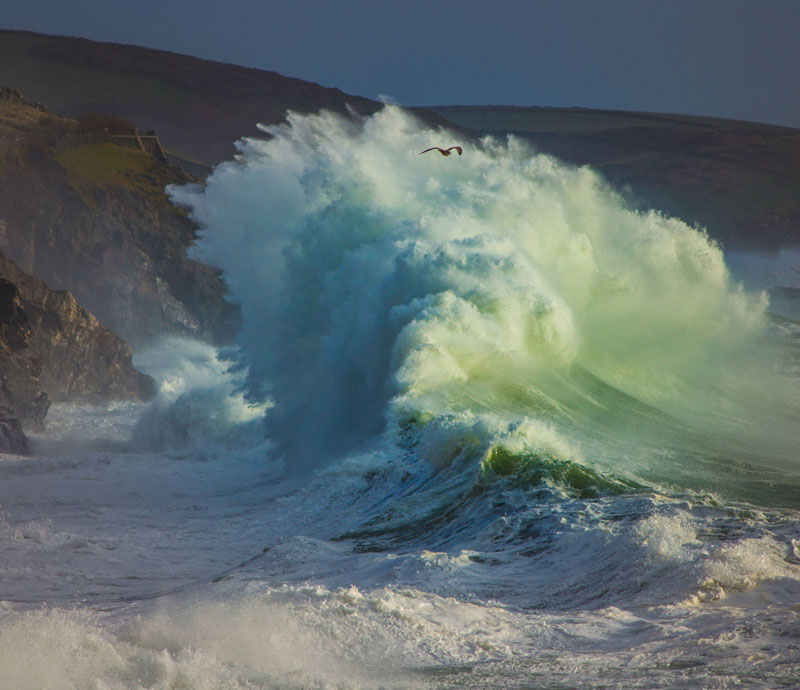
The photo reference already has a strong composition and there’s a reason why this composition is strong. We’ll notice here that there is a strong line that divides the cooler side of the wave from the warmer side of the wave. This line is incredibly important in the success of this composition. This edge basically forces the viewer’s eye to move right along it.

We want to make sure that this is not lost in the final image, and we want to accentuate it so that our composition is as dynamic as it possibly can be.
See also: Composition in Art
Sketching the Waves
We’ll get started with a pastel pencil on the heavily textured side of the paper. There are two sides to this paper and both sides are suitable for pastel applications.
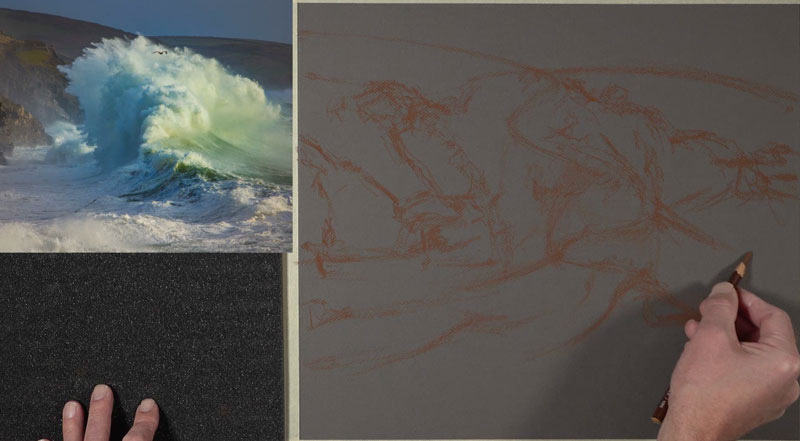
I’m using a reddish brown pencil and I’m holding the pencil fairly low on the shaft. Initially, I use it more like a paint brush rather than a pencil. I’m making loose sketchy marks here, just trying to find the composition. I’m trying to find the flow of the wave and the distant hillside as well.
Drawing the Sky and Background
For the sky, I start with a light blue and apply a bit of gray and some other blues over the top. I want to create a gradation here from a darker blue on the left side over to a lighter – almost red-purple on the right side of the sky. I’m also trying to keep the strokes that I’m making fairly consistent. As you can see below, most of them are going at a diagonal.
Since pastels can have an opaque quality about them, we can work from the background to the foreground. You can see I’ve overlapped the horizon line with additional pastel applications. And that will make the connection between the horizon line and the background sky a bit more seamless.
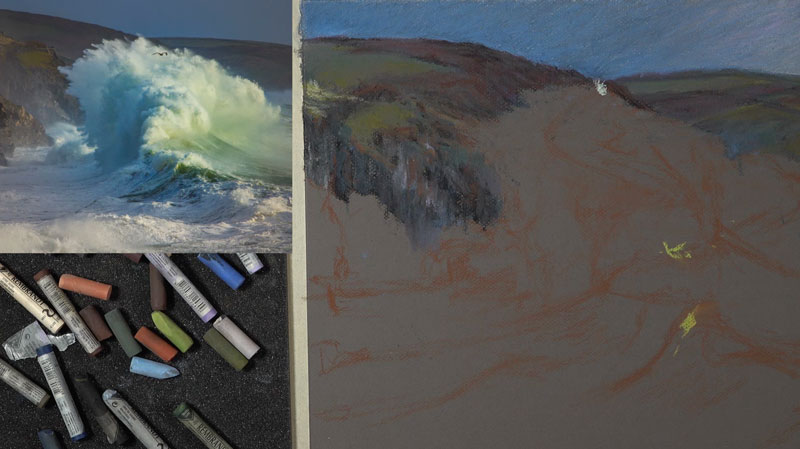
I layer lots of different colors here. There are reds, red-purples and orangey browns. There’s also some yellow-greens and blue-greens. Layering these colors requires patience. This is especially true when you’re working with a heavily textured surface, like we are here. You can see in the early stages when I move onto a new section, the material is fairly sparse and it’s not reading well. But as we continue to add more layers and build up depth in that color, the colors start to make a little bit more sense and the values do as well.
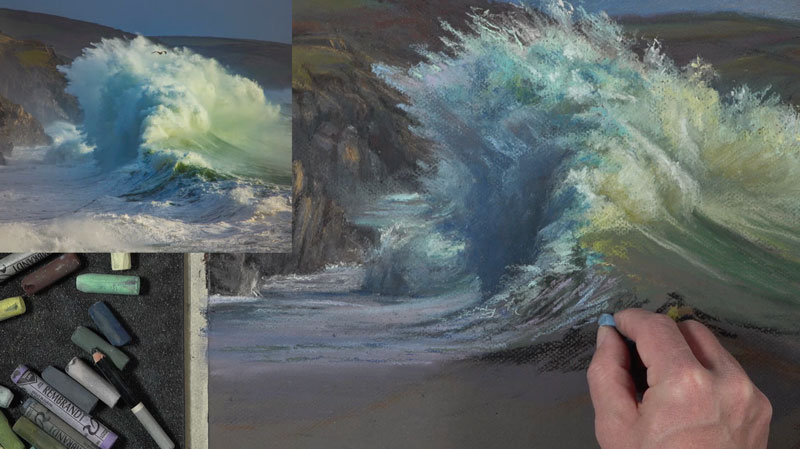
Drawing the Wave From the Top
Once we have a good portion of the background complete, we can address some of the main focus of this image – the wave. I start with a lighter blue on the shadowed side of the wave. In the middle, a warmer highlight is added. From here, I begin gradually building up the shadow and the color contrast in the wave.
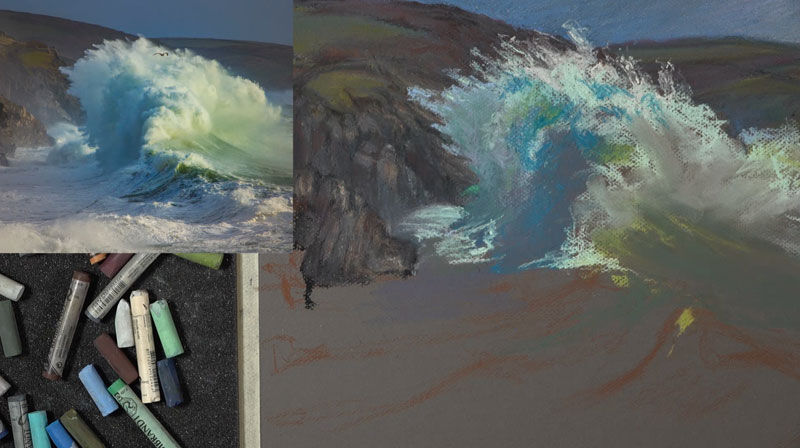
On the shadowed side, we see a lot of cool colors. But on the highlighted side – the right side of the wave – we see warm colors. The colors on the right side of the wave lean more towards a yellow-green. The colors on the shadowed side of the wave lean more to blue or blue-purple.
While there is some blending of the pastels, I’m trying to focus on creating deliberate, strong marks with the medium. You’ll see evidence of this type of mark-making mostly around the areas where we see sea spray. I try to get some energy in my mark making and communicate the power of this particular wave through the marks that I make.
I bring in some lighter yellow-greens and blue-greens here and there as I continue to push that relationship between the darker side or the cooler side of the wave and the warmer and lighter side of the wave. This contrast in value and color temperature is important for capturing the light within the scene.
The direction of the stroke that you make is important and plays a role in communicating the subject. On the right side of the wave, we can see these directional strokes flow in a slightly curved direction. But on the lower part, where we have the water, those directional strokes are flowing down the wave. The opposite of this is happening on the other side of the wave. Again, the directional strokes are flowing down the face of the backside of the wave.
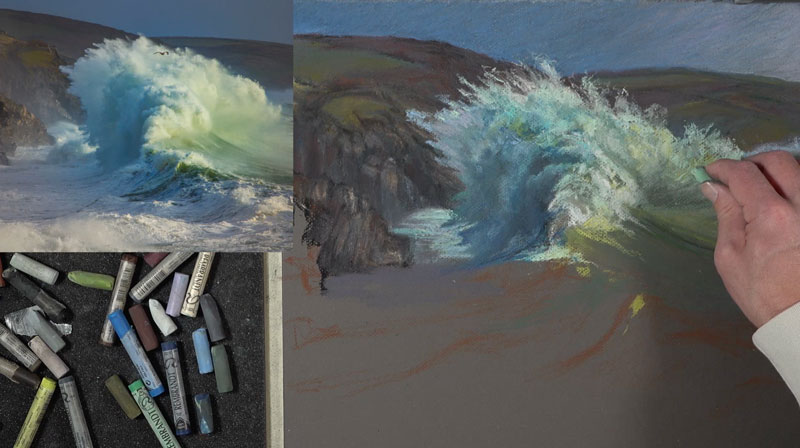
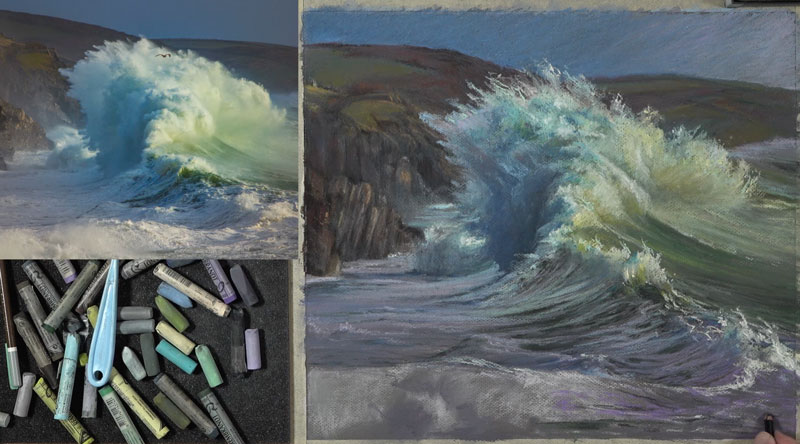
Drawing the Wave in Middle Ground and Foreground
As we work down towards the foreground, we need to keep in mind that the cliffs continue. So as we work down the picture plane into the middle ground and foreground, we’ll continue to make adjustments to the background as well.
As we work towards the viewer, we’ll notice that the contrast in value increases. For this reason, we’ll begin adding bits of black to force some of the values darker. Black, on its own, is very strong and can make a drawing look flat or unnatural. For this reason, we can layer some color over our black applications to make it appear more natural.
To help tone down the black applications, a black pastel pencil is used. This pencil is not quite as soft as a stick pastel so the intensity is slightly lessened.
To heighten the contrast even further, we’ll make strong, unblended applications of lighter values along the crest of the wave. We even see some subtle highlights on the shadowed side of the wave.
Behind the wave, on the left side of the picture plane, we see a large section of water that is mostly in shadow. There is color here and I choose to use purples. Subtle highlights within this shadowed area are addressed with horizontal marks of lighter purples and red-purples.


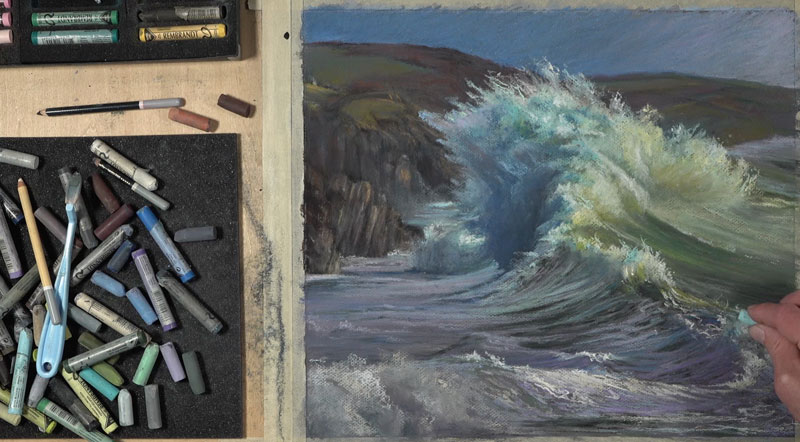
Drawing the Foreground Waves
As we work to the foreground, the dynamic of the wave changes. In the foreground, we see what appears to be mist on the left side of the picture plane. Our mark making here changes as result. Some of the marks are blended out and more neutral grays are applied.
While the left side of the picture plane is slightly blended, the right side remains fairly strong in contrast. We’ll exaggerate this, making the marks strong, bold and colorful.
As we do this, we’ll make sure to accentuate the crest of the wave as it curves with strong highlights.
Finishing Touches to the Waves
To complete the drawing, a few more highlights are added to the crest of the wave in the foreground. After stepping back and analyzing the drawing, additional adjustments are made to the wave in the center of the picture plane and the distant background. These final marks are designed to increase the illusion of space and add a sense of movement and energy.
After these final touches are applied, the drawing of waves with pastels is complete. Here’s another look at the completed drawing…
Once the drawing is complete, the tape around the border can be carefully and slowly removed by pulling at a 90 degree angle.
If so, join over 36,000 others that receive our newsletter with new drawing and painting lessons. Plus, check out three of our course videos and ebooks for free.