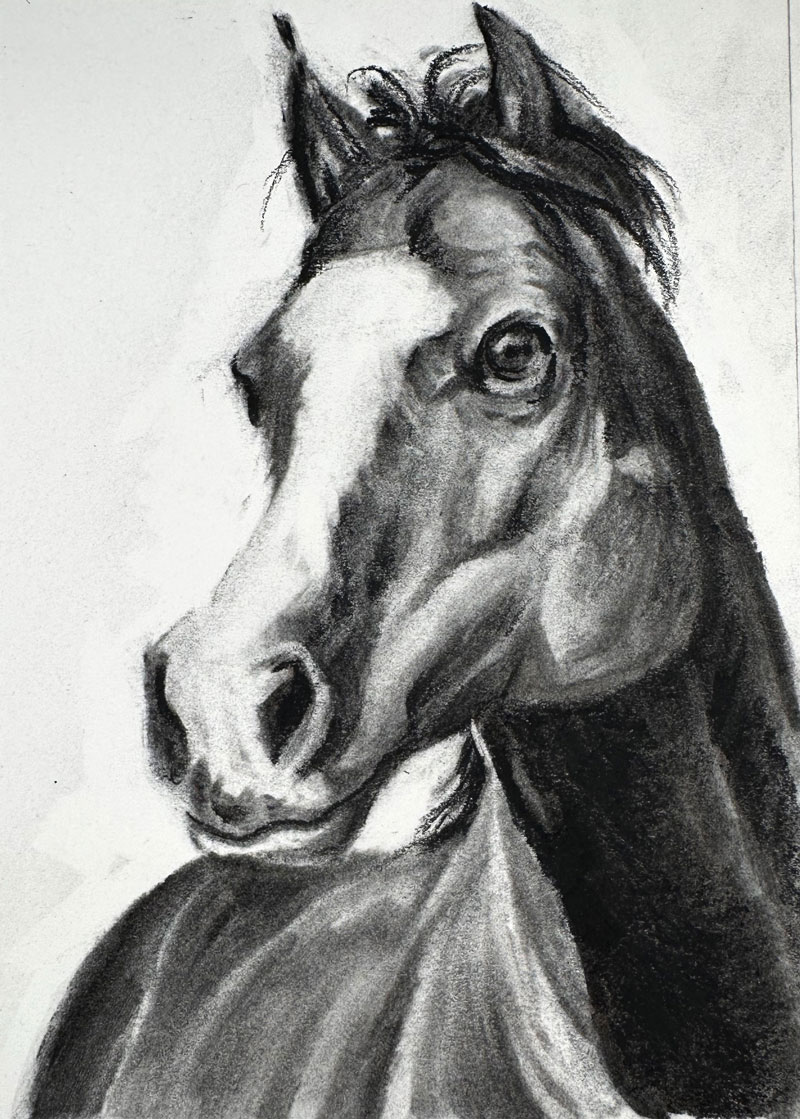
Horse Drawing with Charcoal
In this charcoal drawing lesson, we’ll draw a horse with charcoal in about an hour. Here’s a look at the finished drawing…
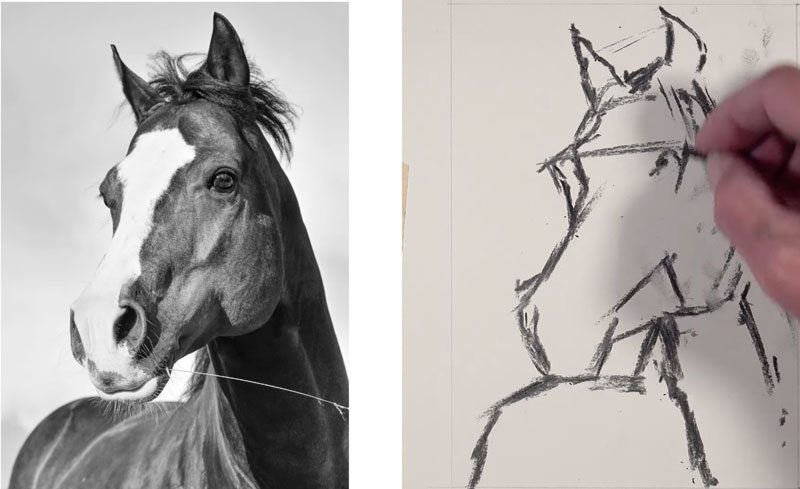
We’ll use a photo reference to complete the drawing. Here’s a look at the photo reference…

Charcoal Materials
For this drawing, we’ll be working with vine or willow charcoal which is very soft and brittle but easily blended and removed from the surface. We’ll also be using compressed charcoal in the form of a charcoal pencil. We’ll also be using a blending stump. You can use a blending stump or a blending tortillon. We’ll be working with a couple of erasers, a kneaded eraser and also a vinyl eraser for more precision erasing.
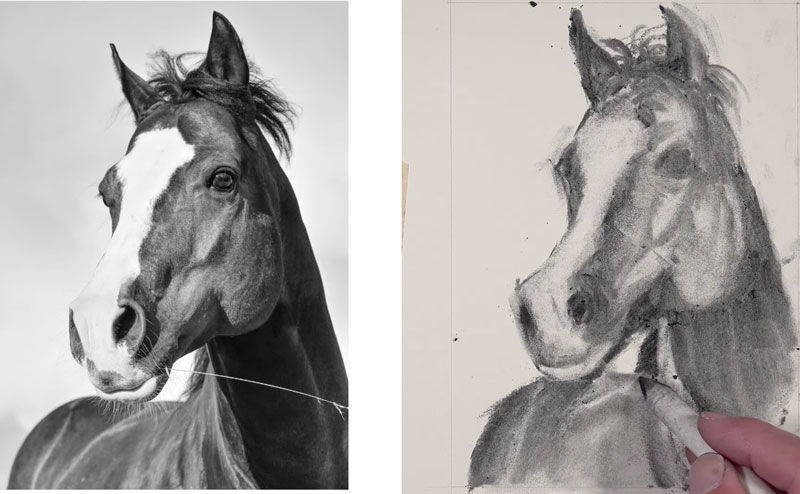
Sketching the Contours of the Horse
We’ll begin making marks with a small stick on vine charcoal. I’m just looking at the contour lines and trying to find shapes as well. I’m making comparisons between the negative space around the horse and the negative space on my drawing paper to find the shapes. I’ll draw a line across the brow line that’ll help me understand where the tops of the eyes are located. Once I have these initial marks in place, I can use them to make comparisons as I add the remainder of the marks for the rest of the head of the horse, the neck and the lower portion of the body.
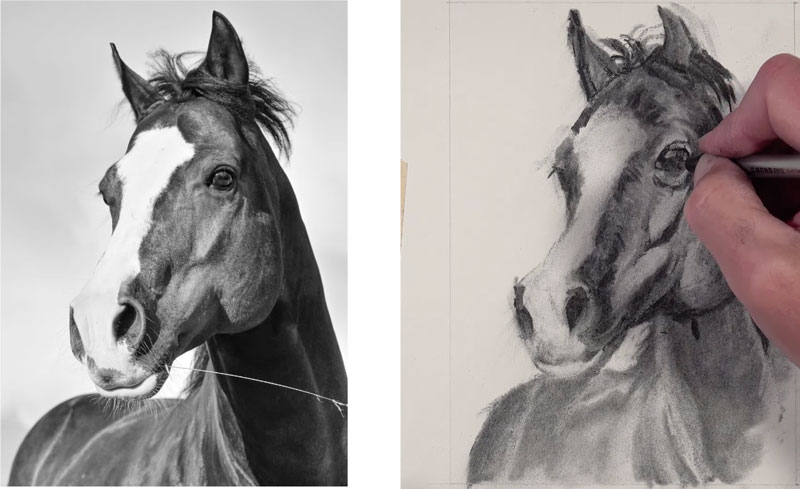
Shading the Horse
Now that we have a rough contour line drawing in place, we’re going to shift our gears a little bit and begin thinking about value. Value is the darkness or lightness of a color. We need to have a full range of value in this piece, meaning we need to have the darkest darks and the lightest lights and the full range of grays in between. Sticking with the vine charcoal, I’m going to start planning out some of the areas where I see shapes of darker value. I’m also going to go ahead and give this drawing a quick little smudge here. This will pull some of the soft vine charcoal into some of the open spaces and provide us with a nice gray base in which to manipulate the values.

Don’t worry that your drawing is getting messed up at this point. I know it’s really easy to do, especially if you’re accustomed to drawing with pen and ink or graphite. But charcoal is a different medium entirely. We can move the charcoal around on the surface and erase relatively easily.
With the blending stump, I’m going to go ahead and pull out a few lines for some of the hair at the top. We’ll find this later in the process. And we’re going to go ahead and go down into the face or the head of the horse and start pulling some of those dark to medium values around.
I’m continually going back and forth with my eyes between the photo reference and the drawing surface, continually making comparisons between the shapes that I see and the shapes that I am including in the drawing.
I’ve switched over to a more precise eraser. This is a vinyl eraser, so it’s a tougher eraser than the kneaded eraser. It does leave some shavings on the surface, but you can blow these away or brush them away with a drafting brush.
Now we’ve got a faint version of our horse in place with some of the values. We’re going to go ahead and continue the process of darkening the values. I’m using a charcoal pencil here, but you’ll see I quickly switch back to the vine charcoal since I’m not quite ready to commit to some of the areas of darker value.
I like to think of working with charcoal somewhat like working with a ball of clay. If you’re trying to make something out of clay, you start with a ball of clay and you have to continue to move it around until you get your sculpture in place. Well, the same thing’s true with charcoal. We start with a very loose interpretation of the subject, and then we gradually refine the drawing using our tools, so the charcoal of course, the blending stump, and also the erasers.
There is a slight reflected highlight on the right side of the jaw, so I’ve used the kneaded eraser to remove that.
Now I’ve switched over to the compressed charcoal pencil. We’re going to get a little bit more defined with some of our details and get quite a bit darker with our darkest values. This will expand the contrast within the scene and create a more full, more natural range of value.
Keep in mind that the compressed charcoal pencil is more difficult to erase compared to the vine charcoal so the marks that you make at this stage are going to be more permanent. You can still blend and smooth transitions of value using the blending stump with compressed charcoal, but erasing is definitely more difficult.
We’ll go ahead and start from the top and work our way to the bottom after we’ve addressed the eye. After adding some of those darker values with the compressed charcoal, I’m using a blending tool to smooth those transitions. We’ll also add some lines for the wispy hair at the top.
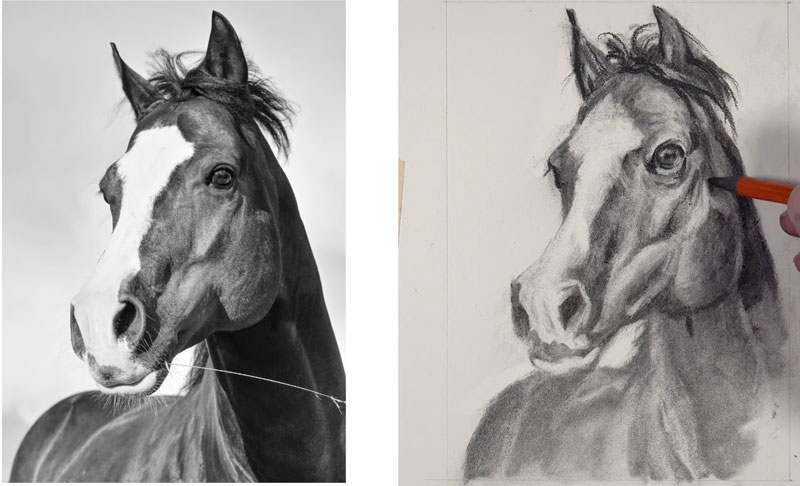
Developing Details on the Horse
Our details are beginning to emerge. We’ll continue switching back and forth between the different forms of charcoal, along with the erasers, to refine the details.
Continue working back and forth with your eyes to find small details and refine them in your drawing. At this point, things slow down a bit. Take your time and make changed to your drawing as necessary.
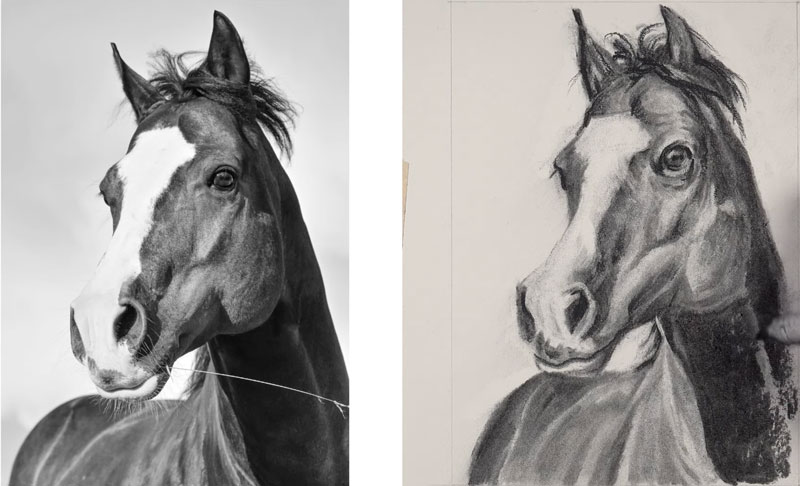
Completing the Drawing of a Horse
Determining when you’re finished with the drawing is up to you. The beauty of charcoal is that there are several stages that you can call the drawing “complete”. Decide when you have added enough details and refinement to call your drawing complete. At this point, I have spent around one hour on the drawing, and while I could continue, I decide that my sketch is complete.
Charcoal Drawing of a Horse – Conclusion
Charcoal has a reputation of being messy and difficult to control. However, charcoal is quite forgiving and allows the artist to make changes throughout the drawing process. Pay attention to the shapes of value instead of lines. Take your time and allow the drawing to go through the necessary stages to completion. Don’t get frustrated and just keep making adjustments until you are happy with the results.
If so, join over 36,000 others that receive our newsletter with new drawing and painting lessons. Plus, check out three of our course videos and ebooks for free.