Linear perspective can be used in different ways. For more the different forms of linear perspective, check out these lessons…
To draw most objects, one starts with either a flat rectangular plane or an actual rectilinear form, i.e., a box. Usually, at the scholastic level, most perspective projects reinforce the basic rules of linear perspective by using subject matter that remains box-like. Examples include city buildings, houses, interior spaces (rooms) and standard stair steps. Often, drawing stairs represents the height of complexity achieved in an introductory linear perspective project.
Of course, when using linear perspective, one can draw anything, even curvy things. Sometimes, while helping my students draw the aforementioned buildings and interior space, someone will invariably ask “How do I draw a spiral staircase?”. Such are the questions that art teachers love to hear. Nothing is more exciting that working through a drawing problem with an eager mind.
The following tutorial demonstrates how to draw a spiral staircase. As you might have guessed, we’ll start with a box.
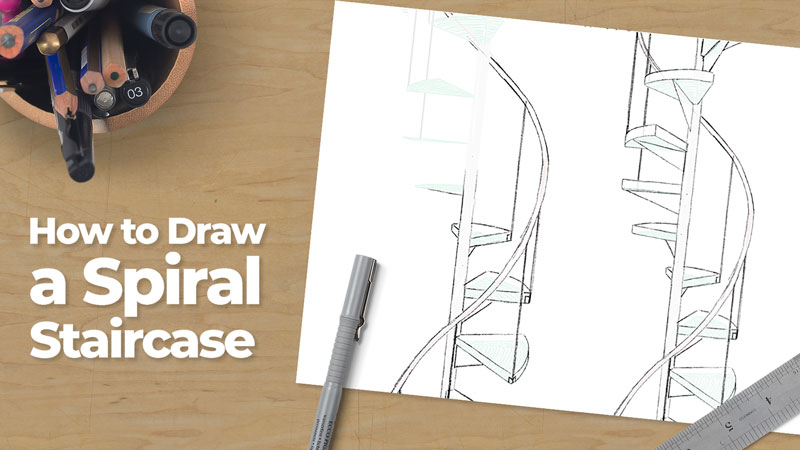
Drawing a Spiral Staircase
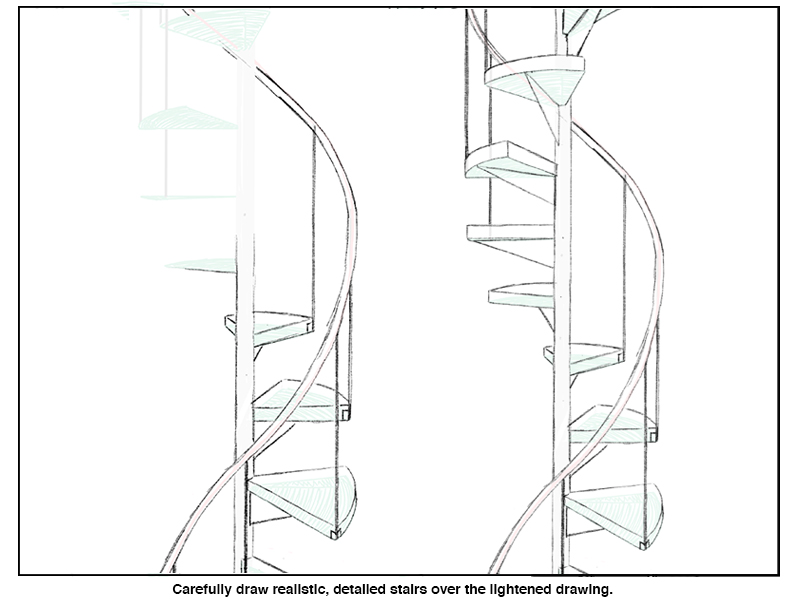
Before we begin drawing the staircase, study the illustration below.
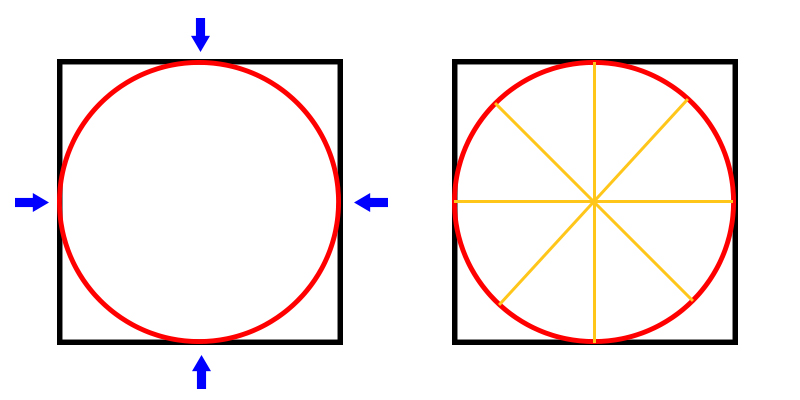
- If you can draw a square, then you can also draw a circle inside of that square by aiming a curved line at the center points of each of the squares sides.
- If you can divide a circle in half, then you can also continue dividing the circle until you have equal eighths.
The two bullet points above are fundamental to drawing a spiral staircase. Let’s begin.
Step One – Draw a Box
Note: The following drawing was created on a tablet using Procreate. One can use a pencil and paper to complete the tutorial just as well. Drawing on the tablet simply makes the tutorial easier to understand. I used different color lines for each steps. In your own drawing, you should draw very lightly since most of the first few steps will eventually be erased.

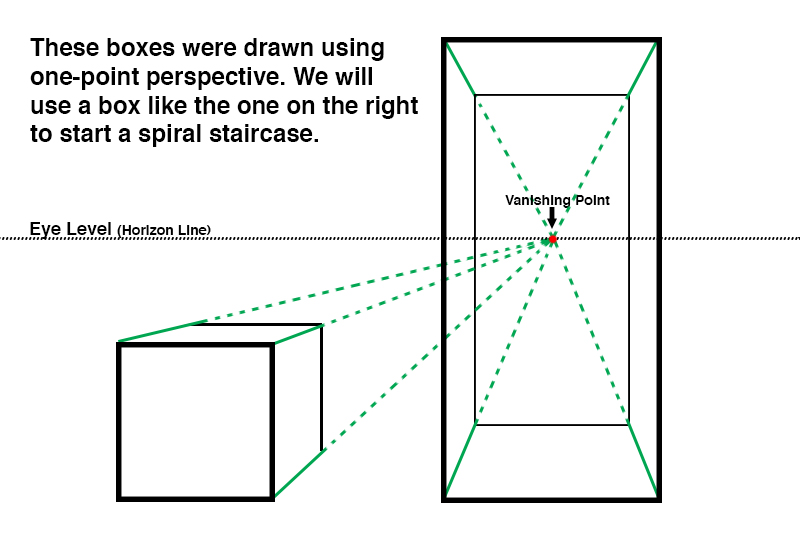
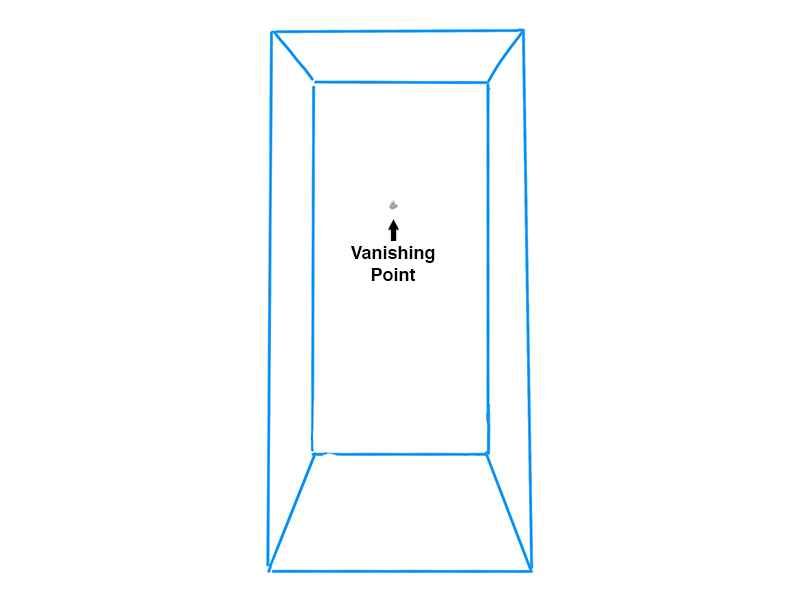
Draw a tall box using one point perspective (if you are unable to draw a box using one point perspective, then practice that first and return to this article). Here, the vanishing point is near the middle of the box.
Don’t worry about the proportions of your box too much if this is your first time drawing a spiral staircase. You can make adjustment to the proportions of your stairs in subsequent steps. In fact, I will change the proportions of my stairs later in the drawing.
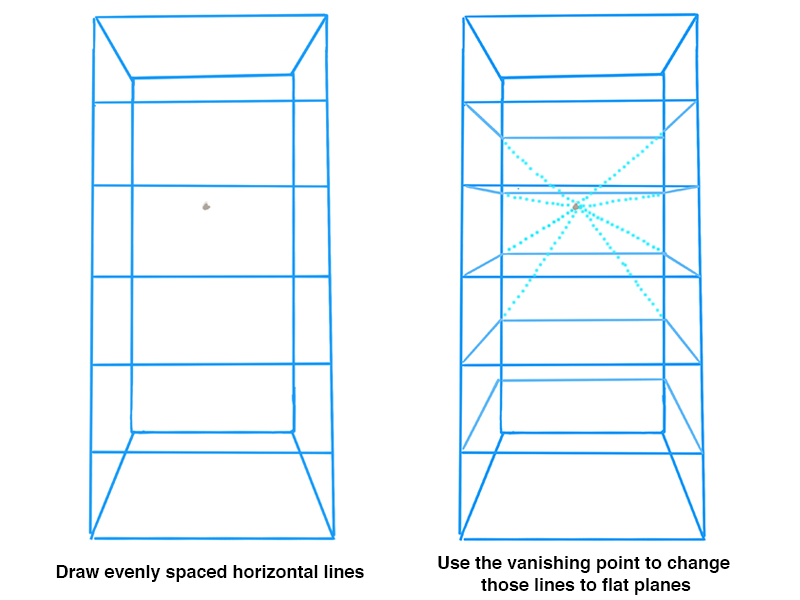
Step Two – Draw a Few Lines
Create a series of lines across the front of your box. The spacing of these lines determine the spacing between your steps, so be sure the distances between these lines are consistent.
Now, using the vanishing point, make a flat horizontal plane from each of the horizontal lines. Your drawing should look a bit like a book case.
These horizontal planes should feel as though they are squares and not rectangles. If necessary, adjust your original boxes proportions and refine the horizontal planes’ shapes.
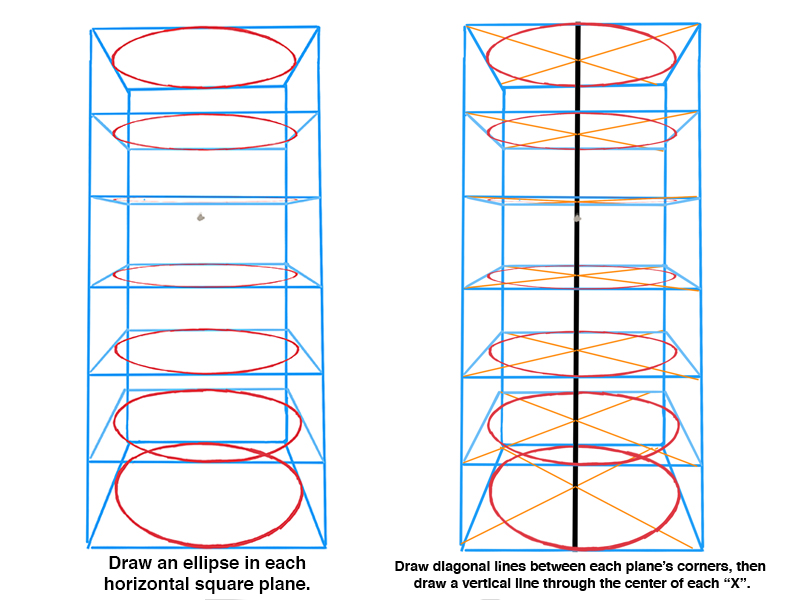
Step Three – Draw a Few Ellipses
Now draw an ellipse inside of each of these horizontal planes. An ellipse is simply a circle that is tilted in space. As mentioned before, aim at the middle of each horizontal plane’s four sides.
Need help drawing ellipses? How to Draw an Ellipse
Only a small segment of each of these ellipses will later become part of a step. You will have a chance to refine these curves edges later in the drawing.
Beginning at the corners, draw an “X” through each of the horizontal planes. Doing so pin-points the center of each plane. Now we can draw a long vertical line through these center points, creating an axis for our steps to rotate around.
Later, we’ll thicken this line so that it looks like a substantial support capable of bearing weight.
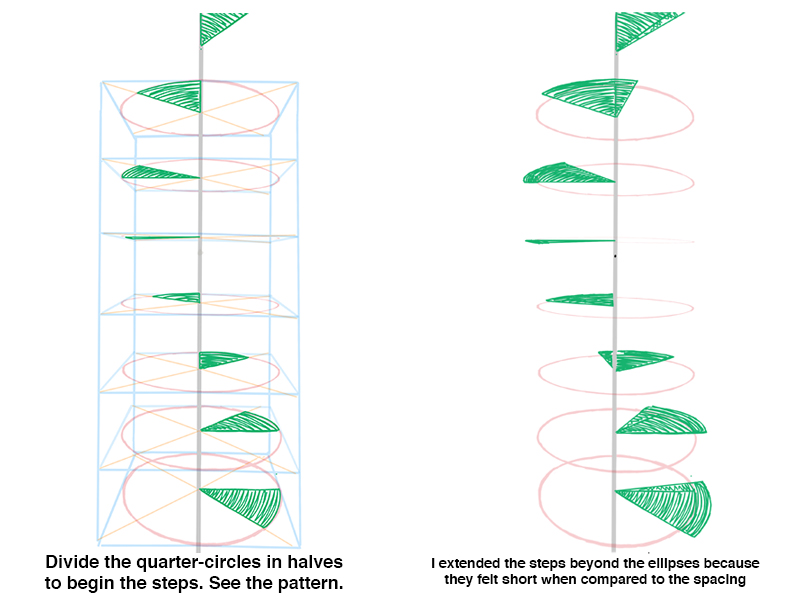
Step Four – Divide the Ellipses
Divide one quarter of each ellipse in half. Shade in one of those halves. They should look like pizza slices.
Notice the pattern these triangular shapes follow as they rotate vertically around the axis of our staircase.
Let’s clean up our drawing some. Erase the original box now. It is no longer useful.
At this point in my own drawing, I felt as though the steps were too small when compared to the spacing between them, so I lengthened the two straight edges of each step and simply drew a new curved line for the end of each step, making sure that the new curved edge matched the degree of curvature of the original edge/ellipse.
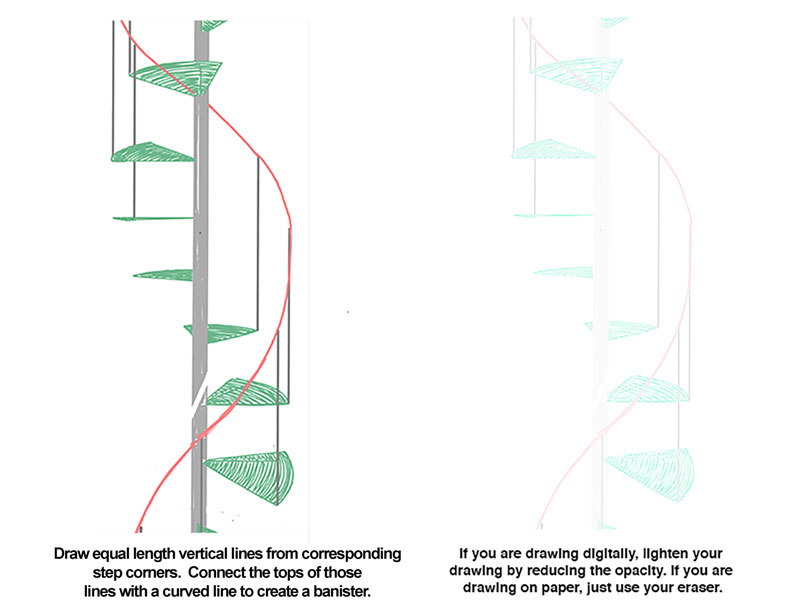
Step Five – Add a Banister
Every staircase needs a banister. On each stair step, draw a straight line upward. Place these lines on corresponding corners. Make sure these lines are equal in length.
Now connect the tips if these vertical lines with a smoothly curving line. The banister-line should mimic the turning of the stairs as long as the vertical lines are equal in length.
Step Six – Give Your Steps Some Form
The skeleton of our staircase is in place. The hard work is done. It’s time to give our stairs some bulk.
Widen the vertical axis to give it some width. Now it is a pole.
Also, change the flat, 2D steps into 3D forms by drawing short vertical lines upward from each corner and repeating the shape of each step at the top of those short lines (see the illustration below for clarification).
For believability’s sake, I added a support under each step by imagining a center point along the support pole between each pair of steps. From those center points, I drew a line towards the approximate center of each step’s curved edge.
Step Seven – Add Shading
When we use linear perspective, we’re using our imagination. To complete the stairs, whether they just are part of a larger composition of just a stand-alone exercise like my own drawing, we need to add value.
To create value, we will need a light source. Can you tell where the light is coming from on the completed staircase below?
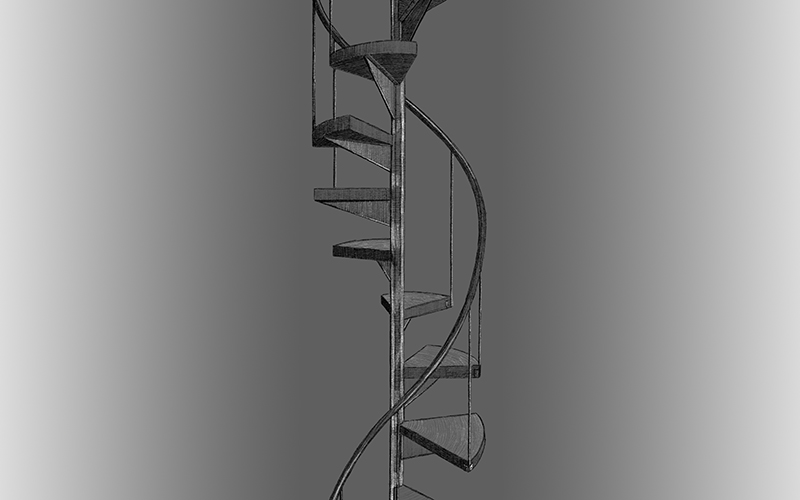
If you guessed that the light is from the top right, you are correct. Be sure to shade the steps according to a fixed light source instead of shading each stair exactly the same.
Unlike a standard staircase, each step in a spiral staircase is oriented in a different direction than those immediately above or below itself.
Congratulations. You have completed the spiral staircase tutorial. Remember, all round and curvy objects are drawable using linear perspective. Just start with a box.
If so, join over 36,000 others that receive our newsletter with new drawing and painting lessons. Plus, check out three of our course videos and ebooks for free.